A comprehensive and extensive guide for all the Witchfire weapons in the current build. Tierlist included!
Introduction
Preyers have a nice array of tools for their work. After extensive hunting I introduce to you this guide and tierlist. The weapons are in order they appear in the game Gunroom menu. At the bottom is a basic summary overview.
THE GRADING IS BASED ON
1 – Versatility – “Is the weapon for specific situations or good all-around?”
2 – Killing Power – “Exactly how dead is our enemy after use?”
3 – Combo potential – “Does it play well with other weapons, spells and other tools?”
With the guide specifics out of the way, here we go.
Angelus – A rank
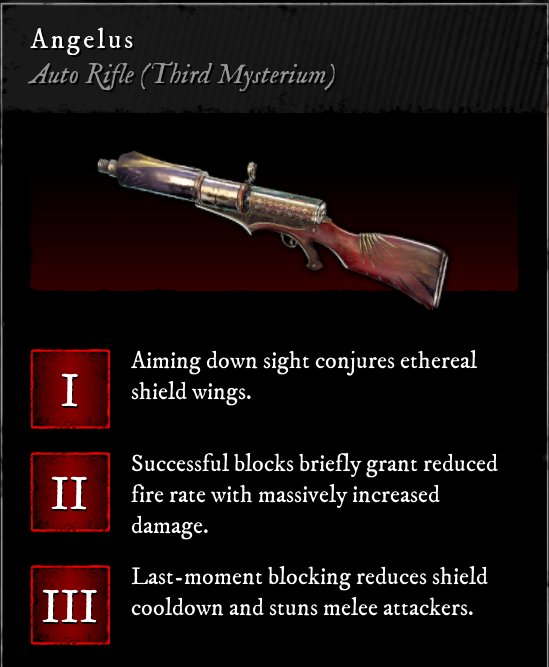 We start off with a subversive one. At first glance, automatic weapons with low damage-per-bullet and requiring you to aim down the sights to be accurate seem like a terrible idea when your mobility is essential to survival. This is true for most auto-weapons in the game but Angelus subverts this by increasing your survivability with an incredibly reliable shield instead. It’s only downside is a low stun rate.
Perfect for the Preyers with good awareness and the foresight to know when it’s safe to tank a hit with a strong safety net so you can take out the high-priority targets.
-Versatility: S
Massive ammo reserves, higher-then-average effective range and the ability to get rid off specific enemies before they can even land a single scratch make this weapon good for any build in any situation. It does like having a partner weapon with high stun rate for the tougher battles.
-Killing Power: B
Just fine for mooks and weaker enemies but not so much for the tougher targets due to the low stun rate. Retreating while shooting pursuers works wonders and the increased damage when the shield breaks can be an opportunity for risky but rewarding plays.
-Combo potential: B
No elemental effects and a relatively slow reload means it doesn’t have any specific build it combo’s well with. But this also means it doesn’t get in the way if your build focuses on a specific element or playstyle. Angelus is great because you can slap it on any loadout and it will do it’s job just fine. Does pair exceptionally well with the Belladonna Fetish so you can be hit twice before you take any damage and the shields recharge separately. Getting hit is a big deal in Witchfire, so avoiding any damage is a boon by itself.
Midas – F Rank
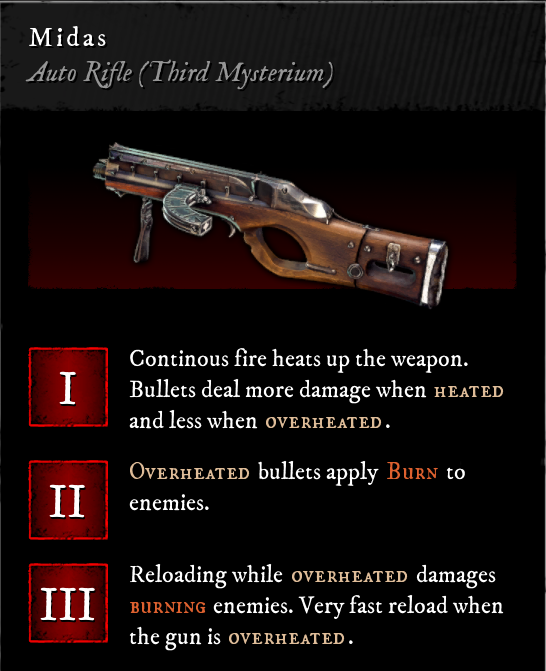 Up next is subjectively one of the worst weapons in the game. Low damage, low range and a contradicting set of Mysterium powerups make it functionally undesirable. Forcing you to either stop shooting when you really don’t want to or be forced to make unsafe plays for mediocre gains.
It’s the starting weapon for most classes however, so we must deal with it.
-Versatility: C
Large Ammo reserves, quick reloads and a high rate of fire are it’s only upsides, meaning you can keep shooting it without worrying too much about accuracy or ammo conservation.
-Killing Power: F
It’s only good at a very specific rate of fire. Shooting too much will result in enemies burning but taking essentially no damage. You’ll often find yourself having to stop to shoot that near-death enemy or wasting ammo to secure the kill, but this is never advantageous as it will often result in that near-death enemy hitting you in return. It’s damage fall-off is also quite harsh, so it’s only effective at close-medium range making the risk of halting your fire even higher.
-Combo potential: F
It’s burn effect can be useful if you stack Fire-Arcana but aside from that it does nothing to improve the rest of your build.
Ricochet – B rank
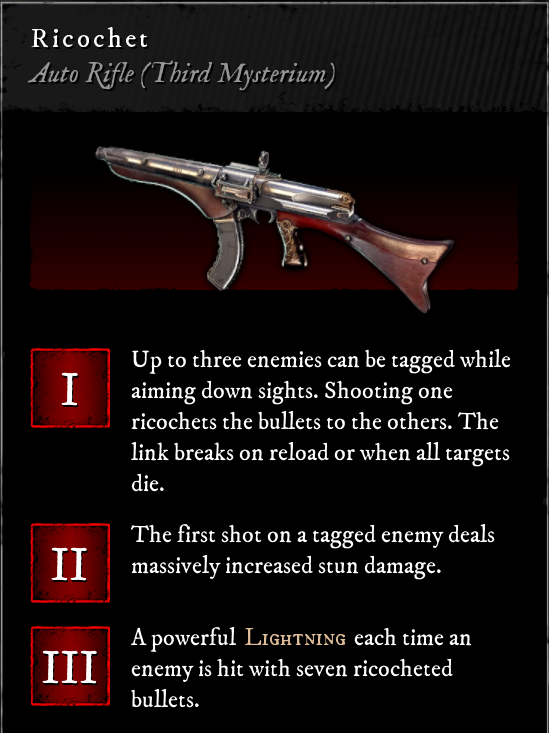 In concept a bit odd and by stats alone doesn’t seem very impressive but it’s Mysterium powers make it an extremely lethal tool for Preyers with good foresight and who see each battle as a puzzle to be methodically solved.
It’s biggest downside is chaos: if you’re getting overwhelmed or starting to panic the effectiveness of this weapon lowers tremendously.
-Versatility: B
Automatic rifles that force you to slow down and aim down sights are not ideal for Preyers that value survivability. However it’s high stun rate, high ammo reserves and good effective range make it real strong for the calculated Preyer, as it’s capable to take down anything the Witch throws at you with consistency… as long as you keep your cool and don’t get overwhelmed.
-Killing Power: B
It’s Mysterium power is almost unfair to the enemy. So a strong enemy like a Grenadier is shooting you from afar while some melee-scrubs chase you? Aim for 1 frame at the Grenadier and turn towards your close friends and riddle them with bullets while you’re out of harms way. That Grenadier will wish he stayed in bed that day. Or forever.
-Combo potential: D
Works really well with other AoE weapons like the All-Seeing-Eye or the Rotweaver to make absolutely sure you have to do as little effort as possible for maximum body count. Though aside from that it has no other interesting combo’s.
Hypnosis – A rank
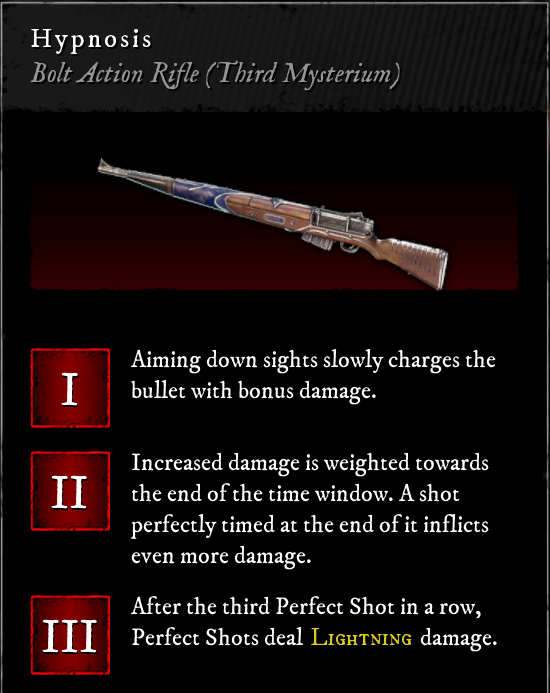 To an impatient or unskilled Preyer this gun is a deathwish. To those with eagle-eye accuracy and a sense of rhythm it becomes potentially the strongest weapon in the game as you might find yourself clearing an entire map without ever getting into harm’s way. Musketeers beware.
And by the pope does this one feel satisfying to shoot.
-Versatility: B
Bolt-action rifles are slow but the range and damage of Hypnosis is exceptional. With every charged shot being a 1-hit-kill on most enemies and having 80 high-damage bullets at your disposal means, if you’re consistent, you won’t ever run out of ammo which is something most long-range weapons suffer from. Be sure to keep an eye on flanks, it’s easy to get tunnelvision with this rifle.
-Killing Power: S
The strongest weapon in damage-per-bullet after Hailstorm, Hypnosis is a beast. It’s charged shots often stun tougher enemies which gives you ample time to charge the next shot and put it in their domes. Any regular mook is dead with one well-timed shot to the head. The lighting effect stunning your target and potentially those around them is the cherry on top; they won’t even be able to dodge your next shot.
-Combo potential: B
A perfect fit for the fast-straving and critical-chain Arcana. Works great with The Eye of a Madwoman, Blood of a Banshee or Painted Tooth relics for even more one-hit kill carnage. Combine it with a faster, close-range weapon and you’ve got yourself a winning build for nearly any situation. Lightning Arcana are great too, especially Shock Wave and Perun.
All-Seeing-Eye – B rank
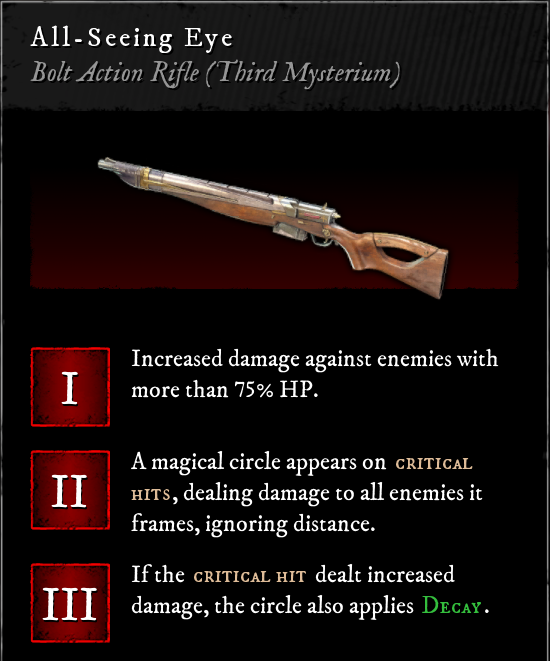 Starts of weak but has arguably one of the strongest Mysterium powers of all weapons.
The potential to focus down one strong enemy while everything around it dies is huge. The Mysterium effect mostly works as you’d expect; anyone in diret sight of the target who was hit will take a chunk of damage, no matter the distance.
It does come with risks however, and getting the gun all the way to Third Mysterium is quite a chore so it’s not recommended for early game.
How does it work? Not even the pope knows.
-Versatility: B
Relatively large ammo reserves, good effective range and great accuracy when aiming down sights make the All-Seeing Eye a reliable workhorse. Since it can clear large groups of weaker enemies with just two or three shots it can make some battles easy as pie. It’s however noticably less effective against Swordsmen and similar high-mobile enemies where the Mysterium effect becomes less consistent.
-Killing Power: A
Against groups of weak and lesser mobile enemies there’s hardly a better weapon for the job. It’s however too low in DPS and stuns to be used for any type of boss or elite enemy as it leaves you too open for counterattack.
-Combo potential: B
Getting one or two Arcana that effect Decay will turn this weapon from good into fantastic. Sometimes two shots are enough to clear entire battles with dozens of enemies. Especially with the Arcana that makes Decay permanent. If you have weapons or spells that have other elemental effects you’re less likely to find these Decay Arcana. Because of this it pairs extremely well with Rotweaver for obvious reasons.
Frostbite – A rank
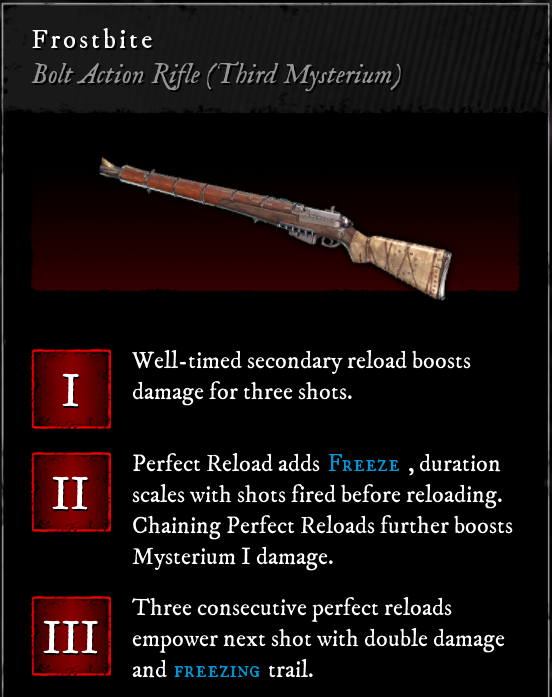 Strong but limiting in it’s playstyle. The most efficient way to make use of it’s Mysterium powers are shooting 3 times, reloading and repeat. This rifle demands consistency and timing from you as a Preyer, failing to do so will severely hamper it’s lethality. When you’re in the proper rhythm it excels against almost any enemy formation and with it’s great range and decent ammo reserves it’s a reliable killing-machine.
It also just looks really nice.
-Versatility: C
You’ll want to keep your enemies far away so you can reliably do critical hits and reloads to keep momentum. If you’re super-confident in your aim it can work in close range, but it will usually mess up your rhythm and lose your streak. Switching weapons ends the streak as well so it’s sometimes rough to decide what to do when enemies run into melee range. You’ll also find it goes through your ammo quickly due to it’s singular playstyle.
-Killing Power: A
If you manage to pop the first freeze you’re good. Keep the momentum and you’ll just be shooting static frozen enemies till the end of the battle. Keep the gun fed and you can do this for almost every engagement you come across. I’ve noticed one downside however: it cannot perform one-shot-kills on most foes kill like Hypnosis does, meaning you’ll need to use two bullets instead of one most of the time, giving it slightly worse ammo economy.
-Combo potential: A
Any Freeze Arcana and spells will make it even easier to turn the battlefield into a frozen statue art-exposition. Ice-Sphere is highly recommended as it counters nearly all of Frostbite’s downsides. Also pairs well with shock-effects for additional stuns. Pick your favourite close-range weapon (with good ammo economy) and you’ve got a build the heretics will dread.
Hangfire – F rank
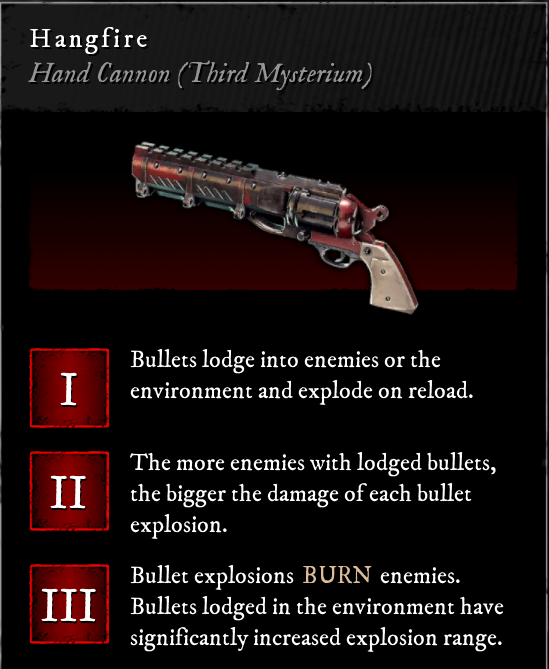 Handcannons. Just saying the name, you feel power. The raw destruction of a cannon in the palm of your hand. Sadly Hangfire absolutely misses the mark and puts the name to shame. Weak damage output, terrible range and poor ammo economy to boot.
Cool concept but the workshop had a miss with this one
-Versatility: F
Lacks range so you’ll always be in a risky position while you try to stack pellets on your enemies just for some decent burst damage on reload. Unless you get really good at guessing you’ll often do too much or too little damage on triggering the explosion, making it unreliable and a waste of ammo. It’s hip-fire accuracy is also surprisingly poor.
-Killing Power: D
Disappointing unless you stack all your pallets on one target, but this is slow and leaves you open. Even then it takes too long for the payoff compared to other weapons. You can do one cheeky strat though: sniping enemies from afar for 1 damage, then triggering the explosions which will always do full damage regardless of your distance to the target.
-Combo potential: F
It would be interesting if the explosions triggered when you reloaded your other weapons for combo potential but that’s sadly not the case, so there’s no reason to keep the pellets around. This plus its burn effect being a non-factor and having no other quirks going for it, Hangfire sits stagnant with no real fit in any builds.
Hunger – C rank
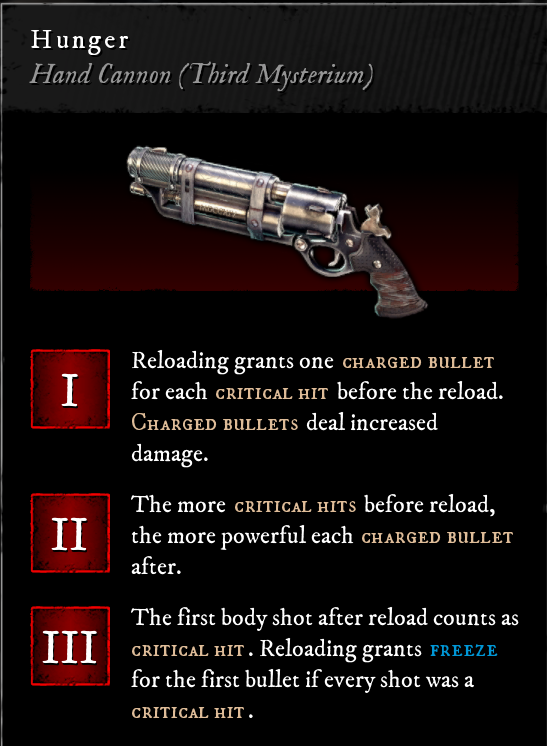
This is both Hunger’s boon and it’s curse; if you’re doing good then it’s great. If things are chaotic and you’re not on your A-game it will betray you.
-Versatility: C
Poor range severely hampers this gun. Since you have to be close, it’s easier to miss and it’s harder to avoid enemies for a clean shot. This makes fights with Hunger a constant high-risk, high-reward situation. Changing weapons does keep your bullets charged however, so you’re not punished for switching it up.
-Killing Power: B
It’s biggest benefit is high stun power. It kills most weaker enemies in one or two charged shots and stuns the rest, provided you hit them in the dome. This makes it exceptionally good for one thing: taking down elites. Consistently hitting them in the head nearly stunlocks them for you to keep racking up pain with the ever-increasing damage buffs it gets. This semi-works against bosses as well, provided you can do a bit of dodging during reloads.
-Combo potential: D
Aside from it’s freeze effect that will rarely, if ever, happen there is no combo potential. If you really like it’s playstyle, I recommend a reliable long-range weapon like Frostbite or Hypnosis and keeping this one in your pocket as a solid secondary.
Cricket – A rank
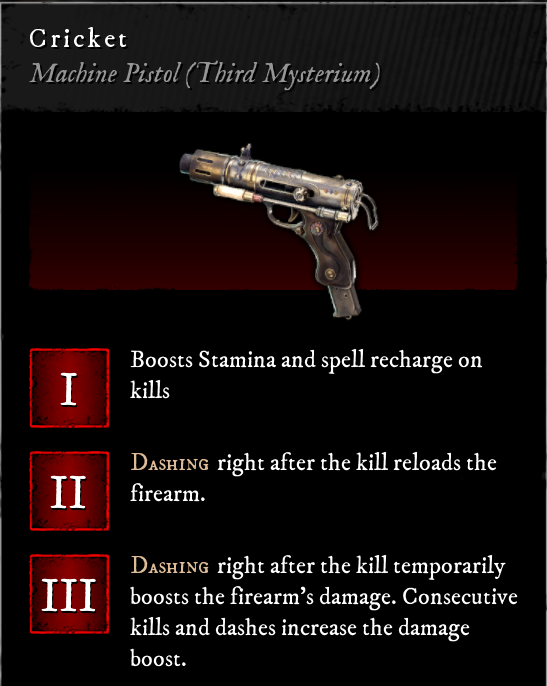 Unassuming in name and design, it couldn’t be more misleading. Using Cricket’s Mysterium powers to their full potential will turn you in a relentless killing machine that only stops after every single heretic is deleted from your vicinity. This requires you to be in close range and moving at all times lest you yourself be taken down with this high-risk, high-reward weapon.
The battles will be chaos and you might find yourself biting the dust more often then with safer weapons… but man is it fun.
-Versatility: B
Lack of range is a downside, but that won’t feel like a problem as you’re dashing from enemy to enemy, killing them increasingly quicker with each elimination. However, without decent ammo-conserving Arcana it will eat up your lead faster then any other weapon in the game so keep an eye on your reserves.
-Killing Power: S
Potentially the strongest close-range weapon in the game. After your first kill in a battle it becomes a rollercoaster of dodges, spells and shots where you’re likely to get hurt yourself. But unlike other weapons with similar effects you don’t get punished for missing or being hit so you’re encouraged to keep it going even when the situation would normally warrant a quick retreat.
-Combo potential: B
Cricket’s playstyle will likely get you hurt a lot, so bonuses to healing are great. Incense can help a lot here. Ammo and Gun Arcana like Phantom Bullets and Critical Chain greatly improve it’s longevity in combat. Stamina Arcana help as well. Using Cricket recharges all your spells faster, including your melee, so that opens even more avenues for efficient eliminations. Cricket itself has no elemental effects or other quirks, but it’s total domination in close-range means you’re free to choose any long-range weapon you wish, preferably one with better ammo economy.
Rotweaver – B rank
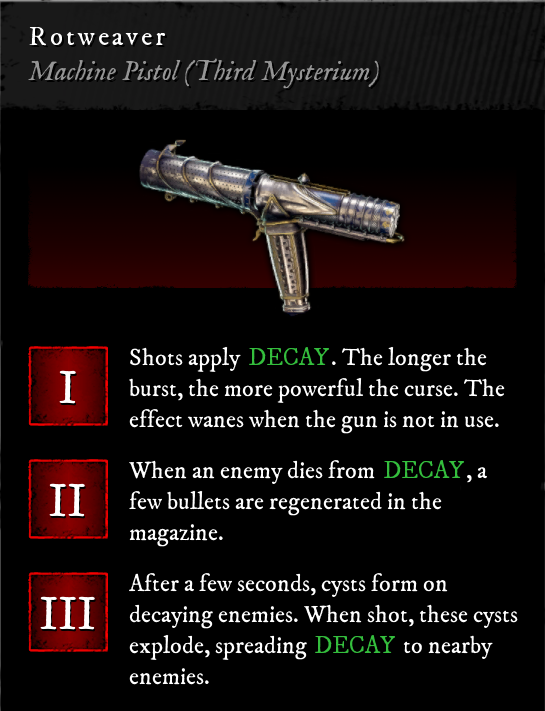 The weapon of choice for Preyers that like to use Decay magic. It’s high rate of fire and instant-decay-inducing effect often turns whole squads of enemies into pools of festering goo within seconds. It’s single-target damage is not to be mocked either. It however needs some help to get rid of it’s downsides and truly become an exceptional tool for killing.
Decay might be the most lethal effect in the game, and Rotweaver shows why.
-Versatility: C
Another weapon that lacks effective range, Rotweaver needs to be used up close and in long bursts to be effective. As usual this is risky as you’re liable to lose track of the enemies that will try to flank you. It’s ammo economy is also not good, so it benefits from ammo Arcana a lot. It becomes more reliable the longer a mission goes on.
-Killing Power: A
As long as you keep it fed, it will keep your enemies dead. Rotweaver also really shines against bosses, as the increasing stacks of decay gets you immense DPS unrivaled by other weapons.
-Combo potential: B
Ammo Arcana like Critical Chain are a must. The Decay effect has arguably the strongest Arcana related to it, so any Decay Arcana increases Rotweavers killing power exponentially and will allow you to get more versatile as a mission goes on. Necrosis is crazy good. Cornucopia combined with the FInal Bullet Arcana might be the highest DPS combo in the game, especially on bosses. Combine this with the All-Seeing Eye and you’ve got a recipe for one of the strongest builds in the game. Just don’t complain about the smell.
Psychopomp – C rank
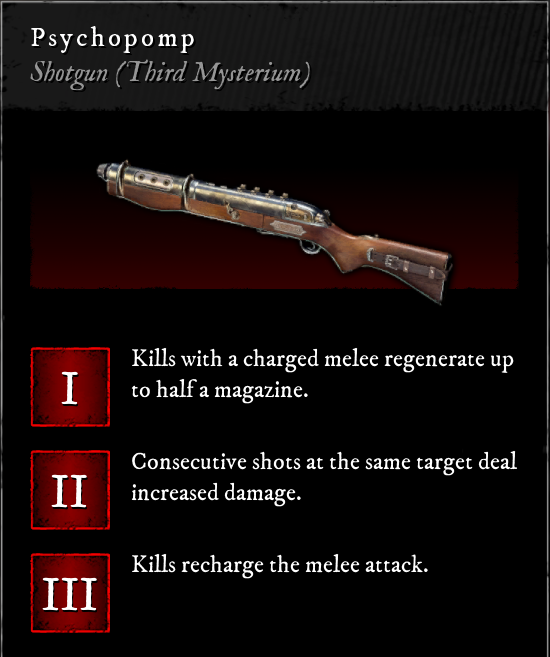 You shoot a guy, you punch a guy. Guys dead? Unto the next guy. Rinse, repeat. It’s not very glamorous but it sure is effective. Though outside of that playstyle Psychopomp’s viability quickly drops when you realise that without the magic punch it takes over 7 seconds for a full reload, and that luxury is something you almost never find in the world of witchhunting. This combined with poor ammo reserves and having the worst effective range in the game makes it tough to judge favourably.
Also it sounds like a barrage of light sneezes. Could use some work.
-Versatility: D
It’s good at two things. One: Kill fodder with the aforementioned double-shot>punch combo or two: focus on one tough enemy and absolutely blast them with the full magazine. This works provided all other enemies leave you alone for over a second, which in late-game becomes a rarity. Also a contender for the weapon with worst ammo economy in the game, even with the punch.
-Killing Power: B
A boss killer if there ever was one. Exceptional stun power provided you’re close enough to give them a kiss. Even better if a random guy walks up to you so you can punch ’em, refilling your mag so you can keep blasting the big guy. Reloading is still the big issue.
-Combo potential: C
Reload speed and Critical Chain Arcana are a must. This is one of the few guns where the heavy spell Cornucopia becomes a gamechanger, especially with the Final Bullet Arcana. But it’s slow to recharge unless you get the Arcana to fix that, but then the build becomes very luck-dependant. Also absolutely needs a long-range partner unless you really want to risk your neck against every single enemy.
Echo – D rank
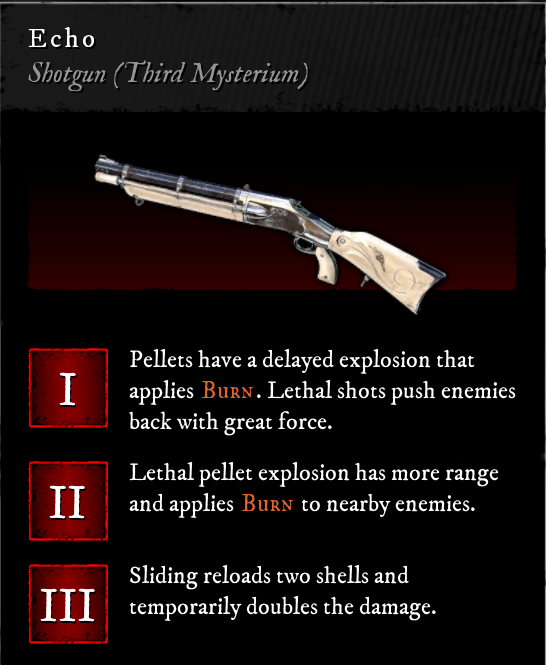 The only gun in it’s tier, it’s certainly worse then most. Slow shots and an even slower reload. However, it provides better killing power then Midas or Hangfire, so in it’s own category it goes.
If you have ADHD and really like the sliding mechanic, this might actually be the gun for you.
-Versatility: D
Five seconds for a reload is better then the Psychopomp, but that’s not saying much. Hence why the sliding becomes mandatory. This strat works great against a group of weak enemies that are spread around, but that’s where it’s usage ends. Because of the delayed explosions you can misjudge the amount of shots needed to kill a foe, wasting ammo. The burning helps kill critically wounded enemies however.
-Killing Power: D
If you unlock it early game it performs decently, with high stun power and some AOE, but it’s effective power considerably drops with higher Gnosis levels. Aside from killing mooks it’s not good for much else unless you get some seriously strong Arcana.
-Combo potential: B
Echo might be the weapon effected most by the Fire Arcana, which will considerably up it’s killing strength on your mission. Combine this with shock spells and you get yourself some surprisingly powerful AOE which is rare in Witchfire. Also one of the few weapons where the Ring of Fire can be beneficial rather then suicidal.
Basilisk – B rank
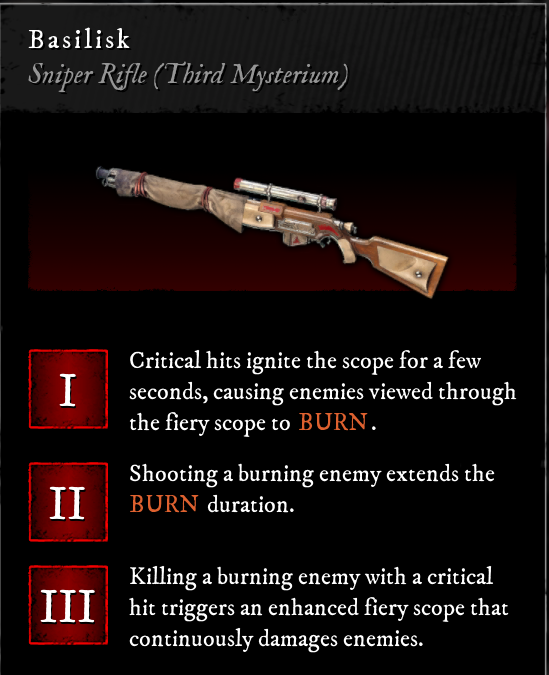 Interesting Mysterium powers indeed. It’s focus is on remaining scoped and quickly dispatching enemies from a distance. It does this exceptionally well, especially with the help of some buffs through Fire Arcana.
Being scoped is risky however, and the burn might not be as useful as it seems.
-Versatility: D
Not for close-combat use, no matter how much you want to do some intimate pyromancy. You’ve got spells for that. Basilisk really needs a partner with good ammo economy and close-range capabilities like Ricochet or Angelus for a reliable loadout.
-Killing Power: B
In practice it almost always takes 2 to 4 headshots to kill any enemy, but it fires them off at surprising speed and the scope remains stable throughout. If you have quick aim, you can make quick work of the enemy. You’ll find the small ticks of burning damage rarely make a significant difference however, and 50 spare ammunition isn’t much so you’ll find yourself going through your reserves fast.
-Combo potential: B
The Crtical Chain Arcana works great like with all rifles. Obviously pairs well with Fire Arcana, especially Pyrolysis which nearly doubles Basilisk’s killing power with the burning scope. Add some lightning spells for the stun and the Blood of the Banshee relic for the explosions and you’ve got yourself some powerful chaos at your disposal.
Hailstorm – C rank
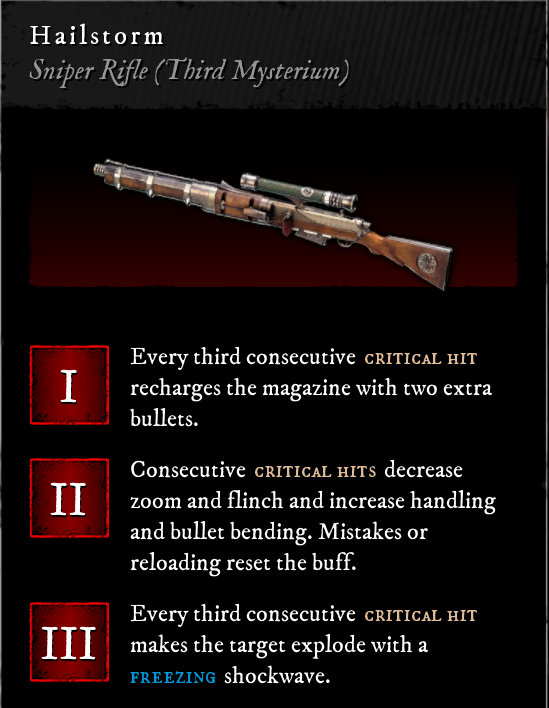 The highest damage-per-bullet weapon in the game. Not even the tougher enemies live after a shot to the dome with this one. And even if they do; on your third successful shot their whole posse turns to ice. Leaving them all neatly open for leisurely one-hit kills. The price? Lowest ammo count in the game at 20 shots. Picking up spare ammo gives you one whole bullet.
Better make them count.
-Versatility: F
Hailstorm was made to do one thing. Kill. Anything else was an afterthought. Every hit must be a critical if you wish to use this weapon for more then a handful of shots. It’s Mysterium power giving it 2 extra bullets in the mag after landing 3 consecutive crits is it’s lifeblood. It’s also probably the most stable weapon in the game, so there’s that. It needs a partner weapon that can do…. everything else. Not many weapons fill that role aside from the S-ranks in this guide.
-Killing Power: S
Does any more need to be said? No enemy is immune to freezing insta-kill deathbullets from half the map away. It’s funnily enough not very effective against bosses because of how they tend to move erratically and the freezing only last a fraction of a second. You’ll also run out of ammo before you’ve depleted their healthbar, which I know sounds unbelievable but it’s true.
-Combo potential: D
Long distance Freeze or Shock effects can help you land more shots. Critical Chain Arcana essentially gives you infinite ammo provided you have perfect aim at all times. The Ice Sphere heavy spell is overkill on damage but does provide a nice safety net. Nothing else really combo’s because whatever Hailstorm shoots is already supposed to be dead. Period.
Striga – S rank
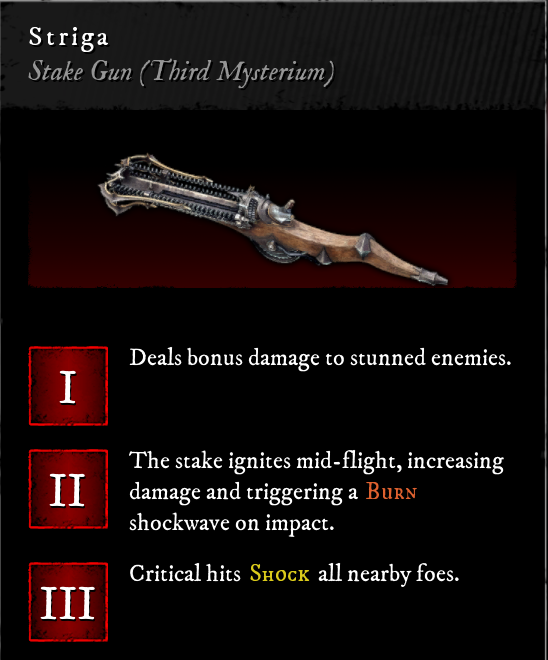 We’re here. The final weapon. Last but certainly not least; hands down the strongest weapon in the game. It’s a guaranteed unlock after you achieve Gnosis level 2 and despite my early scepticism it performs outstandingly. The ridiculously high stun rate, especially on headshot is the stuff of nightmares for the heretics. The massive stakes explode on impact after traveling a few meters and they add lightning damage on crit for even MORE stun power, even to those surrounding your target!
Oh, and the best part?
It has no damage dropoff whatsoever.
-Versatility: S
Far or close. Land your arced shots properly and the enemy will struggle to move closer or get a hit in. And it’s easy to land them because the hurtbox of Striga’s projectiles seem very lenient. It does have a slight delay in-between shots, but it’s easily negligible because of the stuns and many movement options at your disposal. On top of that you get over 70 shots and a 7 shot “magazine” that somehow reloads after winding it for two seconds. Suddenly you forget you even have other weapons in your loadout.
-Killing Power: S
Grenadiers? Headshot bait. Devotees? Target balloons. Swordsmen? Get perma-stunned nerd. Small groups get eviscerated by the AOE while tougher enemies become the target for bullying.
Striga solves problems. Not problem’s like “What is beauty?”. It solves practical problems.
Even the Galley Slave just stands there and takes it after just a few shots. Giving up on the thought of ever beating you.
-Combo potential: A
Since it can do anything, does it have combo’s? Well any further stuns are great to land shots as usual. My personal favourite is the Cursed Bell. Stunning whole groups of enemies, now ready to be staked to the walls and floors.
It has just one tiny downside: since it uses two elements it will always give the game a chance to roll fire and shock arcana during a mission. If you want to focus on just one element, especially if it’s freeze or decay, Striga will likely hamper growing your build through the duration of a run.
The Demonic Weapons
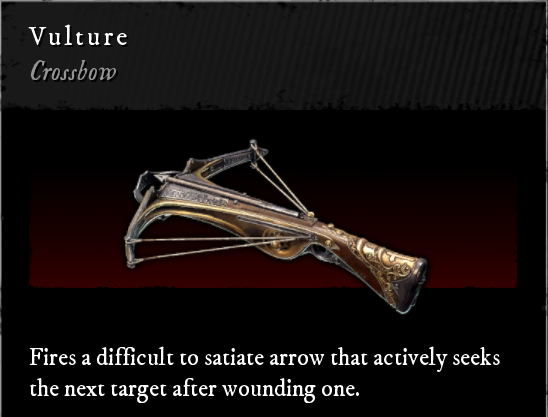 A decently high max ammo count and if you land one hit you get a bunch more afterwards, each dealing 100 damage. It can be a bit inconsistent though. Be sure you hit enemies in a way where when the arrow goes through them, it does not hit the ground or a wall. Handy in a pinch, which is what these weapons are supposed to be for.
It’s S-rank status is for completely negating the Assassin, Wraith and Wailing Spectre calamities. Three or four shots and watch the calamity evaporate before your eyes, you even get a lot of loot to boot. Now Calamities don’t seem so bad!
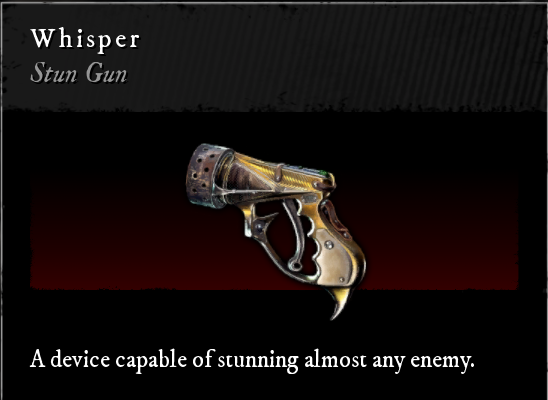 Does exactly what it says on the tin. It stuns. I like the idea, but there are plenty of other ways to do that so wasting your demon weapon slot on it is not a great idea. For a much better effect use the Plague Bell spell. Massive AOE stun and recharges consistently before it even finishes.
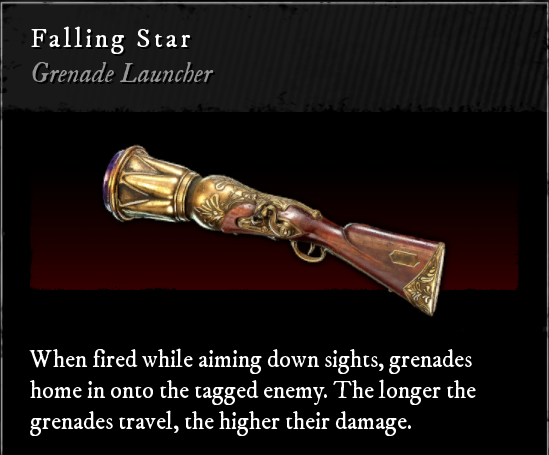 Inconsistent is the key word. The homing capabilities fail more often then succeed and aiming it is awkward to begin with. And if you do get a hit? It barely scratches or stuns the bigger enemies due to the inconsistency of the blast damage. The pope really needs to put the boys to work on improving this one.
Tierlist Overview
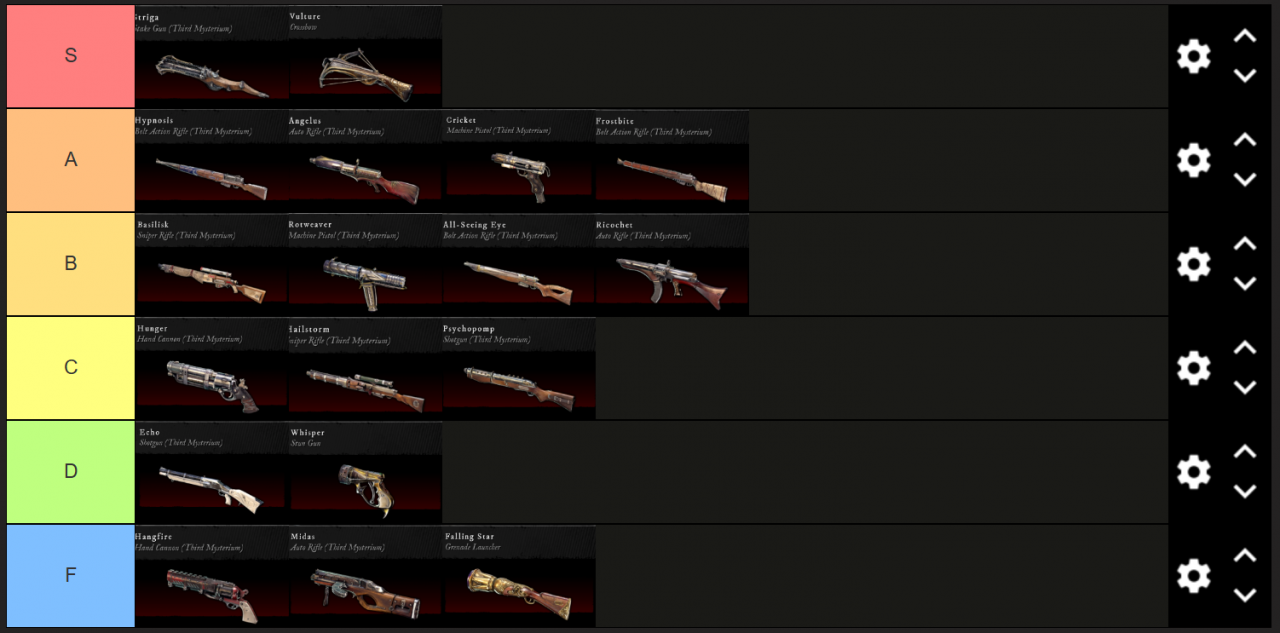
And that’s about it!
