
Invokyr is an up-to-six-player first-person puzzle-horror game. You survive a mysterious manor controlled by a spirit called the Game Master. To get out, you play a magical board game that unlocks doors, explore for treasure, and eventually reach the exit.
I put this guide together so you have one place to check dice effects, idol values, monster weaknesses, events, and shop prices. The guide is still a work in progress — some items and idols are not listed yet because the info is still being gathered. I hope it helps you get started, and I still suggest letting the game surprise you.
Overview
This section covers the events, boards, items, and upgrades you run into in Invokyr. Here is what you will find as you go through the rest of the guide.
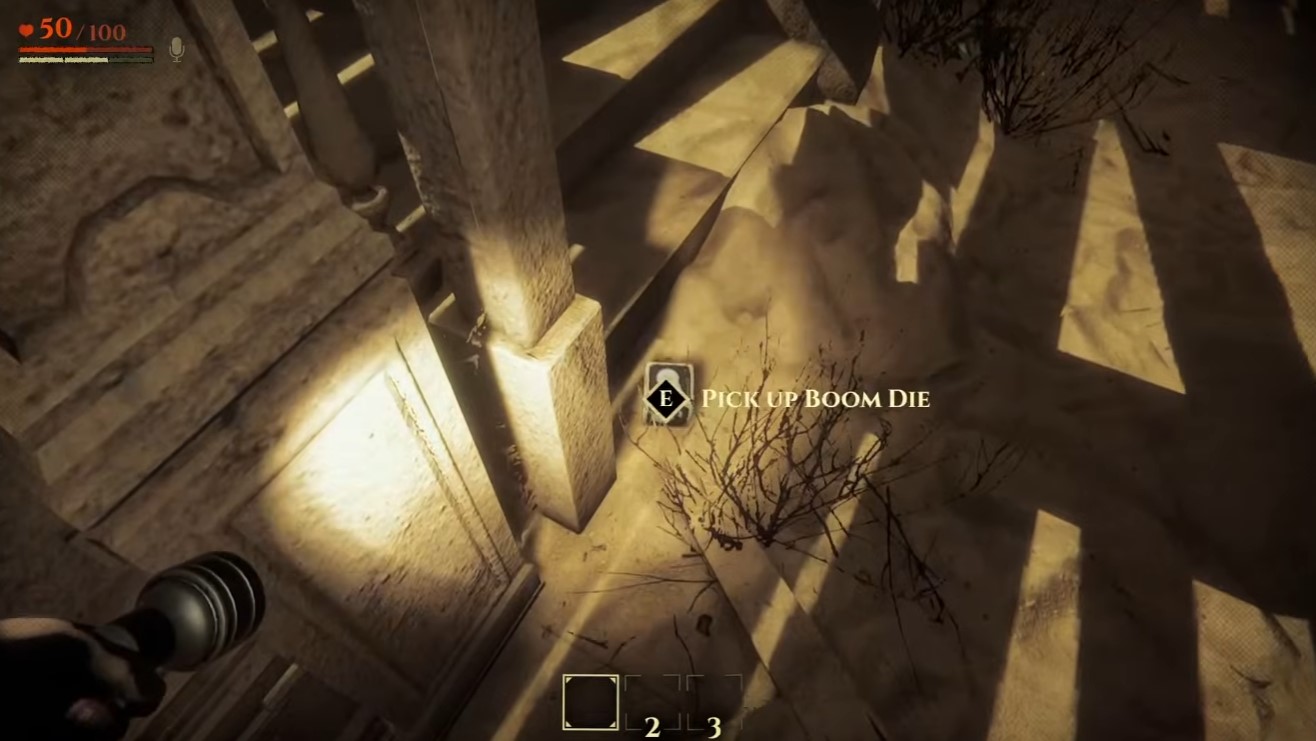
- Events — what happens after you roll.
- Boards — the rooms and spaces the token moves across.
- Items — dice, idols, and other tools you pick up.
- Upgrades — the stat boosts and gear you can buy.
I keep this list updated as more game info comes in. Some entries may still change while I am collecting everything.
Object of the Game
Here is the core idea. Invokyr is a first-person puzzle-horror game for up to six players. You are trapped in a mysterious manor controlled by a spirit called the Game Master. To escape, you play a magical board game that unlocks doors in the manor. Those doors let you explore for treasure and, eventually, find the way out.
The board is moved with a six-sided die. One token stands in for all players, and each roll pushes that token along the board toward the center. Every roll does more than move the token — it rearranges the manor’s rooms and can add a new threat to the house. That threat stays for the rest of the game, so the manor gets more dangerous as you go.
When the token finally reaches the center, the endgame begins. You are teleported into the manor and have to seal the Game Master’s soul back into the board to finish the run.
This is the loop I keep in mind the whole time:
- Roll the token movement die in the game room.
- Complete the event — collect idols around the manor, or survive a game event.
- Return to the main room and roll the movement die again.
- Once the token reaches the center of the board, you are teleported into the manor. You must return to the game room with the Game Master’s soul idol.
- Seal the idol into the board.
- Speak “Invokyr” into the microphone to end the session successfully.
The last step is easy to forget in the moment, but the run is not complete until you say the word. One more thing worth noting up front: this guide is still a work in progress. I know of several items and idols that are not listed here yet because I am still compiling info on them. Content gets added as I discover it, but this version should be more than enough to get you started. I still suggest letting the game surprise you too.
Dice
You find dice all over the manor. Most are inside containers and drawers, but sometimes they sit out in the open on tables or boxes. These dice are your main way to even the odds against the monsters. Every die has a 5/6 chance of a Good Roll with the effect you want, and a 1/6 chance of a Bad Roll with a negative effect. Some Bad Rolls are specific to that die, but many result in general chaos — a random destructive event like a lightning strike, fireworks, a minor monster spawn, or an explosion. Unless I say otherwise below, a Bad Roll means a general chaos result.
Heal Die
A Good Roll creates a circular area of effect that heals or resurrects everyone inside it. A dead player comes back with 10 HP. A living player is healed for 50 HP.
Resurrect Die
A Good Roll brings back one random dead player, even if their body was left in a previous arrangement of the manor. A Bad Roll does not revive anyone and instead spawns a Player Mimic armed with dice that can damage or hinder you. There is extra value here: if you are killed while a Resurrect die is in your inventory, it is consumed and revives you instantly.
Fire Die
A Good Roll ignites the area around where the die lands, after a short delay. Use it to set flammable objects alight or damage some monsters. A Bad Roll ignites that same area immediately with no delay. I have found this is sometimes better for you than the good roll.
Storm Die
A Good Roll sends a lightning bolt onto the landing area after a short delay, damaging a player or monster and igniting the ground. A Bad Roll triggers the bolt with no delay, which can also work in your favor.
Freeze Die
A Good Roll immobilizes the entity it hits for several seconds.
Cocoon Die
A Good Roll wraps any entities within a certain radius of the landing spot in a cocoon for several seconds, after a short delay. If you get cocooned, you can struggle to break free. A Bad Roll triggers the capture with no delay.
Chaos Die
A Good Roll triggers one of the 6 different effects on the faces of the die.
Teleport Die
A Good Roll teleports you to where the die lands. This helps you get around blocking entities or reach spots that are hard to platform to. A Bad Roll spawns a random minor monster where it lands, usually a Dress Mannequin or a Penguin.
Scanner Die
A Good Roll sends out a radar pulse from where the die dropped. It reveals interactables through walls and doors, highlighting idols, players, and monsters in bright green.
Rally Die
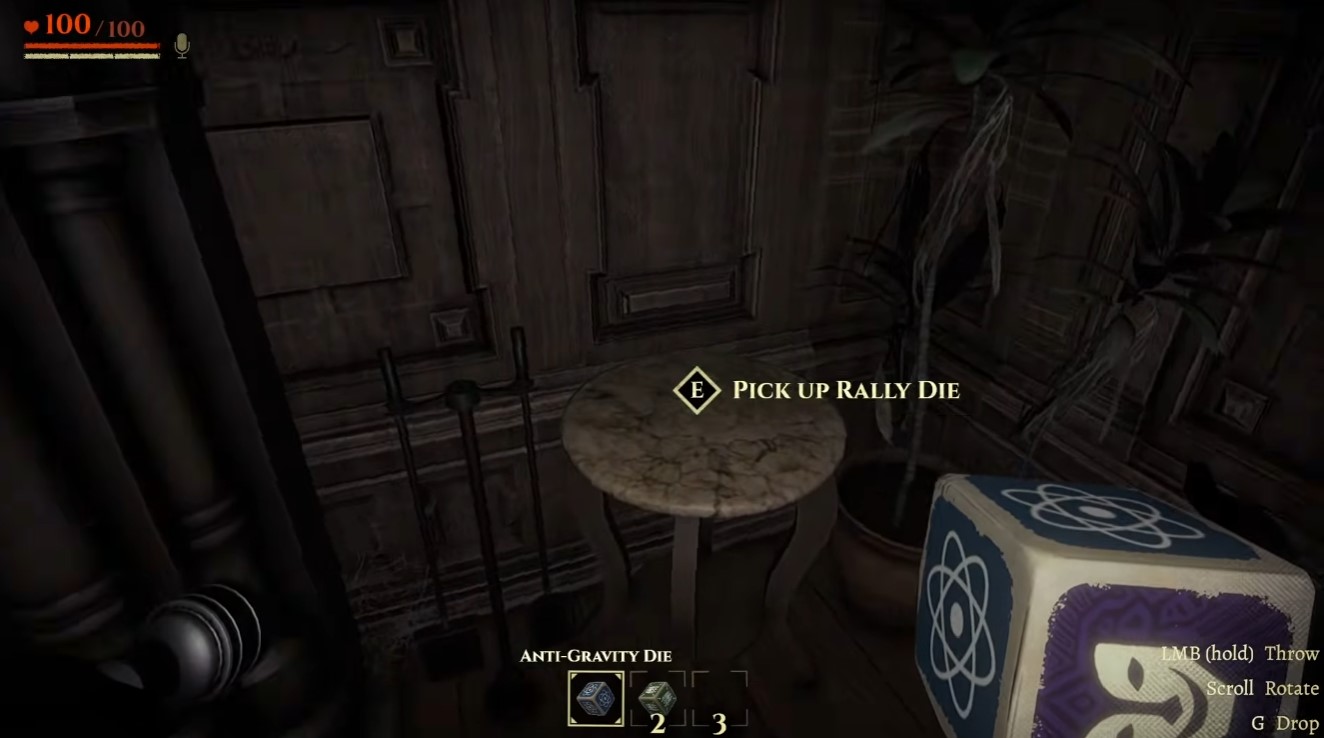
A Good Roll teleports every player to the location the die landed.
Lantern Die
A Good Roll creates a carriable lantern that lights up dark rooms and can be dropped as a marker. You change the light color with the scroll wheel.
Thread Die
A Good Roll spawns a ball of thread that rolls toward the game room. This makes it easy to find your way back when lost. It is extremely useful during the final event, when players are teleported into the deepest part of the house and must find their way to the game room.
Cube Die
A Good Roll creates a large cube you can move to reach higher areas. These only spawn from the Cube Dice Dispenser bought from the shop.
Firework Die
A Good Roll creates several fireworks that bounce around the room until they explode. Touching a firework deals 1 damage. These only spawn from the Firework Dice Dispenser bought from the shop.
Dice Dispenser
Interacting with a dice dispenser spits out a die of the type shown at the top of the device. It recharges as soon as the previous die it spawned is activated, so you can use it again and again. The ones I run into around the manor are mostly Scanner Die dispensers and Cocoon Die dispensers.
Idols
Idols are the lifeblood of your run. You collect Bronze, Silver, and Gold idols during exploration, carry them back to the board, and turn them in. That does two things: it generates money for the shop, and it unlocks your next token movement die. Most exploration phases hand you several idols, and each one is worth a different amount depending on its material.
Here is the part that took me a while to internalize — if the board needs idols to unlock your next movement die, the game tells you exactly how many are required. That number floats above the board itself. So before you run off into a room, look up and check it.
Every idol also carries its own mystical effect. The effect is active only while you are holding it. Drop it and the effect stops immediately; pick it back up and it returns. I learned to keep an eye on which idol I was clutching when things got hairy, because swallowing the wrong effect mid-fight can change everything.
One thing that still bothers me: idols vary in appearance, but you cannot tell what a specific idol does until you actually pick it up. Identification only happens on contact, so grabbing one is always a small gamble.
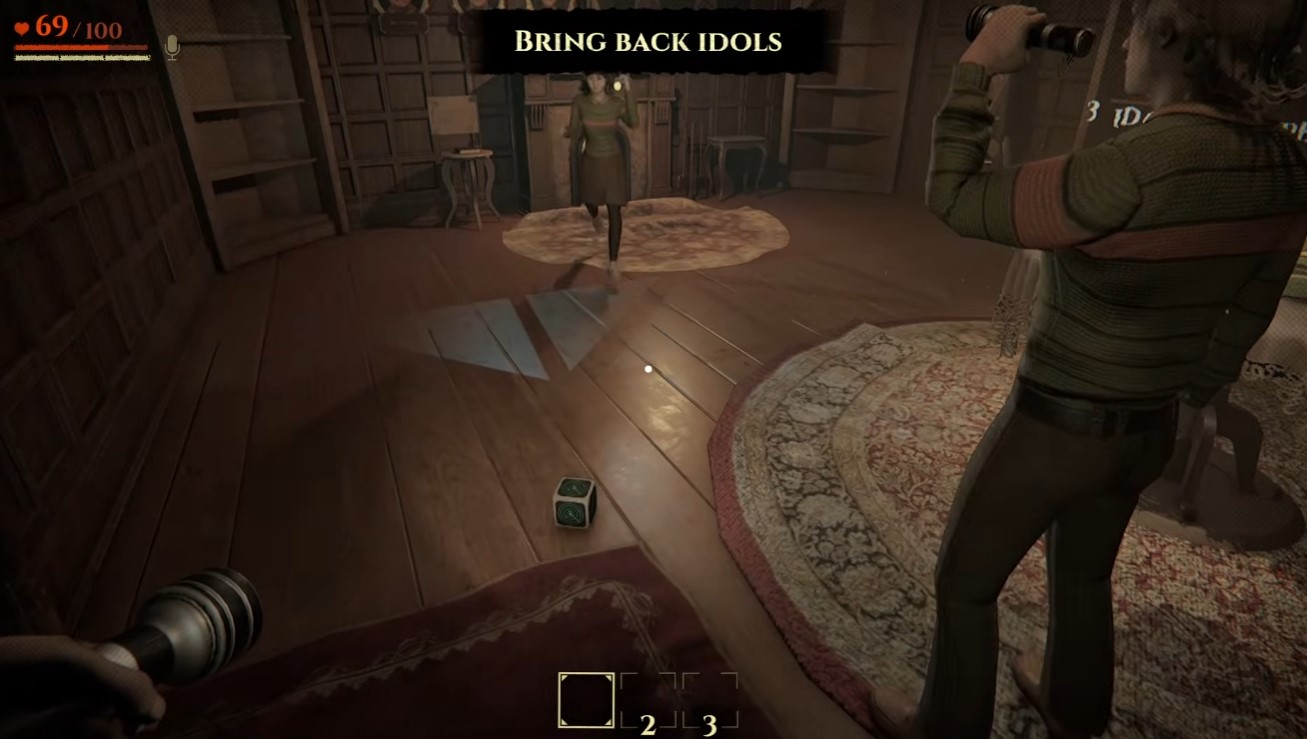
Turn-ins are not wasted even after your movement die is already unlocked. If you bring idols back and the die is sitting there ready, the board consumes them anyway and spawns more token movement dice — up to a maximum of three. Only one of those can be used, mind you. If you end up stuck with a cursed die or a low roller, it can be worth hunting down extra idols just to fish for a better die. I have done this more than once.
Idol Values
The money value comes down to material. That is the simple part.
- Bronze idols: $100
- Silver idols: $150
- Gold idols: $200
I would not ignore a pile of bronze just because it is the cheapest — those turn-ins still pull their weight toward your next die.
Bronze Idols ($100)
Bronze idols are the cheapest tier, but each one still changes how you move or see while you carry it. The eye glow is a handy tell — it tells you at a glance whether an idol is active in someone’s hands. Here is what each bronze idol does.
| Idol | Effect When Held | Eye Glow |
|---|---|---|
| Normal Idol | Does nothing when picked up. | Orange |
| Ice Idol | Creates a frost field around the holder’s feet. The holder and anyone in the radius slide as if on ice. | Blue |
| Miniaturizing Idol | Shrinks the holder and raises the pitch of their voice. | No glow |
| Mirror Environment Idol | Flips your vision while held, but not your controls. | Purple |
That last one caught me off guard the first time. Your view flips, so left looks like right — but your controls stay normal. If you pick it up, walk deliberately until your brain adjusts. The Miniaturizing Idol has no eye glow, which made it harder for me to tell it was active at a glance.
Silver Idols ($150)
Silver idols cost more when you sell them, but every one of them carries a downside. Most of them mess with your senses or your position, so read the effects before you grab one. Here is what each silver idol does while you hold it.
| Idol | Held Effect | Eye Glow |
|---|---|---|
| Blinding Idol | Reduces your vision radius, creating a darkened and quieted area around you | Pink |
| Chaos Idol | Regularly spawns random, usually damage-focused dice and ejects them in front of you | Green |
| Mirror Controls Idol | Flips your movement and aiming controls — both WASD and mouse | Pink |
| Music Box Idol | Plays music and spins its head; at random intervals it glows red and then spikes out, dealing 20 HP damage to the holder | White |
| Spider Idol | Grows legs and breaks free from the first player who picks it up, running off through the manor | — |
| Teleport Idol | Teleports you to a random location in the manor every time it is picked up | — |
| Other Player Eyes Idol | Lets you see through another random player’s eyes; works like a Normal Idol if no other players are alive | — |
| Fire Idol | Ignites fire in its eyes and randomly discharges flames in front of you while forcing you to slowly spin left or right | — |
The Blinding Idol is one I would pass on if you already struggle to see the manor. When you hold it, your vision radius shrinks and a darkened, quieted area forms around you. Its eyes glow pink while held, so you can spot it from a distance.
The Chaos Idol is a risk I usually only take when I have dice to spare. It regularly spawns random dice — usually damage-oriented ones — and ejects them right in front of whoever is holding it. Its eyes glow green.
The Mirror Controls Idol works just like the Mirror Environment Idol in how it flips you. Holding it mirrors your movement and aiming: WASD gets reversed, and your mouse movement does too. Its eyes glow pink. If you pick this one up, give yourself a moment before you try to fight something.
The Music Box Idol looks harmless until it turns on you. It plays music and spins its head around while held, but at random intervals it glows red — and shortly after, sharp spikes shoot out of its body and hit the holder for 20 HP. The glow is your only early warning, and its eyes glow white while held. I keep an eye on it the whole time I carry it.
The Spider Idol does not want to be held. When a player first picks it up, it grows legs and breaks free, running off through the manor. It eventually stops on its own, or you can catch it while it is running — once it stops, it gives up trying to get away. Chasing it down is the real cost here.
The Teleport Idol is the most reactive of the silver set. Every time it is picked up, it sends you to a random location in the manor. That sounds bad, but it can actually save you — when a monster is closing in, grabbing it can pull you out of danger fast.
The Other Player Eyes Idol changes who you are looking through. While held, you see through another random player’s eyes. If no other players are alive, it behaves like a Normal Idol instead.
The Fire Idol lights up the moment it is picked up, igniting fire in its eyes. While you hold it, it randomly discharges flames in front of you and forces you to slowly spin left or right. That fire can ignite flammable objects just like the Fire Die, and it can kill some monsters — so the spinning is annoying, but it doubles as a weapon.
Gold Idols ($200)
The most expensive idol tier sells for $200 at the shop. Only one gold idol is listed so far, but it hits hard enough that one is plenty.
| Idol | Value | Effect |
|---|---|---|
| Storm Idol | $200 | Repeatedly creates lightning strikes close to the player holding it, dealing damage and sometimes igniting the ground. Its eyes glow blue when held. |
Holding the Storm Idol means lightning keeps striking right around you. It damages you, and sometimes it sets the ground on fire. What makes it worse is that you cannot control where it hits. So keep moving and do not stand still while you carry it.
When held, its eyes glow blue. That makes the Storm Idol easy to spot in the dark, which is handy — you will want to know exactly where this thing is at all times.
Special Idols
Most idols fit neatly into the bronze, silver, and gold tiers, but there is one that does not belong to any of them. The Game Master’s Soul is a special idol, and I think it is the most important object you will ever pick up in a run.
It only shows up during the final trial of a game. When it appears, your job is simple: carry it back to the board to end the game. That is the whole point of the final stretch, and it is what stands between your group and the exit.
Unlike every other idol on this list, the Game Master’s Soul has no effect while you hold it. There is no eye glow to watch, no power to trigger, nothing to manage. You just have to get it where it needs to go. I still treat it carefully, because dropping it or losing track of the carrier is the one thing that can stall the ending.
Monsters
Monsters spawn to slow you down while you explore the house. Most of them deal damage that can hurt or kill you outright, so knowing what you are walking into matters. Every board is built around one specific monster that is guaranteed to spawn as the first event.
| Monster | Behavior | Attack Damage | Weaknesses |
|---|---|---|---|
| Alligator | Large, fast, highly aggressive. Roams the house and attacks players it finds. Immune to fire damage. | 60 | Boom dice, Cocoon dice |
| Carnivorous Plant | Begins the event phase asleep. Senses movement (and noise?) in a radius around it, which wakes it up. | 60 HP | Do not sprint near it and it stays asleep, Fire dice, Boom dice |
| Dress Mannequin | Only moves when not in a player’s field of vision. Activates when a player gets near it in its field of vision, at which point its mouth opens. Makes a creaking noise when it moves. | Instant death | Fire, Boom dice, Cocoon dice |
| Horsemen | Giant chess knights that come as a pair — one white, one black. Only one is active at a time: one hunts players while the other stops to rest. | — | Cocoon dice |
| Huntsman | Extremely sensitive to sound; even crouch-walking close by can alert him. Immune to fire damage. | 70 | Fire dice, Boom dice, Cocoon dice |
| Mimic Door | Some doors become mimics and damage players when opened. They make a heavy breathing sound when you are close. | — | — |
| Money Man | A short monster resembling the Monopoly Man. Not immediately aggressive if you keep your distance, but it immediately pursues and grabs any idols it sees. If you are holding an idol, it chases you and attacks with its cane. | — | Fire dice, Boom dice, Cocoon dice |
| Mummy | Roams the manor trailing a very long bandage. Getting close to its line of sight causes it to chase and attack with a long sword that has good horizontal range but no vertical. Walking over his bandage makes him sprint toward that spot to look for a player. | 60 | Standing two feet or more off the ground, Fire dice, Boom dice, Cocoon dice |
| Penguin | A clockwork penguin that makes noise and explodes after a short fuse. The timer does not start until a player comes close. Can be picked up and thrown into pits or at enemies; throwing knocks them down briefly. | Explosion: 100 | — |
| Player Mimic | An exact copy of one of the players in the lobby. Records phrases from proximity voice chat and repeats them at random. Occasionally throws random dice at a player while making an evil laugh. | — | — |
| Sandworm | Roams underground and targets players who run or make loud noises. Rumbles the ground before lunging up to attack. | 70 | — |
| Shadow Man | A white, static-filled man-shaped monster that emerges from televisions playing static around the manor. | — | Turning the active television off |
| Snowman | Roam the manor, but all are harmless except one. Harmless copies can be destroyed by throwing any object through them, even the plain dice from the game room. The aggressive copy chases down players it sees and must be killed by traditional means. | — | Thrown objects (harmless copies), Fire dice, Boom dice, Cocoon dice |
| Spider | Hide on the ceiling and occasionally make noises when players get close. Walking underneath one gets the player cocooned. | — | — |
The Dress Mannequin is the one that caught me off guard the most. Back away until you cannot see it, and it should deactivate. With a full group, one player can keep eyes on it while the rest move past. The Mummy is similar — standing on a table or box protects you from its damage, which is easy to forget mid-chase. And do not walk over its bandage, because that pulls it straight to you.
For the Snowman, hold onto a plain die if you can — it is enough to pop the harmless copies. For the Shadow Man, find the television playing static and switch it off to make him vanish for a short time.
Curses
Curses can trigger when you roll a cursed die during the player token movement phase. If the top face of the die shows a purple curse symbol, a curse hits some or all players in the lobby. It stays active until the next token movement phase, so you are stuck with it for the current round. I always check the top face before I roll a die I did not pick up myself.
Two curses show up on the movement die:
| Curse | Effect |
|---|---|
| Flashlight Disabled | Affected players have their flashlight disabled. |
| Shared Damage & Healing | All players share damage and healing taken. When one player takes damage from any source, all players take it. When one player heals, all players heal. |
The Shared Damage & Healing curse is the one that caught me off guard the first time. If one player steps into a monster hit, everyone feels it, so no one can play carelessly. The Flashlight Disabled curse is the opposite problem — you lose your light and have to move through the manor almost blind until the phase passes.
Events
Once the player token stops during the movement phase, a rhyme appears above the board. That rhyme tells you what just happened. It might be a monster spawning inside the manor, a minigame you have to survive, or a platforming challenge. Pay attention to it — the rhyme is your only heads-up before things change.
After the event fires, the usual loop kicks in again. The manor rearranges, and you explore the new layout to collect idols and unlock the next token movement die. That rhythm repeats for most of the game, so getting comfortable with reading the rhyme quickly saves you a lot of confusion.
- Monster spawn — a new monster appears somewhere in the manor.
- Minigame — the players must survive a challenge together.
- Platforming — a movement-based challenge the group has to clear.
The first event of each board is guaranteed and tied to the board itself, so you always know something is coming early. After that, the rhymes keep you guessing. I still read each one twice before moving, just to be sure I did not misread which type of event I was about to deal with.
Monster Spawn Events
These are the events that drop a monster into your run. Each one has a rhyme, and once it triggers, that monster stays for the rest of the game. I treat every spawn as permanent, because it is. Read the rhyme before you move.
Here is every monster spawn event I have logged, with the rhyme and what it actually does.
| Event | Rhyme | Effect |
|---|---|---|
| Alligator | Keep your feet up above the mud, or it will bite you in cold blood. | Spawns the Alligator monster for the remainder of the game. |
| Carnivorous Plant | Hidden in leaves, it lays in slumber. Slow down your pace or make a blunder. | Spawns the Carnivorous Plant for the remainder of the game. |
| Dress Mannequins | Red light, green light, they want to play. They know when you’re looking away. | Spawns the Dress Mannequin monsters for the remainder of the game. |
| Huntsman | He sees no light, but hears it all. One breath, one step, and down you fall. | Spawns the Huntsman monster for the remainder of the game. |
| Ice Miner | Once he tangles you in his rope, breaking free is your only hope. | Spawns the Ice Miner for the remainder of the game. |
| Mimic Door | TBD | Spawns Mimic Doors throughout the manor for the remainder of the game. |
| Money Man | Guarding his bank, looking for gold. Don’t let him notice what you hold. | Spawns the Money Man for the remainder of the game. |
| Mummy | Don’t trip over his bandages, or face his wrath of past ages. | Spawns the Mummy for the remainder of the game. |
| Player Mimics | One of you may not be true. Stay together, or they’ll come for you. | Spawns Player Mimics for the remainder of the game. |
| Penguins | A cranky bunch to babysit. No way out once the fuse is lit. | Spawns Penguins for the remainder of the game. |
| Sandworm | Don’t let your footsteps make a sound. Something is lurking underground. | Spawns the Sandworm for the remainder of the game. |
| Shadow Man | Don’t let the TVs play the tape, or let the Shadow Man escape. | Spawns the Shadow Man and his activation TVs for the remainder of the game. |
| Snowmen | Copies gather, harmless and cold. Run from the one who breaks the mold. | Spawns Snowmen for the remainder of the game. |
| Spiders | On the ceiling, they walk around. Look up above, or end up bound. | Spawns the Spider monsters on ceilings for the remainder of the game. |
The Mimic Door rhyme is still unconfirmed, so I left it marked TBD rather than guess at it. If you see the real line during a run, that is the one entry here I would want filled in first.
Minigame Events
Some events pull the whole group away from the board and drop you into a challenge instead. Each one starts with a rhyme, and the rhyme is usually a hint about what you have to do. I learned to read those lines carefully before moving, because the first step in most of these is the one that kills you.
Here is every minigame event I have documented so far. I kept the rhymes exactly as they appear, since they double as instructions.
The Floor is Lava
FROM DOWN BELOW, THE HEAT WILL RISE / REACH HIGH GROUND OR MEET YOUR DEMISE
All players get teleported to a room with lava steadily rising under the floor. You have to stack the large boxes scattered around the room to reach the second floor and escape onto the balcony. Getting the stack right matters — 10 boxes need to go up in a 1-2-3-4 formation. If you lose track of the pattern, you waste time you do not have.
The challenge does not fully end after you escape. For the rest of the game, lava keeps rising until it covers the floor for several seconds and damages anyone caught standing in it. You can hear and see fire effects before the lava reaches floor level, so that is your warning. Stand on something like a box or a table and wait it out until the lava goes back down.
Trapdoor Game
COME IN AND PLAY MY TWISTED GAME / THE SAFE TILES ARE NEVER THE SAME
Everyone is teleported into a room with a 5×5 grid of floor tiles, each marked with a different symbol. A wheel on the wall spins, and whichever symbol it lands on becomes the safe tile for that round. Every unsafe tile turns into a trapdoor and drops anyone standing on it to their death. The game runs three rounds, and the number of symbols grows each round — so round three is where I would slow down and look before stepping.
Chessboard
NOT EVERY SQUARE IS SAFE TO TREAD / PLAN YOUR NEXT MOVE OR JOIN THE DEAD
You are teleported into a room holding an idol that has to be brought back to the game board. To get it, you navigate a giant chessboard while the pieces move around and try to crush you as you cross their squares. Watch the piece movement instead of rushing the idol — the pieces are the whole threat here.
Fire Pillar
KEEP AWAY FROM THE DEADLY SPIRE / OR DIE IN THIS TRIAL BY FIRE
A pillar rises in the center of the room and several long jets of flame erupt from it. It spins fast and alternates directions, so do not get comfortable on one side. After a set duration the pillar sinks back into the ground and the event ends.
Rolling Boulder Trap
GRAB THE IDOL, MAKE YOUR ESCAPE / OR THE ROLLING BOULDER SEALS YOUR FATE
The central door opens into a hallway where a single idol waits. Picking it up triggers a boulder trap that rolls down after you as you run back to the game room. If the player carrying the idol gets killed, the boulder does not spawn again the next time the idol is picked up — so that death at least clears the trap for the group.
Dice Spawn
THE BOARD HAS GIFTS IT WANTS TO SHARE / TAKE WHAT FALLS, IF YOU STILL DARE
The game board ejects multiple dice onto the ground. This counts as the dice being rolled, so the effects happen right away — and that means they can help you or hurt you. I have seen a helpful roll land badly for the same group two events in a row.
Ballerina
DO NOT UPSTAGE THE BALLERINA / FOLLOW HER PACE, OR FACE THE DRAMA
All players are teleported into a room with an idol, and you have to get back to the game room through a large room where a ballerina spins in circles. Move while she is stopped and spikes rise from the ground. Time your movement to her turns and keep going.
Shell Game
FOLLOW THE CARD SHOWING THE ROUTE / OR HOPE YOUR LUCK HAS NOT RUN OUT
A room opens next to the game room with three doors. Above them are three cards that shuffle around like a shell game. Track the card with the idol image on it and enter the door it lands above to take the idol. The other two doors are Mimic Door monsters, so picking wrong is not just a lost idol — read the shuffle carefully before you commit.
Game Completion
The endgame triggers on its own. The moment your player token reaches the center of the board, this event fires — you do not choose it, and it doesn’t wait for anyone to be ready.
The rhyme you’ll see is:
AT LAST YOU FOUND MY LONG LOST HEARSE
RETRIEVE MY SOUL AND END THE CURSE
What that means in play is a big shift. Every dead player revives, and the whole group gets teleported to a room deep inside the house — the deepest interior, the kind of spot you haven’t been to yet. Sitting there is an idol that represents the Game Master’s soul.
From here it’s a carry job. Someone has to get that idol back to the game board, and then seal it. Do that and the run is finished. I’d treat the trip back as the real test, because you are moving a win condition through the house, not just grabbing loot.
Shop
Once you clear the first board, the Shop opens. That is your spending stop between boards — a good time to pick up upgrades, furniture, gadgets, and cosmetics before heading back into the manor.
The shop opens again every time you clear a board, and each visit brings a new inventory. So what you see after the first clear will not be the same list you get later. I check it every round, because the stock you skip now may not come back.
Prices in this guide use one format: the normal price first, the discount price in parentheses right after it. For example, 500 (350) means 500 coins at full price, or 350 when the item is discounted. Every item in the shop has a chance to show up at 30% off, and the discounted number in parentheses is what you pay when that happens.
Upgrades
Upgrades work differently from the gear and furniture in the shop. When you buy one, it applies to you for the rest of the game, so think about who on your group needs it most. Nothing carries over — every upgrade resets at the start of a new game, and the price goes up after each board clear.
That price climb is worth keeping in mind before you spend. The numbers below are the prices shown after the first board clear, so early upgrades are cheaper than what you will see later in a run.
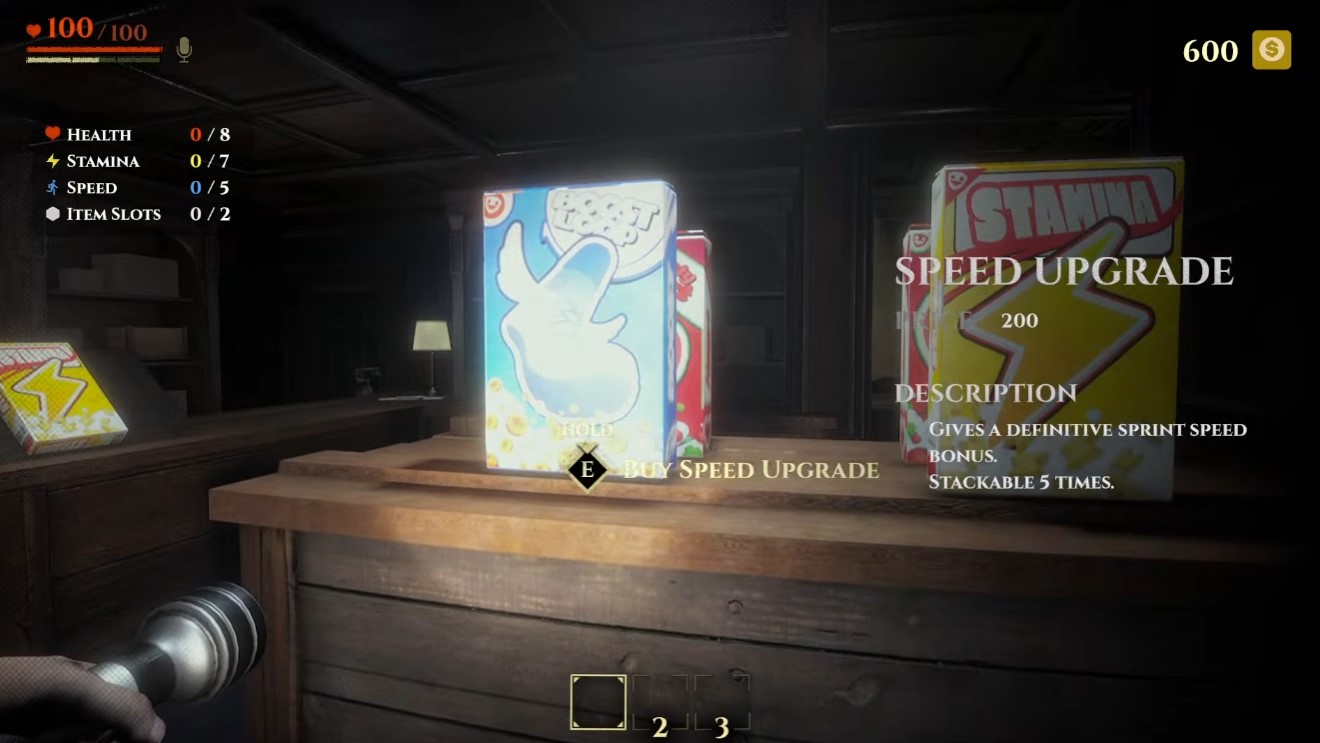
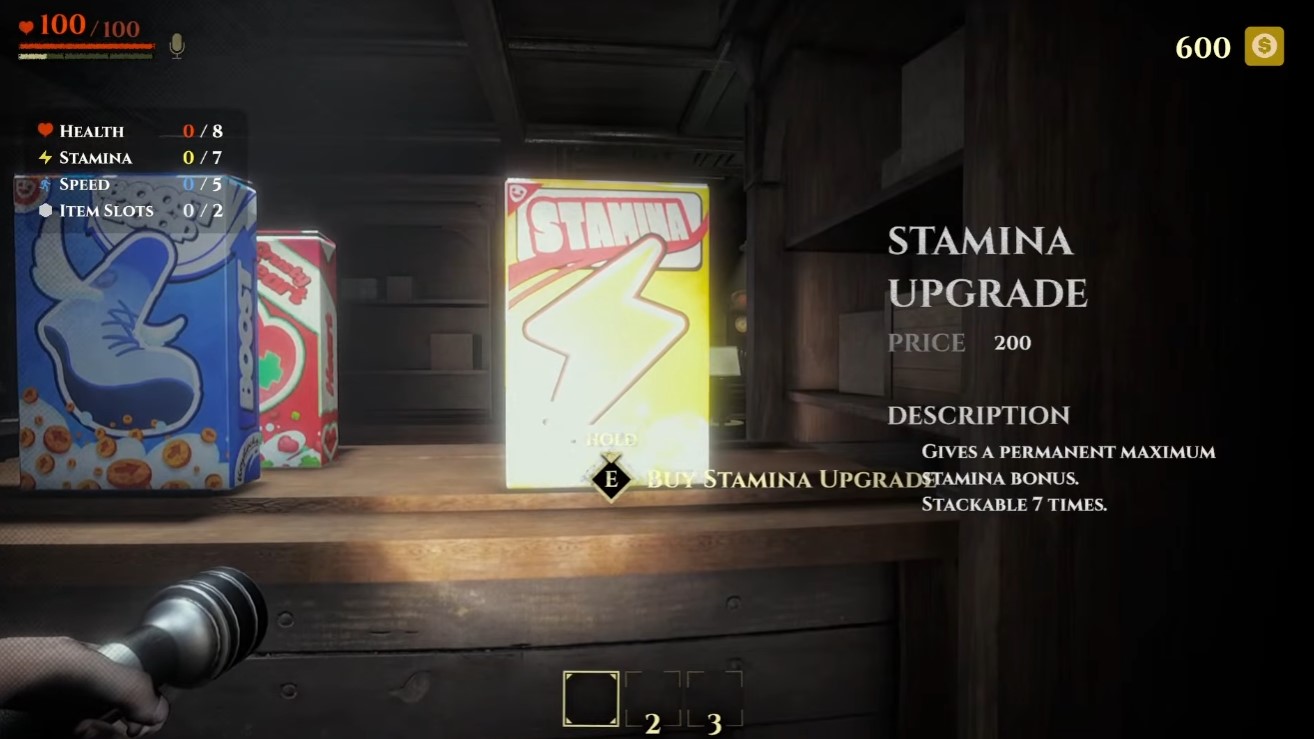
| Upgrade | Effect | Stack Limit | Price |
|---|---|---|---|
| Health | Raises your maximum health by 25 points | 8 times | 200 (140) |
| Stamina | Raises your maximum health by one bar | 7 times | 200 (140) |
| Speed | Increases your running speed | 5 times | 200 (140) |
| Fanny Pack | Gives you one extra inventory slot | 2 times | 400 (280) |
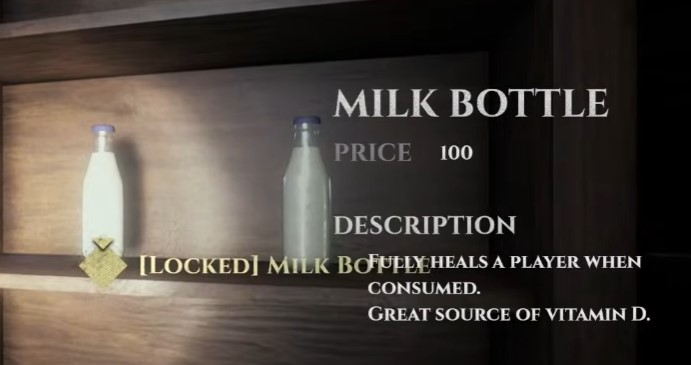
| Milk Bottle | One-time use, instantly fully heals the buyer | Not stackable | 100 |
The Fanny Pack is the one I would watch for, since an extra inventory slot changes how much loot you can carry between rooms. It only stacks twice, so you cannot load up endlessly on it. The Milk Bottle is a simple pick — buy it, hold it, and pop it when you are low on health for a full heal.
Furniture
Furniture items are bought from the shop and placed inside the game room. The nice part is that furniture is shared — every player at the table can use it, not just the person who paid for it. I keep this list handy because a couple of these pieces change how a run actually plays out.
| Furniture | What It Does | Price |
|---|---|---|
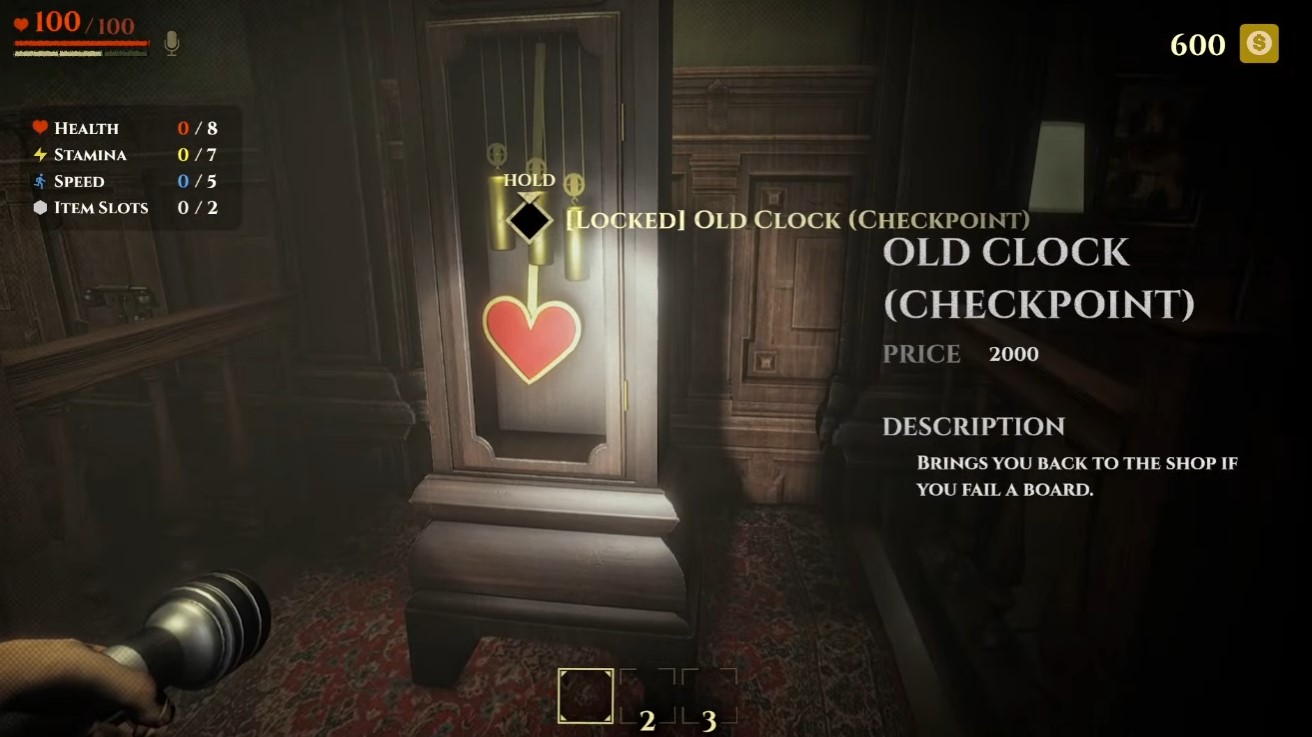
| Old Clock | Brings you back to the shop if you fail a board. It shows up broken in the game room. Buying it repairs it, and once it runs, a total team death no longer ends your run. | 2000 (1400) |
| Mirror | Unlocks the mirror in the game room. | 750 (525) |
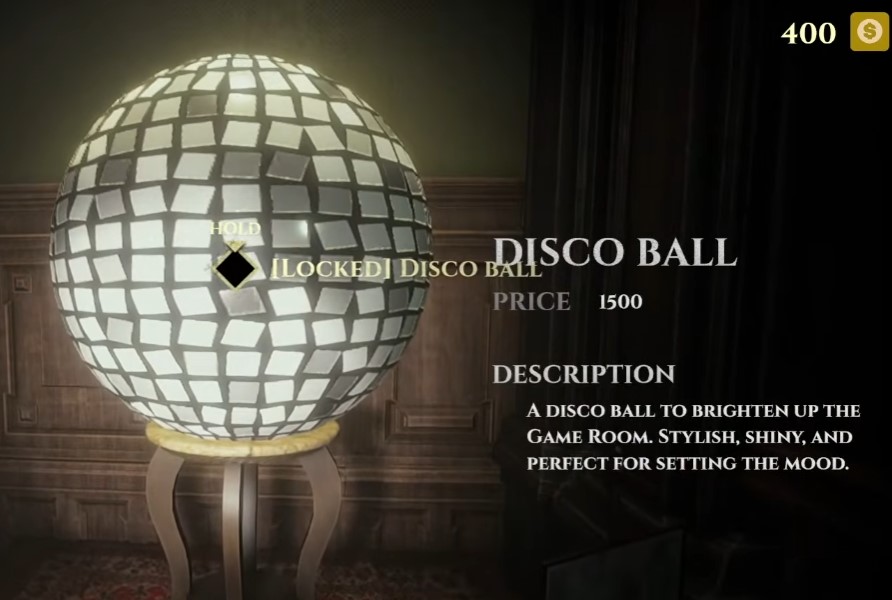
| Disco Ball | A disco ball to brighten up the game room. Stylish, shiny, and perfect for setting the mood. | 1500 (1050) |
| Cube Dice Dispenser | Get all the cubes you always dreamed of. | 500 (350) |
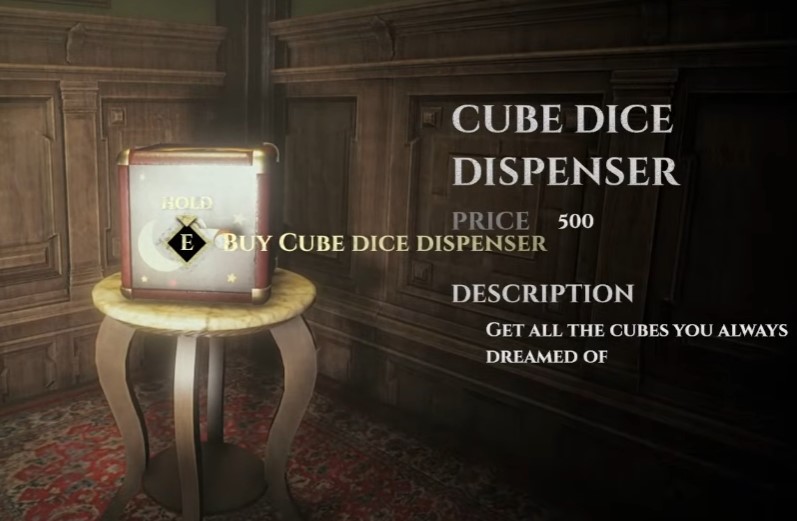
The Old Clock is the one I would buy first. It is expensive, but it is basically a safety net — a full team wipe sends you back to the shop instead of ending the run. The Mirror and Cube Dice Dispenser are cheaper pickups that add utility to the room, and the Disco Ball is purely for looks if you want the space to feel less grim.
Gadgets
Gadgets are a separate category from furniture. You can carry them into a run or use them around the game room, and while a few are pure fun, the rest can genuinely change how a board plays out. I usually check this shelf right after I finish my upgrade spending, because a good gadget fills a gap your health and stamina can’t cover.
Prices below are the normal shop cost, with the discounted price in parentheses. If you grabbed the Old Clock or another discount item earlier, this is where that 30% saving starts to feel real.
| Gadget | What It Does | Price |
|---|---|---|
| Compass | Always points toward the game room. Good for anyone who keeps getting turned around in the manor. | 1250 (875) |
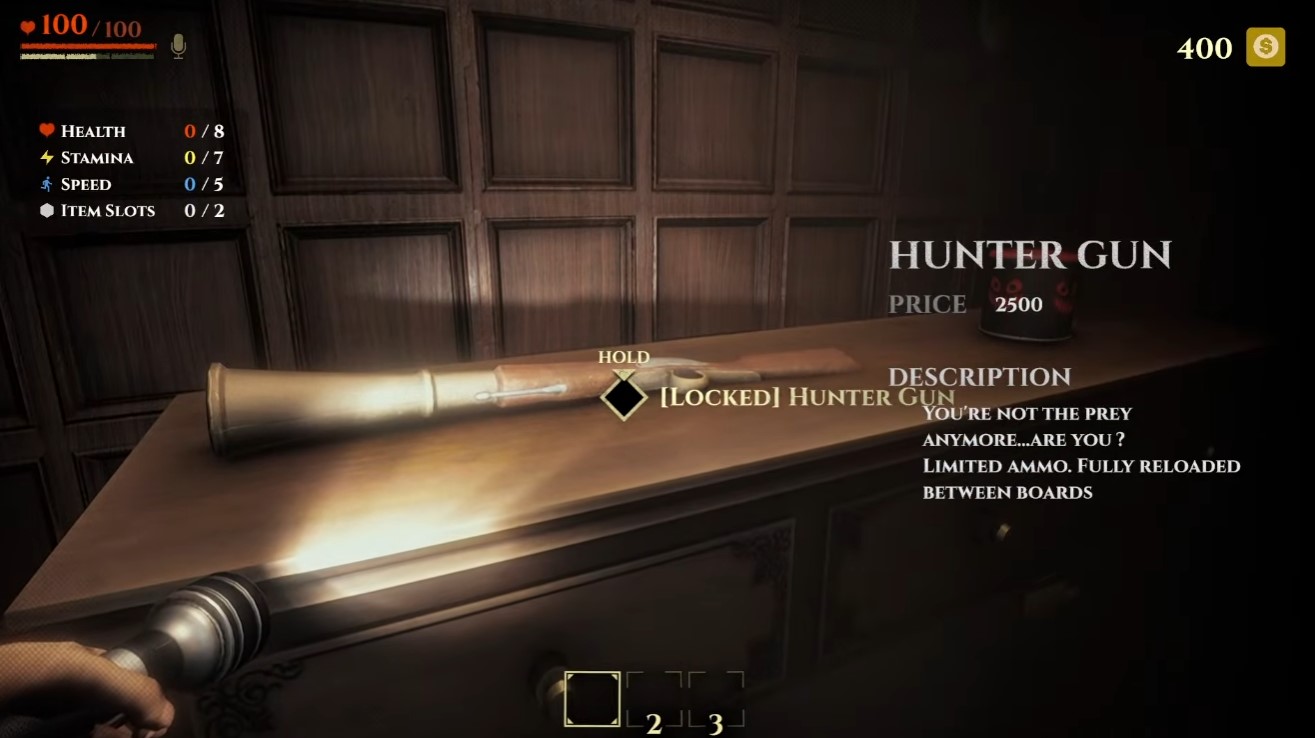
| Hunter Gun | Weapon. Limited ammo, fully reloaded between boards. | 2500 (1750) |
| Flamethrower | Weapon. Sets fire to anything standing in your way. Limited ammo, fully reloaded between boards. | 2500 (1750) |
| Camera | Takes pictures of your favorite moments in the manor. | 375 (262) |
| Monster Sound Box | Plays the sounds of your favorite monsters. | 250 (175) |
| Megaphone | Makes sure everyone hears you when you plan your next move in the manor. | 250 (175) |
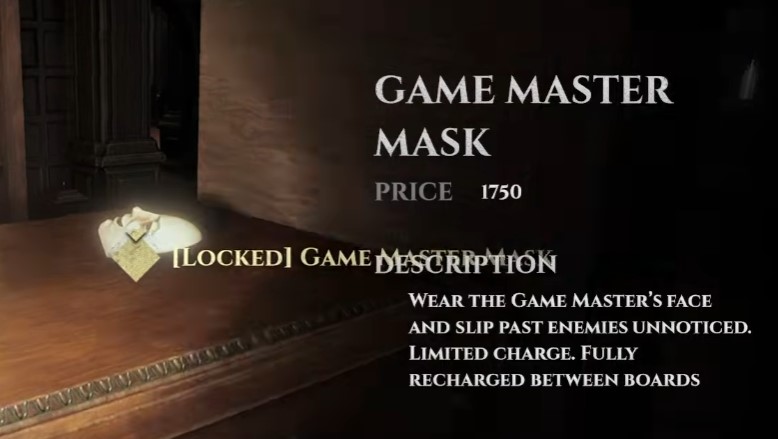
| Game Master Mask | Wear the Game Master‘s face and slip past enemies unnoticed. Limited charge, fully recharged between boards. | 1750 (1225) |
| X-Ray Goggles | See players and your surroundings through walls. Limited charge, fully recharged between boards. | 1250 (875) |
The two weapons are the biggest spend here. The Flamethrower and Hunter Gun both carry limited ammo that refills every board, so if you buy one you are not locked out of using it later — it just resets. The Game Master Mask works the same way with its charge, and using it to walk past enemies without a fight can save you a lot of trouble on a bad board.
The X-Ray Goggles are my pick for teams that split up. Seeing other players and the walls around you cuts down on guesswork, and like the mask, it comes back fully charged after each board. For the cheaper picks, the Compass is worth it if you and your group keep losing the game room, and the Camera, Monster Sound Box, and Megaphone are mostly for fun and communication — I would not treat any of the three as a serious survival buy.
Cosmetics
Cosmetics are a nice break from the survival grind. Any player can buy them, and they only change how the manor or the players look.
Wallpaper
Look at the back wall of the shop. That is where you pick up different wallpapers for the manor. One wallpaper costs 200.
Clothing
There is a hanging rack in the shop. Walk up to it to change the color of your sweater. Standard colors cost 25 each. The gold sweater is a bigger purchase at 1500, so I would only grab it once your group is comfortable with the shop budget.
Miscellaneous Information
There are a few extra systems in Invokyr that the game does not spell out for you at first. I am putting them all in one place so you are not caught off guard mid-run.
Mirrors are placed around the manor, and they act as a one-time save point. If you save your image in a mirror, dying will bring you back to life at that mirror’s location. After it revives someone, the mirror breaks, so you can only use each one once. I try to note where the closest mirror is before I wander too far.
Dead players still have ways to stay involved. The portraits on the wall in the game room show which players have died. Dead players can talk through those portraits, and anyone standing close by will hear them. There is also a chargeable meter that lets a dead player whisper to one specific player they are spectating.
If you finish a run with unused dice, carry them into the shop and drop them into the Dice Burner. Each destroyed die gives you $35. The catch is that dice you picked up from dice dispensers cannot be burned, so keep that in mind before you hoard them.
The last thing I want to mention is the Secret Room. If you do some careful platforming in the game room, you can reach a room hidden above the ceiling. Inside are empty drawers, a newspaper clipping, and a safe with a six-digit lock.
The newspaper clipping reads:
[illegible] and their seven children died on the evening of Sunday the 13th [illegible]. Police are investigating the cause of the fire.
The funeral will be held this Thursday at 10 a.m. at [illegible] Cemetery.
Some parts of the clipping are damaged and hard to read, so I am only copying what is visible. If you find the safe code that goes with it, that story is worth following up on.
Conclusion
That covers the extra systems I wanted to share. There is still more to find in Invokyr, so treat this as a starting point and let the manor surprise you on the way.


