Maximize your Pub, Infirmary, and Guard Tower influence.
Section 1: Overview and Spoiler Warning
If you’ve made it here, first of all; Welcome! It should go without saying, but if you missed the title, there are major SPOILERS in here, so take a moment to consider that. In this guide, I mainly tackle the complex nature of controlling population. Mainly, how to pack in as many Shacks and/or Houses into the influence of the Tavern/Pub, Infirmary, and Security Posts. PLEASE NOTE: This was fully operation with Patch III from the developers. Future updates may break, or otherwise render this guide less efficient.
Section 2: Building an efficient City Grid
Using the “Grid” style, I was able to pack in 44 Shacks and/or Houses in the influence of BOTH the Infirmary, and Pub, with 6 Guard Shacks. We’ll call this 1 City Grid, for the purpose of multiple Grids later if you are building extreme populations. There may be a more efficient method, but I couldn’t find anything more efficient.
With this layout, you need the following;
This will fully cover the following population of 440-528, depending on your Shack to House ratio. On Easy mode, upgrading to Houses is fairly cheap if you build them as they are needed, but on harder difficulties, you might want to keep the Shacks, because that’ll save you a LOT of Wire.
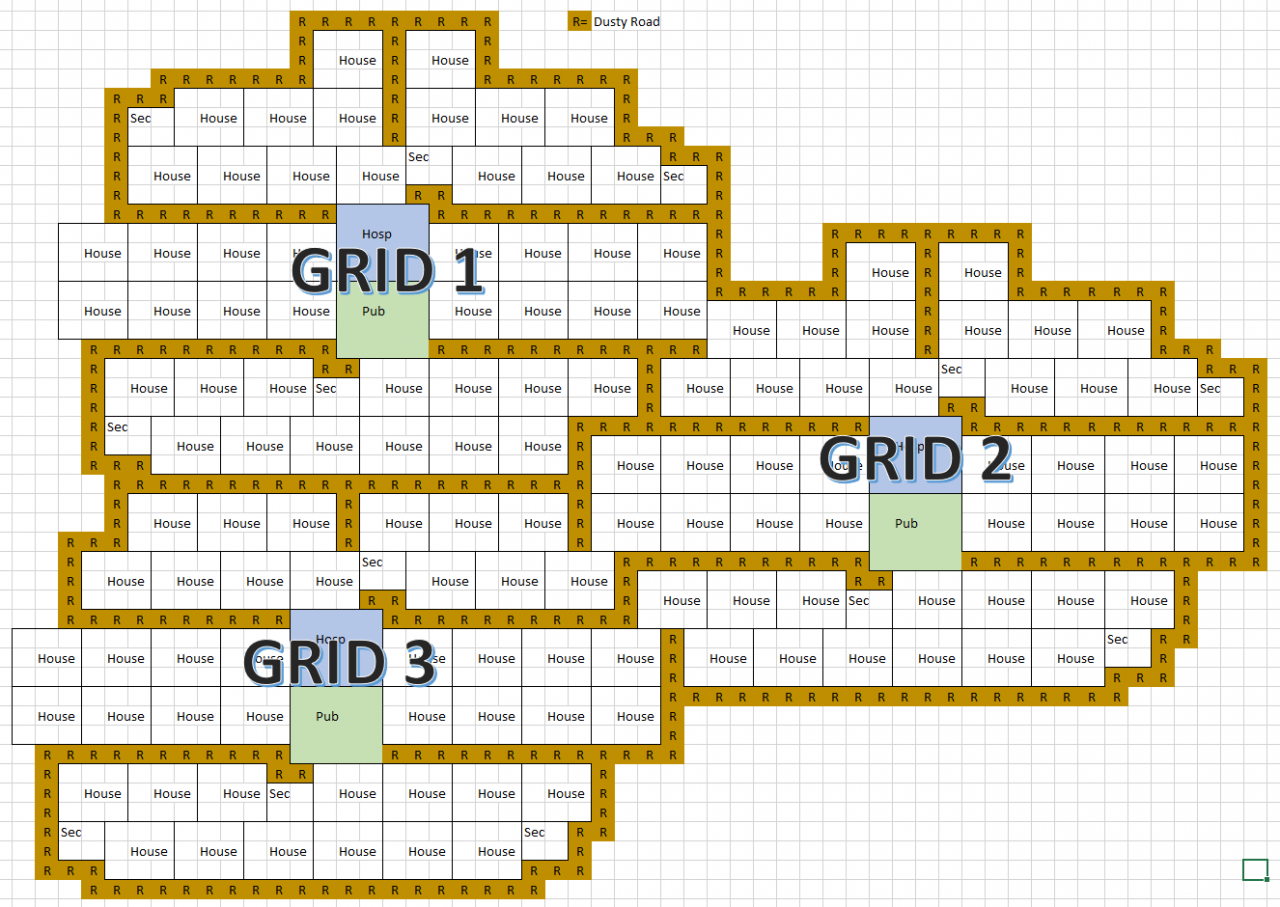
Here is the Plat-Map from a Grid view;

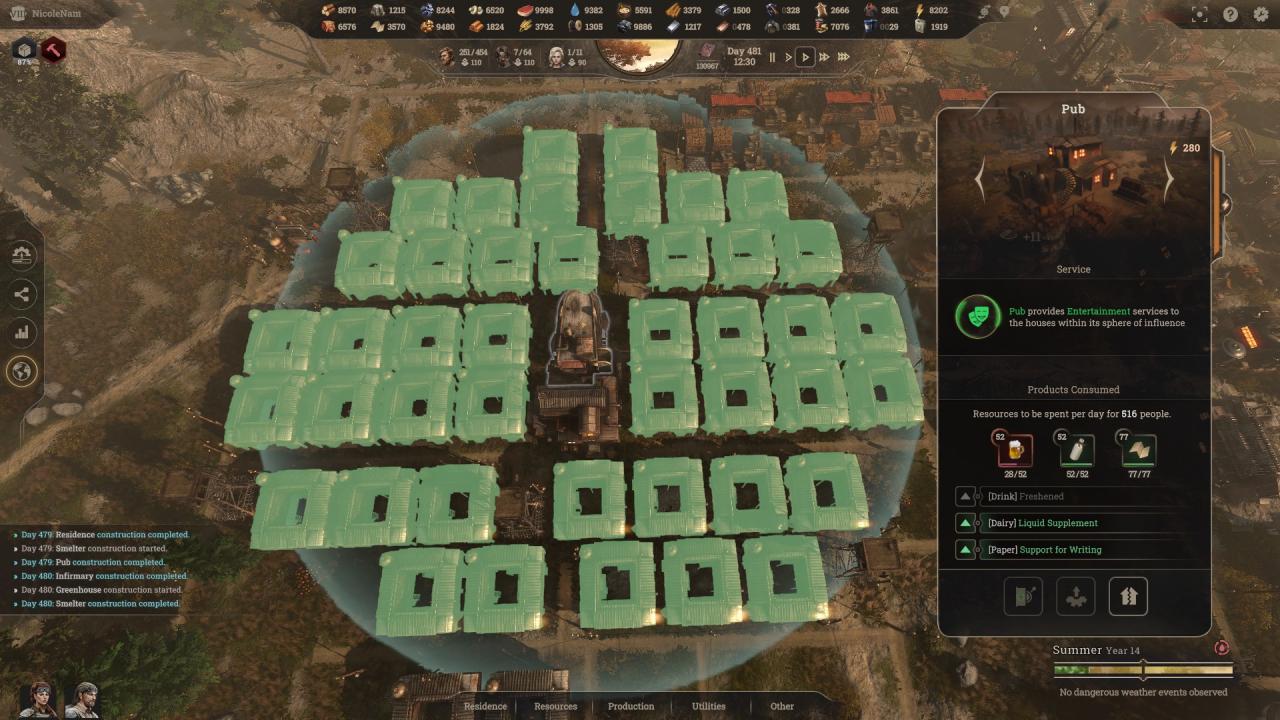
And here is what is looks like in game. One Picture shows the Pub influence, and the other shows the Infirmary influence. I didn’t include Guard Tower examples, as I’m sure you get the idea.

Section 3: Multiple City Grids
Section 4: Why you should LIMIT your population.
Even after 500, I was still increasing population from children. By the time the Bunker was sealed, I had 869 people, with a full maxed Bunker setup (guide in work). My Bunker could house 880 total, so I was able to get EVERYONE in, with 11 beds left.