
The 4166, 1899 puzzle in Big Walk looks like a random string of numbers until you realize the map is doing all the heavy lifting. The button you’re hunting sits behind a rock formation near a destroyed train, deep in the southern region — but getting there requires reading the map’s coordinate system correctly, surviving a long trek past a mountain that blocks the direct route, and knowing exactly which landmarks mean you’re still on track. This guide breaks down the full process: what you need before attempting it, how to decode those numbers, and the exact route to the button once you’re on the ground.
Goal / Problem
The core challenge here is twofold. First, you need to understand what 4166, 1899 actually means on the in-game map — it’s not a random pin drop, but a grid-based coordinate system that takes practice to read. Second, you need to physically reach that location, which means navigating around natural obstacles and using visual markers to confirm you haven’t wandered off course.
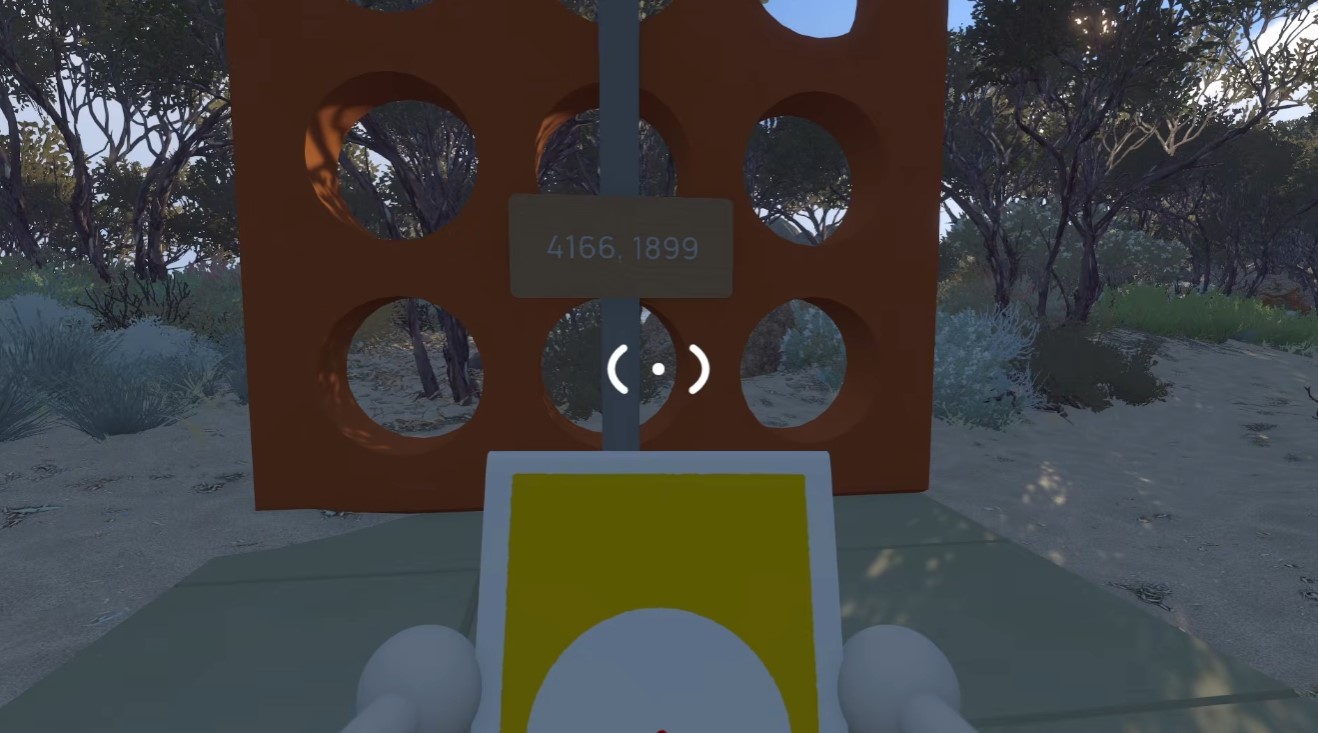
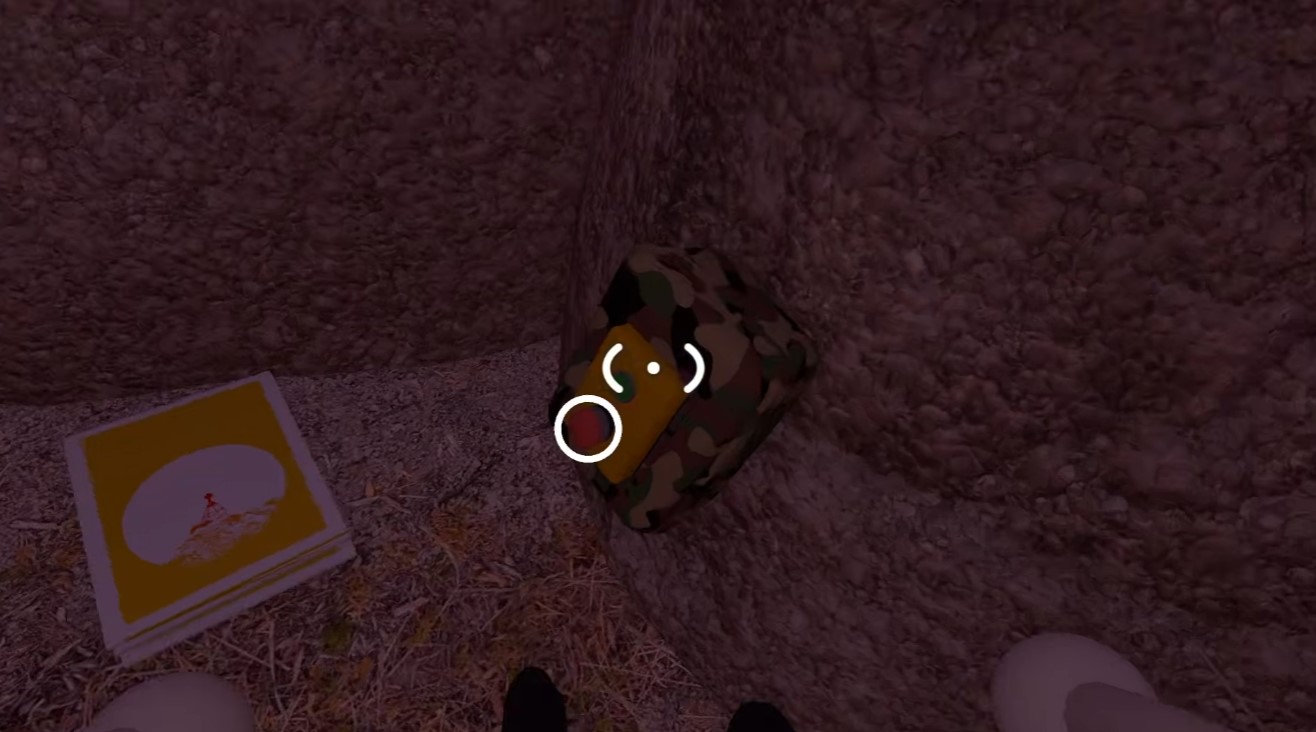
The button itself is hidden behind a rock base near a broken-down train. Pressing and holding it opens a totem that a friend can collect, so this is a cooperative interaction — bring a buddy.
Prerequisites
Before you even think about heading south, you need to check these off:
| Requirement | Details |
|---|---|
| Complete the Red Tower | The main story milestone that gates access to the map |
| Obtain the key from the Red Tower | Dropped after finishing the tower sequence |
| Unlock and retrieve the map | Available from the map room after using the key |
Optional but helpful: Unlock the train for faster travel. It’s not required. Just know the train is slow, so don’t expect a speed demon.
Reading the Map Coordinates
The map displays coordinates like 4166, 1899, and they follow a consistent logic:
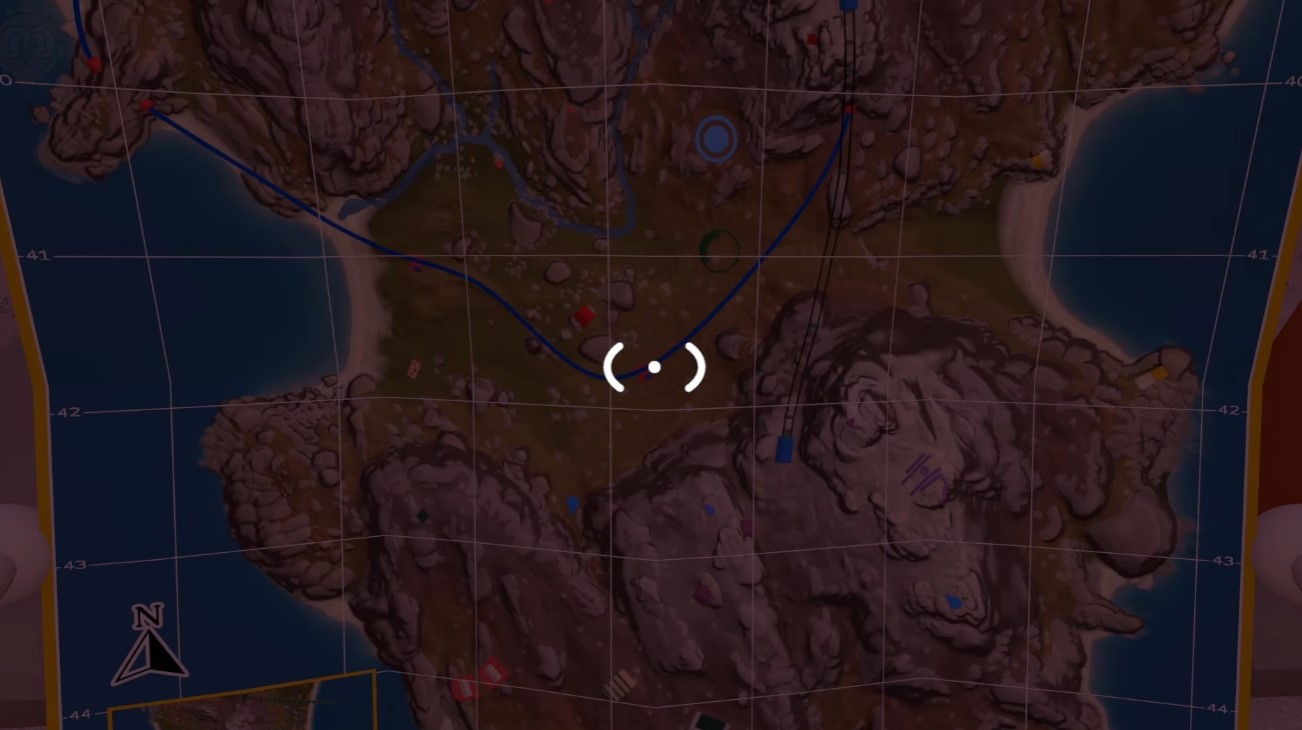
- 4166 — The first number refers to a horizontal grid line. The 66 portion indicates a position within the bracket/center of that grid section.
- 1899 — The second number refers to a vertical grid line. The 99 portion similarly indicates a position within the bracket/center of that grid section.
- Together, these point to a location in the southern part of the map.
To locate the puzzle, open the map and find the intersection of these coordinates. The target area sits south, near a blue structure that’s adjacent to the railroad. The map won’t show your current position, so use the subsection indicator in the top-right corner to confirm which area you’re in.
Steps to Reach the Button
Follow these steps in order. Deviating from the path will cost you time, especially if you’re walking.
- Open the map and identify the target area at coordinates 4166, 1899 — southern region, near the railroad.
- Close the map and start traveling south. If you have the train unlocked, use it to speed up the journey.
- If you don’t have the train, you’ll be walking. A large mountain blocks the direct path, so look for a trail that goes around or over it.
- Follow the trail upward, keeping your heading south. The journey is long, and it may get dark — keep moving without deviating.
- Watch for a green glowing object along the way. This is your confirmation that you’re heading in the right direction.
- Eventually you’ll reach a blue structure next to the railroad. This is your triangulation point — you’re on the ’41’ line now.
- From the blue structure, head south. You’ll see a destroyed train and a puzzle with multiple lights nearby.
- Continue toward the rock base near the destroyed train. This rock formation is your final target.
- Walk behind the rock formation — the button is there, not on top.
- Press and hold the button. This opens a totem that was left behind, allowing your friend to pick it up.
Warning: The walk can take several minutes, and the area gets pitch black at night. If you’re prone to getting lost, wait for daylight or bring a light source.
Tips & Troubleshooting
- The button is behind the rocks, not on top. Walk around the rock base to find it — players often waste time climbing when the answer is at ground level.
- Use the blue structure as your anchor. If you get lost, return to it and head directly south from there.
- The destroyed train and multi-light puzzle are your final markers. If you see both, you’re within meters of the button.
- Coordinate with your friend before pressing. The button opens a totem for a friend to collect, so make sure they’re nearby. If they’re not, you’ll have to wait or reset.
- Don’t rely on the train for speed. It’s slow, and it barely moved after several minutes of gameplay. If you want faster travel, consider waiting for a movement mod.
Tip: The green glowing object you pass during the trek is a reliable path marker. If you haven’t seen it, you’ve likely gone the wrong way.


