
The Blue Slope Sign Music Puzzle sits tucked next to the moon, beside a blue house structure dotted with big ball lights. It looks like a dead end until you realize it’s actually a four-piece assembly job: you need to haul four music block panels from puzzles scattered across the map, bring them back, and arrange them in the moonlight. The catch? Three panels are simple pickups, but the fourth — a sound panel — can turn into a cross-map marathon depending on how far you’ve progressed. Here’s the full route, the recommended order, and the shortcuts that save you from walking the entire island twice.
What the Puzzle Actually Wants
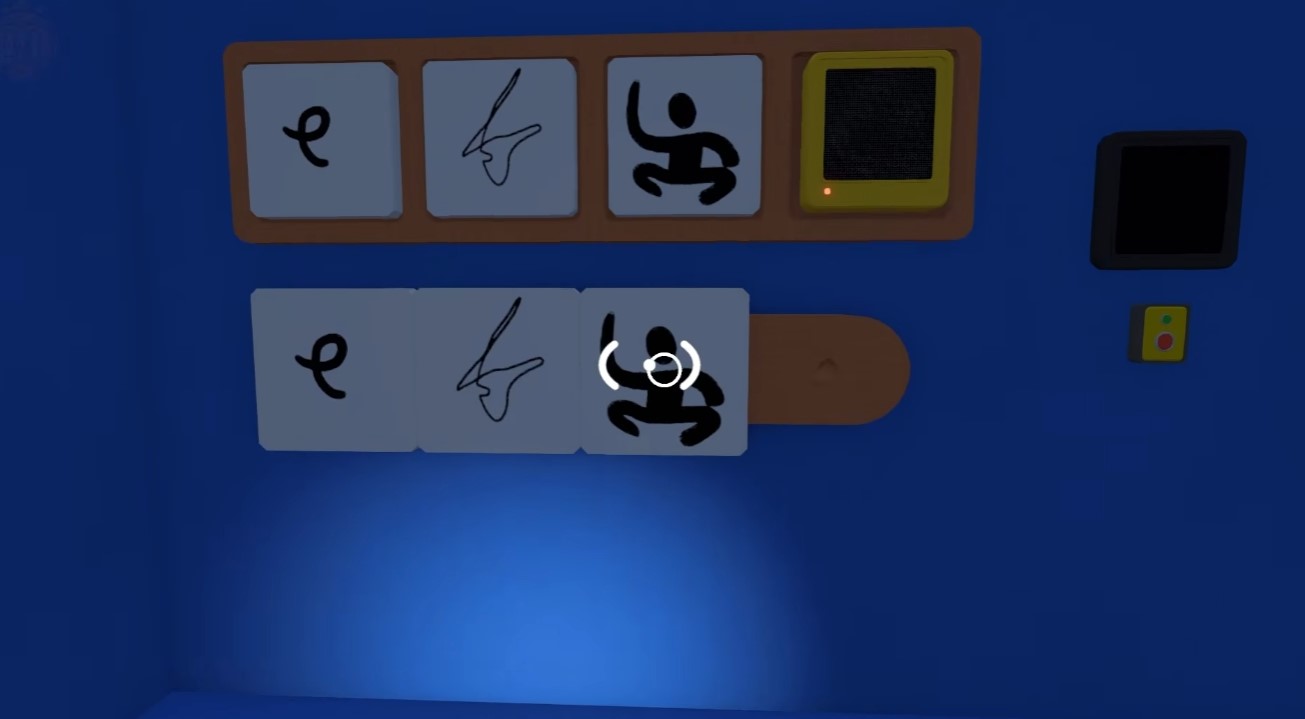
The Blue Slope Sign structure is a frame waiting for four panels. Each panel carries a distinct visual or audio cue, and they only snap into place when you’ve collected all four and returned to the slope. You’ll want to screenshot or note each panel’s design as you grab it — when you’re standing at the frame with three panels in hand, remembering which slot gets which shape is the difference between a clean solve and a frustrating reshuffle.
The puzzle sits south on the map, near a blue structure adjacent to the railroad. If you’re using the map room’s scale model, look for the flag pole without a flag — that’s your unfinished objective marker.
The Four Music Panel Locations
Panel 1 — The Across-the-Map Grab
The first panel is the most straightforward: it’s located in an area on the far side of the map. No puzzle attached, no mechanics — just a pickup. The walk is the only cost. Bring the train or cart to cut the travel time down to a couple of minutes instead of a ten-minute hike.
Panel 2 — The Squiggly
This one hides at a puzzle where you drop an object to trigger a mechanism. Complete the drop puzzle, then jump out the side of the structure rather than taking the normal exit. The panel is walkable from this position — you can carry it directly back to the Blue Slope Sign without needing a teleport or shortcut.
Panel 3 — The Body-Part Pointing Puzzle
The third panel is tied to a puzzle where you point at specific locations using body parts. This is one of Big Walk’s more physical puzzles — you’ll be positioning yourself in front of the puzzle and gesturing toward landmarks. Once you’ve pointed at all the required spots, the panel unlocks.
Panel 4 — The Sound Panel (Two Routes)
This is the one that changes based on your progress:
| Progress | Route | Difficulty |
|---|---|---|
| Post-ending (purple access) | Panel is nearby in the purple area | Easy — short walk |
| Pre-ending (no purple access) | Far side of the map | Hard — memorize the sound, walk back |
If you’ve beaten the main ending and can enter purple areas, grab this panel last — it’s close to the Blue Slope Sign and takes under a minute. Without purple access, you’re looking at a full map crossing. You’ll need to memorize the sound the panel makes, walk all the way back, and replicate it at the frame. There’s no way to carry the sound itself; it lives in your head.
Recommended Order and Travel Tips
Here’s the order that minimizes backtracking:
- Panel 1 — Far side of the map, no puzzle attached. Grab it first while you’re already out there.
- Panel 2 (Squiggly) — Drop puzzle, then jump out the side and walk the panel back.
- Panel 3 — Body-part pointing puzzle. Do this before the sound panel since it’s a fixed location.
- Panel 4 (Sound) — Last, always. If you have purple access, it’s a short hop. If not, this is your long march.
Tip: Use the trains and the cart system for any long-distance travel. The map is bigger than it looks, and walking the sound panel route twice — once to memorize, once to return — is the single biggest time sink in this puzzle. The trains cut that down by roughly 60%.
For navigation, the physical map and the scale model in the map room are your best friends. The map shows coordinates like 4166, 1899 — the first number is the horizontal grid line, the second is vertical, and the two-digit suffix (66, 99) places you within the bracket of that grid section. The Blue Slope Sign sits in the southern part of the map, near the railroad.
Solving the Frame: What to Do With the Panels
Once all four panels are at the Blue Slope Sign, interact with the frame to slot them in. Match each panel to its corresponding position based on the design you noted earlier. The sound panel is the final trigger — after you’ve placed the three visual panels, activate the sound panel and replicate the audio cue you memorized (or heard in the purple area).
The frame clicks into place, and the puzzle resolves. If you’re missing a panel, the frame won’t respond — check your screenshots against the four designs and retrace your steps to the puzzle you skipped.
Warning: The sound panel is the easiest to mess up. If you’re doing the pre-ending route, write down the sequence or record it on your phone. Walking twenty minutes back to the frame and realizing you remembered the wrong pitch is a special kind of frustration.
Why This Puzzle Feels Harder Than It Is
The Blue Slope Sign puzzle isn’t mechanically complex — it’s a fetch quest with a memory check at the end. The difficulty comes entirely from the map’s scale and the sound panel’s placement. The puzzles that house panels 2 and 3 are straightforward once you know where they are; the real enemy is the walking.
If you’re stuck on any of the intermediate puzzles, the green seat speaker puzzle shares similar audio mechanics and is worth studying for comparison: the Green Seat Speaker Headphones Sound Button Puzzle.
The moonlight requirement is cosmetic — the frame only activates at night, but there’s no waiting mechanic. If you arrive during the day, the frame stays inert. Either pass time or come back after dusk; the puzzle itself doesn’t change.


