
Eight shells. Limited Glimpses. One decision that shapes your entire run. Mortal Shell 2 gives you a full roster of playable bodies, but the game’s resource economy is brutal — you simply cannot max out everything in a single playthrough. This guide breaks down every Shell’s exact location, active and passive abilities, the talents worth your points, and an honest tier ranking so you can commit to the right build from the first hour.
The Shell System: Glimpses, Refunds, and What to Prioritize
Before you start sprinting toward coffins, understand the economy. Glimpses are the currency used to fully unlock a Shell’s memory and talent tree, and they are limited per playthrough. You will not max out all eight. Pick one or two Shells and invest deep.
The good news: Shell points can be freely refunded and reassigned between fully unlocked Shells. That means experimentation isn’t punished — but the initial Glimpse cost to unlock each Shell is a real investment.
| Shell | Tier Rating | Best For |
|---|---|---|
| Tiel the Acolyte | A | Stealth, mobility, poison stacking |
| Proxima the Brood Seeker | B (S in boss fights) | Stasis locking, pulling enemies |
| Eredrim the Venerable | A | Break damage, aggressive stagger |
| Gragu the Insatiable | C | Exploration, healing sustain |
| Smert the Apostate | S | Time-stop burst damage |
| Genessa the Wayward | S | Clone-based glass cannon |
| Lazlo the Justicar | B | Passive heat meter, survivability |
| Sariel the Endless | S (A minimum) | Curse reflect, rally healing |
Tip: Your first playthrough should focus on one S-tier Shell (Smert or Genessa) and one A-tier fallback. Glimpses spent on C-tier Shells like Gragu are rarely worth it unless you’re doing a dedicated exploration run.
Tiel the Acolyte — The Earliest Shell, and One of the Best
Location: From Widow’s Overlook (the first beacon you activate), head straight southeast. Run past the enemies — don’t bother fighting — and interact with the coffin. Spend 1 Glimpse to unlock his initial memory.
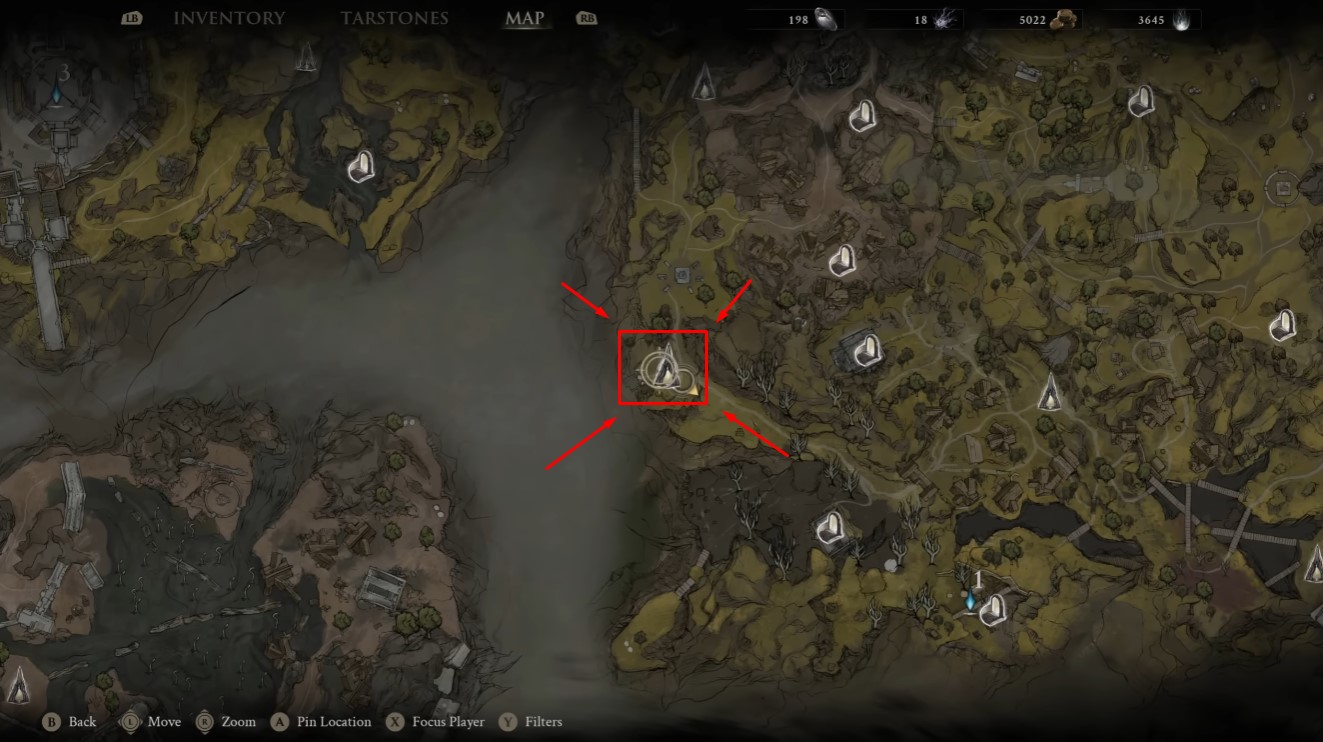
Tiel is your stealth and mobility Shell. His kit revolves around the shadow state, which triggers on perfect dashes and enables follow-up attacks with massive stagger damage.
Active — Lingering Shadow: Enter a shadow state and perform a Shadow Strike with your dagger. This is your gap-closer and burst tool.
Passive — Shadow Dash: Perfect dashes grant shadow state and a follow-up attack with bonus stagger damage. This rewards aggressive, well-timed play.
Key Talents to Prioritize:
| Talent | Effect | Priority |
|---|---|---|
| Poison Burst | Shadow Strike detonates poison stacks | High |
| Shadow Dash improvements | Up to 300% stagger damage | High |
| Death Mark | Shadow Strike potency scales with crits and fragile stacks | High |
| Lethality | Chain Shadow Strikes between enemies on kill | Medium |
| Critical Role | After Shadow Strike, melee/ranged attacks guarantee crits | Medium |
| Plague Bearer | Poison immunity | Situational |
Tiel’s rating is A-rank, and for good reason — he’s excellent for stealth navigation, map traversal, and melting single targets with poison stacks. If you want a Shell that carries you through the early game and stays viable late, Tiel is your safest pick.
Proxima the Brood Seeker — The Stasis Machine
Location: From Widow’s Overlook, head straight north and circle around to Blackridge Cliffs. Run past enemies up the hill and enter the small cavern. She’s easy to grab early.
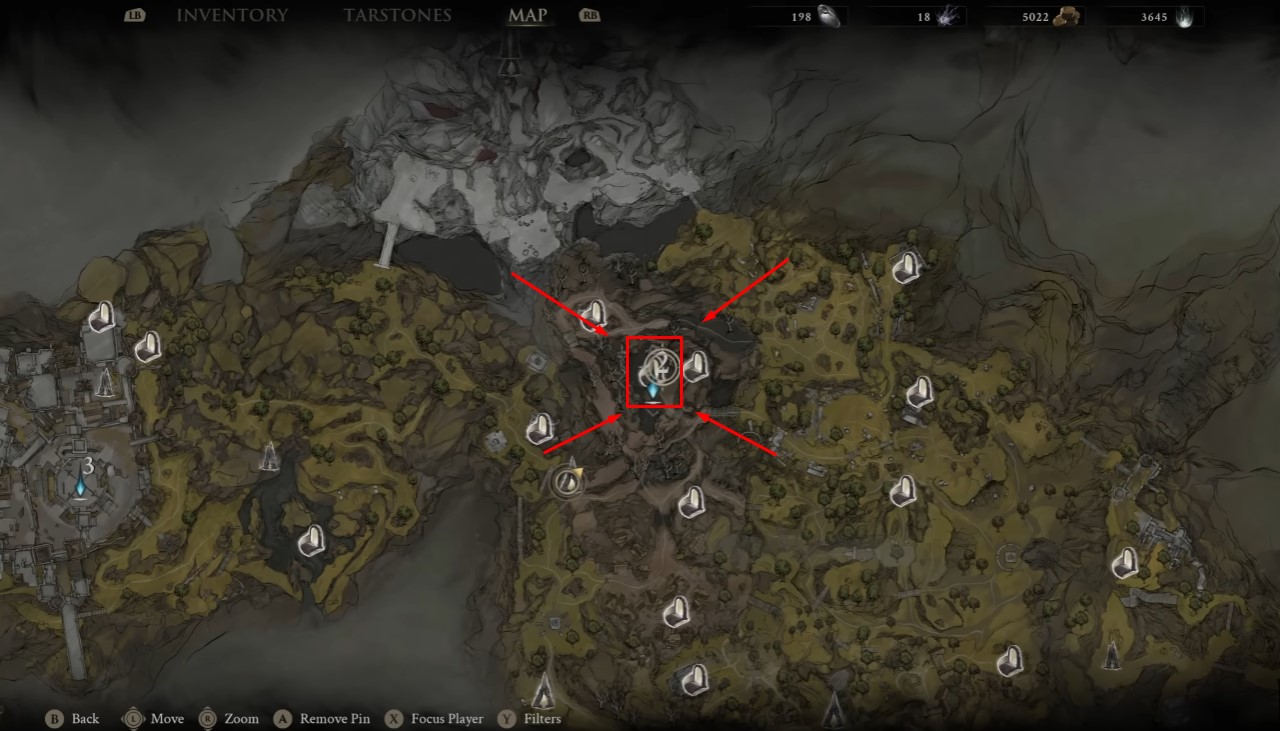
Proxima’s kit is built around her Bio Sampler hook and a damage mitigation passive. On paper, she looks average. In practice, her talent tree contains one of the strongest tools in the game.
Active — Bio Sampler: Fires a hook that pulls weaker enemies to you, or pulls you to stronger enemies. Great for closing distance or repositioning.
Passive — Grafted Armor: 15% base chance to mitigate incoming damage. Mitigated damage is reduced by 50% and prevents stagger.
The Talent That Changes Everything — Seizure: This is the one. Seizure applies stasis to enemies, locking them in place. It’s arguably the strongest crowd-control effect in the game. With the right weapon infusion, you can infinitely stasis-lock enemies, trivializing even boss encounters.
Key Talents to Prioritize:
| Talent | Effect | Priority |
|---|---|---|
| Seizure | Stasis application — game-breaking | Mandatory |
| Imperion | Lightning immunity, increased shock damage/radius | High |
| Bio Hunter | Stacking permanent damage bonus against enemies | High |
| Reflection | Anti-ranged grafted armor | Medium |
| Collector | Specimens sell for gold | Low |
Rating: B-tier in general exploration, but S-tier in boss encounters if you build around Seizure. Proxima is the definition of a Shell that rewards system mastery.
Eredrim the Venerable — Break Damage Specialist
Location: Requires more work than the first two Shells. From Gloomshade Grove (you’ll need to cleanse corruption first), drop down — use a light attack ground slam from height to avoid all fall damage. Run to a boss, defeat it for a citadel lever. Use the lever on a gate, drop down, find the back entrance, and trigger a boss fight in the middle. Defeat that boss to access Eredrim.
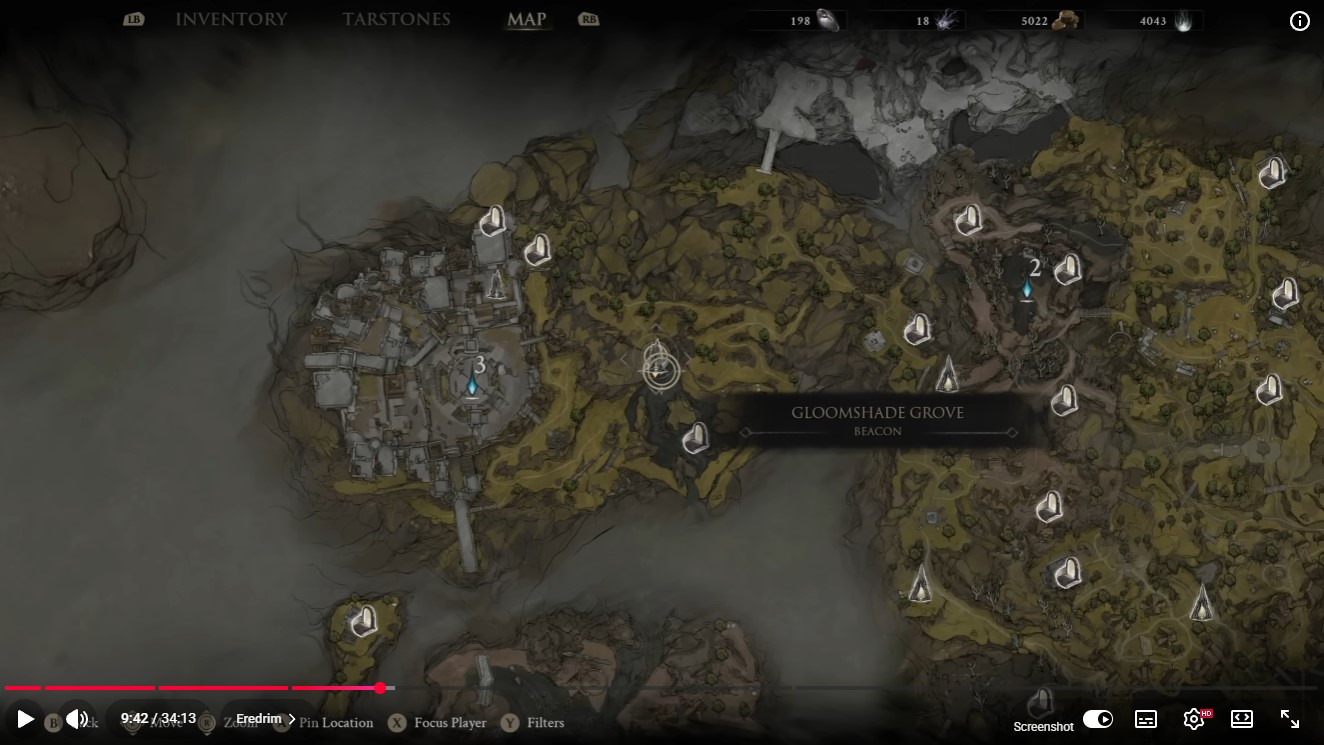
Eredrim is all about break damage — staggering enemies and punishing them. His active abilities are built around lunges and AoE break effects.
Actives:
- Shoulder Bash: Lunge forward with large break damage. Your primary stagger tool.
- Ethereal Diapason: AoE that blinds enemies and deals break damage. Great for groups.
Passive — Executioner: Killing enemies with ripostes stacks buffs with various benefits. This rewards parry-heavy play.
Key Talents to Prioritize:
| Talent | Effect | Priority |
|---|---|---|
| Resonance | Enemies broken with Ethereal suffer stasis | High |
| Seal Affinity | Easier parries, riposte bonus damage | High |
| Anguish | Improves Shoulder Bash | High |
| Oppression | More powerful Shoulder Bash | High |
| Carnage | Executioner benefits | Medium |
Rating: A-rank. Eredrim is fantastic at staggering, deals high damage, and rewards an aggressive parry-based playstyle. If you like being in the enemy’s face and breaking their posture, he’s your Shell.
Gragu the Insatiable — The Exploration-Heavy C-Tier
Location: From Widow’s Overlook, work through Mushroom Village to the One-Legged Wolf area. Gragu is in a tavern there. But first, you need Vatra’s Heart from the Temple of Vatra — solve the candle puzzles for bonus items (the heart is at the end of the path on an altar).
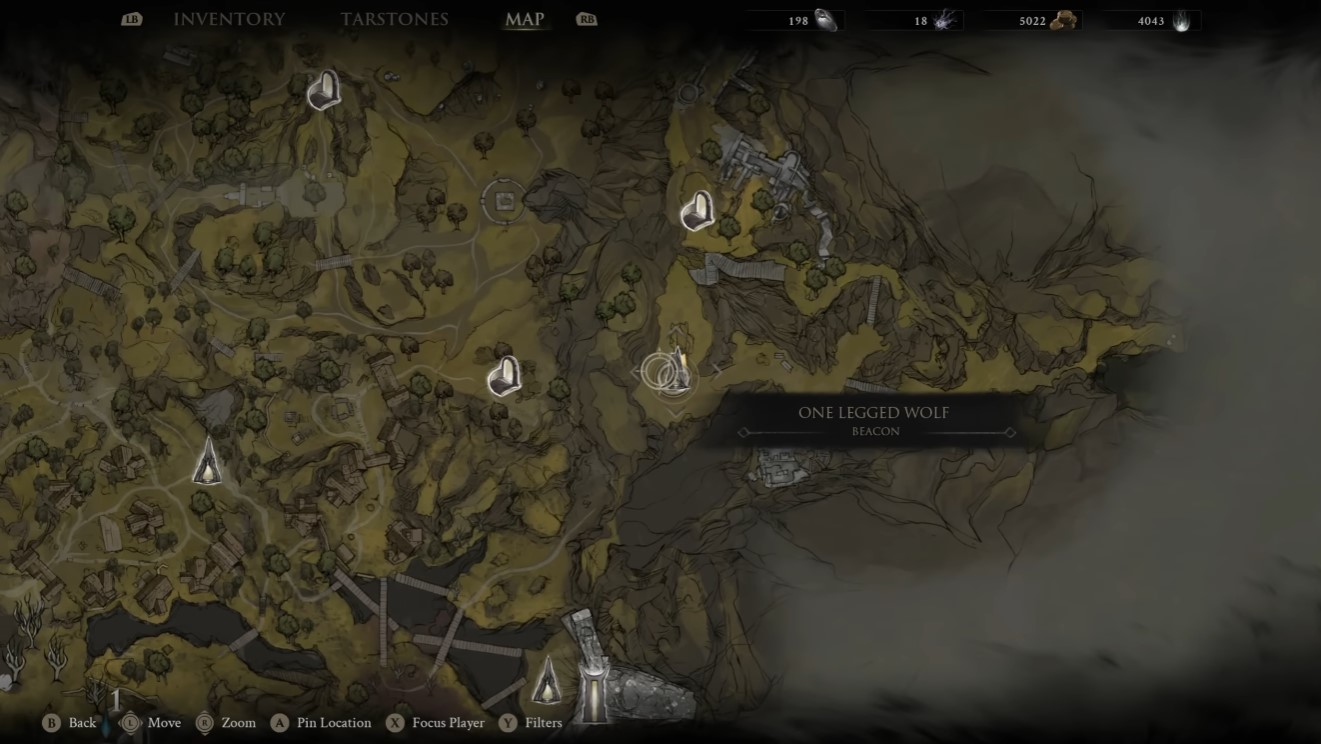
Active — Staggering Blow: A chargeable punch. Longer charge equals higher damage. Simple, but effective for burst.
Passive — Revered Heart: Replaces innate healing. You heal via hearts that are replenished by killing enemies. This is a sustain-based kit, not a burst kit.
Key Talents to Prioritize:
| Talent | Effect | Priority |
|---|---|---|
| Harvest | Up to 8 hearts — considered mandatory | Mandatory |
| Maniac | Bonus damage against enemies never killed before | High (bosses) |
| Blood Lust | Bonuses on using Revered Heart | Medium |
| Devourer | Benefits while heart power is full | Medium |
Warning: Gragu is a trap for boss fights. His healing requires farming hearts before attempts, and if you walk into a boss with no hearts, you have no sustain. His C-tier rating reflects this — great for exploration, weak in boss encounters.
Smert the Apostate — The Time-Stopper
Location: From Gloomshade Grove, head toward the Outskirts of Nokstella. Take a bridge, use a warp gate, and choose the left exit. At the destination, you must fill three separate blood pools. Enter each pool (this knocks you out of your shell), defeat enemies to call your shell back, and repeat. Blood remains permanently once filled.
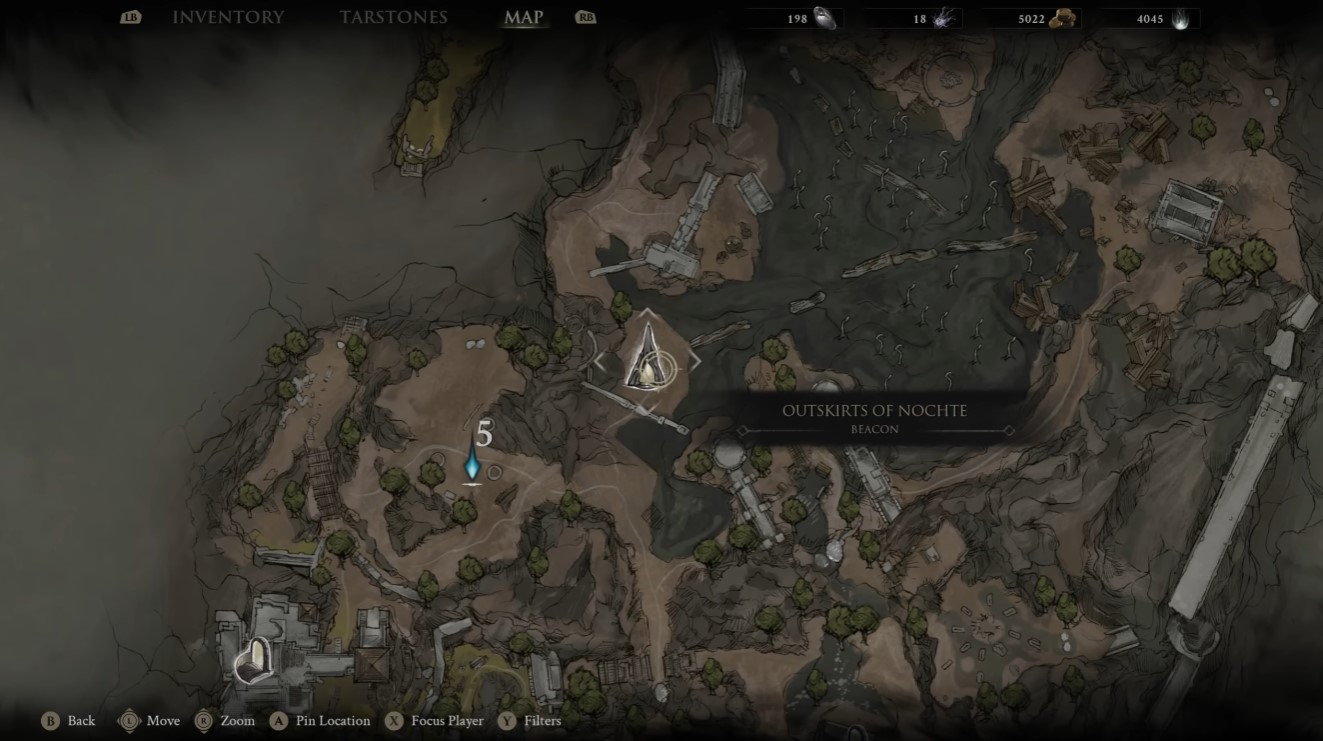
Smert is the highest-skill, highest-reward Shell in the game. His active ability literally stops time.
Active — Miracle: Sacrifices half your health to halt time and enter a fight stance. Unarmed attacks inflict chaos, which detonates when time resumes. You can extend the miracle into overtime by sacrificing additional health. This is a massive damage window.
Passive — Deadly Revelation: At 10% or lower health, Smert gains faith, which generates additional resolve. Rewards desperate plays.
Key Talents to Prioritize:
| Talent | Effect | Priority |
|---|---|---|
| Last Vow | No weapon, fight stance with health restore on hit, massive stagger, crit | High |
| Kicker | Kick enemies to detonate chaos stacks, chance to double | High |
| Beat Down | Ground pound to resume time | High |
| Striker | More chaos dealt during miracle | High |
| Limitless | Bonuses while miracle active | Medium |
Rating: S-tier. Freeze time, deal massive damage, detonate chaos, repeat. Light attacks become punch combos, heavy attacks become kicks (with the Kicker talent), and ground pound replaces X (with Beat Down). Smert is the closest thing to a delete button in Mortal Shell 2.
Genessa the Wayward — The Glass Cannon
Location: From Outskirts of Mamon, go south to Marrow Keep. Run toward a gate, take a teleporter, and run past enemies to a sensor. Interact with the sensor to trigger a boss fight. Defeat the boss to obtain the sensor item, then bring it to Genessa at Marrow Keep. To level her up, talk to the stray that replaces her in the keep.
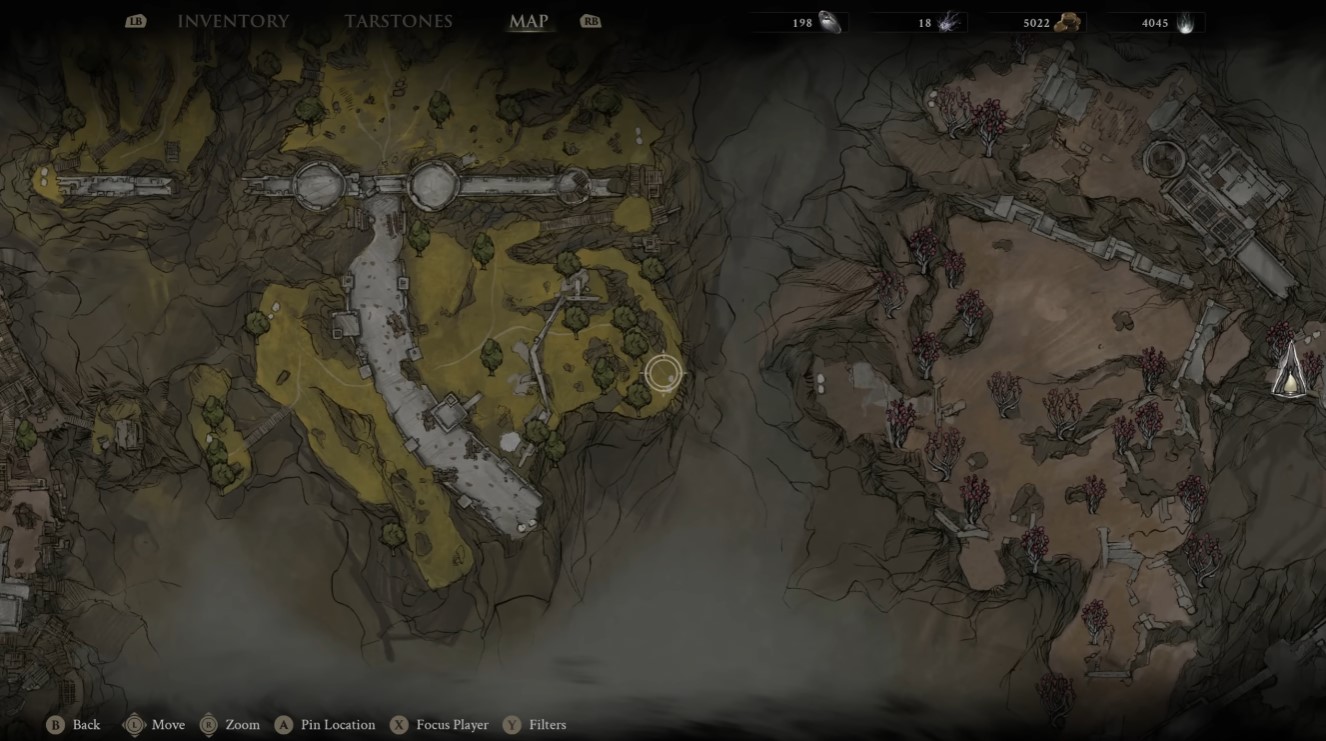
Genessa is the definition of high risk, high reward. She’s fragile, but her clone-based kit can melt anything in seconds.
Abilities:
- Faithful Doubles: Send out shadow clones that attack enemies. These clones can pull from your weapon arts and infusions, making them devastating with elemental builds.
- Duality: When health is depleted, you become a stray instead of being severed. While in stray form, you create a stray double that duplicates your attacks and damage.
Key Talents to Prioritize:
| Talent | Effect | Priority |
|---|---|---|
| Faithful Doubles enhancements | More clone damage, more clones | High |
| Stray Double enhancements | Duplicated damage | High |
| Anti-stasis | Prevent stasis lockdown | Medium |
| Health-depleted benefits | Bonuses when at low health | Medium |
Rating: S-tier. Genessa is a glass cannon with insane damage potential. Her clones combined with elemental infusions are among the strongest damage combos in the game. Just don’t get hit.
Lazlo the Justicar — The Passive Brawler
Location: From High Lord’s Courtyard, go around the benches, past the mines, to the back of the courtyard. Run up, use a jump, and stay on the path to fight the Royal Crypt Mammoth. Defeat it to get Lazlo behind it.
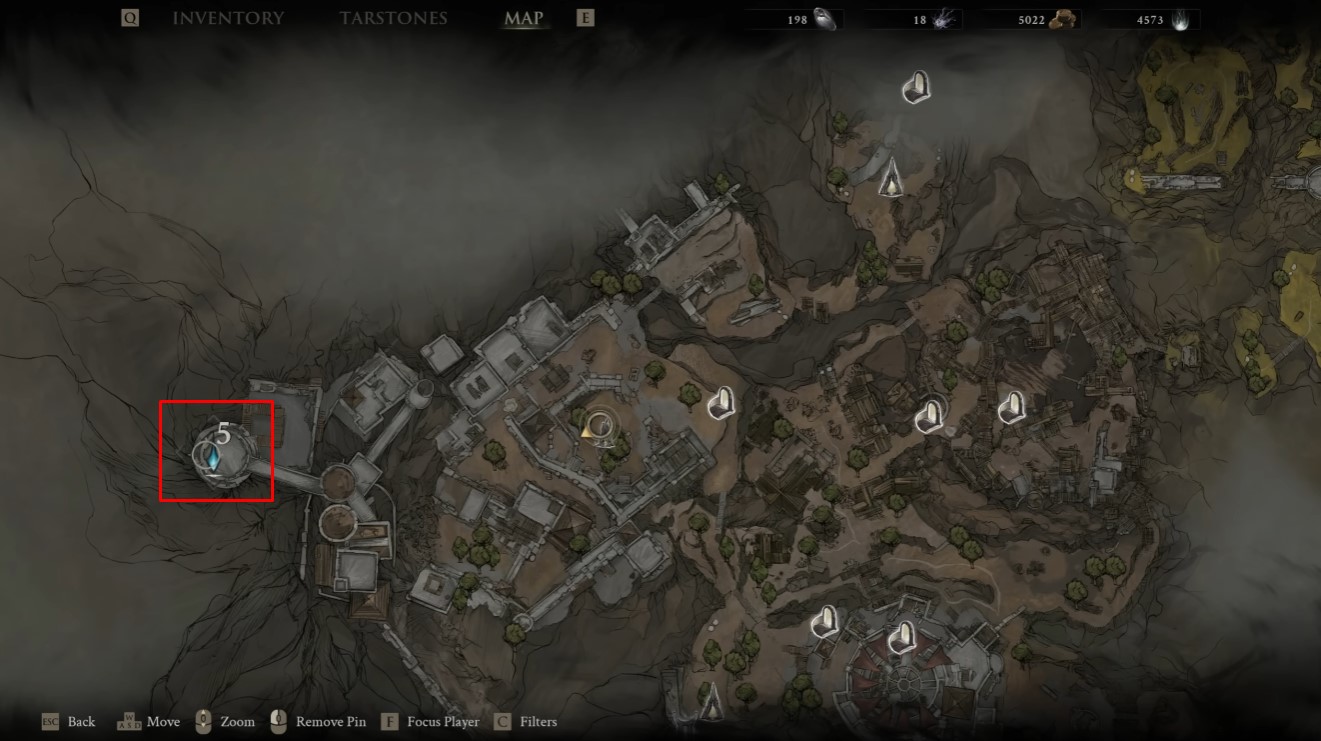
Lazlo is a heat-management Shell. Build heat, overheat, and reap passive bonuses.
Abilities:
- Retribution: Fiery shockwaves. Your active damage tool.
- Heat Meter: Builds up during combat. Overheat state grants 30% more damage, 35% more resolve, and 10% damage reduction. Blowing your armor off causes a big explosion with a cooldown.
Key Talents to Prioritize:
| Talent | Effect | Priority |
|---|---|---|
| Heat meter bonuses | Faster heat build, longer overheat | High |
| Armor cooldown reduction | More frequent explosions | High |
| Burn application | Enemies suffer burn at full heat | Medium |
| 50% fatal blow survival | Second chance mechanic | Medium |
Rating: B-tier. Lazlo’s passive playstyle is decent, but his Retribution active feels underwhelming compared to Smert’s Miracle or Genessa’s clones. He’s tanky and reliable, but not flashy. Hoping for a rework to make Retribution more impactful.
Sariel the Endless — The Curse Reflector
Location: From Outskirts of Mamon, work down, take a teleporter, and fight a boss. Cross bridges to the Silent Steps Beacon. Fight a version of Sariel, then fight another version in a dungeon — this requires destroying beacons to unlock the fight.
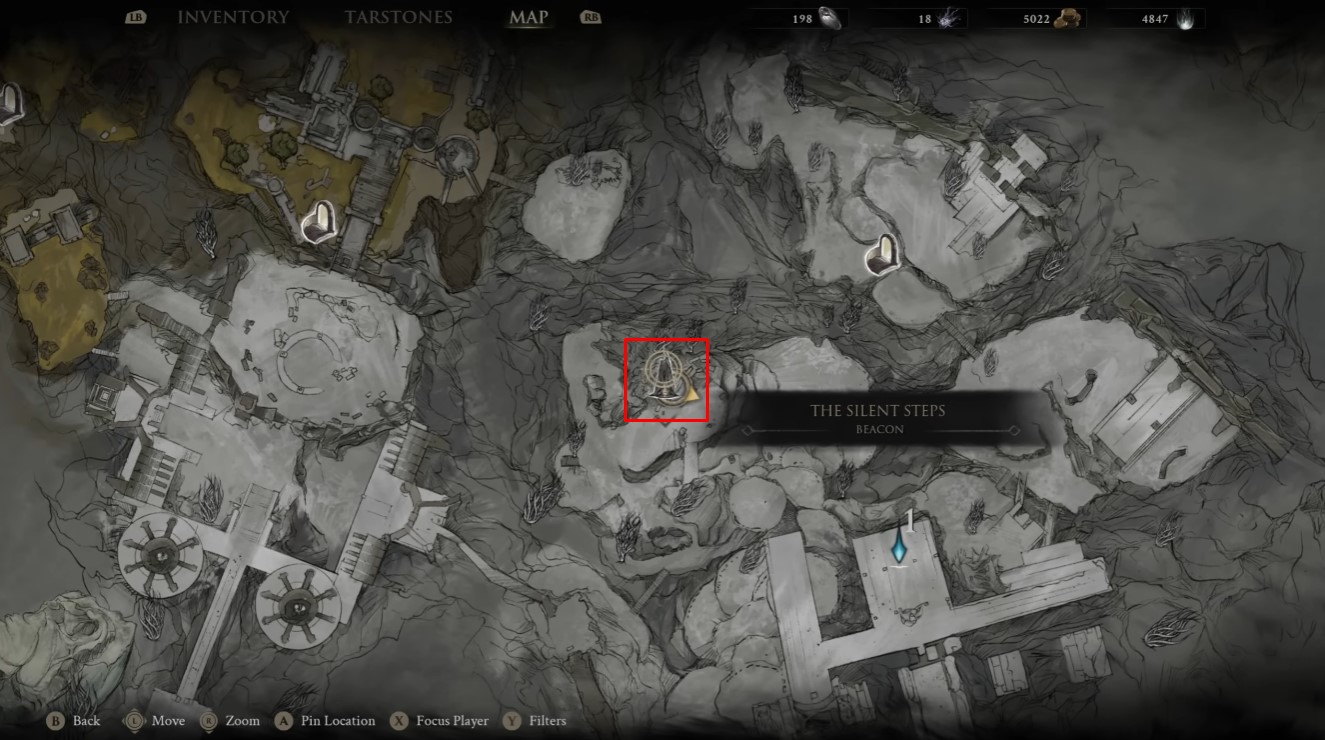
Sariel’s kit is built around pain — a gray health bar that works like rally health from Bloodborne. Take damage, hit enemies to recover it.
Abilities:
- Exodus: Expel parasitic thorns that hunt enemies, inflicting curse stacks. Each activation inflicts pain on Sariel.
- Perch: When Sariel has no pain, incoming damage becomes pain. At max pain, you get super-fast dodges.
- Curse: Nullifies the next melee strike against you, causing enemies to take damage instead. This is a built-in reflect.
Key Talents to Prioritize:
| Talent | Effect | Priority |
|---|---|---|
| Pain mitigation | Reduce negative effects from pain | High |
| Trauma stacks | Shockwave on pain cure inflicts trauma | High |
| 100% damage as pain | All incoming damage becomes gray health | High |
| Extended curse duration | Enemies stay cursed 30 seconds | Medium |
| AoE on cursed enemies | Damaging cursed enemies causes AoE | Medium |
Rating: S-rank potential, minimum A-rank. Sariel is extremely powerful — enemies hurt themselves trying to hit you, and your pain mechanic gives you incredible sustain if you play aggressively. The learning curve is steep, but the payoff is enormous.
Which Shell Should You Pick?
If you want the easiest path to power, Smert is your answer — time-stop burst damage with no real downside. If you prefer a more aggressive, high-skill playstyle, Genessa and Sariel offer S-tier damage with more risk. Tiel is the safest early-game pick and stays viable throughout.
The honest truth: your first playthrough should focus on Smert or Genessa, with Tiel as a backup for stealth sections. Save the niche picks like Gragu and Lazlo for subsequent runs when you know the map and can afford the experimentation.
More Guides:
- Mortal Shell 2: God-Tier Stealth Archer Tiel Build Guide
- Mortal Shell 2: All 5 Tarforge Upgrade Locations
- Mortal Shell 2: How to Get the Great Martyr’s Blade
- Mortal Shell 2: All Gland Locations & Seedbearers Scripture Secret Guide
- Mortal Shell 2: How to Unlock Fast Travel Early (A Step-by-Step Guide)


