
I remember staring at the Active Matter login screen for a solid five minutes, completely lost. Three different currency symbols, a Monolith tree that looked like a bad dream, and a missions terminal throwing raid types at me I’d never heard of. If that sounds familiar, this one’s for you.
This guide is for brand-new players who want the whole loop explained in one place: what to raid, how to push through the Monolith, and where every resource should actually go. It’s not for veterans chasing min-maxed PvP loadouts — it’s the “what do I do first” article I wish I’d had.
The short version of everything below: pick the right raid type, spend Monolith Tokens to climb access levels, and never waste CAM on credits. Get those three things right and the rest of the game opens up fast.
The Missions Terminal is the first thing you should understand
The Missions Terminal is the screen you land on when you log in. It holds your raid mode selectors and your objective board, and it’s where every session starts.
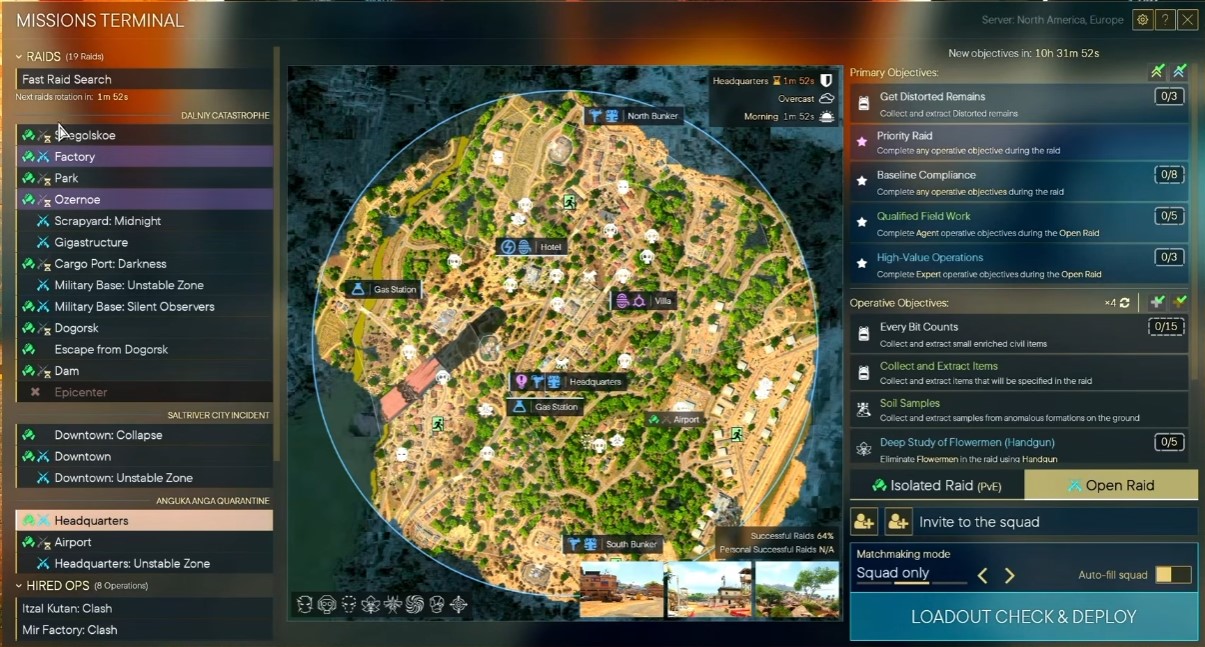
Raid modes currently on the board:
- Hired Ops — an arena-style mode, described in-game as the “Tarov mode.”
- Faction Battles — the battlefield mode. Not yet available, shown grayed out.
- Epicenter — not yet available, shown grayed out.
The two icons you’ll actually use are color-coded, and this trips up a lot of new players:
- Green icon (two hands together) = Isolated Raid = PvE. You and up to two buddies are the only real players in the raid. The enemies you’ll fight are fake PMCs called Burntout Employees.
- Blue X icon (two rifles crossed) = Open Raid = PvP.
PvE or PvP first? Here’s what I’d do
If you’re brand new, live in Isolated Raids for a while. The matchmaking options for Open Raid tell you why:
- Solo only — for solo players.
- Squad only — solo players can queue against squads.
- Any — puts you in any lobby type. If you’re solo, the game tries to place you in a solo lobby first; if none is found, you get dropped into a squad lobby.
- Autofill squad — for solo players who want to join squads. Not recommended; solo queue is genuinely less frustrating.
One important catch: High Value Operations and Qualified Fieldwork are only obtainable in PvP raids. They’re locked in Isolated raids. So if you want those, you eventually have to step into Open Raid.
Objectives: what actually pays out
- Primary Objective — one per raid. Example shown in my run was “take a photo.” It doesn’t display until you’re inside the raid.
- Priority Raid — rewards CAM (Crystallized Active Matter) and Merits. Merits unlock once Cycle 2 unlocks. This is one of the only ways to earn CAM.
- Operative Objectives — secondary objectives that count toward Qualified Fieldwork and High Value Operations. The blue one is High Value Operations: you can do three, meaning you must complete that specific raid three times.
You start with 3 rerolls (my example account had 5). Hover the objective, click it, hit Roll. I rerolled “deep study of Flower Mint handgun” into “high priority cargo” — a far easier mission for the same reward.
Tip: Always check whether a reroll gets you an easier objective with an identical payout before you commit to a rough raid.
Priority Raids changed, and it matters
Priority Raid is now split into three separate maps instead of one. Instead of running one map for 60 CAM, you complete three different priority raids — they flash purple on the board. Examples I saw: Factory, Ozone, and Headquarters.
Complete any Operative Objective in a priority raid and, whether you live or die, you return, turn it in, and get 20 Crystallized Active Matter per priority raid.
Fast Raid Search and region select
Fast Raid Search lets you pick any map or specific area, including Hired Ops. Available maps include Downtown, Headquarters, Airport (when open), Factory, Giga, Military Base on Stable Zone, and Silent Observers.
Hit Loadout Check, then Deploy, and the search begins. You won’t know which map you loaded into until you’re in. As of recording, Fast Raid Search is solo-only, but squad support is planned.
The cog icon changes your region: Europe, North America, and CIS (Russian area).
Monolith progression: the real spine of the game
The Monolith is how you progress. Completing all nodes lets you create a Personal Timeline. Here’s the climb:
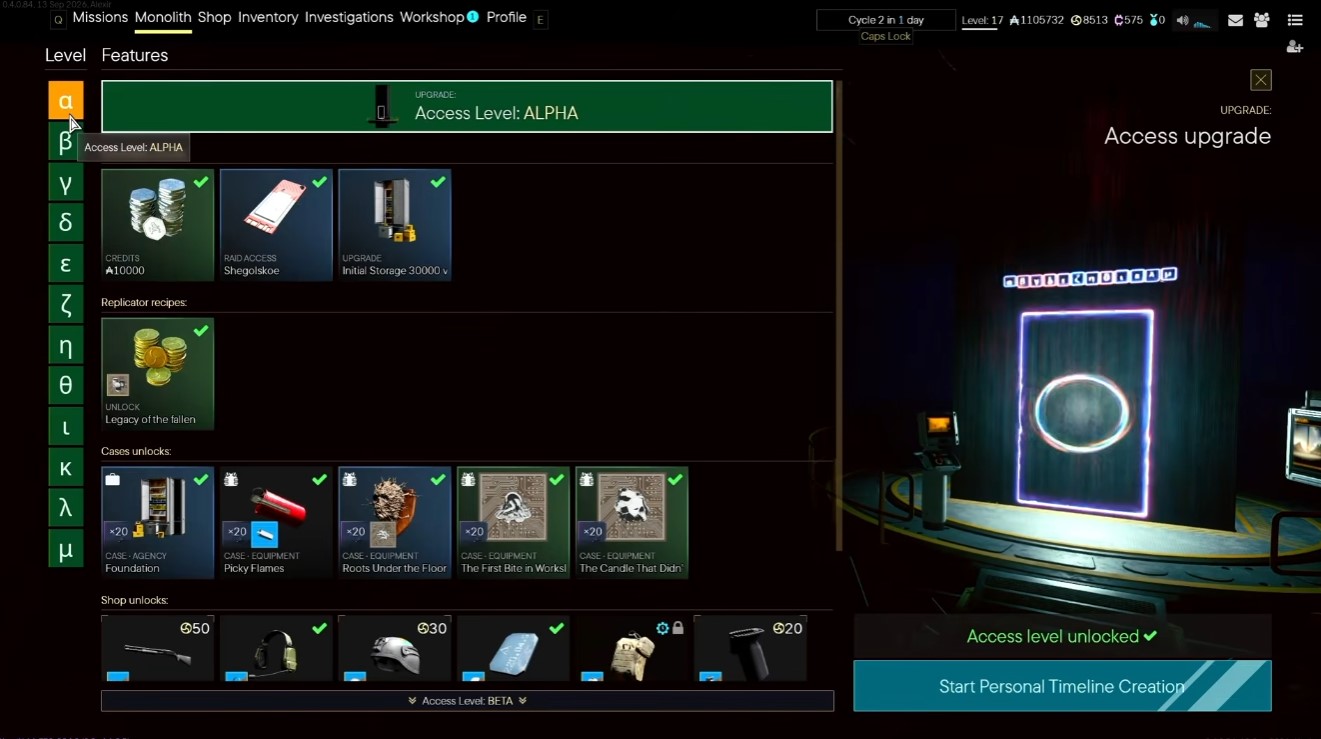
- To unlock access level Gamma, you first complete Alpha objectives to gain access to Beta, which requires spending Monolith Tokens.
- Alpha requires spending 105 Monolith Tokens. Example purchases at this level: MB590, steel armor plate, tack headset, sand grip / sand pistol grip, burst injector. Some items (small medicine rig, burst injector) are locked behind the Harmonization icon.
- Alpha also requires three extract runs: go to Jagolski once and extract, Factory once and extract, Airport once and extract.
- To reach Gamma, you must spend 455 Monolith Tokens between Beta and Alpha levels, plus collect loot and complete 10 successful raids.
Some steps are marked “bypassable” and can be skipped with Monolith Tokens. But here’s the trap: tokens spent skipping steps to gain access to another level do not count toward your overall Monolith Token spent total. And some steps, like “turn soldier remains,” can’t be skipped at all.
What to unlock first
- M4A1 — highly recommended. Unlocks at Gamma access level.
- Giga Structure — unlockable at this level, also highly recommended.
- AUG — very good weapon, don’t sleep on it.
- UMP45 — also a pretty good weapon.
My honest advice: progress in PvE to at least Gamma and get the M4A1 before you start PvP. Follow the steps listed in the bottom right of the Monolith screen, skip the bypassable ones if you want, and keep moving.
The Shop: where CAM should actually go
The Shop is organized by tabs and mostly self-explanatory.
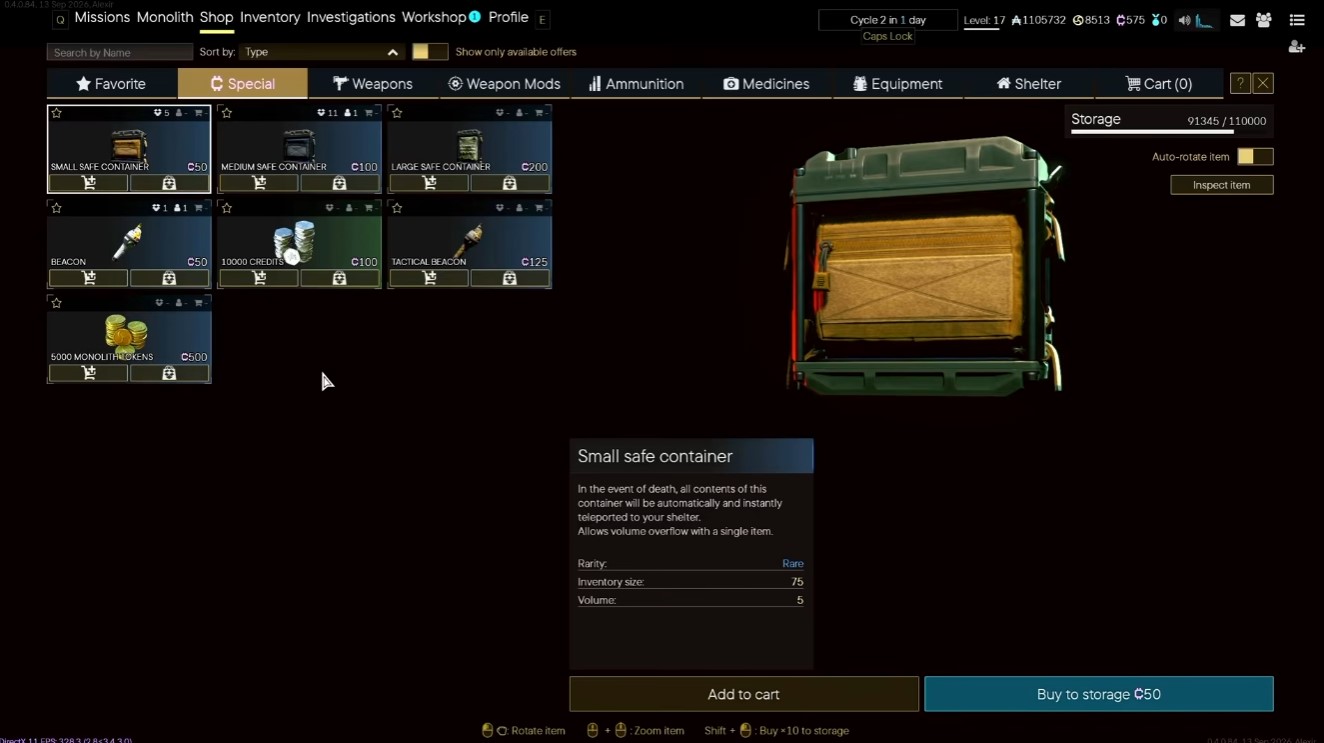
Favorites — mark any weapon as a favorite (I use Vector) and it shows up in your favorites list so you don’t have to dig through every tab. You can also part out a kit here.
Special section — contains safe containers, beacons, credits, tac beacons, and Monolith Tokens.
- Recommended: spend 500 CAM on Monolith Tokens. This gives you an extra 5,000 Monolith Tokens you don’t have to earn in raid, letting you push your Monolith faster. This is the main use of CAM.
- Do NOT spend CAM on credits. Credits are extremely easy to get.
Weapon section — right-click a weapon to view unlock requirements. For unlocked items, right-click to “buy to storage” or “buy to equipment” (instantly equips it). Same right-click options apply to weapon mods.
Other tabs cover ammunition, medicines, equipment, and Shelter (decorations for your shelter).
Inventory, body sleeves, and building a kit
On first login, nothing should be equipped. Here’s how the left-to-right inventory screen works.
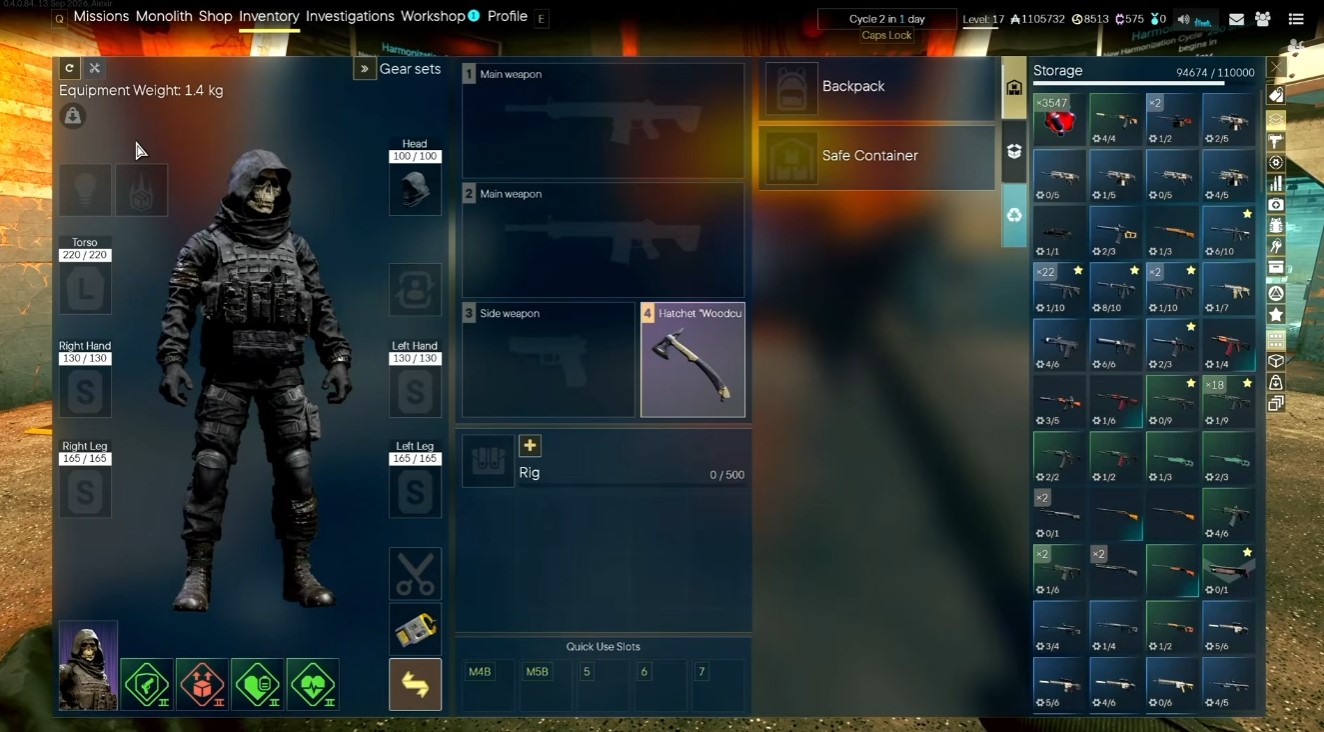
Body Sleeves have a range of stats — hover over each one to see how it works. Perks are selectable and go from level 1 to 3, each stacking higher:
- Bulletproof 2 gives 3.8 bullet resistance.
- Bulletproof 3 gives 6% bullet resistance.
Tier 3 perks have charges. If you die in a raid, the charge decreases. You can recharge it and overcharge it. Click your character to switch body sleeves — locked icons are unavailable, check marks are available. My go-to sleeves are Reaper (premium edition skin) and Paladin, chosen for their stats and inventory volume.
Headgear can be toggled: take off the hood, take off the mask, throw the hood back on. Camouflage changes at the top (I run the paw pattern).
Kit building works tile by tile. Select any tile to see what fits. A couple of things worth knowing:
- Armor plate durability: a plate showing “208 out of 260” has lost durability. Any plate that’s zeroed out and repaired after surviving a raid loses some durability.
- Clear a slot with the minus button.
- If nothing’s available for a slot, hit the quick buy in-slot button (small shop icon) to see what you’ve unlocked from the Monolith and buy straight into the slot. Works for any armor plate size, extra large down to small.
- Resurrection beacon slot: quick buy is available but I don’t recommend spending CAM here — beacons can be earned from missions.
Beacon vs Tac Beacon — this confused me at first:
- A Tac Beacon lets you respawn with a free kit and reappear at the point where you died.
- A regular beacon spawns you with nothing besides your knife, at the beacon placement point or the raid start point.
Other slots work the same way: flashlight, signal grenade, assault bike, robot dog, hood/head armor. Dog tags and ribbon colors let teammates identify each other. Chronogens can be changed by clicking the icons at the bottom right.
Storage, volume, and quick use slots
Storage works by volume — bigger weapons and items take more space. My example storage was 110,000 volume.
- Army Backpack = 450 volume.
- Large Backpack = 1,600 volume.
- Rig capacity: base character has 500; Paladin has 525. Adding a large rig brings it to 1,100 — enough to hold one, two, or three guns.
Quick use slots are for meds and similar items. Drag an item in to bind it. One thing to remember: items placed in the backpack take an extra 1–2 seconds before use begins.
Melee weapons (premium edition): you get a brass knuckles knife, a pocket knife, and a hatchet wood cutter. Equip the hatchet wood cutter — it does the most damage of the three. The mid-tier ($50) edition includes a knife; equip it if that’s your edition. Pick up and run a tactical spear when you can, but note it looks like a large antenna on your back and makes you stand out in PvP.
Investigations: your quests and repeatable CAM
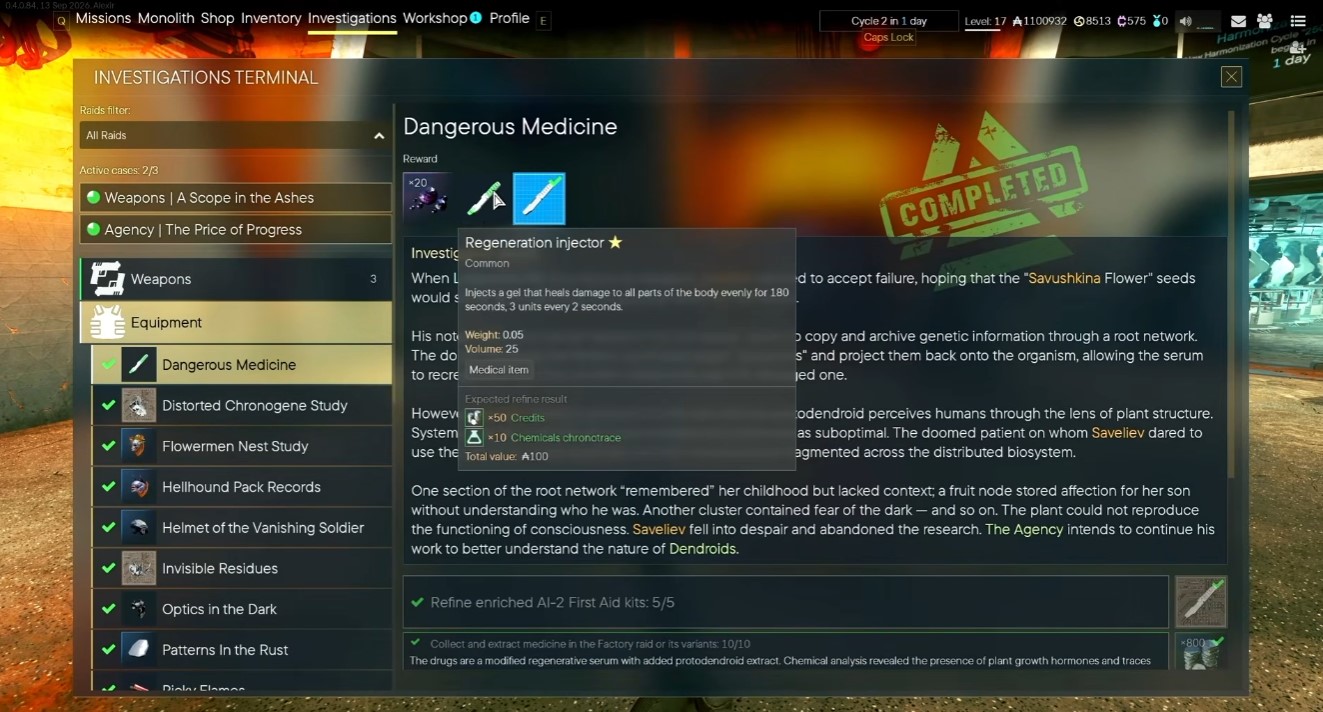
Investigations are your quests, and they’re how you unlock weapons and gear. Categories:
- Weapons
- Equipment — regen injectors, chronogens, perks, helmets, Titan armor plates, suppressors for certain weapons.
- Agency — your body sleeves / characters.
- Additional storage — storage extension plus 5,000.
Every investigation gives 20 Crystallized Active Matter (I never saw one give more or less). You can redo investigations every time you prestige.
The prestige re-unlock flow has one big gotcha:
- After completing an investigation and prestiging, you must unlock it again in the Monolith. Example: after completing Psychologist Gambit, at access level Zeta you can unlock it again — go to the Investigations tab and find Psychologist Gambit (example location: Journey of Consciousness).
- A button will offer to complete it for X Monolith Tokens or X Crystallized Active Matter. Do NOT pay with CAM — only use the Monolith Token option. Then do the last step without spending CAM and get the extra 20 back.
Warning: Monolith Tokens spent inside investigations to skip parts do NOT count toward your overall Monolith Token total for access levels. Same rule as the bypassable steps.
Investigations come from progressing the Monolith and unlocking them. Example: buying “case agency drift” for 6,500 unlocks it, and it then appears under Agency in Investigations. Completing it unlocks the next objective — five total steps — and completion grants an extra 5,000 volume of storage.
Workshop: Refiner and Replicator
The Workshop splits into two functions.
Refiner — selling items and getting crafting materials:
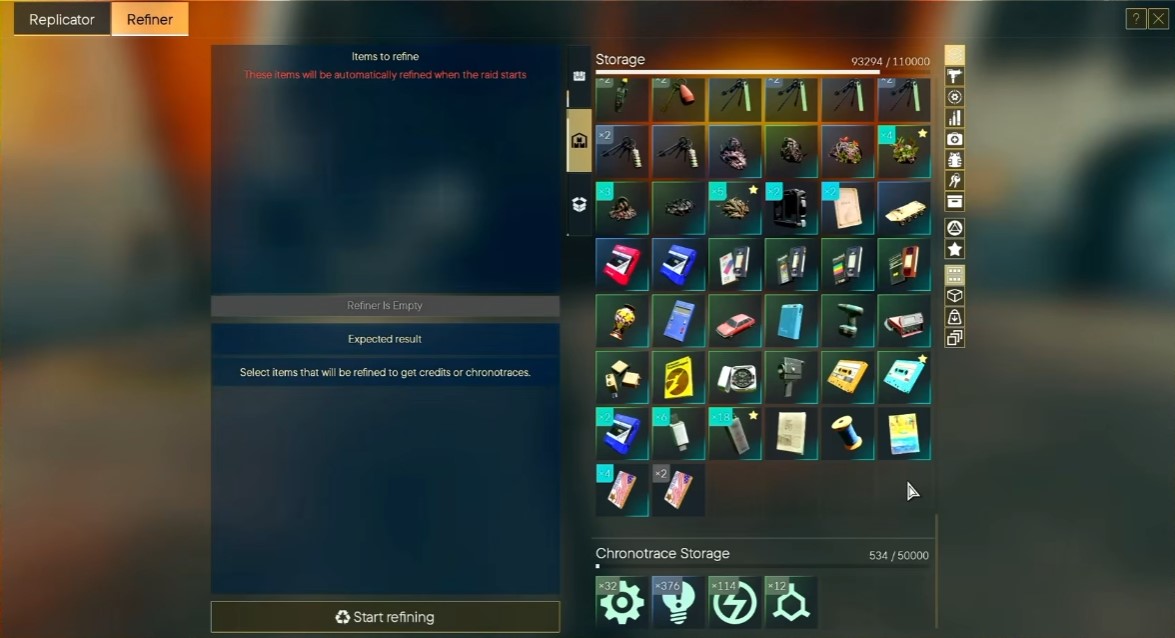
- Refining yields credits, Active Matter, and Chronotraces. Example: refining an item gave $96, 1 Active Matter, and 25 to 30 Metal Chronotraces.
- Hovering an item shows its total value (example: about $333). That value is split across the outputs — selling all outputs yields roughly that total.
- Refining takes 2 seconds.
- You can move quantities into the refine queue. Selling 548 Active Matter (keeping an even 3,000) yielded $54,000.
- Chronotrace values: 1 Chronotrace = $5; 1 Idea Chronotrace = $10. Types include composite, energy, metal, fabric, and a few others. Idea is the most expensive.
Enriched items and rarity hues — this is where the money is:
- Items with a blue hue in the bottom right corner are Enriched and give the most money and Chronotraces.
- Enriched items are required for certain investigations (example: “refine enriched APC toys”). You must find enriched versions — if one accidentally goes into a raid and becomes unenriched, it can’t be used.
- Everything found in raid as loose items or in boxes is Enriched and has the blue hue.
Rarity value examples:
| Item hue | Value |
|---|---|
| Blue-on-blue (upper rarity) | $3,800 |
| Green | $235 |
| No hue | $43 (shown as $172 for a stack of 4) |
Look for green, blue, and purple hued items in raid to maximize value.
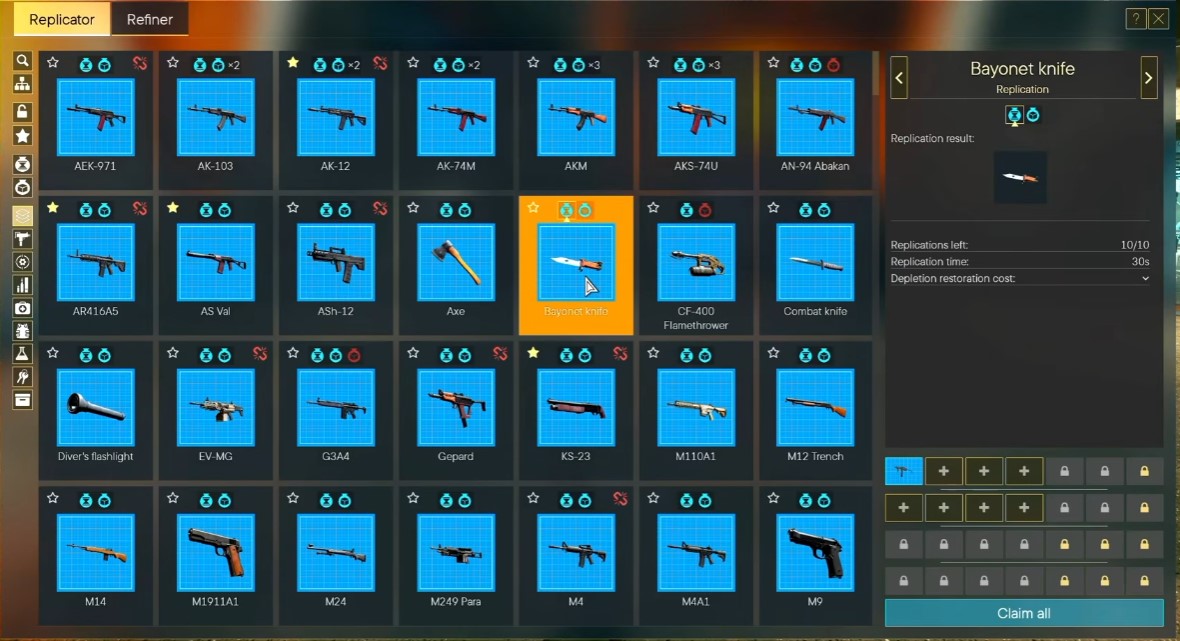
Replicator — making weapons and items:
- Place the blueprint in a slot and supply the listed materials (example: Composite Chronotraces, Metal Chronotraces, and Active Matter).
- Blueprint example: AK-12 requires 505 Composite Chronotrace and 1,480 Metal Chronotraces. Hit the plus icon to start producing; it takes 18 hours to produce one.
- “Replications left” means charges (example: 5 charges). When out of charges, hit the depleted button. Depletion restoration example cost: 85 Active Matter, 505 Composite Chronotraces, and 1,480 Metal Chronotraces. Restoring takes just as much and just as long as making the item.
- When done, click the item to collect it — no money spent beyond materials.
Fusion recipes are the fast lane: they require all listed materials, but replications left is infinite and replication time is instant. Hit plus, grab it, equip it. There are two versions of a fusion recipe (indicated by the times-two icon) — one may give a higher chance of starting with an attachment, the other gives a bare rifle with no attachments besides a fully filled magazine.
Profile, stats, and cycles
The Profile shows your Perks tree — every player’s is different. Under Career you can view statistics for all rebirths (all prestiges) or just the current one.
The game doesn’t display these outright, so here’s how they’re calculated:
- KD = operatives killed divided by deaths.
- Raid success rate = successful raid count divided by total raid count.
Other tabs: Notes (lore found in the world), Key Objectives (in-raid investigations — each map has its own, shown above the bar), and Raid Archive (your past 20 raids).
Cycles (Seasons): for 1,000 CAM you can buy access to the navy blue camouflage, the artifact statue, the dog tag, and the fleck camo. It’s optional and aimed at new players who missed the original access. The artifact statue is the reward for the second prestige in the Giga Structure cycle and appears in your hideout.
The currency breakdown, finally
This is the part that made my head spin on day one. There are four currencies, and each has one job:
| Currency | What it’s for | Where it comes from |
|---|---|---|
| Credits | Buying things in the shop, like weapons | Extremely easy to earn in raid |
| Monolith Tokens | Spent in the Monolith to progress | Earned in raid, or 500 CAM = 5,000 tokens |
| Crystallized Active Matter (CAM) | Shop Special items, Monolith Tokens, Cycle access | Editions, Priority Raids, Investigations |
| Merits | Mac 11, Mac 11 pistol grip, Mac 11 suppressor, Viper, dog tag | Priority Raids; unlocks when Cycle 2 unlocks |
A few closing notes on the currencies:
- Clicking Monolith Tokens in your inventory takes you straight to where you use them.
- Merits have a full stack of 10,000 and become available once Cycle 2 unlocks.
- CAM is the one you protect. Priority Raids give 20 per turn-in, investigations give 20 each, and the best thing you can do with it is 500 CAM for 5,000 Monolith Tokens.
Get the raid type right, climb the Monolith in PvE first, and hold your CAM for tokens. That’s the whole beginner loop — everything else in Active Matter builds on top of those three habits.


