Don’t synthesize like a chump, get all the Rank Vs!
What Does This Guide Cover?
The purpose of this guide is to teach you how to have the highest chance of getting Rank IV or V traits from the things you synthesize, and maximizing the potential power you can draw from traits in general. If you aren’t aware of what specifically increases a character’s Gift Bonus, it can seem like you never get high ranks at all. So we’ll go over that.
Before You Do Anything Else…
I have to mention this real quick just in case you don’t click buttons:
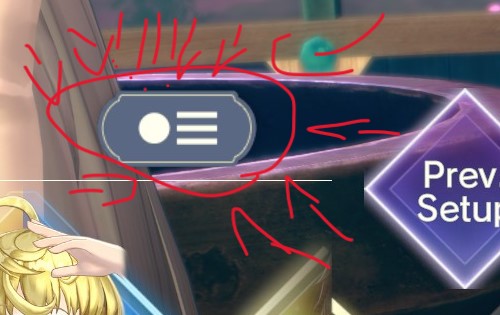
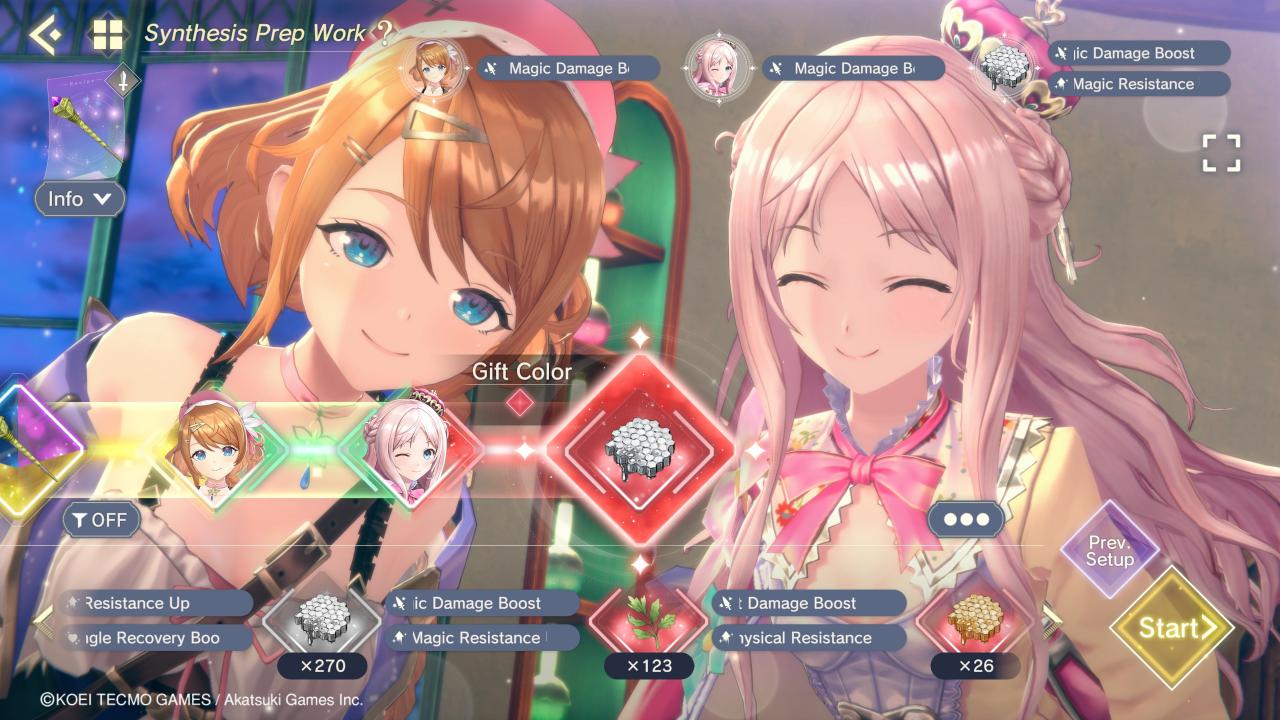
CLICK THIS ICON on the synthesis prep screen when selecting a character or material, because it will show the name of the trait(s) a character/material has, and if you click on the trait name next to the character icon, you can see the full description. No idea why this isn’t the default option.


Basics of Traits, Ranks, and Gift Bonuses
Before we get into detail, I want to go over all the mechanics that will play into getting high-ranked traits just in case you don’t fully understand one of these. If you think you already know everything there is to know, feel free to skip this section.
This one’s the most obvious. Traits are the properties that are applied to anything you synthesize. These traits come from a character’s or material’s “Gifts” which are the traits that they can potentially apply when you choose them during synthesis prep.
Just to avoid confusion, the game calls them “Gifts” when referring to what traits a character or material has, and then they’re referred to as “Traits” when said gifts are actually applied to the final synthesized item. From here on out, I will simply refer to these as “Traits” since they’re one and the same.
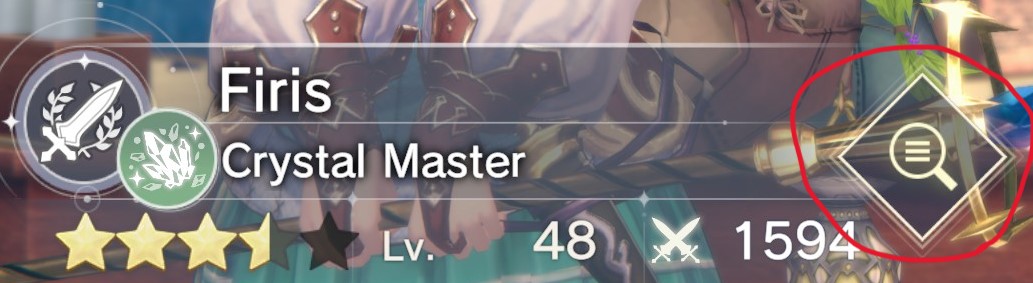
In the “Characters” menu, if you want to view what traits a character specifically has, press the Magnifying Glass icon near their name, then go to the “Gifts” tab. In most cases, a character will have 2 traits for battle items, and 1 trait for non-battle items (Weapons, Armor, and Accessories). A single material houses 2 traits, but what traits they are vary wildly depending on the item.
Traits applied to synthesized items will have a numbered rank associated with it, and as you might’ve guessed, higher ranks make the trait more powerful. Traits can be anywhere from Rank I (1) to Rank V (5). So, a Rank V trait is the best possible outcome for you to have. If you haven’t been looking closely, the difference between rank I-III to Rank IV-V is pretty huge depending on the effect, so don’t underestimate this.
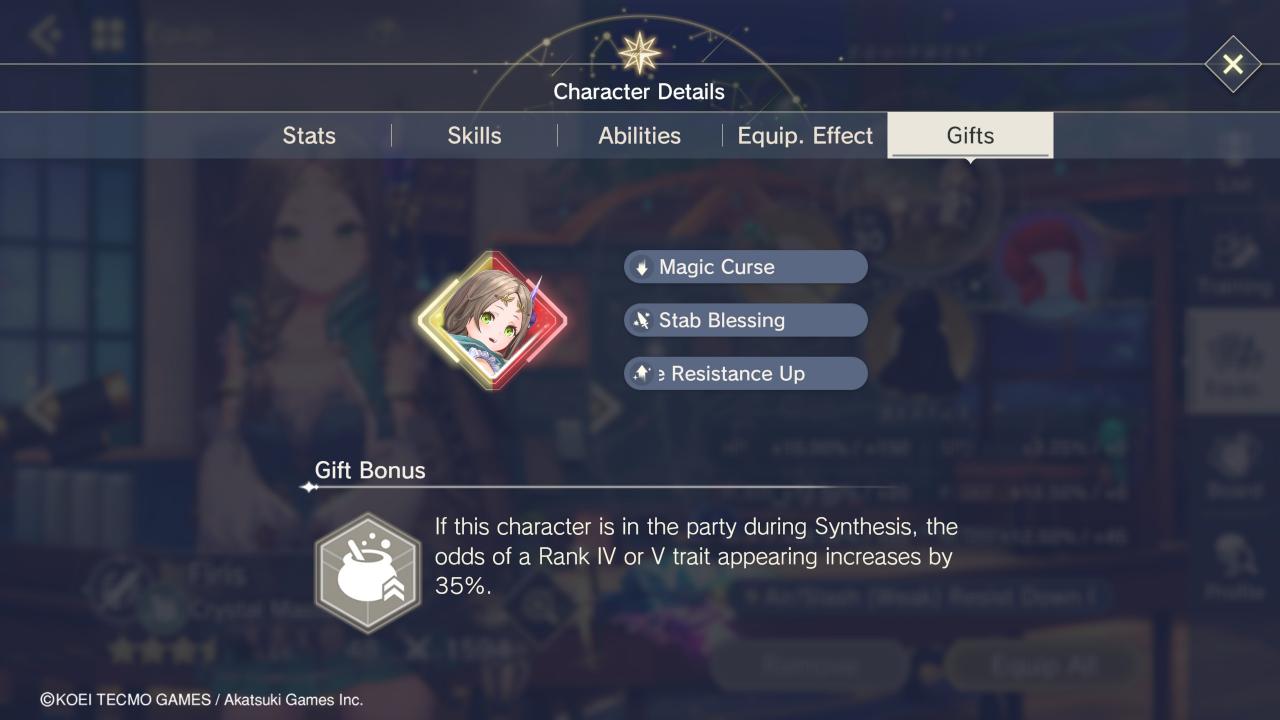
While it is random what rank trait you’ll get, your chances of getting Rank IV and V traits increase from your two character’s “Gift Bonus” (You can see this in the above screenshot on the character details).
Speaking of that… Yes, as I described a second ago, Gift Bonuses come from characters, and increase the chance of Rank IV and V traits showing up if those characters are participating in the synthesis. Now, it’s worth noting, the two characters YOU select during synthesis prep are the ONLY ones that matter; the first 3 characters that appear when you first get to the prep screen are purely cosmetic. We’ll go over this mechanic in detail in it’s own section.
Maximizing Gift Bonuses, and How To Increase It
Firstly, let’s focus on this aspect before we even start synthesizing. Try to have as many characters with as high a gift bonus as possible. As previously stated, the gift bonus each character has increases the chance of a Rank IV or V trait being applied.
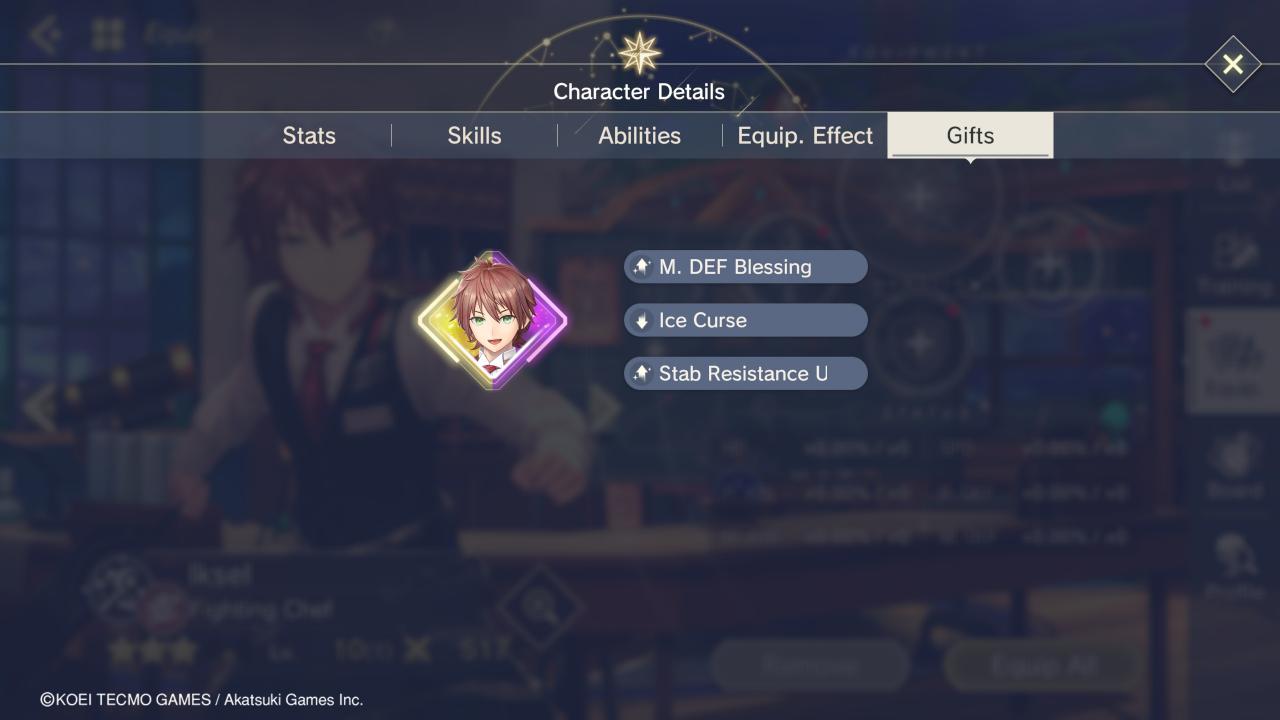
Now, here’s a short PSA: When you gain a new character and leave them untouched, they have NO gift bonus.
This here is my Iksel. I got him from the gacha, but I did not level him up at all or touch his growboard. No gift bonus whatsoever, in comparison to Firis in the screenshot in the previous section.
Anyway, now that you know that, you will want to especially focus on characters that have the traits you want the most. For example, Resna’s 1* variant has “Magic Damage Boost” as one of her traits. This is obviously very versatile and helpful to any character that deals magic damage. However… that isn’t a catch-all “best” trait; we’ll go over that later. For now, just try to focus on characters that have helpful traits you’ll want.
Alright, that’s cool and all, but how do you increase it? Two ways:
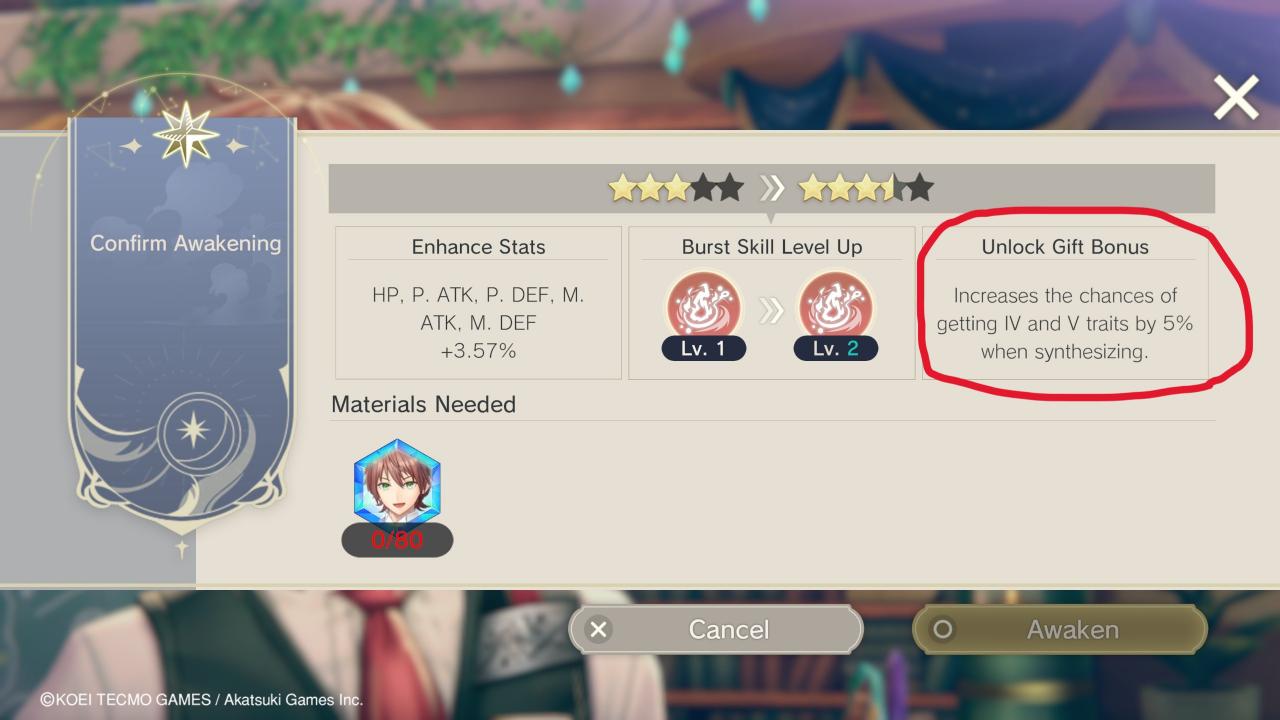
If you wanna be optimistic, you can call this the Slow and Steady approach. If you forgot, awakening characters is increasing their star rank by consuming their “Pieces” as the game calls it. Starting from 3.5* onwards, characters will begin to have their gift bonus chance increased. On top of that, awakening will also increase the character’s base stats, provide passive buffs, and increase the attack power of their “Burst’ skill.
Star Ranks progress like this every time you awaken a character, along with the number of pieces required:
– 1* (None)
– 2* (50 Pieces)
– 3* (50 Pieces)
– 3.5* (80 Pieces, +5% to Gift Bonus)
– 4* (150 Pieces, +10% to Gift Bonus)
– 4.5* (300 Pieces, +15% to Gift Bonus)
– 5* (500 Pieces, +20% to Gift Bonus)
For the record, each of those Gift Bonus percentages stack, which means for example, a 5* character will have a total of +50%.
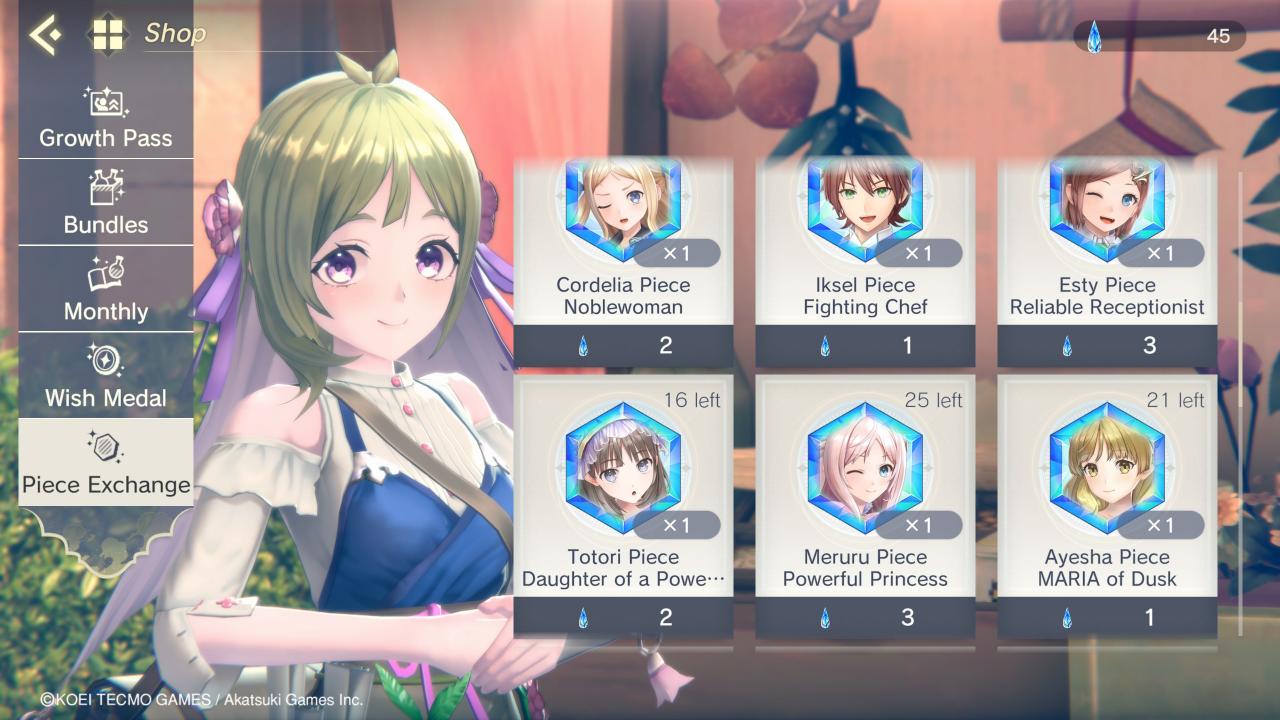
There are currently only 3 ways to get Pieces for characters, which are:
– Obtaining a duplicate of a character you already own from the gacha or Wish Medal Exchange; 1* dupes provide 1 Piece, 2* dupes provide 10 Pieces, and 3* dupes provide 50 Pieces.
– Doing the “Pieces” quest from Ryza’s quest menu. This can be done up to 3 times per day. The party members you complete/skip the quest with are the ones that will obtain their own pieces. Easy difficulty gives 1 piece each per attempt, Normal difficulty gives 2 pieces each per attempt, and Hard difficulty gives 3 pieces each per attempt
– Purchase character pieces from Flocke’s shop; When you obtain a dupe from the gacha, you are given both that character’s pieces and also the same amount of “Generic” pieces which is currency to buy any pieces you want from Flocke. The exchange rate starts at a 1:1 ratio per character, but the cost of pieces increases by 1 for every 25 character pieces you buy, up to 5 generic piece per 1 character piece.
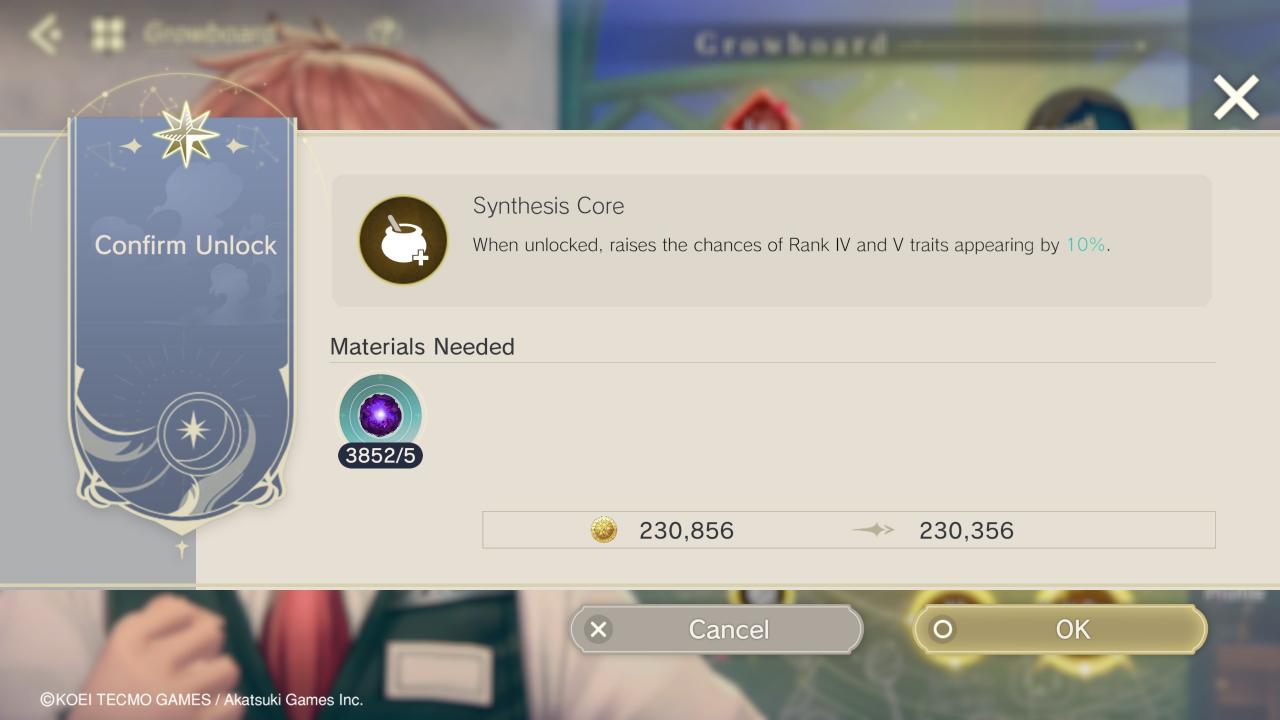
This one is much faster, and simpler. There’s a specific node on every character’s Growboard called “Synthesis Core” which increases a character’s Gift Bonus. Now, as far as I can tell, Synthesis Core stops appearing from Rank VII (7) onwards, and are replaced by the character’s skill cores. I can’t say for certain if Synthesis Core will show up past this, but my highest character’s Growboard is Rank 9, and I have yet to see another Synthesis Core past Rank 6.
So, try to get all your characters to at least Rank 7 on their Growboard.
Trait Synergy
This might be extremely obvious to some of you, but I want to elaborate on it anyway. You should try your best to find a good synergy of characters that have matching traits that pair well together.
I actually know a prime example of this. Resna 1* and Meruru 2* both have “Magic Damage Boost” as their trait. On top of that, Resna’s right color connects to Meruru’s left color, so they can always be paired together if Resna goes first. This gives you a much higer chance of getting multiple “Magic Damage Boost’ traits on your item, and with a high rank if their Gift Bonus is high enough.
So yeah, try to think of character synergies like that, that will pair very well together. Pure magic, pure physical, defense, offense, whatever it may be. It can go a long way.
Specific Traits: High Risk, High Reward
Now this is where it gets a little complicated.
So to put it bluntly: Traits that are hyper-specific will ALWAYS be more powerful than more “general” traits. I think taking a look at the damage-oriented traits paint a good picture of this.
When you click on a trait’s icon during synthesis prep, you’ll see what the trait does alongside it’s percentage variable depending on what rank it ends up being. If you look through them, you’ll notice the numbers for the more “general” traits will almost always be lesser than specific ones.
For this example, here’s the “Damage Dealt Boost”, “Magic Damage Boost”, and “Bolt Damage Boost” traits and what each of their variables are.
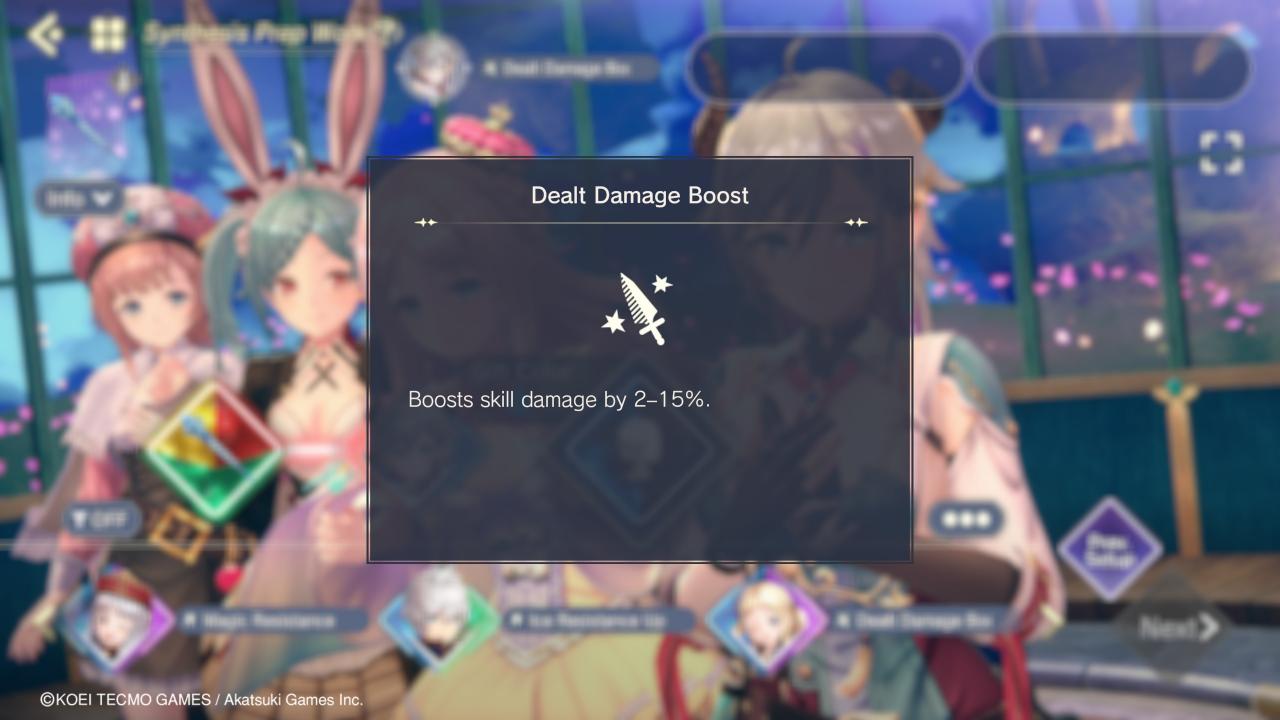
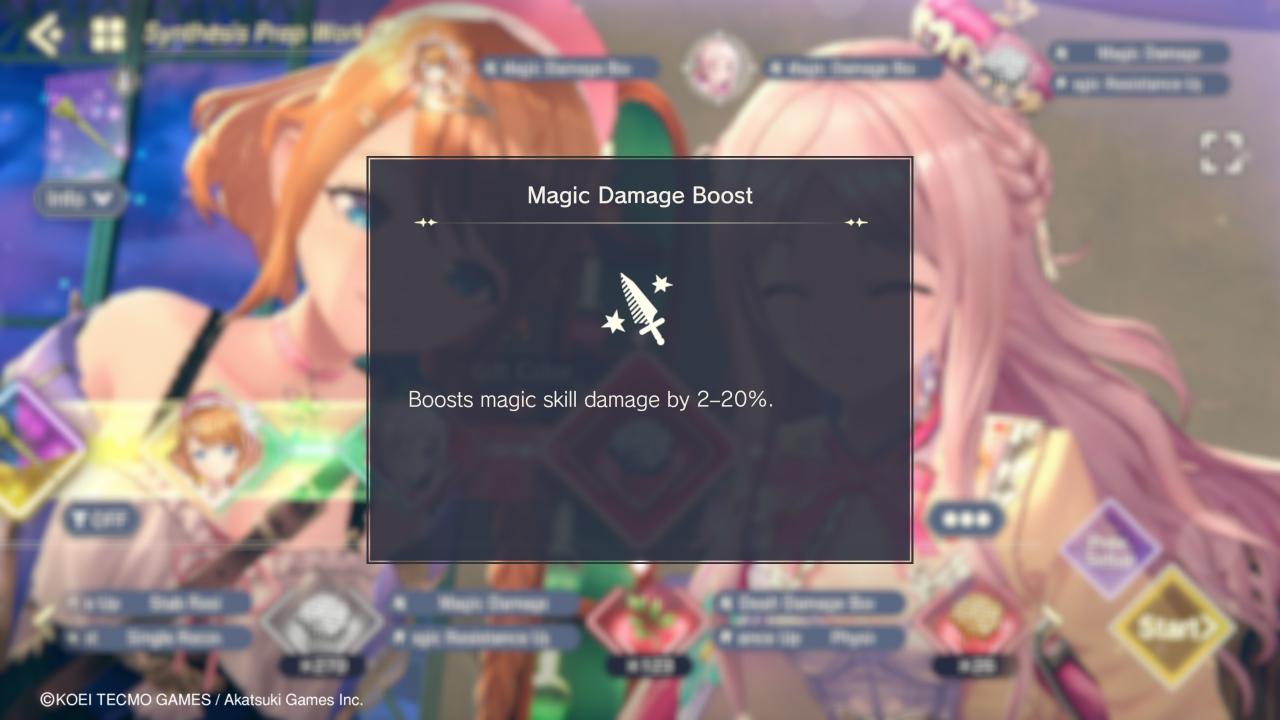

Goes without saying, you can see the higher numbers. “Dealt Damage Boost” works for both physical and magic damage, “Magic Damage Boost” obviously only works for magic damage, and “Bolt Damage Boost” only helps if the character does Bolt damage. If you’re very limited on mana, you might be tempted to go for a more general trait just to get a good piece of gear for your character, and that’s totally fine, it works. You don’t want all your mana to go to waste making trash you can’t take advantage of.
But at a certain point, you’ll be hitting a plataeu sticking with the safer options, so eventually it’d be in your best interest to try to get a highly-ranked specific trait. It can make a big difference depending on the outcome of the synthesis.
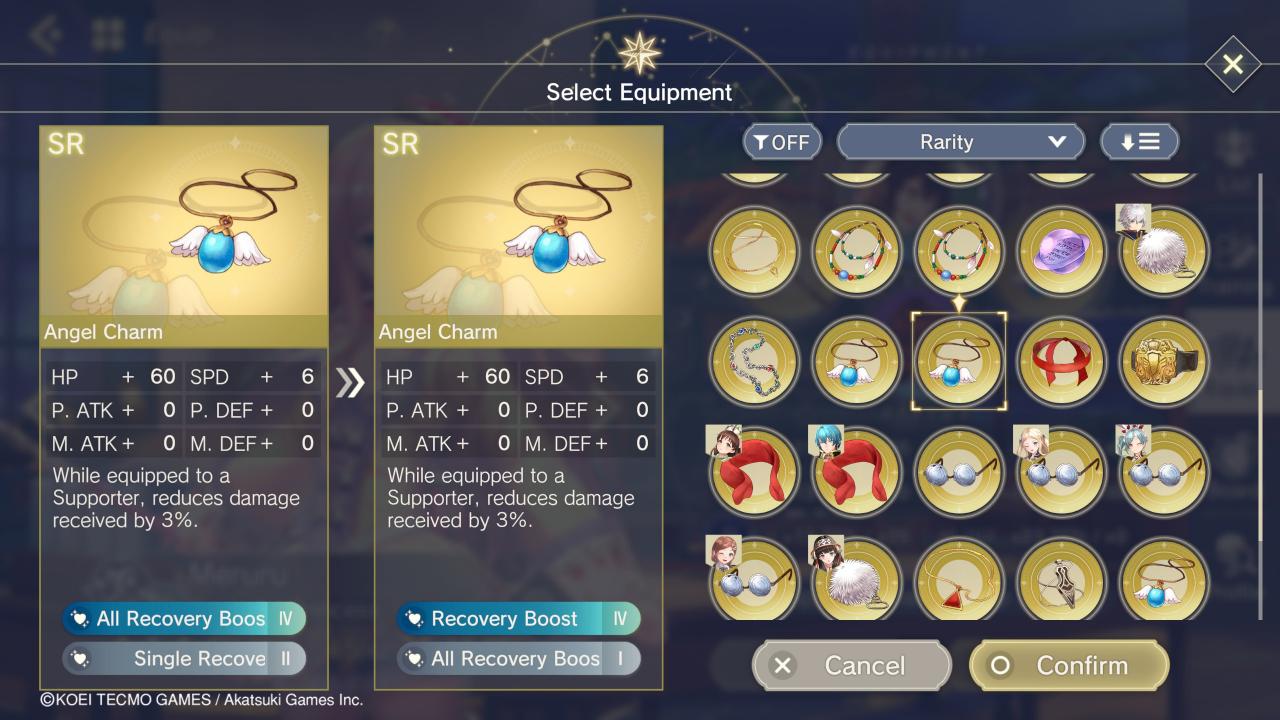
To make another example, here’s two recovery-oriented pieces of gear I have for Meruru. The one on the left has “All Recovery Boost IV” which boosts healing skills targeting all allies by 15%, while the one on the right has “Recovery Boost IV” which increases ALL recovery skills by only 9%. Meruru’s healing skill is all-target and she doesn’t have a single-target heal skill, so the left one is simply a better choice for her.
Material Exclusive Traits
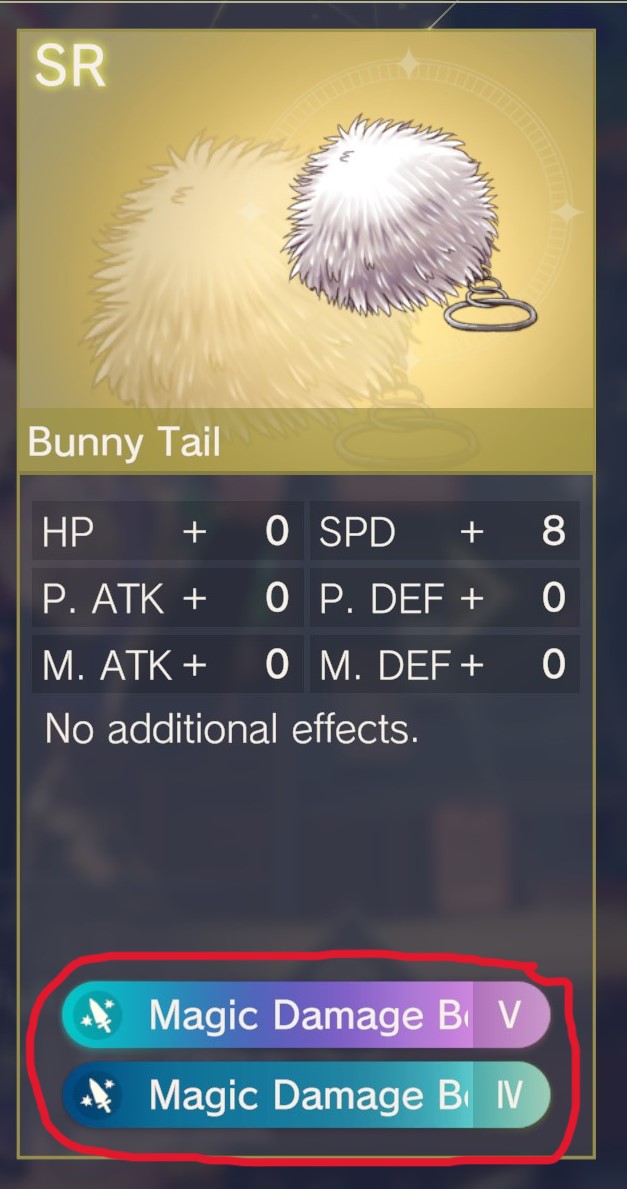
The last thing I wanna mention is that materials have special traits that only come from them, not from characters (At least as far as I know, I can’t say with 100% certainty as I don’t own all characters). Believe it or not, these are even more specific than the ones I mentioned in the last section. So consequently, that means these are even harder to take advantage of. Also, higher rarity materials you gain from dungeons are more likely to contain these traits (i.e SSR ones rather than SR/R)
But by the same token, the potential power you can gain from these can also be wild. It’s similar to what I said in the last section, so I don’t wanna repeat myself too much. Instead, I’ll be showing you all the exclusive traits I know, and the exclusive categories that exist as well.
These traits will have certain words in it’s name in brackets showing it’s category, and that means these traits will only apply under specific circumstances. These are:
– [D]: Effect only works on characters with the “Defender” role
– [A]: Effect only works on characters with the “Attacker” role
– [B: Effect only works on characters with the “Breaker” role
– [Full]: Only works if character is at full HP
– [Resolve]: Only works if character is at 50% or lower HP
– Single Attack Power Up: Increase damage of single-target skills
– All-Target Attack Power Up: Increases damage of skills that target all enemies
– Stunned Damage Up: Increases damage dealt to enemies with a broken stun gauge
– Enhanced Damage Buff: Strengthens any Physical or Magic ATK buff given to Breakers
– Enhanced P./M. Resistance Up: Strengthens Physical and Magic DEF buffs applied to user and/or allies
– Enhanced P./M. Resistance Down: Strengthens any debuffs that make enemies take more damage
– All Resistances Up: Reduces both Physical and Magic damage taken
– All-Target Attack Resistance Up: Reduces damage taken from enemy attacks that target all allies