Here is a quick guide for all items in Bad North. this guide will cover what they do, how they scale up as you level them, and who You’ve had the most success with equipping them on.
Bombs
The bomb takes a second to throw, but can be thrown 1 to 2 fields. On diagonals I’ve had some trouble if there’s a wall or house in the way, so keep an eye out for that.
At level 1, you can throw one bomb per island. For 8 gold, you can unlock level 2 and get a second charge per island. Level three (14 gold) does not unlock a third charge, but does increase the AOE and knockback of the bombs.
Holy Grail
Jabena
Mines
Mines can be placed within 1 or 2 fields of your unit. If you equip mines on archers, you can either place your mines early and pray they are activated, or you have to be careful when placing them mid-round so you don’t get your archers in a pickle. Like bombs, mines can damage your units!
Also like bombs, mines can be upgraded. At level 1, you can set down one mine per island. For 8 gold you can unlock level 2 and gain an additional mine to place. For 14 gold you unlock level 3, which gives you a third mine and a larger AOE, with higher damage.
Philosopher’s Stone
You have to deploy the unit that has the Philosopher’s Stone to get the extra gold. That said, if your unit dies on the island, you won’t gain any extra gold.
Like the Jabena, you lose potential for utility if you equip this item, so keep that in mind for late-game. The Philosopher’s Stone & Collector trait or Philosopher’s Stone & Skillful trait combos are killer early-game, though!
Ring of Command
I never use this for my pikemen. The RIng of Command is fine on swordsmen. I prefer to equip the Ring of Command on my archers, because going from nine arrows per shot to sixteen is delicious.
Equipping the Ring of Command increases the amount of time it takes to replenish your unit! Also, again, you do lose the utility other items may offer, but I consider the extra arrows a fair trade for the lack of utility.
Warhammer
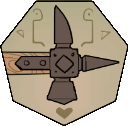
Equip this and your unit will jump forward and cause AOE damage and knockback. Absolutely delightful when used on a boat-load of baddies right as they’re getting off their boat. If you time it right, you should be able to knock most of them (if not all of them) into the water! Unlike Mines or Bombs, the Warhammer has a cooldown and can be used every 40 seconds instead of having a hard limit per island.
I like to equip this item on swordsmen, as it gives them an edge against Brutes. The Warhammer can only be used on level-ground, though, so don’t expect to do a super-hero landing from an elevated position. This item won’t let you jump walls, either, so it’s not much of a mobility boost.
You can buy level 2 for eight gold and level 3 for 14 gold. The upgrade does not shorten the cooldown, but it does increase damage done and knockback.
Warhammer can damage your units, so be careful when using it in a crowd!
One more item to go!
War Horn
Level 2 can be bought for eight gold and increases the number of soldiers called in from three to five. At level 3 (14 gold) you’re able to use the War Horn twice per island, although there is a cooldown.
I only use this item for swordsmen. The lack of mobility pikes have and the squishiness of archers mean both will likely still die out quickly if you’re in a pinch. Swordsmen are slightly better, however, as far as movement and durability goes.

