Banished is a game that explains very little and expects you to know a whole lot from the outset. Hopefully this guide can be a remedy to that.
Early game tips
During the early game, a good tip is to reassign your Blacksmith and Tailor to other jobs once they reach their production limit. Doing this will allow you to maintain the biggest workforce possible for building projects or production. Only assign someone back as a Blacksmith or Tailor when the inventory of tools and clothes reaches a low level (around 15 for each). You can do this with the Wood Cutter as well, but I find that I need them back much more quickly.
Build one starting house
You can get by for the first couple of years with a single house. The citizens will get their food from the Storage Barn and will warm themselves up in the house when they start to freeze, even if they don’t live there. This allows you to focus on building food producers and other high priority buildings like the Schoolhouse.
Clear stone and iron from your Forester radius
When it is first established, the Forester will produce a meagre amount of logs. This partly because the trees it plants take time to mature, and partly because the land is usually covered with stone and iron. When you first set your labourers to harvest resources, have them prioritise harvesting stone and iron from where you plan to put your Forester node.
Food production
Effective forms of food production include Gatherer’s Hut + Hunter Lodge nodes, Fishing Huts with more than 50% water coverage, and Crop Fields of decent sizes. There is information about all of these in the following sections. These food producers will only be ‘effective’ if they have minimal walking distances (see my section on that too).
There are also Pastures and Orchards of course, but they are more of a mid to end game venture. Orchards and Pastures require a few years before they begin producing food, so they should not be used at the start of the game or when a new influx of food is needed immediately.
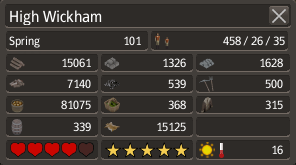
Monitoring production without Town Hall
You can easily calculate how much food you should be producing per year by multiplying your number of citizens (including children and students) by 100. And you want to aim for more than this number as well, so you have some security.
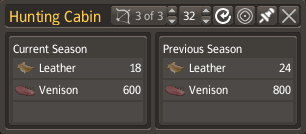
As for how much you are producing, click on one of your food producers and click the circular arrow icon. The Previous Season number tells you how much food it produced last year, NOT in the last season (e.g winter). Roughly add up the amounts to get a total. If your production is less than you need, calculate how much by.
Monitoring production with Town Hall
Check your Town Hall’s production tab often, but especially every early spring. Make sure it is set to Display: 1 Year. The important numbers here are the Used (1yrs) and Produced (1yrs). These tell you how much food your citizens ate last year and how much you produced. Obviously you want to have production be at least an equal amount or more. If production is less, calculate by how much and build more food production with that number in mind.
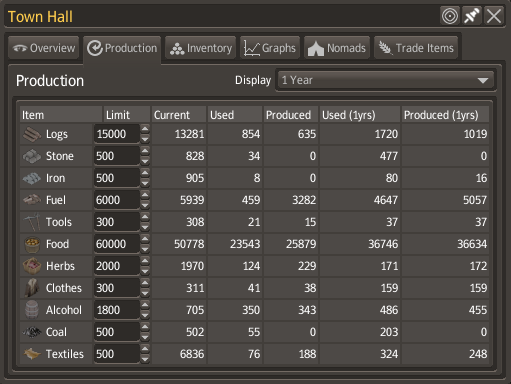
The Used and Produced numbers to the left are those of the current year.
Remedying food production
So now you know how much extra food you need to produce, but how are you going to make sure you reach that number? The answer is to refer to your existing food producers, learn how much they produce per year (click the circular arrow icon), and build as many extra necessary to close the gap in food production.
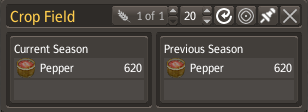
Example: I need an extra 2000 food so I’ll build another 4 Crop Fields the same as this.
Schoolhouse
Get the Schoolhouse up early so your next generation of workers can be educated. Educated workers are 30% more productive than uneducated ones. The Schoolhouse only requires 1 teacher to run so it’s a win-win. Build more Schoolhouses in line with the number of children you have to ensure than no one misses out on an education!
Blacksmith
Creates tools, without which your citizens will be significantly less productive. It’s worth building multiple Blacksmiths as you expand; I like to build one with every Market.
Tailor
Creates clothes, which your citizens need to be able to work outside during the winter. It’s good to have one at every Market as well.
Market
Makes the best use of the food you have available by sharing it throughout the population evenly. Also provides a centralised place for citizens to collect things which increases their efficiency.
Hospital
Treats citizens who contract a disease. You never know when this might happen, so build it as soon as you can. When a citizen contracts a disease, they have to walk to the nearest Hospital, meaning the further away they have to go, the more people they will spread it onto, and could potentially die. Try to build Hospitals as you expand across the map for this reason.
Town Hall
Provides statistics on the production of everything in your town. It is worth building ASAP for the food production statistics alone. You also cannot receive nomads until you’ve built it.
Trading Post
Your source of infinite resources. It should be built comfortably before you run out of nearby stone and iron to harvest. The Trading Post must go along the main river that runs through the map or it will not receive any merchants.
Boardinghouse
Serves as temporary accommodation for any citizens that lose their home to a fire or hurricane, or to nomads that you suddenly accept. It is the best solution for housing a large amount of people quickly before they freeze in the winter. The probability you will be hit by a fire or hurricane is quite low, but it doesn’t hurt to be prepared.
The production of these 3 buildings is determined by the amount of land tiles in their radius, therefore it’s important to never place buildings within the radius of a node. The only exception to this rule being roads, which should be placed well, and sparingly.
If your production of logs is more than you need, go ahead and replace one of your Foresters with a Herbalist to give your citizens a boost in health. It’s important not to have the Herbalist in the radius of an active Forester. This is because the Herbalist relies on having mature trees to produce their herbs and the Forester will cut down said mature trees.
The only instance when your perhaps shouldn’t place the aforementioned buildings as a complete node is if you don’t have enough room close by for the support buildings it requires (see the next section).
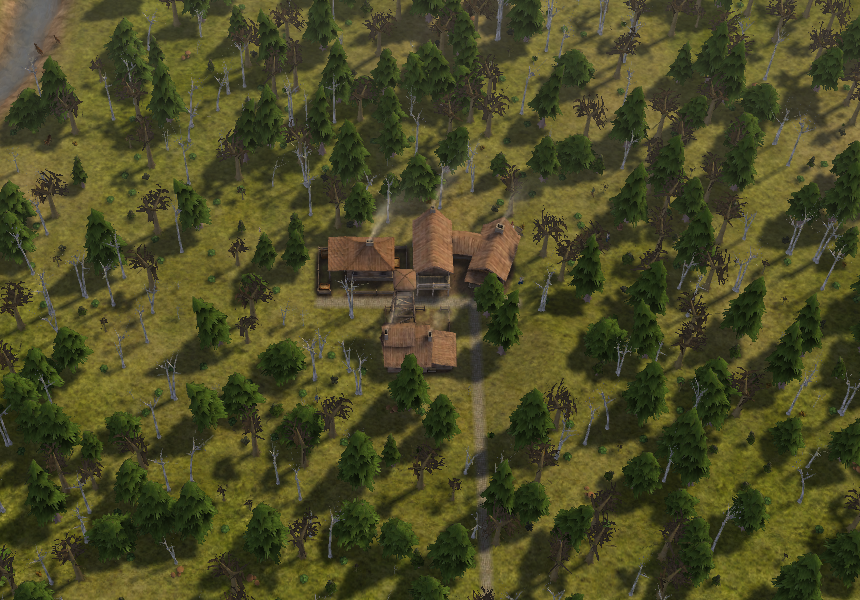
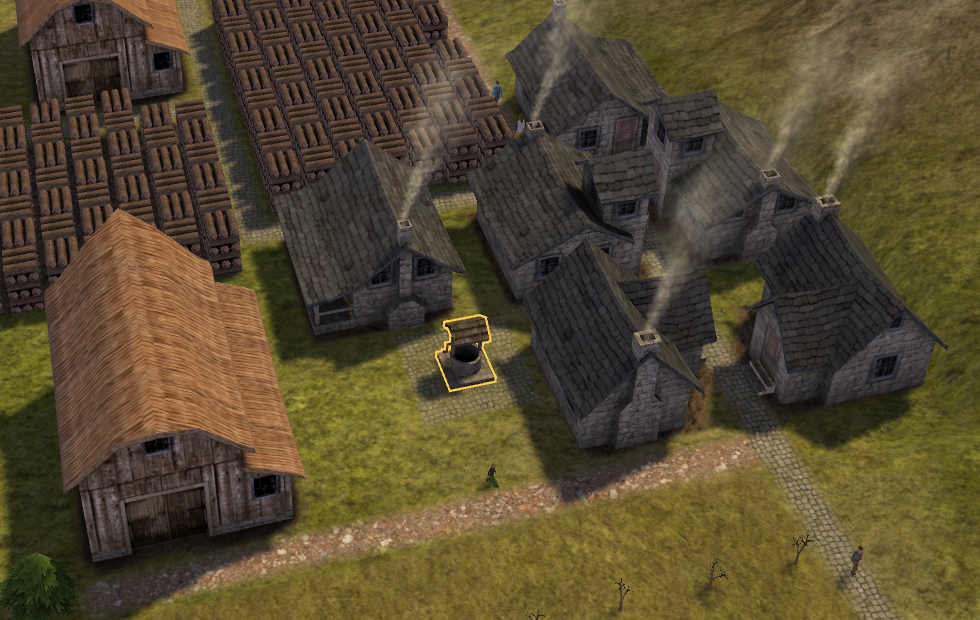
Long story short, you need to place everything as close together as possible. Take a node for instance. The ideal setup for a node is to have, on the very edge of its radius: 2 Storages Barns, a large Stockpile with a Wood Cutter next to it and 6 houses. The fully staffed buildings plus a Wood Cutter will require 12 adults, so 6 houses, no more, no less.
In this example, the only slightly significant walking distance for these workers is how far they have to go to the Market (for food and firewood) which is only about 30 tiles (it’s up and to the left). When the Wood Cutter wakes up in the morning, his workplace is right next door, his supply of logs is right next door and his storage is right next door. There is no greater efficiency and he will produce a ridiculous amount of firewood.
As a general rule, build houses for the workers at the same time as building the workplace. Get into the habit of calculating how many houses are needed to supply the new building and placing said houses as close as you can.
The Market is a borderline essential building for the stability and wellbeing of your town. Markets have a huge radius, in which the residents of any houses can enjoy a more varied selection of food (which increases a citizen’s health score) and a centralised place to collect things (which increases overall efficiency). Food you have in storage is shared out evenly through the Market so it really maximises all that you produce.
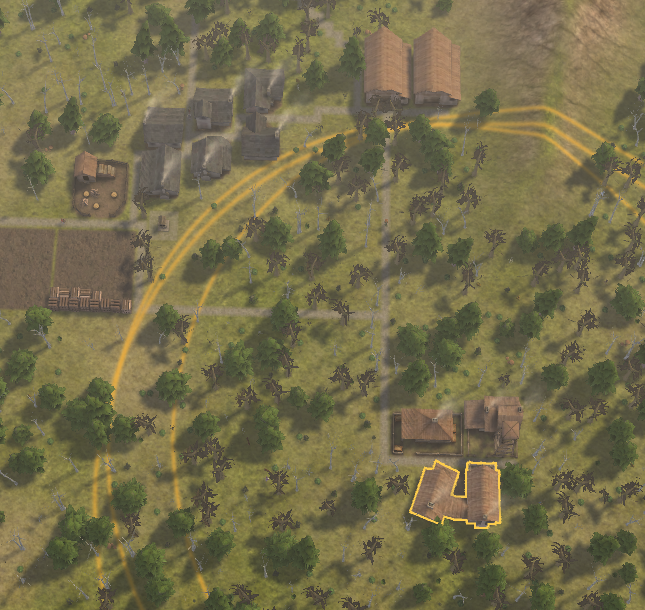
It is therefore that the ideal town layout has every single house inside the radius of a Market whilst also keeping walking distances down to a minimum.
Look out for any paths which are longer than necessary, and if there are any, place a house closer to the workplace. The citizens who move in there will automatically be assigned as the desired type of worker.
Note: The paths in my example image here are too long. The one to my node is a little more than average but the one to my Fishing Shack is far too long. As a result, this Fishing Shack only produces <800 fish, less than half of what I would expect. Unfortunately, I don’t have anywhere closer to put houses so I might end up tearing it down.
An ideal setup is to have 2 Wood Cutters next to the Stock Pile into which a fully-manned Forester (or two) deposit their logs. The Trading Post should be as close by as possible too, with a Storage Barn and Stockpile to store whatever you’re trading for.
With a resource limit set high, you should be able to stock your Trading Post with firewood by the thousands in little time at all. Bump up the desired inventory a little bit over time until you have 9999 firewood.
Other items well suited for trading are food, if you are producing way in excess of what you need and have a full barn of fish nearby for example, and leather which has a very high value and can easily be produced in excess of what you need if you have many Hunting Lodges.
There are 2 merchants that will bring stone and iron for trading: the resources merchant and the general goods merchant. I recommend placing an order with both of them so that they will always bring stone and iron. This increases the prices but it’s worth it for the consistency.
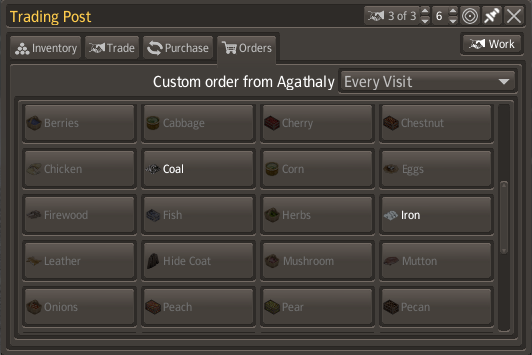
There is also a function to automatically buy items when the merchant visits but I have always preferred to trade manually, since my demand isn’t always the same.
When you’re at a comfortable level of stone and iron, begin trading for coal and wool (place buy order for these as well). Having a steady supply of coal and wool will allow you to upgrade your citizens’ clothes and tools to their higher tier counterparts.
Nomads will always bring a deadly disease. Absolutely do not take in any nomads without already having a Hospital up and running. Preferably, the Hospital should be next to the Boardinghouse so that the nomads can get to the Hospital quickly without causing a large pandemic.
You’re going to want a Boardinghouse for security anyway but they’re especially well suited as temporary housing for the nomads. Unless you have enough empty houses, I suggest building one beforehand as well.
Lastly, make sure your food production is at least par with your food consumption and you have more food production planned out (and enough of it) to accommodate for the nomads. You need to do the maths, have a look at the following example:
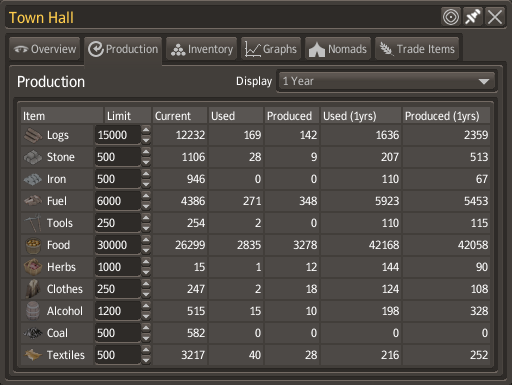
As you can see I am producing 42,000 food per year and consuming 42,000 per year. If I want to take in 50 nomads, I am going to need to produce an extra 5000 food per year. In my case, I might choose to build another full node (>2100 food uneducated), and 5 11×11 Crop Fields (3100 food uneducated).
The reason I have factored in the workers being uneducated is because the new food production will likely be staffed by the very nomads you take in. Nomads are uneducated and uneducated workers produce 30% less than educated workers (according to the Wiki).
I suggest making a save before you accept any nomads, incase you come to regret the decision.
You should be able to build your first houses as stone ones, with the amount raw resources on the ground. This will give you some security because you won’t need as much firewood and production of logs from the Forester can be slow at the start of the game. After that, build a mixture of Wooden Houses and Stone Houses. How many houses can be stone depends on how much stone you have access to on the ground. Keep in mind Stone Houses costs 40 stone each, have a look at your reserve before you place one.
Once you have a Trading Post up and a steady supply of firewood, you will easily be able to trade for the stone to build only Stone Houses from then on. This will mean that you have even more firewood for trading and can further buy more stone.
The citizens in Banished generally follow the roads you place but are programmed to always find the fastest path available which causes them to frequently cut corners and move off in diagonal directions.
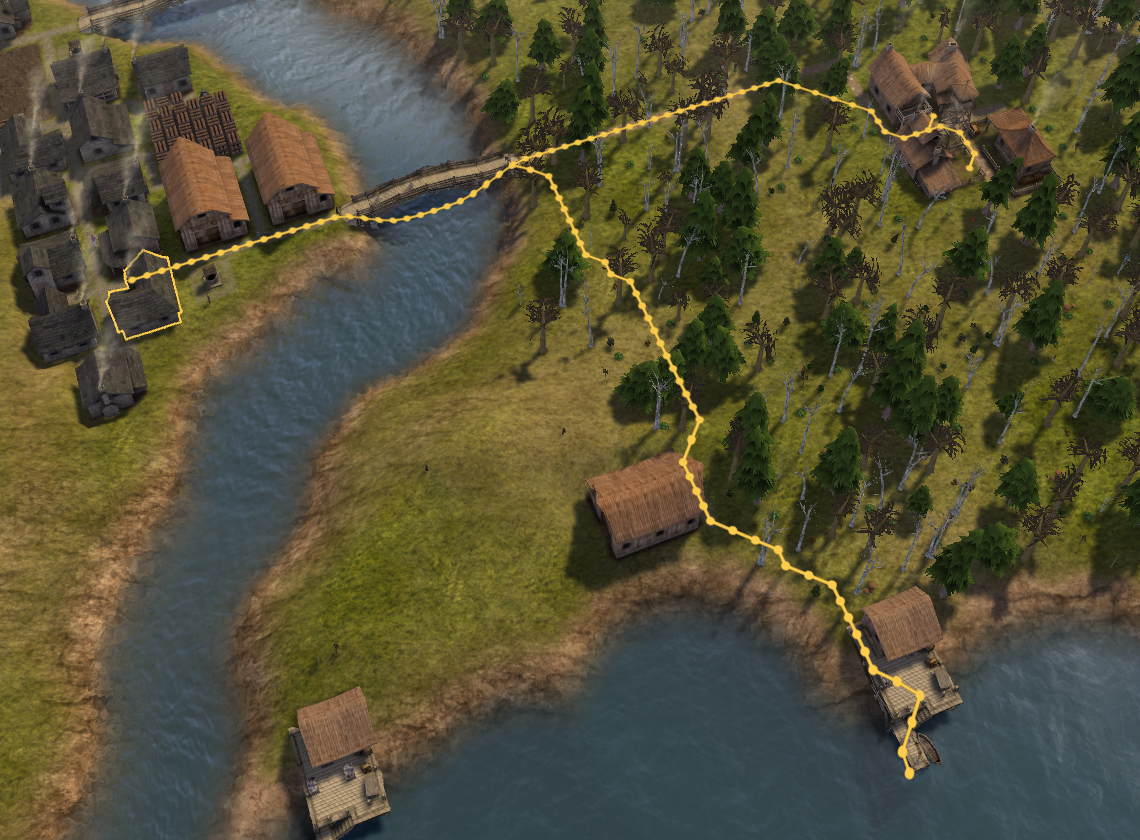
Fortunately, you can place roads in a diagonal zig zag by holding shift. Try to watch for common paths where the citizens walk and trace a road in their line. If you notice that there is a section of the road the citizens are not using (usually the ends), go ahead and remove it.

A diagonal road from my Fishing Hut. A 90 degree road here would go largely unused.
Worst of all is when you ask for something to be done on the other side of a river or lake without a bridge being present. These idiots will walk the entire way around, any way they can, and end up starving or freezing to death. Always build the bridge first and pause any construction on the other side for this reason.
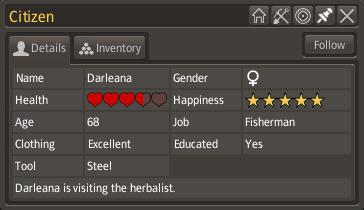
So what do health and happiness mean?
Health is determined by a citizen’s diet, whether they’re getting a varied range of food types and not all you can eat venison from their closest barn. There are 4 food types, as shown in the table below. A high health score can be maintained by producing food of all 4 types and having your citizens live inside the radius of a Market. The Market means that citizens take a selection of different foods back to their houses. If your Citizens have low health, you will experience more frequent outbreaks of disease. As long as you have enough Hospitals however, this isn’t really an issue.
Happiness is determined by how well the citizens are provided for. Citizens with access to food, clothes and tools will be happy. Citizens who aren’t so well supplied will be unhappy. Happiness decreases when citizens are starving or freezing and also fluctuates around times such as a family member’s death and a baby being born. When a citizen is unhappy, they are more likely to idle which means wasting time standing around instead of working. This obviously has a negative effect on productivity.
With all that said, I don’t think you should be concerned about health and happiness at all. Food production, resource production and population control are much more important aspects of the game to focus on. I also don’t think I have ever dropped below 3.5 overall health or happiness, and this is without really trying, so it’s not something that requires constant upkeep.
There are a number of buildings that improve your health and happiness scores, which I go over in the next section. I see them all as fairly unnecessary for the above reasons. They’re worth building if you have the spare resources, just never as a priority.
Produces herbs and uses them to give low health citizens a minor boost in health.
Chapel
Increases happiness of up to 200 people per Chapel.
Cemetery
Negates the dip in happiness citizens receive when a family member dies, but only if there is room for a grave.
Tavern
Produces ale which increases happiness.
Mine/Quarry
Produce iron and stone respectively. They take up a large amount of space which you can never get back, require a lot of workers to produce a good amount, and everyone who lives near them has reduced happiness. Both of these buildings are made redundant by the ease of trading for resources with the Trading Post.
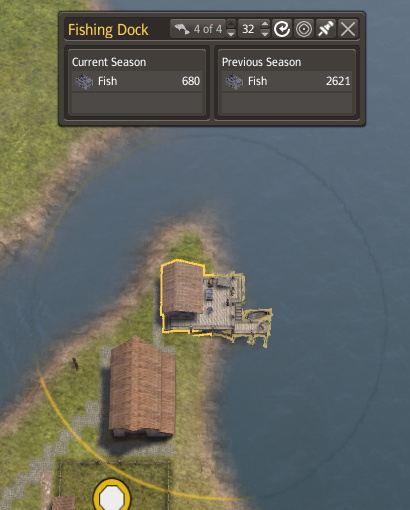
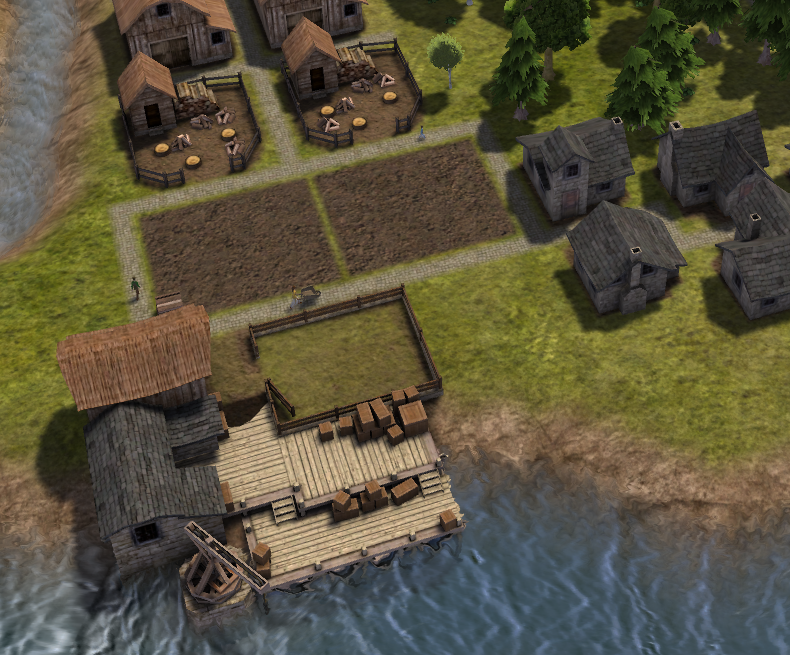
The above is an ideal spot for a Fishing Dock, it has around 70% water coverage and produces 2500+ fish per year. Outcrops like this are uncommon, take advantage of them and put a dock on them.
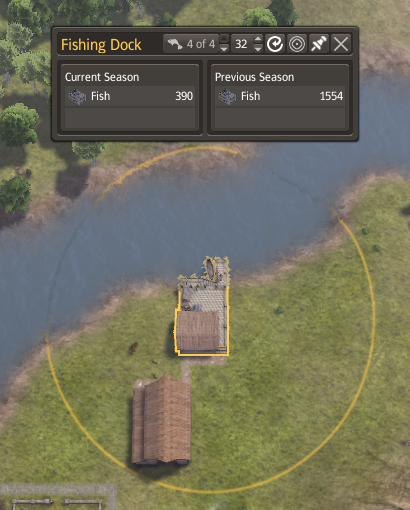
The above is a poor spot for a Fishing Dock, with only around 40% water coverage. With storage and workers living close by, it can produce 1500 fish per year which is respectable but pails in comparison to other docks.
Size calculator[banishedinfo.com]
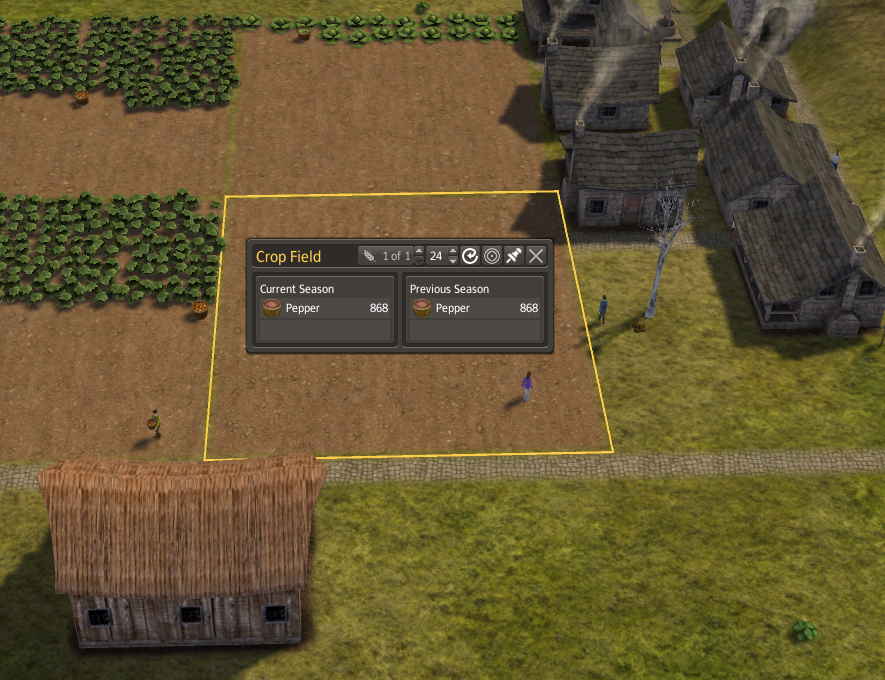
868 food from one worker with an 11×11 Crop Field.
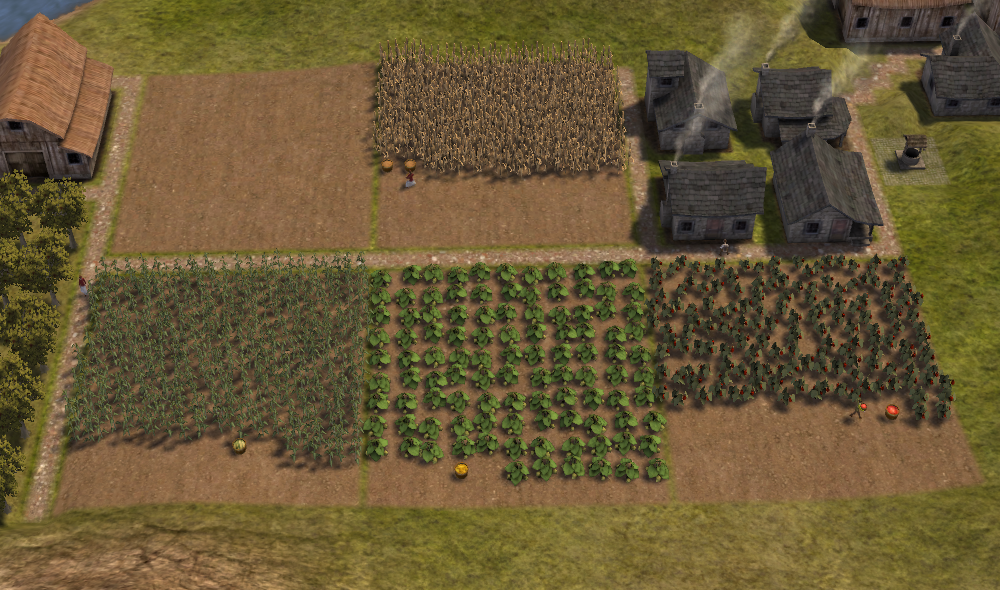
My beans (top left), finished harvesting before anything else.
There is also the fact that corn and wheat count as grains and not vegetables. Since having different types of foods increases the citizens’ health, it’s a good idea to be growing one of the two.
All this is well and good but ultimately, you are limited to whichever seeds you have.
Sometimes a Crop Field will become infested, in which case the food will be lost. The infestation can spread to nearby fields growing the same crop, therefore it is wise to not place two of the same type of field next to each other and alternate seeds types instead.
If you stop building houses, you will experience a decline in the population later down the line. The longer you stop building houses for, the worse it will be. You can see the distribution of your population on the General Statistics window, if there are a very small number of children to adults, you’re heading towards a crash and should start building houses immediately.
Only ~60 young people to ~460 adults, a huge decline is coming.
Population is quite a confusing thing to manage but generally, you can’t go wrong with building at least one house a year. As the population increases, you will need to build more than one house a year to maintain population growth.
It’s very likely you will experience population decline at some point in playing Banished. Suddenly a large number of your citizens will die of old age and you will be left with 100 less people than only a few years ago. Don’t worry though, this is rarely the end for your town. Unless all your citizens are now very old, your population will gradually come back. There are also nomads, who will come if you have built the Town Hall, and can instantly boost your population.
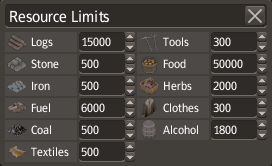
When it comes to tools and clothes, a value of 50 is more than enough for the early game. For firewood, look at the consumption statistics in the Town Hall if you have one. Otherwise, try to calculate it based on the number of houses x 25 (the amount used by wooden houses each year), plus a little extra.
The limit on food production should be a little higher than what your town consumes. Problems arise when there are not enough barns to store the food in. If all the barns are full, there will be nowhere for other producers like the Blacksmith to store their tools. This is quite a unique issue you will likely only encounter very late game however.
Workers who have reached their resource limit will behave like labourers until the reserves come down again. This means they will help out with harvesting resources, moving resources and building roads.