A ranking for the common man, grading every unit based on T3 upgrades only.
S Tier

Glaive Ricochet – A+
Gold standard for swarm control, auto-seeking with high pierce. The crosspaths are equally good.
Bionic Boomerang – S-
High Blimp damage without sacrificing crowd control, a rare middle ground that isn’t worse than the extremes it imitates.
Kylie Boomerang – B
Weaker without Moab Press, Kylie is still high-power on straight line lanes.

Arcane Mastery – D+
Not quite bad, but it’s more a stepping stone to Arcane Spike. A simple power/range buff.
Dragon’s Breath – S
Annihilates almost anything, especially with top crosspath for double damage. Bottom is useful for DDTs, but not mandatory since we get…
Shimmer – S
One of the more reliable decamos, and lets you keep Wall Of Fire to boot. This opens your team comp to include otherwise-unviable unit combos.
Laser Cannon – D
It’s a weaker version of X-3-X, without Plasma Accelerator this becomes a money sink. Popping ice is irrelevant since middle already does that too, and better.
Hydra Rocket Pods – S+
Hits nearly everything for massive damage and pierce, and stops camos. Even with the nerf that doesn’t let it pop blacks, this unit only went from broken to amazing.
Buckshot – C-
Decent damage and knockback, but only that. Like Laser Cannon, it’s more a prerequisite for the T4 version. Even when wider shots would be better, it doesn’t have the crowd control to justify itself.

Sun Avatar – A
Very expensive, but the strongest tower you’ll get for a very long time. If you’re trying to win by having more lives at Round 40, this is what you pick.
Robo Monkey – D-
Dumpster-ed by the limit of 3 units, Robo either deals crap damage or can’t deal with camos without a support unit. By the time you can get 2-3-0 with camo detection, you’ll need blimp damage more than rapid-fire shots.
Dark Knight – S+
Cheaper and better than Robo, with extra blimp damage and teleport for emergencies. And typically, 3 Dark Knights will be preferred to a Sun Avatar unless your aim is overkill.
A Tier

Submerge And Support – A+
The other reliable T3 decamo, though the inability to attack nerfs it compared to Shimmer. But since Sub is a functional unit outside of this (unlike Village), there’s no problems using it.
Ballistic Missile – C+
Decent for leads/ceramics, if nothing else. Generally ignored in favor of Bottom path, but can cover a blind spot in a pinch.
Triple Guns – B-
Triple Guns itself isn’t that strong, it’s Airburst Darts. Triple Guns is used when you run out of room, since AP Darts isn’t an option yet.

Destroyer – S
3-2-0 needs decamo, but makes up for raw firepower otherwise. Even blimps struggle if both sides can hit bloons, as do the ceramics.
Cannon Ship – B-
Cheap and weak, but keeps your 0-2-2s relevant longer without selling. Leads into Monkey Pirates, eventually letting you troll early DDT sends.
Merchantman – C-
The other 0-2-2 path, round income is usually worse than time-based in Battles 2. Merchants only give 300 a round, so it’s more of a delayed refund than a money printer. But it’s still an good attacking unit, which makes it better than a Farm.

Sprockets – D+
Same as Arcane Mastery, a cheap power bump on a unit that doesn’t do much with it. 3-0-2 turrets have pin, which doesn’t make it terrible.
Cleansing Foam – A
Weaker decamo, but you can get multiple Engineers to make up for it. Also removes regrow/leads, so it’s a godsend if you have a high-power roster with lots of vulnerabilities.
Double Gun – A
Surprisingly powerful against swarms, with high pierce/speed/stun making a nasty wall of defense. This is how you do a power bump.

Berserker Brew – A
Alch doesn’t handle Camos at all, but it doesn’t need to. Berserker Brew lets units with innate camo detection solo the waves.
Unstable Concoction – B
Bigger blimps are dangerous as they spawn faster and faster children, which this path goes a long way towards stopping.
Lead To Gold – C?
Very situational, but a delicious sucker punch when you’re otherwise weak to lead.
 Camolead by technicality, with 2-X-X and nonstandard pop methods. With shorter tracks and importance of independent towers, Spike Factories are used more for raw power than a safety net.
Spiked Balls – S
Deletes ceramics and swarms alike, it’s very hard to get something past a couple of 3-2-0 Spactory.
Moab Shredr – D+
There’s better options for blimp damage, even Spiked Balls are good enough to handle them.
Long Life Spikes – C-
If you want to use Spike Factories as intended by the Catholic Church.
B Tier
 High power but needs a lot of support, it’s not the indestructible force of nature that Redditors would have you believe.
Hot Shots – C+
Damage boost and pops leads, but Tack Shooter usually isn’t your lead popper anyway.
Blade Shooter – A-
Very high pierce, though it becomes irrelevant past a certain point. Good when paired with a late game unit.
Tack Sprayer – B+
Higher DPS from more tacks, lower pierce. Does better with buffs from Alchemist.
 Super cheap, it falls off hard later on. But they’re easy to spam with a camo sidegrade, and often underestimated.
Spike-O-Pult – A-
In a cluster-heavy environment, Spike-O-Pult is king. Can’t pop leads until T4, but everything else gets blown away. Cherry on top if there’s walls in the map.
Triple Shot – D+
Outclassed by the other two, no Super Monkey Fan Club means this path is a wash.
Crossbow – B+
High pierce and speed, picking between Top and Bottom path is a matter of preference.
 Usually used with Pursuit, which cuts versatility and affordability by a lot. Micro expands options quite a bit, but takes a certain kind of player to put up with it.
Razor Rotors: C-
Damage/antilead bump. Comes with Pursuit, so it’s not out-of-the-way to get.
Downdraft: S-
Sends waves back where they started, effectively doubling or tripling the track length. Heli becomes a godly support unit with this.
Moab Shove: D-B
Strength varies wildly, based on the user’s ability to micro (with 0-2-3, no pursuit with better shove) and the opponent’s blimp spam. Best used with short-range damage dealers like Dragon’s Breath.
 Sniper is strong in general, but better against single strong bloons than many mid-tier bloons.
Deadly Precision – C-
Ceramics come too fast for Sniper’s one-shots to handle it.
Bouncing Bullet – B
Kind of a sleeper, try setting to Last for shrapnel to bounce forwards instead of backwards.
Semi Automatic – B-
Decent for waves, competes with Bouncing Bullet and lags behind a bit. Easier to class with 1-X-X, which may be better for lead.
 Set 2-X-X to Close to circumvent the slow firing bug. Decent but not spectacular in every path, Obyn is mandatory if you’re running Druid.
Druid Of The Storm: A-
Sends bloons to the start, kind of slow but wave resets are amazing.
Druid Of The Jungle: B
Would be S if it weren’t nerfed, but pretty good regardless.
Druid Of Wrath: C-
Stepping stone to Poplust, weak on it’s own.
C Tier
 Radar Scanner is the most reliable anti-camo measure. but it’s a big space/money/damage loss. It’s a band-aid that can be avoided with proper decamo & planning.
Primary Training: C
Seems like a troll pick, but not a bad idea if you have two Primary units like Bombs/Tacks or Boomer/Dart that need Radar Scanner badly.
Monkey Intelligence Bureau: C-
Band-Aid Deluxe, it’s usually used to help powerful units like Spectre/Tack Zone to hit Lead or Purples along with camo. But at a low level, those units are locked behind T4/T5 upgrades .
Monkey Town: C+
Got a big change, costs 5000 and boosts bloon eco by 10% each. Small by itself, but the Drums/Radar are nice enough to justify the detour.
 Ace is kind of bad without T4s, but there’s still something worth using in the pile.
Fighter Plane: C-
Good blimp damage, but doesn’t keep up with the bigger ones or touch DDTs.
Bomber Ace: E
Garbage.
Neva-Miss Targeting: A+
Broken with Alchemist since it gets lead popping and massive power. By itself, still a powerhouse but you’ll usually have a higher priority unit.
 The cooler Tack Shooter. Thrives early with 2-1-0 and late with T4 Embrittlement/Icicles, T3 is the awkward puberty phase for Ice Monkey.
Ice Shards: C
Depends on having someone who can pop frozens, to set off the chain reaction. Good power if the condition’s met.
Arctic Wind: C-
Large radius and pierce, but doesn’t give anything that 2-1-0 isn’t already helping with. Space isn’t enough of an issue to use the water freezing platform.
Cryo Cannon: C
Just okay without Icicles.
 Middling unit unless you pair it with Striker Jones. With him, black bloon immunity eventually means nothing. Even DDTs fall to the mighty bombers.
Really Big Bombs: C
Straight damage buff, boosts frags too. Not much else.
Moab Mauler: C+
A couple of these destroys most blimps, and aren’t terrible for cleanup either.
Cluster Bombs: B
Swarm sweeper, still hurts blimps. Both sidepaths are good, squeezing a bit more versatility from it.
 Inherent camo detection is nice, which makes Ninja easy to fit into a team. But at the lower tiers, it’s kind of a waste of space. X-2-X is unreliable decamo.
Double Shot: C-
Cheap damage bump, stepping stone to Bloonjutsu. By itself, isn’t worth much.
Shinobi Tactics: D
Got changed to cost double, but only take 10 stacks to hit maximum. This makes up for the smaller map sizes, but Shinobi Tactics is usually used to buff a T5 Ninja anyways.
Flash Bomb: C+
Stuns large crowd and lets Ninjas hit lead, but overpriced. Might be a good troll with Shinobi+Flash spam, but blimps are unaffected.
 Mortar can be micro-heavy and relies a lot on T4 upgrades, which lands it low on the tier list. But if you can’t handle them at their Heavy Shells, you don’t deserve their Shattering Shells.
Shell Shock: D+
Stun isn’t that strong, but it’s nice for your other units to take advantage of. There’s no maps like Moon Landing that let you abuse it.
Heavy Shells: C-
Buffed by stuns, which lets Mortars self-synergize. But the bonus damage to troublesome bloon types means more, unless you’re leaning hard into stuns with Ninja/T4 Bomb.
Signal Flare: B-
The least reliable form of decamo is still decamo. Get multiple so purple camo swarms don’t slide part.
D Tier
 Banana Farm suffers from obsolescence. Eco’s too good to add a tower devoted to money, at the cost of any pop power or camo detection. Could work for troll strats like lategame Super Monkey spam, or to have income after sending DDT swarms, but not a normal loadout.
Banana Plantation – E
Manual collection without Monkey Farmers is a pain, and Monkey Bank makes more money. Don’t bother.
Monkey Bank – C
Monkey Bank collects faster than anything else, with the restriction of time-locking withdrawals and slight micro.
Marketplace – D+
Easy money, but it’s still a banana farm. It produces more than BTD6, so this is for the non-bank gang.
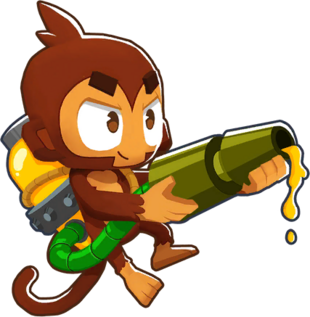
Bloon Dissolver – D
A middling bridge to Bloon Liquifier, Bloon Dissolver by itself is nothing noteworthy. Decent cleanup, but many units do it better while hurting blimps too.
Glue Hose – D+
Mass gluing action sounds good, since Battles 2 loves throwing swarms. But it has to pick between pierce and longevity, and can’t run both since the glue conflicts. So you need a frontloaded defense, or more crowd control for the crowd controlling unit.
Moab Glue – C+
The only way to slow blimps early on, being an indirect buff to damage dealers. But with inability to affect BADs, and Glue Gunner’s other baggage, it’s not worth it.
