Here’s where to find your screenshots taken with the photo mode in CityDriver and more useful information.
TL;DR: Here’s the folder you’re looking for
Please, keep in mind that you have to either change *YourUserName* into the actual user name, which you’re using on your system or simply follow the path manually and click on you the folder with your user name.
Note, that the Screenshots are always labelled in the following naming convention HighresScreenshot[Sequential Number]
e.g.: “HighresScreenshot00000”, “HighresScreenshot00001”, “HighresScreenshot00002”, etc.
Should you delete or move a screenshot from this folder and create a new screenshot in the game, the screenshot will be labelled as the next missing screenshot in the sequence and not incrementally. So, if you delete or move HighresScreenshot00001 in between HighresScreenshot00000 and HighresScreenshot00002, the next new screenshot will be labelled HighresScreenshot00001 and not HighresScreenshot00003.
How to take screenshots
To open the photo mode in CityDriver simply start a game session and press the O key at any time. And to then take screenshots you just need to hit Enter on your keyboard. You can activate the photo mode outside the vehicle on foot, inside the vehicle in first person, third person and any other default camera perspective too – but not in the main menu and its submenus.
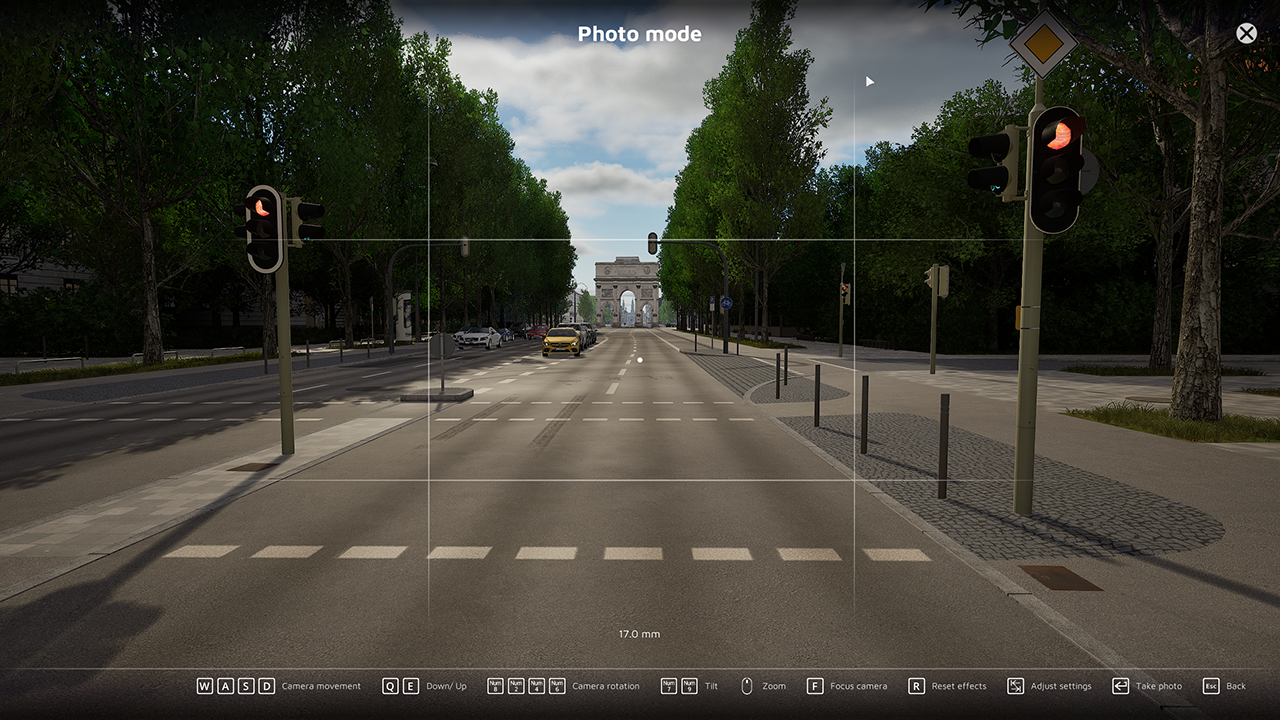 All functions can not only be used with hotkeys but can of course also be used with the mouse.
The camera movement can be controlled via W, A, S and D keys on your keyboard.
Q and E will change the height of your camera.
On the Numpad (that is if you have a keyboard with a Numpad) you can control the camera’s rotation via Num8, Num2, Num4 and Num6. However, you can also your mouse’ movement to control where the camera is looking by holding the left mouse button while moving your mouse.
Num7 and Num9 control the tilt of the camera.
Note, the camera of the photo mode does not have any collision with most assets of the game on purpose to allow for freedom of movement to find the perfect angle for your screenshots.
You zoom the camera’s view in and out scrolling the mouse wheel up or down.
You can either auto-focus the camera (shortcut F key)or set the focus manually in the “Adjust settings” submenu. more on this later.
However, the auto-focus works best if there is an object in the centre of the camera (crosshair dot in the centre of the screen) has a collision. This works fine outside of the vehicle as most objects in the game world have collisions (not all of them to save performance though). Inside a vehicle, though you will probably struggle to get the auto-focus working as most of the assets actually don’t have any collision (again to save performance). It’s best to adjust the focus manually in this situation via the “Adjust settings” submenu.
And if you want to exit the photo mode and return to gameplay just hit the Esc key or click the X in the top right corner of the screen.
Adjust settings
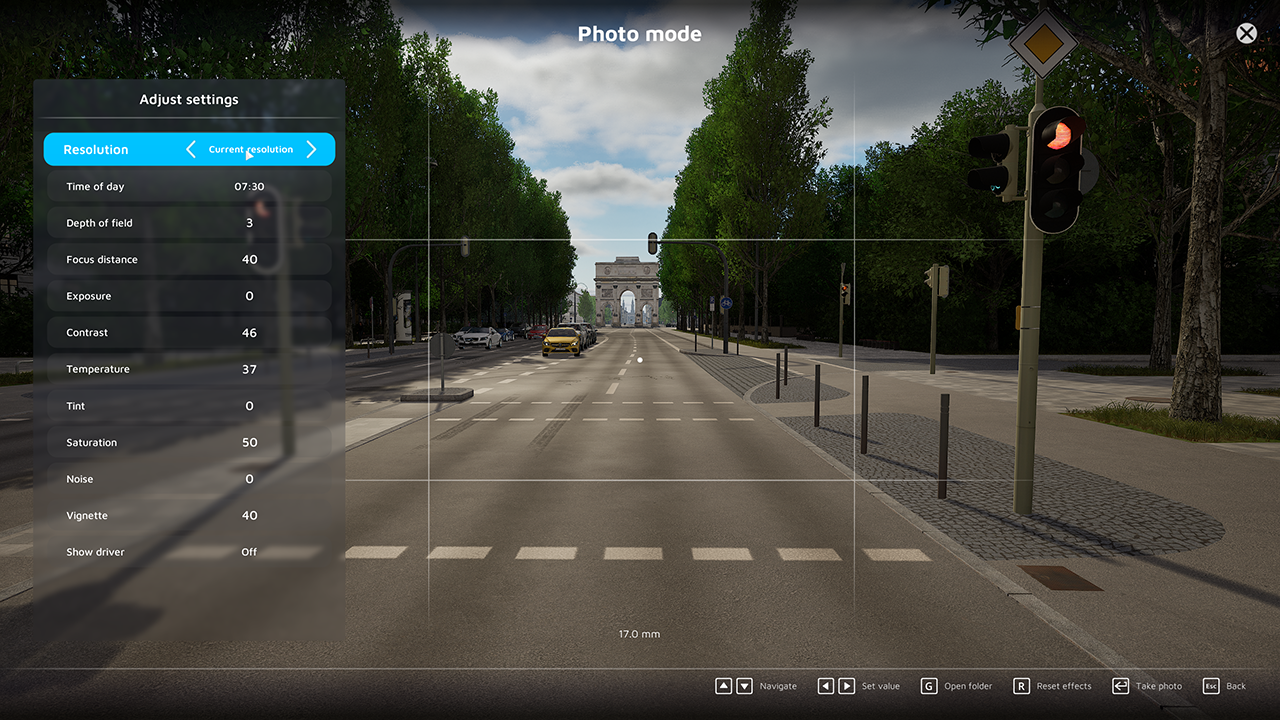
Here you can either use your currently set resolution, or choose a lower or higher resolution. Please, keep in mind that a higher resolution will take longer to render/take the screenshot and in the worst case, the game might crash due to insufficient memory (VRAM or RAM) in your PC system.
Despite the actual time of day in the game, you can change the time of day for the photo mode individually to get the best daylight for your screenshot. Exiting the photo mode will set the time of day back to the previous time during gameplay.
Depth of field is how much of your image is in focus (in general).
What Is Depth of Field in Photography?[www.masterclass.com]
Focusing distance is the distance from the focusing plane to the subject, which can result in the foreground or background being out of focus, but the subject can remain in focus.
Exposure is the amount of light which reaches your camera sensor or film, which will result in a darker or brighter image.
The contrast here is the visual ratio of different tones in an image.
As in colour temperature. The higher the number, the “colder” or whiter the colour of the light.
A Photographer’s Guide to Color Temperature[medium.com]
Tints the image overall towards other colour spectrums.
Saturation describes the intensity of the colour.
This is the amount of noise (tiny particles, grains or similar) in the image.
The vignette is a dark gradient from the border of the screen towards the centre, which you can adjust with this option. For more details on this, see https://en.wikipedia.org/wiki/Vignetting
Here you can change the visibility of the driver model inside your vehicle if you activated the photo mode after you’ve entered the vehicle. This option won’t have any effect if you’ve activated the photo mode while walking on foot.
If you change these graphical settings, you can’t apply them to the actual game graphics when quitting the photo mode.
As of writing the screenshot folder can be opened in CityDriver only via the Photomode (hotkey O), where you can find the option (hidden) inside the “Adjust settings” submenu (hotkey Tab).
Inside the “Adjust settings” submenu you can find the “Open folder” button (hotkey G), which will open an explorer window at the correct location: C:\Users\*YourUserName*\AppData\Local\CityDriver\Saved\Screenshots\Windows
That’s all for now
Feel free to share your screenshots here on Steam or over on our Community Discord: https://discord.gg/viewapp-community