Version 1.0.11 | Just a quick guide to help newbies; Warning! has pictures.
Will try to not go much into details.
General

Your position on the current map. Can be found in the middle of your screen.
The coordinates are read :: Area – Line – ( X – Y – Z)

If you click on it, you can change to another line.
If there are few/no players, there will be little or no extra lines.
Can be found at the upper left corner.
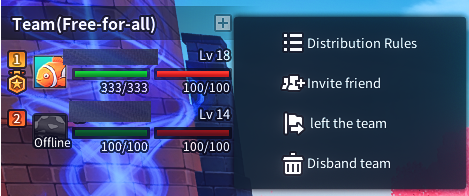
The team box. Will only show up if you’re in a team.
If you click on the +, the secondary options will show up.
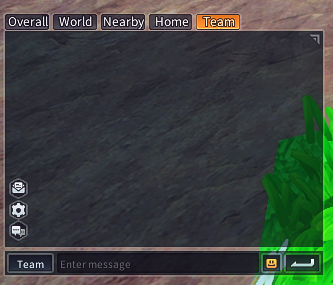
- Your chat box. Can be found at lower left corner.
- The envelope lets you know if you have any mail.
- The gear lets you control what shows up in current tab of chat.
- The talk bubble brings up your private messages UI.

Your hotbar and info. Can be found at the bottom of the screen.
- Stamina is consumed when you run, climb, dodge.
- Hunger is consumed when you are hurt and is used to regen hp. BUT, only at 80+. This makes the hunger bar completely useless below 80. If you have 0 hunger you will slowly lose hp and die.
===========================================
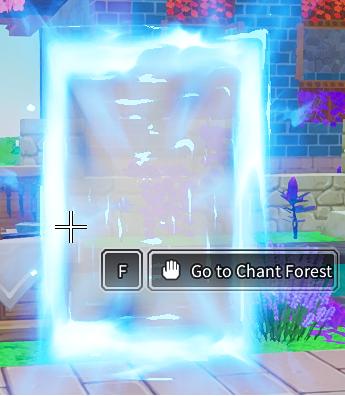
A portal that lead to a higher level area. You can use any portal at anybody’s home.
Or, you can make your own by combining 10 chant shards at the crafting table.
It’ll disappear after 2 hours
=============================================
- Gears lose durability if you die while equipped.
- Unequipped gears and die to teleport fast back to spawn spot.
- Sprinting and jumping lets you move 30% – 40% further than sprinting alone
- When on a mount, fall distance for damage is greatly increase
- There is a “Resonite Stone” you can craft from bag for 3 gravel to teleport you home.
- Don’t forget you can climb with R if you fall down in a ravine.
- Aggro on mobs is very far and high if you are below their level. This range decreases as your level gets higher than the mobs. At 10 levels higher than the mob it will no longer aggro you.
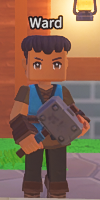
- Ward’s house has an assembly table, craft table, and artisan table
- Stay away from Mora’s closet of death. You will get stuck in there.
Classes
 SnS(sword and shield) is the tank class. The #1 important rule for tank class is to have the correct elemental armor against the bosses in dungeons. SnS is great for farming mobs in the world at later levels. They can stack mobs which makes them really efficient.

 The archer is the main DD(damage dealer). It is really straightforward. It has great range and does good damage. Has a charge shot and a quick shot. Does great against normal mobs and elemental mobs.
 The mage is mainly a healer class. It is a must for dungeon bosses. Has a clutter bag because they must carry all elemental wands. Currently, the mage does not have any offhand extra skills besides heal. It excels at fighting tanky and range mobs in the world.
====================================================================
Weapon talent can start gaining xp once you are level 10 and are using copper or higher gears.
You must equipped both main and offhand to received experience. Xp is gained by killing mobs no lower than 6 levels below you.
Weapons do not share talent points and can be reset individually for the cost of white dragonite. This cost increases as you increase any weapon talent level.
Unfortunately, weapon talents do not make or break. Since it takes a very long time to get where it actually matters due to limited weapon xp per day. And most weapon talents are pretty useless untl the very end.
Life Skills
It is recommended to take the profession that coincides with the main class you want to use. For, when you craft an epic gear it is automatically bound to you and cannot be unbound except with real money.
Life skills points are obtained at 3, 6, 9, then every odd level.
The blacksmith makes all weapons. They also make gears for the tank class. Can mine advance ores and smelt ores into ingots. Create weapons or metal armor to level up profession.

The tailor makes gear for the mage. Supply resources for bandages. Can harvest advance forages. Make advance threads and cloths. Make cloth armors to level up profession.

The hunter makes gear for the archer. Skin advance mobs. Make advance leather. Make leather armors to level up profession.

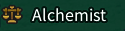
The alchemist makes potions. Can sometimes get a vigor potion randomly. This is the most important profession as some of the potions are a necessity and is the only way to get vigor potions.
The farmer grows crops. The crops are used mainly for alchemy, and cooking. Most crops are worthless besides the basic ones. All crops takes a long time to grow.

The first time you take care of any crop it will double the yield. Anytime after that it decrease wait time to harvest. Some crops require loam before you can plant them. The loams are dirt piles you can find in world.
This profession does not cost any life points and can only be level up through a specific Home Quest.
The carpenter makes furniture and buildings. Furniture sometimes require rare materials from dungeons. This profession does not cost any life points. Make furniture to level up.
By far the most useless profession ever. The food gives stat buffs for 1 hour but you have to eat it at your home on a table. The food cost a lot of resources and labor. They also rot very quick. They do not sell very well either.

This profession does not cost any life points. Make dishes not from the basic recipe tab to level up.
Home and Shop
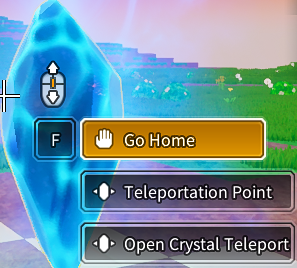 Go Home – MUST finish tutorial. Go to any crystal and chose go home. Another interface will pop up. Then click on the “Back to my home”
Teleportation Point – Sets your designated spawn if you die, leave your home, or use a resonite stone.
Open crystal teleport – Lets you warp to other crystals, for a fee of white dragonite. The first time, at a new crystal, it will say “activate crystal teleport” instead. Make sure to activate it to be able to teleport there.
- 2 modes while at home. “Battle mode” and “Build mode”. Switch by pressing F5.
- Give friends permission to build/use some utility by pressing H and enabling.
- Accessing home screen is at top right.
- F7 access the cash shop.
============================================================

Type in another player’s UID# in th field next to “Go Home” and click on “Go home”, to visit their place. For groups it’s G#. Get the UID# by inspecting player, clicking on name in chat, or them giving you UID#.
Don’t forget to favorite a place on the top right so you won’t have type in UID# again.
============================================================
Inspect a player and chose “Co-Build Home”
============================================================
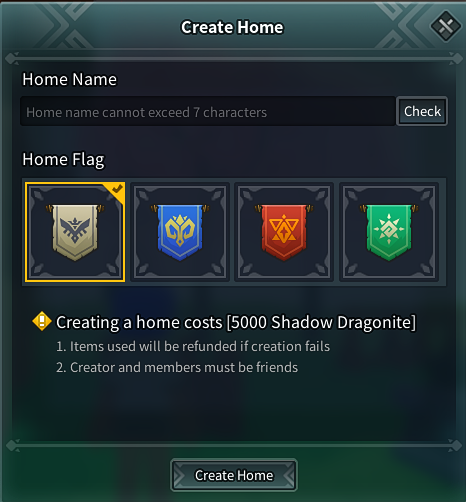
These are your money in this game. There are 2 kind of dragonite; Shadow Dragonite(sd) and White Dragonite(wd). Sd is the main currency and is tradable between players. Wd is not. But you can convert sd into wd from your bag ui.
Shadow Dragonite
Sd can only be generated from “Home Quests.” or by trading/selling.
Afaik, Sd has no use beyond interacting with players and converting to wd.

White Dragonite
Wd comes from quests and mobs will seldom drop them too.
You can also get 200 wd from the cash shop under item tab daily for 1 home coin.
Wd is needed to repair gears, teleport, craft, and npc shops.

Home Coins
These are also only generated by “Home Quests.“.
They are used specifically for the home shop by Izan.

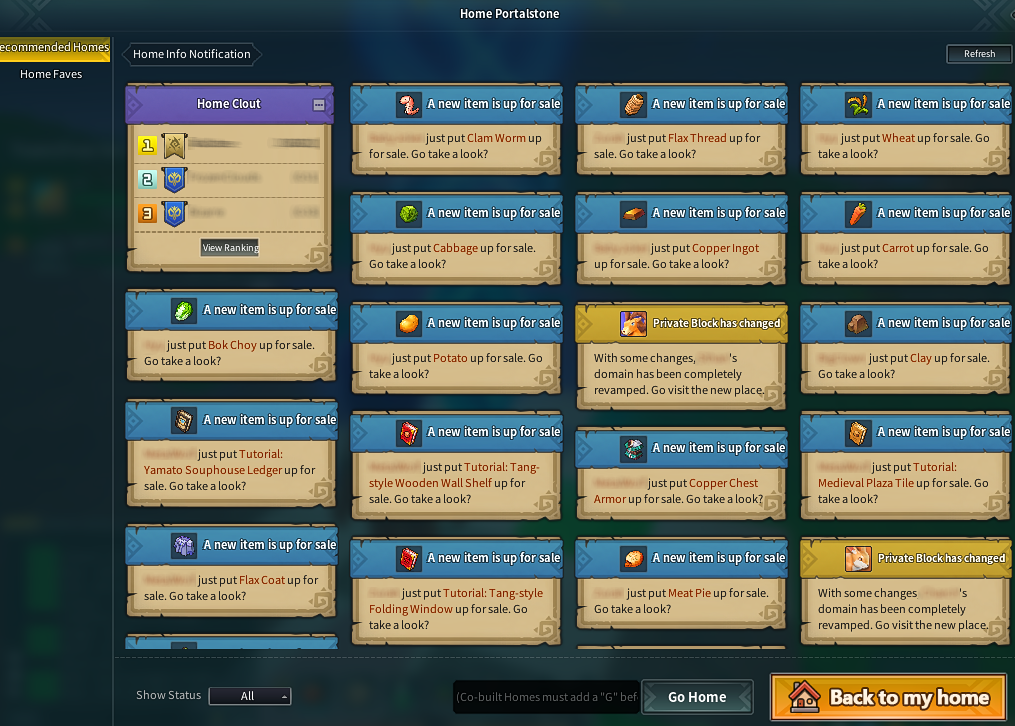
This is the same screen when you inspect crystal and chose go home. It shows all the current players who just recently put up stuff for sale. See something interesting? just highlight and click go.
 To sell something you need a stall. Can be crafted at the “Crafting Table” under “functions” tab. Placed stall down in “Build Mode”. Inspect it with F and put stuff up for sale. The pricing is per unit.
Once something is sold, collect the money by inspecting stall and chose collect.
Quests
Home Quests – These are from Izan and they reset once per day. Only 3 quests need to be completed to turn in to Izan but try to finish as much as possible. At first you won’t be able to do some quests, specifically the mystery realms one, but as you level up it’ll get easier.
Main source of experience, shadow dragonite/white dragonite, home coins, and weapon talent xp. These can take a long time to finish if you don’t know how to play the system. But, with these knowledge, you can finish all of them in as little as 1 hour.
=============================================
You can abandon the home quest from Izan, and retake it to reroll different quests that you get from quest givers. This is very important when you are new as you won’t be able to easily do some of the quests.
Important for rerolling….
- Food quests from Larry/Mora (sponge cake, coconut toast..etc)
- Rare potion quests from Hazael
- Changing mystery dungeon quests from mobs to forage or vice versa
- Ward’s hard furniture crafts into easier one
This game has a bad and blatant DGDB(dynamic game difficulty balance). In the common language, players call it rigged or scripted. This is first noticeable when you encounter the “Carrot” quest where carrots suddenly become a myth. So, here are some tips.
================================================
- If quest target spawns at tutorial island go gather there; as tutorial island MUST spawn these to not deter away new players. Another reason, you are not the first person there, so the spawns has already been registered and cannot be readjusted towards you else it’ll be completely obvious. Although, if you do wander too far off it’ll revert to adjusting to you.
- If you are the first person to appear in an area, the game will give a bad roll to spawn rate of the quest forage/mob. Do not wander around aimlessly as the game knows what you are looking for. It will not prioritized spawning quest targets.
- Stay in area if you know quest target spawn there and get rid of other things. This seems to be what the game wants you to do. Quest target will magically appear again. It’s usually off screen or behind you, so rotate camera often.
- These quests can be used to your advantage to gather other items like herbs, flax, copper, etc.. at 2x – 3x the normal rate. Since, these other stuff takes the place of your quest spawn.
- Depending on the situation and what you need, stay in a busy line or move to an empty line.
- Go to where you know it is the only spawn. Mudrots by the dock/marsh. Mushrooms/boars at cedar woods. Forage mushrooms just to the south of Watchtower.
- It is often better to consume some wd to teleporting to the correct place than to wander around hoping for RNG to be with you and wasting time.
- If you have a quest that requires a certain item that drops from a mob(egg, milk, animal hide…etc) and doesn’t require you to collect as a task. Don’t take it yet, but remember what you need. Go and kill the mobs for the items first.
=====================================================
I’m not positive, since I will not pry/mine because it’s an indie game, but from observation, I believe your quests mobs/forages are despawned as you approach and your quest drops get a heavy nerf. But don’t spite, bad DGDB is quite common, even in big AAA games.
Then after dead boss, everybody shares the same loot. There is no loot roll. Most parties are generous and will split fairly, but there are some where master looter will just take. This is more common in the later dungeons and hard mode dungeons where the loot is rare.
Even though the dungeons have minimum level entrance, it is recommended to be a couple levels higher. Else, you will get swatted in one to two shot by elite mobs/boss and boss fight will take an eternity to complete. Bosses like most other games have an enraged mode when half dead.
Dungeons have a 2h cooldown once you complete them.
Bring Water Armor
Bring Fire Armor
Bring Thunder Armor

Bring Fire Armor
Fishing
Get yourself a fishing rod. You can craft one from the craft menu in your bag or from the crafting table. Then equip it.
========================================================
========================================================
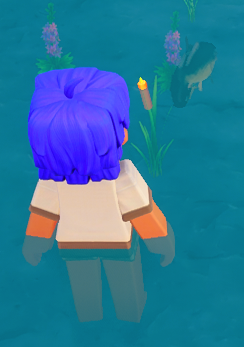
Find a body of water that has fishes in it. You must be able to SEE the fish to actually catch a fish.
========================================================
========================================================
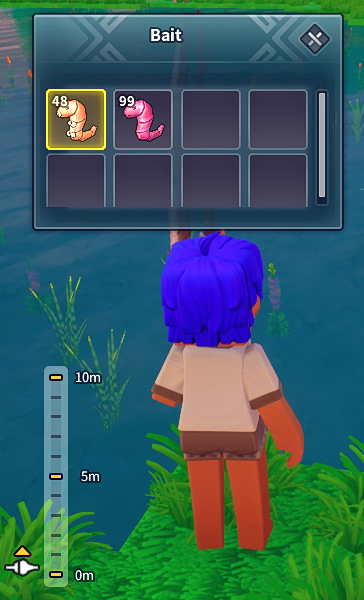
Right-click and configure your bait and depth.
The depth can be adjusted by clicking next to the meter.
========================================================
========================================================
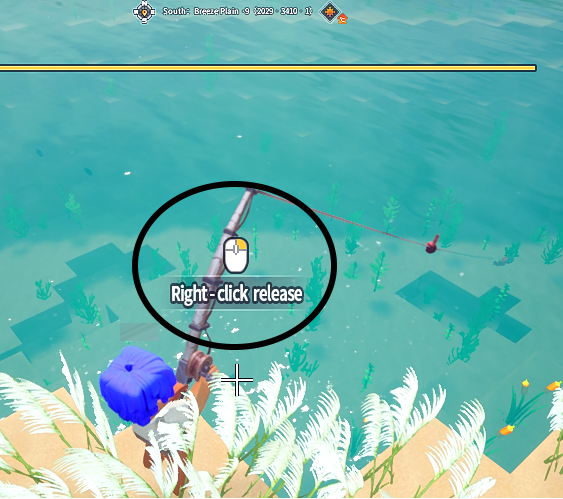
Throw the line next to the fish. It has to be really close to the fish.
If the fish scatters or don’t start biting within 15 seconds recast it.
Do not wait any longer as fishes no longer swim towards bait with recent changes to fishing.
You’ll know when a fish is biting it as it’ll swim right for the lure and stop there.
Then, when the fish starts biting, wait for the splash before pulling the rod.
It’ll also play a splashing noise.

========================================================
========================================================
When fishing a rare fish you’ll have to do a QTE(quick time event). Just follow the direction that pops up till the yellow bar disappear while holding the left mouse button to reel in.
========================================================
========================================================
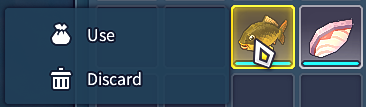
Fishes can be turn into fish meat by right clicking on them in bag and then use.
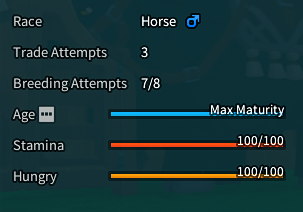
Taming and Breeding
In order to breed you need to build the breeding nest from the crafting table under the mount tab.

Then you have to manually take the mounts with you and put the mounts in there. Breeding takes a long time. The community agrees it’s about 6 hours and have a cool down of 6 hours. If after 6 hours and no baby, restart the breeding by taking a mount out and put it back in. Not sure if it’s a bug or it means that breeding was unsuccessful.
The offspring produced does not inherit any of the parents talents or skills.
Talents are randomly rolled every time and most of the time it’s just bad ones.
A skill can be gotten at hunter hut by talking to Barry. It cost some shadow dragonite and goes up every time. They are all very bad and not worth the cost. If you talk to Barry and try to add another skill it just erases the old one and replace with a new one.
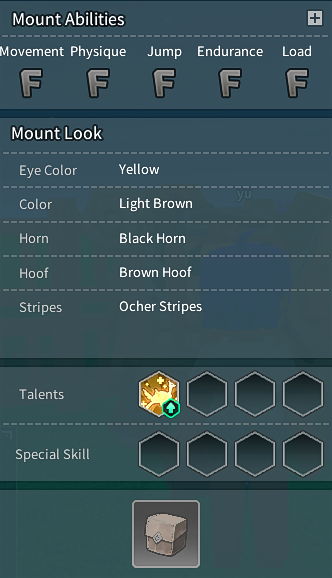
The offspring also inherit the breeding attempt.
As you can see it is no longer 10/10. So, eventually you’ll need to start over with new mounts.
The offspring starts off at level 1 and you will need to level it up to 5 to be able to ride it.
To level it up feed it the same feed you used for taming. It doesn’t matter if it’s full or not.
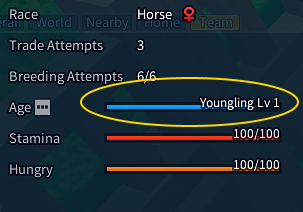
Once it tells you to use a nutrient. You’ll need to feed it a nutrient instead to level it up.
Nutrients can be made from alchemy or bought from other players.


Brewing
Make a Distilling table and place it in your home.

Make a brew barrel and brewing table. Place the brewing table in your home.


Get some produce as materials and wood as fuel.
Wheat, potato, and corn can be used as materials.
Wheat is the fastest as it only takes 10 seconds.
Both potato and corn takes 10 minutes.
Use the distiller and select material of choice.
Then for container, choose the empty barrel.
Then chose desire wood for fuel and select distill.
Once the container is full, remove it and place it on the brew table by highlighting the table and using the barrel.
Make the copper bottle and then use the copper bottle on the barrel.

Alcohol lamp for alchemy.

NPC

Izan – next to your post board

Barry – Very far northeast from post station. Outside the hut.


Tarah – Enter door and up the stairs
Luvina – LEFT of door and up the long stairway


Kenan – East from crystal. Left house.
Michael – East from crystal. Inside left house.
Ward – North from crystal
Iona – West from crystal
Mora – South from crystal


Morrel – East of crystal by door
Cole – Inside, up stairs. Turn north. Go up stone stairs at end of room.
Larry – Inside, up stairs. Turn north. Go all the way up stone stairs at end of room.
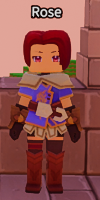
Rose – Inside, up stairs. Turn north. Go all the way up stone stairs at end of room.
Hazael – East of crystal. Go inside.