A comprehensive guide detailing all 201 achievements, how to unlock them, their rewards, and everything else you may find useful on your way to 100%ing Halls of Torment.
Intro
* This guide is to up-to-date and provides accurate information as of 7/25/23.
As the title suggests, this is a comprehensive guide, meaning that I will go into detail for each achievement under each Quest category.
Sections may have multiple parts as there is a character limit for a given section and my goal is to thoroughly explain how to do these quests. 🙂
A general example of how an achievement will be displayed:
Title
Adjacent Quests
Quest Description
Character
Reward
Notes (tips and advice for earning the achievement)
Achievements for each section will be listed in order of row and then column. Example:
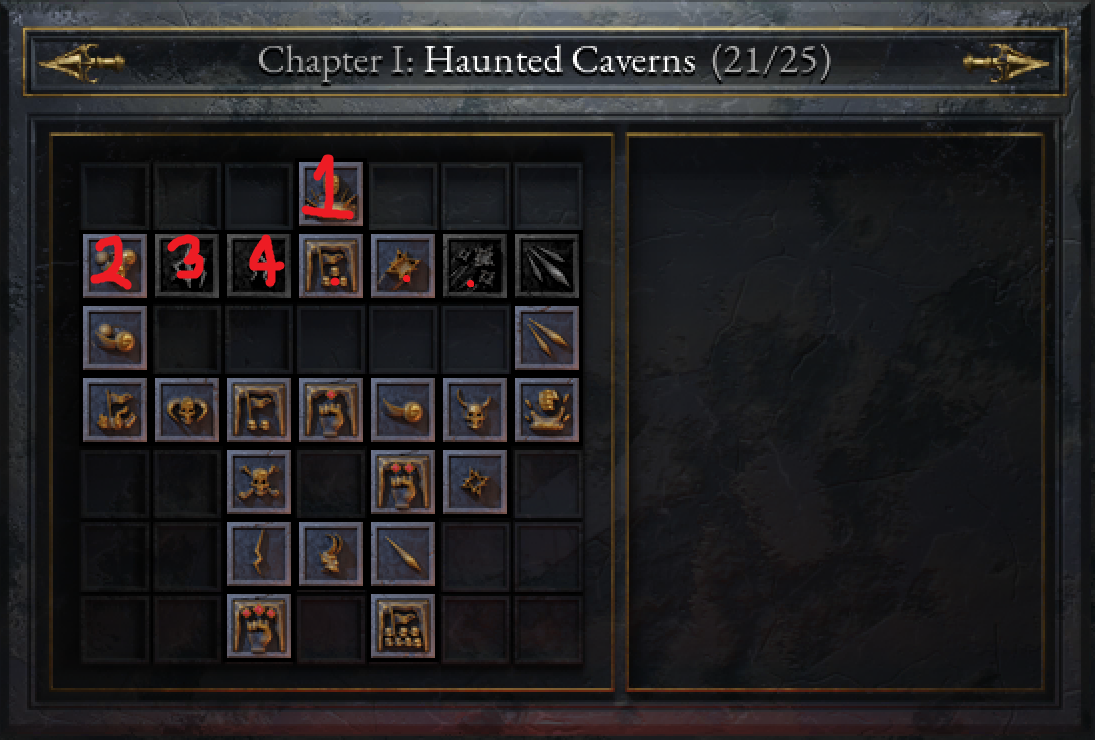 Quests at the top of each section take priority, as do the ones on the left (just like reading a book).
In order to discover certain quests, you will need to complete an adjacent quest (a completed quest that is next to that quest).

For example, I have completed Quest X. Therefore, I have discovered Quest Y. In order to discover Quest Z, I will first need to complete Quest Y.
If you are looking for a specific quest, you can either go to the section wherein your quest lies or you can press ctrl & f at the same time to search for the name of a specific quest in order to find it easier.
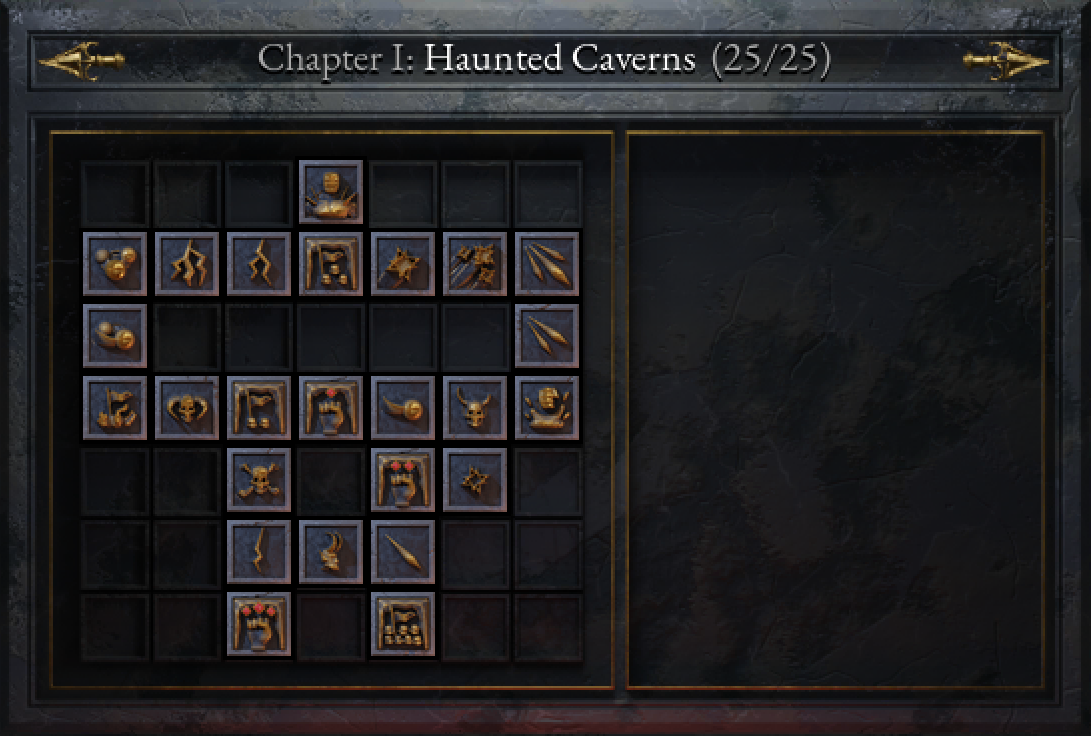
Chapter I: Haunted Caverns (1-15)
 Quests that have an * in the ‘Description’ section indicate that the quest must be completed in one run.
Ability Masteries in this section:
- Arcane Splinter – unlocked by default
- Astronomer’s Orbs – unlocked by default
- Lightning Strike – unlocked by default
- Phantom Needles – unlocked by default
Quest – Lord of Pain
Adjacent Quests – Cavern Dominator II
Description: Defeat the Lord of Pain.
Character: any
Reward: 2000 Gold
Notes: The Lord of Pain will spawn at the end of the 30 minute timer in the Haunted Caverns, which will clear out any remaining monsters and leave you 1 on 1 with him. Upon defeating him, you will have escaped the halls, and unlocked this achievement.
Quest – Astronomer’s Orbs Mastery III
Adjacent Quests – Astronomer’s Orbs Mastery II , Lightning Strike Mastery III
Description: Deal 3,000,000 damage with Astronomer’s Orbs. *
Character: any
Reward: Trait Types: Bodies & Material
Notes: An easy way to do the 3,000,000 damage masteries is to load in to the Forgotten Viaduct and picking up the starting scroll (which you obtain after beating the hall once) and re-rolling until you get the mastery you are trying to achieve. Once you have it, grab both the other scrolls and head to either side of the bridge to fight the group of ghosts. Since they have lots of health, you will be able to easily rack up damage and can get your mastery done.
Quest – Lightning Strike Mastery III
Adjacent Quests – Astronomer’s Orbs Mastery III, Lightning Strike Mastery II
Description: Deal 3,000,000 damage with Lightning Strike. *
Character: any
Reward: Trait Types: Capacity & Repercussion
Notes: An easy way to do the 3,000,000 damage masteries is to load in to the Forgotten Viaduct and picking up the starting scroll (which you obtain after beating the hall once) and re-rolling until you get the mastery you are trying to achieve. Once you have it, grab both the other scrolls and head to either side of the bridge to fight the group of ghosts. Since they have lots of health, you will be able to easily rack up damage and can get your mastery done.
Quest – Lightning Strike Mastery II
Adjacent Quests – Lightning Strike Mastery III, Cavern Dominator II
Description: Deal 1,500,000 damage with Lightning Strike. *
Character: any
Reward: Upgrade: Explosive Strike
Notes: The 1,500,000 damage mastery is fairly easily obtained during any given run without needing to do the bridge ghost strat like in the 3,000,000 damage mastery. Just make sure that you select the ability you’d like to get the mastery with early on and upgrade it as much as you can.
Quest – Cavern Dominator II
Adjacent Quests – Lord of Pain, Lightning Strike Mastery II, Arcane Splinter Mastery II
Description: Kill 15,000 enemies in one run. *
Character: any
Reward: 1000 Gold
Notes: This is able to be done fairly quickly with any character. You will likely complete this quest passively during one of your runs. An easy way to do this is with the Archer for the projectiles and movement speed, allowing you to be able to move quickly and clear enemies fast.
Quest – Arcane Splinter Mastery II
Adjacent Quests – Cavern Dominator II, Arcane Splinter Mastery III
Description: Deal 1,500,000 damage with Arcane Splinter. *
Character: any
Reward: Upgrade: Arcane Unrest
Notes: The 1,500,000 damage mastery is fairly easily obtained during any given run without needing to do the bridge ghost strat like in the 3,000,000 damage mastery. Just make sure that you select the ability you’d like to get the mastery with early on and upgrade it as much as you can.
Quest – Arcane Splinter Mastery III
Adjacent Quests – Arcane Splinter Mastery II, Phantom Needles Mastery III
Description: Deal 3,000,000 damage with Arcane Splinter. *
Character: any
Reward: Trait Types: Split & Fading
Notes: An easy way to do the 3,000,000 damage masteries is to load in to the Forgotten Viaduct and picking up the starting scroll (which you obtain after beating the hall once) and re-rolling until you get the mastery you are trying to achieve. Once you have it, grab both the other scrolls and head to either side of the bridge to fight the group of ghosts. Since they have lots of health, you will be able to easily rack up damage and can get your mastery done.
Quest – Phantom Needles Mastery III
Adjacent Quests – Arcane Splinter Mastery III, Phantom Needles Mastery II
Description: Deal 3,000,000 damage with Phantom Needles. *
Character: any
Reward: Trait Types: Power & Pinpoint
Notes: An easy way to do the 3,000,000 damage masteries is to load in to the Forgotten Viaduct and picking up the starting scroll (which you obtain after beating the hall once) and re-rolling until you get the mastery you are trying to achieve. Once you have it, grab both the other scrolls and head to either side of the bridge to fight the group of ghosts. Since they have lots of health, you will be able to easily rack up damage and can get your mastery done.
Quest – Astronomer’s Orbs Mastery II
Adjacent Quests – Astronomer’s Orbs Mastery III, Hellhound Slayer I
Description: Deal 1,500,000 damage with Astronomer’s Orbs. *
Character: any
Reward: Upgrade: Inner Orbit
Notes: The 1,500,000 damage mastery is fairly easily obtained during any given run without needing to do the bridge ghost strat like in the 3,000,000 damage mastery. Just make sure that you select the ability you’d like to get the mastery with early on and upgrade it as much as you can.
Quest – Phantom Needles Mastery II
Adjacent Quests – Phantom Needles Mastery III, Slime Slayer I
Description: Deal 1,500,000 damage with Phantom Needles. *
Character: any
Reward: Upgrade: Phantom Split
Notes: The 1,500,000 damage mastery is fairly easily obtained during any given run without needing to do the bridge ghost strat like in the 3,000,000 damage mastery. Just make sure that you select the ability you’d like to get the mastery with early on and upgrade it as much as you can.
Quest – Hellhound Slayer I
Adjacent Quests – Astronomer’s Orbs Mastery II, The Lich
Description: Kill 50,000 Hellhounds.
Character: any
Reward: 2000 Gold
Notes: Hellhounds can be found in both the Haunted Caverns and the Ember Grounds. This quest can be completed passively by just doing other quests in these two halls.
Quest – The Lich
Adjacent Quests – Hellhound Slayer I, Cavern Dominator I
Description: Defeat the Lich.
Character: any
Reward: Character: Cleric
Notes: The Lich is an elite enemy that spawns around the 8 minute mark. Upon defeating her you will complete this quest.
Quest – Cavern Dominator I
Adjacent Quests – The Lich, Cavern Survivor I, Skeleton Slayer I
Description: Kill 5,000 enemies in one run. *
Character: any
Reward: 500 Gold
Notes: Will be completed passively during any one of your runs.
Quest – Cavern Survivor I
Adjacent Quests – Cavern Dominator I, Astronomer’s Orbs Mastery I
Description: Survive until there are only 26 minutes left.
Character: any
Reward: Character: Archer
Notes: Simply survive until the timer in the bottom right shows 26:00 on the clock.
Quest – Astronomer’s Orbs Mastery I
Adjacent Quests – Cavern Survivor I, The Skeleton Lord, Cavern Survivor II
Description: Deal 750,000 damage with Astronomer’s Orbs. *
Character: any
Reward: Trait Types: Mass & Density
Notes: 750,000 damage masteries are completed fairly easily. Make sure you select the ability early on, upgrade it, and it should rack up enough damage throughout the rest of your run.
Chapter I: Haunted Caverns (16-25)
Ability Masteries in this section:
- Arcane Splinter – unlocked by default
- Lightning Strike – unlocked by default
- Phantom Needles – unlocked by default
Quest – The Skeleton Lord
Adjacent Quests – Astronomer’s Orbs Mastery I, Slime Slayer I, Arcane Splinter Mastery I
Description: Defeat the Skeleton Lord.
Character: any
Reward: Items: Necromancer’s Clutch
Notes: The Skeleton Lord is an elite enemy that spawns at around the 16 minute mark. Upon defeating him you will complete this quest.
Quest – Slime Slayer I
Adjacent Quests – Phantom Needles Mastery II, The Skeleton Lord
Description: Kill 50,000 Slimes.
Character: any
Reward: Item: Septic Boots
Notes: Like the Hellhound Slayer Quest, slimes can be found in both the Haunted Caverns and Ember Grounds. This quest can be done passively while working on other quests in these two halls.
Quest – Skeleton Slayer I
Adjacent Quests – Cavern Dominator I, Lightning Strike Mastery I
Description: Kill 50,000 Skeletons.
Character: any
Reward: 2000 Gold
Notes: Skeletons can be found in the Haunted Caverns, Ember Grounds, and Forgotten Viaduct. Can be completed passively while working on other quests.
Quest – Cavern Survivor II
Adjacent Quests – Astronomer’s Orbs Mastery I, Arcane Splinter Mastery I, Phantom Needles Mastery I
Description: Survive until there are only 14 minutes left.
Character: any
Reward: 500 Gold
Notes: Survive until the clock in the bottom right says 14:00.
Quest – Arcane Splinter Mastery I
Adjacent Quests – The Skeleton Lord, Cavern Survivor II
Description: Deal 750,000 damage with Arcane Splinter. *
Character: any
Reward: Trait Types: Focus & Piercing
Notes: 750,000 damage masteries are completed fairly easily. Make sure you select the ability early on, upgrade it, and it should rack up enough damage throughout the rest of your run.
Quest – Lightning Strike Mastery I
Adjacent Quests – Skeleton Slayer I, The Imp Chieftain, Cavern Survivor III
Description: Deal 750,000 damage with Lightning Strike. *
Character: any
Reward: Trait Types: Intensity & Charges
Notes: 750,000 damage masteries are completed fairly easily. Make sure you select the ability early on, upgrade it, and it should rack up enough damage throughout the rest of your run.
Quest – The Imp Chieftain
Adjacent Quests – Lightning Strike Mastery I, Phantom Needles Mastery I
Description: Defeat the Imp Chieftain.
Character: any
Reward: Stage: Ember Ground
Notes: The Imp Chieftain is an elite enemy that spawns around the 24 minute mark. Upon defeating him you will complete this quest.
Quest – Phantom Needles Mastery I
Adjacent Quests – Cavern Survivor II, The Imp Chieftain, Cavern Dominator III
Description: Deal 750,000 damage with Phantom Needles. *
Character: any
Reward: Trait Types: Spin & Puncture
Notes: 750,000 damage masteries are completed fairly easily. Make sure you select the ability early on, upgrade it, and it should rack up enough damage throughout the rest of your run.
Quest – Cavern Survivor III
Adjacent Quests – Lightning Strike Mastery I
Description: Survive until there are only 2 minutes left.
Character: any
Reward: 1000 Gold
Notes: Survive until the clock in the bottom right shows 2:00. Can be difficult but after a couple of runs, you will start to survive longer and longer and will eventually reach the final 2 minutes.
Quest – Cavern Dominator III
Adjacent Quests – Phantom Needles Mastery I
Description: Kill 25,000 enemies in one run. *
Character: any
Reward: Haunted Caverns: Starting Ability
Notes: Should be able to complete this quest passively during a run but if you are struggling, I recommend Archer for the movement speed and projectiles.
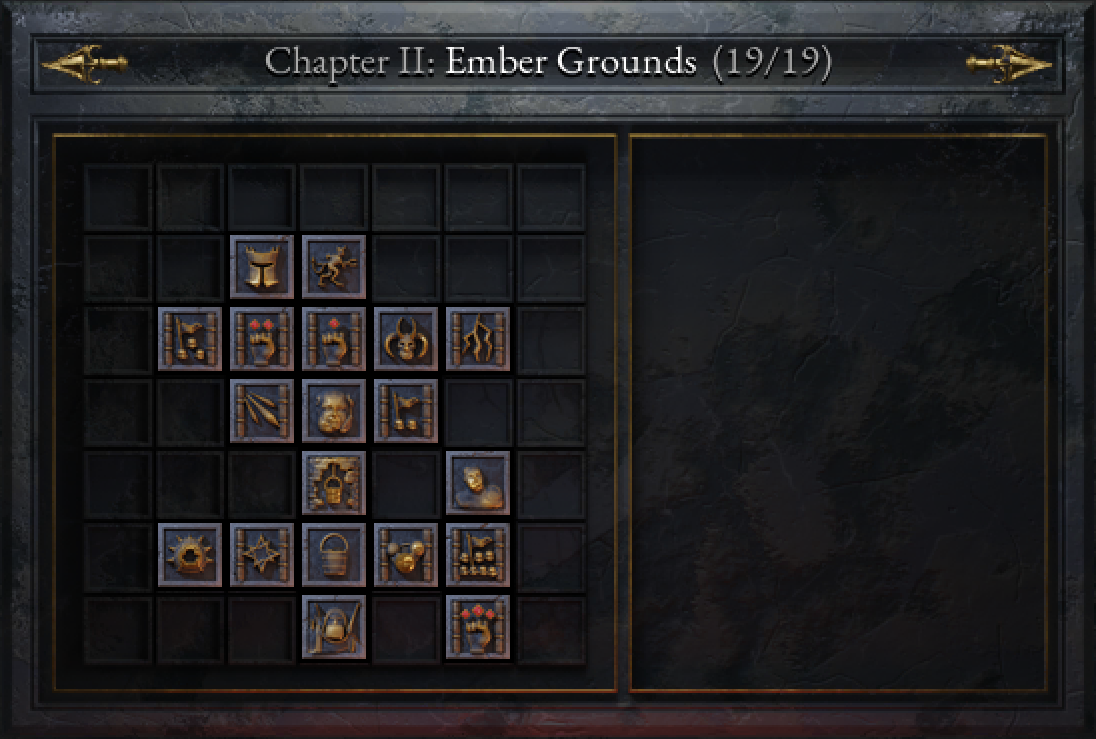
Chapter II: Ember Grounds (1-19)
 Quests that have an * in the ‘Description’ section indicate that the quest must be completed in one run.
Ability Masteries in this section:
- None
Quest – Wraith Warlord
Adjacent Quests – Imp Slayer I, Ember Survivor II
Description: Defeat the Wraith Warlord.
Character: any
Reward: Stage: Forgotten Viaduct
Notes: The Wraith Warlord is an elite enemy that spawns at around the 14 minute mark. Defeating him will complete this quest.
Quest – Imp Slayer I
Adjacent Quests – Wraith Warlord, Ember Survivor I
Description: Kill 50,000 imps.
Character: any
Reward: 2000 Gold
Notes: Doing other quests in this hall will contribute towards the progress of this quest. Imps spawn at multiple intervals of the run, so if you’re needing to finish up this quest, look out for them and clear as many as possible.
Quest – Ember Dominator II
Adjacent Quests – Ember Survivor II
Description: Kill 5,000 enemies in one visit of the Ember Grounds. *
Character: any
Reward: 1500 Gold
Notes: Will be completed passively by doing a run in the hall.
Quest – Ember Survivor II
Adjacent Quests – Wraith Warlord, Ember Dominator II, Ember Survivor I
Description: Survive the Ember Grounds until there are only 12 minutes left.
Character: any
Reward: 1000 Gold
Notes: Survive until the clock in the bottom right shows 12:00.
Quest – Ember Survivor I
Adjacent Quests – Imp Slayer I, Ember Survivor II, Flamedancer, The Wellkeeper
Description: Survive the Ember Grounds until there are only 22 minutes left.
Character: any
Reward: 500 Gold
Notes: Survive until the clock in the bottom right shows 22:00.
Quest – Flamedancer
Adjacent Quests – Ember Survivor I, Ability Expert: Lightning Strike, Ember Dominator I
Description: Defeat the Flamedancer.
Character: any
Reward: Item: Demonic Bond
Notes: The Flamedancer is an elite enemy that spawns at around the 24 minute mark. Defeating him will complete this quest.
Quest – Ability Expert: Lightning Strike
Adjacent Quests – Flamedancer
Description: Get Lightning Strike to Level 3 to be able to select Ability Upgrades. *
Character: any
Reward: Upgrade: Electrifying Strike
Notes: Upon selecting the Lightning Strike ability, choose three upgrades corresponding to the ability, and after selecting the third one, this achievement will complete. Getting Lightning Strike to Level 3 allows you to earn an upgrade to that ability, which can be found in a golden scroll.
Quest – Ability Expert: Phantom Needles
Adjacent Quests – Ember Survivor II, The Wellkeeper
Description: Get Phantom Needles to level 3 to be able to select Ability Upgrades. *
Character: any
Reward: Upgrade: Phantom Rift
Notes: Upon selecting the Phantom Needles ability, choose three upgrades corresponding to the ability, and after selecting the third one, this achievement will complete. Getting Phantom needles to Level 3 allows you to earn an upgrade to that ability, which can be found in a golden scroll.
Quest – The Wellkeeper
Adjacent Quests – Ember Survivor I, Ability Expert: Phantom Needles, Ember Dominator I, Finders Keepers
Description: Enter Ember Grounds and rescue the Wellkeeper.
Character: any
Unlocks: Wellkeeper
Notes: Upon entering the Ember Grounds for the first time (and any time thereafter in which you haven’t rescued him), the Wellkeeper will spawn in a cage on the map (with an indicator pointing to him). He will ask you to find a key somewhere in the map (again, with an indicator pointing to it). Upon collecting it, return to him and open the cage. He will be permanently unlocked in the lobby allowing you to purchase items you retrieve during runs.
Quest – Ember Dominator I
Adjacent Quests – Flamedancer, The Wellkeeper
Description: Kill 1,000 enemies in one visit of the Ember Grounds. *
Character: any
Unlocks: Character: Exterminator
Notes: Will be completed passively during any of your runs.
Quest – Finders, Keepers
Adjacent Quests – The Wellkeeper, Additional Fees
Description: Retrieve 1 item from the Halls of Torment.
Character: any
Reward: 1 Gold
Notes: Once you have unlocked the Wellkeeper, any chests that you open from elites will give you gear. You can go to the well near where you spawn and select an item to be retrieved. Retrieving items allows you to purchase them from the Wellkeeper where you can then use the item permanently.
Quest – Scorched Slayer I
Adjacent Quests – Ember Dominator III
Description: Kill 50,000 Scorched.
Character: any
Reward: 2000 Gold
Notes: Doing other quests in this hall will contribute towards the progress of this quest. Scorched will spawn at various times during the run so make sure you clear them when you get the chance.
Quest – Wyrm Queen
Adjacent Quests – Ability Expert: Arcane Spliter
Description: Defeat the Wyrm Queen.
Character: any
Reward: Character: Warlock
Notes: The Wyrm Queen is an elite enemy that spawns around the 6 minute mark. Defeating it will complete this quest.
Quest – Ability Expert: Arcane Splinter
Adjacent Quests – Wyrm Queen, Additional Fees
Description: Get Arcane Splinter to Level 3 to be able to select Ability Upgrades. *
Character: any
Reward: Upgrade: Arcane Shivers
Notes: Upon selecting the Arcane Splinters ability, choose three upgrades corresponding to the ability, and after selecting the third one, this achievement will complete. Getting Phantom needles to Level 3 allows you to earn an upgrade to that ability, which can be found in a golden scroll.
Quest – Additional Fees
Adjacent Quests – Finders Keepers, Ability Expert: Arcane Spliter, Ability Expert: Astronomer’s Orbs
Description: Purchase an item from the Wellkeeper.
Character: any
Reward: Item: Spellcaster Gloves
Notes: Once you have retrieved an item from the well, it will show up as being able to be purcashed at the Wellkeeper in the lobby. Purchasing an item will complete this quest. Purchasing bottles does not count.
Quest – Ability Expert: Astronomer’s Orbs
Adjacent Quests – Additional Fees, Ember Dominator III
Description: Get Astronomer’s Orbs to Level 3 to be able to select Ability Upgrades. *
Character: any
Reward: Upgrade: Electrified Orbs
Notes: Upon selecting the Astronomer’s Orbs ability, choose three upgrades corresponding to the ability, and after selecting the third one, this achievement will complete. Getting Phantom needles to Level 3 allows you to earn an upgrade to that ability, which can be found in a golden scroll.
Quest – Ember Dominator III
Adjacent Quests – Scorched Slayer I, Ability Expert: Astronomer’s Orbs, Ember Survivor III
Description: Kill 15,000 enemies in one visit of the Ember Grounds. *
Character: any
Reward: Ember Grounds: Starting Ability
Notes: Will likely be done passively during any of your runs in the hall.
Quest – Lord of Regret
Adjacent Quests – Additional Fees
Description: Defeat the Lord of Regret.
Character: any
Reward: 2500 Gold
Notes: After surviving the 30 minutes of the Ember Grounds, the enemies will clear and the Lord of Regret spawns. After successfully defeating him, you will escape the hall and complete this quest.
Quest – Ember Survivor III
Adjacent Quests – Ember Dominator III
Description: Survive the Ember Grounds until there are only 2 minutes left.
Character: any
Reward: 1500 Gold
Notes: Survive until the clock in the bottom right shows 2:00.
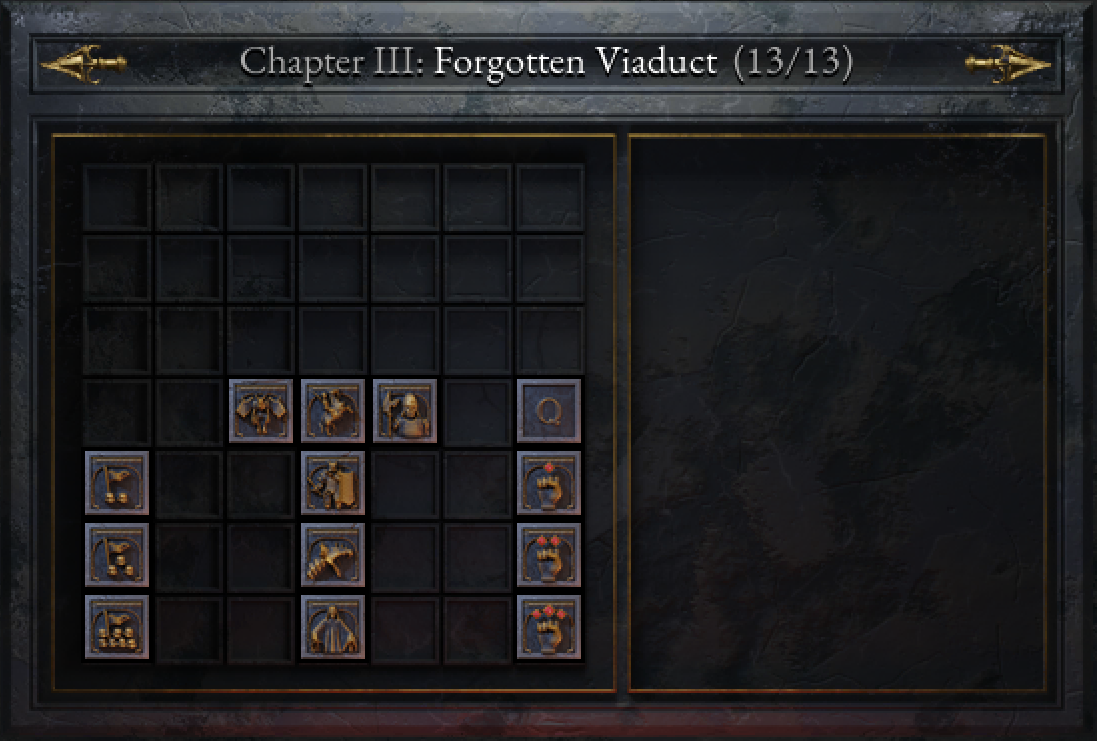
Chapter III: Forgotten Viaduct (1-13)
 Quests that have an * in the ‘Description’ section indicate that the quest must be completed in one run.
Ability Masteries in this section:
- None
Quest – Gargoyle Slayer I
Adjacent Quests – Wraith Horseman
Description: Kill 50,000 Gargoyles
Character: any
Reward: 2500 Gold
Notes: This quest will be completed passively during your other runs in this hall. They spawn very frequently so make sure to clear them when you see them.
Quest – Wraith Horseman
Adjacent Quests – Gargoyle Slayer I, Wraith Slayer I
Description: Defeat the Wraith Horseman.
Character: any
Reward: Character: Shield Maiden
Notes: The Wraith Horseman is an elite enemy that spawns at around the 24 minute mark. Defeating him will complete this quest.
Quest – Wraith Slayer I
Adjacent Quests – Wraith Horseman
Description: Kill 50,000 Wraiths.
Character: any
Reward: 2500 Gold
Notes: This quest will be completed passively during your other runs. They spawn a lot, so killing 50,000 won’t be a problem.
Quest – The Cupbearer
Adjacent Quests – Viaduct Survivor I
Description: Enter Forgotten Viaduct and rescue the Cupbearer.
Character: any
Reward: Cupbearer
Notes: Similar to the Wellkeeper in the Ember Grounds, upon entering the Forgotten Viaduct for the first time (and every time thereafter where you haven’t rescued him), the Cupbearer will spawn. An indicator points to him and upon talking to him, he will tell you to retrieve his potion flask. Returning to him will complete this quest and unlock him in the lobby.
Quest – Viaduct Dominator I
Adjacent Quests – Viaduct Dominator II
Description: Kill 1,000 enemies in one visit of the Forgotten Viaduct. *
Character: any
Reward: 1000 Gold
Notes: This quest will be done passively during your runs in the hall.
Quest – Frost Knight
Adjacent Quests – Wraith Horseman, Hydra
Description: Defeat the Frost Knight.
Character: any
Reward: 750 Gold
Notes: The Frost Knight is an elite enemy that spawns at around the 16 minute mark. Defeating him will complete this quest.
Quest – Viaduct Survivor I
Adjacent Quests – The Cupbearer, Viaduct Survivor II
Description: Survive the Forgotten Viaduct until there are only 18 minutes left.
Character: any
Reward: 750 Gold
Notes: Survive until the clock in the bottom right shows 18:00.
Quest – Viaduct Dominator II
Adjacent Quests – Viaduct Dominator I, Viaduct Dominator III
Description: Kill 5,000 enemies in one visit of the Forgotten Viaduct. *
Character: any
Reward: 2000 Gold
Notes: This quest will be completed passively during your runs in the hall.
Quest – Hydra
Adjacent Quests – Frost Knight, Lord of Despair
Description: Defeat the Hydra.
Character: any
Reward: Forgotten Viaduct: Starting Ability
Notes: The Hydra is an elite enemy that spawns at around the 8 minute mark. Defeating him will complete this quest.
Quest – Viaduct Survivor II
Adjacent Quests – Viaduct Survivor I, Viaduct Survivor III
Description: Survive the Forgotten Viaduct until there are only 10 minutes left.
Character: any
Reward: 1250 Gold
Notes: Survive until the clock in the bottom right shows 10:00.
Quest – Viaduct Dominator III
Adjacent Quests – Viaduct Dominator II
Description: Kill 10,000 enemies in one visit of the Forgotten Viaduct. *
Character: any
Reward: Character: Sorceress
Notes: Will be completed passively during your runs.
Quest – Lord of Despair
Adjacent Quests – Hydra
Description: Defeat the Lord of Despair.
Character: any
Reward: 3000 Gold
Notes: After surviving for 30 minutes in this hall, the Lord of Despair will spawn. Upon defeating him you will complete this quest.
Quest – Viaduct Survivor III
Adjacent Quests – Viaduct Survivor II
Description: Survive the Forgotten Viaduct until there are only 2 minutes left.
Character: any
Reward: 2000 Gold
Notes: Survive until the clock in the bottom right shows 2:00.
Story: Path of the Sword (1-16)
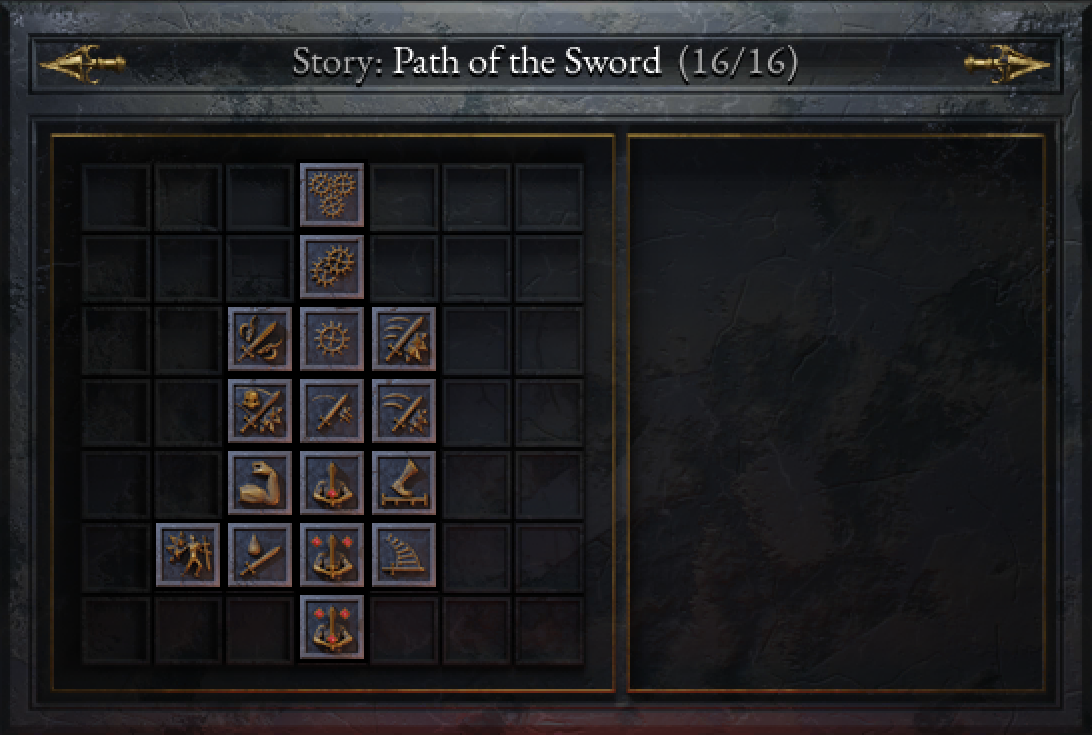 Quests that have an * in the ‘Description’ section indicate that the quest must be completed in one run.
Ability Masteries in this section:
- Ring Blades – unlocked by default
Quest – Ringblade Mastery III
Adjacent Quests – Ringblade Mastery II
Description: Deal 3,000,000 damage with Ring Blades. *
Character: any
Reward: Trait Types: Cruel & Reaching
Notes: An easy way to do the 3,000,000 damage masteries is to load in to the Forgotten Viaduct and picking up the starting scroll (which you obtain after beating the hall once) and re-rolling until you get the mastery you are trying to achieve. Once you have it, grab both the other scrolls and head to either side of the bridge to fight the group of ghosts. Since they have lots of health, you will be able to easily rack up damage and can get your mastery done.
Quest – Ringblade Mastery II
Adjacent Quests – Ringblade Mastery III, Ringblade Mastery I
Description: Deal 1,500,000 damage with Ring Blades. *
Character: any
Reward: Upgrade: Piercing Blades
Notes: The 1,500,000 damage mastery is fairly easily obtained during any given run without needing to do the bridge ghost strat like in the 3,000,000 damage mastery. Just make sure that you select the ability you’d like to get the mastery with early on and upgrade it as much as you can.
Quest – Undaunted
Adjacent Quests – Ringblade Mastery I, Power Hitter
Description: Kill a total of 10 bosses.
Character: Swordsman
Reward: Item: Fighter’s Headband
Notes: With the Swordsman, kill 10 elite enemies or Lords. These can be from any hall.
Quest – Ringblade Mastery I
Adjacent Quests – Ringblade Mastery II, Undaunted, Swordplay Mastery III, Swordplay Mastery III
Description: Deal 750,000 damage with Ring Blades. *
Character: any
Reward: Trait Types: Strong & Fast
Notes: 750,000 damage masteries are completed fairly easily. Make sure you select the ability early on, upgrade it, and it should rack up enough damage throughout the rest of your run.
Quest – Swordplay Mastery III
Adjacent Quests – Ringblade Mastery I, Swordplay Mastery II
Description: Deal 3,000,000 damage with the main weapon. *
Character: Swordsman
Reward: 1500 Gold
Notes: Dealing 3,000,000 damage with your main weapon will happen passively. Ways to increase the damage quickly is increasing Damage, Crit Chance, Crit Damage, and Attack Speed.
Quest – Power Hitter
Adjacent Quests – Undaunted, Swordplay Mastery I, Strong Arms
Description: Hit 1,000 enemies for 300 or more damage in one run. (Main Weapon) *
Character: Swordsman
Reward: Item: Echoing Band
Notes: You can increase your main weapon’s damage by increasing Damage as well as your Crit Chance and Crit Damage.
Quest – Swordplay Mastery I
Adjacent Quests – Ringblade Mastery I, Power Hitter, Swordplay Mastery II, Novice Swordsman
Description: Deal 200,000 damage with the main weapon. *
Character: Swordsman
Reward: Ability: Ring Blades
Notes: Dealing 200,000 damage with your main weapon will happen passively. Ways to increase the damage quickly is increasing Damage, Crit Chance, Crit Damage, and Attack Speed.
Quest – Swordplay Mastery II
Adjacent Quests – Swordplay Mastery III, Swordplay Mastery I, Forward
Description: Deal 1,000,000 damage with the main weapon. *
Character: Swordsman
Reward: 750 Gold
Notes: Dealing 1,000,000 damage with your main weapon will happen passively. Ways to increase the damage quickly is increasing Damage, Crit Chance, Crit Damage, and Attack Speed.
Quest – Strong Arms
Adjacent Quests – Power Hitter, Novice Swordsman, Blood’s Taste
Description: Acquire the trait [Strength IV] in a run. *
Character: Swordsman
Reward: Blessing: Strength
Notes: In a given run, upgrade the Strength trait (+10% Damage) up to level IV (4).
Quest – Novice Swordsman
Adjacent Quests – Swordplay Mastery I, Strong Arms, Forward, Trained Swordsman
Description: Reach level 30.
Character: Swordsman
Reward: Item: Scars of Toil
Notes: Reaching level 30 will happen passively during your run.
Quest – Forward
Adjacent Quests – Swordplay Mastery II, Novice Swordsman, Wide Sweep
Description: Walk 5,000 meters in one run. *
Character: Swordsman
Reward: Item: Spike Boots
Notes: This will likely happen passively. You can increase your movement speed to be able to complete this quicker.
Quest – Just a Flesh Wound
Adjacent Quests – Blood’s Taste
Description: Get hit a total of 500 times over all attempts.
Character: Swordsman
Reward: Item: Thornfists
Notes: Getting hit 500 times will happen over time as you do runs with the Swordsman.
Quest – Blood’s Taste
Adjacent Quests – Strong Arms, Just a Flesh Wound, Trained Swordsman
Description: Recover 2,000 HP in one run. *
Character: Swordsman
Reward: Item: Blood-Soaked Shirt
Notes: Recover HP via Health Regeneration or potions.
Quest – Trained Swordsman
Adjacent Quests – Novice Swordsman, Blood’s Taste, Wide Sweep, Master Swordsman
Description: Reach level 60.
Character: Swordsman
Reward: 750 Gold
Notes: Reaching level 60 will happen passively during your runs.
Quest – Wide Sweep
Adjacent Quests – Forward, Trained Swordsman
Description: Hit 20 enemies with a single attack.
Character: Swordsman
Reward: Trait: Multihit I
Notes: This will likely happen on its own as you get further into the level where more crowds of enemies spawn. To have this happen quicker, increase your Cone/Area Size.
Quest – Master Swordsman
Adjacent Quests – Trained Swordsman
Description: Reach level 100.
Character: Swordsman
Reward: 1500 Gold
Notes: Reaching level 100 takes a while. Make sure you have retrieved the Jade Amulet (Under Milestones section – level up 500 times) and equipped it (+50% XP Gain). It is recommended you attempt this once you have at least 170 or 180 completed quests, as quest completion gives you XP boosts and the 170 mark is the threshold where you can start to get close to level 100. If you complete around 190, you should be guaranteed to hit level 100.
The way I did it was load into the Forgotten Viaduct, grab the scroll immediately that spawned next to you and head south for the other scroll down there. You can additionally choose to go for the scroll at the top of the map, but I decided against it to prioritize my time spent killing enemies. Save the glove that spawns at the start of the level until the end so that you can retrieve all the remaining XP on the map that you may not have picked up. Choose abilities that are High DPS and good for clearing. My personal favorites are Kugelblitz, Dragon Breath, Lightning Strike, and Ring Blades. These are all good for different reasons, but mostly they do lots of damage and can clear enemies at a distance that you may not be able to reach.
This may take you a few attempts (it took me a while to finally start consistently hitting level 100), so don’t worry. These may be some of the last quests you complete on your way to 100%ing HoT.
Story: Swift as an Arrow (1-16)
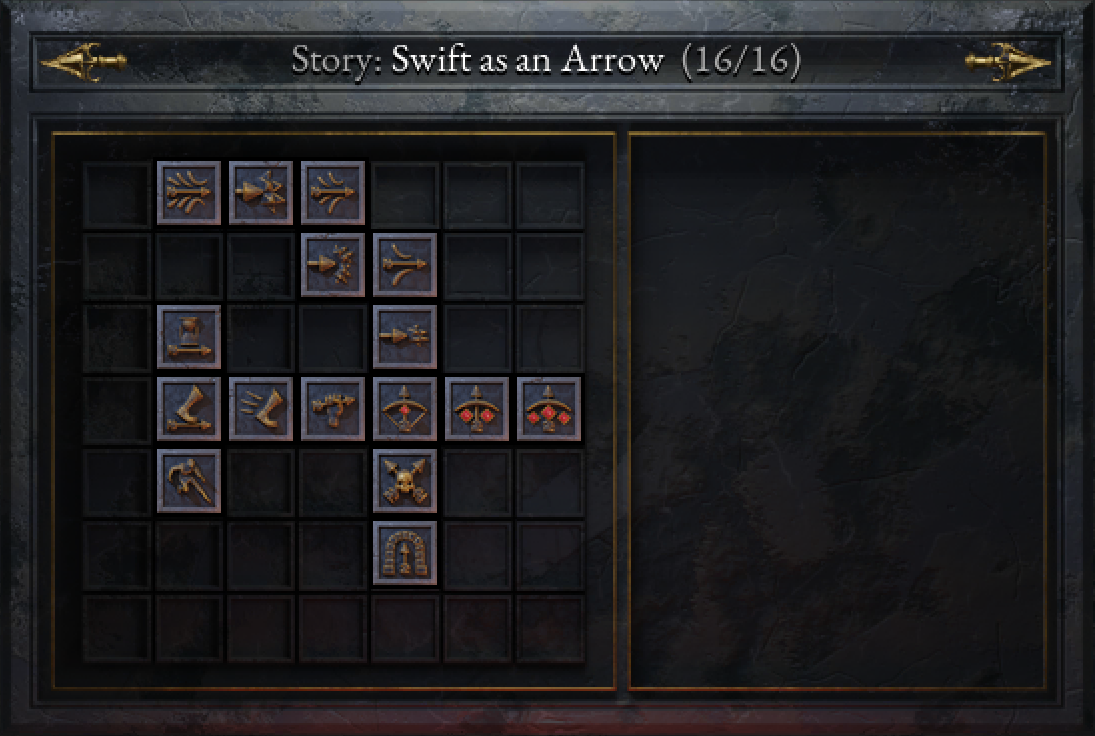 Quests that have an * in the ‘Description’ section indicate that the quest must be completed in one run.
Ability Masteries in this section:
- Transfixion – unlocked by completing Archery Mastery I
Quest – Transfixion Mastery III
Adjacent Quests – Archery Mastery III
Description: Deal 3,000,000 damage with Transfixion. *
Character: any
Reward: Trait Types: Deadlines & Potency
Notes: An easy way to do the 3,000,000 damage masteries is to load in to the Forgotten Viaduct and picking up the starting scroll (which you obtain after beating the hall once) and re-rolling until you get the mastery you are trying to achieve. Once you have it, grab both the other scrolls and head to either side of the bridge to fight the group of ghosts. Since they have lots of health, you will be able to easily rack up damage and can get your mastery done.
Quest – Archery Mastery III
Adjacent Quests – Transfixion Mastery III, Transfixion Mastery II
Description: Crit enemies 50,000 times within one run. *
Character: Archer
Reward: 1500 Gold
Notes: Critting enemies can be done easily by increasing your Crit Chance through your gear, your stats, or in-game upgrades. If you’re struggling to do this, I suggest using the bridge ghosts in the Forgotten Viaduct.
Quest – Transfixion Mastery II
Adjacent Quests – Archery Mastery III, Archery Mastery II
Description: Deal 1,500,000 damage with Transfixion. *
Character: any
Reward: Upgrade: Painful Incision
Notes: The 1,500,000 damage mastery is fairly easily obtained during any given run without needing to do the bridge ghost strat like in the 3,000,000 damage mastery. Just make sure that you select the ability you’d like to get the mastery with early on and upgrade it as much as you can.
Quest – Archery Mastery II
Adjacent Quests – Transfixion Mastery II, Transfixion Mastery I
Description: Crit enemies 20,000 times within one run. *
Character: Archer
Reward: 750 Gold
Notes: Critting enemies can be done easily by increasing your Crit Chance through your gear, your stats, or in-game upgrades. If you’re struggling to do this, I suggest using the bridge ghosts in the Forgotten Viaduct.
Quest – Transfixion Mastery I
Adjacent Quests – Archery Mastery II, Archery Mastery I
Description: Deal 750,000 damage with Transfixion. *
Character: any
Reward: Trait Types: Effectivity & Accuracy
Notes: 750,000 damage masteries are completed fairly easily. Make sure you select the ability early on, upgrade it, and it should rack up enough damage throughout the rest of your run.
Quest – Taking Aim
Adjacent Quests – Forward Evermore
Description: Wait for 180 seconds before you start moving. You must move in order to complete the quest.
Character: Archer
Reward: Item: Hunter’s Garb
Notes: Once you spawn in, do not move for 3 minutes. I suggest doing this in the Haunted Caverns since the enemies in the first few minutes are pretty weak. It would be smart to bring gear to either help you kill things faster or be a bit more tanky. You can die and revive and still have this quest complete, so don’t worry about if you die and have a revive.
Quest – Archery Mastery I
Adjacent Quests – Transfixion Mastery I, Novice Archer
Description: Crit enemies 5,000 times within one run. *
Character: Archer
Reward: Ability: Transfixion
Notes: Critting enemies can be done easily by increasing your Crit Chance through your gear, your stats, or in-game upgrades.
Quest – Forward Evermore
Adjacent Quests – Taking Aim, Guided by the Wind, Untouchable
Description: Walk 100,000 meters.
Character: Archer
Reward: Item: Guiding Star
Notes: This can be done over multiple runs and will likely happen passively, increasing your movement speed will help complete this quicker.
Quest – Guided by the Wind
Adjacent Quests – Forward Evermore, Breathless
Description: Increase your movement speed to 8m/s. *
Character: Archer
Reward: Trait: Piercing Wind
Notes: Archer has a base movement speed of 5.0 m/s, so equipping gear to increase your movement speed or upgrading your stats in the run will help you get this easily.
Quest – Breathless
Adjacent Quests – Guided by the Wind, Novice Archer
Description: Acquire the trait [Quick Hands IV] in a run. *
Character: Archer
Reward: Blessing: Attack Speed
Notes: Pick the Quick Hands (+8% Attack Speed) trait 4 times (IV).
Quest – Novice Archer
Adjacent Quests – Archery Mastery I, Breathless, Trained Archer, Piercing Through
Description: Reach level 30.
Character: Archer
Reward: Item: Elven Slippers
Notes: This will be done passively in your runs.
Quest – Trained Archer
Adjacent Quests – Novice Archer, Master Archer
Description: Reach level 60.
Character: Archer
Reward: 750 Gold
Notes: This will be done passively in your runs.
Quest – Master Archer
Adjacent Quests – Trained Archer
Description: Reach level 100.
Character: Archer
Reward: 1500 Gold
Notes: Reaching level 100 takes a while. Make sure you have retrieved the Jade Amulet (Under Milestones section – level up 500 times) and equipped it (+50% XP Gain). It is recommended you attempt this once you have at least 170 or 180 completed quests, and quest completion gives you XP boosts and the 170 mark is the threshold where you can start to get close to level 100. If you complete around 190, you should be guaranteed to hit level 100.
The way I did it was load into the Forgotten Viaduct, grab the scroll immediately that spawned next to you and head south for the other scroll down there. You can additionally choose to go for the scroll at the top of the map, but I decided against it to prioritize my time spent killing enemies. Save the glove that spawns at the start of the level until the end so that you can retrieve all the remaining XP on the map that you may not have picked up. Choose abilities that are High DPS and good for clearing. My personal favorites are Kugelblitz, Dragon Breath, Lightning Strike, and Ring Blades. These are all good for different reasons, but mostly they do lots of damage and can clear enemies at a distance that you may not be able to reach.
This may take you a few attempts (it took me a while to finally start consistently hitting level 100), so don’t worry. These may be some of the last quests you complete on your way to 100%ing HoT.
Quest – Untouchable
Adjacent Quests – Forward Evermore
Description: Do not get hit for 3 minutes.
Character: Archer
Reward: Item: Wind Crown
Notes: Avoid being hit for 3 minutes in one of your runs. It is easiest to do this at the start of your run where enemies are few and slow. Make sure you are constantly moving and keeping distance since your projectiles can shoot from afar.
Quest – Piercing Through
Adjacent Quests – Novice Archer, Confident
Description: Kill 20,000 enemies in one run. *
Character: Archer
Reward: Item: Hunting Gloves
Notes: This quest can be done easily in both the Haunted Caverns and the Ember Grounds. Grab gear, abilities, and upgrades to help you clear easier.
Quest – Confident
Adjacent Quests – Piercing Through
Description: Enter the Halls of Torment 20 times and survive at least 5 minutes.
Character: Archer
Reward: Item: Collar of Confidence
Notes: Doing runs with Archer will passively complete this quest.
Story: Scorched Earth (1-18)
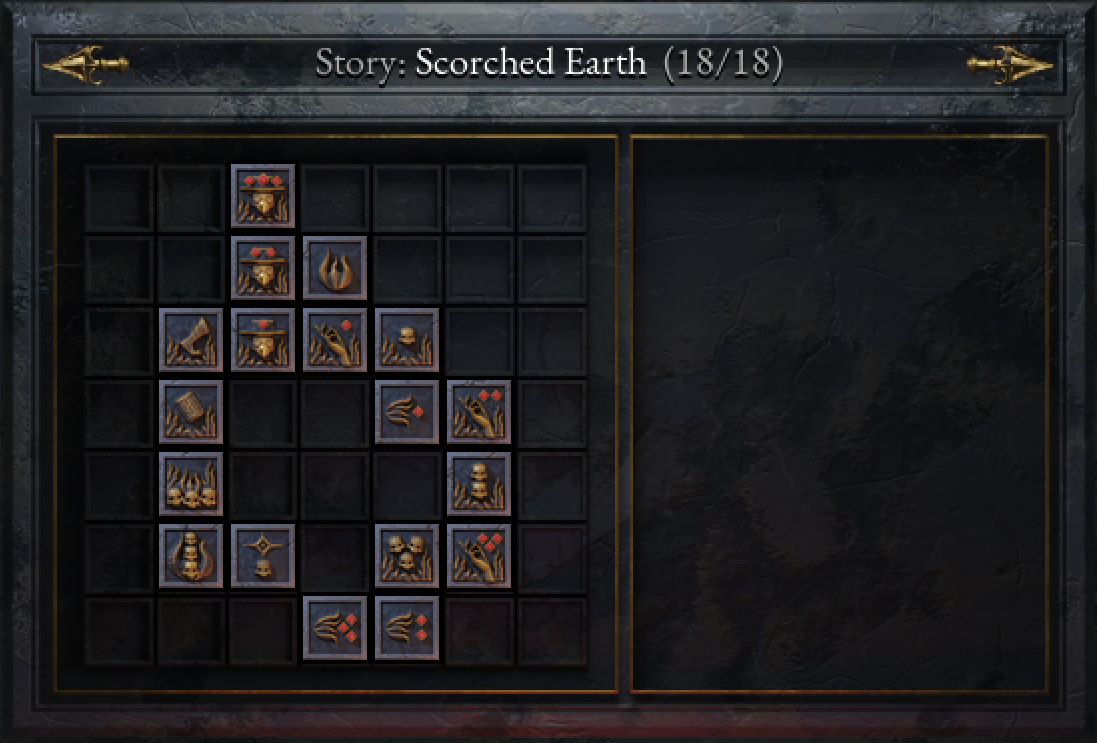
Ability Masteries in this section:
- Dragon’s Breath – unlocked by completing Inferno I
Quest – Master Exterminator
Adjacent Quests – Trained Exterminator
Description: Reach level 100.
Character: Exterminator
Reward: 1500 Gold
Notes: Reaching level 100 takes a while. Make sure you have retrieved the Jade Amulet (Under Milestones section – level up 500 times) and equipped it (+50% XP Gain). It is recommended you attempt this once you have at least 170 or 180 completed quests, and quest completion gives you XP boosts and the 170 mark is the threshold where you can start to get close to level 100. If you complete around 190, you should be guaranteed to hit level 100.
The way I did it was load into the Forgotten Viaduct, grab the scroll immediately that spawned next to you and head south for the other scroll down there. You can additionally choose to go for the scroll at the top of the map, but I decided against it to prioritize my time spent killing enemies. Save the glove that spawns at the start of the level until the end so that you can retrieve all the remaining XP on the map that you may not have picked up. Choose abilities that are High DPS and good for clearing. My personal favorites are Kugelblitz, Dragon Breath, Lightning Strike, and Ring Blades. These are all good for different reasons, but mostly they do lots of damage and can clear enemies at a distance that you may not be able to reach.
This may take you a few attempts (it took me a while to finally start consistently hitting level 100), so don’t worry. These may be some of the last quests you complete on your way to 100%ing HoT.
Quest – Trained Exterminator
Adjacent Quests – Master Exterminator, Incinerated I, Novice Exterminator
Description: Reach level 60.
Character: Exterminator
Reward: 750 Gold
Notes: This quest will be done passively during your runs.
Quest – Incinerated I
Adjacent Quests – Trained Exterminator, Inferno I
Description: Deal 200,000 burn damage in one run. *
Character: Exterminator
Reward: Blessing: Fire Damage
Notes: This quest will be done passively during your runs. Increasing burn chance can help get this done quicker.
Quest – Firewalker
Adjacent Quests – Novice Exterminator, Flammable
Description: Walk 8,000 meters in one run. *
Character: Exterminator
Reward: Item: Firewalker Boots
Notes: This will be done passively in your runs, increase your movement speed via gear or upgrades to complete this quest quicker.
Quest – Novice Exterminator
Adjacent Quests – Trained Exterminator, Firewalker, Inferno I
Description: Reach level 30.
Character: Exterminator
Reward: Item: Ring of Fire
Notes: This quest will be done passively during your run.
Quest – Inferno I
Adjacent Quests – Incinerated I, Novice Exterminator, Firestarter I
Description: Deal 300,000 fire damage in one run. *
Character: Exterminator
Reward: Ability: Dragon’s Breath
Notes: This quest will be done passively during your runs. Increasing burn chance can help get this done quicker.
Quest – FIrestarter I
Adjacent Quests – Inferno I, Dragon’s Breath Mastery I
Description: Apply burn to 10,000 enemies.
Character: Exterminator
Reward: Trait: Fire Affinity
Notes: This quest will be done passively during your runs. Increasing burn chance can help get this done quicker.
Quest – Flammable
Adjacent Quests – Firewalker, Burning Masses
Description: Destroy 200 objects.
Character: Exterminator
Reward: Item: Sparking Tips
Notes: Destroy barrels/crates around the map on any of the halls. Can be done over multiple runs, therefore it should complete passively.
Quest – Dragon’s Breath Mastery I
Adjacent Quests – Firestarter I, Inferno II
Description: Deal 500,000 damage with Dragon’s Breath. *
Character: any
Reward: Trait Types: Flammability & Recovery
Notes: Dealing 500,000 damage with Dragon’s Breath should be done easily. Pick it early on and upgrade it as soon as possible. AVOID using the Stream of Fire upgrade.
Quest – Inferno II
Adjacent Quests – Dragon’s Breath Mastery I, Firestarter II
Description: Deal 1,000,000 fire damage in one run. *
Character: Exterminator
Reward: 750 Gold
Notes: This quest will be done passively during your runs. Increasing burn chance can help get this done quicker.
Quest – Burning Masses
Adjacent Quests – Flammable, Pest Killer
Description: Apply 50 or more burn effects at the same time.
Character: Exterminator
Reward: Item: Ruby Circlet
Notes: In large groups of enemies you will be able to complete this quest, make sure that your burn chance is high and you can get this done easily.
Quest – Firestarter II
Adjacent Quests – Inferno II, Inferno III
Description: Apply burn to 50,000 enemies.
Character: Exterminator
Reward: 750 Gold
Notes: This quest will be done passively over multiple runs, increasing burn chance can help speed up this quest.
Quest – Pest Killer
Adjacent Quests – Burning Masses, Prolonged Suffering
Description: Kill 50,000 enemies.
Character: Exterminator
Reward: Item: Rat Ring
Notes: This quest will be done passively over multiple runs.
Quest – Prolonged Suffering
Adjacent Quests – Pest Killer
Description: Kill 50,000 enemies with effects.
Character: any
Reward: 2500 Gold
Notes: This will be done passively as it can be done on any character. Effects like burn and electrify will help you complete this quest.
Quest – Firestarter III
Adjacent Quests – Inferno III, Dragon’s Breath Mastery II
Description: Apply burn to 200,000 enemies.
Character: Exterminator
Reward: 1500 Gold
Notes: This quest will complete passively, can be sped up by increasing burn chance.
Quest – Inferno III
Adjacent Quests – Firestarter II, Firestarter III
Description: Deal 3,000,000 fire damage in one run. *
Character: Exterminator
Reward: 1500 Gold
Notes: This quest will be done passively during your runs. Increasing burn chance can help get this done quicker. If you struggle with this, you can use the bridge ghosts on Forgotten Viaduct.
Quest – Dragon’s Breath Mastery III
Adjacent Quests – Dragon’s Breath Mastery II
Description: Deal 2,000,000 damage with Dragon’s Breath. *
Character: any
Reward: Trait Types: Incineration & Agony
Notes: Dealing 1,000,000 damage with Dragon’s Breath should be done easily. Pick it early on and upgrade it as soon as possible. Use the bridge ghosts on the Forgotten Viaduct for this to complete quickly. AVOID using the Stream of Fire upgrade.
Quest – Dragon’s Breath Mastery II
Adjacent Quests – Firestarter III, Dragon’s Breath Mastery III
Description: Deal 1,000,000 damage with Dragon’s Breath. *
Character: any
Reward: Upgrade: Stream of Fire
Notes: Dealing 1,000,000 damage with Dragon’s Breath should be done easily. Pick it early on and upgrade it as soon as possible. If you are struggling, use the bridge ghosts on the Forgotten Viaduct. AVOID using the Stream of Fire upgrade.
Story: Unholy Crusade (1-16)
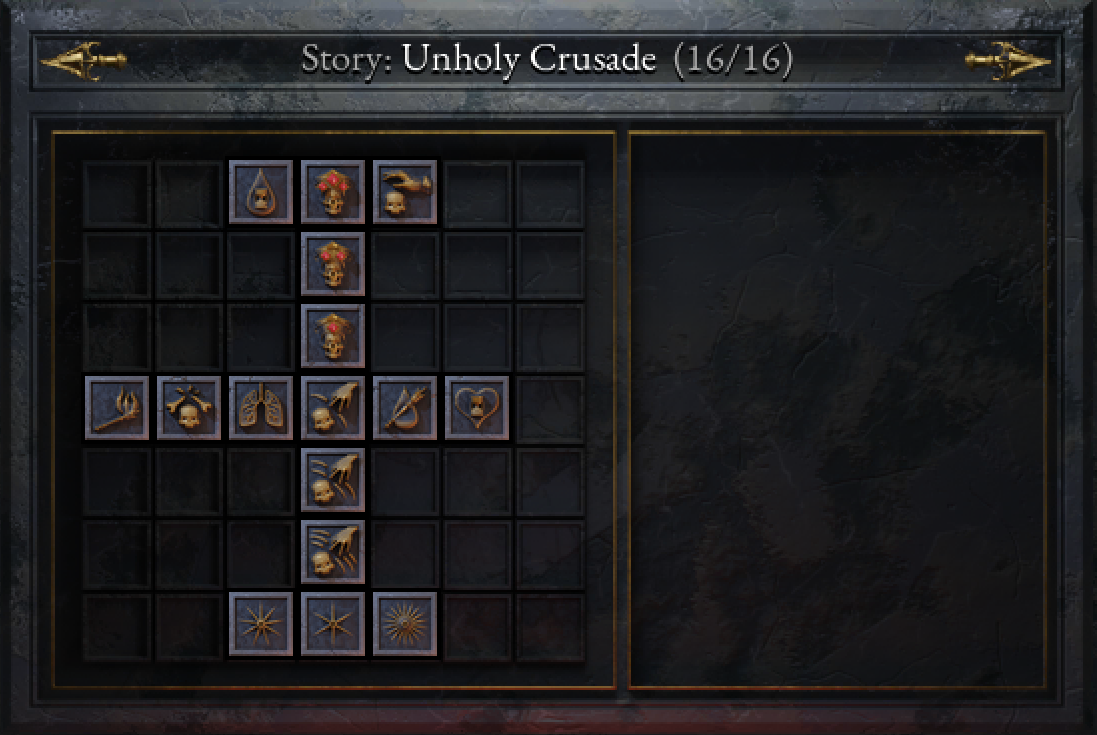 Quests that have an * in the ‘Description’ section indicate that the quest must be completed in one run.
Ability Masteries in this section:
- Radiant Aura – unlocked by completing False Blessing I
Quest – Fragile Stamina
Adjacent Quests – Master Cleric
Description: Survive 20 min without regenerating health. Other health sources (e.g. potions) are allowed. *
Character: any
Reward: Item: Pacesetters
Notes: In order to do this, make sure that you select a character that starts out with 0.0/s Health Regeneration (Sorceress or Warlock). Additionally, make sure you fully refund any Health Regeneration stats you have purchased in the Shrine of Blessings. Avoid selecting stats that give you +Health Regeneration. Potions, as stated, are allowed. The Blood-Soaked Shirt can be used whilst completing this quest.
Quest – Master Cleric
Adjacent Quests – Fragile Stamina, Unholy Touch, Trained Cleric
Description: Reach level 100.
Character: Cleric
Reward: 1500 Gold
Notes: Reaching level 100 takes a while. Make sure you have retrieved the Jade Amulet (Under Milestones section – level up 500 times) and equipped it (+50% XP Gain). It is recommended you attempt this once you have at least 170 or 180 completed quests, and quest completion gives you XP boosts and the 170 mark is the threshold where you can start to get close to level 100. If you complete around 190, you should be guaranteed to hit level 100.
The way I did it was load into the Forgotten Viaduct, grab the scroll immediately that spawned next to you and head south for the other scroll down there. You can additionally choose to go for the scroll at the top of the map, but I decided against it to prioritize my time spent killing enemies. Save the glove that spawns at the start of the level until the end so that you can retrieve all the remaining XP on the map that you may not have picked up. Choose abilities that are High DPS and good for clearing. My personal favorites are Kugelblitz, Dragon Breath, Lightning Strike, and Ring Blades. These are all good for different reasons, but mostly they do lots of damage and can clear enemies at a distance that you may not be able to reach.
This may take you a few attempts (it took me a while to finally start consistently hitting level 100), so don’t worry. These may be some of the last quests you complete on your way to 100%ing HoT.
Quest – Unholy Touch
Adjacent Quests – Master Cleric
Description: Apply 50,000 debuffs in total.
Character: Cleric
Reward: 1000 Gold
Notes: This quest will happen passively over time. Choosing weapons/upgrades that inflict burn, electrify, etc… will help speed up this quest completion.
Quest – Trained Cleric
Adjacent Quests – Master Cleric, Novice Cleric
Description: Reach level 60.
Character: Cleric
Reward: 750 Gold
Notes: This will happen passively during your run.
Quest – Novice Cleric
Adjacent Quests – Trained Cleric, False Blessing I
Description: Reach level 30.
Character: Cleric
Reward: 250 Gold
Notes: This will happen passively during your run.
Quest – Burning Belief
Adjacent Quests – Broken Body
Description: Deal 500,000 burn damage in one run. *
Character: Cleric
Reward: 1000 Gold
Notes: Selecting gear (such as the Ring of Fire), abilities, and upgrades that inflict burn damage will get this quest done. This shouldn’t be too hard and as long as you have some consistent way to burn your enemies, you should get this done.
Quest – Broken Body
Adjacent Quests – Burning Belief, Unction
Description: Apply 10 stacks of Fragile on a single enemy at once.
Character: Cleric
Reward: 1000 Gold
Notes: Selecting the Transfixion ability and upgrading the Effect Chance upgrade will help you get this. Otherwise, it will happen passively.
Quest – Unction
Adjacent Quests – Broken Body, False Blessing I
Description: Acquire the trait [Metabolism IV] in a run.
Character: Cleric
Reward: Blessing: Effect on Hit Chance
Notes: Select the upgrade Metabolism (Health Regeneration) and get it to level IV (4).
Quest – False Blessing I
Adjacent Quests – Novice Cleric, Unction, Cleric’s Stand, False Blessing II
Description: Deal 500,000 magic damage in one run. *
Character: Cleric
Reward: Ability: Radiant Aura
Notes: This will happen passively during your run as your main weapon deals magic damage.
Quest – Cleric’s Stand
Adjacent Quests – False Blessing I, Fragile Body
Description: Regenerate 1,500 HP in one run. Only passive regeneration is counted. *
Character: Cleric
Reward: Trait: False Blessing
Notes: Only passive regeneration indicates that this can be achieved by your Health Regeneration stat or gear. Potions do not count towards this quest. Assuming you have a high health regeneration stat, this should be done passively.
Quest – Fragile Body
Adjacent Quests – Cleric’s Stand
Description: Survive 28 minutes with your original max health. (Don’t use items, blessings or traits)
Character: any
Reward: Item: Blood Catcher
Notes: Make sure to unequip any gear that gives +% Health Capacity and refund your Health Capacity stats in the Shrine of Blessings. Upon entering the run, press ESC to check your health and make sure that throughout the run it does not change. Do not take any upgrades that give you health or decrease your health. All other types of defensive stats are fine.
Quest – False Blessing II
Adjacent Quests – False Blessing I, False Blessing III
Description: Deal 1,500,000 magic damage in one run. *
Character: Cleric
Reward: 750 Gold
Notes: This will be done passively as your main weapon deals magic damage.
Quest – False Blessing III
Adjacent Quests – False Blessing II, Radiant Aura Mastery I
Description: Deal 5,000,000 magic damage in one run. *
Character: Cleric
Reward: 1500 Gold
Notes: This might be done passively but may require you to use a strategy to get more damage. When in doubt, go to the bridge ghosts and use them as a damage sponge.
Quest – Radiant Aura Mastery II
Adjacent Quests – Radiant Aura Mastery I
Description: Deal 1,500,000 damage with Radiant Aura. *
Character: any
Reward: Upgrade: Sacred Flame
Notes: The 1,500,000 damage mastery is fairly easily obtained during any given run without needing to do the bridge ghost strat like in the 3,000,000 damage mastery. Just make sure that you select the ability you’d like to get the mastery with early on and upgrade it as much as you can.
Quest – Radiant Aura Mastery I
Adjacent Quests – False Blessing III, Radiant Aura Mastery II, Radiant Aura Mastery III
Description: Deal 750,000 damage with Radiant Aura. *
Character: any
Reward: Trait Types: Crit & Reach
Notes: 750,000 damage masteries are completed fairly easily. Make sure you select the ability early on, upgrade it, and it should rack up enough damage throughout the rest of your run.
Quest – Radiant Aura Mastery III
Adjacent Quests – Radiant Aura Mastery I
Description: Deal 3,000,000 damage with Radiant Aura. *
Character: any
Reward: Trait Types: Haste & Might
Notes: An easy way to do the 3,000,000 damage masteries is to load in to the Forgotten Viaduct and picking up the starting scroll (which you obtain after beating the hall once) and re-rolling until you get the mastery you are trying to achieve. Once you have it, grab both the other scrolls and head to either side of the bridge to fight the group of ghosts. Since they have lots of health, you will be able to easily rack up damage and can get your mastery done.
Story: Demonic Pact (1-15)
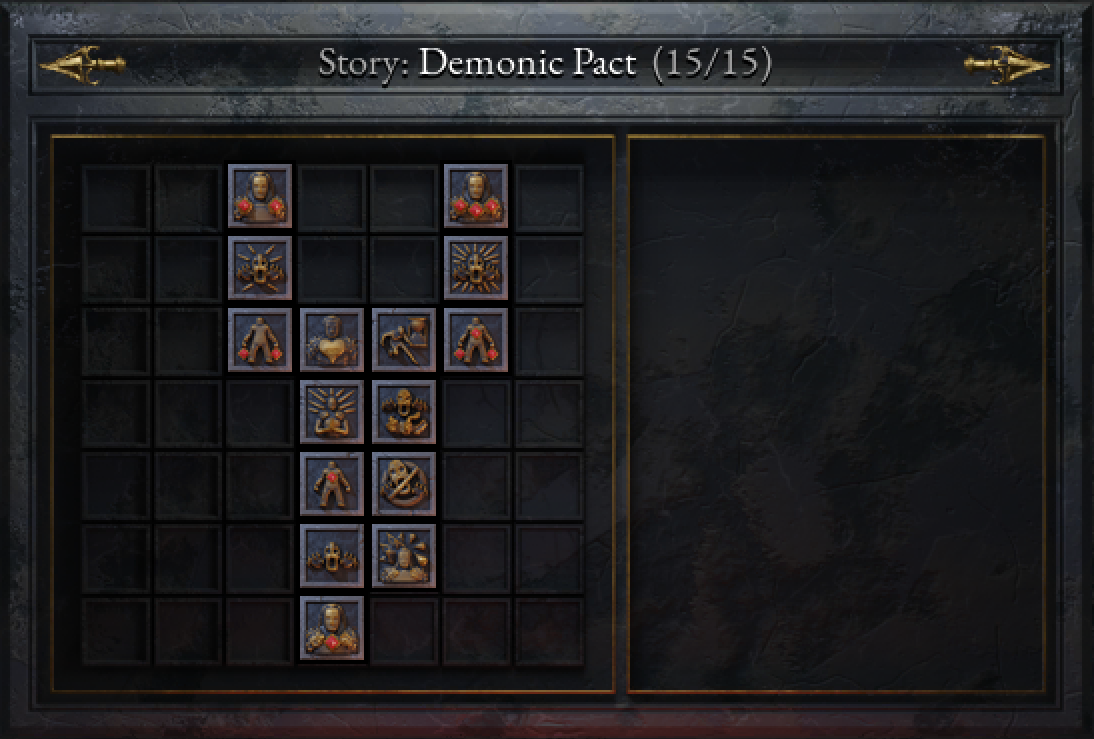 Quests that have an * in the ‘Description’ section indicate that the quest must be completed in one run.
Ability Masteries in this section:
- Golem – unlocked by completing Demonic Commander I
Quest – Trained Warlock
Adjacent Quests – Demonic Commander II
Description: Reach level 60.
Character: Warlock
Reward: Item: Invocation Signet
Notes: This will be done passively during your run.
Quest – Master Warlock
Adjacent Quests – Demonic Commander III
Description: Reach level 100.
Character: Warlock
Reward: 1500 Gold
Notes: Reaching level 100 takes a while. Make sure you have retrieved the Jade Amulet (Under Milestones section – level up 500 times) and equipped it (+50% XP Gain). It is recommended you attempt this once you have at least 170 or 180 completed quests, and quest completion gives you XP boosts and the 170 mark is the threshold where you can start to get close to level 100. If you complete around 190, you should be guaranteed to hit level 100.
The way I did it was load into the Forgotten Viaduct, grab the scroll immediately that spawned next to you and head south for the other scroll down there. You can additionally choose to go for the scroll at the top of the map, but I decided against it to prioritize my time spent killing enemies. Save the glove that spawns at the start of the level until the end so that you can retrieve all the remaining XP on the map that you may not have picked up. Choose abilities that are High DPS and good for clearing. My personal favorites are Kugelblitz, Dragon Breath, Lightning Strike, and Ring Blades. These are all good for different reasons, but mostly they do lots of damage and can clear enemies at a distance that you may not be able to reach.
This may take you a few attempts (it took me a while to finally start consistently hitting level 100), so don’t worry. These may be some of the last quests you complete on your way to 100%ing HoT.
Quest – Demonic Commander II
Adjacent Quests – Trained Warlock, Golem Mastery II
Description: Deal 2,000,000 summon damage in one run. *
Character: Warlock
Reward: 750 Gold
Notes: This quest will be done passively. Bringing summon gear and/or choosing Summon damage upgrades during the run will help you get this done quicker.
Quest – Demonic Commander III
Adjacent Quests – Master Warlock, Golem Mastery III
Description: Deal 5,000,000 summon damage in one run. *
Character: Warlock
Reward: 1500 Gold
Notes: This quest may require a bit more input and as a result you may have to use the bridge ghosts to help. Bringing summon gear and/or choosing Summon damage upgrades during the run will help you get this done quicker.
Quest – Golem Mastery II
Adjacent Quests – Demonic Commander II, Demonic Exchange
Description: Deal 1,500,000 damage with the Golem. *
Character: any
Reward: Upgrade: Ferrite Infusion
Notes: The 1,500,000 damage mastery is fairly easily obtained during any given run without needing to do the bridge ghost strat like in the 3,000,000 damage mastery. Just make sure that you select the ability you’d like to get the mastery with early on and upgrade it as much as you can.
Quest – Demonic Exchange
Adjacent Quests – Golem Mastery II, Stepping Back, Longliving
Description: Survive 5 minutes with a maximum health of 250 or less. *
Character: Warlock
Reward: Trait: Demonic Exchange
 Notes: During your run, you will see Dedication abilities, which decreases your health but increases your damage. Always take these as it is super easy to get your health decreased to below 250. Additionally, make sure your gear has no +% base health and your Shrine of Blessing Health Capacity is refunded so that you start out on base health (350).
Quest – Stepping Back
Adjacent Quests – Demonic Exchange, Golem Mastery III, Beastmaster
Description: Do not get hit for 5 minutes. *
Character: Warlock
Reward: Item: Shadow Cloak
Notes: Simply enter a run and avoid being hit for 5 minutes, I recommend the Haunted Caverns as enemies are slow and easy to avoid. It helps to bring movement speed or attack speed. Be careful with the slimes as their movement pattern may be hard to predict at times.
Quest – Golem Mastery III
Adjacent Quests – Demonic Commander III, Stepping Back
Description: Deal 3,000,000 damage with the Golem. *
Character: any
Reward: Trait Types: Inexorable & Devastation
Notes: An easy way to do the 3,000,000 damage masteries is to load in to the Forgotten Viaduct and picking up the starting scroll (which you obtain after beating the hall once) and re-rolling until you get the mastery you are trying to achieve. Once you have it, grab both the other scrolls and head to either side of the bridge to fight the group of ghosts. Since they have lots of health, you will be able to easily rack up damage and can get your mastery done.
Quest – Longliving
Adjacent Quests – Demonic Exchange, Beastmaster, Golem Mastery I
Description: Acquire the trait [Channeling V] in a run. *
Character: Warlock
Reward: Blessing: Duration
Notes: In a run, choose the Channeling (+8% Duration) stat and upgrade it fully to level V (5).
Quest – Beastmaster
Adjacent Quests – Stepping Back, Longliving, Observer
Description: Kill 5,000 Hellhounds in one exploration. *
Character: Warlock
Reward: 1000 Gold
Notes: This can be done passively, either on Haunted Caverns or Ember Grounds. There are multiple waves of Hellhounds in either Hall, so you should be able to clear them out easily and get this quest done.
Quest – Golem Mastery I
Adjacent Quests – Longliving, Observer, Demonic Commander I
Description: Deal 750,000 damage with the Golem. *
Character: any
Reward: Trait Types: Adjustment & Power
Notes: 750,000 damage masteries are completed fairly easily. Make sure you select the ability early on, upgrade it, and it should rack up enough damage throughout the rest of your run.
Quest – Observer
Adjacent Quests – Beastmaster, Golem Mastery I, Mark of Madness
Description: Survive 28 minutes without using your main weapon. *
Character: Warlock
Reward: 1000 Gold
Notes: It is important to plan out your gear ahead of time for this quest. You can either bring a build that focuses on other summons (Pest Ring, Necromancers Clutch, Invocator’s Grasp) or that focuses on your abilities (Spellcaster Gloves). Either way you choose, make sure you disable auto attack for the main weapon (right mouse button). Surviving until the final 2 minutes will complete this quest.
Quest – Demonic Commander I
Adjacent Quests – Golem Mastery I, Mark of Madness, Novice Warlock
Description: Deal 500,000 summon damage in one run. *
Character: Warlock
Reward: Ability: Summon Golem
Notes: This quest will be done passively. Bringing summon gear and/or choosing Summon damage upgrades during the run will help you get this done quicker.
Quest – Mark of Madness
Adjacent Quests – Observer, Demonic Commander I
Description: Take a total of 15,000 damage over all runs.
Character: Warlock
Reward: 1000 Gold
Notes: This will happen passively. You should get at least a large chunk of this done whilst working on the other Warlock quests. For the remaining bit, you can just spawn into runs and take damage until you’ve completed this quest.
Quest – Novice Warlock
Adjacent Quests – Demonic Commander I
Description: Reach level 30.
Character: Warlock
Reward: 500 Gold
Notes: This will happen passively during your run.
Story: Lightning Storm (1-16)
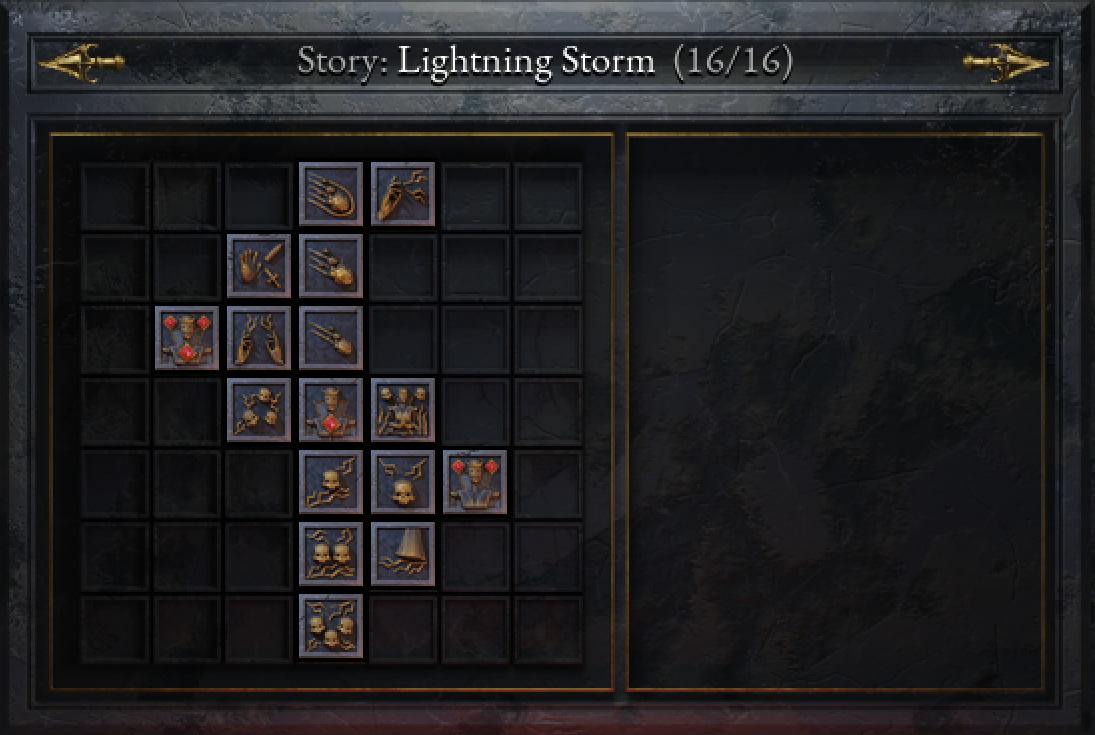 Quests that have an * in the ‘Description’ section indicate that the quest must be completed in one run.
Ability Masteries in this section:
- Meteor Strike – unlocked by completing Thunderstorm I
Quest – Meteor Strike Mastery III
Adjacent Quests – Queen of Thunder, Meteor Strike Mastery II
Description: Deal 3,000,000 damage with Meteor Strike. *
Character: any
Reward: Trait Types: Fusion & Shower
Notes: An easy way to do the 3,000,000 damage masteries is to load in to the Forgotten Viaduct and picking up the starting scroll (which you obtain after beating the hall once) and re-rolling until you get the mastery you are trying to achieve. Once you have it, grab both the other scrolls and head to either side of the bridge to fight the group of ghosts. Since they have lots of health, you will be able to easily rack up damage and can get your mastery done.
Quest – Queen of Thunder
Adjacent Quests – Meteor Strike Mastery III
Description: Apply electrify 100,000 times.
Character: any
Reward: Item: Thunder Crown
Notes: This will be done passively during your runs. Wearing gear to increase electrify chance (Ring of Thunder), or upgrading abilities to increase the chance will help get this done quicker.
Quest – Magic Step
Adjacent Quests – Meteor Strike Mastery II, Electrified
Description: Block 90 attacks in one run. *
Character: Sorceress
Reward: 1000 Gold
Notes: Upgrade your block strength, and if you really want, bring some block strength gear. This should happen pretty easily in a 30 minute run.
Quest – Meteor Strike Mastery II
Adjacent Quests – Meteor Strike Mastery III, Magic Step, Meteor Strike Mastery I
Description: Deal 1,500,000 damage with Meteor Strike. *
Character: any
Reward: Upgrade: Scattered Debris
Notes: The 1,500,000 damage mastery is fairly easily obtained during any given run without needing to do the bridge ghost strat like in the 3,000,000 damage mastery. Just make sure that you select the ability you’d like to get the mastery with early on and upgrade it as much as you can.
Quest – Master Sorceress
Adjacent Quests – Electrified
Description: Reach level 100.
Character: Sorceress
Reward: 1500 Gold
Notes: Reaching level 100 takes a while. Make sure you have retrieved the Jade Amulet (Under Milestones section – level up 500 times) and equipped it (+50% XP Gain). It is recommended you attempt this once you have at least 170 or 180 completed quests, and quest completion gives you XP boosts and the 170 mark is the threshold where you can start to get close to level 100. If you complete around 190, you should be guaranteed to hit level 100.
The way I did it was load into the Forgotten Viaduct, grab the scroll immediately that spawned next to you and head south for the other scroll down there. You can additionally choose to go for the scroll at the top of the map, but I decided against it to prioritize my time spent killing enemies. Save the glove that spawns at the start of the level until the end so that you can retrieve all the remaining XP on the map that you may not have picked up. Choose abilities that are High DPS and good for clearing. My personal favorites are Kugelblitz, Dragon Breath, Lightning Strike, and Ring Blades. These are all good for different reasons, but mostly they do lots of damage and can clear enemies at a distance that you may not be able to reach.
This may take you a few attempts (it took me a while to finally start consistently hitting level 100), so don’t worry. These may be some of the last quests you complete on your way to 100%ing HoT.
Quest – Electrified
Adjacent Quests – Magic Step, Master Sorceress, Meteor Strike Mastery I, Thunderstrike
Description: Deal 500,000 electrify damage in one run. *
Character: Sorceress
Reward: Blessing: Lightning Damage
Notes: This should happen passively, just increase your damage stats and your electrify chance and you will rack up electrify damage.
Quest – Meteor Strike Mastery I
Adjacent Quests – Meteor Strike Mastery II, Electrified, Novice Sorceress
Description: Deal 750,000 damage with Meteor Strike. *
Character: any
Reward: Trait Types: Frequency & Heat
Notes: 750,000 damage masteries are completed fairly easily. Make sure you select the ability early on, upgrade it, and it should rack up enough damage throughout the rest of your run.
Quest – Thunderstrike
Adjacent Quests – Electrified, Novice Sorceress
Description: Hit 1,000 enemies for 500 or more damage in one run. (Main Attack) *
Character: Sorceress
Reward: Item: Ring of Thunder
Notes: Increase your base damage, crit chance, and crit damage so that your crit damage deals over 500 damage.
Quest – Novice Sorceress
Adjacent Quests – Meteor Strike Mastery I, Thunderstrike, Hot Touch, Thunderstorm I
Description: Reach level 30.
Character: Sorceress
Reward: 250 Gold
Notes: This will happen passively during your run.
Quest – Hot Touch
Adjacent Quests – Novice Sorceress, Charged Up
Description: Apply burn to 1,000 enemies in a single run. *
Character: Sorceress
Reward: 1000 Gold
Notes: During your run, select fire abilities (Meteor Strike, Dragon’s Breath), upgrade their burn chance, their damage, and additionally you can choose lightning abilities as some have a Chance to Burn upgrade.
Quest – Thunderstorm I
Adjacent Quests – Novice Sorceress, Charged Up, Thunderstorm II
Description: Deal 500,000 lightning damage in one run. *
Character: Sorceress
Reward: Ability: Meteor Strike
Notes: This will be done passively during your run.
Quest – Charged Up
Adjacent Quests – Hot Touch, Thunderstorm I, Trained Sorceress
Description: Apply 20 stacks of electrify on a single enemy. *
Character: Sorceress
Reward: Trait: Lightning Affinity
Notes: This one can be a bit difficult. In order to maximize your electrify opportunity, fully increase your Effect on Hit Chance in the Shrine of Blessings, wear the Ring of Thunder and Thunder Crown, choose abilities Lightning Strikes, Kugelblitz, and Astronomer’s Orbs. Upgrade the Lightning Strikes and Kugelblitz however you wish, making sure you always take +% Electrify Chance upgrades. With the Astronomer’s Orbs, there is an upgrade that allows you to get Electrified Orbs, so take it. Another way to help is by finding one of the Golden Skulls in a crate, as it will 2x your attack speed, giving you 2x the chance. Fighting the Lord of any Hall should, with this setup, get you this achievement.
Quest – Trained Sorceress
Adjacent Quests – Charged Up
Description: Reach level 60.
Character: Sorceress
Reward: 750 Gold
Notes: This will happen passively during your run.
Quest – Thunderstorm II
Adjacent Quests – Thunderstorm I, Electrostatis, Thunderstorm III
Description: Deal 2,000,000 lightning damage in one run. *
Character: Sorceress
Reward: 750 Gold
Notes: This will likely happen passively during your run, make sure to choose other lightning damaging abilities.
Quest – Electrostatis
Adjacent Quests – Charged Up, Thunderstorm II
Description: Increase your movement speed to 11m/s. *
Character: Sorceress
Reward: Item: Electrostatic Treads
Notes: Sorceress’ base movement speed is 5.6m/s. Bring gear and select upgrades to increase this and you will get your movement speed up to 11m/s.
Quest – Thunderstorm II
Adjacent Quests – Thunderstorm II
Description: Deal 5,000,000 lightning damage in one run. *
Character: Sorceress
Reward: 1500 Gold
Notes: This one will be done during your runs, make sure you are talking lightning abilities and upgrading their damage. If you are struggling, use the bridge ghosts on the Forgotten Viaduct.
Story: Steady Shield (1-16)
 Quests that have an * in the ‘Description’ section indicate that the quest must be completed in one run.
Ability Masteries in this section:
- Kugelblitz – unlocked by completing Shield Mastery I
Quest – Shield Mastery I
Adjacent Quests – Novice Shieldmaiden, Duelist
Description: Deal 300,000 damage with the shield bash. *
Character: Shield Maiden
Reward: Ability: Kugelblitz
Notes: This will be done passively during your run.
Quest – Novice Shieldmaiden
Adjacent Quests – Shield Mastery I, Kugelblitz Mastery I, Invincible
Description: Reach level 30.
Character: Shield Maiden
Reward: 250 Gold
Notes: This will be done passively during your run.
Quest – Kugelblitz Mastery I
Adjacent Quests – Novice Shieldmaiden, Direct Hits
Description: Deal 750,000 damage with the Kugelblitz. *
Character: any
Reward: Trait Types: Voltage & Discharge
Notes: 750,000 damage masteries are completed fairly easily. Make sure you select the ability early on, upgrade it, and it should rack up enough damage throughout the rest of your run.
Quest – Duelist
Adjacent Quests – Shield Mastery I, Invincible, Shield Mastery II
Description: Defeat a Lord.
Character: Shield Maiden
Reward: Item: Duelist’s Spark
Notes: This one is fairly simple, just do a run with Shield Maiden and kill the Lord of the Hall. To do this easily, kill the Lord in the Haunted Caverns.
Quest – Invincible
Adjacent Quests – Novice Shieldmaiden, Duelist, Direct Hits, Bulwark
Description: Acquire the trait [Parry V] in a run. *
Character: Shield Maiden
Reward: Blessing: Block Strength
Notes: Select the trait Parry (+ Block Strength) and level it up to V (5).
Quest – Direct Hits
Adjacent Quests – Kugelblitz Mastery I, Invincible, Kugelblitz Mastery II
Description: Crit 2,000 enemies with your main attack in one run. Shield Bash doesn’t count. *
Character: Shield Maiden
Reward: Item: Fencer’s Gloves
Notes: Increase your crit chance early on by bringing crit chance gear (Wooden Ring) and ugrading crit chance stats. This may take a couple attempts but by the end of the run you will see if you’ve done it or not.
Quest – Shield Mastery II
Adjacent Quests – Duelist, Bulwark, Tower
Description: Deal 1,500,000 damage with the shield bash. *
Character: Shield Maiden
Reward: 750 Gold
Notes: This one is a bit harder, you will likely do this passively during your run, but the bridge ghosts are always a good option.
Quest – Bulwark
Adjacent Quests – Invincible, Shield Mastery II, Kugelblitz Mastery II, Trained Shieldmaiden
Description: Get hit 180 times in a single run. *
Character: Shield Maiden
Reward: Trait: Bulwark
Notes: Have low block strength to get this done quickly. Increasing your health capacity and regeneration will help you survive. This will probably be done passively anyway.
Quest – Kugelblitz Mastery II
Adjacent Quests – Direct Hits, Bulwark, Maiden’s Blessing
Description: Deal 1,500,000 damage with the Kugelblitz. *
Character: any
Reward: Upgrade: High Voltage
Notes: The 1,500,000 damage mastery is fairly easily obtained during any given run without needing to do the bridge ghost strat like in the 3,000,000 damage mastery. Just make sure that you select the ability you’d like to get the mastery with early on and upgrade it as much as you can.
Quest – Tower
Adjacent Quests – Shield Mastery II, Trained Shieldmaiden, Shield Mastery III
Description: Wait for 180 seconds before you start moving. You must move to complete the quest.
Character: Shield Maiden
Reward: 1000 Gold
Notes: Similar to the archer one, don’t move for 180 seconds. You can bring gear to either be tanky (block strength, base defense) or to kill enemies quickly (attack strength, range). Do this on Haunted Caverns to deal with the easiest monsters. Just be careful about spending your upgrades wisely.
Quest – Trained Shieldmaiden
Adjacent Quests – Bulwark, Tower, Maiden’s Blessing, Stomp
Description: Reach level 60.
Character: Shield Maiden
Reward: 750 Gold
Notes: This will be done passively during your run.
Quest – Maiden’s Blessing
Adjacent Quests – Kugelblitz Mastery II, Trained Shieldmaiden, Kugelblitz Mastery III
Description: Recover 100,000 HP in total.
Character: any
Reward: Item: Maiden’s Tear
Notes: This will happen passively over all of your runs, from your first one all the way up until this quest is completed.
Quest – Shield Mastery III
Adjacent Quests – Tower, Stomp
Description: Deal 3,000,000 damage with the shield bash. *
Character: Shield Maiden
Reward: 1500 Gold
Notes: This one is difficult and it took me a few close attempts. You definitely want to use the bridge ghosts for this. Play the run out like any other (grabbing scrolls, upgrades, etc) but sooner rather than later (20-25 minute mark), head to the bridge ghosts and start attacking them. I’ve seen it recommended to not use abilities and turn off auto attack, but I dislike that play style. I grabbed scrolls that could do AoE damage to kill off the monsters while I focused on attacking the bridge ghosts. This will go down to the wire, however, so don’t expect to complete this early on in a run.
Quest – Stomp
Adjacent Quests – Trained Shieldmaiden, Shield Mastery III, Kugelblitz Mastery III, Who needs defense?
Description: Hit 15 enemies with a single attack. Can’t be done with the shield bash.
Character: Shield Maiden
Reward: Trait: Multihit II
Notes: Increasing range and area/cone size can help you do this. This will likely happen on its own though.
Quest – Kugelblitz Mastery III
Adjacent Quests – Maiden’s Blessing, Stomp
Description: Deal 3,000,000 damage with the Kugelblitz. *
Character: any
Reward: Trait Types: Resistance & Peak
Notes: An easy way to do the 3,000,000 damage masteries is to load in to the Forgotten Viaduct and picking up the starting scroll (which you obtain after beating the hall once) and re-rolling until you get the mastery you are trying to achieve. Once you have it, grab both the other scrolls and head to either side of the bridge to fight the group of ghosts. Since they have lots of health, you will be able to easily rack up damage and can get your mastery done.
Quest – Who needs defense?
Adjacent Quests – Stomp, Master Shieldmaiden
Description: Survive 28 minutes without increasing your defense stat, including bonuses from gear. *
Character: Shield Maiden
Reward: Item: Defiant Plate
Notes: Refund your Defense in the Shrine of Blessings, unequip all gear that gives you +% base defense. Make sure to keep your defense at 15 the entire run. Do not grab upgrades that grant you defense. All other forms of defensive stats are fair game though: block strength, health capacity, etc… Just avoid upgrading base defense.
Adjacent Quests – Who needs defense?
Description: Reach level 100.
Character: Shield Maiden
Reward: 1500 Gold
Notes: Reaching level 100 takes a while. Make sure you have retrieved the Jade Amulet (Under Milestones section – level up 500 times) and equipped it (+50% XP Gain). It is recommended you attempt this once you have at least 170 or 180 completed quests, and quest completion gives you XP boosts and the 170 mark is the threshold where you can start to get close to level 100. If you complete around 190, you should be guaranteed to hit level 100.
The way I did it was load into the Forgotten Viaduct, grab the scroll immediately that spawned next to you and head south for the other scroll down there. You can additionally choose to go for the scroll at the top of the map, but I decided against it to prioritize my time spent killing enemies. Save the glove that spawns at the start of the level until the end so that you can retrieve all the remaining XP on the map that you may not have picked up. Choose abilities that are High DPS and good for clearing. My personal favorites are Kugelblitz, Dragon Breath, Lightning Strike, and Ring Blades. These are all good for different reasons, but mostly they do lots of damage and can clear enemies at a distance that you may not be able to reach.
This may take you a few attempts (it took me a while to finally start consistently hitting level 100), so don’t worry. These may be some of the last quests you complete on your way to 100%ing HoT.
Milestones (1-30)
Quest – Hell Dweller
Adjacent Quests – Seasoned, Pinpoint II
Description: Play for 666 minutes.
Character: any
Reward: 6666 Gold
Notes: Will happen passively while you play.
Quest – Seasoned
Adjacent Quests – Hell Dweller, Survivor II, Guest of Hell
Description: Level up 2000 times.
Character: any
Reward: 4000 Gold
Notes: Will happen passively while you play.
Quest – Survivor I
Adjacent Quests – Seasoned, Trader I
Description: Kill a total of 10 lords.
Character: any
Reward: 5000 Gold
Notes: Survive 30 minutes and kill 10 lords of any hall, will happen passively while you play.
Quest – Boss Slayer II
Adjacent Quests – Pinpoint II, Mass Destruction II
Description: Kill a total of 100 bosses.
Character: any
Reward: 5000 Gold
Notes: Kill the elite enemies that spawn/lords to contribute towards this. Will happen passively while you play.
Quest – Pinpoint II
Adjacent Quests – Hell Dweller, Boss Slayer II, Guest of Hell, Horde Slayer I
Description: Crit enemies 500,000 times.
Character: any
Reward: 4000 Gold
Notes: Will happen passively while you play. Having high crit chance helps finish this quicker.
Quest – Guest of Hell
Adjacent Quests – Seasoned, Pinpoint II, Trader I, Obolus
Description: Play for 333 minutes.
Character: any
Reward: Trait: Dedication IV
Notes: Will happen passively while you play.
Quest – Trader I
Adjacent Quests – Survivor II, Guest of Hell, Elite Slayer II, Pestbringer I
Description: Purchase 10 items from the wellkeeper.
Character: any
Reward: Item: Seal of Rebirth
Notes: Retrieve 10 items from runs and buy them from the wellkeeper.
Quest – Elite Slayer II
Adjacent Quests – Trader I, Novice
Description: Kill a total of 150 elite enemies.
Character: any
Reward: 4000 Gold
Notes: Kill the elite enemies that spawn in any given run. Will happen passively while you play.
Quest – Mass Destruction II
Adjacent Quests – Boss Slayer II, Horde Slayer I, Tippler
Description: Deal 100,000,000 damage in total.
Character: any
Reward: 4000 Gold
Notes: Will happen passively while you play.
Quest – Horde Slayer I
Adjacent Quests – Pinpoint II, Mass Destruction II, Obolus, Pinpoint I
Description: Kill 100,000 enemies in total.
Character: any
Reward: Trait: Weapon Proficiency IV
Notes: Will happen passively while you play.
Quest – Obolus
Adjacent Quests – Guest of Hell, Horde Slayer I, Pestbringer I, First Try
Description: Collect a total of 300 gold.
Character: any
Reward: Shrine of Blessings
Notes: Will happen passively while you play.
Quest – Pestbringer I
Adjacent Quests – Trader I, Obolus, Novice, Thirsty
Description: Apply debuffs 50,000 times.
Character: any
Reward: 1000 Gold
Notes: Will happen passively while you play.
Quest – Novice
Adjacent Quests – Elite Slayer II, Pestbringer I, Boss Slayer I
Description: Level up 500 times.
Character: any
Reward: Item: Jade Amulet
Notes: Will happen passively while you play.
Quest – Pestbringer II
Adjacent Quests – Tippler
Description: Apply debuffs 500,000 times.
Character: any
Reward: 4000 Gold
Notes: Will happen passively while you play.
Quest – Tippler
Adjacent Quests – Mass Destruction II, Pestbringer II, Pinpoint I, Horde Slayer II
Description: Consume a total of 100 potions.
Character: any
Reward: 2000 Gold
Notes: Will happen passively while you play.
Quest – Pinpoint I
Adjacent Quests – Horde Slayer I, Tippler, First Try, Mass Destruction I
Description: Crit enemies 50,000 times.
Character: any
Reward: 1000 Gold
Notes: Will happen passively while you play.
Quest – First Try
Adjacent Quests – Obolus, Pinpoint I, Thirsty, Determined
Description: Enter the Halls of Torment.
Character: any
Reward: Quest Stone
Notes: Will happen when you play your first run.
Quest – Thirsty
Adjacent Quests – Pestbringer I, First Try, Boss Slayer I, Tormenter I
Description: Consume a total of 10 potions.
Character: any
Reward: Blessing: Health Recovery
Notes: Will happen passively while you play.
Quest – Boss Slayer I
Adjacent Quests – Novice, Thirsty, Tormenter II, Survivor I
Description: Kill a total of 10 bosses.
Character: any
Reward: Trait: Stance Proficiency IV
Notes: Will happen passively while you play.
Quest – Tormenter II
Adjacent Quests – Boss Slayer I
Description: Apply damage effects 500,000 times.
Character: any
Reward: 4000 Gold
Notes: Will happen passively while you play.
Quest – Horde Slayer II
Adjacent Quests – Tippler, Mass Destruction I, Trader II
Description: Kill 400,000 enemies in total.
Character: any
Reward: 3000 Gold
Notes: Will happen passively while you play.
Quest – Mass Destruction I
Adjacent Quests – Pinpoint I, Horde Slayer II, Determined, Elite Slayer I
Description: Deal 10,000,000 damage in total.
Character: any
Reward: 1500 Gold
Notes: Will happen passively while you play.
Quest – Determined
Adjacent Quests – First Try, Mass Destruction I, Tormenter I, Greed Rising
Description: Enter the Halls of Torment 5 times and survive at least 5 minutes.
Character: any
Reward: 1000 Gold
Notes: Will happen passively while you play.
Quest – Tormenter I
Adjacent Quests – Thirsty, Determined, Survivor I, Steadfast
Description: Apply damage effects 50,000 times.
Character: any
Reward: 1000 Gold
Notes: Will happen passively while you play.
Quest – Survivor I
Adjacent Quests – Boss Slayer I, Tormenter I, Treasurer
Description: Kill a total of 1 lord.
Character: any
Reward: Blessing: Revives
Notes: Survive 30 minutes and kill 1 lord of any hall.
Quest – Trader II
Adjacent Quests – Horde Slayer II, Elite Slayer I
Description: Purchase 40 items from the wellkeeper.
Character: any
Reward: 5000 Gold
Notes: This one may take a while. Retrieve 40 items from your runs (potions don’t count) and buy them. You may need to farm gold for this. [See [b]Treasurer[/b] for gold farming info].
Quest – Elite Slayer I
Adjacent Quests – Mass Destruction I, Trader II, Greed Rising
Description: Kill a total of 50 elite enemies.
Character: any
Reward: Blessing: Gold Drops
Notes: Kill the elite enemies that spawn in your run.
Quest – Greed Rising
Adjacent Quests – Determined, Elite Slayer I, Steadfast
Description: Collect a total of 20,000 gold.
Character: any
Reward: Gold gets brewed in barrels.
Notes: Will happen passively while you play.
Quest – Steadfast
Adjacent Quests – Tormenter I, Greed Rising, Treasurer
Description: Enter the Halls of Torment 20 times and survive at least 5 minutes.
Character: any
Reward: 3000 Gold
Notes: Will happen passively while you play.
Quest – Treasurer
Adjacent Quests – Survivor I, Steadfast
Description: Collect a total of 200,000 gold.
Character: any
Reward: 5000 Gold
Notes: Most of this will be collected during your runs. If you need to farm gold – use the archer and run around the Ember Grounds breaking as many barrels as possible. Make sure your Gold Gain is maxed in the Shrine of Blessings and increase your movement speed and pickup speed. Doing this will net you >10,000 gold a run, which should help you farm gold easily.