Maps and checklists for 100% completion of puzzles in an enclave.
Preamble
The maps and lists are quite rough and ready, especially all the hidden cubes in Chasm and the Void. I will be looking to make refinements in the future, but for now they should work as a general guide for 100% enclave completion.
The “area” column is very approximate, but should make sense if you’re in the enclave.
The “direction” (dir.) in the tables in turn is very approximate to the center of the area.
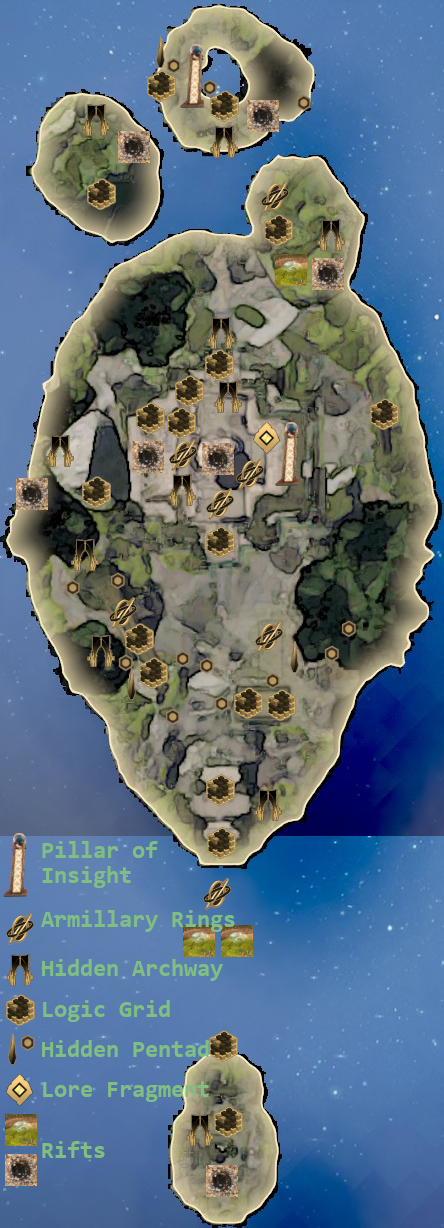
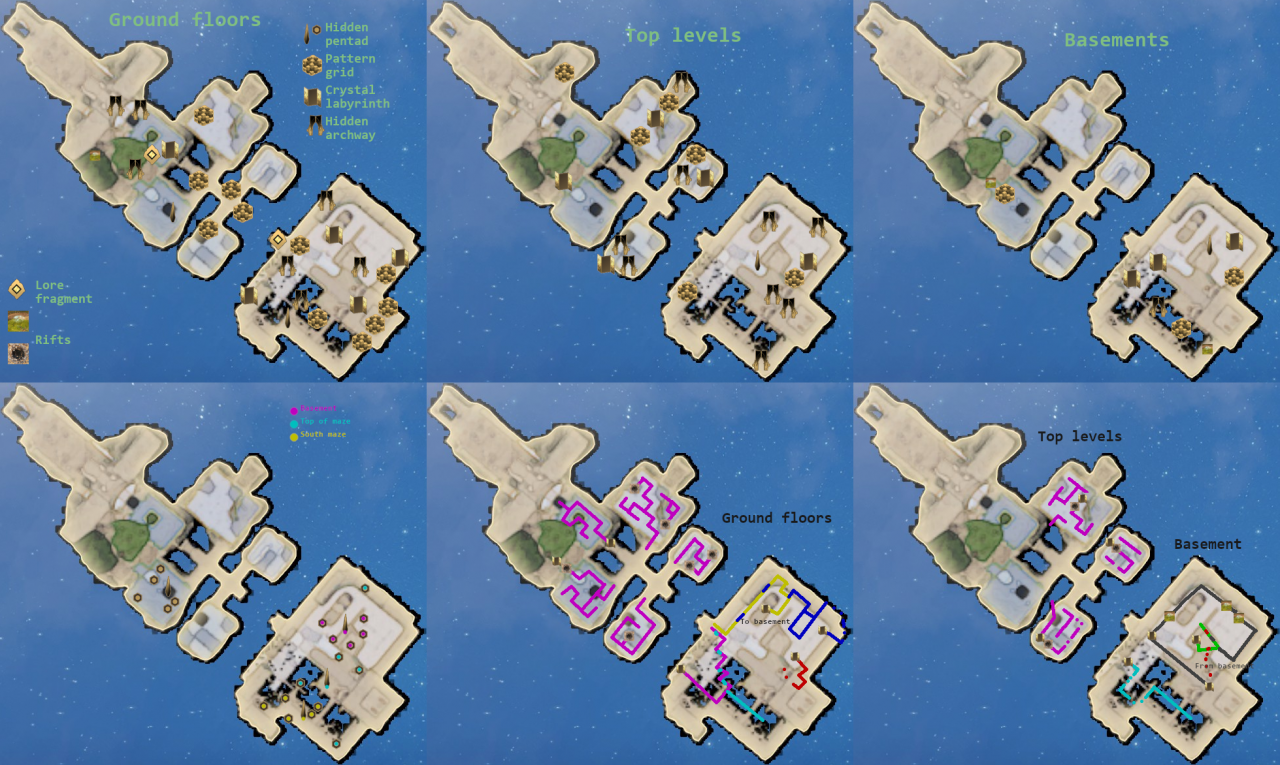
The map icons are placed as near their actual location as possible, but I tried to limit overlapping icons as little as possible, and the huge player marker on the in-game map is also not that helpful.
VERDANT GLEN
– Empyrean Journey
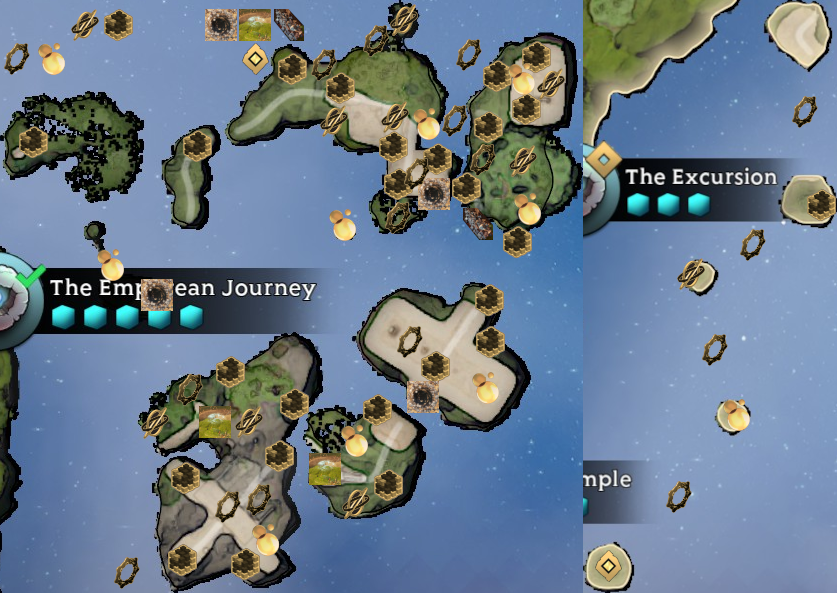
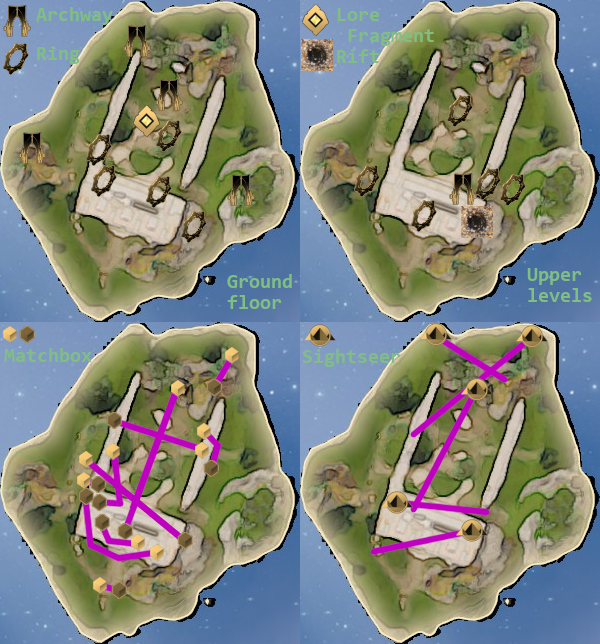
– Glass Temple
– Excursion
– Chamber of the Tribunes (1/2)
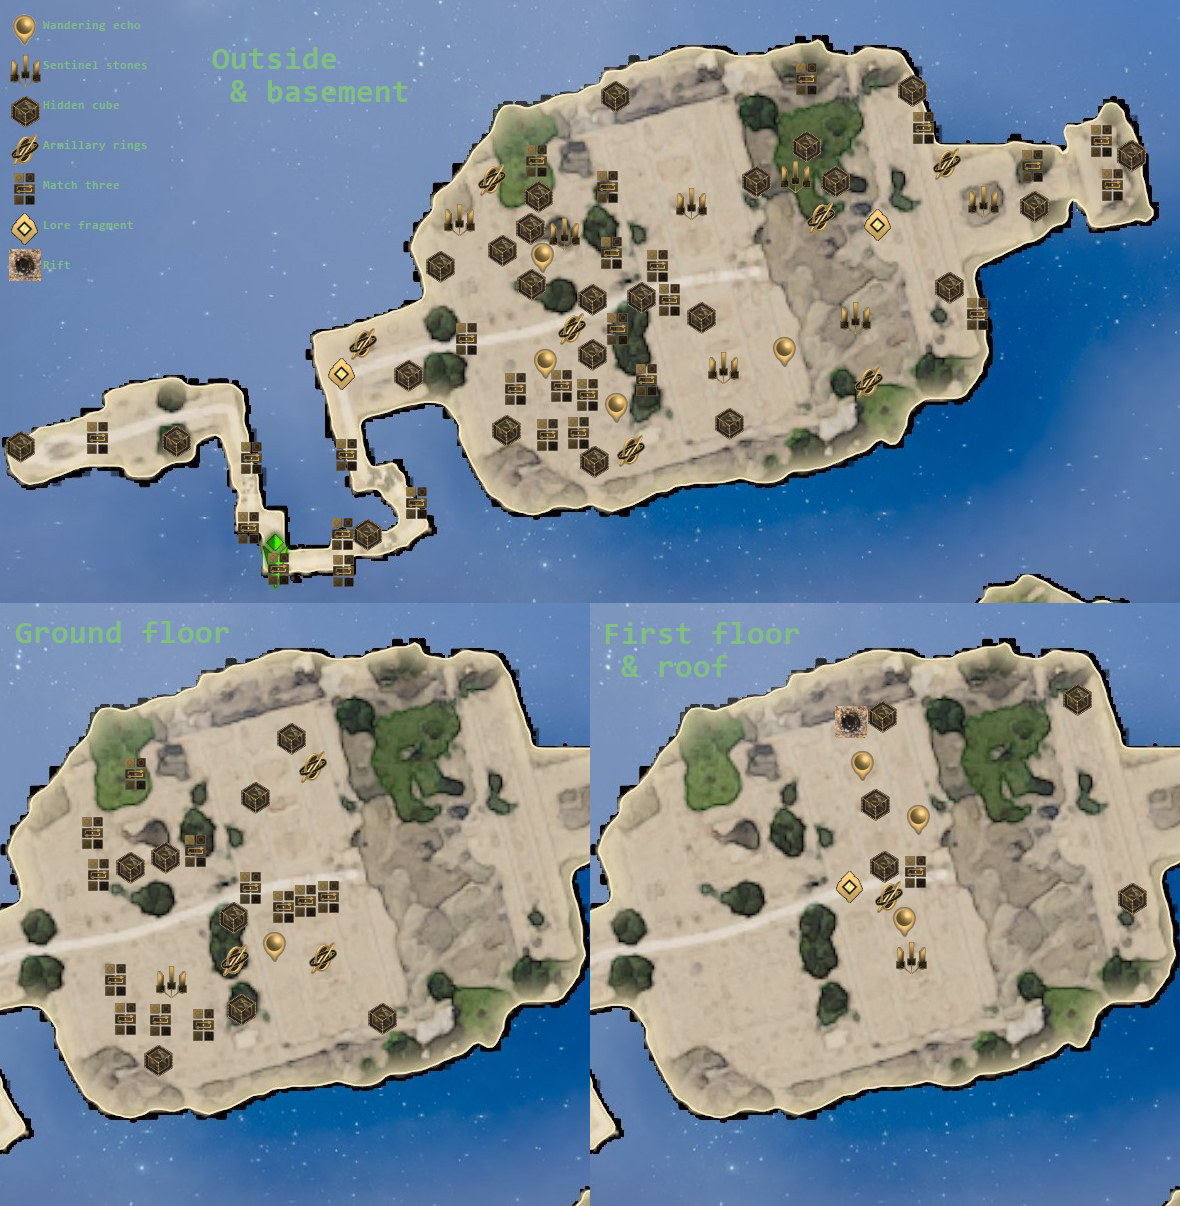
LUCIENT WATERS
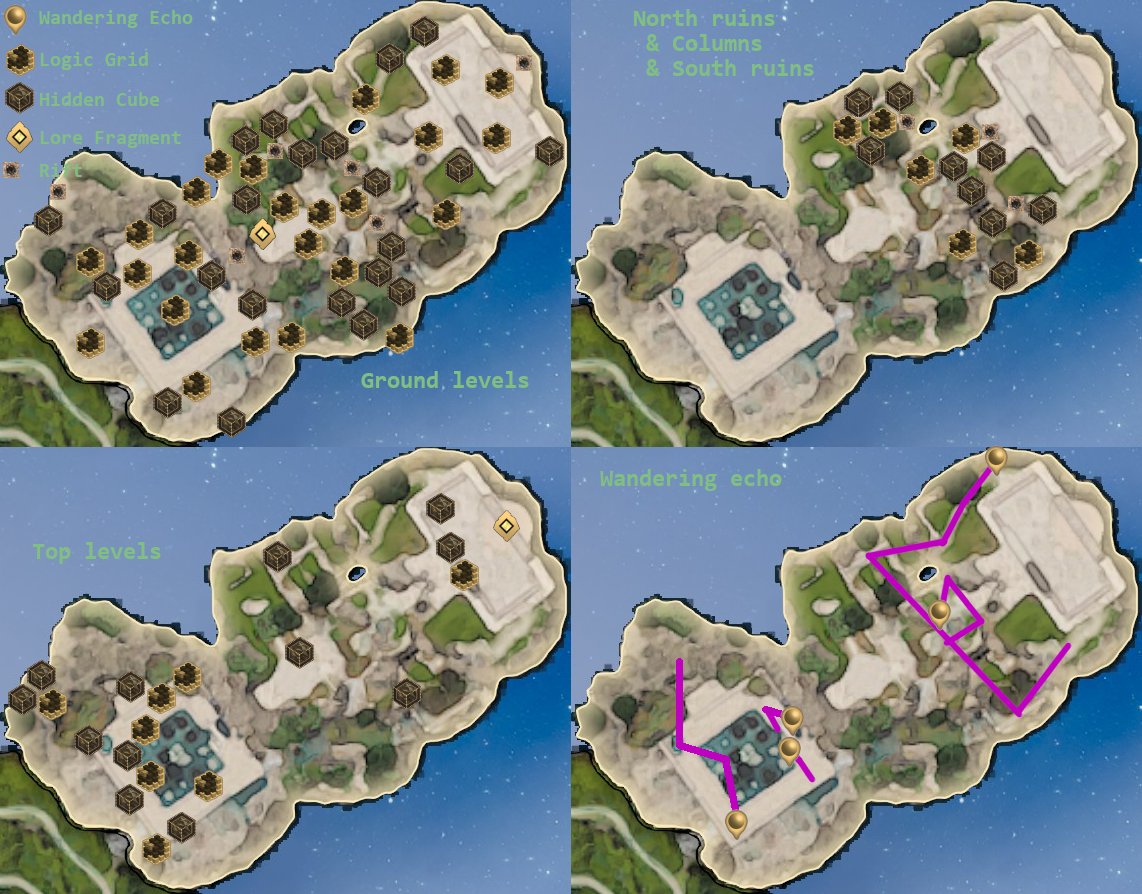
– Ancient Court
Look at the gate in the East wall from the rubble of the West wall
Look down at the North-West corner of the roof
Look at the water North of the East wall
Look at the palm trees inbetween the water and the rock in the East
Look at the North-East side of the Building from the North-East
In front of the building
North of the entrance, up in an alcove
On the South-East side of the wall
South of a rock, in the water
Inside the building
On top of the rubble in the North-West of the building
South-East of the building, next to the water
Above a gate in the West wall, visible from the West
In the North-West of the first floor
Inside a window next to the green cube
– Shattered Oasis (1/2)
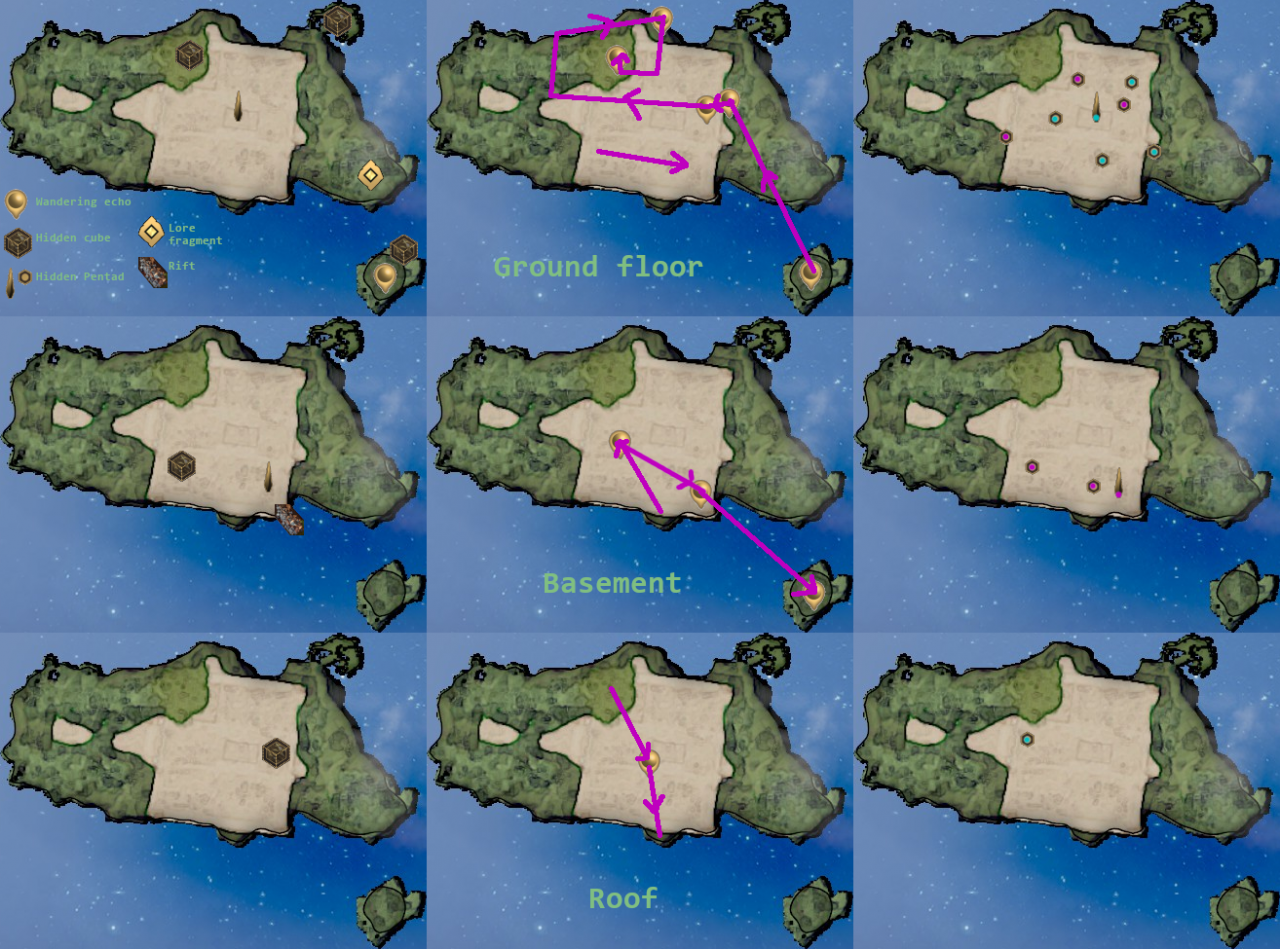
– Gather No Moss
AUTUMN FALLS
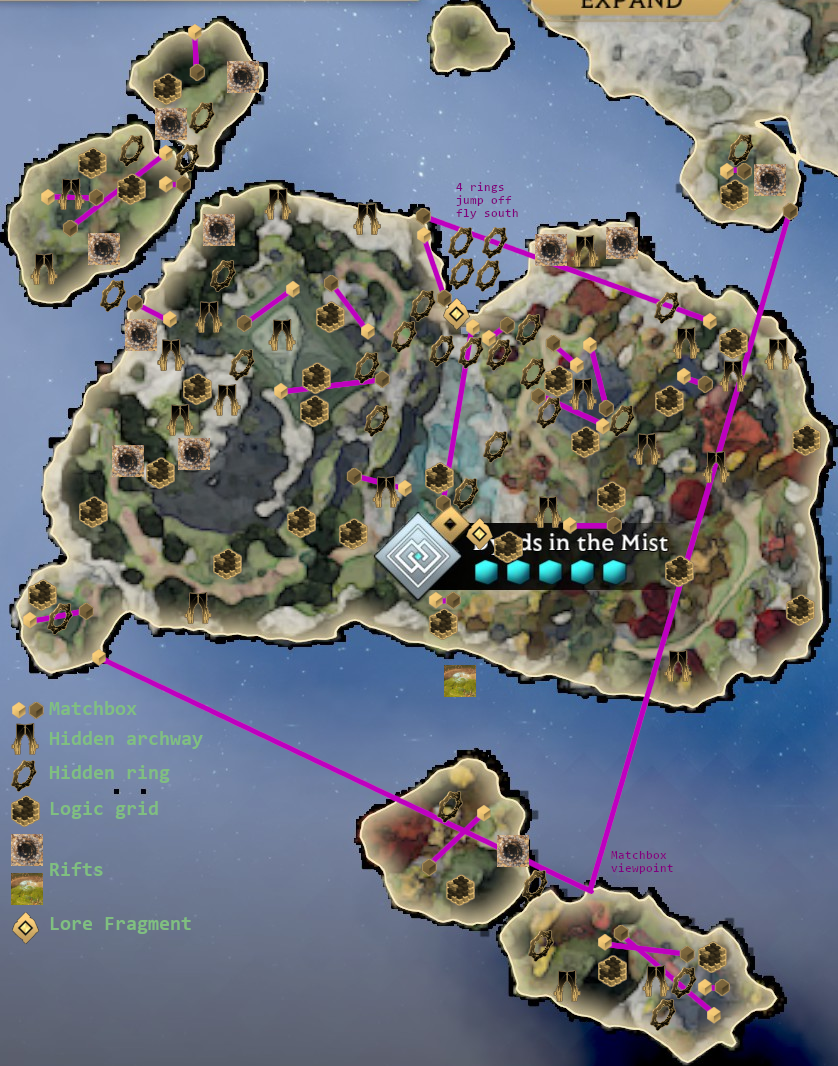
– Dyads in the Mist (1/2)
Inside the bell
Inside a tree
Inside the wooden floor of the bridge
Underneath the platform
North of the stone stairs
North in the siding of the awning
Inside the green cube
Atop the awning
Inside a stone lamp
– Dyads in the Mist (2/2)
Under the gazebo on the ground
Atop the gazebo
Inside the bridge
On the lower awning
Inside the ground outside
Under the deck
Inside a tree North of the West building
Inside the house on the same level
On rocky ground
West of the building
East under the rope bridge
Underneath NE island
Underneath the awning
On the ledge above, next to the path
On the East corner of the second awning
On the North corner of the awning
Underneath the green cube
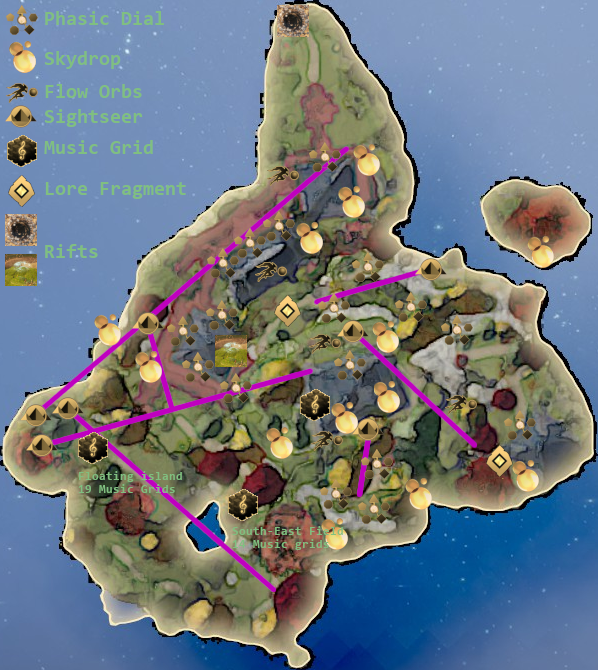
– Phase and the Melody (1/2)
Look at the red bridge South of the NW House
The staircase North-East of the lore fragment
South-West of the SE house
On the Hill South of the Sightseer
– Phase and the Melody (2/2)
NE house, looking at the small floating island
South of SE Field looking North-West
Look at the front of the C house from the West
– Chasm and the Void (1/2)
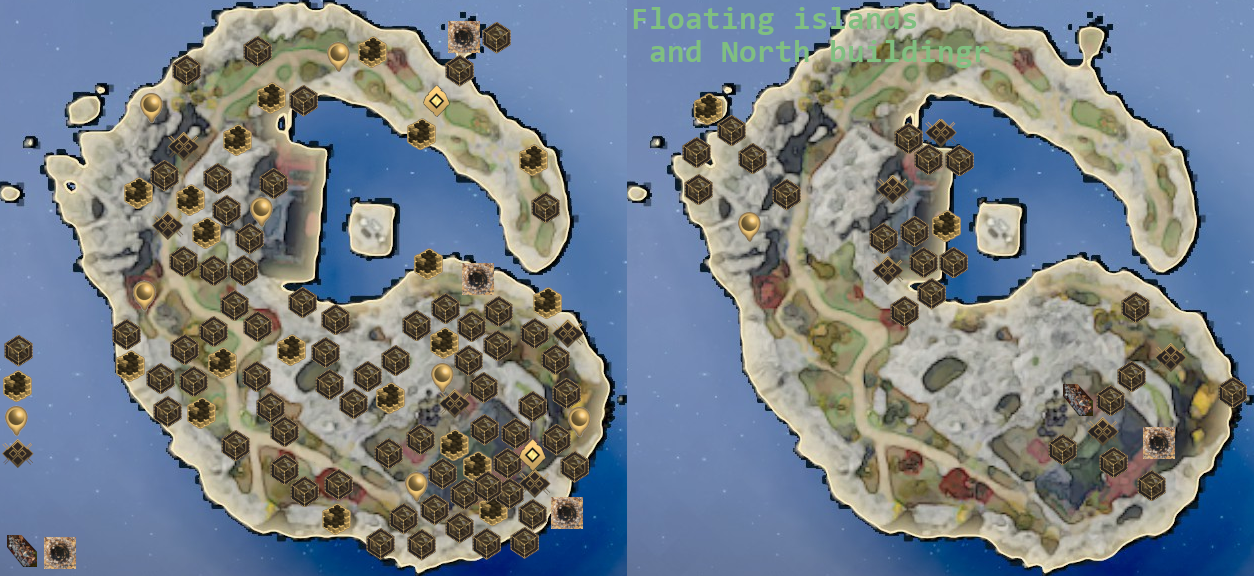
– Chasm and the Void (2/2)
SHADY WILDWOOD
– Vanishing Point
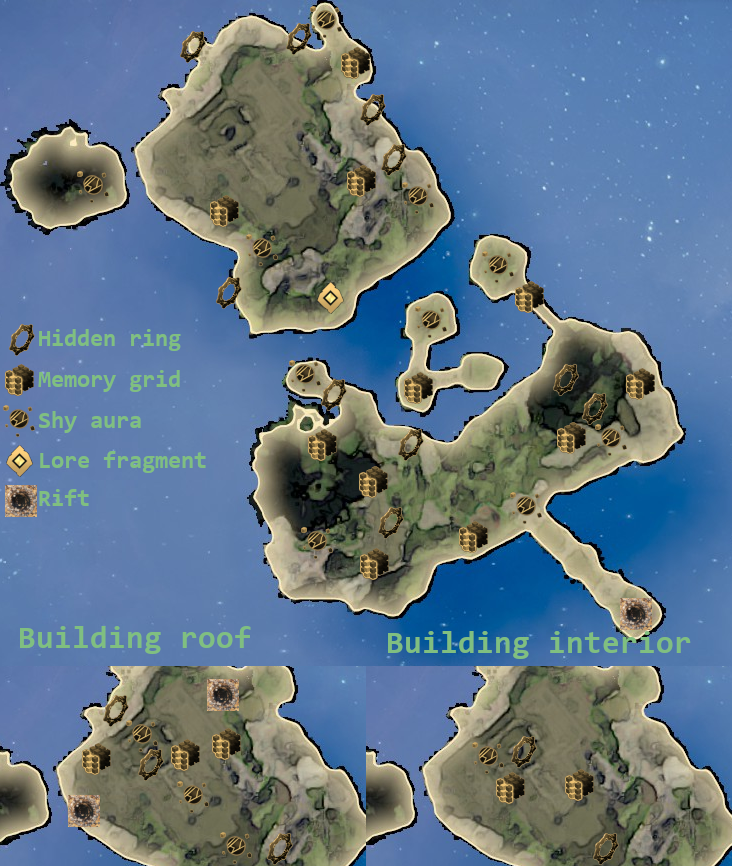
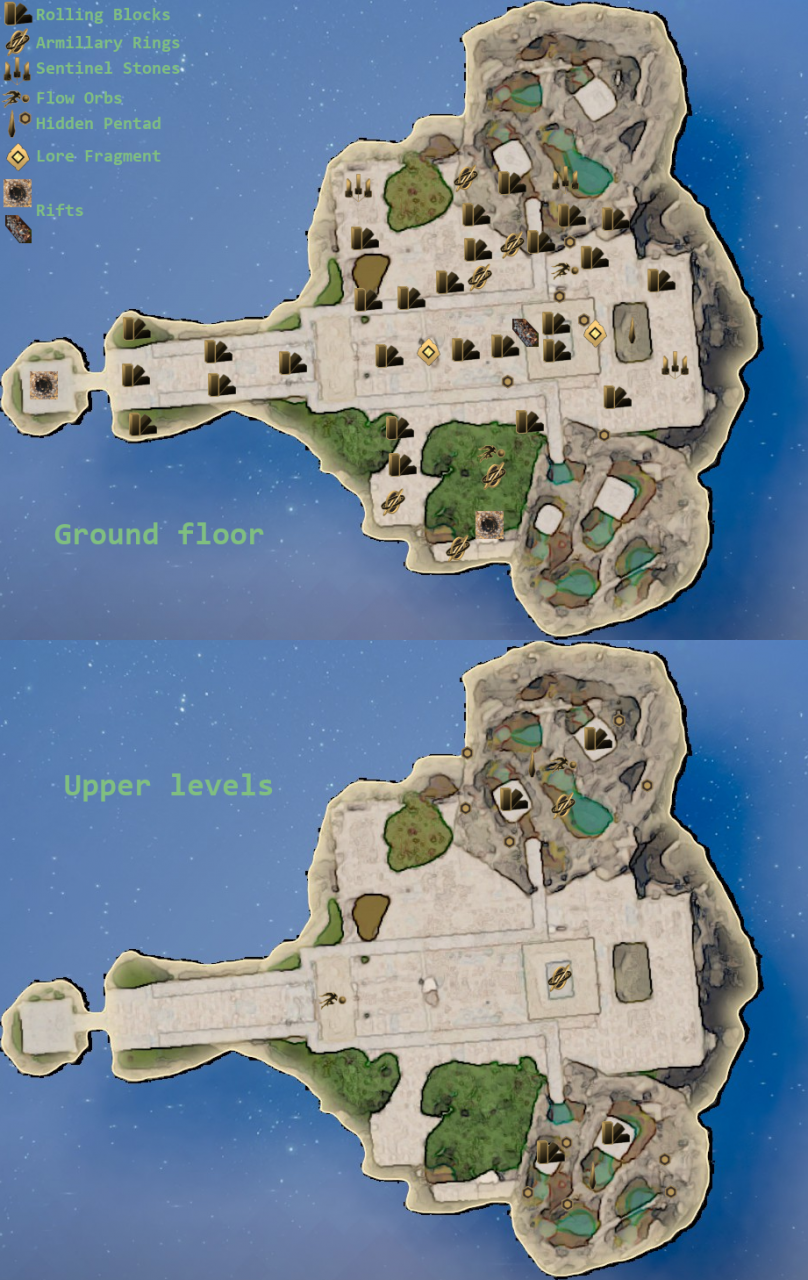
– Reflections in the Sky
This is a very cool level. The basic premise is that everything in the enclave is “doubled up”, i.e. everything has a counterpoint that is usually directly horizontally below (or above) itself, so almost almost every puzzle on the map and in the table exists twice, offset horizontally . There are two main exceptions: the North-East and South-East islands are counterpoints of each other, rather than being “just” upside-down. And 4 puzzles have no counterpoint, these have a “FALSE” entry in the tables “refl.” (reflection) column. And of course, because you land on the North island, the exit rift of this enclave is positioned on the South island.