This is a guide for Kill The Crows. It covers the weapons, equipment, special abilities, strategies, and achievements. I’ll include some tips and tricks that I’ve found helpful to get to the 500 kills mark.
BASICS
Welcome to Kill The Crows!
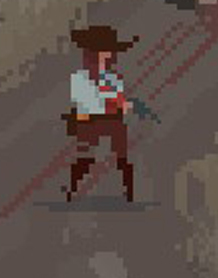
It’s a simple arena shooter set in the supernatural west.
Basic movement is with the WASD keys.
Shoot is set to the left mouse button.
Reload is set to R.
Dodge is set to Space.
Showdown, the time stopping super power that allows our heroin to execute shots quickly and accurately, is set to right click.
Secondary fire is set to the middle mouse button.
WEAPONS
•••••••••••••••••••••••••••••••••••••••••••••••••••••••••••••••••••••••••••••••••••••••••••••••••••••••••••••••••••••••••••

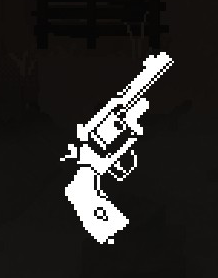
PEACEBRINGER
Reload Time:
1.6s
Rounds:
6
Secondary/Special:
None
Flavour text:
The first handgun used by Isabelle. Although a commonly seen model, it was favored especially by sheriffs due to its high reliability. It is the sole heirloom of Isabella’s family.
Unlock conditions:
None
Notes:
Useful all game thanks to it’s quick single round reloading speed. I would rank this 2/4.
•••••••••••••••••••••••••••••••••••••••••••••••••••••••••••••••••••••••••••••••••••••••••••••••••••••••••••••••••••••••••••
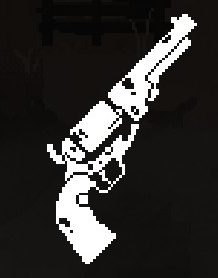
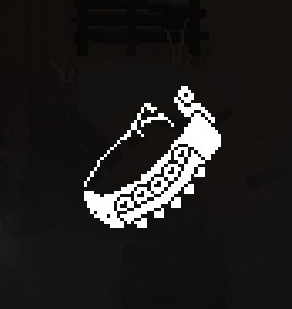
THE CRIMSON
Reload Time:
1.2s
Rounds:
8
Secondary/Special:
Reloads all 8 rounds at once from a speed loader
Flavour text:
A ceremonial Revolver once used by a long-lost cavalry. It was wielded by a boy Isabella encountered in the wastelands. The boy who saved Isabella’s life handed her the gun and vanished across the Crimson Horizon.
Unlock conditions:
Defeat a boss with 90% accuracy. Very Easy, just don’t miss a shot and you’re good.
Notes:
I’m on the fence about this one. Its 8 round capacity is nice and you would think it’s reloading speed would be the best in the game but I don’t think it is. Since it reloads all of it’s ammo at once you are left with an empty revolver for a long time. The single round loaders at least give you one round to shoot when you’re in a bind and you’re spamming reload. I would rank this 4/4.
•••••••••••••••••••••••••••••••••••••••••••••••••••••••••••••••••••••••••••••••••••••••••••••••••••••••••••••••••••••••••••
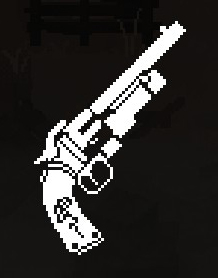
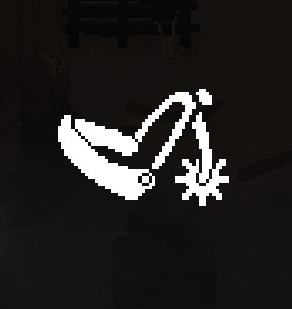
POCKET CANNON
Reload Time:
1.7s
Rounds:
4
Secondary/Special:
Each shot can pierce through up to 2 enemies at once.
Flavour text:
A revolver with a sylinder and barrel modification to accommodate rifle rounds. It was wielded by the infamous outlaw who engaged in a duel with Isabella. This revolver was the spoils of that duel.
Unlock conditions:
Using a Showdown power, kill 6 of more enemies at once 5 separate times in a single play-through.
Notes:
Not a bad revolver but not one that I would use consistently. The penetration seems like a overpowered perk but it doesn’t go through cover and only travels through 2 enemies at once. Useful until you unlock the final revolver and then it’s over shadowed by the shotgun function. 3/4.
•••••••••••••••••••••••••••••••••••••••••••••••••••••••••••••••••••••••••••••••••••••••••••••••••••••••••••••••••••••••••••
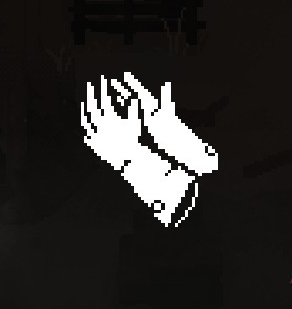
ROYAL GUNSMITH’S CUSTOM
Reload Time:
1.9s
Rounds:
6
Secondary/Special:
Underbarrel shotgun secondary fire that can kill as many enemies as are in it’s cone of fire. Reduces your movement speed while reloading.
Flavour text:
A double-barreled revolver that fires shotgun shells from the lower barrels. It bears the mark of a royal gunsmith lost to time, disappering alongside the kingdom. The gunsmith, upon observing Isabella’s left eye, crafted this revolver in silence.
Unlock conditions:
Kill 15 enemies using the bomber enemy in a single play-through. Simple once you get above 100 kills. Just focus on the Bombers in the crowds of enemies and you’ll get it in no time.
Notes:
This is the one I usually use. It definitely has its downsides. You need to occupy an equipment slot while using this so you get a decent speed while reloading and the reload in itself is very slow, even with single rounds. I feel like it’s capacity to kill at close range out weighs it’s detractors but you might think different. 1/4.
SHOWDOWN
•••••••••••••••••••••••••••••••••••••••••••••••••••••••••••••••••••••••••••••••••••••••••••••••••••••••••••••••••••••••••••
Showdown is a special power that let’s Isabella stop time and pick her shots. It is a timed special so don’t take too long. Only one power lets you actually wait and look at your options. If you accidentally right click and activate it, it will waste a charge so make sure you aren’t randomly clicking. FYI: Charge cost is just how many crows you need to kill to get one full charge.
•••••••••••••••••••••••••••••••••••••••••••••••••••••••••••••••••••••••••••••••••••••••••••••••••••••••••••••••••••••••••••

CROW EYE
Charges:
2
Charge Cost:
7
Max Targets:
6
Special:
Fully reloads your revolver.
Flavour text:
A mysterious power gained from an accident a decade ago. On that day, they appeared wearing crow masks. It was during that very day that the town’s sheriff was murdered, and the church was set ablaze.
Unlock conditions:
None
Notes:
Starting Showdown so it isn’t amazing but it works in a pinch. Activate it and quickly move the circle to an enemy to tag them. After 6 are tagged or the time runs out, you will quickly shoot all of the selected targets and get a free full reload. It’s quickly overshadowed so it’s 4/4.
•••••••••••••••••••••••••••••••••••••••••••••••••••••••••••••••••••••••••••••••••••••••••••••••••••••••••••••••••••••••••••

BLUE CONSTELLATION
Charges:
2
Charge Cost:
9
Max Targets:
9
Special:
Showdown timer doesn’t start until you move the cursor. Fully reloads your revolver.
Flavour text:
The cultists conducted their ritual on every townsperson regardless of their gender and age. These acts resembled torture more than rituals, persisting for several days. No one emerged unscathed from the harrowing ordeal.
Unlock conditions:
Get 50 kills in a single play-through.
Notes:
Not bad but I never found much use for it. The extra targets are very helpful but I never found the slowdown mechanic to be that convenient or necessary. 3/4
•••••••••••••••••••••••••••••••••••••••••••••••••••••••••••••••••••••••••••••••••••••••••••••••••••••••••••••••••••••••••••

GROWING HATRED
Charges:
3
Charge Cost:
7
Max Targets:
Unlimited
Special:
The circle emanates from the centre of the player and tags targets that are nearby. Fully reloads your revolver.
Flavour text:
Isabella, who was just a young girl at the time, also had her left eye gouged out under the guise of a ritual. The cultists discarded the bloodied corpses into the swamp. Isabella, too, was cast into a pit filled with corpses alongside her family.
Unlock conditions:
Defeat a boss. After 100 crows are killed a boss will appear. Shoot both of the blue crows that orbit around him and he will go down. Dodge around the tombstones he puts up in front of him and shoot him once to defeat him.
Notes:
My most used Showdown. The best for crowd control. You don’t control the circle but the longer you hold down the right mouse button, the larger the circle grows. When the time runs out, all of the cultists that were tags and not behind cover will all be shot. 1/4.
•••••••••••••••••••••••••••••••••••••••••••••••••••••••••••••••••••••••••••••••••••••••••••••••••••••••••••••••••••••••••••

CURSED GAZE
Charges:
2
Charge Cost:
9
Max Targets:
6
Special:
Does not automatically reload your revolver. Shoots through all cover.
Flavour text:
However, the ritual proved successful, and she stood as the lone survivor who endured through the rite. Isabella, her immortal eye burning brightly, fled from her hometown.
Unlock conditions:
Reach 300 kills in a single play-through
Notes:
The final Showdown and what I like to dub the “boss killer”. You have to guide the circle to your targets but no matter where they are, they will be shot. This thing will go through multiple walls, wells, hedges, everything. With bosses, once you hit all of the blue crows orbiting them, they will put up a wall of tombstones that you can’t shoot through. With this Showdown, you can easily shoot through their wall. 2/4.
•••••••••••••••••••••••••••••••••••••••••••••••••••••••••••••••••••••••••••••••••••••••••••••••••••••••••••••••••••••••••••
These are passive upgrades that you can equip 2 at a time. The Strange Locket and Harmonica are the best combo in my opinion.
•••••••••••••••••••••••••••••••••••••••••••••••••••••••••••••••••••••••••••••••••••••••••••••••••••••••••••••••••••••••••••
RUSTY SPUR
Ability:
Dodge has a short recovery time.
Flavour text:
A spur used by horseman. As the world twisted, conventional horse breeds neared extinction, rendering this relic of a bygone era to lose its utility.
Unlock conditions:
Kill 6 or more enemies with a single Showdown.
Notes:
You’ll use this for the majority of the game. Great way to spam dodge and get out of sticky situations.
•••••••••••••••••••••••••••••••••••••••••••••••••••••••••••••••••••••••••••••••••••••••••••••••••••••••••••••••••••••••••••
RIFLEMAN GLOVES
Ability:
Movement speed increased while reloading.
Flavour text:
Highly pliable gloves that extend to the fingertips. They prevent burns when handling overheated firearms.
Unlock conditions:
Kill 2 Shield Crows without using Showdown. Just roll behind them and shoot them in the back.
Notes:
Again, great early piece of equipment. You’ll use this for the majority of the game.
•••••••••••••••••••••••••••••••••••••••••••••••••••••••••••••••••••••••••••••••••••••••••••••••••••••••••••••••••••••••••••
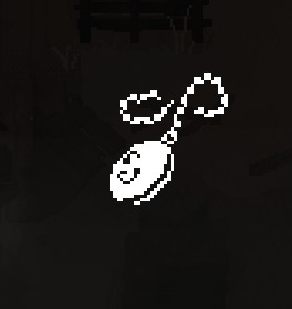
STRANGE LOCKET
Ability:
When you kill 5 or more enemies in one Showdown shot, your Showdown charges will gain charges.
Flavour text:
A necklace designed for photo insertion. It holds an unknown power, and when exposed to starlight, it vibrates faintly.
Unlock conditions:
Kill 30 enemies with Showdown in a single play-through.
Notes:
One of the best pieces of equipment in the game. When used with the harmonica, you can spam Showdown and become untouchable.
•••••••••••••••••••••••••••••••••••••••••••••••••••••••••••••••••••••••••••••••••••••••••••••••••••••••••••••••••••••••••••
LEATHER BANDOLEER
Ability:
You reload your revolver faster once it is completely empty but it has to be completely filled to gain the ability again.
Flavour text:
A must-have for adept gunfighters. This bandoleer is worn around the waist, allowing for swift magazine replacements.
Unlock conditions:
Defeat a boss with the last bullet.
Notes:
Very easy to get if you pay attention. Relatively useful when paired with the Crimson but other than that, not really worth a slot.
•••••••••••••••••••••••••••••••••••••••••••••••••••••••••••••••••••••••••••••••••••••••••••••••••••••••••••••••••••••••••••

DIPPING TOBACCO
Ability:
Increases the number of targets you can tag with Showdown.
Flavour text:
Tobacco powder contained within a cylindrical container. It is chewed for use, inducing an awakened state momentarily. It appears to be more than a simple mixture of tobacco.
Unlock conditions:
Kill 3 or more Sniper Crows with a single Showdown.
Notes:
It’s okay but once you unlock Growing Hatred, it becomes obsolete.
•••••••••••••••••••••••••••••••••••••••••••••••••••••••••••••••••••••••••••••••••••••••••••••••••••••••••••••••••••••••••••
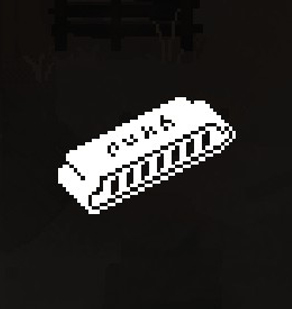
OLD HARMONICA
Ability:
You recharge your Showdown when standing still.
Flavour text:
A harmonica with several holes damaged. It was cherished by sentinels tasked with long-term posts, serving as a pastime.
Unlock conditions:
Defeat a boss with Showdown.
Notes:
Another one of the best pieces of equipment in the game. This paired with the locket will make the game trivial.
•••••••••••••••••••••••••••••••••••••••••••••••••••••••••••••••••••••••••••••••••••••••••••••••••••••••••••••••••••••••••••
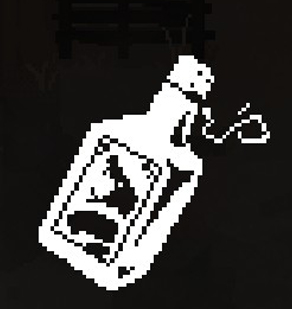
FUNCTIONAL OIL
Ability:
You can shoot while dodging.
Flavour text:
Snake oil sold by a faceless wandering merchant. It is claimed to have actual efficacy in enhancing physical abilities, but it is often results in the erosion of rationality.
Unlock conditions:
Reach 200 Kills with 90% accuracy
Notes:
I rarely used this.
•••••••••••••••••••••••••••••••••••••••••••••••••••••••••••••••••••••••••••••••••••••••••••••••••••••••••••••••••••••••••••
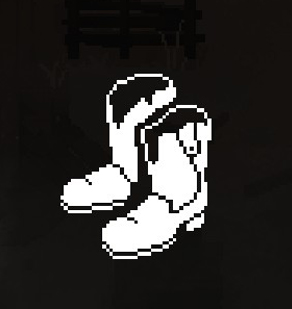
IMPROVED BOOTS
Ability:
Your movement speed is increased briefly after a Showdown shot.
Flavour text:
Tailored for delivery personnel covering long distances. They integrate a fine cowhide layer on the sole, allowing for faster movement.
Unlock conditions:
Reach 401 kills
Notes:
The last and hardest piece to unlock and it really isn’t amazing. If you use your showdown right, you won’t need to quickly move anywhere.
•••••••••••••••••••••••••••••••••••••••••••••••••••••••••••••••••••••••••••••••••••••••••••••••••••••••••••••••••••••••••••
THE MURDER OF CROWS
•••••••••••••••••••••••••••••••••••••••••••••••••••••••••••••••••••••••••••••••••••••••••••••••••••••••••••••••••••••••••••
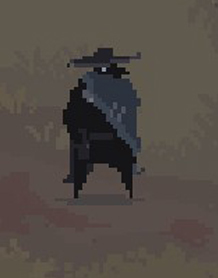
Pistol Crow:
The first enemy you’ll see. They run up to you, slowly aim, and fire a slow bullet that drops off a short distance later. They are easy to dispatch but always been on the look out as a stray round might hit you now and again.
•••••••••••••••••••••••••••••••••••••••••••••••••••••••••••••••••••••••••••••••••••••••••••••••••••••••••••••••••••••••••••
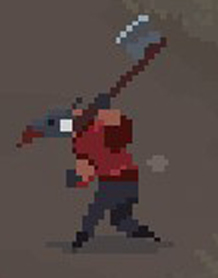
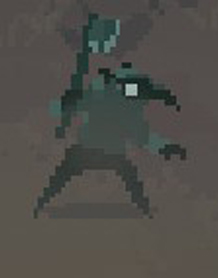
Axe Crow:
The second enemy you’ll come across. They run at you with an axe and try to bury it in your head. You can kite them quite easily as you both run the same speed. Again, don’t underestimate them.
•••••••••••••••••••••••••••••••••••••••••••••••••••••••••••••••••••••••••••••••••••••••••••••••••••••••••••••••••••••••••••
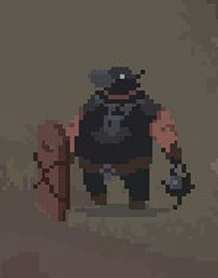
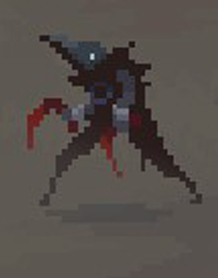
Shield Crow:
This large crow is very slow and will hit you with a flail if you get close enough. They have a floating shield that orbits around them. The shield will block all of your regular shots but not your Showdown shots. If you are out of show down you can out run their shield and shoot them in the side or you could roll behind them and shoot them in the back.
•••••••••••••••••••••••••••••••••••••••••••••••••••••••••••••••••••••••••••••••••••••••••••••••••••••••••••••••••••••••••••
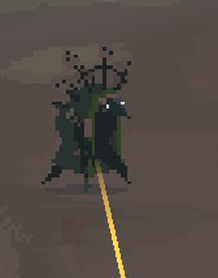
Sniper Crow:
This enemy sits as far back as possible and will train a shot on you as indicated by a red line. The line will turn yellow before they take a shot. You can outrun their shot but it’s always easier to roll. Beware: Their shot animation doesn’t line up with their bullet so you can get hit by their line of site before the bullet hits Isabella.
•••••••••••••••••••••••••••••••••••••••••••••••••••••••••••••••••••••••••••••••••••••••••••••••••••••••••••••••••••••••••••
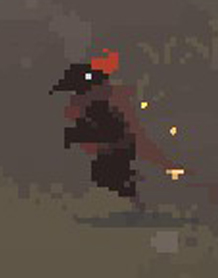
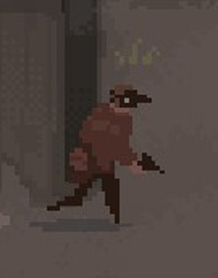
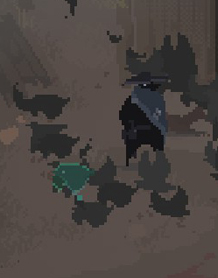
Bomber Crow:
A crow cultist with a suicide bomb vest. They will make a beeline for you, stop to prime the vest, and then leap at you, exploding when contacting the ground. You can see their blast radius by the circle on the ground after they prime the vest. If shot, they will fall but the vest will go off after a short while so stay away from dead bombers. They will take out friendly units, so focus on them first.
•••••••••••••••••••••••••••••••••••••••••••••••••••••••••••••••••••••••••••••••••••••••••••••••••••••••••••••••••••••••••••
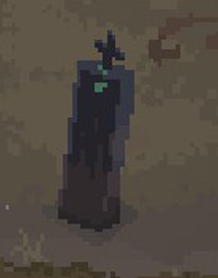
Hidden Crow:
A mantis-like crow who quickly hops in a staccato pattern towards you. They can make up ground on you fast so take them out after the bombers. They blend into the background so keep your eyes peeled.
•••••••••••••••••••••••••••••••••••••••••••••••••••••••••••••••••••••••••••••••••••••••••••••••••••••••••••••••••••••••••••
Boss Crow:
The main antagonist. This crow will raise tombstones out of the ground that will block your path.
He will summon a ring of crows around him, with certain ones being blue. After that he will teleport away and slowly walk towards you. Once he sees you he will train his sights on you and shoot with 3 shots. He has a similar line of sight to the sniper so beware once it turns yellow.
Shoot the blue crows and he will go down, raising a wall of tombstones in front of him. Dodge around the tombstones and shoot him once to end the boss phase. If you can’t get to him when he’s down, he will teleport away and regain his circle of crows. They tombstones will eventually burst and ghost crows will emerge and run at you:
They are the same as the axe enemies.
STRATEGIES
•••••••••••••••••••••••••••••••••••••••••••••••••••••••••••••••••••••••••••••••••••••••••••••••••••••••••••••••••••••••••••
-Remap the reload function from ‘R’ to ‘LShift’. This will keep your fingers on the movement keys longer and put that typically lethargic pinky to work.
-Abuse your Showdown. Once you get the Harmonica and the Locket, that combo plus Cursed Gaze makes the game a bit easier in the later levels.
-Prioritise Bomber Crows and Hidden Crows. Most other Crows can be dodged.
-Remember to reload before you shoot the last blue crow for the boss. That way you are downing him with a full revolver.
•••••••••••••••••••••••••••••••••••••••••••••••••••••••••••••••••••••••••••••••••••••••••••••••••••••••••••••••••••••••••••
ACHIEVEMENTS
•••••••••••••••••••••••••••••••••••••••••••••••••••••••••••••••••••••••••••••••••••••••••••••••••••••••••••••••••••••••••••
Kill the Crows isn’t a hard game so all of these achievements are easy enough with enough play time. When I say hard, I don’t mean truly hard.
•••••••••••••••••••••••••••••••••••••••••••••••••••••••••••••••••••••••••••••••••••••••••••••••••••••••••••••••••••••••••••
EASIEST:

Are you Stuck?
Simple. Stand still for 30 seconds.

Western Flail
Get killed by a Shield Crow’s flail.

Scarecrow
Scare the crows (the animals not the enemy) when they gather. If you see crows fly off after you shoot at them, you’ve done it right. Can be done through multiple play-throughs.

Full Pocket
Equip two pieces of equipment. Once you have two, put one on each hip.

Gear Up!
Equip a piece of equipment.

Warm Hug
Get killed by a Bomber Crow.

Remember Me?
Defeat your first boss

Kill it with fire
When a Hidden Crow appears on screen after 300 kills, you’ll get the achievement.

“WHEN YOU HAVE TO SHOOT, SHOOT, DON’T WALK!!”
Use your Showdown to kill a boss. You can only use this when he is downed. The easiest one to use is Cursed Gaze.

Hey, Careful with that dynam..
Get a Bomber Crow to kill 20 other Crow Cultists. Focus on the Bombers in the crowds of Crows headed your way. If you can get them in a bottleneck, it’s even easier.

The Kid
Unlock the second revolver.

The Outlaw
Unlock the third revolver.

The Gunsmith
Unlock the forth revolver.

After Harrowing Ritual,
Unlock the second Showdown.

Girl in bloodstains
Unlock the third Showdown

Fled across the desert
Unlock the fourth Showdown
•••••••••••••••••••••••••••••••••••••••••••••••••••••••••••••••••••••••••••••••••••••••••••••••••••••••••••••••••••••••••••
EASY:

Survivor
Achieve 200 Kills.

Crow Killer
Achieve 300 Kills.

Murder of crows
Deal with 30 enemies at the same time. Just kite the first 30 enemies that appear on screen and you’ll get this.

Weird West Shows
Kill 20 Ghost Crows. This can be achieved over multiple play-throughs or you can wait for 20 to spawn during a boss phase.

I count six shots
Achieve 60 Kills with 100% accuracy. Just watch your shots or use Showdown as much as you can.

I count two guns
Achieve 120 kills with 100% accuracy. Same as above. You’ll eventually get Showdowns and equipment that help with this.
•••••••••••••••••••••••••••••••••••••••••••••••••••••••••••••••••••••••••••••••••••••••••••••••••••••••••••••••••••••••••••
HARD:

Full Arsenal
Unlock all the gear. 400 kills can be a slog but just push through it. Abuse Showdown as much as possible and try to stay in the centre of the screen where you have room to move.

Gunslinger
Achieve 500 kills. It might take a few tries but you’ll get here eventually. Same as above, abuse Showdown and try to stay in the centre. Aim for Bombers and Hidden first, Shield and Sniper second, Axes and Pistols last. You’ll get there.