A guide designed to detail my personal Dive schedule (and point out the most optimal and time/resource-saving approach) to doing daily missions and other cool things. Whether or not it helps is up to you.
Version History
Introduction
Rockman/Megaman X DiVE is of course a mobile game released in March 2020 (closed beta in august 2019) brought over to Steam, advantages included. Some people like it, some are indifferent, and some are irrationally upset over its existence despite it being a way to finance the Megaman franchise besides begging people, shilling or making new accounts to buy games and collections (ones they never even play) over and over again.
In my personal opinion as a MM fan, (primarily X series) it’s not exactly the best thing on earth, not the worst either. It’s more of fan service than anything with references only the hardcore fans get. It suffers from gacha tropes but isn’t as grindy as it looks. As someone whose played from very early on I’d say with the right approach and self-control the game is surprisingly pretty F2P friendly.
To be clear, this is the first version of X DiVE that players could play, the original version made by Capcom Taiwan, hosted by them. This version is the only one on Steam as of the time writing this. Contrary to popular belief there’s little practical difference between the TW/JP/Global versions besides location and update schedule. (even with optimal ping and connection the game still has those ‘WTF stutter’ moments in arena) This version (Taiwan) gets everything first since it’s the source version every other derives from, and probably gives the most handouts. (excluding JP)
But we’re not here for a review, we’re here for how to take advantage of that F2P friendly approach.
Basic Info
In detail, you will be:
- Receiving a net gain in and hoarding AP every day by not overconsuming it (for future events that rely on it)
- How to optimally save additional resources such as EM, Zenny, etc
- A few other tips and pointers (and a few useful secrets)
During your daily X DiVE grind (and additional resource farming) you’re going to be consuming a certain amount of items each day, might as well give a refresher on what they are and what they do. You don’t need this if you know this part, so skip at your leisure.
- Zenny (non-premium currency, used when upgrading armor, skill levels, etc.)
- AP (stamina, energy, needed for playing story, boss challenge and guild bounties, given for free each day, naturally regens to 180 but can go up to 9999 if you use it conservatively)
- Red Tokens (gained from playing arena, can buy cards and certain memories with these)
- Skip Dives (used for skipping stages, you gain more than you lose so you’re unlikely to run out of these unless you’re probably a new blood)
Do these so you reap their benefits quickly and efficiently.
- Check if there are any ongoing things in the Current Event menu in the sidebar on the main menu, such as Hunter Token Roulette
- Mail, for daily rewards from login (normal and event)
- Research, so you can claim anything that might be done and get free AP/blue box
- Friends list, so you can quickly gift AP and accept it from your friends
- Guild, accept your randomly chosen reward and make sure to donate if you need to
- Guild bounties, claim them if you didn’t before reset and start them to claim them later
Daily Mission Overview
You don’t have to complete these in any particular order, and some you’ll do passively.
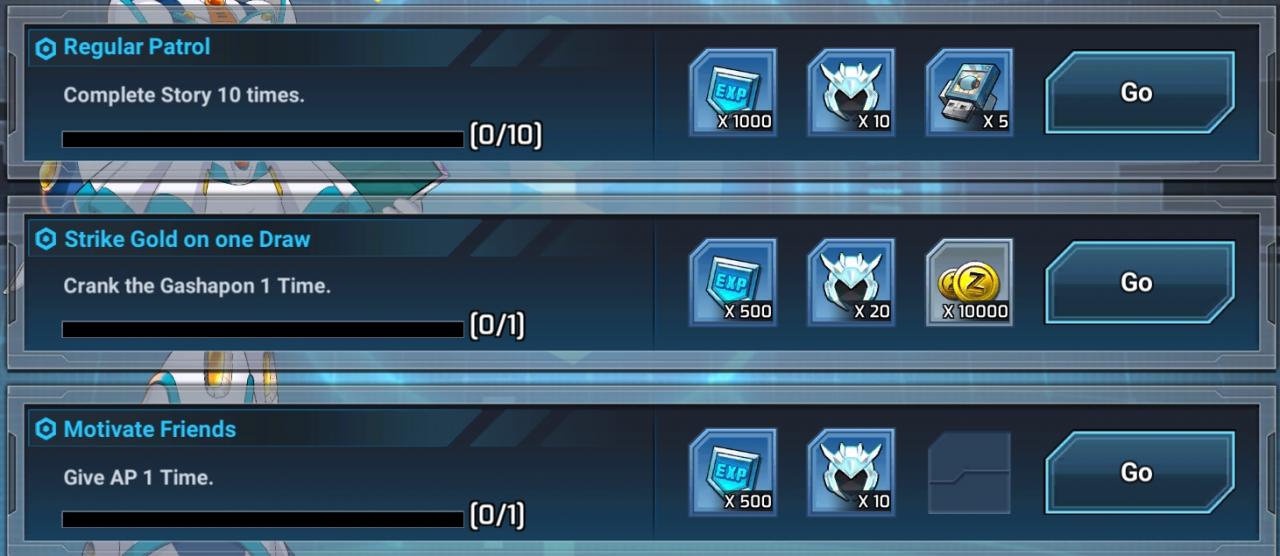
NOTE: Complete Story 10 times, BOSS Challenge 3 times, and Event Stages (not the active advertised events) can all be completed with Skip Dives, they do not need to be played manually after the first completion to count. There’s very little reason to, aside from direct weapon proficiency gain and having to play event stages on a new difficulty or a new boss challenge.
Easy. Just pick one from the highest world you’re in that you’ve 3-starred. All levels in a world give the same drops excluding tiered materials. The difference between doing it on Normal or Hard is to choose between Weapon EXP or Boss Chip EXP, no difference otherwise.
Just pick one stage to x3 skip, preferably one with a memory drop you want from it. Doing too many will start to hurt your free AP gain though.
Do all of them. Each one can only be done twice a day, but there’s no change in gains from skip diving, so make sure you S clear the missions before skip diving them.
NOTE: If you’re in a guild and the Zenny and EXP guild buffs are active, the gains from Story, boss challenge and event stages will also be boosted!
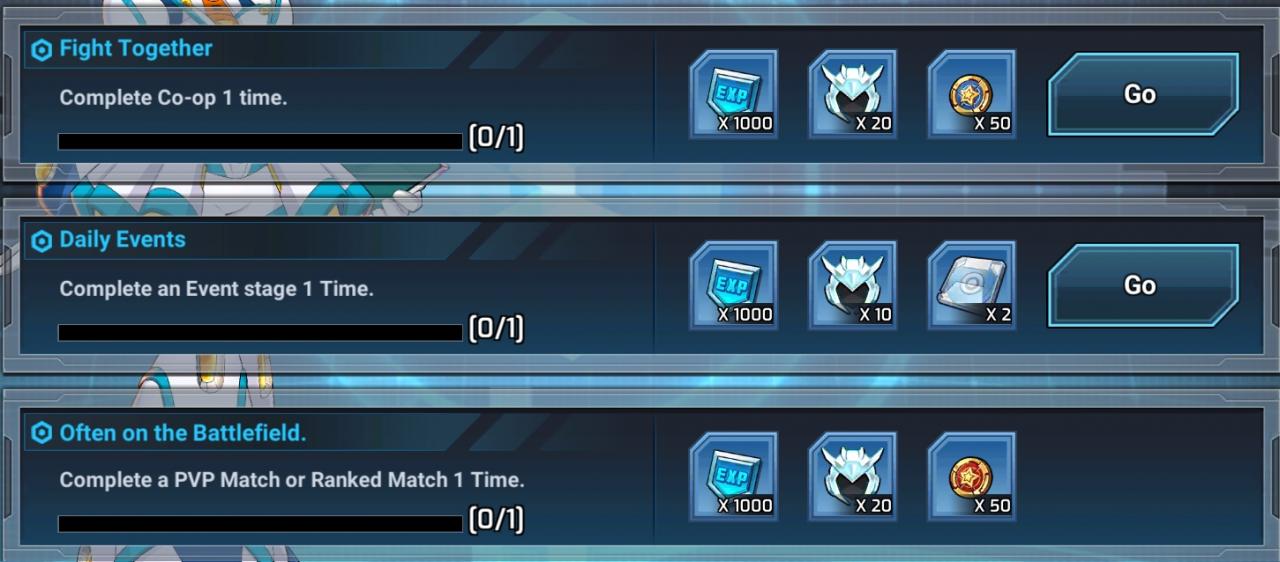
This is arguably one of the longer missions to do, simply because you have to actually play a stage. Though I leave your approach to this up to you as there are two ways to go about it.
This is counter intuitive to resource gain, but it is also the way to go if you’re just looking to punch your card and go. The stage goes by very quickly, especially at your level. Mega Scorpio will die before he even gets to breathe. Bring someone and a pair of weapons that have good quick mobbing capabilities if you have them and it’ll be over in a minute or two. If not just bring your highest level weapons.
What you get from this is:
– Random level 20 torso/feet/drive armor drops
– Small amount of purple bolts
Basically not much, but if you wanna go fast you gotta cut corners, right?
This is how you would optimally gain more rewards, but the time and effort needed will be a little more. This is also the method I personally choose as it is more beneficial in the long run. What you’d gain from doing this is as follows:
– Random armor drops (blue/purple) corresponding to the level of the stage you played
– Bolts (purple/gold depending on how far)
– Completing a stage with a partner gives you 1 blue box containing 15 Blue EXP resources for Weapons/Chips, 4 Blue Card EXP items, and one random ore.
– Some of the corresponding ore listed in the level’s rewards.
– If you complete the stage on Challenge mode (equalized power) and with a partner, you will also gain 100 co-op tokens. But you can only get these tokens once a week (Week resets on Sunday, 4 PM EST) per co-op stage.
Rewards can only be gotten twice per day, however. Excluding Tokens and the blue boxes. You can get the blue box infinite times, however. So theoretically you can farm co-op as much as you want as long as you beat a stage with a partner. So if you want to get EXP items without buying them, burning AP on story stages or resetting unused weapons, this is the way to do it. You could play 1-2 as much as you want (Challenge or not) after you get your 2 daily rewards in. Surplus armor can be dismantled for extra zenny and purple bolts.
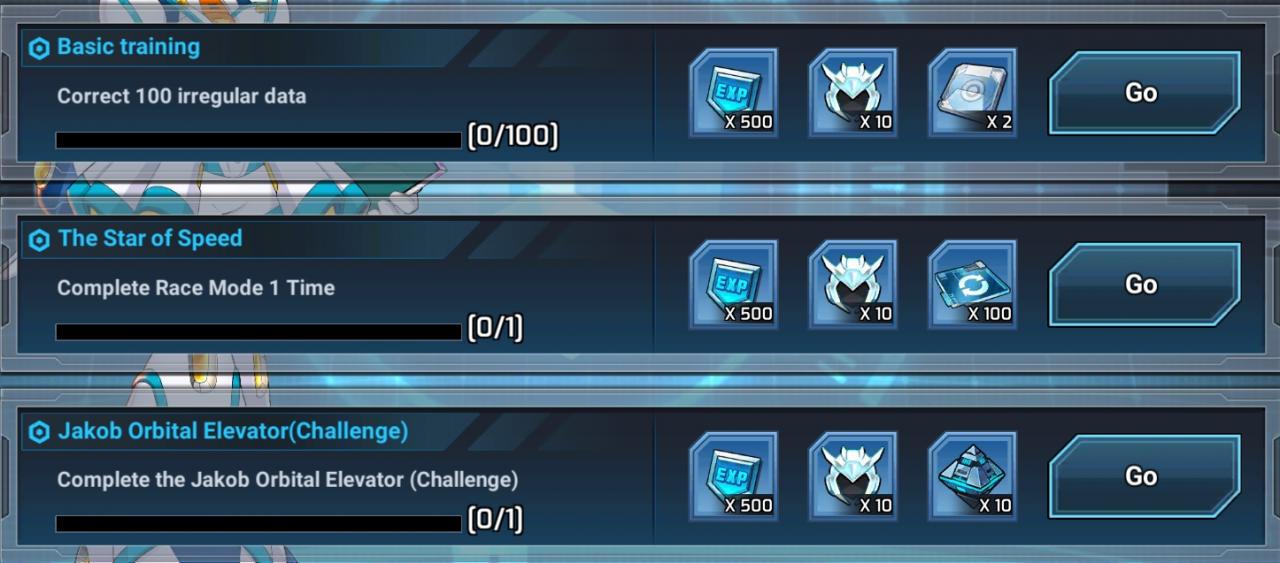
On paper this might seem daunting, but you can play any Jakob stage you want as long as it is challenge mode. Even if you beat it already. There are several candidates.
There are 72 Bat Bone enemies and they’re the only ones. They die very easy and with a sprayer (the weapon type bonus for this stage) you could in theory stand in one place and just hold the attack button. But you don’t even need a sprayer to easily go through the stage. Just make sure they don’t swarm you. Massimo makes this stage a snooze.
The enemy is one mid-boss, a Bee Blader. You’re on a conveyor belt with lava beneath you. Sometimes Deerballs drop from the ceiling but they’re not the target. The Bee should die quickly if you focus buster fire on it and avoid projectiles.
The enemy is one Giant Mettaur, simple enough. Though if you take too long eventually 4 more Mets spawn, two of them being medics. If you take even longer, the blue balls that stun on contact will show up. Just make sure you hold a sprayer, unload your skills and then hose them down and they should die quickly if you brought the right stuff. Gator Fangs makes this stupid fast.
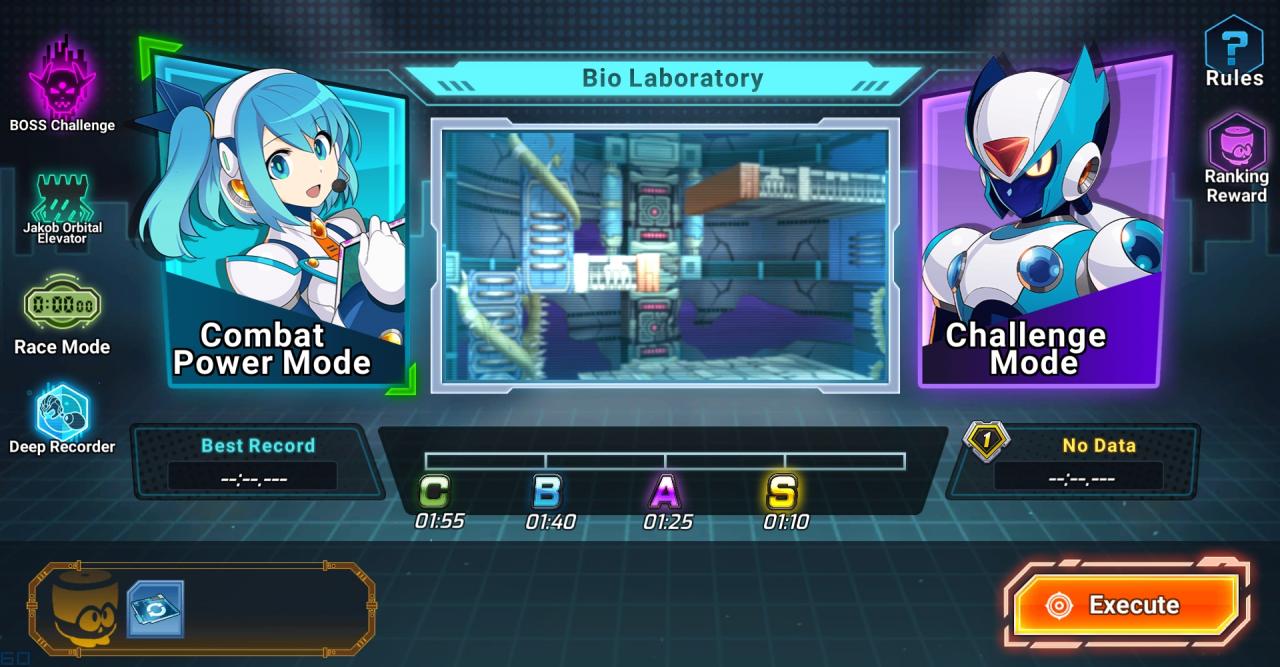
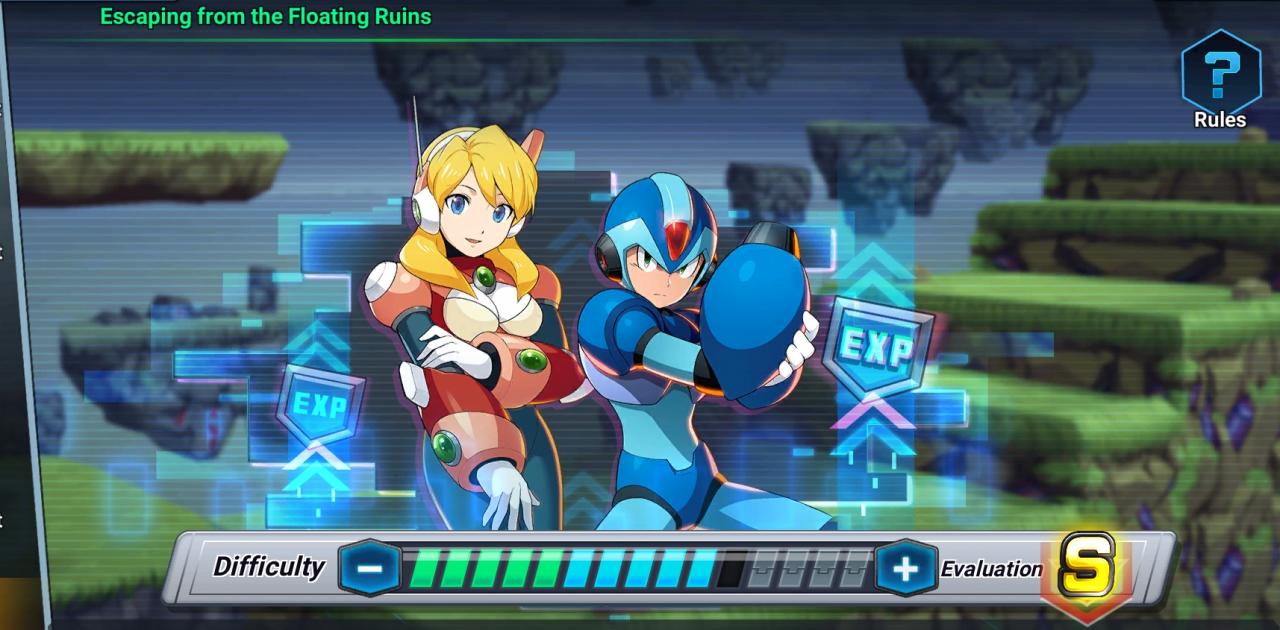
Now this one’s level dependent. Your level determines which from a pool of stages you get. Naturally you pick what goes fast and just play the stage as fast as possible. Completing it completes the mission. You can play the mission in Combat Power mode (not equalized power) or Challenge mode (equalized). The difference is minimal, as the stage you get will typically be appropriate for your level anyway. It’s technically easier and faster to just pick combat power mode, beat the stage and call it a day. But you can do both and be rewarded for both. Completion will get you sync materials (for the backup weapons system).
If you want, you can actually *try* for 1st place to get the best optional rewards, but that’s not related to the daily mission, do that at your own discretion. You get blue and purple weapon boxes and some proficiency.
This couldn’t be any easier, and you can even do it for free. Just simply pull on any capsule, but to save resources you should just do the one free pull on the zenny capsule per day.
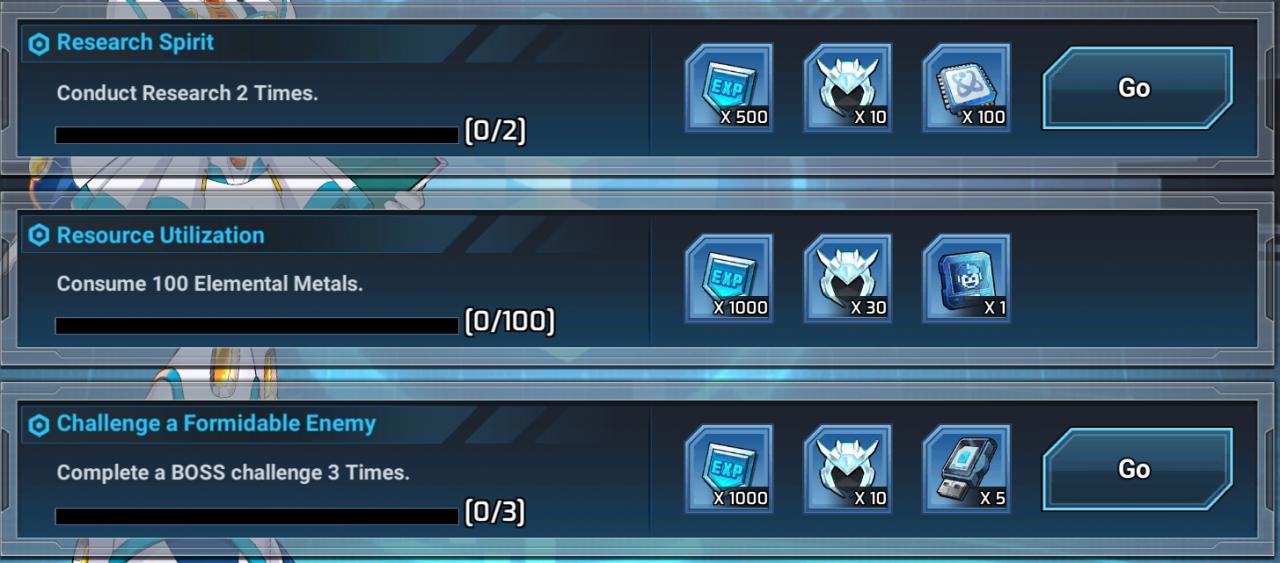
Now this one I honestly skip. It’s not mandatory and if you’re trying to save EM, it’s counter-intuitive. But if you wanted to, this could be done any number of ways. The simplest is a normal single pull on any capsule for 100 EM, but you could also reset weapons/cards, buy some AP, or buy items in the shop that cost EM, or speed up research/bounties.
This is simple, just participate in one match in practice or ranked. Win or loss doesn’t matter.
However, for optimal gains…
PvP comes with its own rewards table, a random draw of an item from the board corresponding to the number of matches/wins you’ve done. There are two boards, one for daily and one for weekly. You can get everything on the boards, but the order is random.
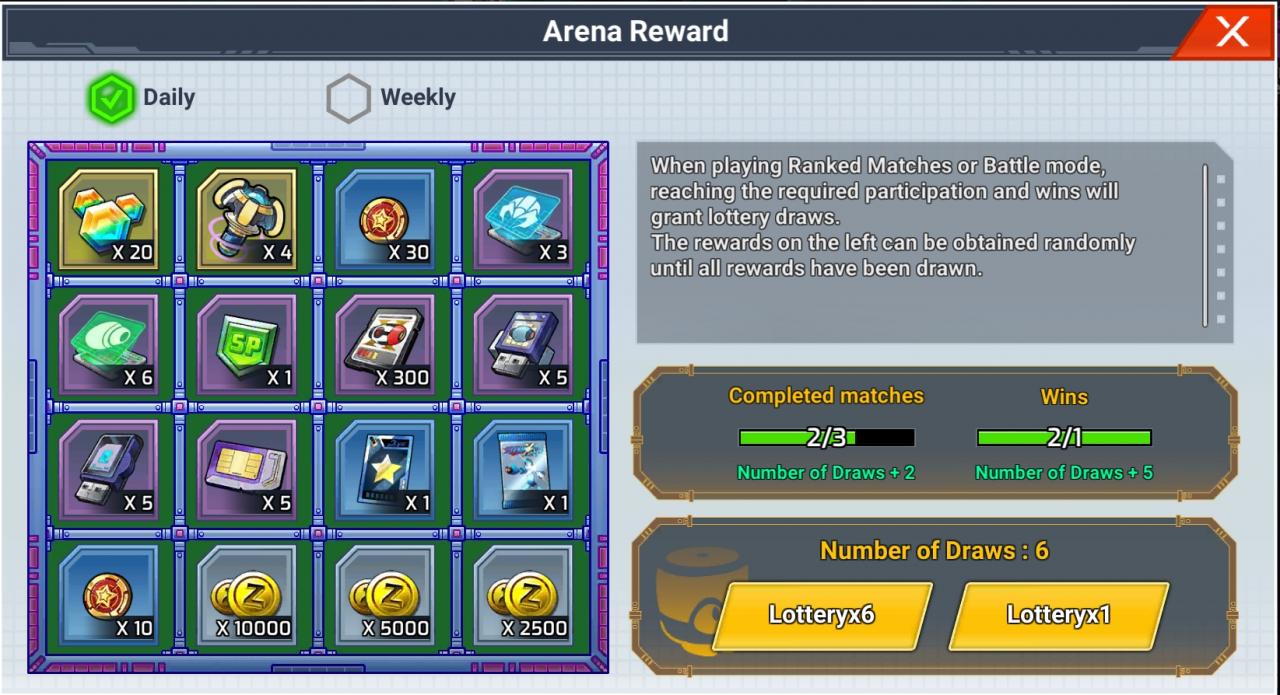
To clear the daily board, you need
– 10 participations
– 1 win
To summarize, 1 match for speedrunning the mission, 10 matches+1 win for optimal gains.
To clear the weekly board, you need
– 50 participations
– 3 wins
Your daily progress also counts for the weekly board progress, so don’t worry about doing extra. You can do the weekly ASAP (don’t) or just let it fill out naturally by mid-late week.
Looks demanding, but it isn’t. You can just leave the game be on starting a match, you don’t have to win more than one, and the playerbase is more than happy (most of the time) to stand in Practice, being killed by you, and using an auto-clicker or pressing the next match button manually to keep queuing. You could find an AFK player and just murder them, then do the same thing for 9 more matches. Though if both players are idle that’s just going to add more time to the task. So it’s entirely user-dependent on how fast this will go. Though if you wanna sweat all the matches or sweat in ranked PvP be my guest, you do you.
If you’re doing the other missions then this should come naturally, though that primarily depends on if you do 2 co-ops, or play Jakob 3. You can play a Jakob stage and abort it at no cost of character usage, but the kills are counted as they are made for this, this can be exploited even for certain event missions that crop up. Otherwise it’s not hard to get them.
Very easy, just go to the lab and research any two things, free research (Free 3 AP drops and blue box) does not count. Pick what you want or need, the lower the tier the cheaper the cost. If you’re clocking in, just pick the material boxes as they only cost Zenny. Otherwise focus on items you would rather make headway in ranking up. Lucky Treasures and the gold/purple bottles are once a week research, and the Treasures contain a variety of goodies, EM included. So try and passively go for those.
I’d argue this is the easiest one to do and for me it’s often done first. Simply go to the Friends menu on the left popout menu, and gift to all friends.
Of course the hurdle is having friends, but people will often randomly add you or people add each other through the text chat all the time. Getting into a guild is a fast way to do this as there are lots of free to join guilds. Add your guild mates to expedite your friends count (and to have benefits for later)
Guilds
Guilds are a feature in Dive where you essentially join a player group and contribute to its growth and gain access to more rewards and benefits. Such as: buffs to attack and defense, EXP and zenny gain, multiple dive trigger uses, etc.. There’s no reason to not be in a guild, even if you’re the sole member. (don’t do that, not good for your resource consumption)
There are also competitive aspects like guild raids, but that’s got nothing to do with this guide necessarily.
The daily work for the guild is fairly simple, requires no gameplay at all. Just some clicks.
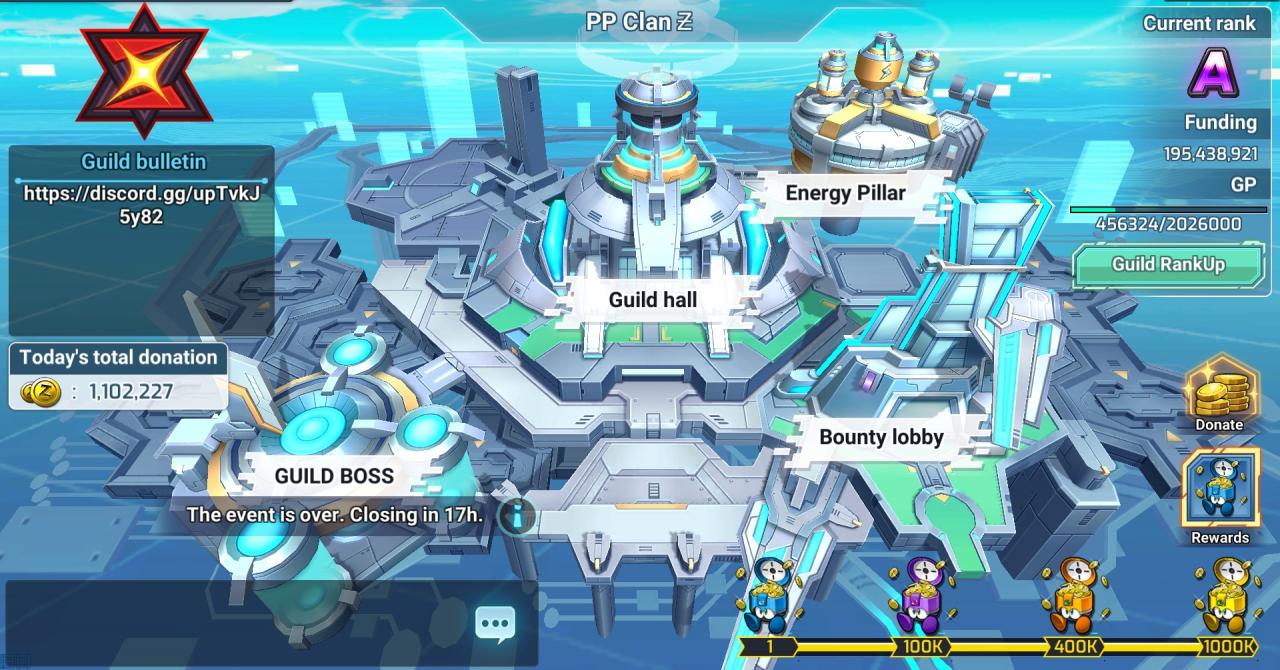
Here you can put your own Zenny into the guild, for funds to the various upgrades and costs of applying buffs through the Energy Pillar. There’s incentive for total donations for the day to be at 1 million zenny, might seem like a lot, but if ten players donate 100k between themselves that covers it. If you have more players, work out who donates what, you don’t have to cover all or even a fraction of the cost by yourself, some players overdonate more than needed, some donate 1 million the moment reset comes. So as long as that incentive is met by the next day, all the highest quality rewards will be randomly distributed amongst the guild members.
Contrary to popular belief, being the top donator does not guarantee you any of the best rewards, it’s 100% RNG.
I won’t be listing all the guild rewards in high detail, that’s not my field of expertise and like raids is beyond the scope of this guide. They range from unique cards, EM, surplus zenny, certain resource boxes, weapon proficiency and skill points.
This area is where the other half of daily guild work is, though it’s a bit more complicated.
Each day, six bounties are given to each guild member, where you must dispatch your own collection of characters and completing them gives zenny and varying boxes (including lucky treasures) as well as important guild coins (GP) to those who complete the missions. Completing them is as simple as some clicks, but it’s a little more nuanced than that.
The quality of the rewards depends on the success level, which is influenced by how many stars you filled out for the additional completion requirements, These are:
- Specific character at a certain star rank
- Number of dispatched characters in the group
- Total number of rank stars between every character in the group
The success levels are:
- Basic (1x)
- Great (1.5x)
- Huge (2x)
There’s no failure, so if you’re alright with a high chance for basic rewards then don’t fret. But you typically want to fill out all the stars if you can. There’s no guarantee for getting Huge success, but if you fill out all the stars you eliminate the odds of Basic success.
Each day you have 3 additional support characters you can call upon from others on your friends list, though these are based entirely on the CURRENTLY USED character they have. So if you’re jonesing for an extra Vile and yours isn’t available to get that one extra star, you’ll need to call upon a buddy to switch to them and wait for the game to update.
The characters that are in the pool for character bounty requirements are (as of the time of writing this):
- All B rank characters (X, Massimo, Axl, Mega Man, Pallette, Servbot)
- All A rank characters (Zero, Marino, Alia, Layer, Volnutt, Aile, MegaMan.EXE, Zero(Z), Bit, Thunder Bolt Mega Man, Rising Fire X, Roll, Vile, Star Force Mega Man)
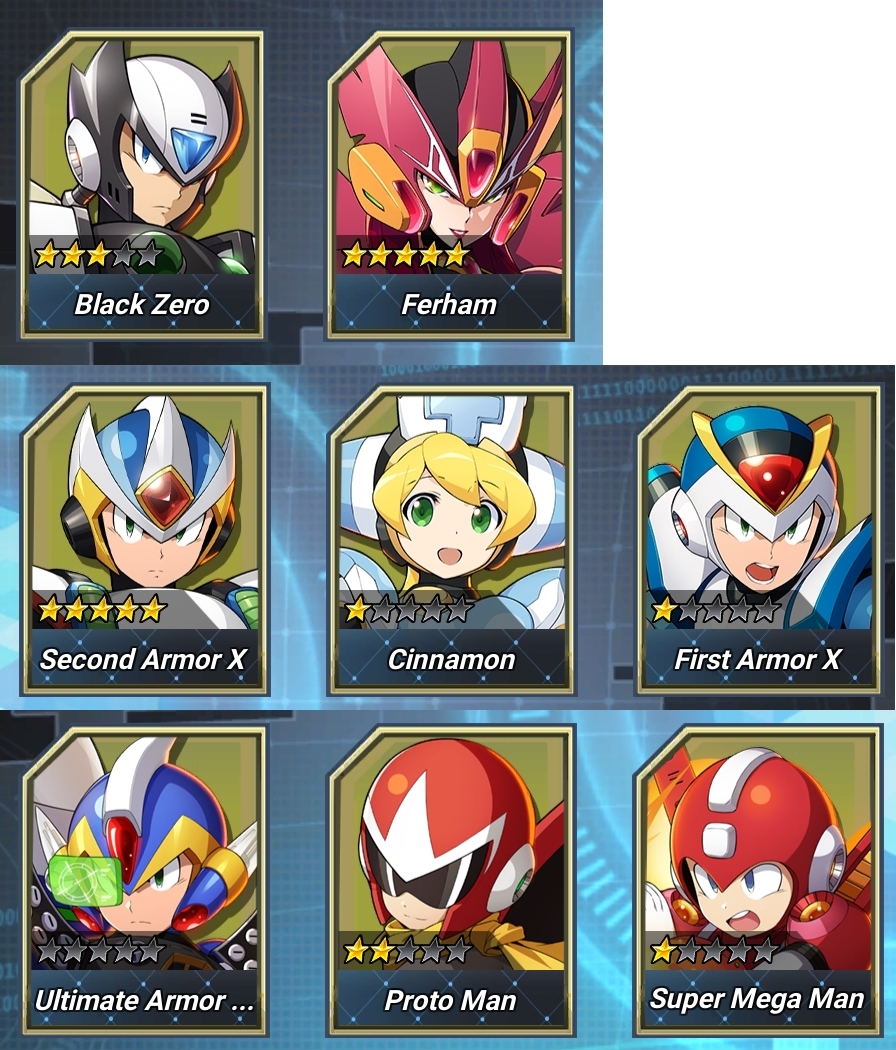
- Some early S rank characters (First Armor X, Cinnamon, Black Zero, Ferham, Second Armor X, Command Mission Ultimate Armor X, Proto Man, Super Mega Man)
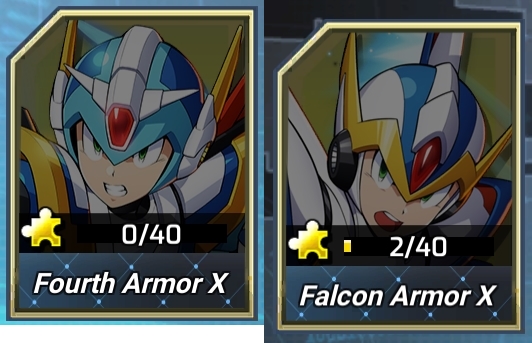
- Later S rank characters (Falcon Armor X, Fourth Armor X)

You can use whoever you want, barring any specific completion requirements.
The available difficulties are random, but more become put in circulation the higher your guild rank is. Higher difficulty means higher requirements for the missions.
Special Events
There are several types so I’ll list them as best I can.
These are simple, as Megaman as it gets albeit dumbed down. Typically these are straightforward romps through a unique level and even might have a unique boss or a reskin of an existing one. Some are simple like the Highway Blitz, where you just run through a stage that has tropes from the MMX1 intro stage, or more advanced ones will have you move through the stage while collecting certain items along the way.
These have star requirements like all others, but how many you fill out dictates how many points/tickets you earn, so you want to go for a 3-star run every time. The points are for a linear rewards path, and are also used in ranked events. The tickets are either for a roulette of rewards or are used for an event shop.
You gain more points/tickets from typically using certain characters and weapons. The Rules section of the stages tell you what has the bonuses. Usually it’s a new/featured character/weapon or two, and then some A/B rank options with less bonus.
These stages use a unique stamina type called EP, (event points?) and it regenerates slowly when under 15 (the normal cap) but can reach a maximum of 30. Normally to reach 30 you must purchase more with EM, but entering the stage and remaining in it (or the game thinking you’re in the stage) will allow it to build over time relative to how much you started it with. You can use EP in increments of 3 up to 15 to increase the amount of points/tickets you get, and this also affect how it regenerates.
Here’s a secret, if you start the stage but force the game to close through something like task manager (basically terminating the process) the game will still be building EP. This doesn’t help you gain more event points or tickets necessarily, but if you’re not going to play the game for awhile you should do this so you’ll have extra EP to run or skip dive with upon returning without the game remaining at 15 if you were away longer than it took to build only to 15.
This is the typical boss speedrun, albeit Dive’s bosses are either easy to quick kill, or annoying little bastards that are irredeemable. Typically, you want to clear it as fast as possible.
Like the point rewards in the previous event type, there’s points to get along the way to refining your boss rush. Every time you use a different character or weapon you will gain an extra bonus for your score. The more you use, the more score and you’ll eventually clear everything to get. This is harder than it sounds because in order to add to a bonus it must be a unique character/weapon. You can use anything you’ve used already as long as you add something new to the loadout.
You’ll want to shoot for at least 45k points as there’s a unique card to get after getting all the featured memories/EM (Comrade Forever), 65k or more will get you a unique title for that boss rush. The latter is rather superfluous but if you want to grind for it be my guest.
There’s three bosses, they’re featured on the background for the event. Some are easy to kill with the right setup but there’s usually one boss that’s rather hard to dispose of quickly. There’s also AI and positioning exploits to make death animations play faster but that varies, people usually spread these nuggets of info for aspiring boss rush low-time shooters, so hit up your local moderately sized X Dive discord community, you’re likely to find the strats.
It’s like Boss Rush, but instead your goal is to beat the unique stage as fast as possible. Speed demon characters and other means of going fast as the way to go for low times, but bonuses work the same as boss rush.
These are usually tied to some event (as of now it’s been for when the new OC characters were introduced) relating to a special character addition. These are one-time clears for a minor EM payout, but can be replayed for story content if you wish. There’s not much else to say.
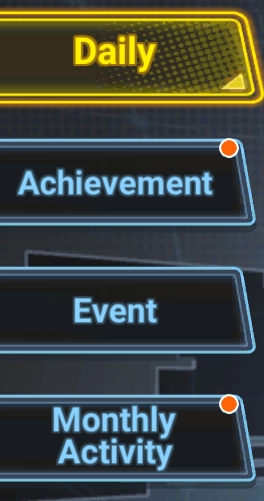
Some events have extra daily or milestone missions to complete and the tab appears on the mission menu. These often net you bonus loot and EM so it’d be wise to do them. Event stages that last 2 weeks typically add these in the 2nd week so keep that in mind!
The list varies but usually stays the same:
- Kill x amount of enemies (daily and milestone)
- Complete co-op 3 times (daily)
- Complete story 1/10 times (daily)
- Research items (daily/milestone, varies)
- Complete boss challenge x amount of times (milestone)
- Complete specified Jakob stages (milestone, can be done in advance of the event)
- Complete Jakob (Hard) x amount of times (milestone)
- Gift AP 10 times. (daily, if anticipating this don’t gift AP until after the update period on Wednesdays, 12-4 AM EST)
There are ones unique to event stages, so be aware. These can typically be done in advance of the 2nd week.
- Event Stage unique mission: Complete each difficulty (milestone)
- Event Stage unique mission: Complete each difficulty with an S rank (milestone)
- Event Stage unique mission: Complete the stage on challenge mode (milestone)
- Event Stage unique mission: Complete the stage on challenge mode with an S rank (milestone)
Conserving EM
But I’m here to provide my philosophy on conserving EM as best as possible, and the number of ways even an F2P can survive without breaking their metaphorical bank. Though this depends on your self-control and patience, and willing to really hit that grind. If you’re a spender or too lazy to grind then this section is not for you.
Monthly F2P gain is around 5k EM if you’ve done all your missions every day, and if you reached Rank GA in ranked PvP not counting extra events.
The net gain for EM every day, without any events or login bonuses is 80 EM a day for F2Ps. Not enough for a pull. But of course, there’s always an event of sorts going on and more ways than ever to get extra EM every day. Skipping that daily mission won’t impact level progression that much.
Make sure steam overlay is enabled ao you can interact with the menus there. I personally treat it as an emergency bank, though you can collect it at your own discretion.
Every new Jakob stage clear provides a small amount of EM, certain thresholds provide 50 or 100, not counting Current Event menu rewards. Though it gets pretty hard as time goes on, you can always put it off and come back when you have more characters and a higher level to burn through it. Certain Jakob Stage completions (normal only) also trigger milestones in the Current Event menu.
Some seem to impulse throw their EM at multis on a banner they’re interested in, I don’t do this. I do one single per day on something I have interest in. On the last day of a banner I do more singles after that and round it out to the nearest ten (like 20 or 30), but in my experience I have better singles luck than any multis I’ve ever done. This does not apply to everyone but it’s better than throwing your hard-earned stash away.
When going for pity, if you’re willing to burn more time than needed you can try 250 single pulls instead, your odds might fare better than 25 multis. It’d certainly make for something to do while chatting it up or listening to something (or even streaming the pulls).
I do go for these. Why? Even if it’s not something new, the patch resources are invaluable (especially if you’re not pulling all the time) and getting something new is also a good thing. But be aware you’ll be taking a hit. 1111 multis are something entirely different, so consider you’ll be pulling 11 times for the cost of 10.
One of the prizes for reaching Rank GA in ranked match is 1k EM. I used to go for this but gradually it became more tedious, though some are willing to boost you if you can find the right people. (they do this because you get rewarded based on what you reached during the season, not where you were when it ended) If you can’t hit GA you still get decent amounts for participating and reaching A and onwards.
I always daily single pull one of these even if there’s nothing of interest being featured. Since all S rank characters and weapons are at a slightly higher rate, it’s helpful for patch gains through dupes. You might luck out but don’t expect it.
I did explain that this tricks the game into letting EP build past 15 points, but did you know it can also undo your mistakes in Jakob and Boss Raids? When you die and the Quit/Power Guidance prompt appears, if you force close the game it won’t detract from your character usage for either. It will be as if you never did the attempt. So if you make a mistake during Jakob or Raid, use this trick to get a fresh start.
If you keep the types of boxes with “DX” in the name, occasionally there will be updates to the loot table within. So it can be helpful to open them at a much later date than when you received them.
When going for total power, the best ways to raise that number are to equip limited weapons and cards, preferably ones you leveled up. You can stash the limited weapons you’re not using with the backup system, speaking of that…
Ordinarily, you can’t equip a weapon that’s in backup through the weapons menus, but if you do it at the prep screen it will instead put what you were just using in backup instead, this is much faster than tinkering with your backup menu.
Most cards have an effect, and it improves when the card reaches 5 stars. But, some cards can stack with themselves. One must be 5 stars and one less than 5, and the effects must be activated from having two of one color (the card’s own color) and be different versions of the effect or else it does not work. There can’t be more than 1 sprayer amp 3 effect at the same time, they don’t stack, but 1, 2 and 3 do.
For example, the Professor Gaudile card (the platypus scientist from Command Mission) has one effect – Sprayer Amp 2 – that activates with two yellow colors. If you have a 5 star Gaudile the effect becomes Sprayer Amp 3. If you have another Gaudile card that isn’t 5 star, you can equip the 5 star and the non 5 star one at the same time and stack the sprayer amp effects! Makes sense? This can be very helpful in further specializing your builds. The unique event cards can also benefit from this if they’re colored correctly, though it’s hard to stack those without sacrificing a yellow star up card.
Be aware this works for any cards with a identical effect, but remember it must be a different version of the effect. Not all effects stack, mostly unique card effects that activate once a stage or other special ones don’t. Stacking only really applies to the standard amps and adaptability passives and such.