Set up your Steam edition of Melvor Idle to use mods (aka. scripts and extensions), the simplified way.
Introduction
Setting Up Melvor Mod Manager (M3)
Get the latest version of M3 from here[cherrymace.github.io] (Windows) or follow the instructions here[github.com] to compile the code yourself (Windows, MacOS, Linux).
Installing M3 is as easy as double-clicking the installer downloaded above. There are no options during installation and the application should automatically launch upon successful install.
Note: Windows may warn you about the application being from an unknown/untrusted source due to the lack of a code signing cert (those things are expensive). You can either choose to allow, or, if you feel uncomfortable with that, you can always compile your own executable with the source code provided in the repository as well.
The last required step in the setup process is to set your Melvor Idle install directory. Upon launching into M3, you’ll be greeted with a window like this:
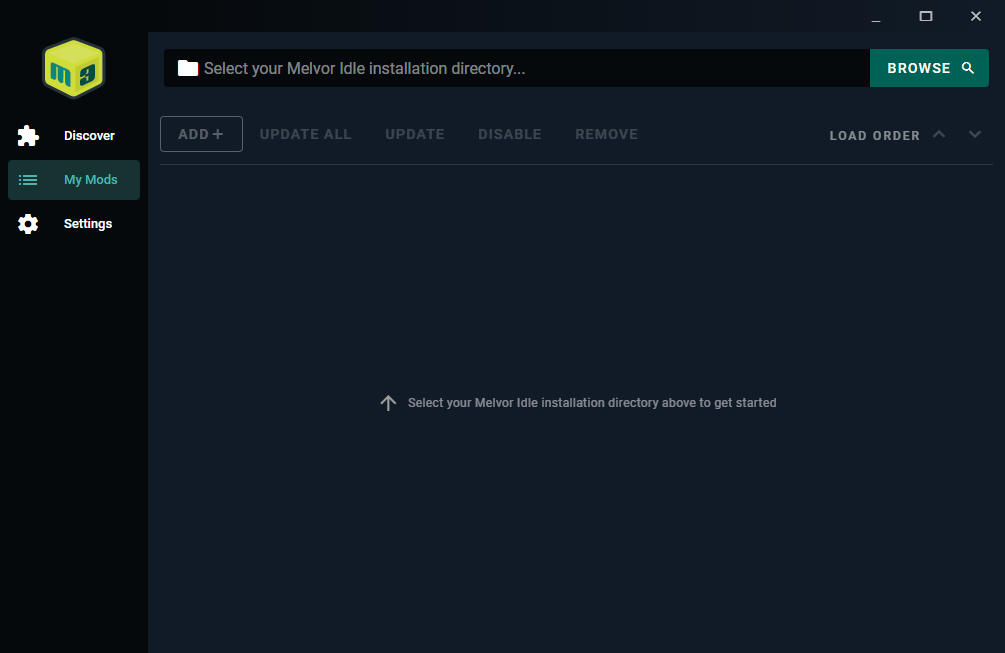
Click the button labeled “BROWSE” in the top-right and select the correct folder – you’ll get feedback if you’ve selected a valid or invalid directory.
Example path: C:\Program Files (x86)\Steam\steamapps\common\Melvor Idle
A Quick Overview
This is where you do all of your mod installation and management. You can add, remove, disable/enable and update mods (where available) from this list. You can also adjust the mod’s load order in the rare case that it’s necessary.
There are some basic settings to choose from here with tooltip explanations on the more ambiguous ones. You can stop M3 from automatically checking for updates (where available) and change the behavior of the LAUNCH button.
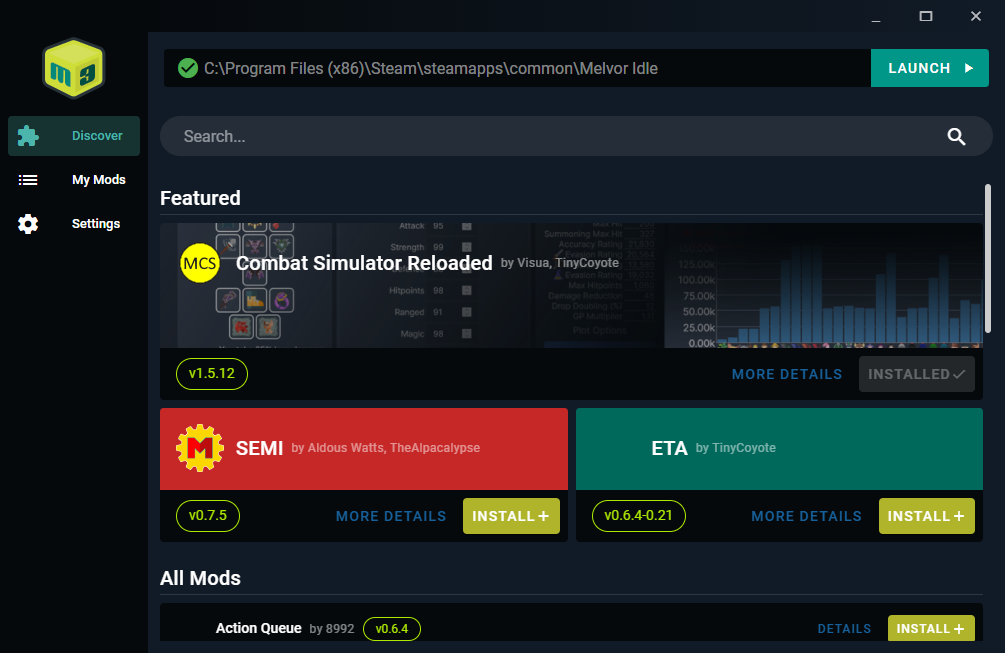
- Through the Discover tab, a curated list that makes installing the most popular mods even easier
- A local .js (script) or manifest.json (browser extension) file
- A web URL (currently only supports Greasy Fork links)
Installing a mod from the Discover tab is as easy as it gets. Find a mod you want? Click the ‘Install’ button and it will take care of the rest.
If you’ve downloaded or written a script to be ran, simply select From File under the Add + menu, and then browse for the desired JavaScript (.js) file.
Adding a browser extension from a file is the same process, but instead of pointing to a .js file, you’ll want to select the extension’s manifest – commonly a manifest.json in the extension’s top level directory.
As mentioned above, only Greasy Fork URLs are currently supported to be added via this method. Select From URL under the Add + menu and then type or paste the URL to the script you’d like to add.
Example acceptable URL (shameless plug): https://greasyfork.org/en/scripts/428146-quickshards-for-melvor-idle
Popular Mods
Leave a comment if there are any that you’ve run into an issue while trying to install or would like added due to having gone through a more complex process to install it yourself.
SEMI now uses TypeScript .ts files in the source so adding the extension without first building it will not work correctly. Thankfully you can skip having to download any dev tools or learning any of the commands necessary to do so – the releases in SEMI’s GitLab repo include an already built version.
- Navigate to SEMI’s releases page[gitlab.com]
- Download the pre-built extension by clicking the link labeled build under the Other section.
- Unzip the contents of the downloaded file above wherever you’d prefer.
- Use M3’s Add From File dialog and navigate to the manifest.json within the extracted directory.
By Buttchouda