This guide describes how to make a mod for the steam workshop and upload it.
Creating A Mod
You can find all of these files in the local game folder. They can be found by
Right click the game on steam
Click properties
Click local files
Click browse.
The local files directory should look like this:
 For example, if you wish to modify the species’ dialogue, you need to create a copy of BREED_TEXT.txt and put the new dialogue into that text file.
If you want to make a new player sprite, after you have created the sprite, name it spr_player_idle.png and spr_player_move.png respectively and place it into a new Sprites folder.
Once you have properly created and named your mod, you need to place it inside a folder. This folder contains all of your mods files. In this way, you can create a mod that changes species dialogue, personality dialogue, and has new sprites. The mod folder can be named whatever you like.
If you have new sprites, place them inside a folder called “Sprites” and place that folder inside the overall mod folder.
Here is an example of a completed mod folder. It is named “Skull Player”. Inside are mod files for a new player sprite, new species dialogue, and new personality dialogue.

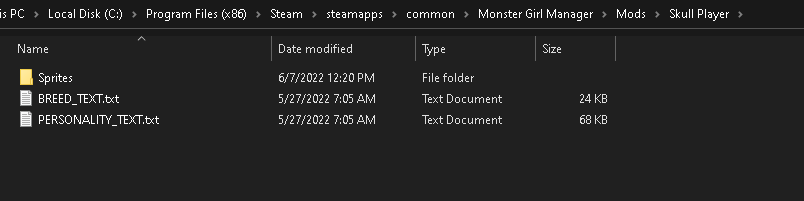

As you can see, you only need to insert the files you are replacing. You do not need to include game files that you did not edit. When your mod is downloaded, Monster Girl Manager will automatically replace the modified files, and read from vanilla files where no changes are found.
Once you have created your mod and placed everything into a folder, place that folder into the Mods folder in the steam local files. This is very important. I will explain why later.
Uploading a new mod to the workshop

This opens the upload menu. It should look like this:
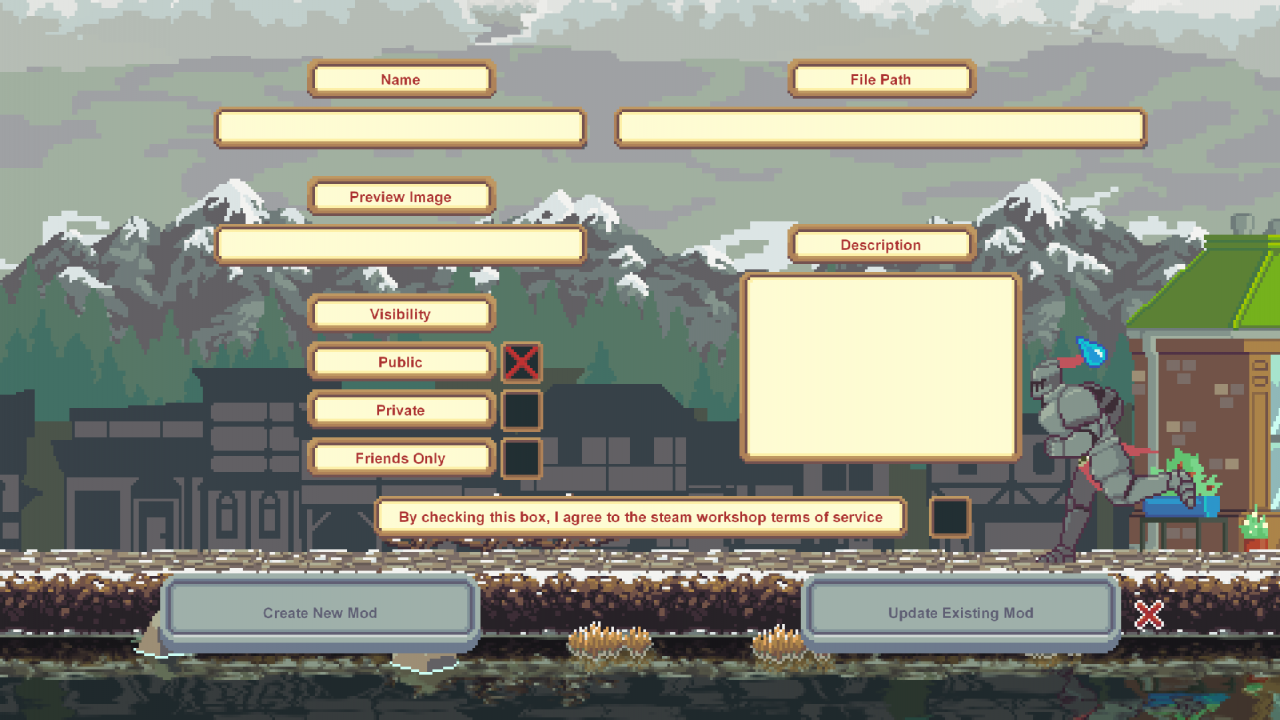
Click on the boxes below “Name” and “Description” to type in the mod info you want on the Workshop page.
When clicking the box below “Preview Image”, a file dialogue should appear. If you are in fullscreen mode, you may need to alt-tab out. Feel free to click any of the supported file types. This will be the preview image on the workshop
Clicking any of the visibility checkboxes will set the item visibility when it enters the steam workshop.
You must agree to the steam workshop terms of service to upload mods. Click the checkbox next to the agreement text box to agree. You can also click the text box to be taken to the steam workshop agreement page.
Finally, click the box below “File Path” to select the mod folder you created earlier. If you are in fullscreen mode, you may need to alt-tab out. It is very important that the mod you upload is:
A folder. You can not upload individual files. If uploaded by themselves, the game won’t be able to read the files correctly.
Inside the local game folder. Monster Girl Manager can not upload folders outside of its home directory to steam. This is why you needed to place your mod into the Mods folder. If you upload a folder from outside the home directory, the workshop details will be uploaded without the mod, and players will not be able to download it.
Click “Create New Mod”. If everything is correct, you will be taken to the mod on the Steam Workshop. You may need to refresh the workshop page to see your changes.
Feel free to edit the mod further on the workshop. If the mod is public, other players can see and subscribe to your mod. Steam automatically downloads the mod if a user subscribes to it.
You can subscribe to your own mod to check if it is functioning. It should show up in the Activate Mod menu if everything is correct.
Updating an existing mod
A dialogue box will appear prompting you for the mod id.
 You need to enter a steam supplied mod id. When you create a mod, Monster Girl Manager saves a file called [YourModName]modID.txt in the local directory. Open that text file and copy paste the ID into the text box in the mod id prompt.
If the mod ID matches, the mod will be updated and you will be taken to the steam workshop to confirm. Otherwise you will receive a warning that the mod could not be found.
It is very important that you keep the mod id in a safe place so that you can continue to edit the mod in the future.
This concludes the guide to the workshop. If you have further questions or would like to see the mod system expanded, please message me in the official discord or leave a post on the appropriate forums.