This is a simple guide to show how to build a V8 engine, which is the orange/red one found in the Brat and Chad cars. You could build this engine from the catalog, or pull one from a car. If you want to tear one down, it will just be the steps in reverse.
1. All the parts you need
Engine case parts
Engine internals
Carb Parts
Accessories
Spark and Fuel
I have a format I am going to stick with. I have circled each part and I will also give a quantity such as (2) if there is more than one. If there is no quantity, assume you need only one.
1.a Engine case
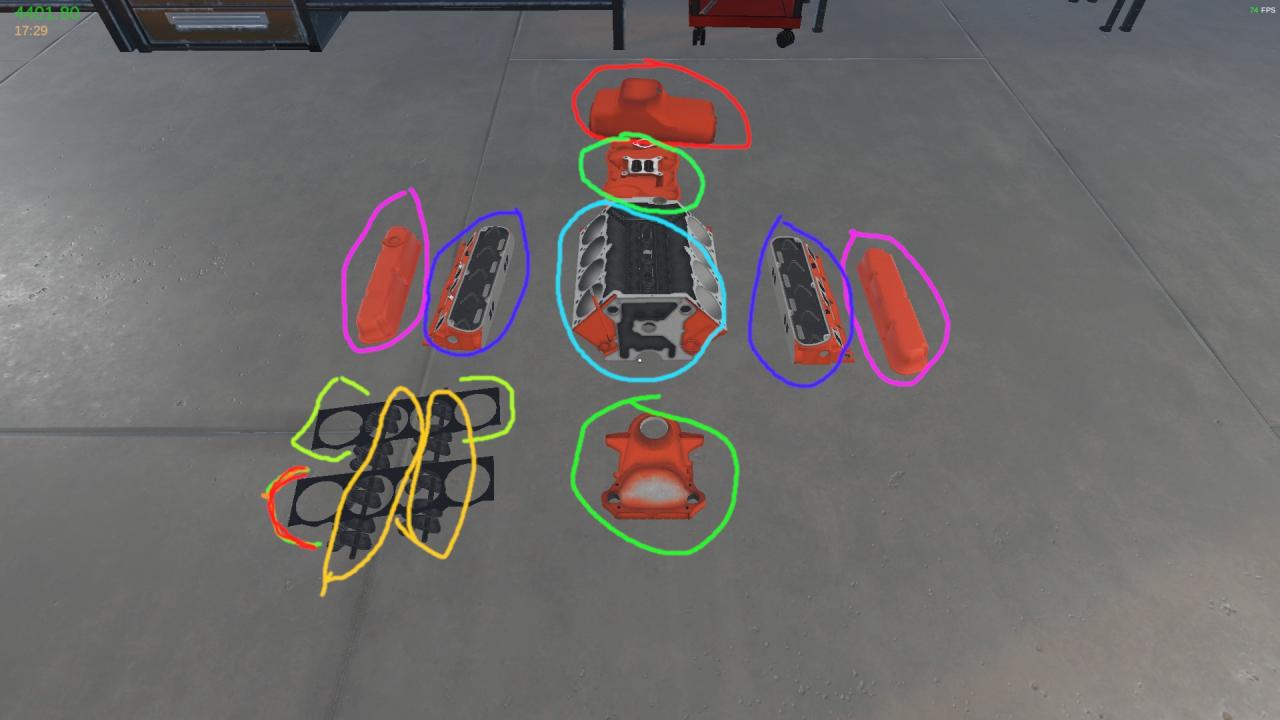
From the top and left to right:
Red – Oil pan
Pink – Cylinder Head Cover (R)
Blue – Cylinder Head (R)
Cyan – Engine Block
Blue – Cylinder Head (L)
Pink – Cylinder Head Cover (L)
Lime green – Head Gasket (2)
Orange – Rockers (2)
Green – Timing Cover
1.b Engine Internals
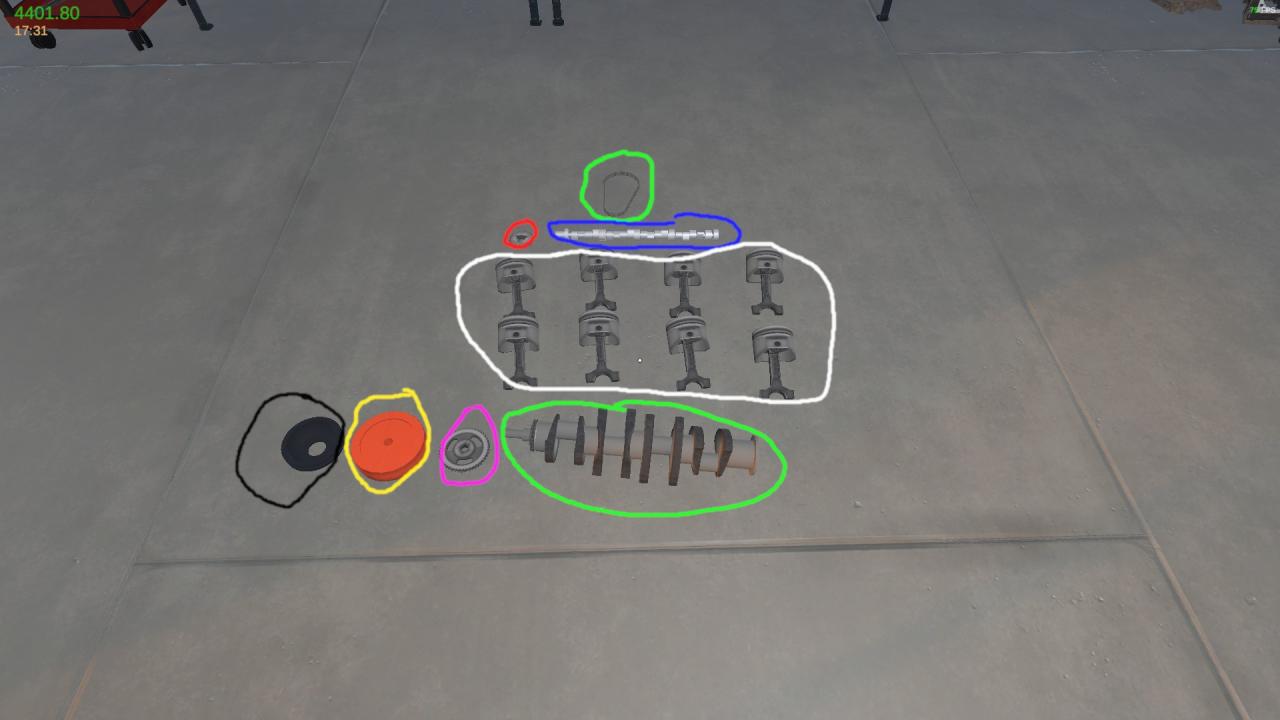
Again, from the top down and left to right.
Green – Timing Chain
Red – Crankshaft Sprocket (I put it in the wrong place, should be down by the crank)
Blue – Camshaft
White – Pistons (8)
Black – Crankshaft Pulley
Yellow – Harmonic Balancer
Pink – Camshaft Sprocket
Green – Crankshaft
1.c Carb Parts
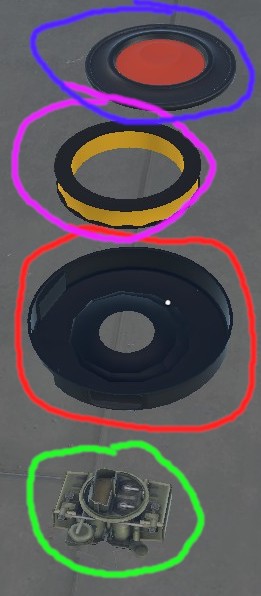
Top to bottom.
Blue – Air Filter Lid
Pink – Air Filter
Red – Air Filter Housing
Green – Carb
1.d Accessories
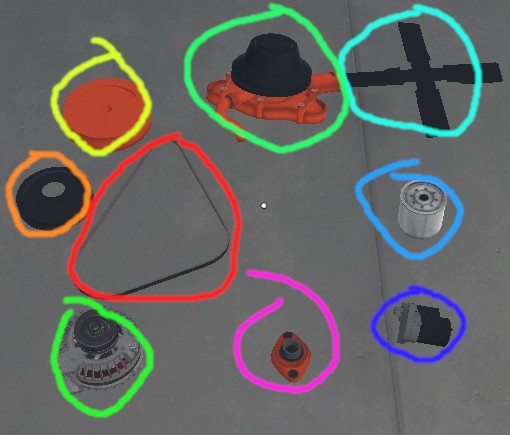
Top to bottom, left to right.
Yellow – (ignore this, I included it with the engine internals section.) Harmonic Balancer (0)
Green – Water pump
Cyan – Engine Fan
Orange – (ignore this, I included it with the engine internals section.) Crankshaft Pulley
Red – Alternator Belt
Blue – Oil Filter
Green – Alternator
Pink – Thermostat
Dark Blue – Starter (This actually goes on the transmission, not the engine)
1.e Spark and Fuel
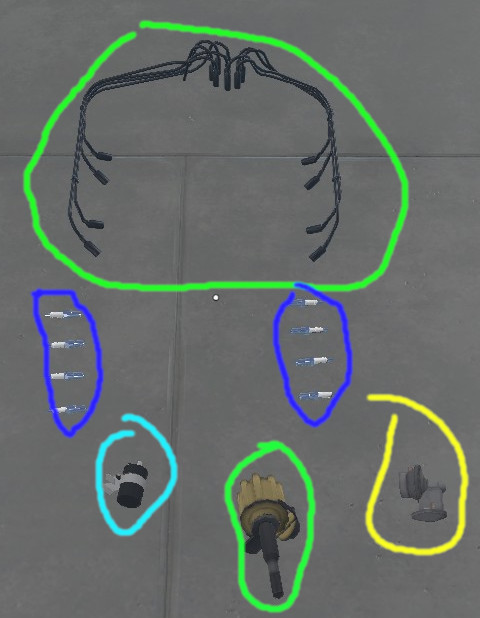
Top to bottom, left to right.
Green – Spark Plug Wires
Blue – Spark Plugs (8) – You need one for each cylinder, totaling 8.
Cyan – Ignition Coil
Green – Distributor
Yellow – Fuel Pump
2. Engine Block
To start with, take the engine block and stick it on the engine stand.
Once on the stand, you want to rotate the engine so you can install the crankshaft into the bottom of the engine. Be sure to tighten all 10 bolts.
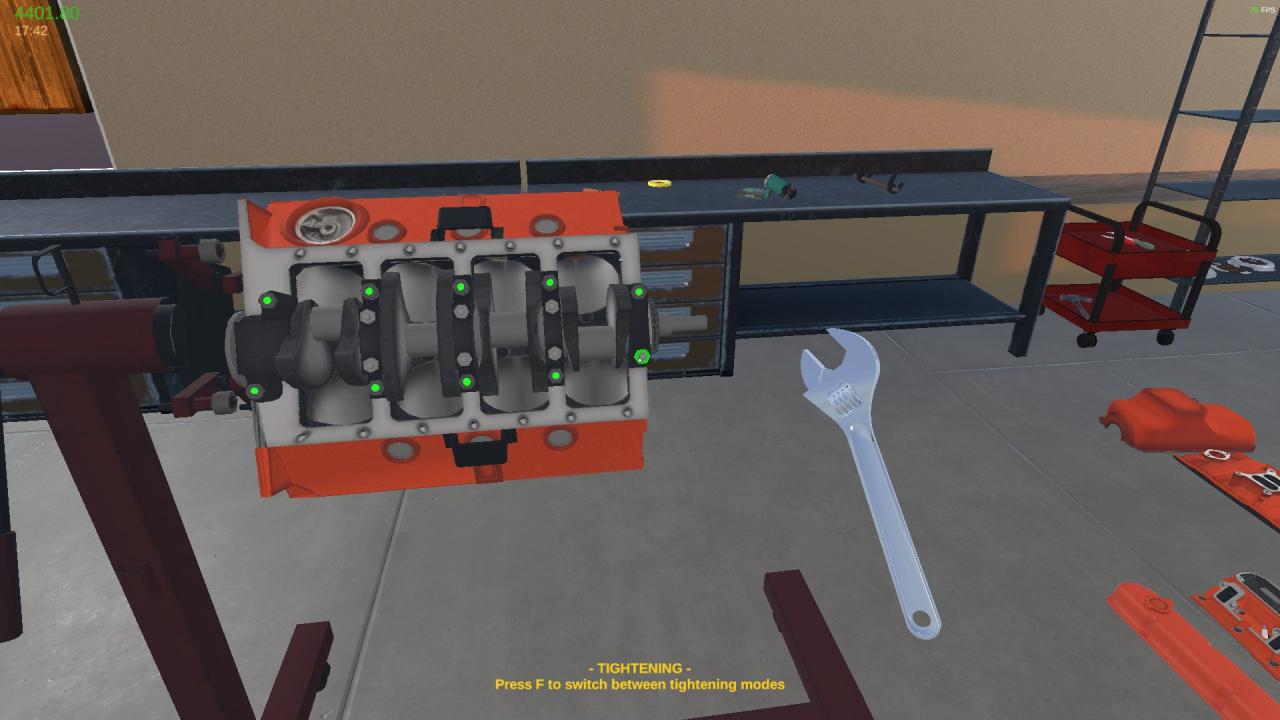
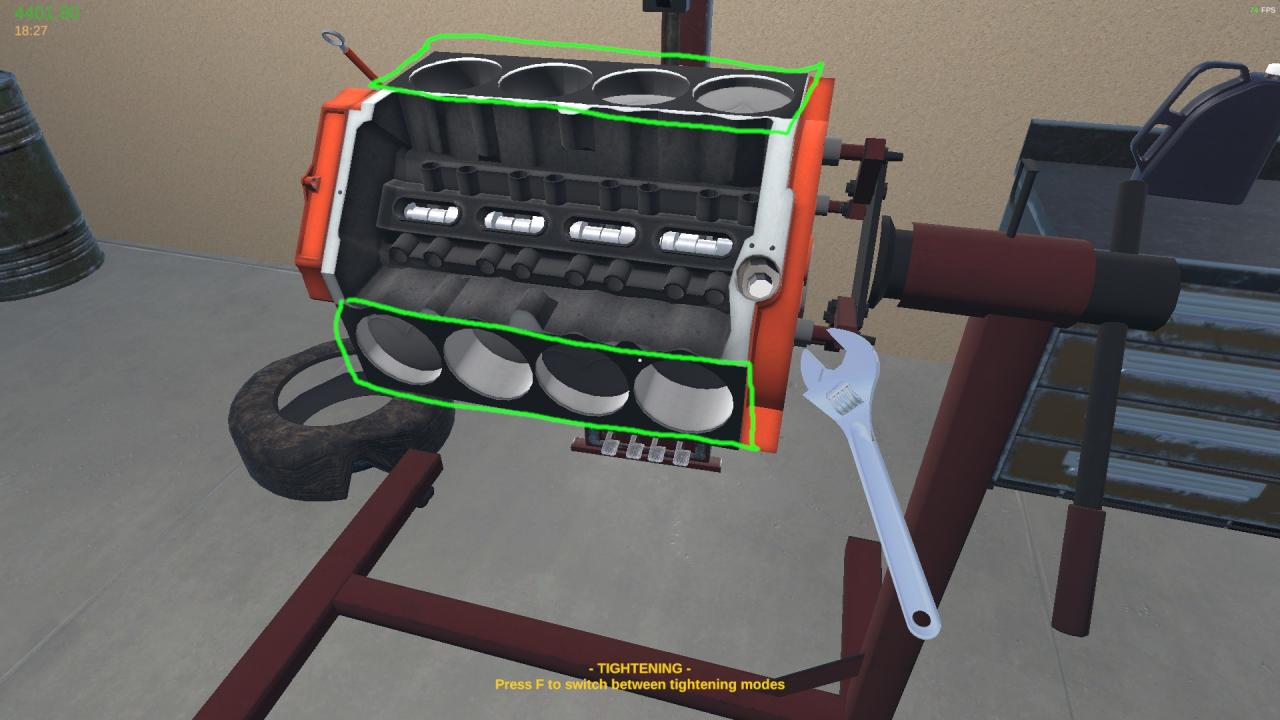
Once the crankshaft is in, you can begin putting the piston in. There are 8 for this engine, and each piston has two bolts. I recommend doing them one at a time.
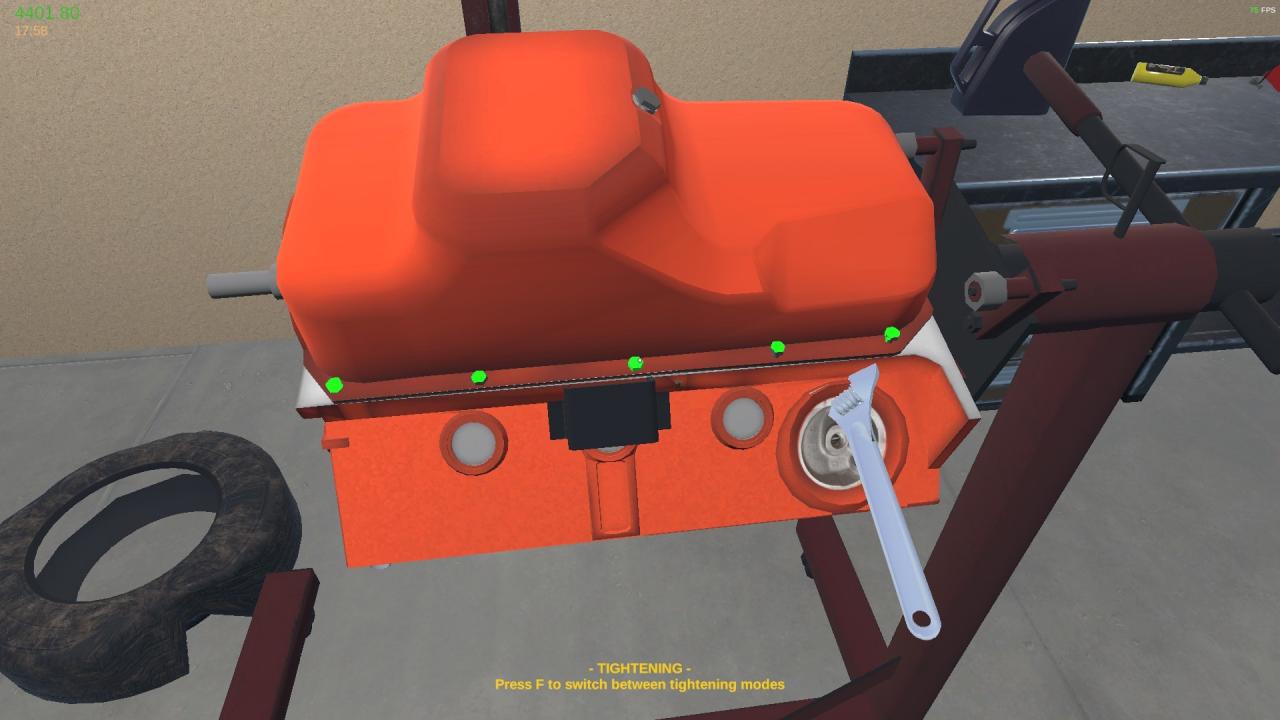
Once all the pistons are installed you can go ahead and install the oil pan. There are 5 bolts on each side, making a total of 10 bolts on the oil pan.
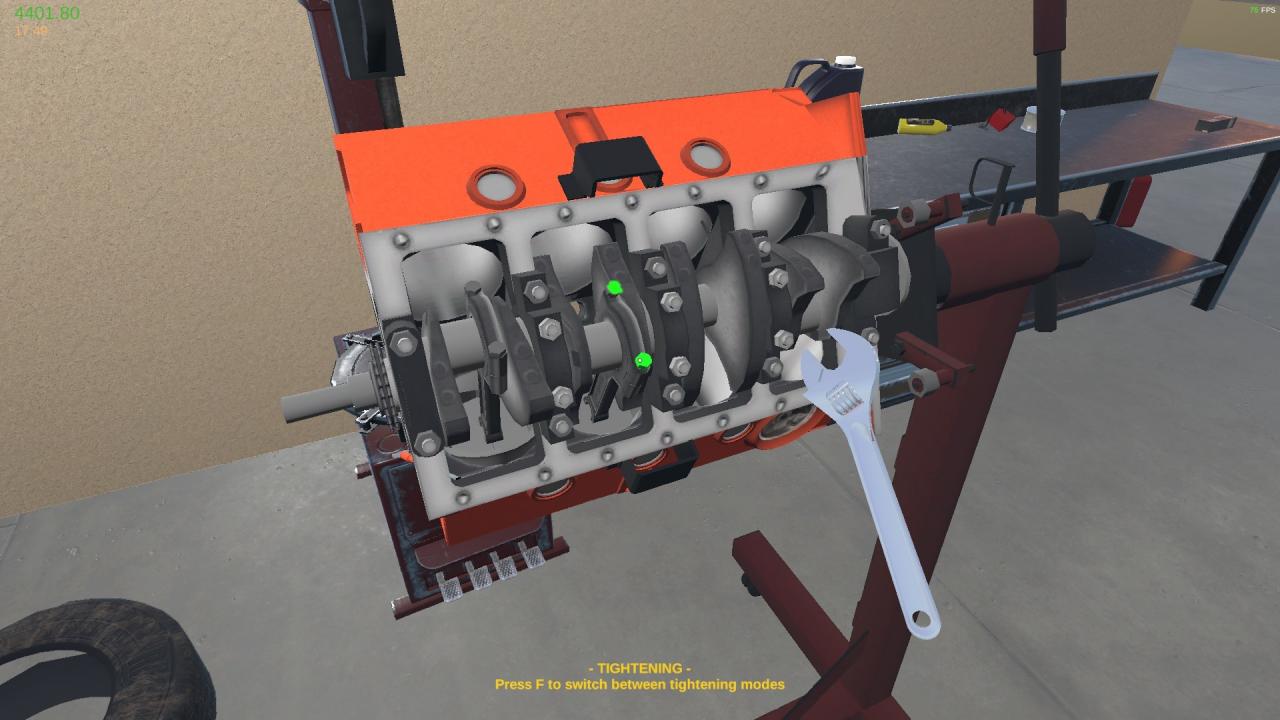
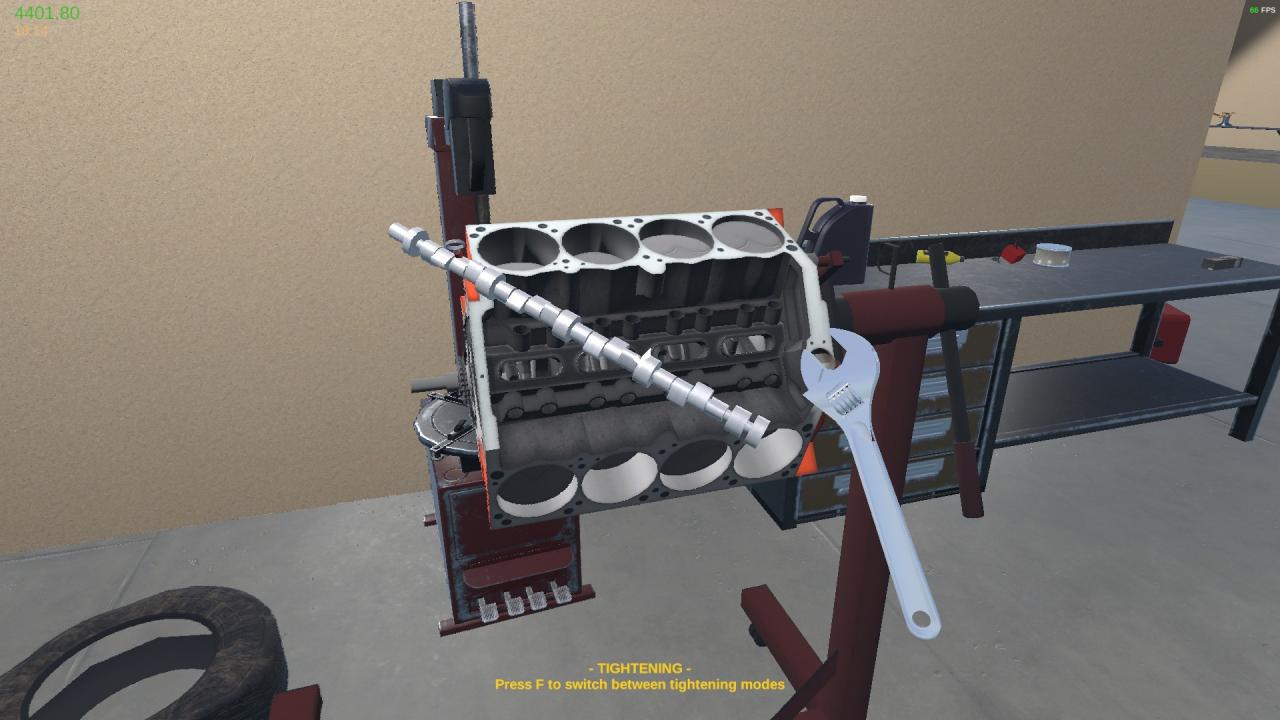
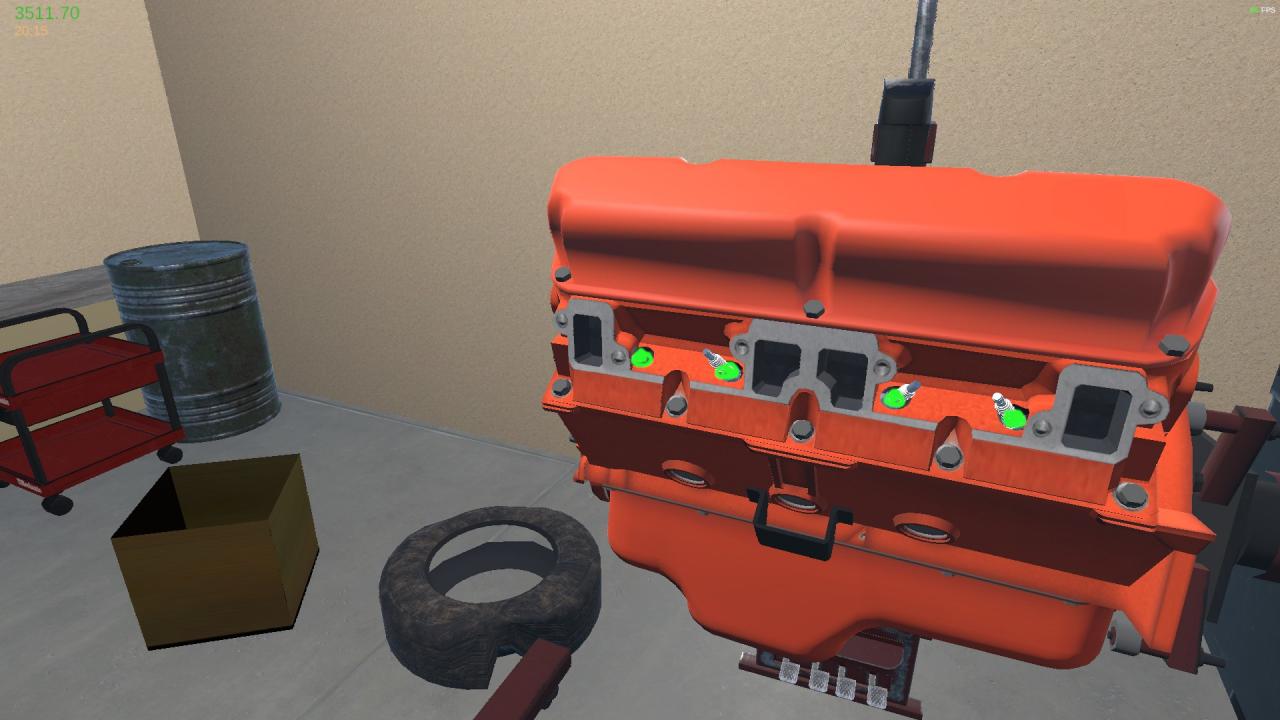
Now is the time for the camshaft. You need to rotate the engine so you can get to the top of it now, we’re done with all the bottom end work. It can be confusing as to where it goes if you don’t know engines well, so I’ve included a photo of exactly where to hold it to install. There are no bolts to hold the camshaft on this engine.
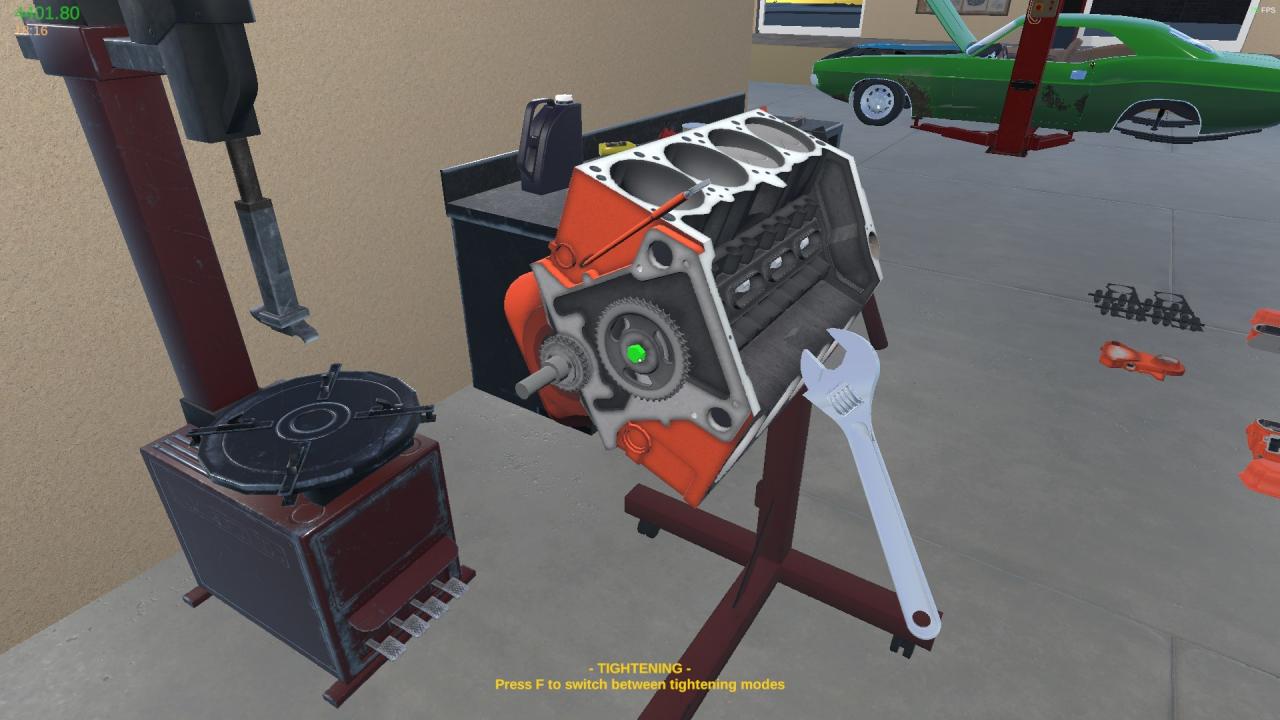
Once that is done you can install the crankshaft sprocket (the small one) and the camshaft sprocket (the larger one) only the camshaft sprocket has a bolt.
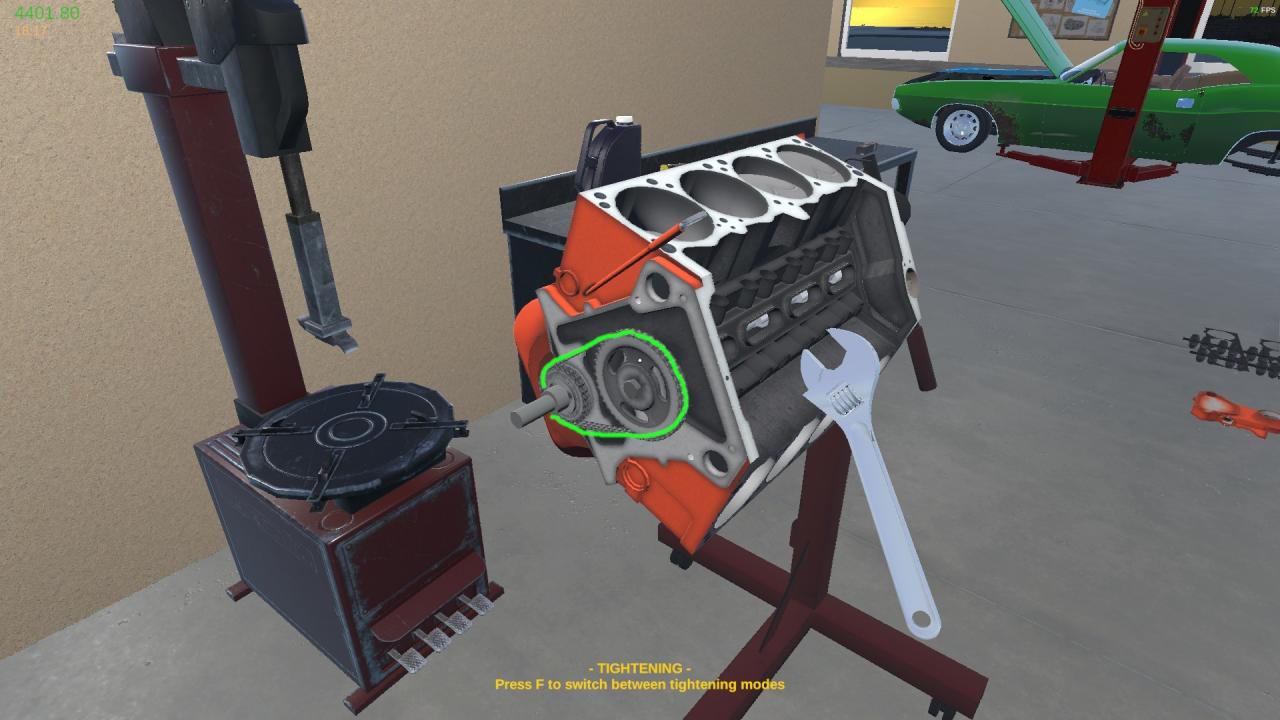
Next is the timing chain. It just goes on without any tools or bolting, you need a pry tool to remove it though.
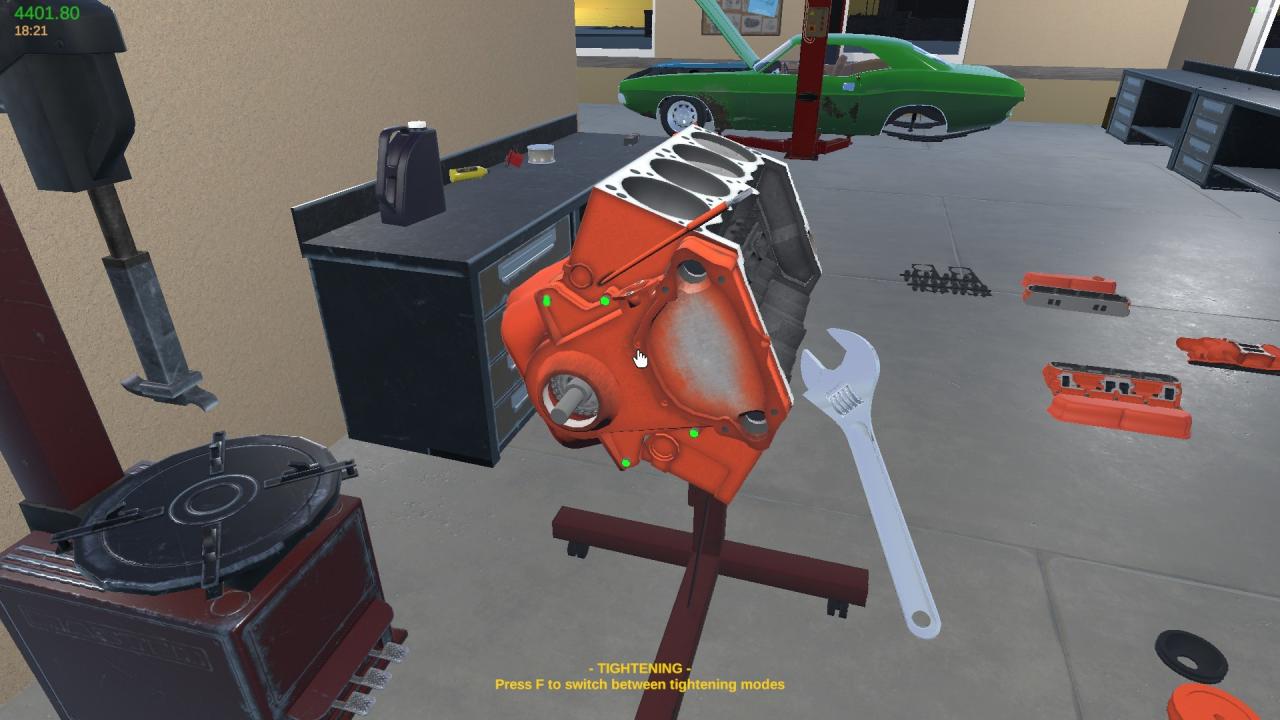
Now the timing cover, it goes on the front of the engine and . It’s just 4 bolts on this engine.
Now the head gaskets! These are important. Like really important, don’t forget them. No tools needed, and you will need to drop your wrench to grab them.
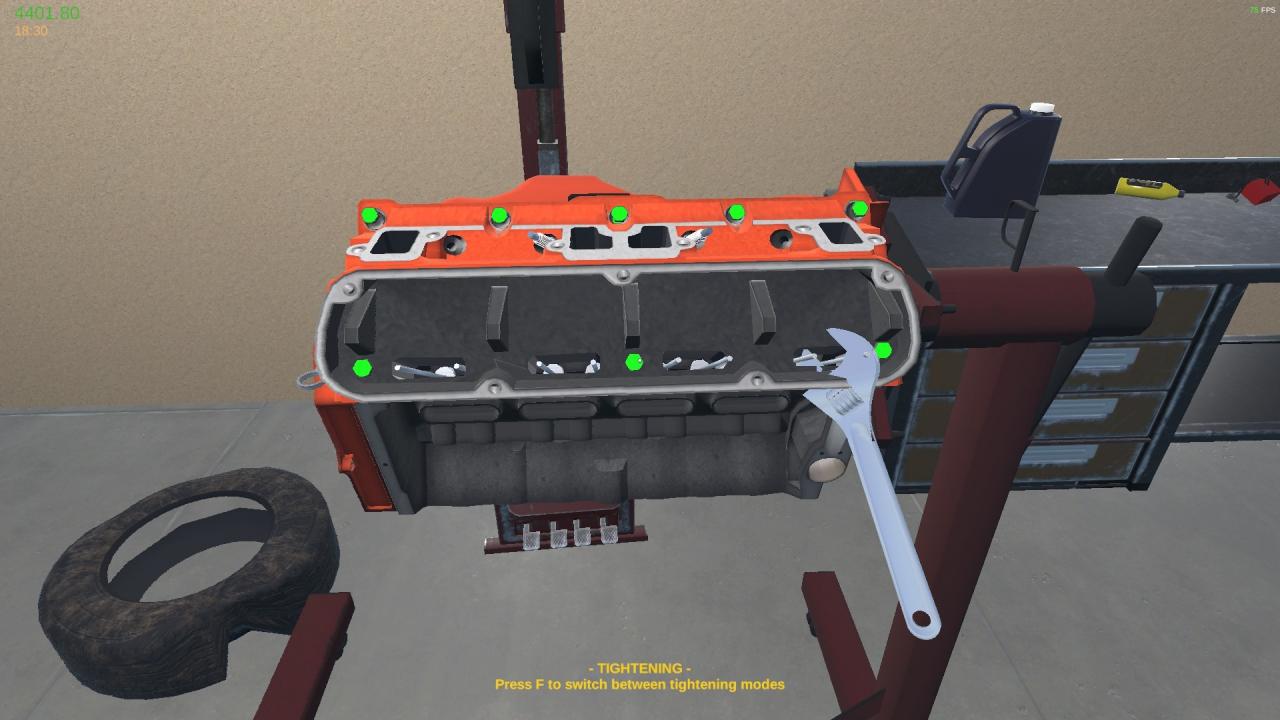
Now is time for the Cylinder Heads. You have a left and right one, but the process is the same for both. Just be sure you’re putting the left one on the left side of the engine, and the right one on the right side. There are 5 bolts for each cylinder head, and they can be easy to miss.
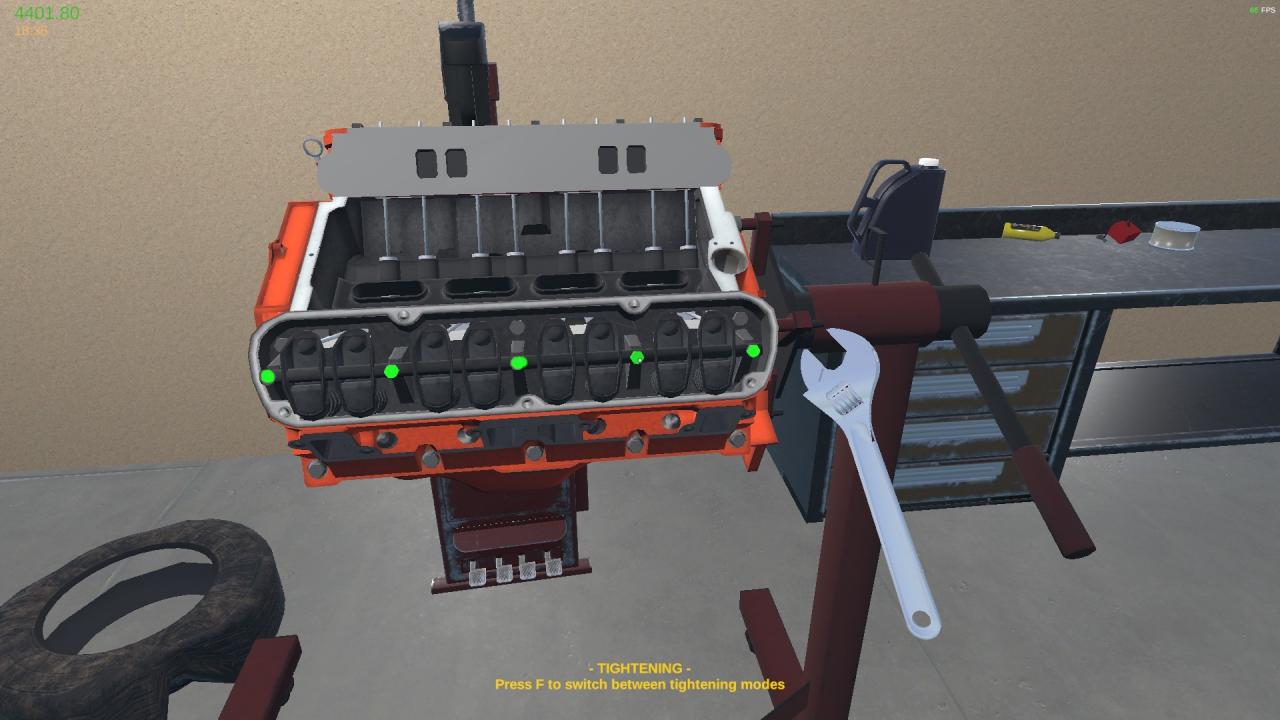
Now is the time for the rockers. They go directly on top of the cylinder heads, each set of rockers has 5 bolts.
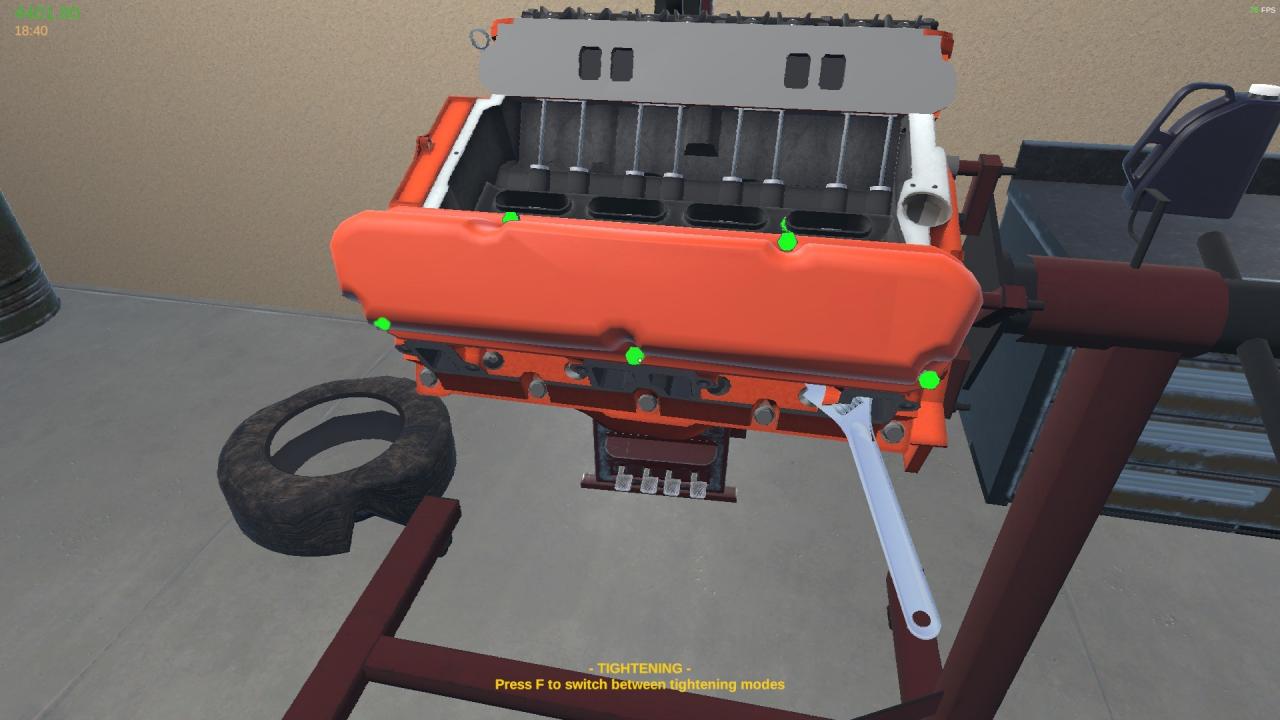
Next is the Cylinder Head Cover as the game calls it (normally called a valve cover) again there are 2, one for each side and they are directional. So one for the left side, one for the right.
5 bolts, 3 on the side 2 toward the center.
And that is it for the internals of the engine, now at this point you should have a very enginey looking engine. Next we will start working on fuel and spark!
3. Fuel and Spark
First the spark plugs, if you don’t have them in already.
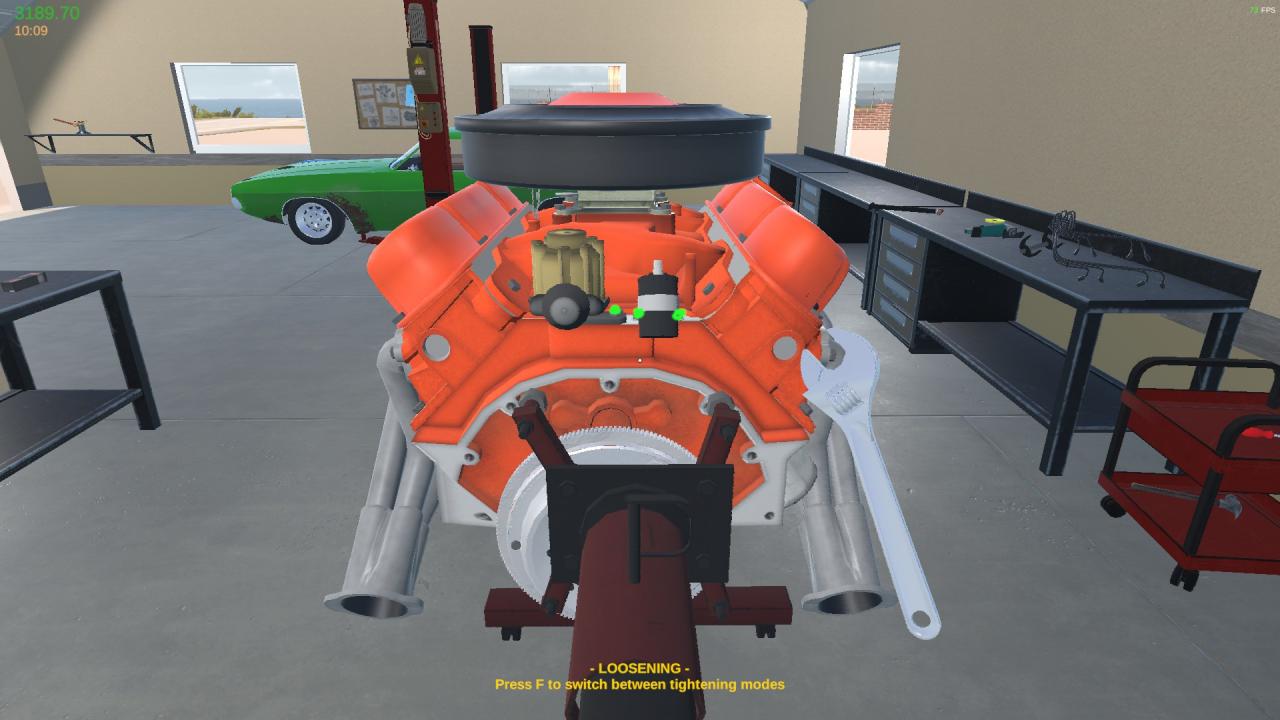
Next is the distributor and the ignition coil. These go on the back of the engine, right above where the transmission goes.
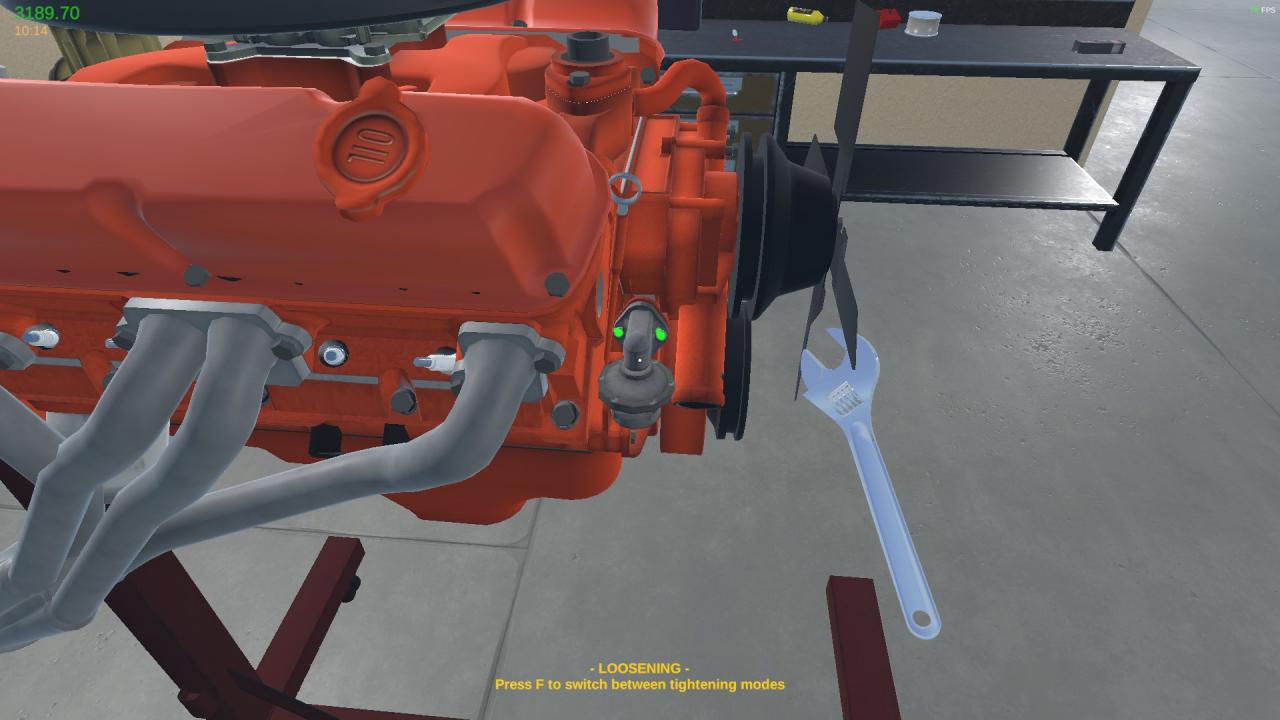
Then the fuel pump. This goes on the frnt of the engine, right in front of the right exhaust.
After that is just the spark plug wires, which I put on once the engine is in the car.
4. Accessories
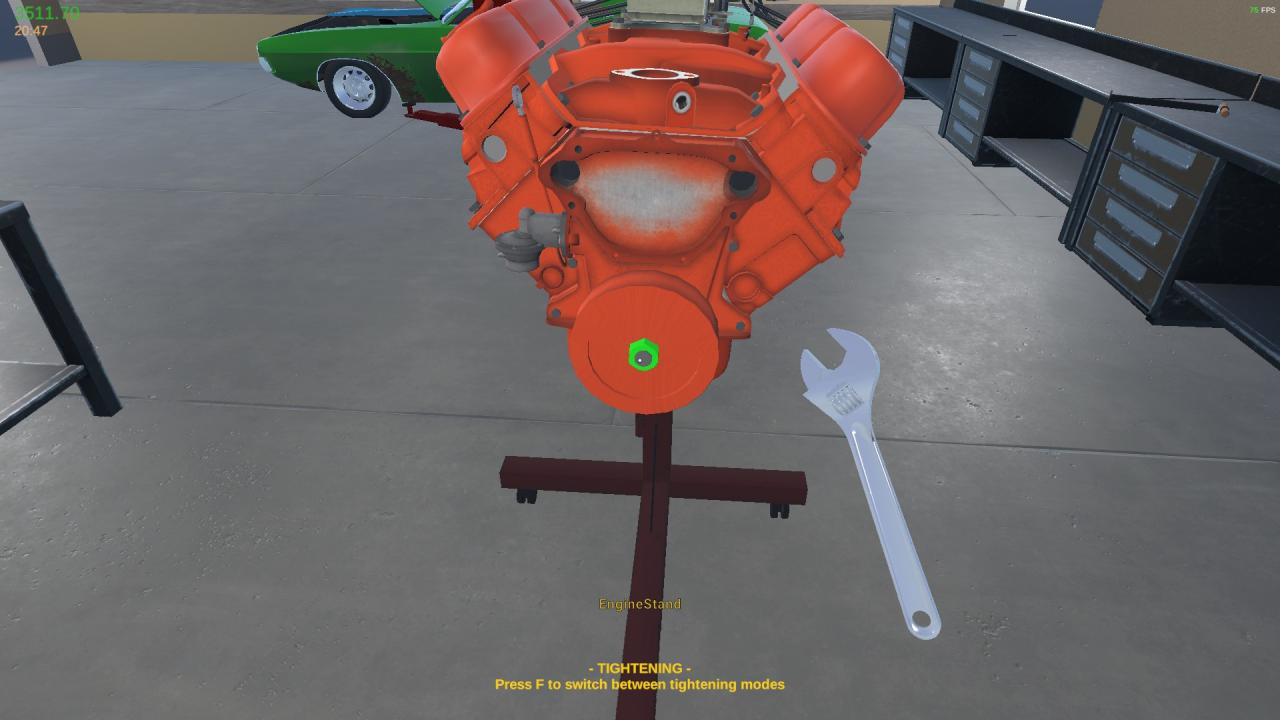
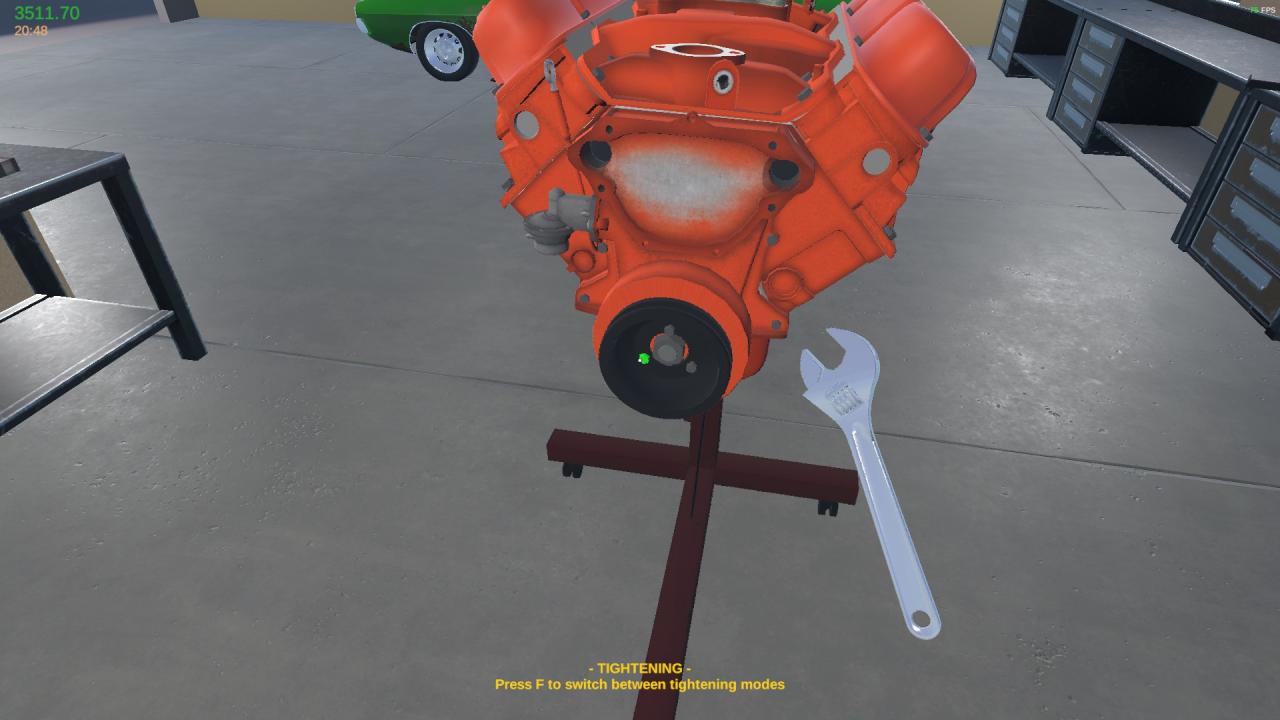
First comes the Harmonic Balancer. This goes on the front of the engine, right onto the end of the crankshaft. Only one bolt.
Now the crankshaft pulley, this bolts straight onto the harmonic balancer. It has 3 bolts.
Next is the water pump. It can be easy to miss the bolts on this engine, as they’re kind of hidden. It has 4 bolts.
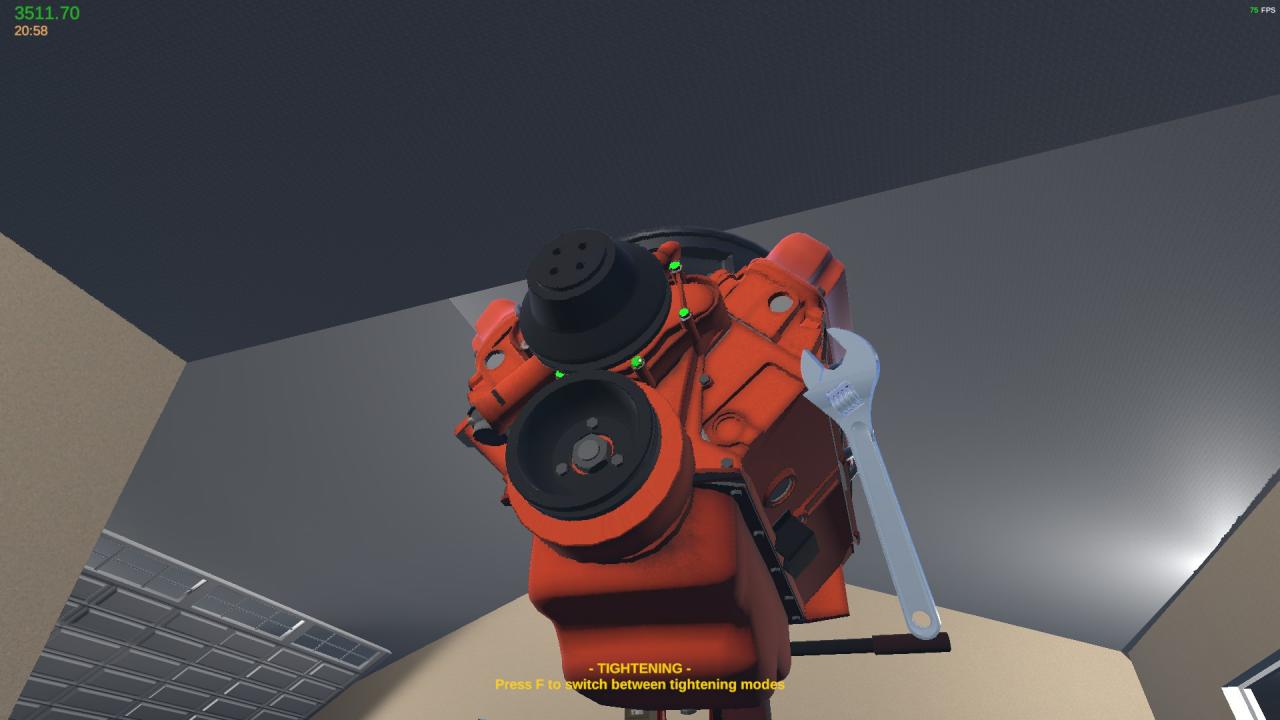
Next is the engine fan. This bolts on to the water pump. 4 bolts.
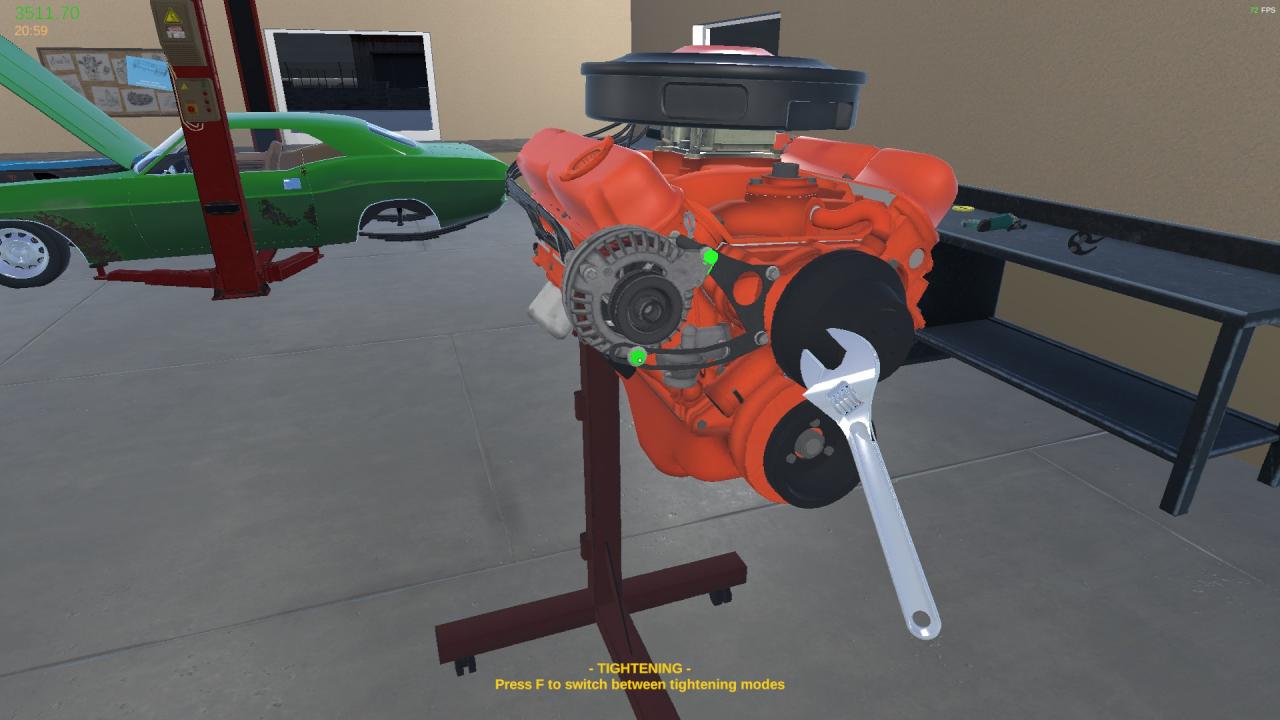
Then the alternator. 2 bolts, plus 1 main wire on the back once the engine is in the car.
You’re now ready for the alternator belt. I didn’t take a picture of that, but I have confidence in your ability to put the belt on. Not tools needed to put the belt on or to take it off.
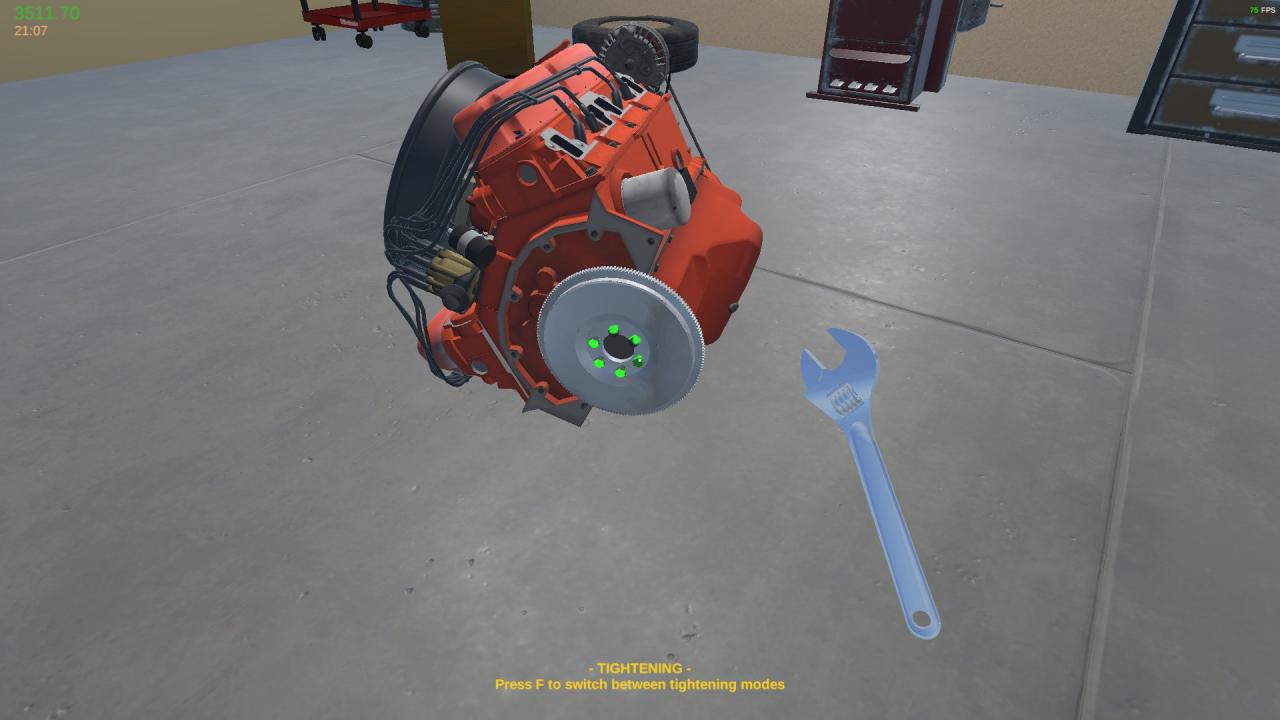
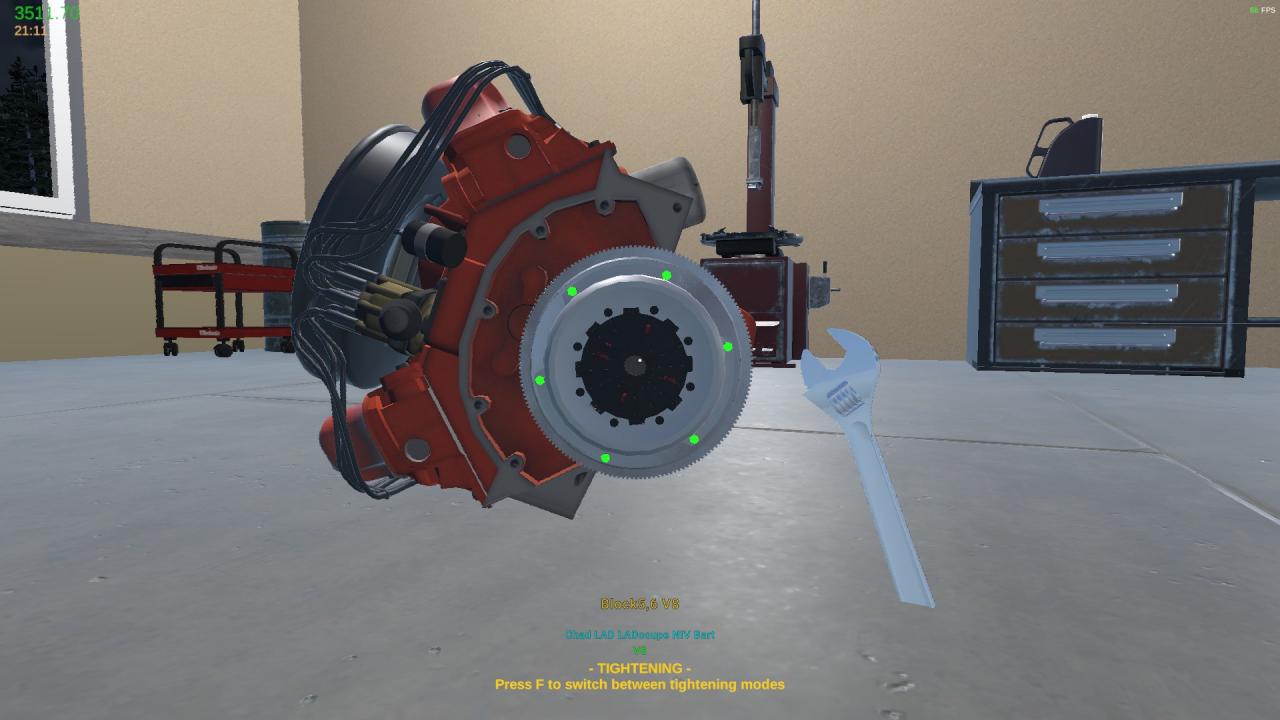
Now for the final 3 parts. First, the flywheel. 6 bolts.
Next is the clutch plate, no tools needed for this part and it just sits on the flywheel.
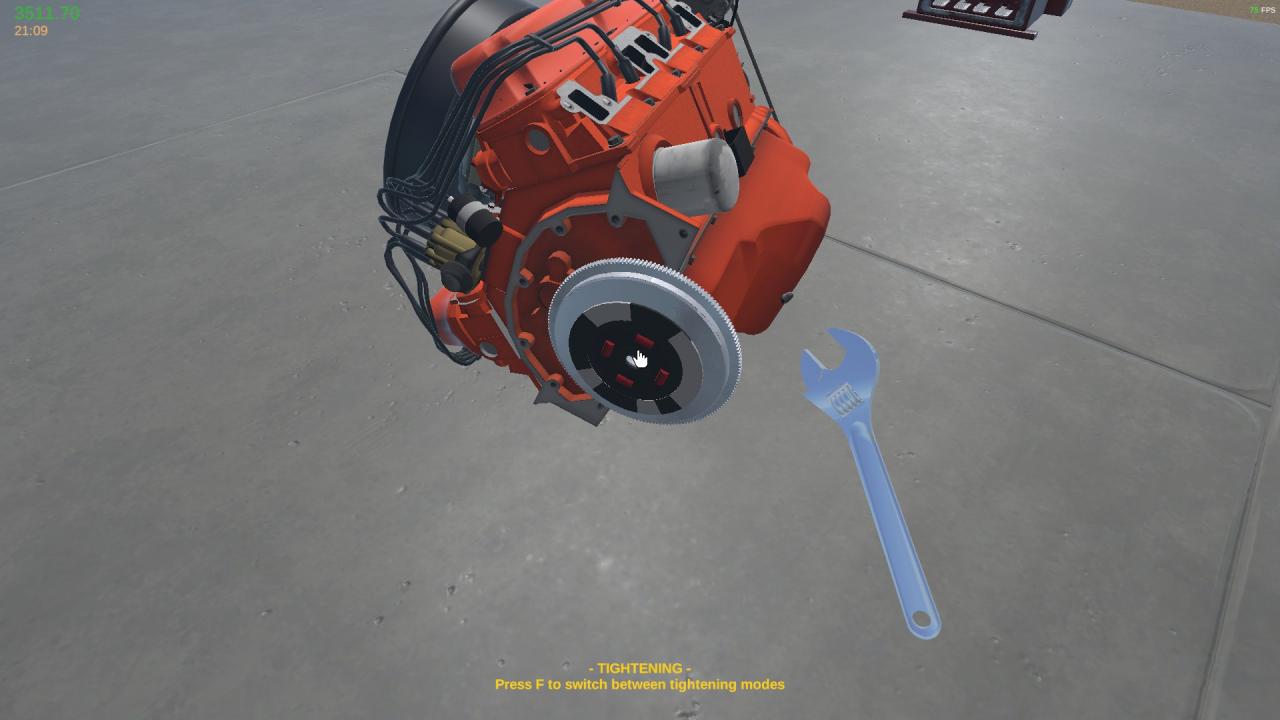
Finally is the clutch pressure plate. 6 bolts
Now you have a engine that is ready to put in a car, or to stare at longingly. Your choice.