A guide to help you decide if a certain utility room is worth buying and using for your fortress’ strategy.
I.a. Standard Utilities
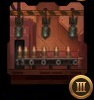
- Ballistic Radar & Early Warning System
MK I – $900 – (100 HP 3 PWR) +5% global accuracy, +10% global accuracy from operator
MK II – $700 – (100 HP 3 PWR) +8% global accuracy, +12% global accuracy from operator
MK III – $700 – (100 HP 3 PWR) +10% global accuracy, +15% global accuracy from operator
 The Ballistic Radar & EWS is the first utility you receive, and you essentially are given a free trial to test it out in the tutorial levels, at which point you will need to buy it once you gain your first fortress. It initially grants +5 aim passively and another +10 aim when staffed by a soldier. This makes it a very useful utility, becoming more powerful the more ballistic weapons weapons you field as ballistic weapons tend to have the lowest accuracy compared to other weapon types. Eventually, a MK III BW & EWS will give you +25 total aim to all of your weapons, making them very accurate and very deadly as a result. It also comes with a very handy early warning system, highlighting your rooms in red if they are being fired upon by the enemy. With this amount of intelligence, you can quickly order soldiers to avoid enemy fire, especially against anti-personnel bombs, flashbangs, and ICBMs.
This is a good room that becomes better with the more cannons you field, as well as providing important intel that shapes the way you react to the enemy.
- Active Defense Control
MK I – $1000 – (100 HP 4 PWR)
MK II – $600 – (120 HP 3 PWR)
MK III – $600 – (150 HP 2 PWR)
 A very important utility whose purpose is to defend your fortress from any incoming projectiles, making sure you don’t take any damage. Having one of these is essential for getting high scores, since taking damage lowers the points you gain from being victorious. If something happens to this utility, like, say, a SIRIUS laser frying the computer, your defensive rating falls as the turrets become less effective in terms of firepower and firerate.
As such, you want to always protect and prevent this utility from being destroyed. This is easily one of the best rooms to buy – it is necessary in order to use any defensive turrets, and that includes flak.
- Medical Ray Station
MK I – $800 – (80 HP 5 PWR) 100% Healing Rate
MK II – $600 – (100 HP 5 PWR) 150% Healing Rate
MK III – $600 – (125 HP 5 PWR) 200% Healing Rate
 Medical Ray Stations heal your soldiers at an accelerated pace, completely healing them in less than 10 seconds. The problem with this is that there is usually no need to rapidly heal your soldiers in an optimal game, as you can just cycle your soldiers around your base if they get hurt, letting them regenerate their health in a safer room. The only reason the AI uses this room is because the AI can’t cycle soldiers. Yes, it is useful in dire situations where your fortress is in chaos, but once you get stuff like Fleet Command or Kinetic Shield, this takes up extra power and room that could be used for those utilities that stop that from happening in the first place.
My verdict? Never buy this. Learn to cycle your soldiers instead.
- Blast Engine
MK I – $600 – (100 HP +3 PWR 3 AMMO)
MK II – $400 – (110 HP +4 PWR 4 AMMO)
MK III – $400 – (125 HP +5 PWR 5 AMMO)
 The Blast Engine tries its best to be viable, but unfortunately for it, Nuclear Reactor exists. This room consumes ammo comparable to small artillery, and produces an equal amount of power. This power generation isn’t a lot – only 3 power, and then 5 power – but can be doubled with a stoker stationed here, meaning that a MK III with a stoker can generate more power than a MK II Nuclear Reactor, but the difference is just 1 power. One thing the Blast Engine can claim is that it doesn’t catastrophically blow up when it is destroyed, but it still makes a fire when destroyed (even though you shouldn’t let either happen to begin with), and the fact that they are cheaper than nuclear reactors.
My final opinion: It is usable, mostly if you are on a budget or are playing on REDCON 2 or 3. Nuclear Reactor is better in most situations, since that one doesn’t use ammo and generates more energy passively.
I.b. Standard Utilities cont.
- Munitions Depot
MK I – $700 – (100 HP 3 PWR +5 AMMO) – 1 operator adds 5 ammo, 2 operators add 10 ammo
MK II – $500 – (110 HP 3 PWR +6 AMMO) – 1 operator adds 6 ammo, 2 operators add 12 ammo
MK III – $500 – (125 HP 3 PWR +7 AMMO) – 1 operator adds 7 ammo, 2 operators add 14 ammo
 The Munitions Depot adds a passive amount of ammo to your fortress for the small price of 3 power. These are used to remedy ammo shortages from trying to power on too many weapons or preparing specialized ammo at the same time. You always should try to avoid ammo shortages; your weapons fire 25% slower when at a deficit of -1 to -10 ammo, 50% slower at -11 to -20 ammo, and finally 75% slower at -21 ammo or greater. Not only does this make you much slower at defeating your enemy, but it also means your enemy has more opportunities to defeat you! Thankfully, the Munitions Depot begins with a free +5 ammo bonus, letting you prepare special ammo for your guns more frequently and easily without falling in an ammo deficit. What’s more, you can double or triple the output of the Munitions Depot by stationing 1 or 2 operators in it, easily allowing you to use multiple weapons at once. The MK III version can yield up to an additional 24 ammo, enough to supply an ICBM mostly by itself! Keep in mind, however, that destruction of the depot results in a small fire burning in your fort, on top of losing the extra ammo, potentially putting you at a deficit. If this ever happens, you should be able to put it out quickly since the fire starts off weak, but it may start off very strong if it was destroyed by an incendiary shell.
Overall, this is a good utility that enhances your offensive firepower for a small amount of power.
- Fleet Command
MK I – $1000 – (100 HP 4 PWR) – Navigator doubles airship speed, -80% arrival time
MK II – $750 – (125 HP 4 PWR)
Fleet High Command III – $750 – (150 HP 4 PWR) – 300 second call time, reduced to 60 seconds with operator
 The Fleet Command will, once prepared, call in either an airship to transport up to 4 soldiers to the enemy base or a bomber blimp that drops an EMP bomb. Generally, you want to use the regular troop-transport airship, since anytime you can drop an EMP bomb safely you could also drop your infantry safely as well. The reason why is because the EMP bomb must touch the target room in order to considered dropped; if the bomber is shot down while it is dropping the bomb, the bomb will NOT explode. Dropping the bomb takes the same amount of time as dropping soldiers, so it is generally not worth going for the EMP bomb. If you do want to try invading, I recommend doing it with an armory working in your fort, since it makes your troops able to easily kill enemy soldiers, giving them the chance to start destroying weapons quicker. Winning in this manner by killing all enemy soldiers and weapons will give you the TAKEOVER victory, giving you extra points and money to spend. Keep in mind that unless you want to wait 5 minutes for the airship to come, you should have an operator speeding up the process at all times.
In short, this utility offers a different way to win, granting extra credits for pulling it off. It also offers a way to cause a massive blackout, rendering the enemy as a sitting duck while you go ham with your weapons, but it is usually better to just take the extra money. A very good utility.
- Armory
MK I – $500 – (100 HP 2 PWR) – 5% damage reduction to infantry, grants machine guns to infantry, shelter trait
Enhanced Gear Armory – $300 – (125 HP 2 PWR) – 12% damage reduction to infantry
Elite Forces Armory – $300 – (150 HP 2 PWR) – 20% damage reduction to infantry
 The Armory grants a number of special perks when placed in a fortress. It reduces the damage that your infantry with its body armor takes by a small amount at first, and the later on a much greater amount in the endgame. It also grants machine guns to your infantry that perform far superior than the standard-issue rifles, dealing slightly less damage per shot but firing nearly 3 times as fast, quickly peppering their enemies with lead before they are counter-attacked. A soldier equipped with such deadly firearms can stand their ground even when outnumbered 2:1, and several friendlies helping each other out can dispatch any intruders or defenders in seconds. Furthermore, the utility acts as a SHELTER, decreasing damage taken even further if you have soldiers recovering here. These traits make it hard to kill enemy soldiers in this room even with medium-sized artillery, and should be taken out if you plan to invade them as well.
Final rating: It is good, but not too game-changing unless you specifically setup for invasion with Fleet Command. Doesn’t do too much otherwise outside of being invaded, but it only uses 2 power and helps shield your inner rooms from attacks so I can’t really complain.
- Nuclear Reactor
MK I – $1000 – (125 HP +5 PWR)
MK II – $1000 – (150 HP +9 PWR)
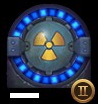 One of the more straightfoward utilities, the Nuclear Reactor provides a passive 5 power (or 9 power for the MK II variant) to your fortress. Sending an operator here does nothing, and as such you should really never have soldiers here except to repair and extinguish fires, since destruction of the Nuclear Reactor results in a massive nuclear explosion, instantly killing any soldiers that were there previously. Protect this room at all costs. This utility is great for powering up energy weapons, which consume at least 6 power from your fortress.
Lastly, this is a solid utility that requires no maintenance from you and provides a nice boost in power with no additional requirements. Just keep an eye out for ARCHONS and lasers and you should be good to go.
II. Large Utilities
- Kinetic Shield
MK I – $2000 – (200 HP 8 PWR) – 3 operator slots, 150% Matrix restoration speed, 40 HP barrier
Advanced Kinetic Shield Core – $2000 – (200 HP 9 PWR) – 4 operator slots, 190% Matrix restoration speed, 50 HP barrier, SHELTER trait
 Kinetic Shields are quite useful since they completely absorb any projectile that comes in contact except for missiles. This means that if your shield is active, you are 100% safe from cannons and mortars for the moment. Not even an OMEGA super-heavy shell can bypass an active shield. The shield starts at 10 HP, which means it can absorb a 10 damage shell before dissolving – it can only withstand a single HYDRA shell before fading into thin air, which is quite poor against a coordinated volley.
However, each operator stationed at the room adds an extra 10 HP to the shield, culminating in a total of 40 HP – enough to withstand a HYDRA or BASILISK volley, or even a TALOS mortar. The Advanced Core allows an extra operator and therefore an extra 10 HP, at the cost of 1 extra power consumed. This extra 10 HP does make a difference – fully staffed, it can tank any ALASTOR shells as well as re-materializing instantly if struck by an ARCHON MK I shell. The restoration speed is also quite important; the more operators staffed at the room, the more quicker the shield re-activates and the less time you spend vulnerable. Thanks to these traits, the enemy AI will likely target this room with lasers and ARCHON shells, or perhaps if its feeling cheeky with shredder mortars due to the amount of operators grouped together. Thankfully, the Advanced Core has the SHELTER trait, reducing damage done to your operators by a significant amount, just like the Armory, ICBMs, or the OMEGA.
In short, I would recommend this utility for any strategy that can spare the 8/9 power as even an unstaffed Kinetic Shield can stop an OMEGA bullet by doing nothing; your fortress becomes much harder to destroy, especially in conjunction with a Scrambler Relay and/or Active Defense Control as well.
- Clandestine Operations
MK I – $2000 – (200 HP 5 PWR) [Infiltrate]
MK II – $1000 – (220 HP 5 PWR) – 100 second charge time
 Where do I begin with this…
For $2000, 5 power, and 2 room slots, you can wait for 1 and a half minutes and you might be able to convert whatever human remains are still left in the enemy base. You must have an operator stationed in this room for 100 consecutive seconds in order to have the option to infiltrate. This room does NOT charge up by itself. In fact, it’s the only room with an ability that doesn’t charge up automatically; anytime you don’t have someone stationed here means you are delaying your opportunity to infiltrate. To make matters worse, the AI will try to disrupt your preparations by shooting a laser or with a Sniper shell from an ARCHON. Whenever that happens, you easily lose at least 10 seconds due to having to repair the room first before you can once again operate it. Then, there’s the question of whether there even is a suitable candidate to convert; while the game automatically chooses the healthiest soldier (or, if all soldiers are healthy, the most isolated), there’s no guarantee it will be suitable for the 1-man invasion since they are generally outnumbered and in the worst case, outgunned if the enemy has an armory. Sure, you could just use them to do as much damage and then die, but you might as well use a TYPHON to destroy rooms and kill soldiers much faster than waiting around for half the level.On the flip side, this room is just threatening enough that you will eventually need to respond to it in some way, since losing 1 soldier is already quite bad, much less having a rouge soldier breaking your rooms while you are trying to focus on the enemy’s fort. Regardless, all you really need to do is hit it with a laser or even a BASILISK if they have a poor defense, and you instantly buy yourself an extra 10 seconds, minimum.
That said, I understand the main idea behind this utility is to help win long and drawn-out battles, but the problem is you must sacrifice 1 soldier to even begin the process instead of helping prepare a weapon like ARCHON or a superweapon like the OMEGA. If Hexage ever makes an update for this game, I would certainly hope they fix this utility by at least allowing it to charge up by itself like every other ability in the game. As of now, this is easily the worst utility in the game. Use this only to see what it does or if you plan to do a challenge or meme strat.
- Scrambler Signal Relay
MK I – $2000 – (200 HP 8 PWR) 1 operator reduces recharge by 20%, 2 operators reduce by 40% [Scramle Pulse]
MK II – $1000 – (220 HP 8 PWR)
 Easily one of the best utilities in the game. For $2000, you get a room that when activated denies ALL inbound mortars, shells, and EMPs by forcing them to miss throughout the duration. Instead of being forced to miss, missiles (and by extension, ICBMs) turn around, flying back to the rooms they came from, potentially instantly winning you the level. You don’t even need this active to be in an advantageous position; simply having it ready means you will not take huge amounts of damage. Indeed, when the AI has a Scrambler ready, you WILL be forced to have your highest-damage guns on hold most of the time, until you either destroy it or bait the scramble with a TARTARUS mortar or some other threatening projectile/volley.
Keep in mind, however, that if a Scrambler is activated to turn away flying missiles, a second Scrambler signal will undo the first. For example, if you launch a NEMESIS Nuke and the enemy uses their Scrambler, the Nuke will start to fly towards you. If you activate your Scrambler at any point after they have, your nuke will fly towards the enemy again, leaving both of you without scrambles available…but they will be the ones that have to deal with a nuclear explosion! Lastly, if both Scramblers activate directly after each other, the missiles will turn awkwardly left and right, leaving them exposed to any nearby defense turrets. This can potentially save your battle from devastation if say the enemy launches an ICBM first and has their Scrambler activated last – the awkward turns done by the missile may buy you enough time to shoot it down.
In summary, this is easily an instant-buy. You’ll never regret it. Being able to deny and/or perform a reversal on the enemy’s attacks is incredibly powerful. Being able to deny that every 27 seconds is broken. You combine this with any other defense system and you instantly become many times more difficult to destroy.
III. Defensive Turrets
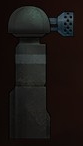
- Autocannon Defense Turret – $400 – (1 PWR 2 AMMO)
 The first turret you will unlock. Its method of attack is to fire as many bullets as quickly as it can towards the offending projectile traveling to your base. While it boasts a high rate of fire, its accuracy leaves something to be desired – it is only effective against airships, rockets, and shells that conveniently travel straight at it. It is an ok turret, but there are better ones to unlock and use.
 - Flak Defense Tower – $500 – (5 AMMO)
 The second turret that is unlocked, Flak turrets fire a burst of many bomblets at a low rate of fire, acting as a sort of “shotgun” turret – the closer the projectile is to the turret, the more likely it will be hit by all of its bomblets. The amount of bomblets fired in one volley is enough to completely destroy OMEGA shells by itself, and can greatly damage an ICBM with just one volley. For this reason, this is easily the best turret, and becomes even better with a supporting Laser system.
 - Laser Defense System – $600 – (2 PWR)
 The last turret that is unlocked, this turret has a couple of unique properties: it only consumes 2 power, starts damaging incoming projectiles at 100% accuracy the moment it comes in range, and provides a 30% rotation boost to adjacent defense turrets. Its main strength is that it starts attacking shells and missiles at 100% accuracy within a couple of seconds, making it the fastest (and therefore the best turret) at destroying light shells. Furthermore, the 30% rotation boost to nearby turrets mean that your flak and autocannon turrets become better at reacting to a volley of projectiles, making your fortress much more defensive. A very good turret that’s better than autocannon most of the time bit worse than Flak most of the time.
By Pizza Time