This guide is a comprehensive look at the basic mechanics and tips for new players.
Basic Mechanics
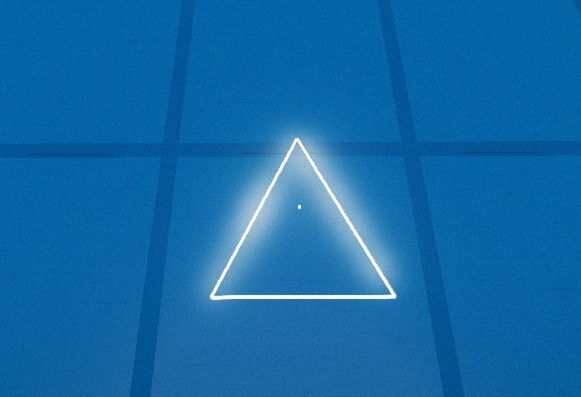 If you go into free-cam in the video viewer, you’ll see this representing the player.
The large triangle represents which way the player is currently facing. This is not your hit-box. In Swarmlake, the hit-box is nothing more than the tiny dot inside the triangle. A hit-box this small allows you to survive running into swarms of enemies, as well as the most important tool in the game: your gun.
Your gun does more than just kill enemies. It carves a path through swarms and also protects you from dying.
Many people think deaths are completely random while others think there’s a hidden HP value. Instead, you actually die from one hit; however, you do have a shield- in the form of bullets.
When a bullet spawns, for a split second its hit-box is a radius around you, which protects you from enemies in all directions. If an enemy hits this shield, the bullet is used up. Your screen will shake slightly, indicating that enemies are getting too close and you need to move.
You will only die if there are too many enemies for your fire rate to handle, meaning you’re getting hit faster than your bullets can provide a shield. Remember though, your shield is not something to heavily rely on, rather you want to use the path your bullets make while the shield protects you from stray enemies. For this reason, you want to be holding W for the majority of your run to take advantage of the protection your gun provides. Strafing or moving backward can be very dangerous and should only be done for quick adjustments to your position.
Fire-rate is the last gun mechanic. You start out only having 75% of your actual fire rate. At 1,000 shards, your fire rate is bumped up to 82%. At 3,000, it’s brought up to 90%. Finally, at 6,000, your fire rate is now at its max value. Your gun will flash white as a visual representation of your fire-rate increasing.
Though not gun related, a mechanic to keep in mind is the ability to jump off of enemies. This can be useful for additional height to escape the swarm or reach a particularly high bomb.
Spawns and Scaling

2 things affect how the game scales: score and time. Enemy spawn rate scales with both time and score. As mentioned before, your fire rate increases at 1,000, 3,000, 6,000. Bomb spawn frequency and limit also scale with score, the limit caps at 3 when you hit 4,000.
But how does this affect gameplay? Well, despite your high fire rate, enemies begin to spawn faster than you can kill them before you even hit 100 points. With waves getting progressively denser as time goes on, it’s very important that you don’t waste time during a run.
This would be a good time to talk about bombs.

Bombs are your main tool for getting shards and keeping the swarm thin, they explode when you get close enough to them, destroying all enemies in a large radius. They are completely stationary, but if the player gets far enough from them, they will respawn a distance in front of the player. When you shoot them your bullets will ricochet back, you can use this to help clear enemies around you as you advance on a bomb or just to hit some near you without needing to turn at all. Bombs always spawn somewhere in front of you, as well as all enemy spawns.
General Advice
It’s good to think about why you died at the end of a run and what you could have done differently. You can use the provided video at the end of a run to go over what led you to your death. Watching top runs on the leaderboard is also a good resource for learning. The discord is also a good resource, linked in the comments.
When running around a mass of enemies run at an angle, this way you can be running parallel to the swarm while still shooting at it to protect yourself. Specifically if the swarm is on your right, run forward and to the left, and vice versa.
Don’t get greedy, sometimes you wont get to collect even half the shards from a bomb, if the swarm is right on your tail, slowing down or turning around can be a death sentence, you usually can however activate a bomb and jump around the swarm, allowing you to collect shards while its turning around on you. This isn’t always safe of course, like mentioned before experience is most important.
If the bombs are clumped together outside of the swarm, instead of activating the closest bomb, you can go for the farther bomb, and use the space to go backwards and activate the other, this way instead of having to just run forward and leave most of the shards behind, you can safely turn around and collect.
At higher scores when there’s thousands and thousands of enemies on your tail, it’s good to take advantage of vertical movement. You jump and fall faster than you can move horizontally. A good time to go higher or lower is when a lot of enemies are getting too close, or if you can’t find a bomb. Once you’re up higher, look for a bomb, activate it, and go down to collect. Keep track of where the swarm is and keep moving, you don’t want to be collecting shards on the floor only to have the entire swarm come down on you. If there aren’t too many enemies on the ground, shoot upwards at the swarm coming down on you to give yourself a better chance at escape.
Enemies and How to Deal With Them
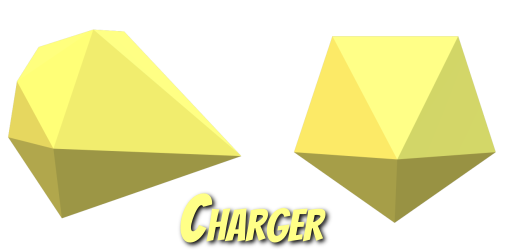
Since lines of chargers spawn already very dense, make sure to shoot at them if they are in your path- at higher scores, newly spawned lines becomes so dense that it’s almost certain death to run into them, so make sure to be wary of those. Eventually, chargers group up and form a large wall. Avoid running into the said wall unless you’re able to clear a hole to safely run though beforehand. If you don’t have that option, run through the outer ends of a wall rather than closer to the center where there are more enemies. If you cant do either of these, which is quite often, just run in the same direction of the wall to dramatically slow the rate enemies run into you, making it much easier on your shield. To get through, simply run on an angle, keeping up with the wall as well running along it, using your gun to carve a hole in front of you until you see an opening on the other side to jump through.

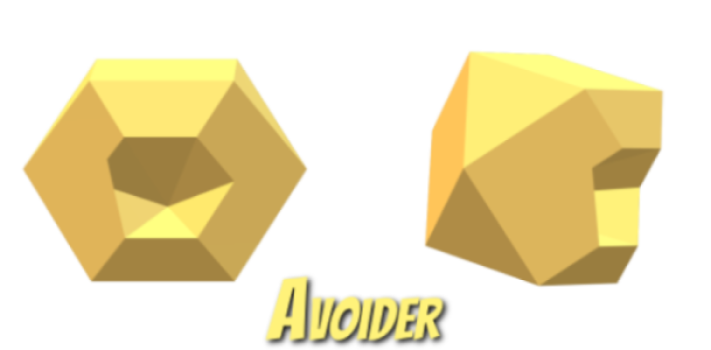
Since swarmers and avoiders tend to clump together, I’m putting them in the same section. Swarmers just directly charge you, that’s it. They have a slow turn speed but move fast, so avoid running in one direction for too long. Avoiders instead try to flank you from the sides, but “bounce” away upon getting too close to your bullets/shield. They’re only really a threat when you suddenly turn or jump into them. Otherwise they’re just less dangerous swarmers.