Recently with Update 5 there has been an influx of new players trying out Evrima for the first time. This guide is for those who have no idea what they’re doing. From how to obtain food and how to defend yourself, this guide will cover everything a new player needs to know!
How to swap to Evrima branch
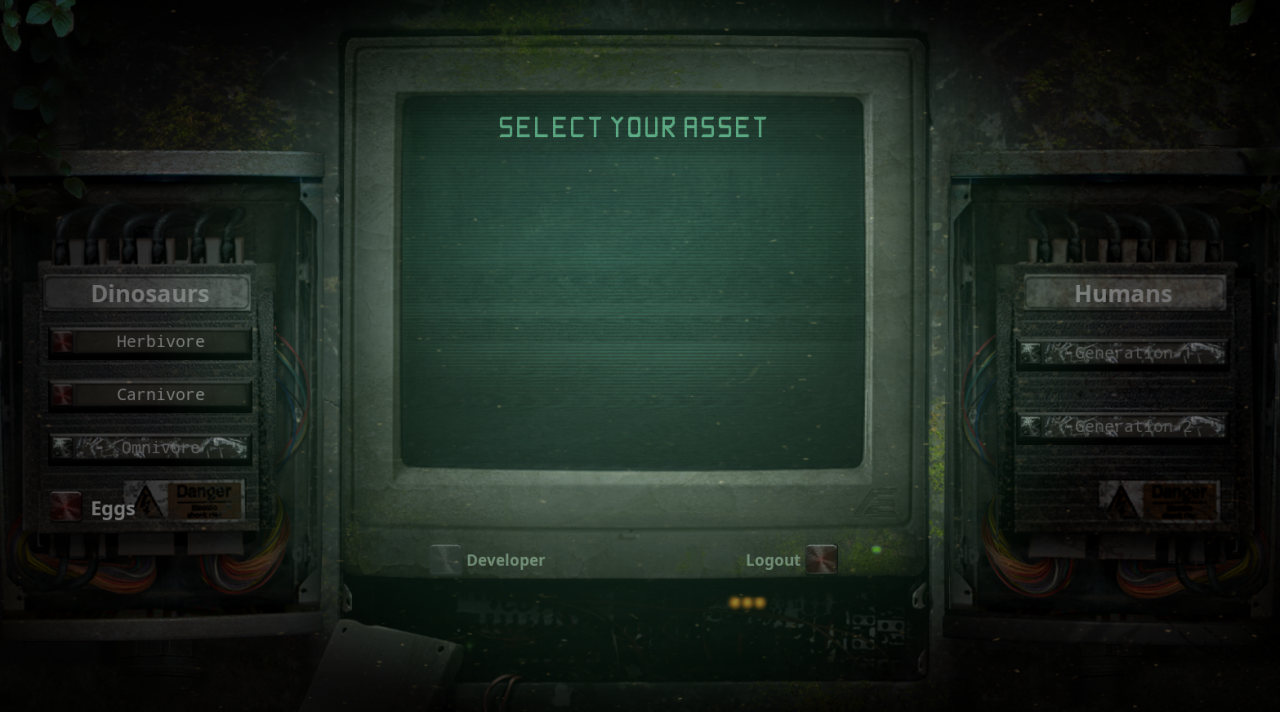
Choose your dinosaur
As a new player choosing the right dinosaur is extremely important. Each dinosaur has a different skill ceiling and if you choose the wrong one before you learn how to do anything you may never make it to adulthood.
Utahraptor, Dryosaurus, Hypsilophodon, and Pteranodon are all great starter dinosaurs. They have a quick growth time and the Hypsi doesn’t have to grow at all. Despite all of them being relatively squishy — only the Utah having decent HP — they’re perfect for learning the ropes.
If you’re especially scared of fighting and dying, you’re better off with Hypsi or Ptera. Ptera can fly and go its entire life without conflict, but that’s only if you choose to do so. Now if you’re in for a challenge as a dinosaur who is constantly hunted and needs to hunt prey twice its size, Utah is just for you.
Food, diet, water
Easily the most important tool at your disposal is scent. Holding Q will make your dinosaur sniff and a compass will immediately appear at the top of your screen. The downwards arrow is South and the upwards arrow is North. You can smell blood, footsteps if you’re a carnivore, corpses, your diet food, and water. The longer you hold Q the further your scent range extends. Herbivores cannot scent while walking to demotivate the hunting of carnivores, but carnivores can scent while walking to make hunting easier.
Choosing the right spawn often determines your survival. For carnivores, you want to spawn in heavily populated areas to quickly find food and a group if you’d rather play with others. Northwest (NW), Center, South, and Southeast (SE) are great choices. For herbivores, you want to spawn where your diet food is and at all times avoid populated areas so you’re not immediately killed. Herbivore juveniles are, after all, slow and weak compared to carnivore juveniles, not to mention the adult carnivores always looking for an easy meal. All dinosaurs have different diets. If you want information on a specific dinosaur, scroll down this guide and find your preferred dinosaur. There you’ll find where to best locate their diet food and the best spawn for them.
The three hexes above your hunger are your diet bars. Diet food affects your Health Regen, Stamina Regen, Night Vision Range (currently not in the game), Growth Rate, Locked Health Regen, Bleed Regen, Fracture Regen, and Scent Range. If you have a bad diet you’re going to be considerably weaker than someone with a perfect diet. At the very least you want to have one diet so you don’t get any debuffs, but having a perfect diet makes thing everything much easier. You grow faster and have many other buffs. You won’t be overpowered, but you’ll certainly be better than someone with a bad or average diet. If you can, avoid eating non-diet food and stock up on diet food. Diet food can go past 100% so you’re not constantly looking for it. For herbivores, I recommend spawning at your most dangerous to get diet food and filling up to 200-300% so you’re not frequently going back for it and endangering yourself.
When you’re low on water and are getting desperate for a drink, you need to find a quiet spot at a river or risk getting drowned by a Deinosuchus, The Isle’s scary alligator. Picking the wrong drinking spot is an easy way to lose all of your progress in a few seconds. You’re better off avoiding drinking at Center and sticking to highly forested spots where it’s easy to hide while you drink. You’re never safe, but keeping exposure from rivers to a minimum while you swim or drink is the safest option. As you travel across the map and have more experiences you’ll begin to learn where the safest spots are.
Combat, bleed, fractures
Every dinosaur has a special ability. Deinosuchus can lunge out of the water and drown you while the Carnotaurus can rapidly increase its already lightning-fast speed and knockdown whatever’s in its way. Whatever the case is, all of these abilities have some kind of cost. They usually cost stamina, but in the Hypsi’s case it uses a percentage of its hunger to spit a vile concoction and blind its predators (or just do it to troll lol). Do not let your stamina run out in a fight or your survival chances will plummet. If you want information on a specific dinosaur’s combat tips and abilities, scroll down to their tab.
Aside from mixpacking (different species being friendly and helping each other, that’s disgusting), everything is fair game in a fight. Going into water to avoid being pounced by Utahs, running into the forest to avoid Carnos, or jumping on a rock that’s easier to defend, they’re all strategic ways of escaping a fight and increasing your chances of survival. It’s not underhanded or cheap, it’s called using your brain and if Legacy players tell you otherwise they’re wrong. Knowing when a fight cannot be won is essential to survival. If you’re a Carno outnumbered by Utahs 1:8, you’re more than likely going to die unless you hide in the water or the Utahs are bad.
Speaking of Legacy players and Utahs, bleed is very different than the old Legacy system. You can die of bleed when you’re sitting (press H to sit and hold H to sleep), so you need to make sure to escape a fight and sit before your bleed pool gets too low. Your bleed pool appears when something that can cause bleed like a Carno’s bite or Tenontosaurus’s kick hits you. It’s a red blood drop, and as your bleed accumulates it’ll go down. When it reaches 0% you’ll die of blood loss no matter what your HP was. You can check your HP, growth, coordinates, gender, nest, skin code, and mate by pressing Tab.
Utah has the highest bleed output in the game for its size when it pounces. If you get pounced, hold E to drain the Utah’s stamina and buck them off and QUICKLY finish the fight. Utahs thrive in prolonged fights like the bleedster’s they are, so the longer you take to kill them or find safe water to hide in the more likely you are to die. Don’t bother running. Utahs can catch up to anything and you’ll only be wasting your stamina unless you’re a smaller dinosaur.
The fracture system that is ten times better than Legacy bone break is currently only utilized by the Pachycephalosaurus. The Pachy raises it’s head when it’s about to ram something so be sure to avoid that. There are three fractures. The leg fracture, body fracture, and head fracture. A body and leg fracture reduces your speed and makes you use more stamina when you run. If you have both at the same time you’re probably going to die because you’ll be extremely slow and use huge amounts of stamina when you run. The head fracture reduces your bite damage and those who use special abilities related to the head cannot use them. Your vision will be extremely dark and clouded. Sitting makes you heal faster so don’t run around with any fractures. You can also get fractures by falling from a height. Always watch where you’re going.
Courting, nesting, raising kids
First off, you need to find someone of the opposite gender who is above 80% growth. You want to face each other and hold N. This activates the courtship animation. After it’s done, press N in a spot where’d you like your nest. Make sure you pick a nice safe spot with some food and water nearby. Some dinosaurs have to build their nest from the ground up while others collect twigs to build it. Hold Q to smell the twigs and press G to pick them up. Press E to add them to the nest and repeat. If you need to build your nest hold B and repeat until the nest is made. The female holds E on the nest to lay the eggs and bam! You now have eggs. The dinosaurs that use twigs will have to add more twigs to the nest to keep it warm, while others have to sit on the nest. Eggs that get too cold or hot will rot. Pressing E to manage the nest will make the eggs colder. You can hold Q to smell your nest and see the temperature bar or press Tab and view your entire nest settings. Click on the eggs to set them to private or public, and when they reach 100% incubation players can hatch from them. If you’re on the dinosaur selection screen you can press Eggs and request an egg, or insert a code someone gave you from the Nest Tab to hatch in a nest. You will know if someone requested an egg if there’s a warning symbol on your nest when you press Q or on an egg when you go to Nest by pressing Tab. Click on the egg to accept, decline, or block the player from requesting an egg.
Congratulations! You have babies! Now you need to feed them or they will die. They cannot do anything for themselves and are completely up to your mercy. The baby can beg by holding E and you must hold E on them to feed them. Feeding your babies takes a percentage of your diet food, hunger, and water so if you’re a carnivore make sure you have a nice-sized corpse nearby! It’s great to have 3 diets so your babies grow up fast. Your diet also affects the number of eggs you can lay. 1 diet for 2 eggs, 2 diet for 4 eggs, and 3 diet for 6 eggs. If you have no diet food you cannot lay eggs.
At juvenile stage your babies need to eat and drink by themselves. They can strike out on their own or stay with you. Good luck raising them from there on because things have gotten a whole lot harder. Predators will think of your babies as an easy snack so keep them hidden and safe!
…And you can’t inbreed. Siblings cannot nest with each other and parents can’t nest with their kids. Why did you even think about it?
Tenontosaurus
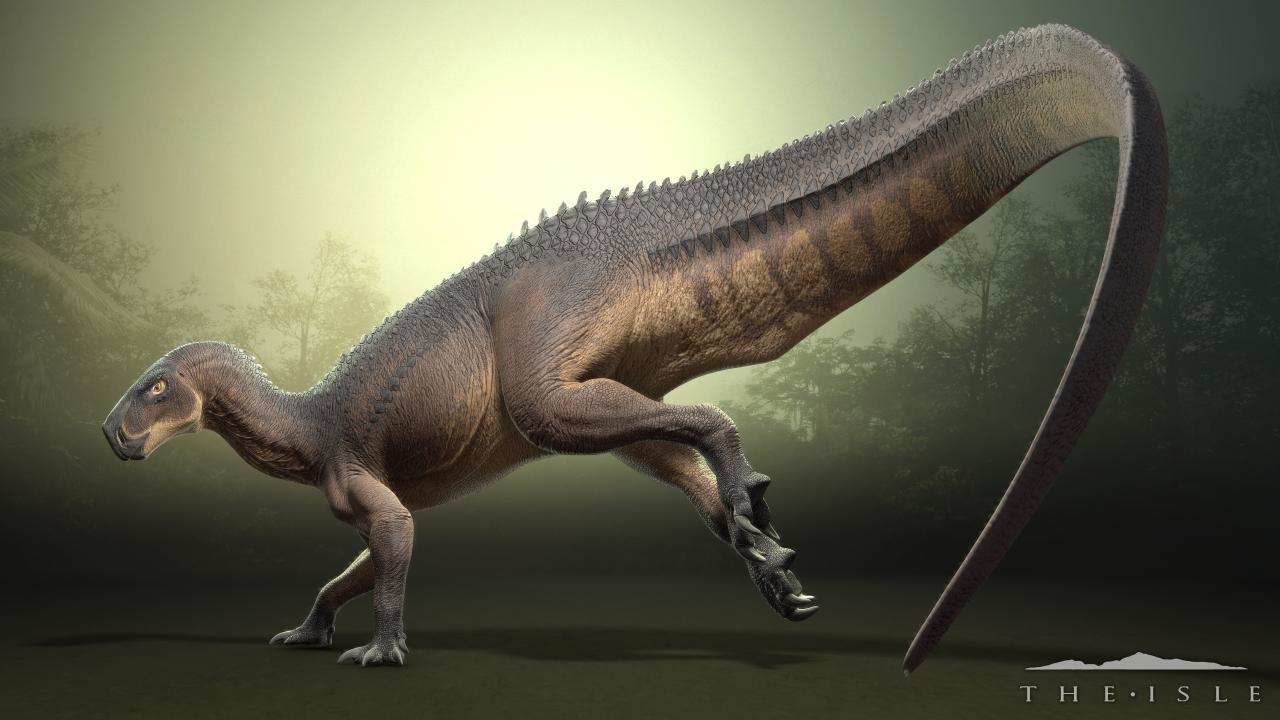
My personal favorite. The Teno is currently the second biggest herbivore. It’s fairly matched against the Carno and can deal with a few Utahs by itself. It has great stamina and stamina regen, a fast trot, and it swims quickly. It can dish out high damage and bleed and has a good bleed heal of its own. Despite having all these great things about it it’s a dinosaur with a high skill ceiling because of its precise attacks and extreme stamina-dependent nature, but before we get into combat lets start with simply growing.
Its diet food are potato (spawning along riverbanks), radish (spawning at Northwest, Center, and South), and mountain ash (spawning at Southeast swamps). If you could tell by the diets, the best spawns for Teno are South, Southeast, and sometimes Center. You want to spawn at Center or South to fill up on radish. Northwest is too far from Southeast and you’ll be traveling for potentially over 30 minutes if you do. Northwest and Center are both extremely dangerous so you want to stay along the forest line of the Shallows area. Potato spawns at two rivers by Southeast and mountain ash spawns almost everywhere by the swamps unless other tenos already ate it. The goal is to fill up on radish, run to Southeast and get potato, get mountain ash, then safely hide in a bush near some safe water and grow quietly. AFK growing is the safest and most efficient way to grow but your play style is up to you. With a perfect diet the Teno takes about 2 hours to grow.
Teno has some of the most difficult combat in the game. It cannot make any mistakes in a fight or you will pay the price. The Teno can kick with right click, tail slam by holding alt and right click, claw attack by holding alt and left click, and bite with left click. The kick does the most damage and bleed and is best used against Carnos. The tail slam is best used against Carnos as a ranged stun, NOT YOUR MAIN SOURCE OF DAMAGE. Tail slam uses a large amount of stamina so use it sparingly, but it’s good against Utahs because they’ll be going at the tip of your tail for a seemingly easy bite. Claw attack is a good source of consistent damage if you’re going for a Carnos tail and it’s always great against Utahs. The bite is basically useless.
A solo experienced Teno can fight up to 2 Carnos, but if you’re new you’re probably going to die to 1 unless they’re bad too. Don’t be afraid of dying. Teno is a dinosaur where you have to experience fights to get good with. Now for matchups…
1 Teno v 4 Utahs is fair if the Utahs are good. Any more and the outlook is cloudy. Remember E to buck.
1 Teno v 1 Carno is fair if both are good. Any more and the outlook is cloudy. Carno charge has a special sound you can hear before they bulldoze you. Quickly get out of the way and if you can’t see them run around unpredictably to avoid getting knocked over. If they go for a charge and you see them position yourself so they’ll run into the tip of your tail. Tail slam to stun them out of charge then kick them for good damage. More of an experienced trick. Even if you time it incorrectly as long as you positioned it correctly you’ll only take reduced damage to the tail.
1 Teno v 3 Pachys is fair if the Pachys are good. Pachy headbutt can cancel Teno’s attack so remember to dodge and weave. Utilize tail slam for range.
Don’t waste your time fighting Stegosaurus and Deinos unless they’re small. Everything else not mentioned here you can one shot with a kick.
Stegosaurus
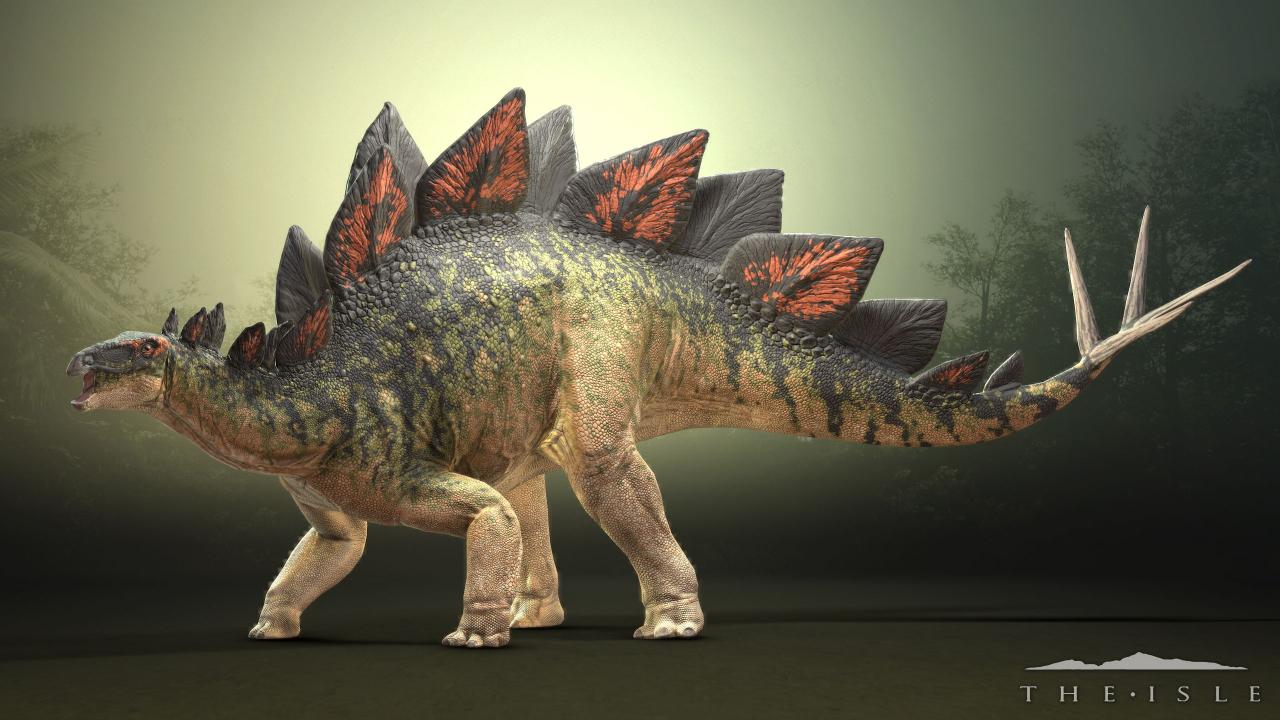
Probably the hardest dinosaur to grow because of its size and speed, but in the end, it’s the strongest. As long as you know how to deal with Utahs you will probably never die. It can nearly one shot Carnos and you can drink anywhere you want without having to worry about getting drowned. It’s too big for Deinos and even if you get attacked by one you can easily 1v2 and sometimes even 1v3 them. Its tail attack currently has the highest damage and bleed in the game. Only large Utah packs and 3+ brave Deinos have a chance at killing it.
The Stego benefits the most from spawning at Center. Yes, it’s dangerous, but both pumpkins and marigold, two of its diets, spawns at Center. Then you want to run to Southeast for sumac and AFK grow for about 3-4 hours. Think that’s long? Legacy Spinosaurus took seven hours.
Right click to tail attack. Your tail will swing in the direction you’re looking. Left click to bite. Do I even need to list the match ups? If you’re ever in danger just go in some safe water or a forest. They’re usually enough to demotivate anyone from hunting you, and those who were willing to hunt you are already rare enough. Again, remember to hold E to buck if Utahs pounce you. I always avoid other Stegos because I’ve played enough to not trust anyone in certain species. Solo Stego is pretty fun anyways.
I guess you only need to worry about these match-ups.
1 v 6+ extremely good Utahs. The good ones are usually in VC but if they’re not then they’ll be a bit more disorganized and make more mistakes you can punish them for easily.
1 v 6 extremely good and ballsy Carnos. You may wonder why the amount of Carnos are the same as Utahs. Carnos are much stronger and faster than Utahs, so why? Utahs are simply better at fighting Stegos than Carnos. There’s no reason for a Carno to ever fight a Stego anyways since they’re not on their diet.
Utahraptor
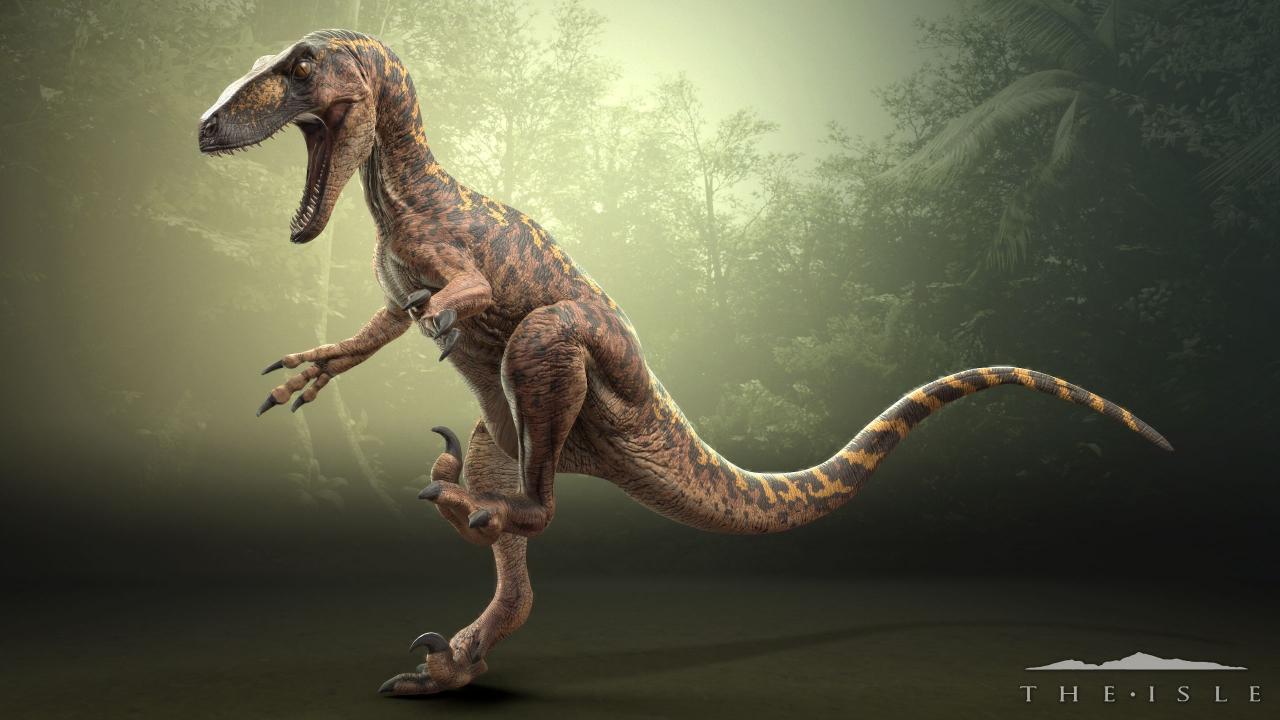
Perhaps the most fun carnivore in the game. The risk of death is present in every moment of its life. Carnos are constantly after it and most of its hunts are a game of life and death. This nimble little bleedster has been a pain in the ass since The Isle came out years ago, and even in Evrima it’s a dirty little rat I love and hate. Best in packs and growing fast there’s never a shortage of Utahs. A good starter dinosaur.
Center, Northwest, Southeast, and South are all great areas to spawn. You want to go where the populace goes to find food. Utilizing its pounce for great bleed, hunts against the larger game tend to be long. Pinning a smaller animal with pounce does a lot of damage and is usually enough to kill it. Right click to pounce, and make sure you keep holding the button when you latch on or you’ll jump off. Do not run out of stamina while you’re latched on or you’ll be stunned and fall off, an easy target for your prey to retaliate. Left click is a bite and holding alt with left click is a bite and claw attack that does decent bleed. I won’t list its diet food here because it’s pretty long and you’ll never find it in specific locations, and you can always check for yourself by pressing Tab in-game. Its growth is about an hour and thirty minutes with a perfect diet.
4 good Utahs v 1 good Teno is fair. Watch out for it’s tail and remember it can turn on a dime with a roundhouse kick. Getting stunned may very well be the death of you.
4 good Utahs v 1 good Carno is fair, perhaps even 3 Utahs. Don’t get charged. Bob and weave, be unpredictable. Carno has garbage stamina and it won’t be able to keep up in a prolonged fight. Bait it and give your packmates opportunities to pounce. It got nerfed with the update so it’ll die with about 2-4 good pounces.
2 extremely good Utahs v 1 good Pachy is kinda fair. Pachy bleeds quickly and is like a glass cannon. Bait it out and avoid its ram or pay the price. 2 good pounces will give a Pachy a run for its money.
6+ extremely good Utahs v 1 Stego is fair. If it goes in the water, hides against a rock, or goes into a forest the fight may very well be lost. You cannot get greedy. Play slow and steady, only go in for a pounce when you know you’ll succeed. Cover for your packmates.
Utah 1v1 is dangerous. A pounce can turn the tide. A full pounce does almost all of your HP and will bleed you out and you can’t buck off another Utah. Immediately escape the fight if you get pounced for more than 4 seconds and find somewhere to heal the bleed. You want to utilize alt bites and only pounce if you know you’ll land it. If you mess up a pounce the enemy will get the chance to get bites on you or even pounce on you yourself.
Carnotaurus
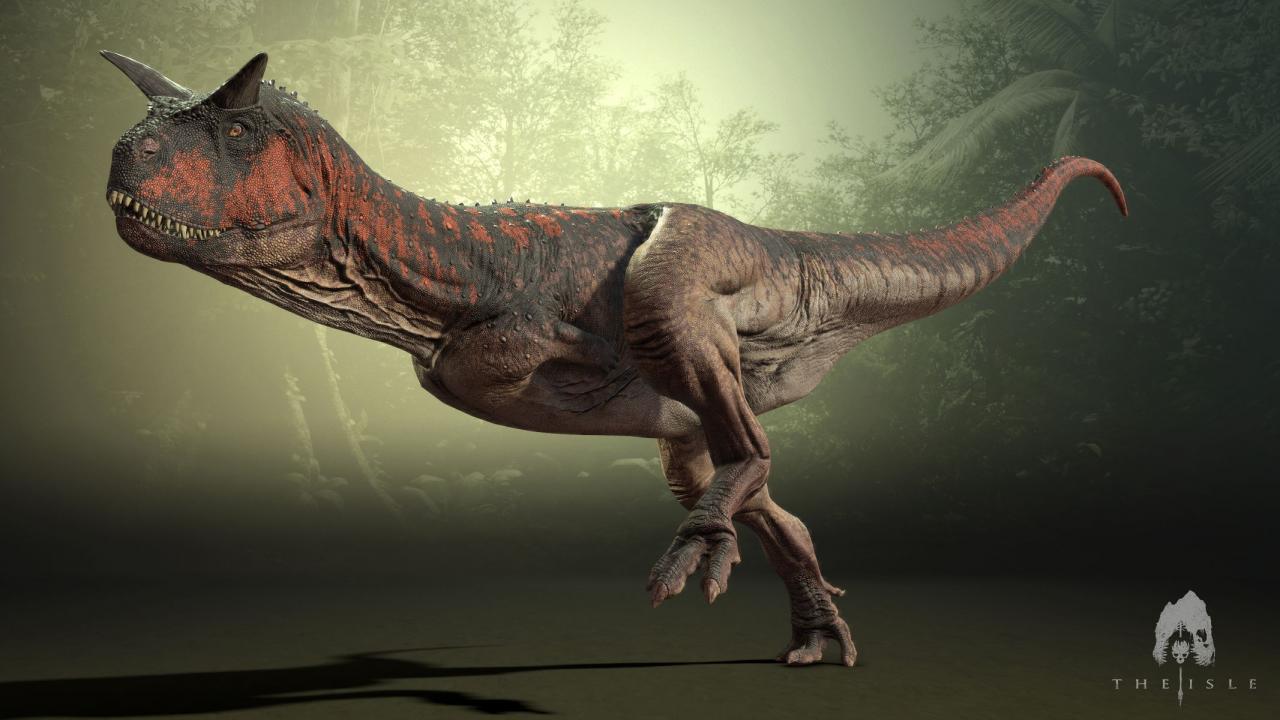
You… like this dinosaur? Alright, I get it. You want to feel like a big apex without being tied to the water like Deino. Fast with a fair growth time, the Carno rules the land keeps Utahs in check. You want to stay in the Center, Northwest, and South regions. You hate the forest because you’re always going to run into trees, so if you’re playing in a pack having someone chase your prey and another person cut them off from escaping into the forest is a great strategy. Carno isn’t a complicated dinosaur and there’s not much to say about it. Its charge is simple. After running in a straight line for about 2-3 seconds you can press right click to activate a charge. It consumes an immense amount of stamina so only charge when you get close to your prey. Carno doesn’t have much stamina and can be run down by Utahs so you always need to be thinking of ways of escape if you can’t fight in a situation. With a perfect diet Carno has a growth time of about 2 hours, maybe 2 and a half.
1 good Carno v 1 good Teno is fair. Bait out its attacks. Go for charges. You do good bleed, so don’t let it rest. Let it panic.
1 good Carno v 4 good Utahs is fair. Dodge their pounces, shelter by water or a rock if you don’t want to take any risks. Remember E to buck. Alt bite is good if they’re going to pounce at your head.
Why are you fighting Stegos? They’re not on your diet. 1 headshot from a Stego will put you on death’s door. If you had any less than 100% hp, even 95%, you will die.
1 good Carno v 3 good Pachys is fair. Dodge their headbutts. Don’t get greedy. 1 hit from a Pachy can start a chain attack where you get stun locked especially if they got a fracture on you. The ballsy ones are easy to bait out. They can’t charge their ram forever and if they pushed too far you can punish them easily.
4+ good Carnos v 1 good Deino is fair, but let’s be honest, there’s no Deino stupid enough to stray far from land long enough to let you kill them unless they want to die. They’re tanky but easy to dodge if you’re good, even if they’re alt biting.
Pachycephalosaurus
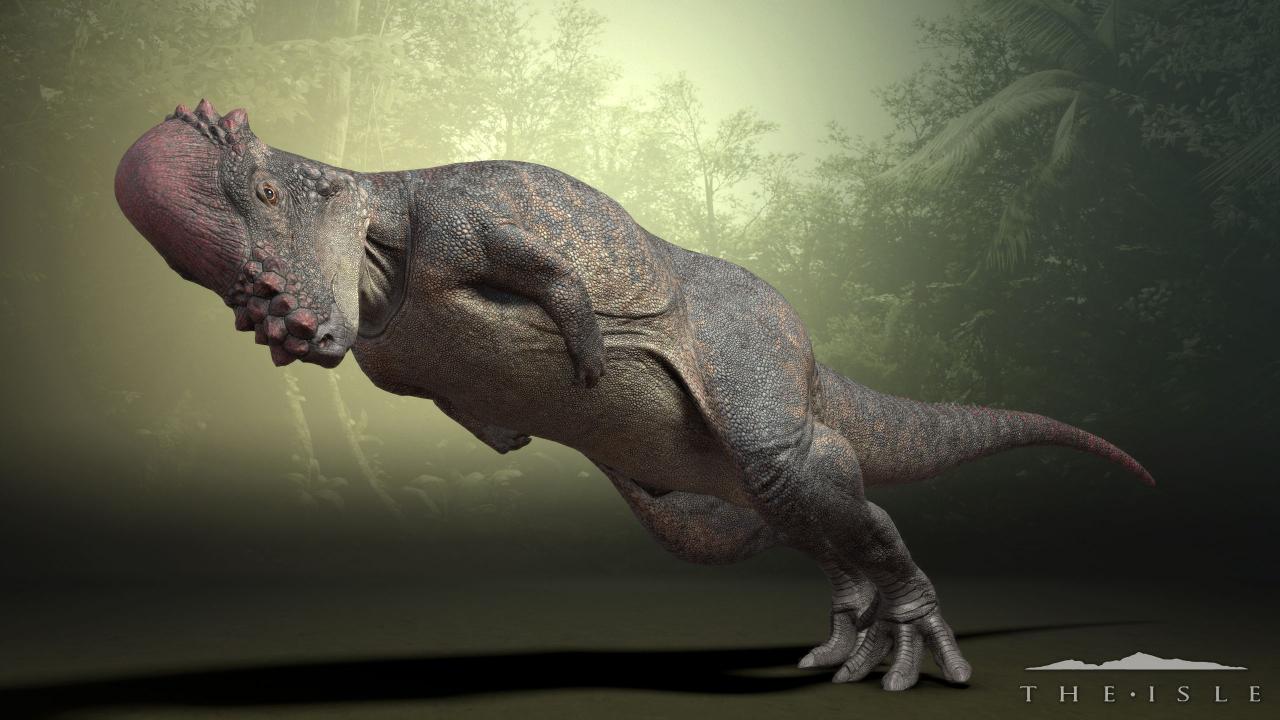
I don’t really like it. You need to have a herd to even think about defending yourself. Well, that’s not true, but it sure feels like it. Best played defensively although 10x more enjoyable offensively, the Pachy hands out fractures left and right. Pachys can easily humble cocky Utahs and Carnos who think they’re about to get an easy meal. They’re the most hated dinosaurs because of the frequency of bloodthirsty Pachys who go around killing even herbivores (nothing wrong with that, it’s just annoying and I kill every Pachy on sight idc if they’re friendly). If you play this dinosaur religiously you probably have anger issues.
Pachy takes about an hour and a half to grow with a perfect diet. All of it’s diets spawn in the same general area so just spawn at South and go a little further out for agave. Return to South and cross the river for oranges, and beyond the South nesting ground is coconuts. You have to be 50% growth to ram a tree for coconuts, so if you’re small just wait for them to fall naturally. Look down on a coconut and ram it to crack it twice then chow down. You’re better off AFK growing because of how garbage Pachy’s growth stages are.
Hold right click to charge up a ram. You can also click it, and if you’re holding it look down with your camera to cancel your ram without wasting stamina or making yourself open to attack. Holding alt with right click will make you headbutt in the direction you look. It’s best against Utahs and does good damage. If you hit anything smaller than you with it it’ll knock them down. Only the ram does fracture damage.
3 good Pachys v 1 good Carno is fair. Make openings for your herdmates and cover for them. If a Carno is charging at you straight ahead stand your ground and time your ram perfectly. You will stun them out of their charge and fracture them if you’re lucky. Go in one at a time to finish the Carno off. If you’re playing solo just fracture the Carno’s leg and immediately run.
1 good Pachy v 2 extremely good Utahs is fair. Don’t let them pounce on you. You can ram them out of pounce animation. Watch your stamina and remember E to buck. Alt bite to knock them over.
3 good Pachys v 1 good Teno is fair. Watch out for their tail slam. Same advice as Carno. Cover for your herdmates and go in one at a time.
Other dinosaurs not listed can either be one shot or will 1-2 shot you.
Deinosuchus
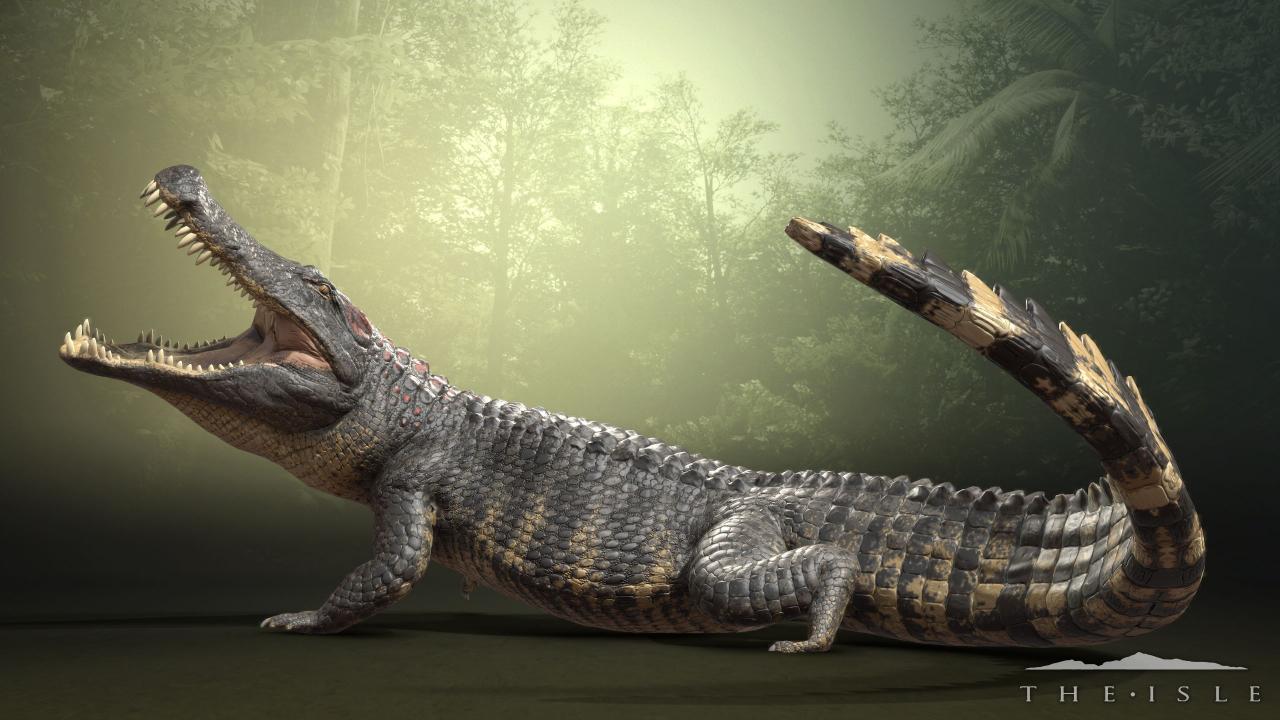
Arguably the most boring playable. Slow, restricted to water because of scary Stegos, and barely getting the chance to catch anything because most players are smart with where they choose to drink, the Deino is better suited for those who want to relax and not worry about life and death every moment. Aside from cannibals, Deino should never die as it cruises in the water. Fish will keep you alive and you can always risk going onto land to steal food from the land carnivores. I’m sure there will be rare moments where you make a big catch so don’t worry too much.
Deino takes about 3-4 hours to grow with a perfect diet. Diet isn’t listed as it’s very long and you can check with Tab in-game. Spawn Center, Northwest, South, or Southeast. Left click to bite, hold alt with left click to quickly bite in any direction, and right click is your lunge. If you manage to catch something DO NOT let go of right click or you will let go of them. Your stamina will slowly drain as you drown them and if you run out of stamina before they do they will escape.
Match-ups aren’t necessary as you can easily avoid everything aside from other Deinos as long as you stay in the water. Just… don’t fight Stegos unless you have 2 or 3 others with you. Don’t try to lunge Stegos as they’re too big. It will stun both of you however. You’re better off alt biting in a fight against a Stego or Deino because you bite quicker.
Pteranodon + Honorable mention
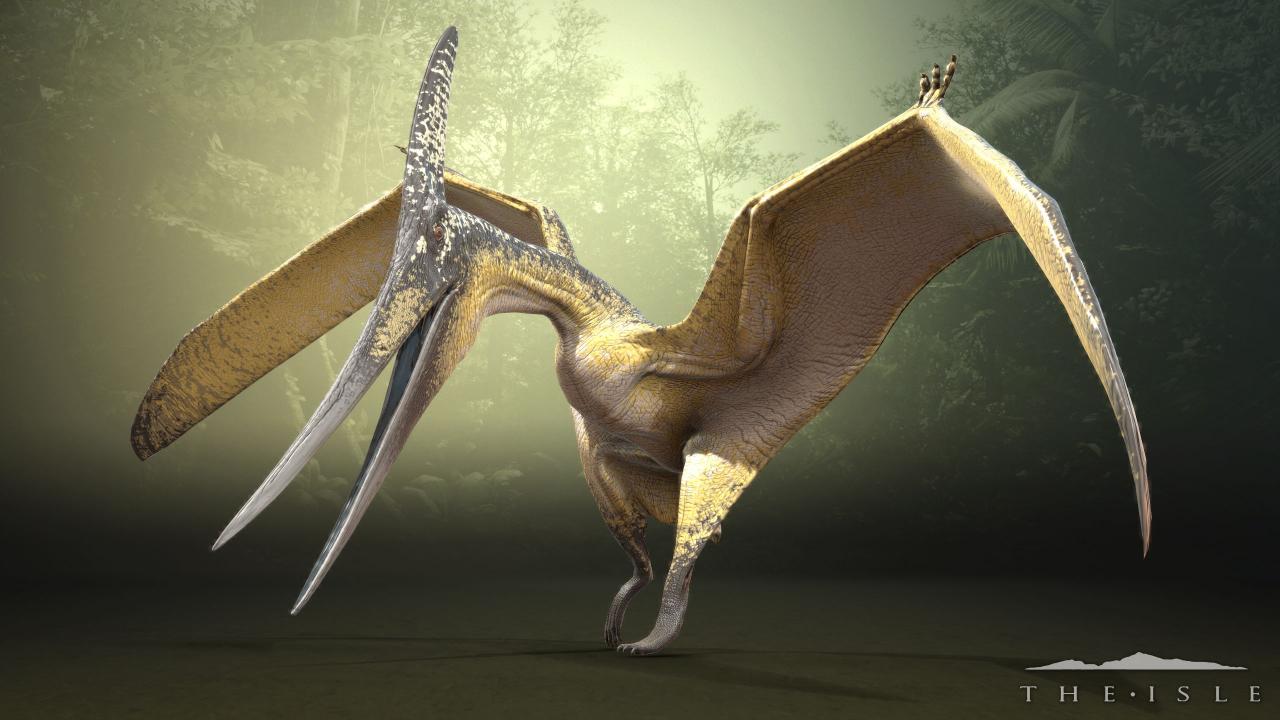
The Ptera is one of the squishiest playables in the game, but it makes up for it with its flight. Very relaxed gameplay combined with spectating the world is a play style you can never go wrong with.
There isn’t much to say about the Ptera aside from it’s mechanics. The Ptera takes abour <50 minutes to grow with a perfect diet. To fly, hold space bar. Drain a larger amount of stamina for a stationary take-off. Run and hold space bar to consume less. Holding space bar in the air or looking up with W will make you ascend. Going straight up drains a larger amount of stamina. Go straight down to dive, but don’t dive into the ground or risk death. Hold Z to prepare for landing as you near the ground.
To latch to a tree, hold Z as you approach it then press right click when you get close.
Look for ripples in rivers for schools of fish. Fly low to the water and hold left click to skim until you catch a fish. Be careful not to fall in!
Unless you’re trolling flying around pecking stuff don’t fight anything. Basically everything one shots you.
— Hypsilophodon —
Hold right click to aim your spit and shoot at your victim’s eyes. It consumes hunger so make sure to stay filled up. Its diet food doesn’t make any difference since it’s so small and you don’t have to grow. Unlike Dryo, Hypsi deserves an honorable mention because it has a special ability that actually works and is fun to use.
Thanks to Xiao for his great guide, all credit to his effort. you can also read the original guide from Steam Community. enjoy the game.
More Guides:
- The Isle: Tenontosaurus Guide (Grow, Nest, And Survive)
- The Isle: Pteranodon Guide for Beginners 2021