Full step by step guide to helping you survive the night. Tips and hints with explanations. Also all OUTFIT UNLOCKS.
Introduction
To point out the obvious, this is an adult game with sexual themes and nudity. This guide will be no different. I mean if you’re reading this, you most likely already bought the game for that reason alone… Also spoiler warning…Duh…
To my understanding, there are 6 endings to the game, 9 clothing items and 3 skins to unlock, as well as 7 unique sex scenes (won’t be spoiled for you). We will be covering how to obtain all of these topics in detail down below.
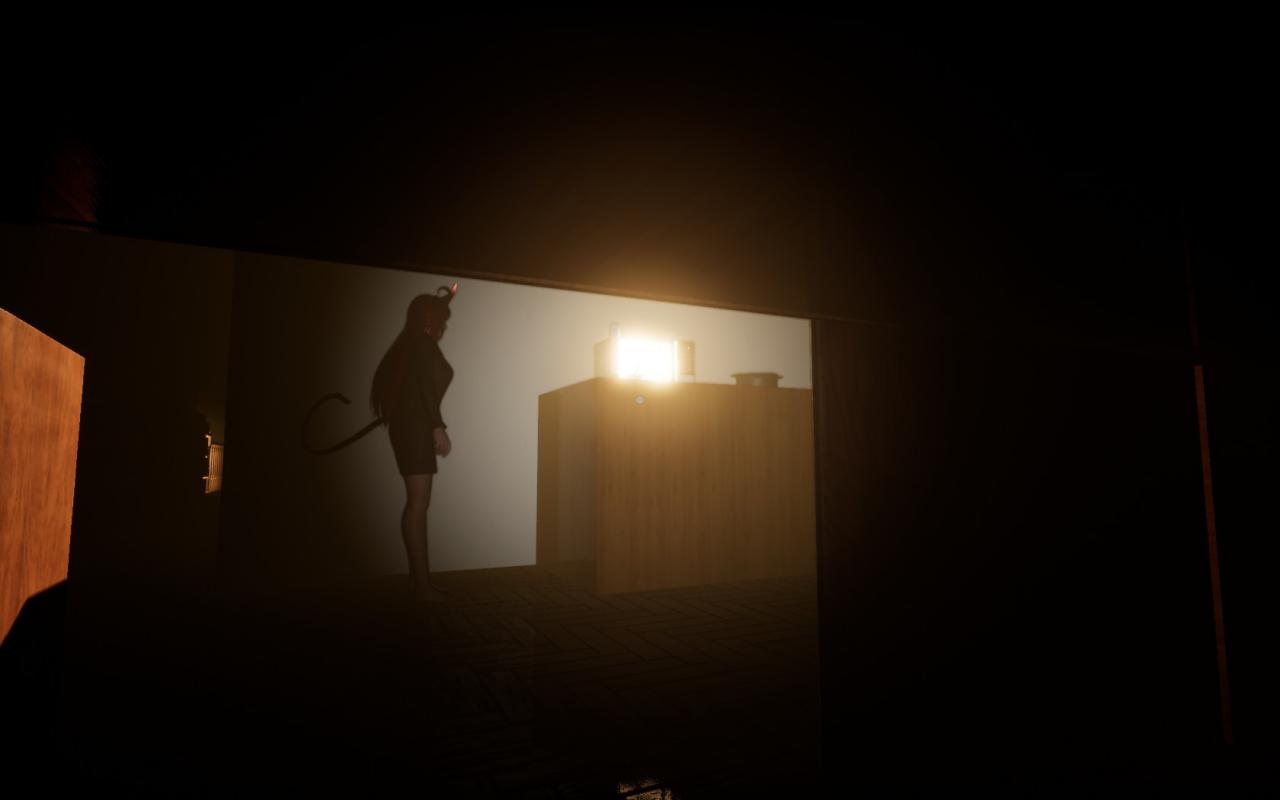
PS. I nicknamed The Succubus Ms. S.
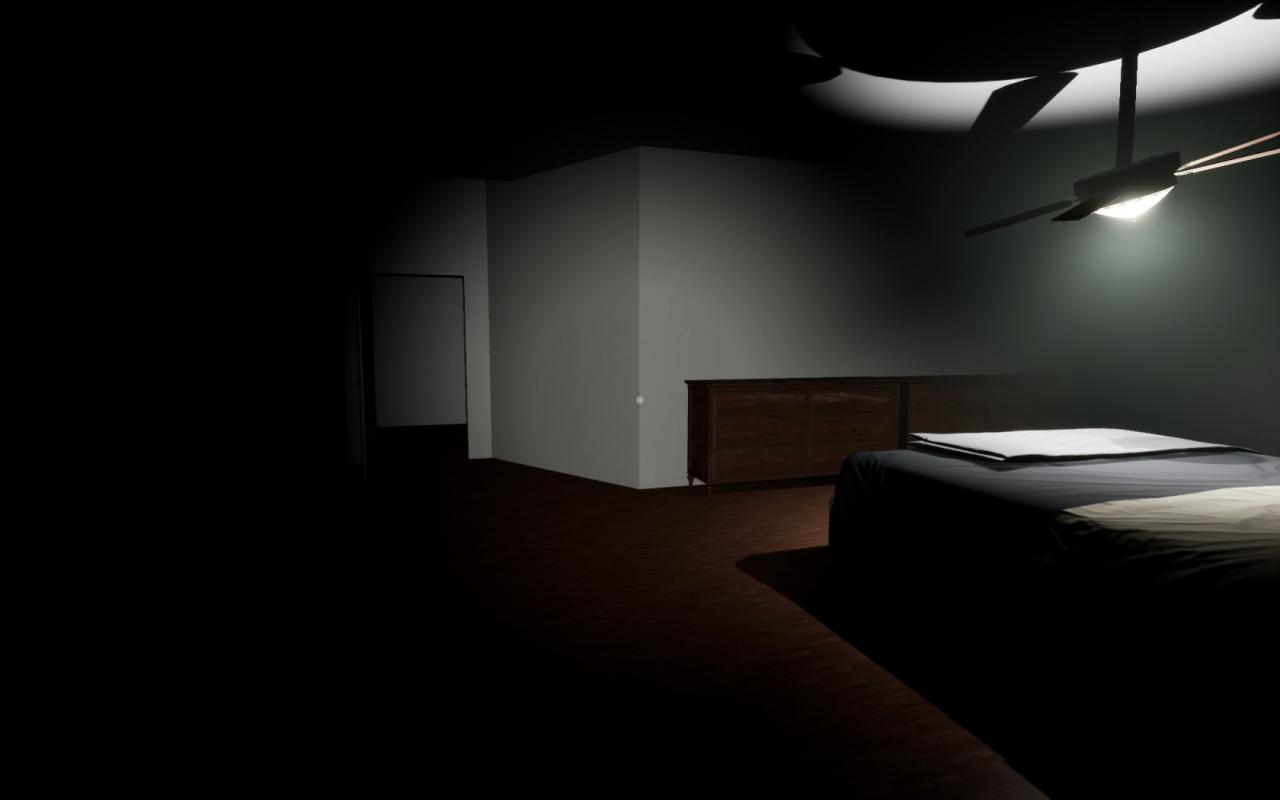
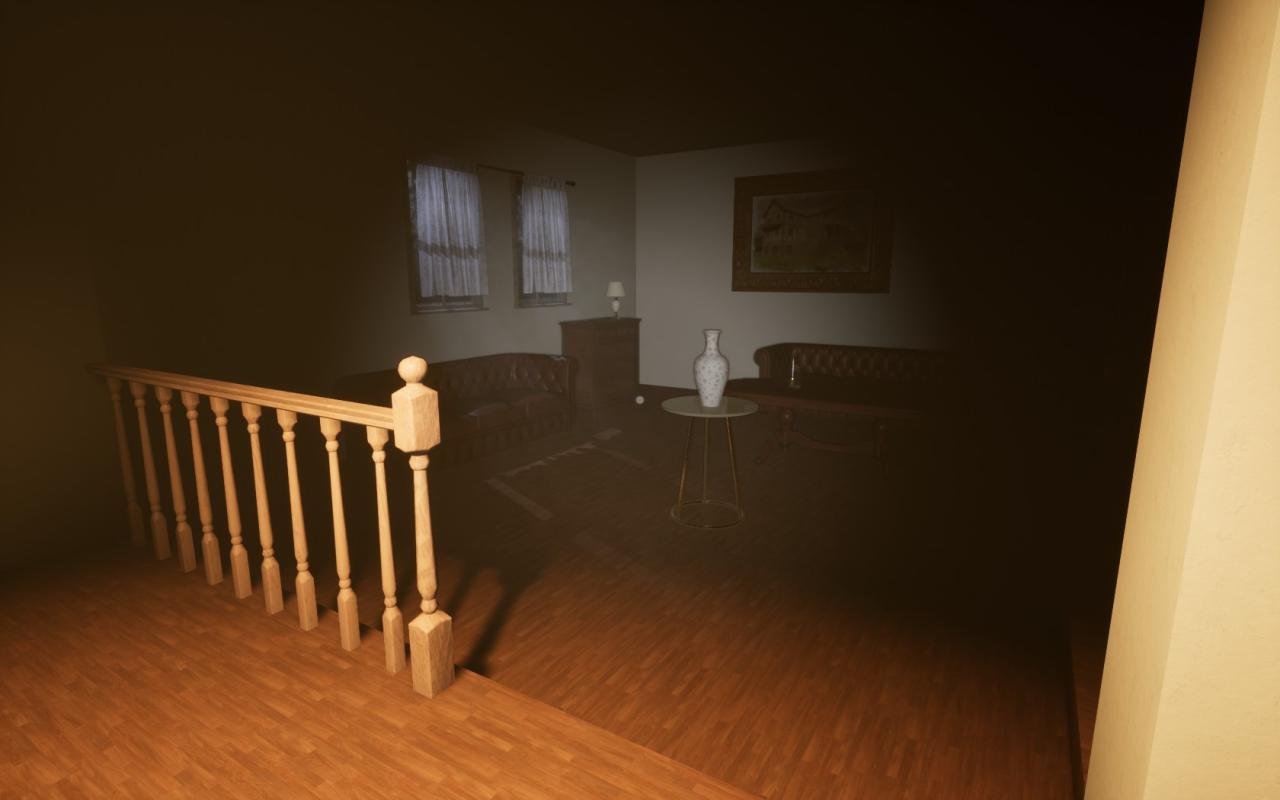
The Map
This Is the map of the house. I will be referencing the map in greater detail through out the guide.
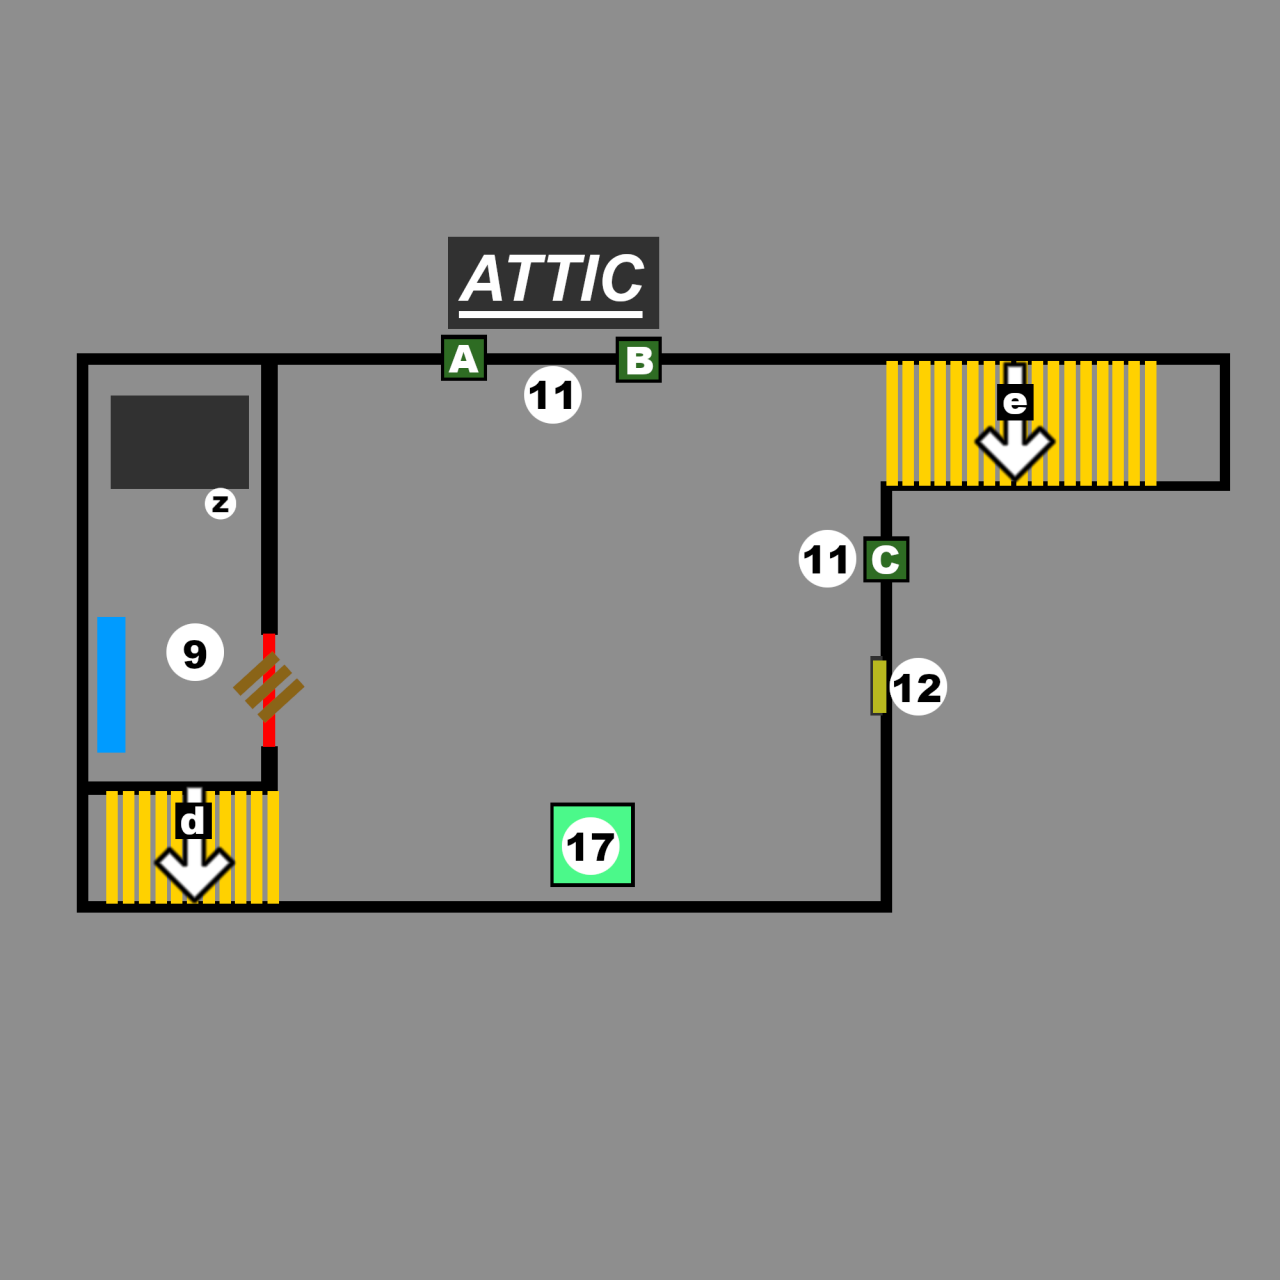
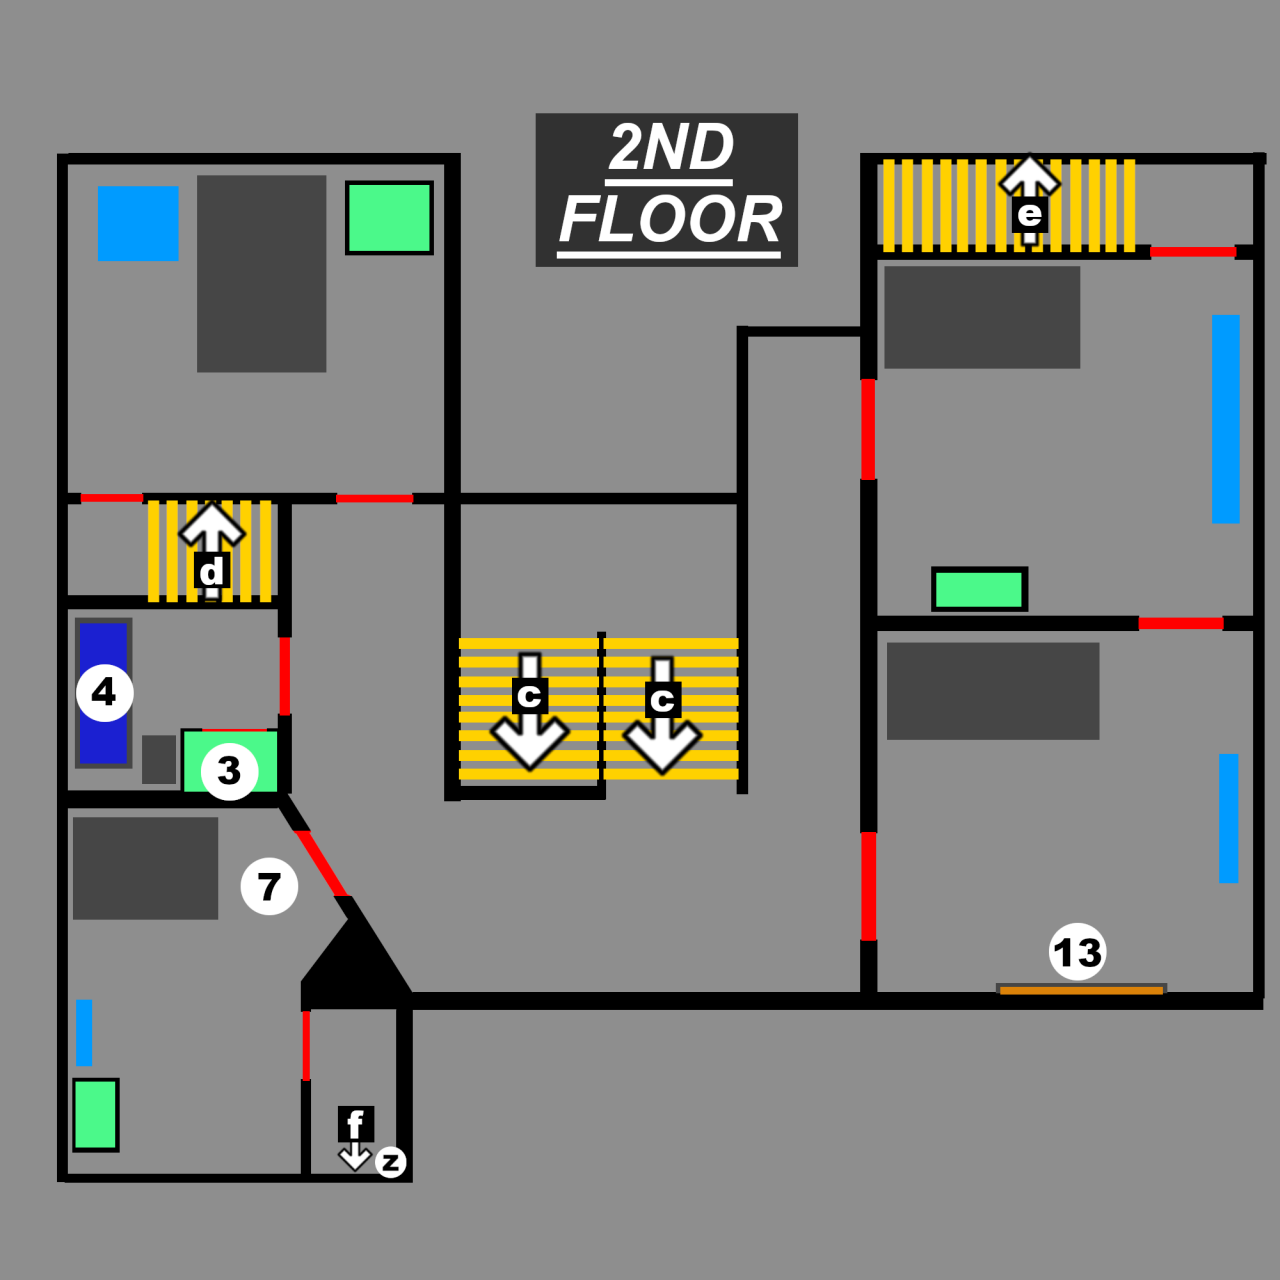
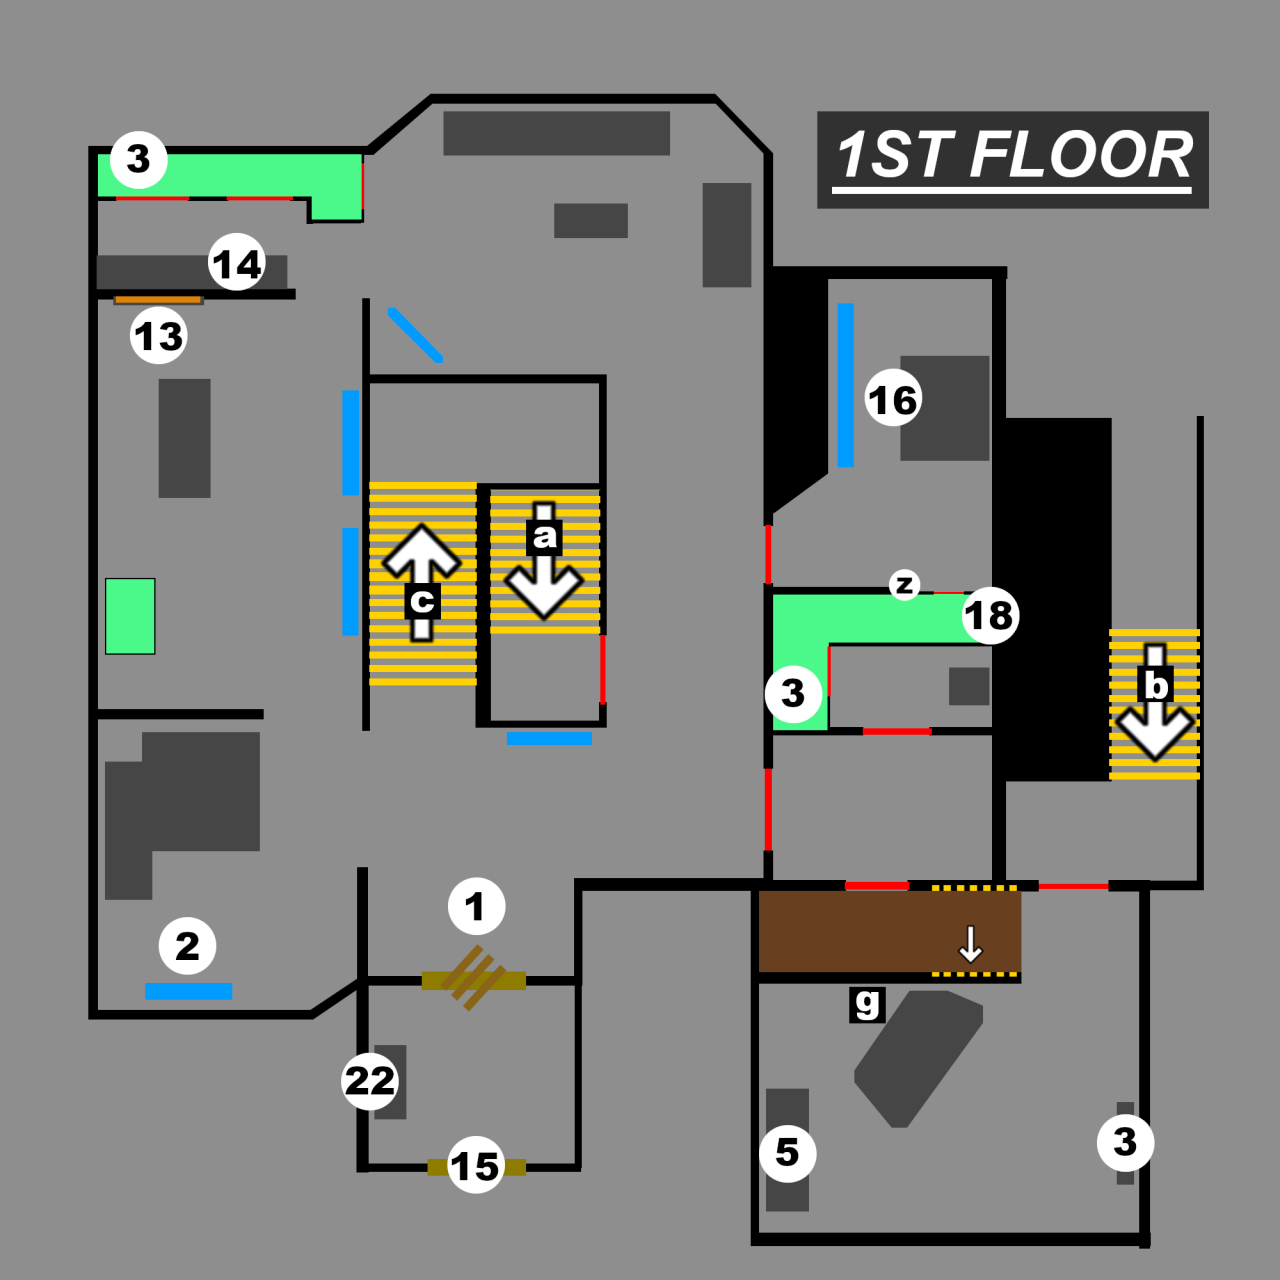
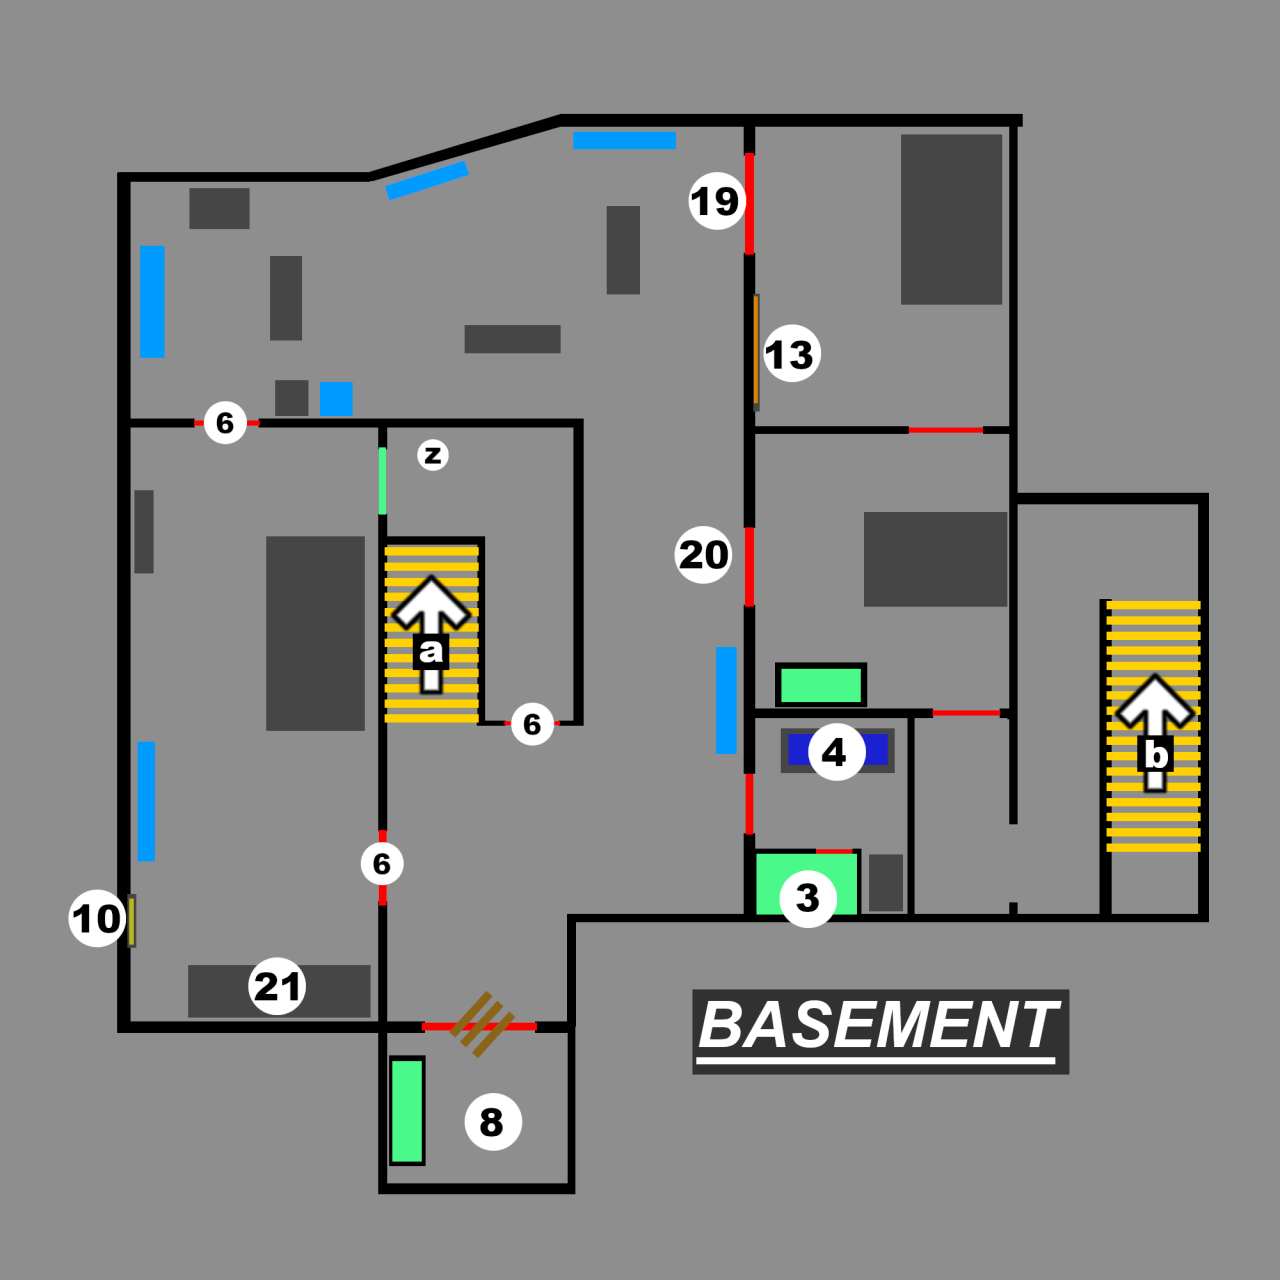
Red Line – Doors and cabinet doors.
Light Blue – Dresser/Cabinet. Searchable drawers.
Light Green – Places where Ms. S can’t follow. Under cabinets, closets, hole in the wall, etc.
Yellow Stripes – Stairs. Up arrow is going up. Down arrow is going down.
Dark Yellow – Master Door and Front Door.
Dark Gray – Furniture.
Orange Lines – Cut wires locations.
Dark Blue – Tub to fill Bucket with water.
Single Yellow Stripe – Openable Power Box.
3 Brown Stripes On Red – Wooden Boards.
Dark Green – Power Diverter Spots
The Lowercase Letters are names for the stairways and secret passages between floors.
The Numbers represent specific Spots mentioned in the Guide.
Before You Start (Tips)
The Succubus is easily trainable once you figure out her rhythm. Some things to take note of;
- At the start of every game (& round if you get caught), she starts in the attic. She has a set path down stairs which takes her about 15-20 seconds.
- She is NEVER faster then you. You can always outrun her when she spots you.
- She DOES NOT always know where you are. Her pathway is based off whether or not she can hear your footsteps. She has Godlike hearing and will hear your footsteps from 3 floors away. So assume shes always running towards you when you’re moving.
- She tends to wander around if she does not hear you. (I.E. if you’re hiding in a cabinet or standing still.) But if she happens to see you, she will run for you.
- Bait her as much as you can. Waiting for her to come from a certain direction and then b-lining it the other way can drastically increase your time to search if done right.
- Know the general location of Ms. S as much as you can. It’s easier to train her if you do and you don’t run the risk of running into her by accident.
- If you are not near her, she will place traps. She’s really good at putting them in places where you normally walk so be careful.
- You can also disarm the traps. It takes about 5 seconds and it will make a loud noise that she will hear.
- Act fast and keep moving unless you’re baiting her. Shes a sneaky little one that’s desperate for your pecker.
- Search drawers from bottom up to be quick. Crouching helps as well.
- Know your shortcuts and the house layout. They can help put distance between you and Ms. S
- Sound Is EXTREMELY IMPORTANT. If you hear her moans, shes really close. Also doors opening is a good sign of where she is.
- Check EVERY DRAWER you come across. You DO NOT need to search inside each drawer thoroughly. If an item is inside, you will hear a noticeable noise from the drawer when its opened.
- When you find an item, it’s extremely useful to use that item as soon as you can. You can only carry 1 item at a time and using each item as soon as you find it will save you from searching for it again later on. I.E. using the Crowbar at all 3 places before you drop it.
- The search button and the drop button is the same button. It can become an annoyance if you don’t control where you click.
- Use the Remote when you need to search dead end places. There are 2 places in the house where its frustrating to search if you can’t get a head start away from Ms. S. Other then those 2 places, Use it if you want to make some distance from her.
All Important Items, Their Uses, & Spawns
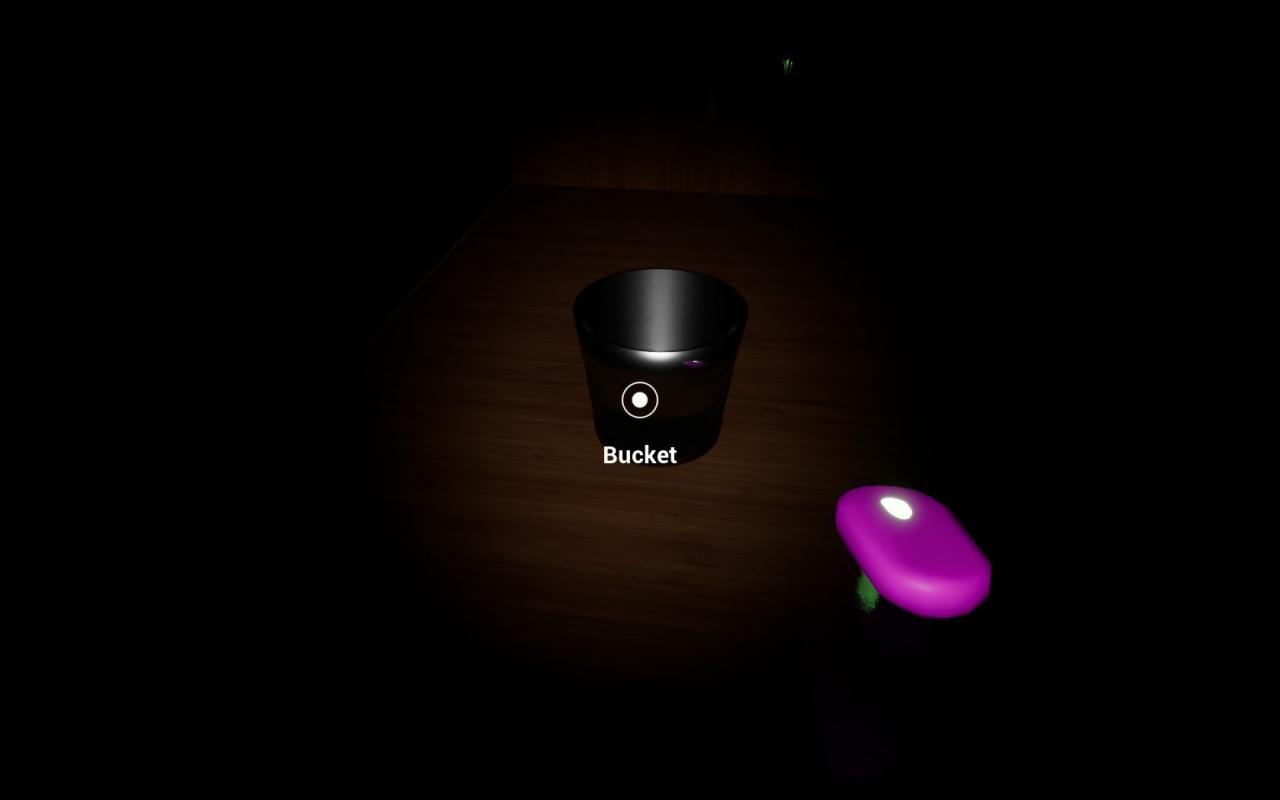
The Bucket – Fill It with water at one of the two bath tubs. Then use it on the Molten Key. Randomly spawns in 1 of 5 places. (Map Locations #3) (Read The Normal Ending for specifics.)
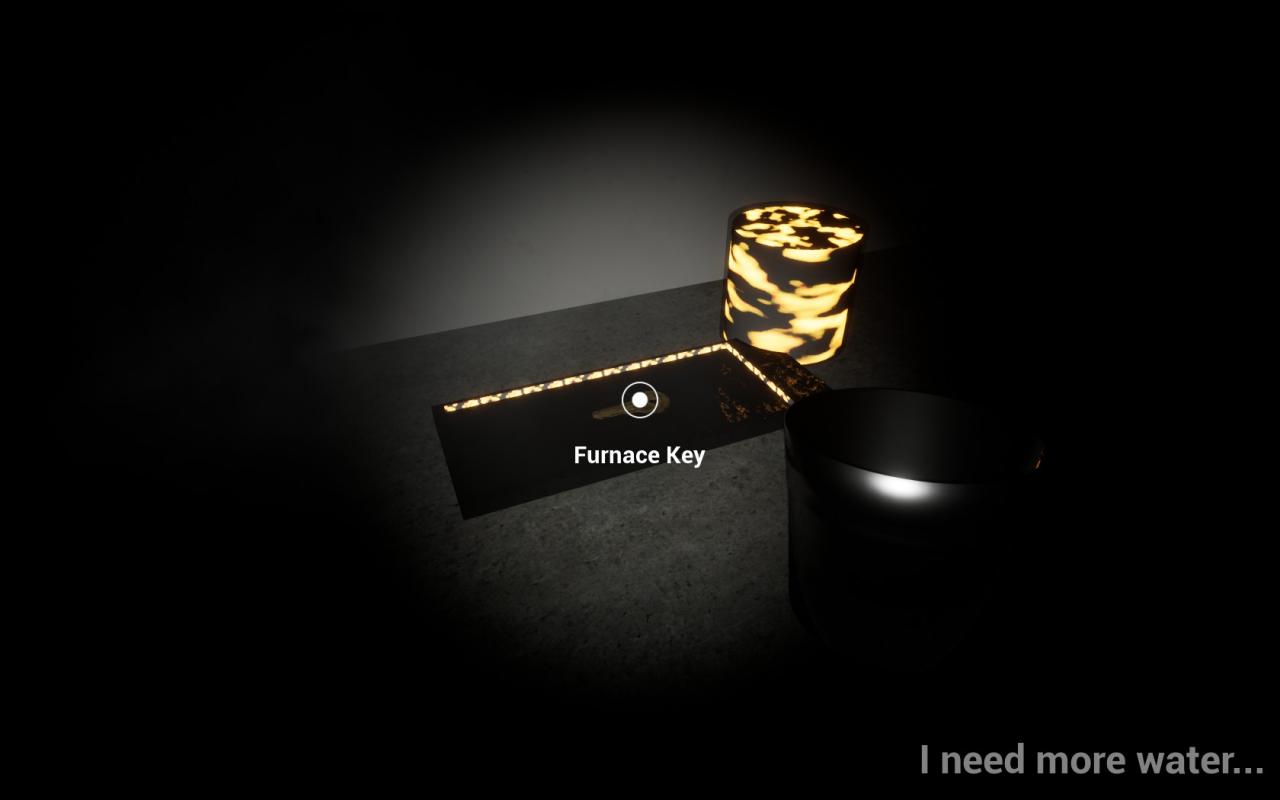
Molten/Furnace Key – Use this key on the three doors in the Basement to open the Boiler Room. Has a set spawn location in the Garage on the table (Map Locations #5).
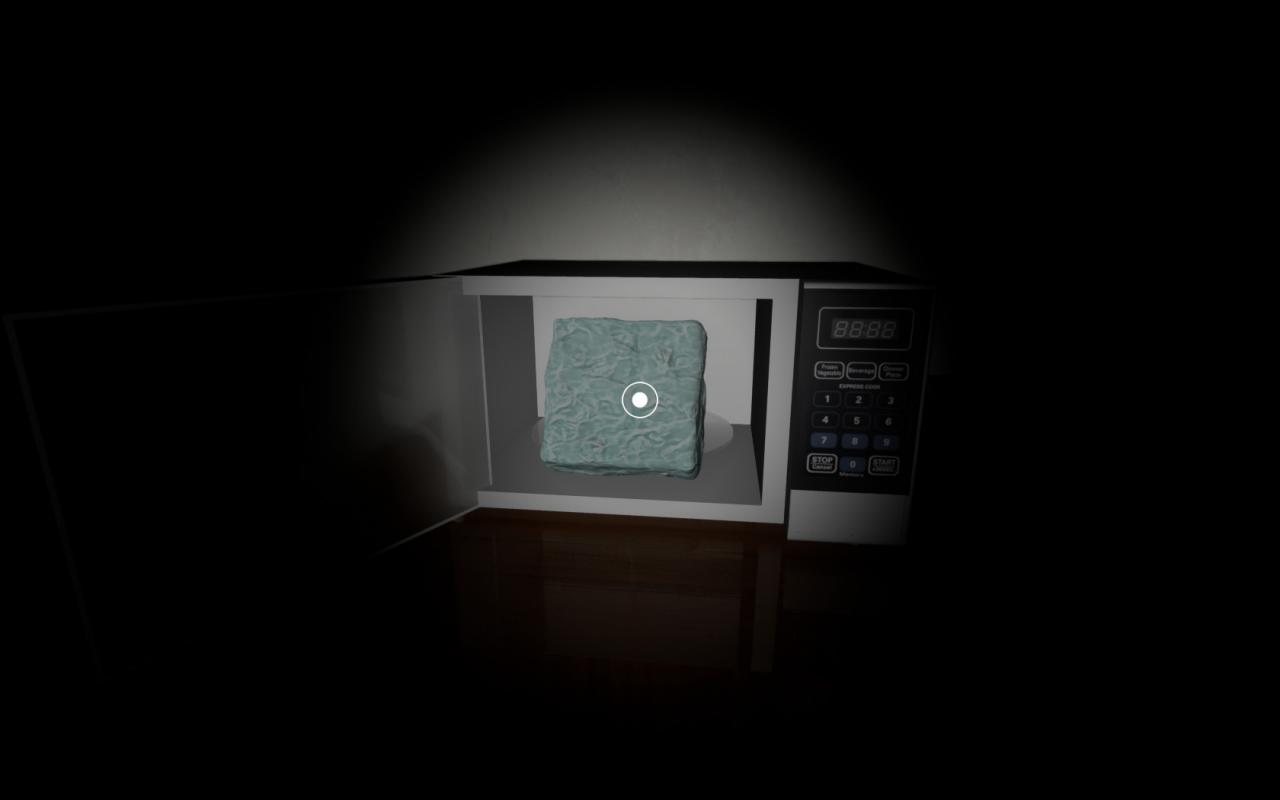
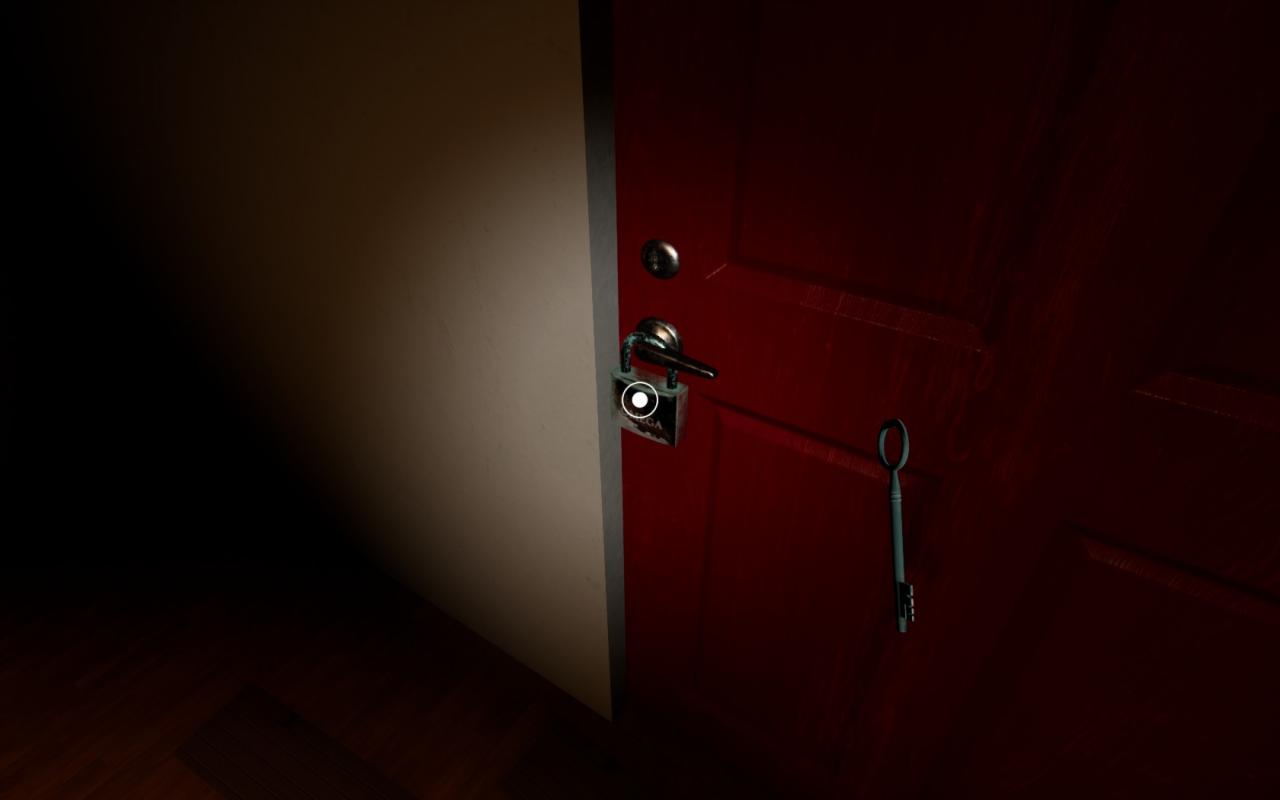
Frozen/Thawed Key – First used in the Microwave in the Kitchen (Map Locations #14). Then used to unlock the Padlock on the Master Door (Map Locations #1). Randomly spawns throughout the house.

Master Key – Uses to unlock the Master Door (Map Locations #1). Randomly spawns throughout the house.
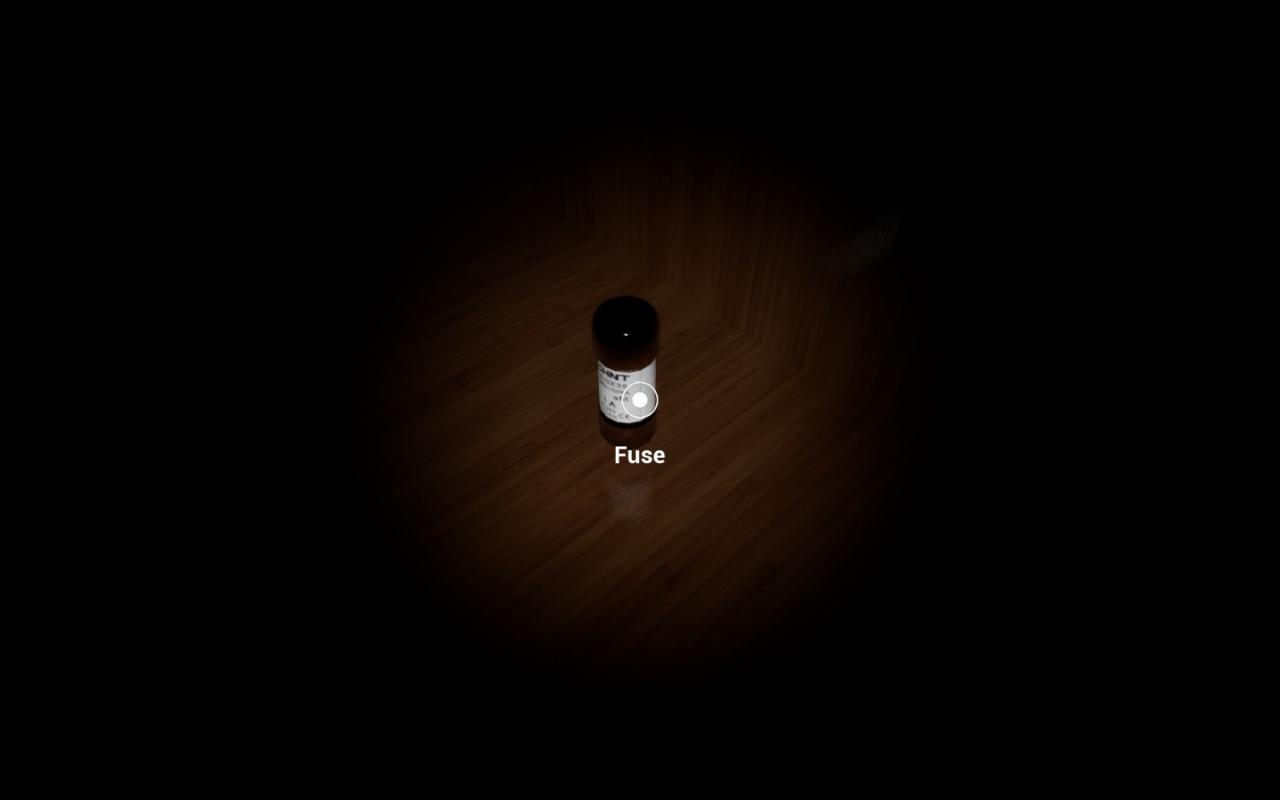
Fuse – This goes into the Power Box in the Basement, in the Boiler Room (Map Locations #10). Randomly spawns throughout the house.
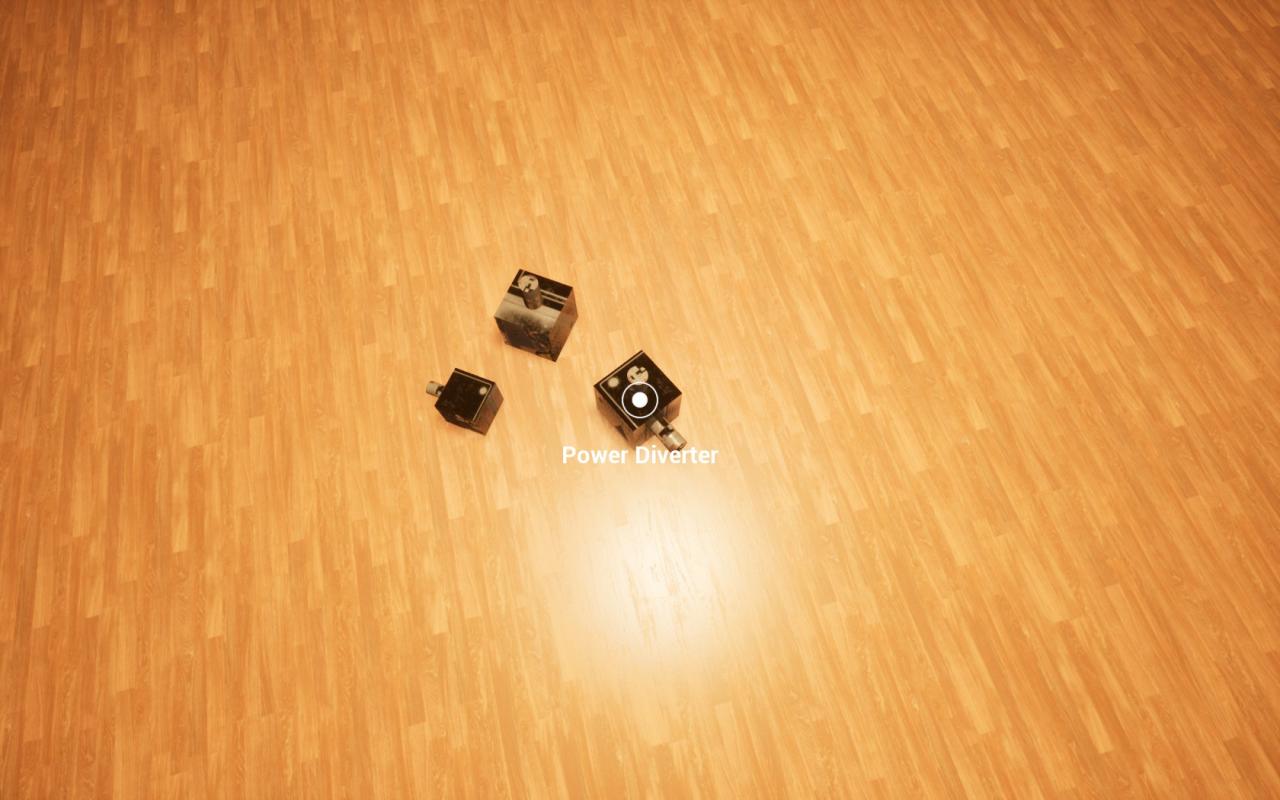
Power Diverters – There are three of these. They all go in the attic on the wall, connecting the wires together (Map Locations #11). Randomly spawns throughout the house.
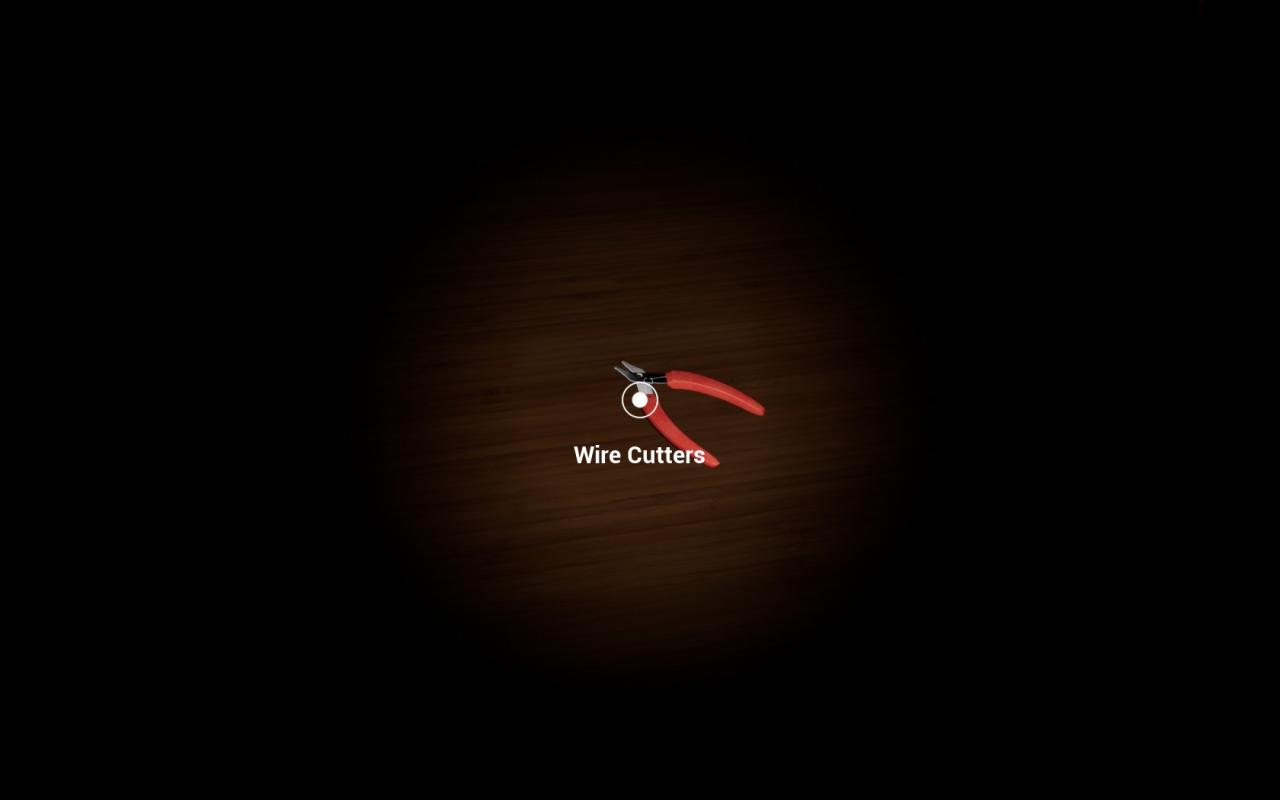
Wire Cutters – Used to cut the 3 wires throughout the rest of the house. Has a set spawn location in the Attic inside the Black Box on the wall (Map Locations #12). Must have power on and completed the Power Diverters puzzle. (Read The Normal Ending for specifics.)
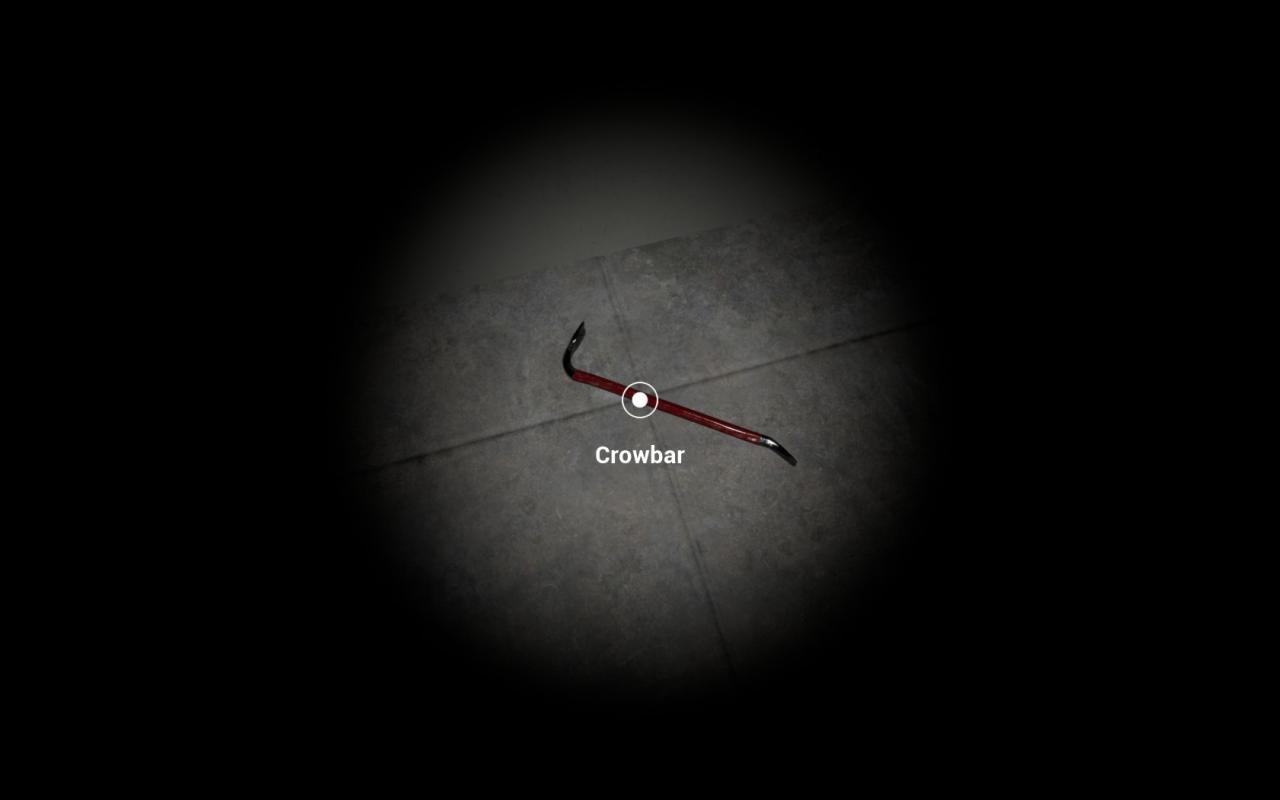
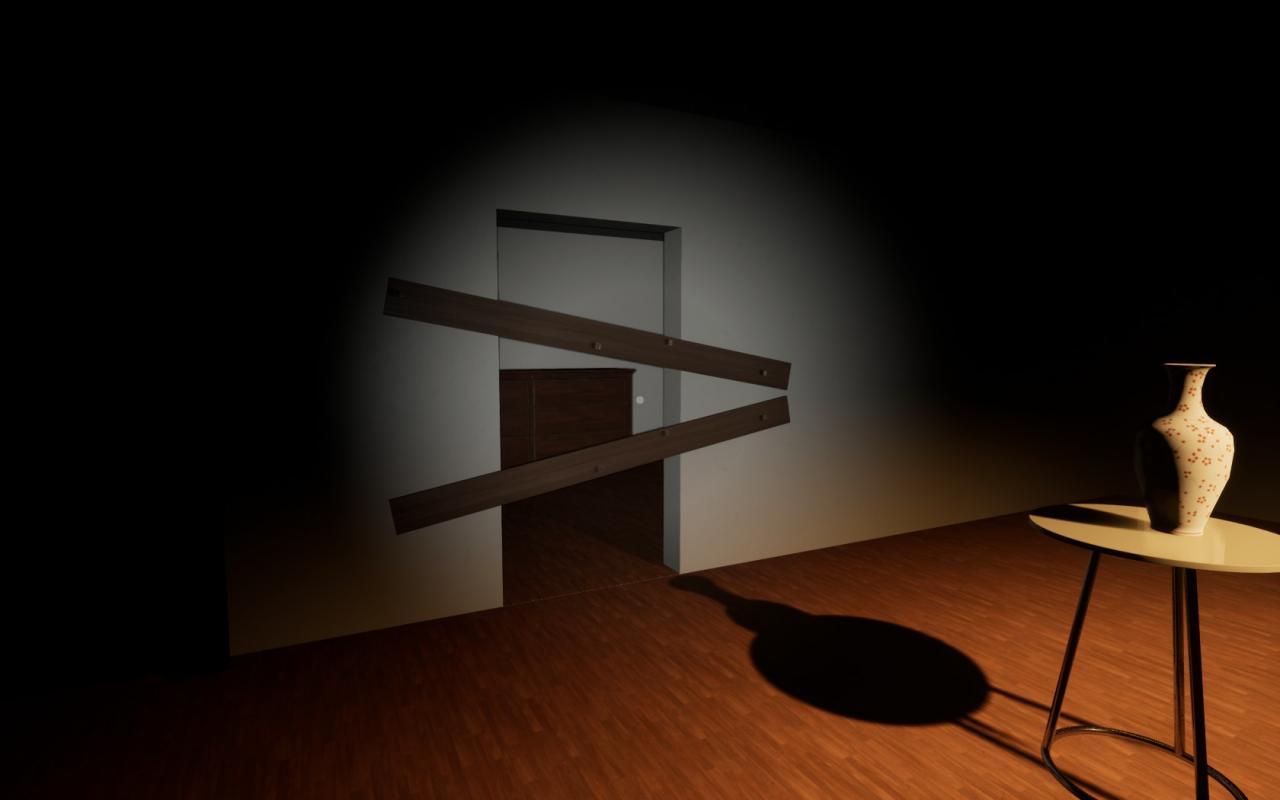
Crowbar – Used to take the boards off of 3 doorways. Found in the Basement (Map Locations #8) after going through the Secret Passageway (Map Locations #f) from the 2nd Floor. (Read The Normal Ending for specifics.)

The Lovense Remote – Used to keep The Succubus at bay. Limited uses and is useless when the battery dies. Randomly spawns throughout the house.
Pink String – Use to craft the Succubus Trap. Goes on the blueprint cabinet in the Boiler Room (Map Locations #21). Randomly spawns throughout the house.
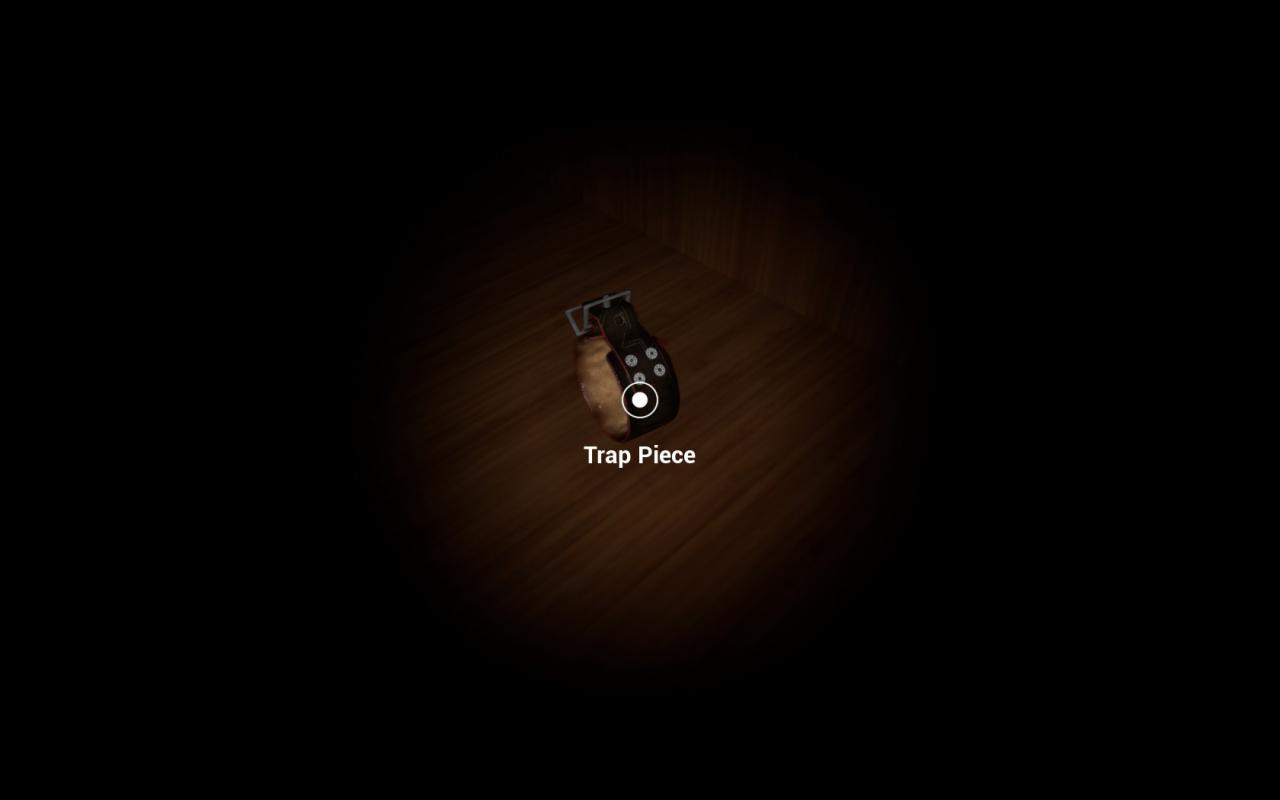
Cuff Links – Use to craft the Succubus Trap. Goes on the blueprint cabinet in the Boiler Room (Map Locations #21). Randomly spawns throughout the house.
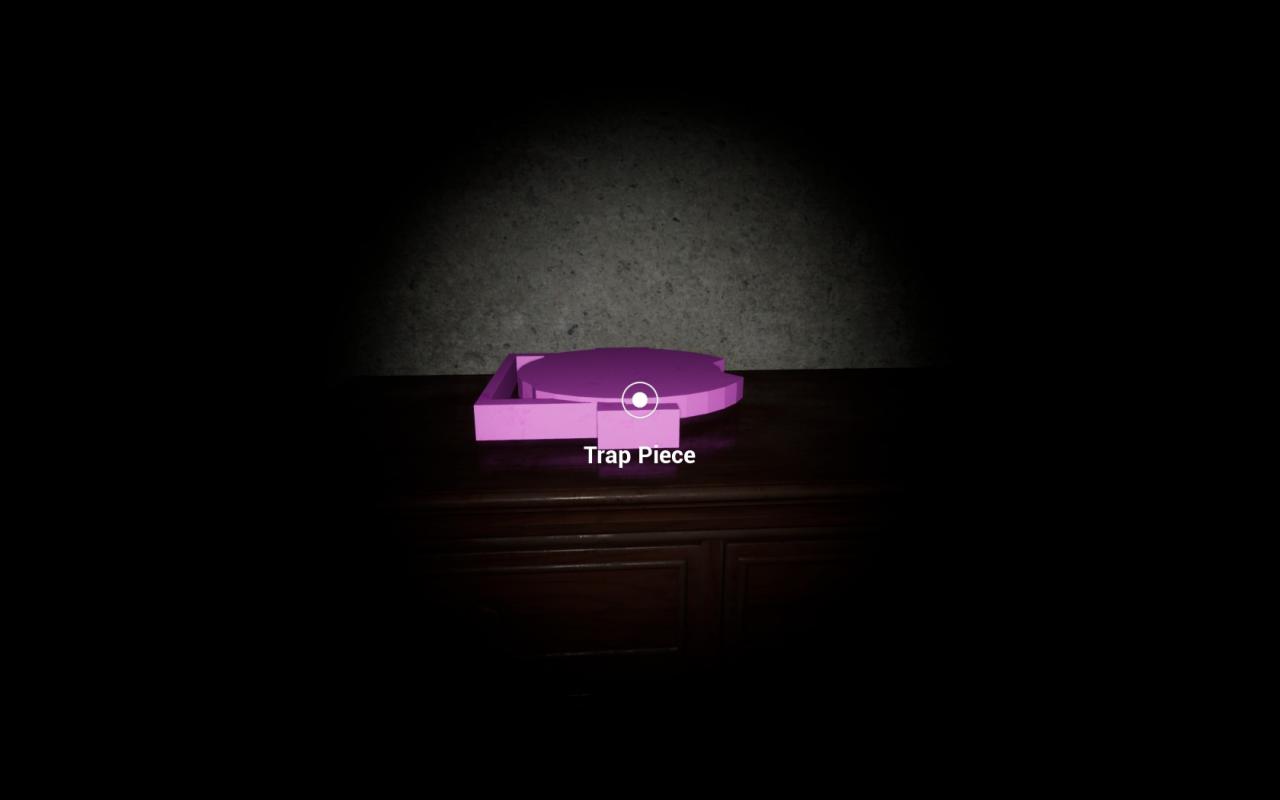
Pink Bear Trap – Use to craft the Succubus Trap. Goes on the blueprint cabinet in the Boiler Room (Map Locations #22). Has a set spawn location outside the Master Door.
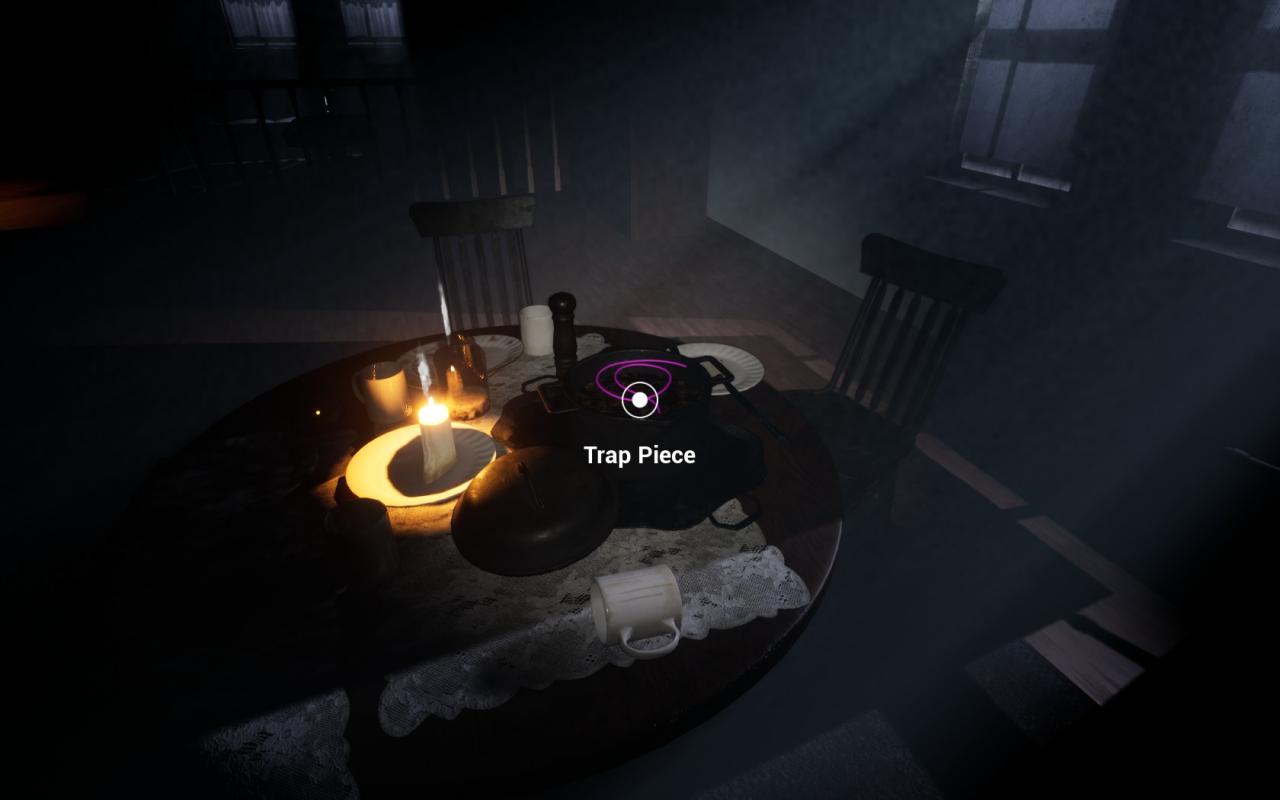
The Succubus Trap – Crafted by finding the Pink String, The Cuff Links, and the Pink Bear Trap. Crafted in the Basements Boiler Room (Map Locations #21).
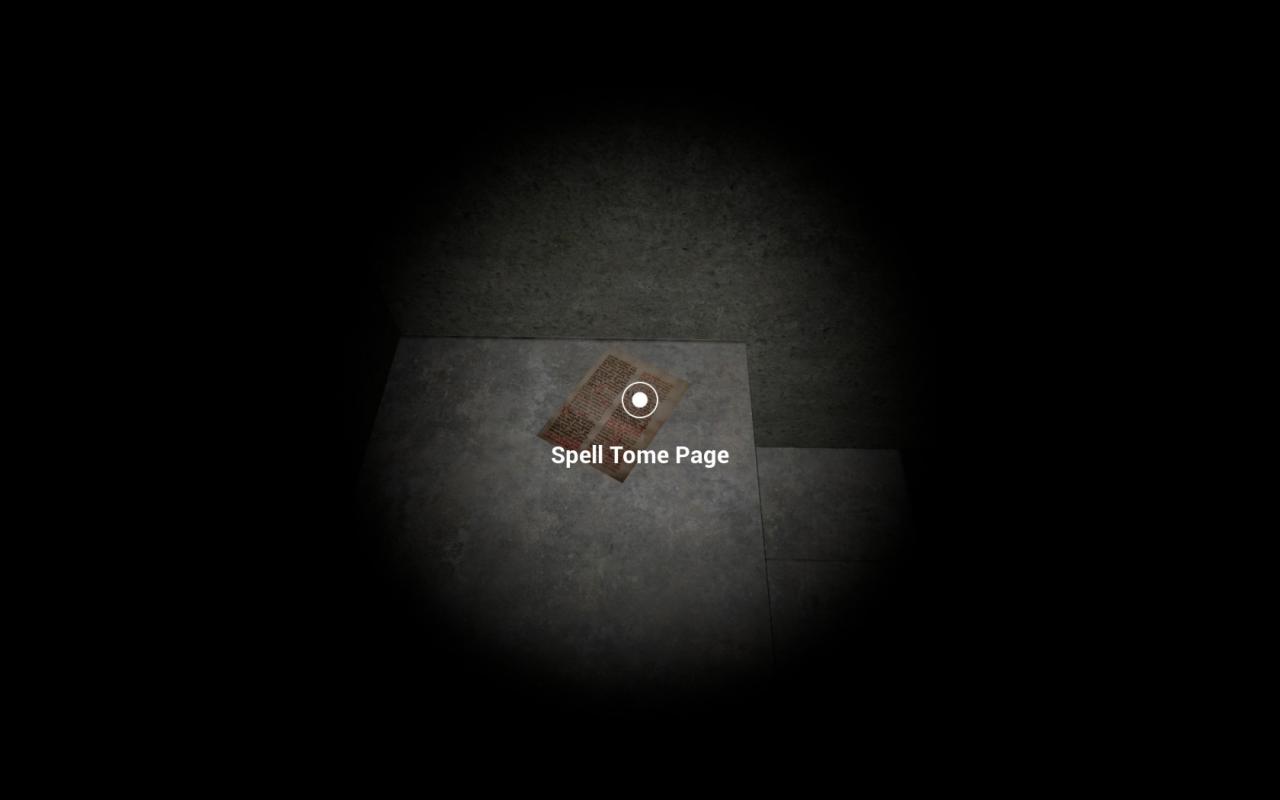
The Notes – There are 4 of them. (Map Locations #Z) See The Notes Section for specifics.
Searching Guide
I’ve listed a few problem areas where it is difficult to search and the best way to go around them.
This Room is by far the most frustrating place to search as it is a dead end. There are two ways to search it with ease though. Choose which ever one is easier for you.
First way (preferred way)
Stand in the Attic and wait till she comes for you. Drop down the Hole (Map Location #17) to the stairway and run to the First Floor Bedroom (Map Location #16). Quickly search the drawers then hide in the closet when you are done (Map Location #18). Wait for her to come in the room with you and then take the secret passage to the bathroom (Map Location #3). This negates running into her on your way out of the room.
Second Way
Find the Lovense Remote and use it as you’re searching the room. Do keep in mind that the drop button is the same as the search button so be careful when opening the drawers.
I typically always search this first immediately when I spawn in. It takes Ms. S about 15-20 Seconds to get down stairs and its the easiest way to search it. As well as the drawers next to the stairs in front of your spawn.
Baiting Guide
Baiting means to wait for Ms. S in one place so she can get close, then running away to have her follow a specific pathway, creating distance between you too.
If you’re having issues baiting Ms. S or making distance between you and her so you can search an area, this should help you. I’ll separate them by the floors you want to search in/be in. Rinse and repeat them if needed.
To search the basement with ease. Bait Ms. S to the Second Floor Bedroom (Map Location #7) with the secret passage to the basement. Wait for her by the door and watch the stairs. When you see her, run to the Secret Passage in the closet and quickly follow down the vents. This should buy you at least 15 seconds to search the basement.
To search the First Floor with ease, Bait Ms. S to the attic and wait by the Hole (Map Location #17). When you see her, jump down onto the stairway and run to the First Floor. Search anything you have missed. This is also a great way to get the Frozen key in the Microwave.
The Second floor and the Attic are a bit tricky to search in. You have to move fast. The best way I’ve found is to bait her to the far Basement Bedroom (Map Location #19). Wait for her to run down the hallway past the other bedroom door (Map Location #20) then have her follow you through both bedrooms up the (b) Staircase. Wait on the staircase to see if shes following you, then continue up the (c) Stairs to search which ever room you need to be in.
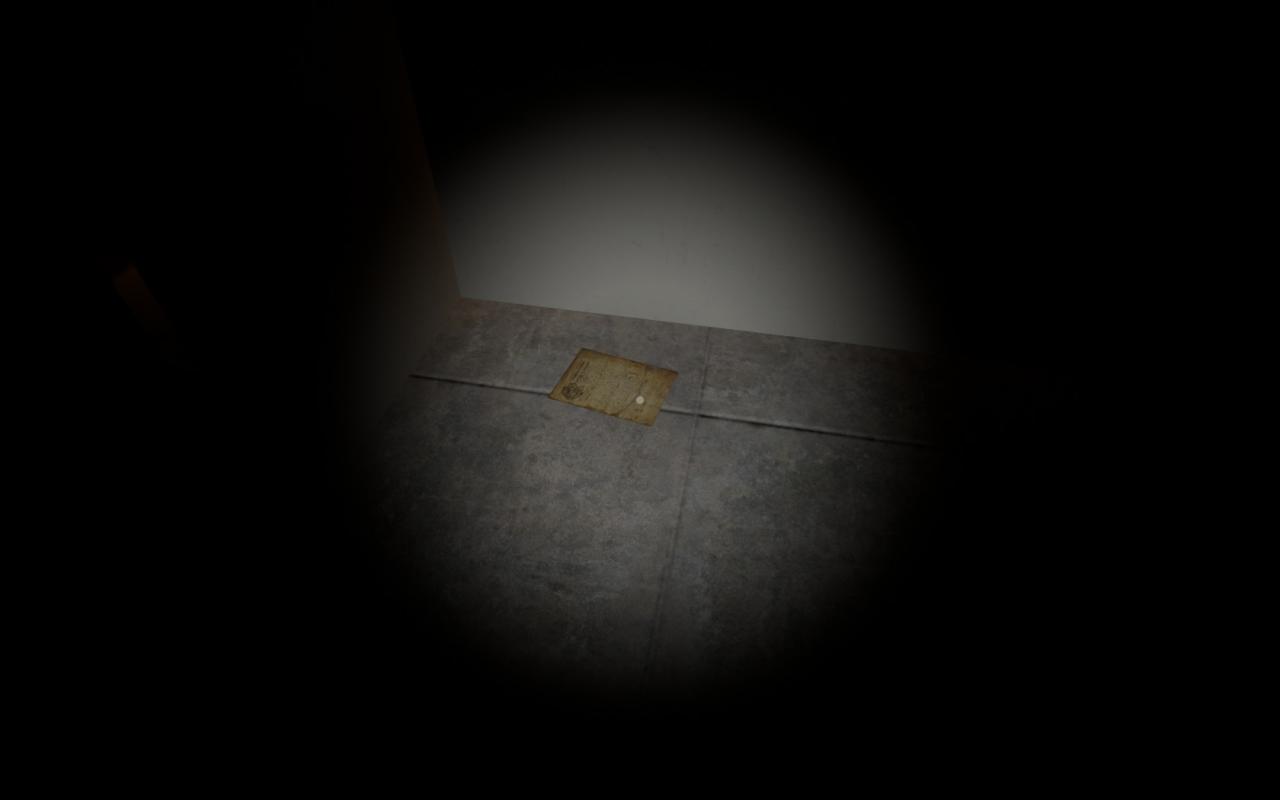
Note Locations
There are 4 Note Pages. The locations are set and do not change between playthroughs (Map Locations #Z). Picking up the Notes do not hinder you, so pick them up when you see them.
- First Page – In the bedroom on the First Floor, inside the closet on the right. The same closet that has a secret passage way to the bathroom.
- Second Page – On the way to get the Crowbar, in the vents. Hard to miss.
- Third Page – In the Basement, through the door to the Right the stairs. Follow the small path and its behind the boxes before you go through the small hole in the wall.
- Forth Page – In the Attic Bedroom under the bed.
The Bad Ending (Depends on your view of bad)
This ending is by far the easiest route. Simply let the Succubus catch you 3 times in one playthrough. Each time you are caught, you will be given one of the three pleasures of Ms. S’s Sweet divine love.
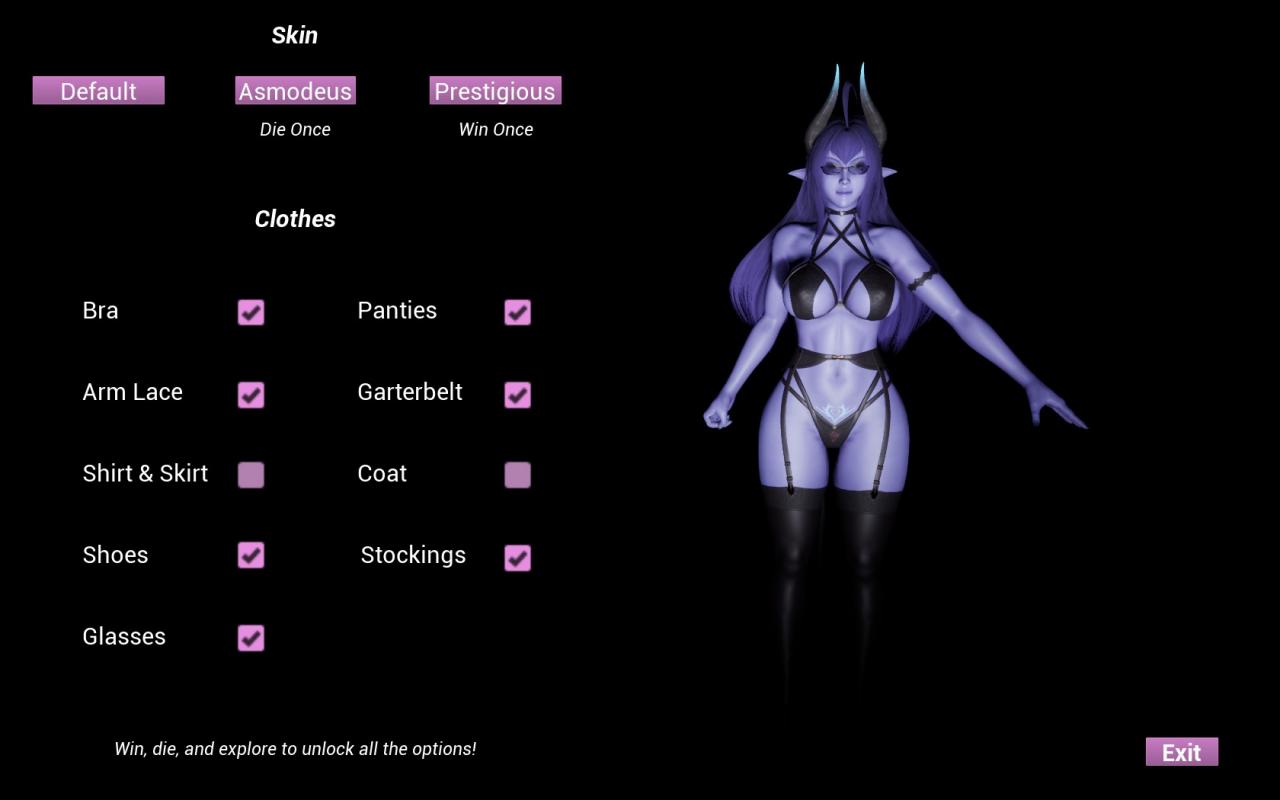
Getting this ending will unlock the Asmodeus Skin, as well as the Shirt & Skirt and the Coat clothing items.
The Normal Ending
Every playthrough is different as items have random spawns. Most items will be found in drawers and sometimes even just lying on the floor. Most of these steps can be done in any order you come across. This is my preferred method but feel free to use this as a guide to your travels rather then a walkthrough. Make sure to search drawers with any free time you have away from Ms. S.
With The Normal Escaped Ending, you do not need the notes. It doesn’t hurt to grab them if you want though. You will also not need the Cuff Links, Pink string, and the Pink Bear Trap.
You Spawn right in front of the Door you are trying to escape out of (Map Location #1). It is locked with two locks that need keys, boarded up, and has three electronic locks. The Main Goal is to open this door. I refer to this door as the “Master Door.”
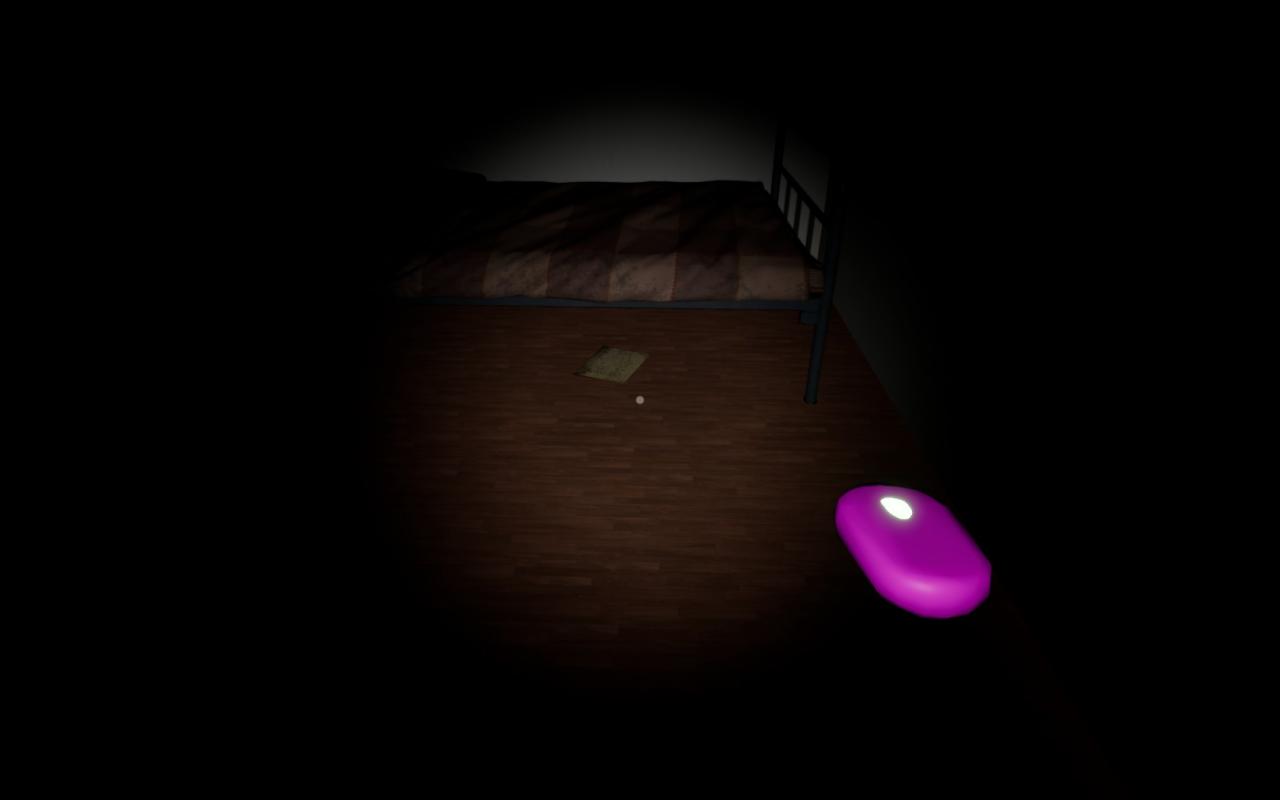
When you first start your night at the Lovely Ms. S Household, I highly recommend searching the drawers to the left of where you spawn first (Map Location #2). You have 15-20 seconds before Ms. S comes downstairs from the Attic. This area can be a pain to search if you wait till after and is best if you search it first.
Your main goal right now is finding the Bucket. There are 5 spawns points of where the Bucket can spawn. 3 on the First Floor, one in the Second Floor, and one in the Basement.
- 1 – In the Kitchen, inside the cabinets.
- 2 – In the First Floor Bathroom, inside the cabinet. You can also go through the closet in the First Floor Bedroom (Note Location) to get to it.
- 3 – In the Garage, on top of the Tool Box.
- 4 – In the Second Floor Bathroom, in the cabinet.
- 5 – In the Basement Bathroom, In the cabinet.
On the Map Above, their locations are Numbered as (3)
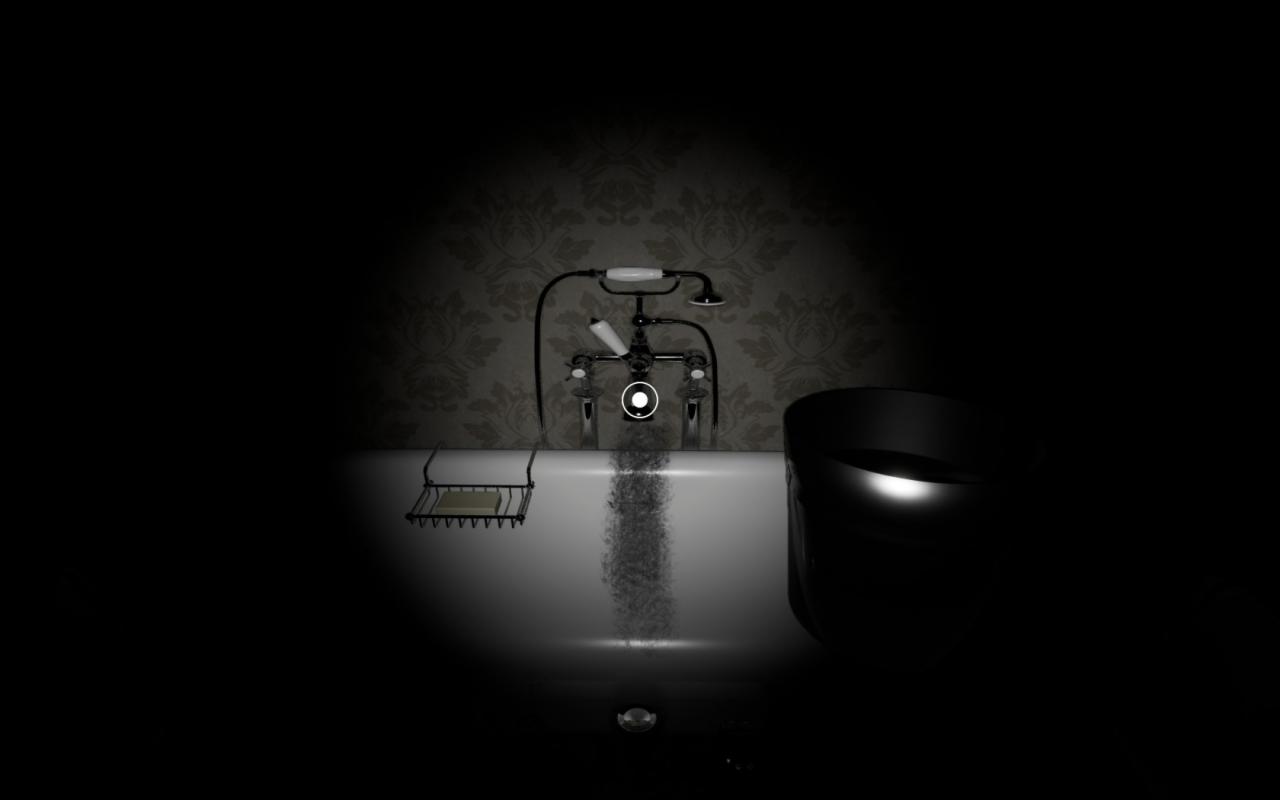
Once you find the Bucket, go to one of the two Bathrooms with a bathtub (Map Location #4). Then hold (E) on the bathtub for about 10 seconds to fill the bucket with water. DO NOT move while you are filling it up. She Seems to not be able to hear the water running. Also keep in mind the shortcut under the Deck in the Garage (Map Location #g). It leads to the Basement Bathroom (Map Location #4).
Once you have the Bucket with water in it, Take it to the Molten Key in the Garage (Map Location #5), and poor it on the Key with (E). Then take the key and go to the basement (Take the shortcut under the Deck to be quick (Map Location #g)), and unlock the 3 doors that lead to the Boiler Room. (Map Location #6)
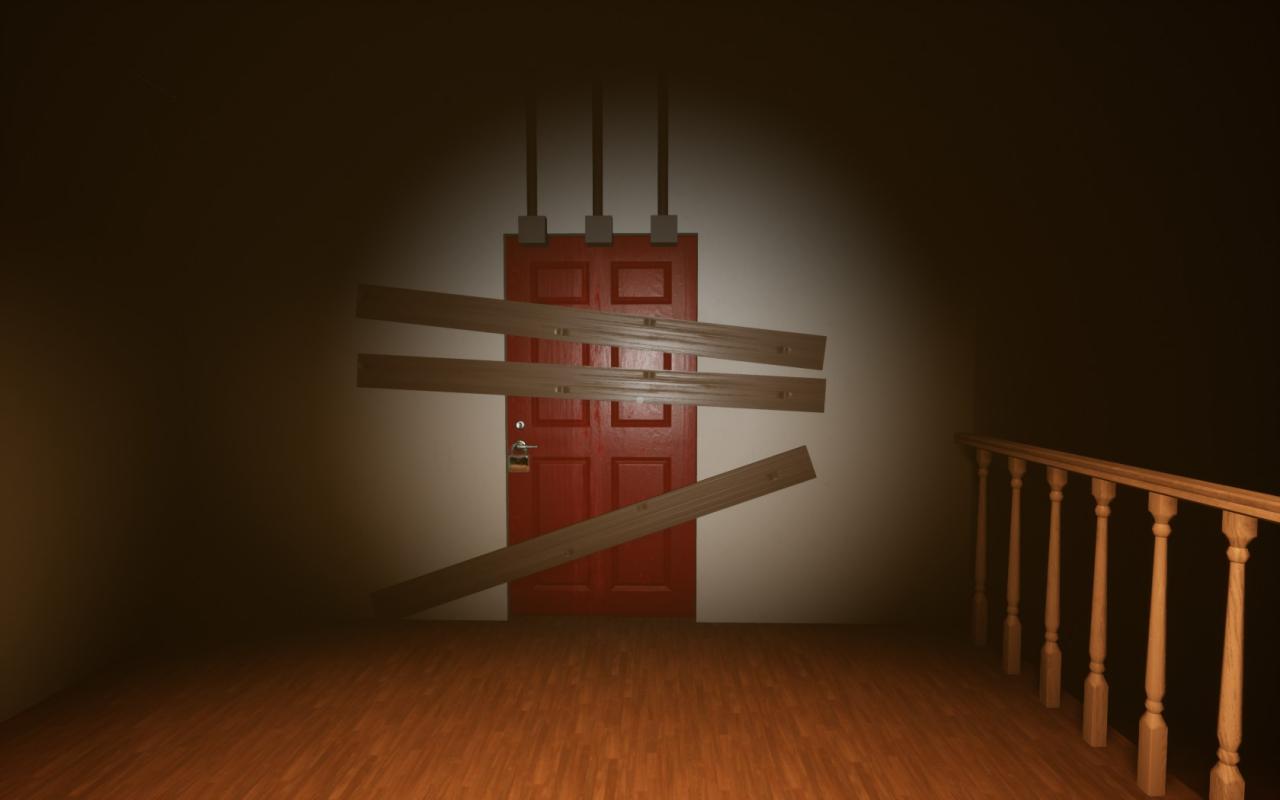
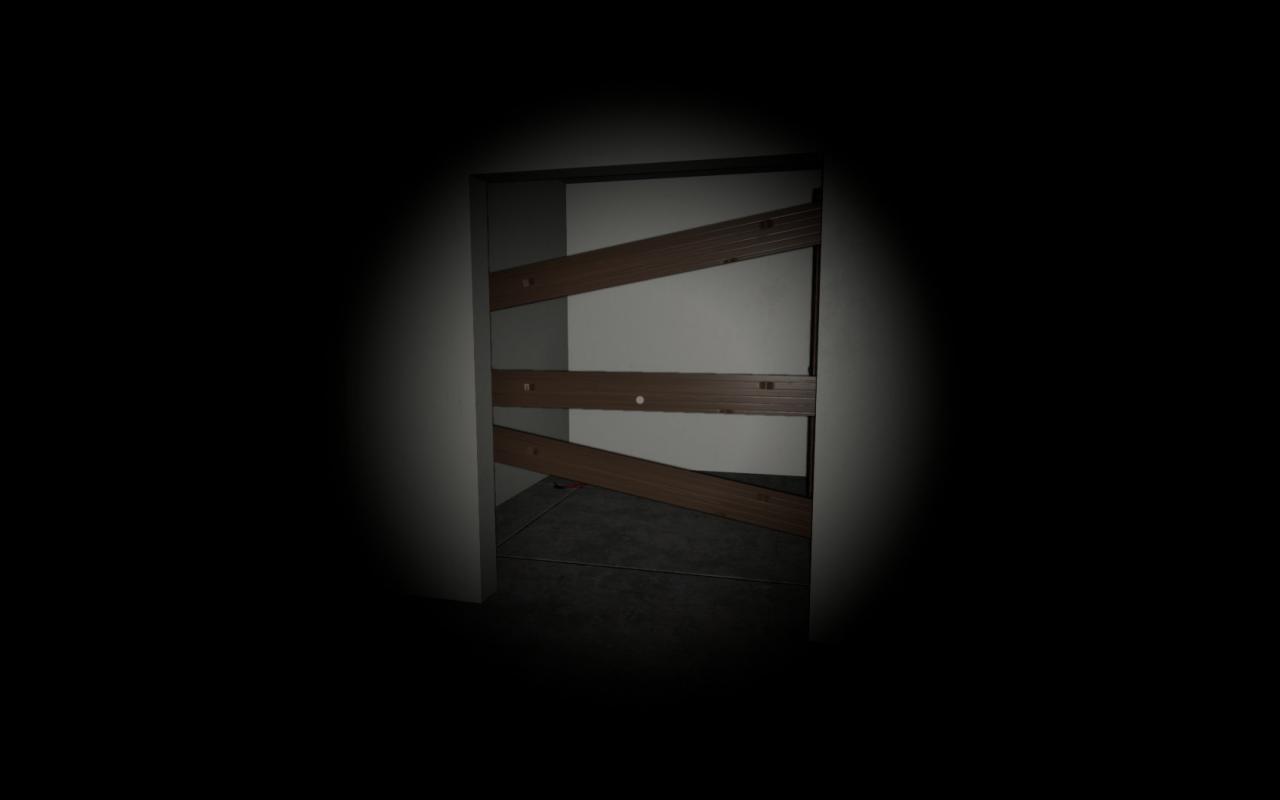
Run upstairs to the Second Floor and go to the first bedroom on the Right (Map Location #7). Inside the closet to the Left is a Secret Pathway to the Basement (Map Location #f). (This Route is a good way to distance yourself From Ms. S. if you need time in the Basement.) Drop down (Note Location Z) and follow the Vents to bring you to the crowbar (Map Location #8). Use the Crowbar (E) on the boards to get out then make your way to the Master Door (Map Location #1). Remove those boards and then proceed to the Attic, thus removing the last set of boards to the Attic Bedroom (Map Location #9) (Note Location Z). Once done, you no longer need the crowbar.
Start thoroughly searching the drawers in the house. When you find a required item, Stop searching and bring that item to where it needs to be. This will save you time and headaches (Both heads). The next few steps can be done in any order as you find items. The items you are looking for are and what they are used for are;
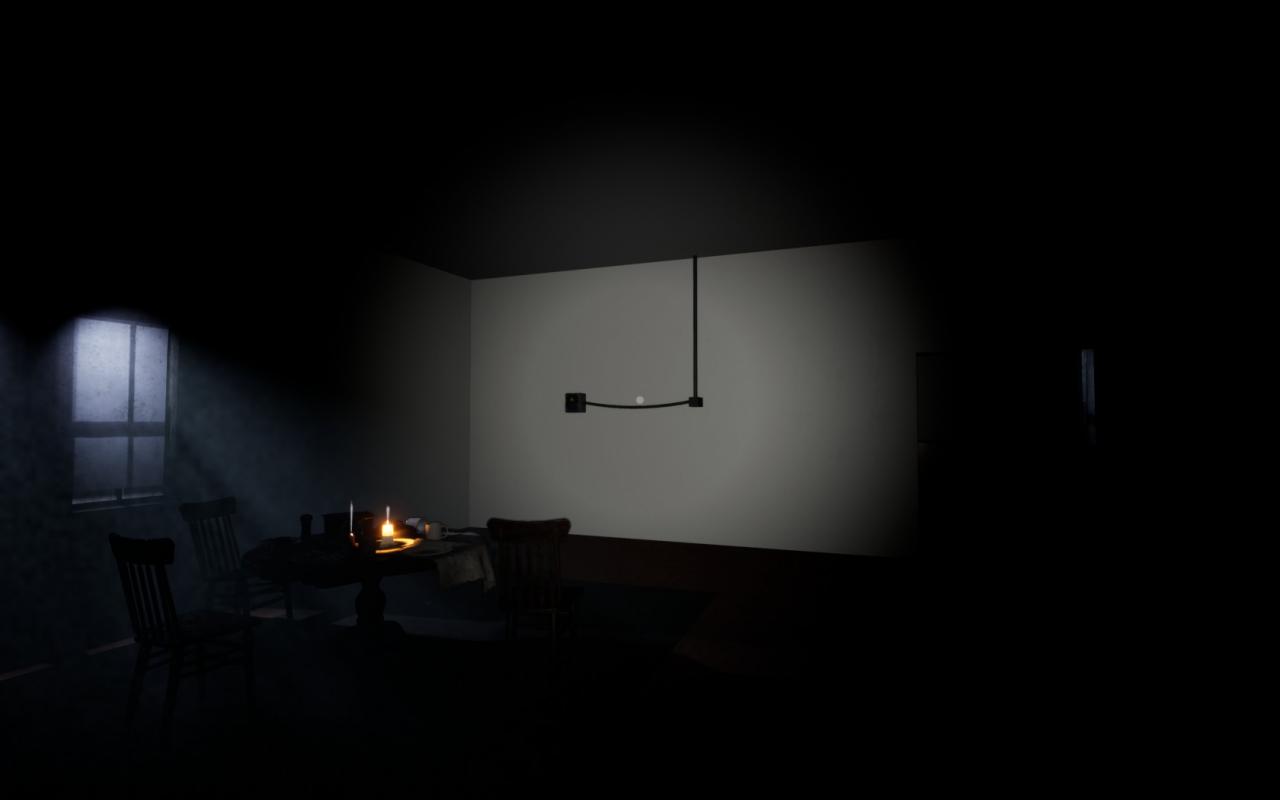
Used to turn on the power to the house. In the Boiler Room in the Basement, you can find a Power Box towards the southwest side of the room on the wall (Map Location #10). Open the Power Box (Left Mouse Button) and press (E) with the fuse in your hand over the empty fuse slot. The house lights will turn on and make it easier to see Ms. S cu…come for you.

There are three of these things scattered through out the house. Bring them to the Attic. When you’re there, you will notice the long set of wires on the back and right wall (Map Location #11). Each Diverter has a specific spot to be placed into to connect those wires. Press (E) with each Diverter over the three spots(Map Locations #A,B,C) until it fits in one. They can be placed in their respected spots at any time.
To solve the puzzle though, you need to have the power on in the house. If you have power, and each Diverter is in its place, Press (E) on each Diverter to reroute the power to the Attic Power Box. Basically, spinning each one. When done correctly, the wires will light up Green.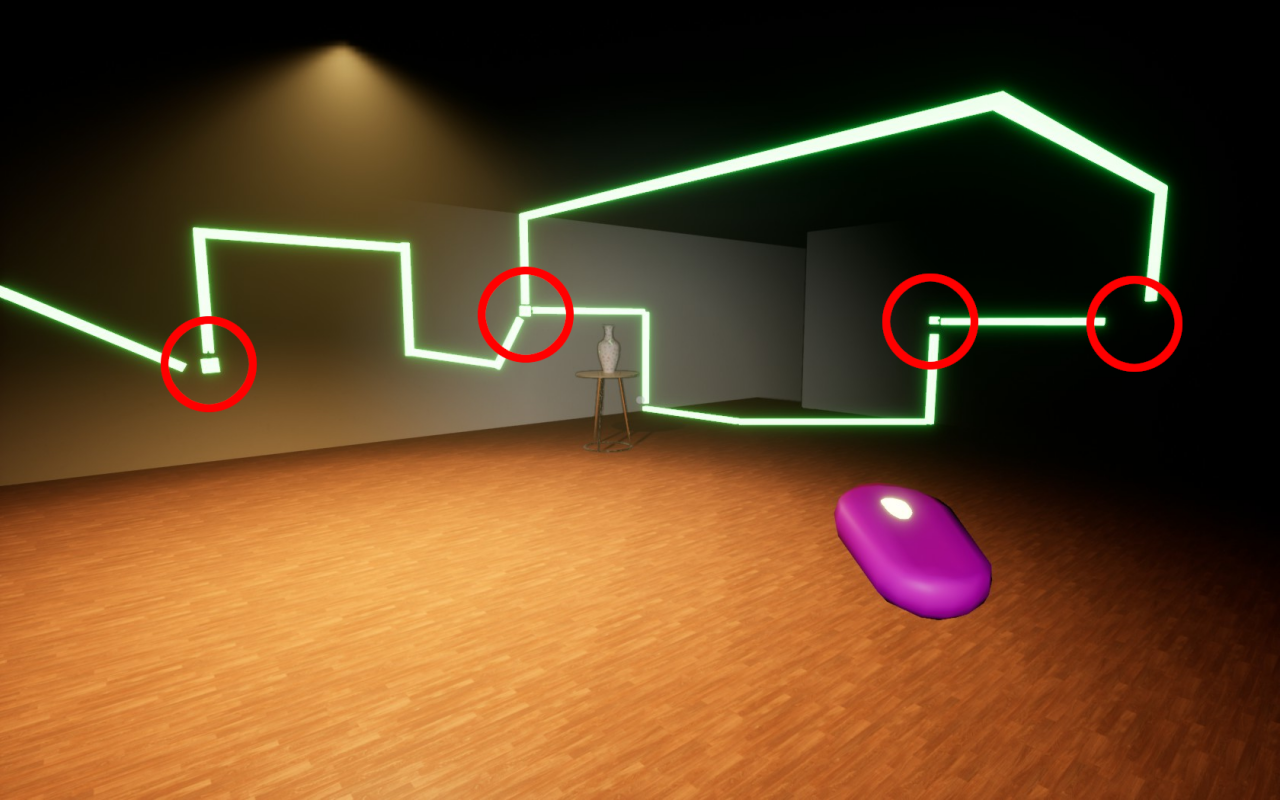
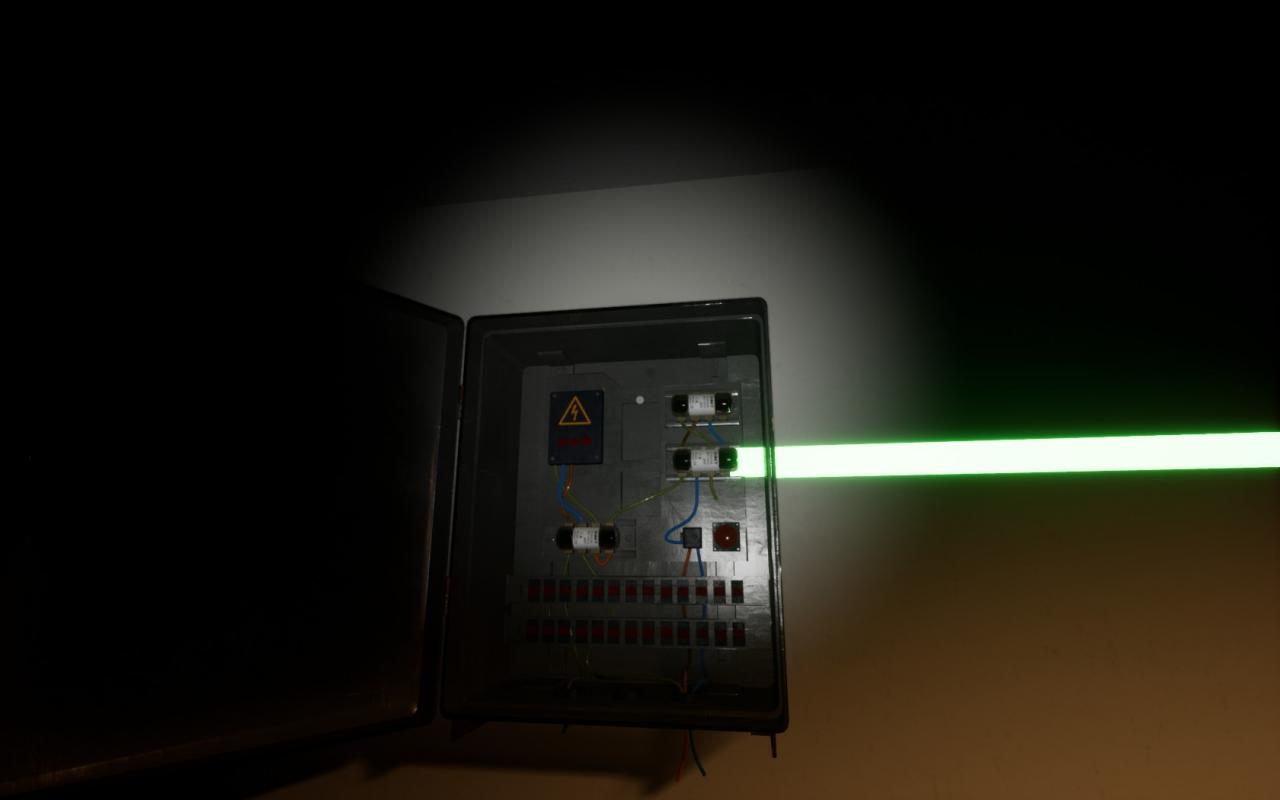
Now that you have rerouted the power to the Attic, you can now open the Attic Power Box (Map Location #12). Inside will be the Wire Cutters. The far right red circle in the image.
There are three wires in the house that you need to cut. Besides the Attic, There is one on each floor (Map Locations #13). These wires power the Electronic Locks on the Master Door. Simply press (E) on the wire to cut it. Once all three are cut, the Electronic Locks will disengage and you will no longer need the Wire Cutters. This is what they will look like.
When you find the Frozen Key, bring it to the the kitchen and put it in the Microwave on the counter (Map Location #14). Press the microwave three times to turn it on (the door does not need to be closed). Keep in mind that Ms. S will come running to the Microwave when it starts, so make sure to hide under the cabinets across from the microwave. When the Microwave is done, it will beep, again attracting Ms. S to it. Wait for her to leave and grab the key. Now bring it to the Master Door (Map Location #1) and press (E) on the Pad Lock (not the door) unlocking one of the two key locks. Once done, you no longer need the Frozen Key.
When you find The Master Key, Simply bring it to the Master door (Map Location #1) and press (E) on the door, unlocking one of the two key locks. Once done, you no longer need the Master Key.
Once you have unlocked the two key locks, Disengaged the Power Locks, and tore down the boards, you can now open the Master Door. Simply leave through the Front Door (Map Location #15) and you will be home free.
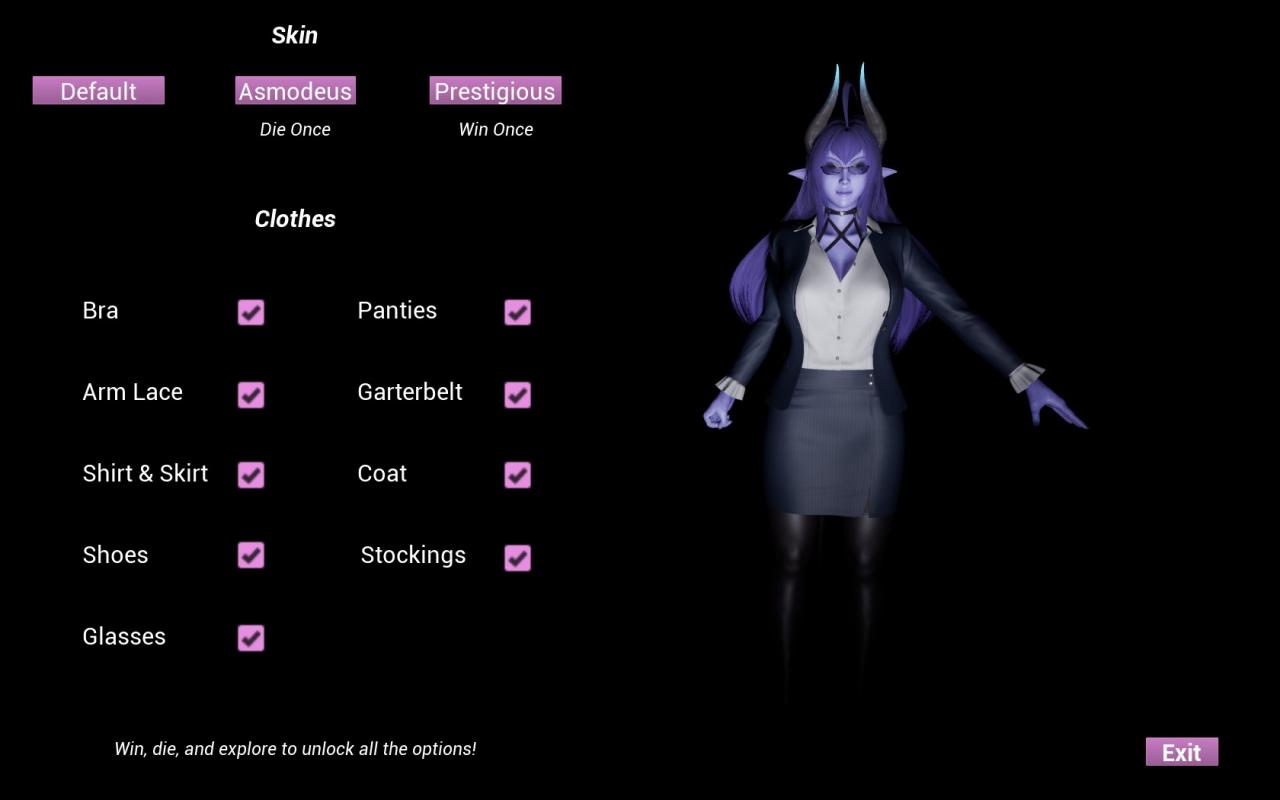
Doing this Ending will reward you with the Prestigious Skin.
The Good Exorcist Ending
This ending has 4 separate sub-endings to choose from and you must go through the game again to see the other 3 variants. Simply follow everything in The Normal Ending route except we will also be adding a few extra steps.
This time around, keep your eyes out for 2 special items. The first item being a Cuff Link and the second item being a Pink String.
The next thing to focus on is collecting the notes. You must collect all 4 notes any time before you Exorcise The Succubus. See The Notes Section For their locations. (Map Locations #Z)
Once you have the Boiler Room open, you should notice there are 3 blueprints on a counter towards the south wall (Map Locations #21). Place the two items mention earlier (the Cuff Link and the Pink String) on top of the blueprints by pressing (E) on the blueprint with the item in your hand. It does not matter what order you place them in.
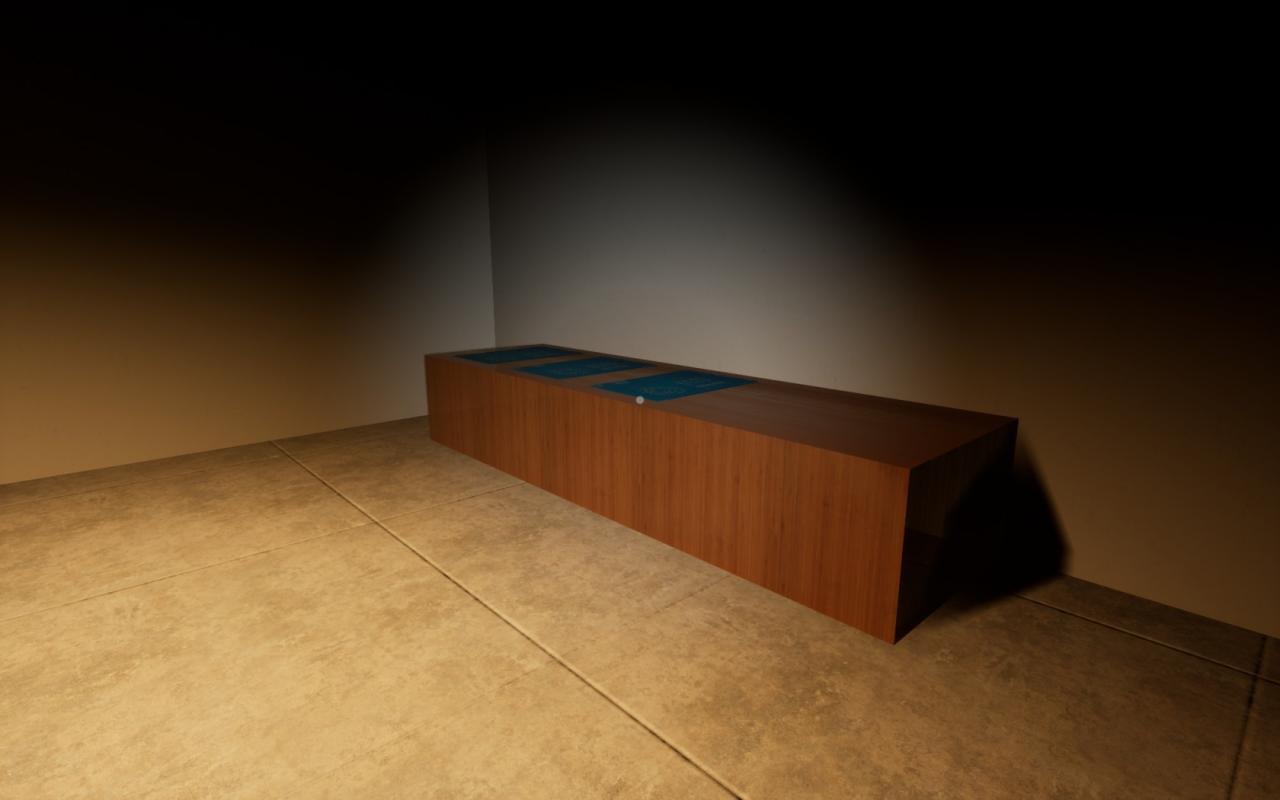
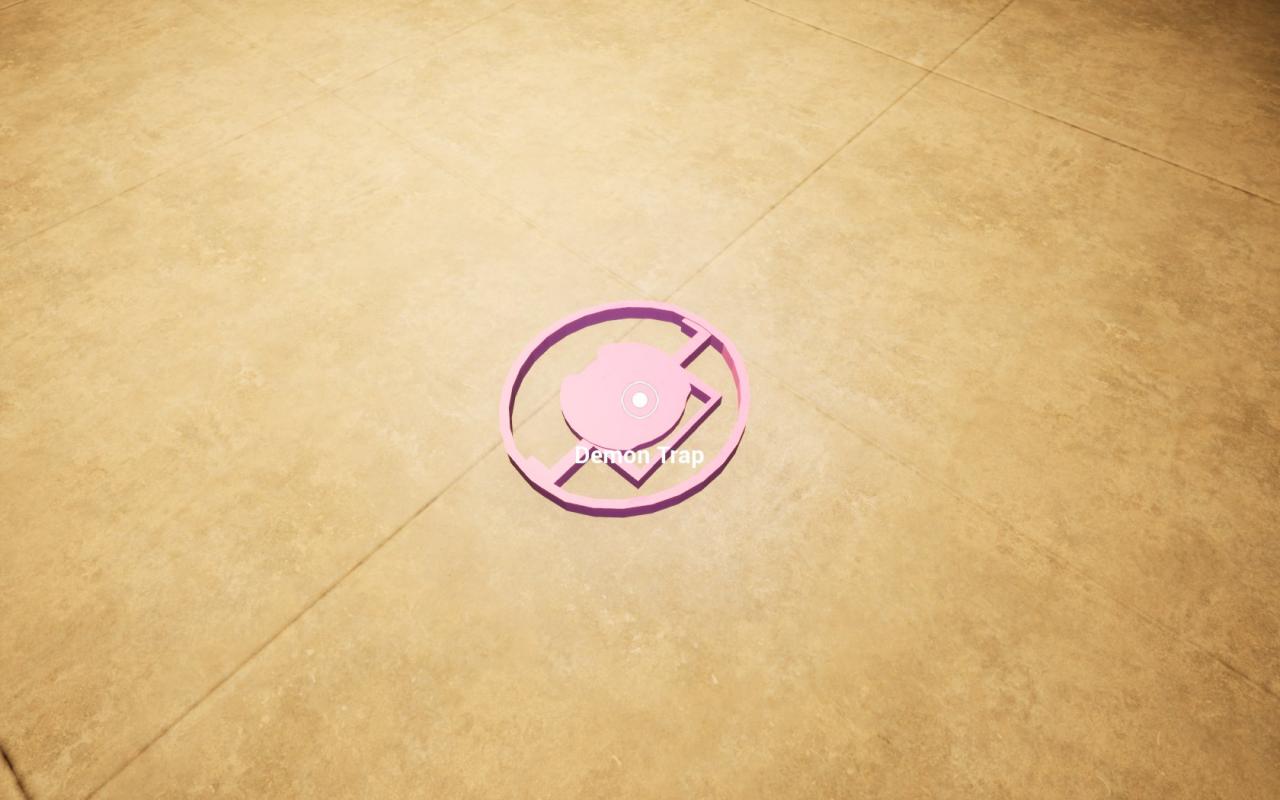
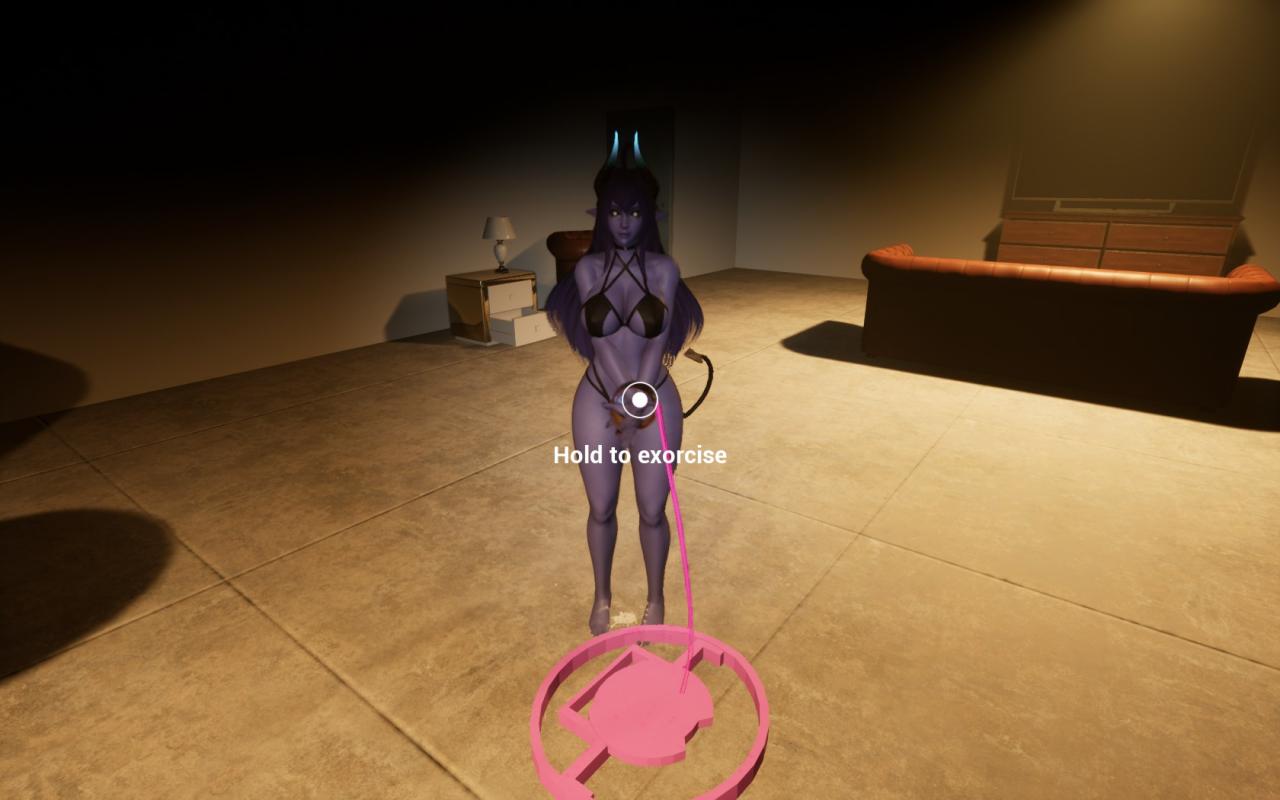
Now, once you have the Master Door unlocked and opened, inside the room where the Escape Door is, to the right should be a Pink Bear Trap (Map Locations #22). That is the final piece to the Succubus Trap. Bring it down stairs to the Boiler Room and place it onto the blueprints (Map Locations #21). Once done, on the right side of the counter, there should now be a Pink Succubus Trap. Grab it and place it on the ground (You must press (E) on the floor with it to set the trap.) Make sure you have all 4 notes.
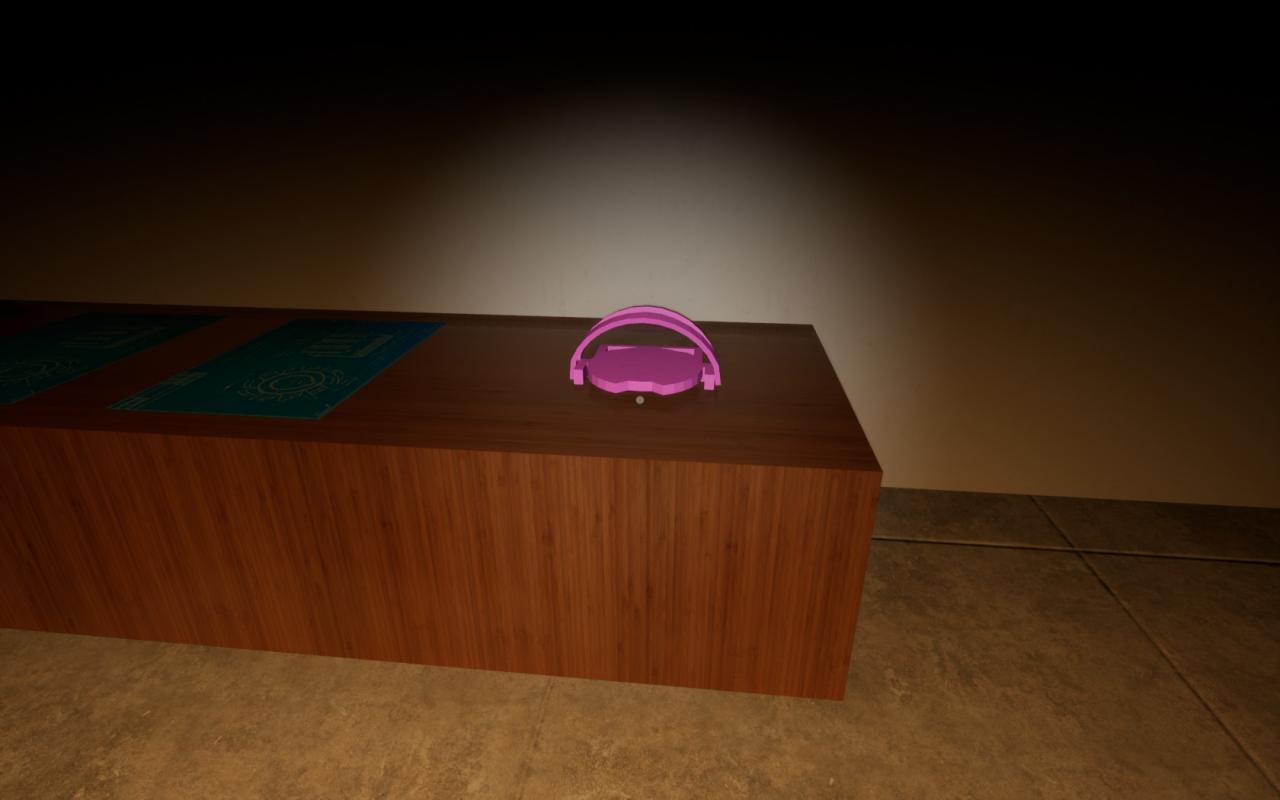
Then simply wait for Ms. S to run over top of it. When she does, hold the (Left Mouse Button) to Exorcise her. Keep in mind that the trap will only keep her tied up for about 10 seconds. If she breaks out, you can pick the trap back up from the Blueprint Counter and try again.
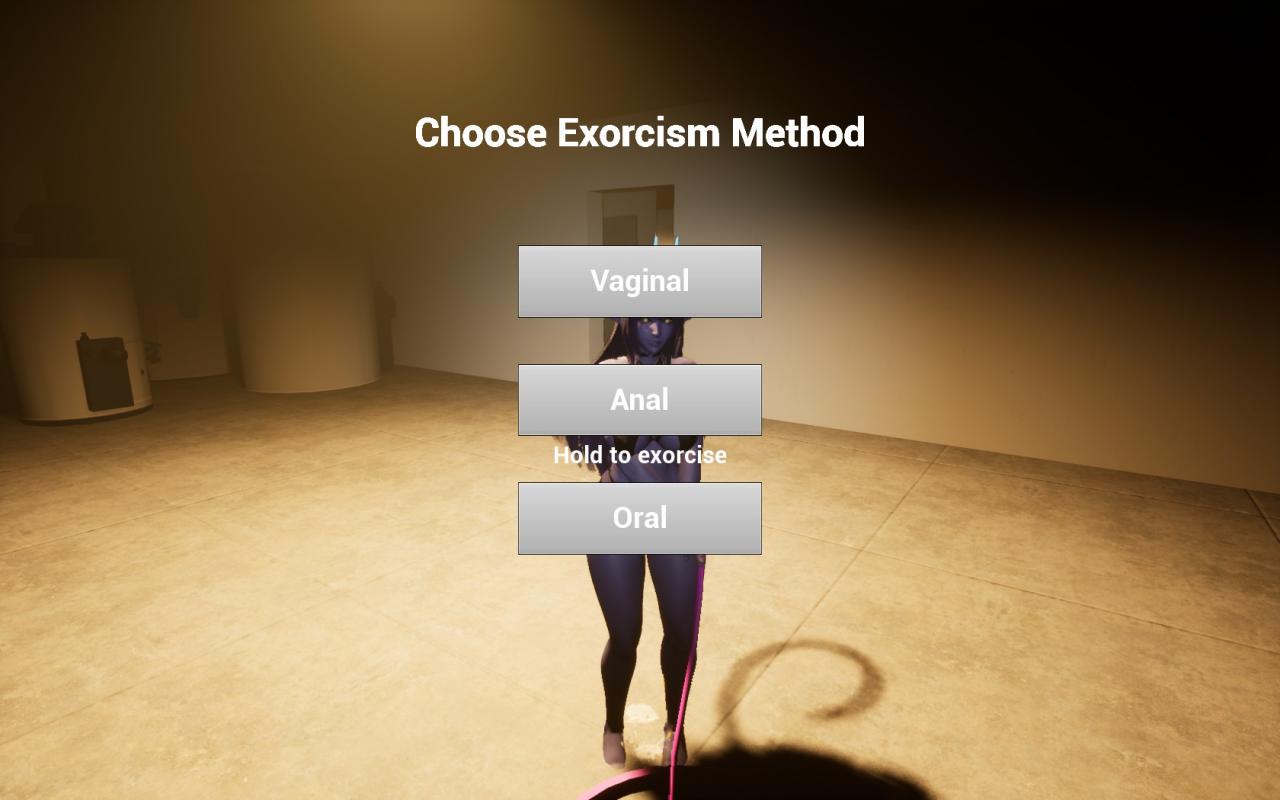
You will now be given 4 options to choose from, Vaginal, Anal, Oral, and Mystical. You can only pick one so choose wisely. Each option gives a different Sex Mini-game to play. Simply press the (Left Mouse Button) to fill up the love gauge and when you’re satisfied, press the (ESC) button to finish~. If you want to see the three other options, you must play through the game again.
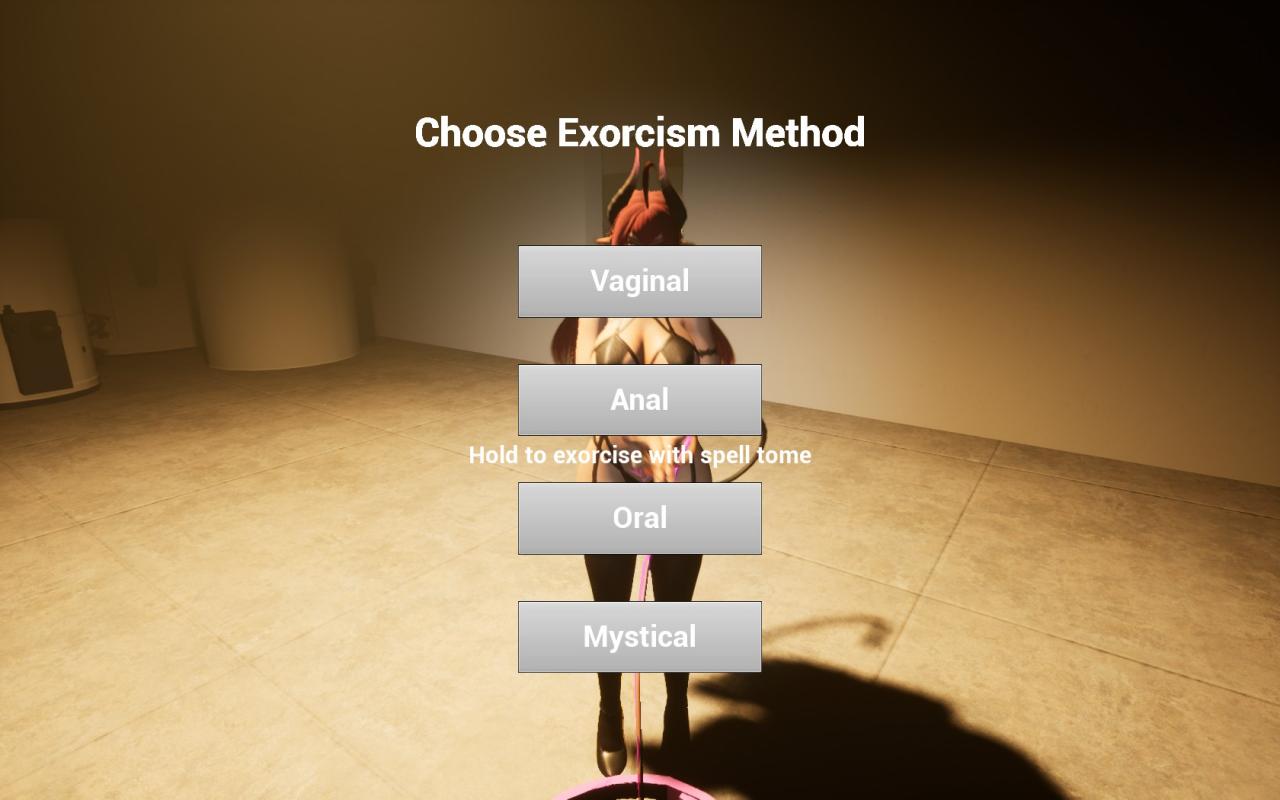
Choosing the Mystical Option will Unlock the Glasses. Going through all 4 options will unlock the Arm Lace, Garter Belt, Shoes, Stockings, as well as unlocking the ability to remove her panties and bra.
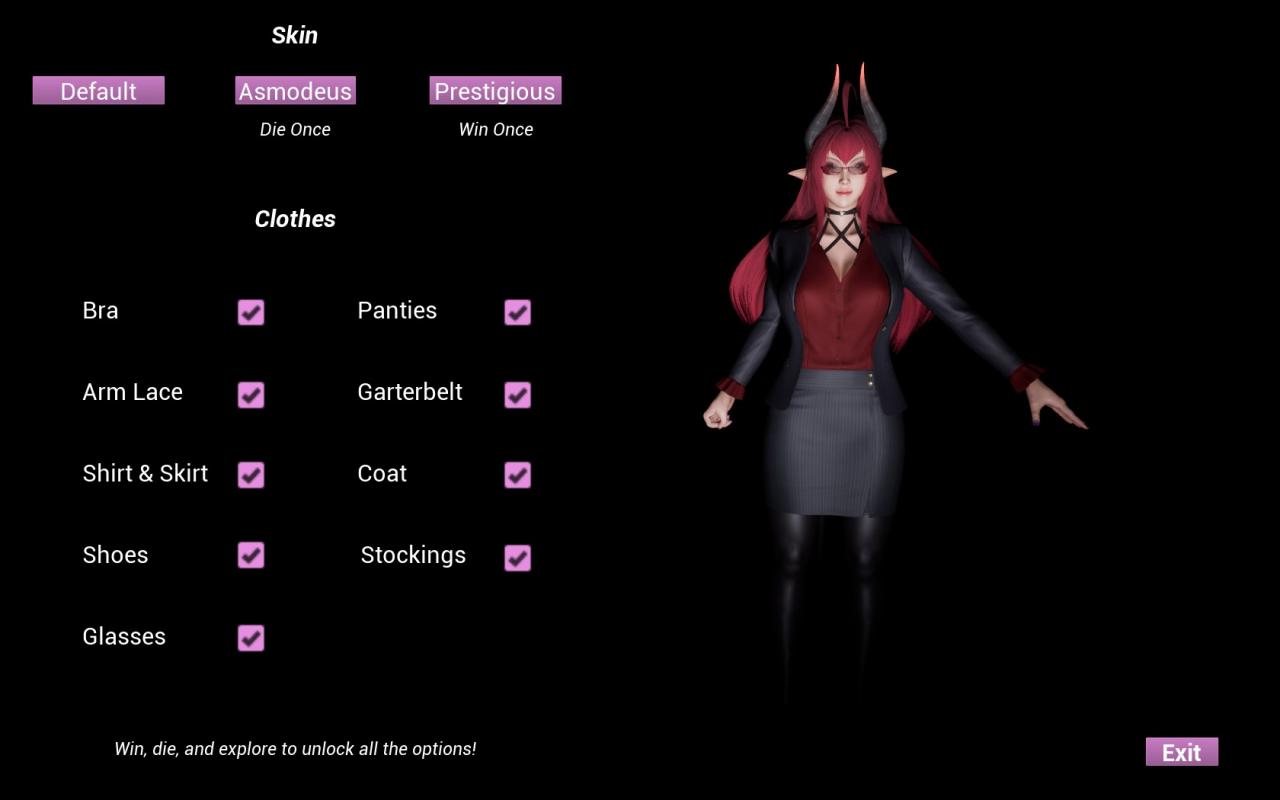
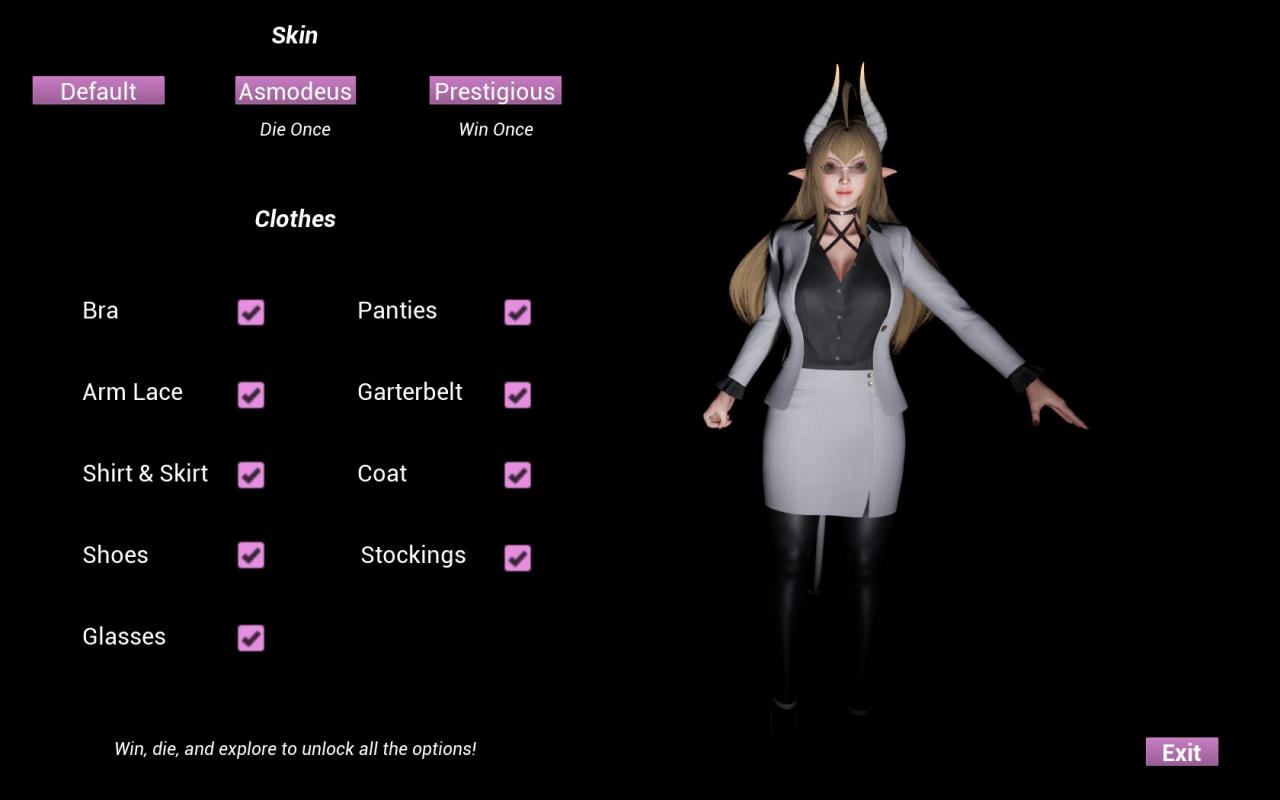
Clothing & Skins
There are 9 Clothing options to choose from.
- Bra – locked by default. Unlocked by seeing all 4 Exorcists.
- Panties – locked by default. Unlocked by seeing all 4 Exorcists.
- Arm Lace – Unlocked by seeing all 4 Exorcists.
- Garter Belt – Unlocked by seeing all 4 Exorcists.
- Shirt & Skirt – Unlocked by succumbing to Ms. S (Die 3 times).
- Coat – Unlocked by succumbing to Ms. S (Die 3 times).
- Shoes – Unlocked by seeing all 4 Exorcists.
- Stockings – Unlocked by seeing all 4 Exorcists.
- Glasses – Unlocked by choosing the Mystical Option in the Good Exorcising Ending.
There are 3 Skin Types. They also change the clothing color as well.
- Default – Unlocked by default.
- Asmodeus – Unlocked by succumbing to Ms. S (Die 3 times).
- Prestigious – Unlocked by Escaping or any of the Exorcising Endings.
Once unlocked, you can mismatch any piece of clothing or skin you want. Including going full nude.