This guide breaks down everything you need to know about the arsenal and tools available in the game.
Additional Weapons
There are two secondary weapons currently in the game: the Pistol and the Revolver. 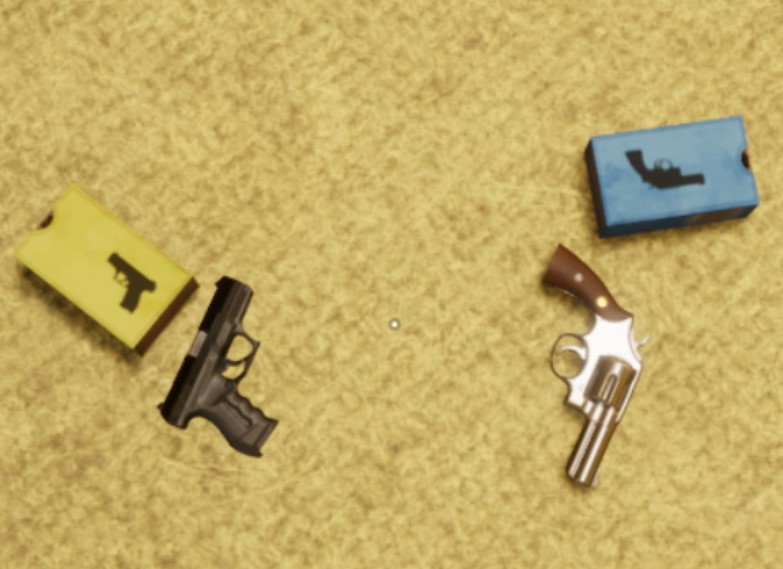
| Weapon | Magazine Size | Damage | Best Use | Notes |
|---|---|---|---|---|
| Pistol | 12 rounds | Low | Early game against monsters | High fire rate compensates for low damage. You’ll miss shots against fast-moving monsters, so the pistol is decent for the first few minutes. Against human players (if you’re playing as a monster), avoid this – a human with a shotgun will kill you much faster. |
| Revolver | 6 rounds | Very High | Monster side / Sniping | Ideal for the monster side. If you find one while disguised, find a good sniper position overlooking a group of humans. Aim for the head and fire. The revolver has massive effective range – you can kill players dozens of meters away. After they go to loot the body, keep picking them off. Against monsters, try to shoot them in the head while they’re still in their slow disguised form – much easier than hitting a rushing monster. |
Primary Weapons
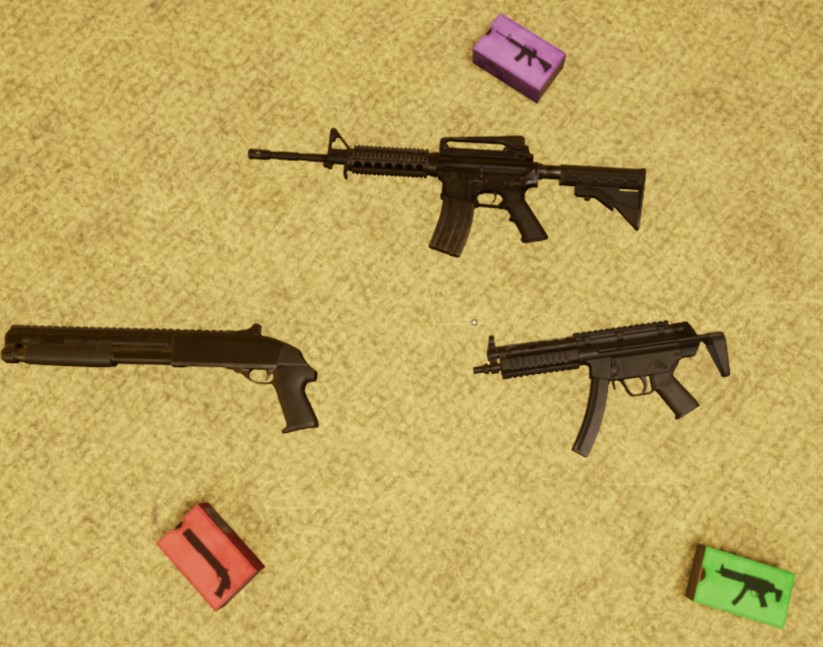
There are three primary weapons: Submachine Gun (SMG) , Shotgun, and Assault Rifle.
| Weapon | Magazine | Damage | Fire Rate | Best Against | Notes |
|---|---|---|---|---|---|
| SMG | Large | Good | Very High | Multiple monsters | Great against groups of monsters. If you struggle with the shotgun, pick this. Tap-fire for single shots (hold for a microsecond – single clicks don’t register properly). |
| Shotgun | 6 shells | Highest | Low | Monsters & Humans | Kills any monster with one point-blank headshot (good luck landing it). Even evolved monsters drop from a well-placed shot. If you can’t aim, the damage won’t save you – the low fire rate and small magazine will hurt you. |
| Assault Rifle | Standard | High | High | All situations | The safest weapon in the game. Combines stopping power with fire rate. Hold down fire from distance or close range – it won’t let you down against crowds. Hard to find but worth it. Same single-shot issue as the SMG: hold for a microsecond, don’t click quickly. |
Grenade
The grenade works better against humans than monsters.
| Property | Detail |
|---|---|
| Fuse time | 3 seconds after pulling the pin |
| Blast radius | Small – instant death at point blank, removes over half HP at 1 meter |
| Bounce | Poor – doesn’t bounce well, doesn’t fly far |
| Against monsters | Hold for 1–2 seconds, then throw directly in their face (watch for teammates) |
| As a monster | Throw into a crowd of humans |
Items
| Item | Function | Notes |
|---|---|---|
| Thermometer | Detects infected/monsters among players | Left-click on a player to check temperature: Green = human, Red = monster/infected. Right-click to show others you’re clean or check if you’ve been infected. Warning: Don’t get too close to players with shotguns – if they’re a monster, they’ll kill you instantly. You and your team can force others to submit to temperature checks at gunpoint. |
| Painkillers | Healing item | Restores 25 HP, cannot heal above 100 HP. Warning: Monsters can infect painkillers – be careful accepting them from overly generous players. |
| Portal Stabilizer | Used to open the portal | Spawns in yellow and white cases (100% chance in white cases). Resembles a bio-sample from a distance. |
| Bio-sample | Used to create a vaccine | Inserted into the bioreactor. Monsters can use it to heal and evolve. |
| Vaccine | Cures infected players | Synthesized from 5 bio-samples in the bioreactor. Only used for vaccinating infected players – nothing else. |
Final Thoughts
That covers every weapon and item currently in Backrooms: Apprehension. The key takeaway? Know your role – the revolver is a monster’s best friend, the shotgun is a human’s nightmare up close, and the assault rifle is your safest bet if you can find one. Items like the thermometer and painkillers can save your life, but only if you use them wisely. Got any strategies of your own? Drop them in the comments – I’d love to hear how you’re surviving out there.
More Guides:
- BACKROOMS: APPREHENSION – Basic Controls
- BACKROOMS: APPREHENSION – How to Fix Microphone Issues and the CreateProcess() Error 11c7
- BACKROOMS: APPREHENSION – How to Disable Motion Blur & Head Bob