
Every weapon in Mortal Shell 2 can carry you to the credits, but only a handful are worth building around. The gap between a properly infused Great Martyr’s Blade and a raw one is the difference between a boss fight lasting ninety seconds and nine minutes. This guide breaks down all eight weapons — from the starting Iconoclast to the endgame Clockwork Scythe — covering exact movesets, optimal Tar Stone and Infusion pairings, and precise locations, so you can plan your ultimate loadout before you even leave the first area.
The Iconoclast: Your Starter Is a Keeper
The Iconoclast is the default weapon, and unlike most games where the starting gear gets shelved, this one stays competitive for the entire run. It’s one of only two weapons with access to Curse — arguably the strongest status effect in the game. Cursed enemies that try to hit you stagger themselves and take damage instead. That alone justifies keeping it equipped even after you’ve collected everything else.
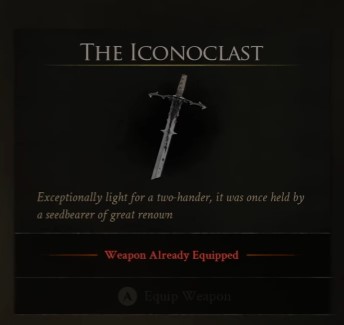
Tar Stone: Zealot Stone. The light combo finisher chain grants 150% resolve and turns the third light attack into a one-two combo. It’s the clear best-in-slot.
Infusion: Arbiter’s Prize (Blood Curse) or Curse Blood Stone. Curse is the play here. The self-stagger mechanic punishes aggressive enemies and lets you trade hits you’d normally have to dodge.
Ability: Strike Stone for the flashy combo with strong break damage and AoE. Unwieldy or Acolyte stones work as fallbacks.
Moveset:
- Light attacks: One-two combo, enhanced with the Zealot Stone
- Heavy attacks: Thrusts into a heavy overhead
- Running light: Jump attack
- Running heavy: Golf swing — excellent for launching enemies
Tip: The running heavy’s launch sets up free follow-ups. Use it to start engagements, then chain into the light combo for resolve generation.
Axe & Dagger: Double the Hits, Double the Fun
The Axe & Dagger is likely the first weapon you’ll unlock after the starter, and it introduces the most important mechanic in the game: the Duality Stone. This Tar Stone turns every base attack into a strike-twice sequence (one-two, one-two, one-two), effectively doubling your DPS. Nothing else in the game comes close to that raw output multiplier.
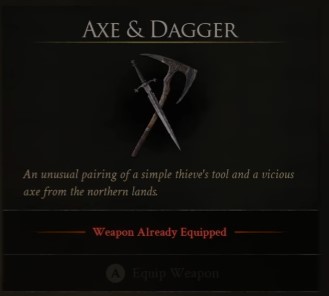
Tar Stone: Duality Stone. Non-negotiable. The damage increase is so significant that every other option is a downgrade.
Infusion: Blood Curse (Arbiter’s Prize) or Serpent Stone. Blood Curse is the recommendation — the multi-hit nature of the moveset applies status effects rapidly.
Ability: Magdalena’s Momento, earned from the first gate boss. It’s a huge flurry of strikes that inflicts Weak and carries high crit chance and crit damage.
Moveset:
- Light attacks: Multi-hit combos that stack status effects quickly
- Heavy attacks: Standard dual-wield heavies
- Running light: Multi-hit attack
- Running heavy: Leap attack with good closing distance
Location: From the mushroom village, run right and cross a bridge. Find an illusory archway, walk through the statue to grab a key, then return to the Shrine of Trials and go through it to claim the weapon.
Veteran’s Battle Axe: The Running Heavy That Carries
The Veteran’s Battle Axe is a fantastic early-game pickup that stays relevant thanks to one move: the running heavy. It’s an absolutely decimating attack with strong knockback and distance control, and it’s useful from the moment you get it to the final boss.
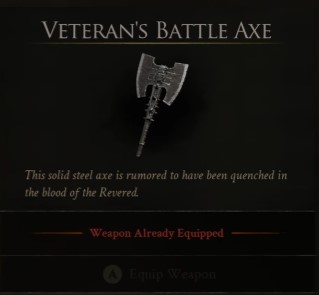
Tar Stone: Thief Stone to stack warp stacks and make axe swings faster. Grudge Stone or Parasitic Stone work for health-stacking progression builds if you prefer survivability.
Infusion: Curse Blood is the obvious choice given Curse’s strength. But the Veteran’s Battle Axe is the only weapon with access to permanent Burn infusion — it looks incredible on the axe and is worth using until you find Curse.
Moveset:
- Light attacks: Small poke into a solid combo
- Heavy attacks: Big overhead, big spin, big golf swing. Recommended combo: light into heavy into heavy
- Running light: Similar to the Iconoclast’s
- Running heavy: The star of the show — decimating damage with excellent knockback
Location: Head north to Black Ridge Pass, then curve around to King’s Crypt. The dungeon is trap-heavy — spikes and arrows everywhere — but the axe is the reward at the end.
Warning: The trap density in King’s Crypt is brutal. Take it slow, watch for floor plates, and don’t rush the pulls.
Great Martyr’s Blade: Frost Makes It Broken
On paper, the Great Martyr’s Blade is a slow greatsword with high base damage and a punishing moveset. In practice, it’s one of the most broken weapons in the game — provided you have the Frost infusion. It’s the only weapon with Frost access, and the status effect completely negates the slow moveset by freezing enemies in place.
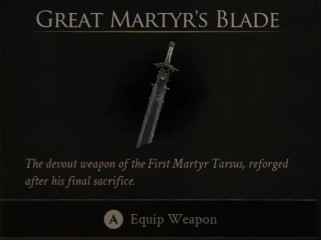
Tar Stone: Light attack finisher enhancement, which adds 30% crit chance to the heavy attack finisher. This pairs perfectly with the Frost infusion’s crowd control.
Infusion: Frost. Without it, this is one of the slowest weapons in the game. With it, you freeze enemies and dismantle them at your leisure. There’s no competition.
Ability: Captive’s Scabstone — 300% strike damage, massive stagger damage, and the resolve cost is reduced to 75. It’s a fantastic choice for burst windows.
Moveset:
- Light attacks: Thrust, big swing, thrust
- Heavy attacks: Heavy swing, then an enhanced heavy (normally another swing)
- Running light: Big golf swing
- Running heavy: Spin-to-win into a thrust
Location: From Gloomshade Grove, head west. Kill the Blood Cursed Lithopod boss — hit the goofy-looking stone to spawn it. Use the key to enter the citadel area, then go through Martyr’s Prison to get the sword.
Frost Stone Location: Far southeast of the world, behind a late-game gate in the second half of the game.
Compare: Before Frost, the Great Martyr’s Blade is B-tier at best. After Frost, it’s an S-tier boss melter. The infusion is the entire build — don’t judge the weapon until you have it.
Obsidian Hammer: Lock Everything Down
The Obsidian Hammer is a late-game weapon built around one idea: enemies shouldn’t get to play. It’s the only weapon with Trauma infusion access and one of two with Stasis, giving you two distinct flavors of oppressive crowd control.
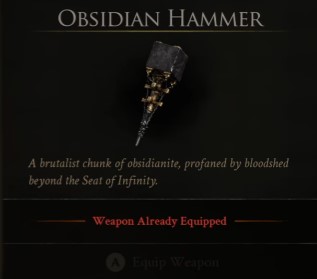
Tar Stone: Cleric Stone. Lock down enemies and generate crit chances for big bonks.
Infusion: Stasis applies 5 stacks per hit, and with the hammer’s slow but heavy swings, you’ll have enemies permanently slowed. It’s extremely oppressive and likely to be nerfed. Trauma is the alternative — it builds stagger damage over time and excels in stagger-focused builds.
Ability: Colossus Stone, unique to the hammer, sends out big shockwaves with excellent AoE and stuns. Lost Clot Stone works as a fallback.
Moveset:
- Light attacks: Big vertical bonks
- Heavy attacks: Sweeping bonks with an enhanced final hit
- Running light: Jump attack
- Running heavy: Big slam
Location: South from the outskirts of Mammon, southwest into the Obsidianite Mines. The area is hectic with miners — clear the dungeon to get the hammer.
Warning: Stasis on the Obsidian Hammer is almost certainly getting nerfed. Enjoy it while it lasts, but have the Trauma build ready as a backup.
Axatana: Speed Meets Status Stacking
The Axatana is one of the best weapons in the game, and it’s a personal favorite. It’s one of two weapons with Duality Stone access, and despite its fast attack speed, it also has Stasis — which means you can stack Stasis to 99 on bosses and lock them down completely.
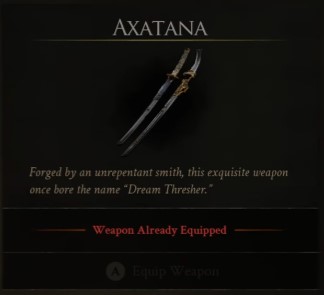
Tar Stone: Duality Stone. Doubles your DPS with strike-twice attacks. Nothing else comes close.
Infusion: Stasis is the standout — the fast attack speed makes it trivially easy to stack to 99 on bosses. Voltaic is an excellent alternative if Stasis gets nerfed.
Ability: Hexopod Core offers super-fast multi-attacks but requires leveling for stagger immunity due to the high risk. Strike Stone also works.
Moveset:
- Light attacks: One-two-one-two-one-two, very fast
- Heavy attacks: Axe swings (single target), then the axe comes out for AoE
- Running light: Multi-hit
- Running heavy: Two big chunky hits
Location: Head south to a small tower. Press a button on the front, use a teleporter to reach the island, and fight an enemy wielding an Axatana. The weapon is sitting right next to her — no boss gating.
Tip: The Axatana’s fast attacks plus Stasis is the strongest status application in the game. You can permanently lock down most bosses with a single combo string.
Black Needle: Phantom Bursts and Boomerang Tosses
The Black Needle is a late-game spear with fast thrust attacks and a unique mechanic: it’s the only weapon with Phantom infusion access. Phantom builds up damage over time, then splashes out a large burst of stagger — a fun and unique playstyle that rewards sustained aggression.
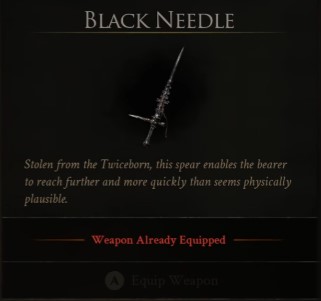
Tar Stone: Thief Stone works well with the fast attack speed. Zealot Stone is also viable. This weapon is flexible; either works.
Infusion: Phantom is the unique option — build damage, then release a stagger burst. Poison is also available if you prefer DoT stacking.
Ability: Conqueror’s Reward for big bulky damage. Infuse Stone lets you toss the spear like a boomerang for AoE damage.
Moveset:
- Light attacks: Thrust, thrust, spin, thrust
- Heavy attacks: Sweep, sweep, sweep, sweep, thrust
- Running light: Quick stab
- Running heavy: Heavier thrust
Location: Late game, south area. Obtain from the boss at the end of Cester’s Gate. You’ll also get a ranged weapon and the Phantom Stone in the same area. Clearing the gate gives a unique special.
Clockwork Scythe: Chainsaw Mode
The Clockwork Scythe is a late-game fan favorite, and for good reason — it has a unique chainsaw mechanic that’s both devastating and extremely likely to be nerfed. If you get it, use it before the patch drops.
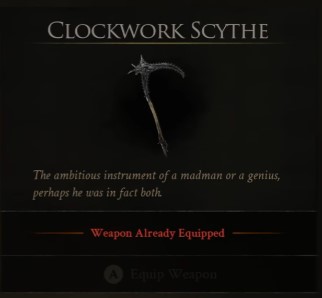
Tar Stone: Thief Stone to ramp up warp strikes for faster attack speed.
Infusion: Arbiter’s Prize (Blood Curse) is thematic — a bloody scythe fits the chainsaw aesthetic. Voltaic Crown also works; it’s personal preference.
Ability: Scholar’s Wormstone is the headline — consume resolve over time to activate chainsaw mode. Each chainsaw spin deals 35% of weapon-based damage, and all attacks become multi-hits. It’s devastating with status effects. Clockwork Shardstone is literally chainsaw mode — walk into enemies and shred them.
Moveset:
- Light attacks: Sweep, sweep, big sweep — very wide reaping swings
- Heavy attacks: Standard heavy swings
- Running light: Quick sweep
- Running heavy: Heavy sweep
Location: From the outskirts of Mammon, go all the way to the Chamber of Becoming. Clear it to get the scythe.
Warning: The Clockwork Scythe’s chainsaw mode is overtuned. Expect a nerf — build around the multi-hit mechanic while you can.
Weapon Priority and Location Summary
| Weapon | Location | Best Tar Stone | Best Infusion | Tier |
|---|---|---|---|---|
| Iconoclast | Starter | Zealot Stone | Curse | S |
| Axe & Dagger | Mushroom village shrine | Duality Stone | Blood Curse | A |
| Veteran’s Battle Axe | King’s Crypt | Thief Stone | Burn / Curse | A |
| Great Martyr’s Blade | Martyr’s Prison | Light finisher enhancement | Frost | S (with Frost) |
| Obsidian Hammer | Obsidianite Mines | Cleric Stone | Stasis / Trauma | A |
| Axatana | South tower island | Duality Stone | Stasis | S |
| Black Needle | Cester’s Gate boss | Thief Stone | Phantom | B |
| Clockwork Scythe | Chamber of Becoming | Thief Stone | Blood Curse | S |
Recommended unlock order: Iconoclast → Axe & Dagger → Veteran’s Battle Axe → Great Martyr’s Blade → Axatana → Obsidian Hammer → Clockwork Scythe → Black Needle.
The Axatana and Great Martyr’s Blade are the two weapons worth building your endgame around. The Axatana’s Duality Stone plus Stasis stacking is the most consistent boss lockdown in the game, while the Great Martyr’s Blade with Frost turns every encounter into target practice. Everything else is situational — but every weapon in this game has a build that makes it shine.


