
The community has spent weeks debating whether Tiel is a gimmick shell or a genuine powerhouse, and honestly, I think most players are missing the point. The argument usually boils down to his low health pool making him a liability in boss fights, which tells me they haven’t tried stacking 99 poison stacks and detonating them for 600+ damage in a single shadow strike. I’ve been running this Stealth Archer Tiel build for two full playthroughs now, and it turns the hardest encounters in the game into a ranged execution sequence. This is the complete endgame setup—weapons, tarstones, shell skills, and the exact boss fight loop—so you can copy it and dominate.
Quick Answer
The core loop is: apply poison with the Crossbow, stack it fast using Splitting Stone and Hack Stone, then detonate everything with Tiel’s Poison Burst shadow strike.
- Weapons: Axe and Dagger (melee fallback) + Crossbow (primary poison applicator)
- Mandatory Infusion: Hack Stone level 3 — permanently imbues all four crossbow projectiles with poison
- Combat Tarstones: Splitting Stone (4 projectiles per tap), Duality Stone (2 poison stacks per melee hit)
- Support Tarstones: Devout Stone (+28 resolve on kills), Marksman’s Stone (+12% ranged crit at level 2), Vitality Stone (+30% crit damage at level 2)
- Shell Ability: Poison Burst — detonates all stacks, dealing 6 damage per stack
- Boss Loop: Spam crossbow (6 shots / 8 taps), reposition with Shadow Dash, then Shadow Strike to detonate
- Damage Ceiling: 50-99 stacks = 600+ damage, enough to one-shot most bosses or force a phase transition
Why Tiel Is the Best Shell for This Build
Tiel’s entire kit is built around evasion and poison synergy, which makes him the only shell where this ranged burst strategy actually clicks. His passive Shadow Dash triggers on perfect dodges, giving you both i-frames and a follow-up attack with bonus stagger damage. That means you can stay in the danger zone just long enough to bait an attack, dodge through it, and create space while your poison stacks tick up.
The catch is his health pool. Tiel is a glass cannon, and I’m not going to pretend otherwise. You will die if you get cornered. But that’s the trade-off for having the highest damage ceiling in the game. My rule is simple: if I’m taking more than one hit per boss attempt, I’m positioning wrong.
Weapon Setup: Axe and Dagger + Crossbow
The weapon pairing here is straightforward, but the roles are strictly divided. The Crossbow is your poison delivery system, period. The Axe and Dagger is there for resource generation and emergency melee, not for damage.
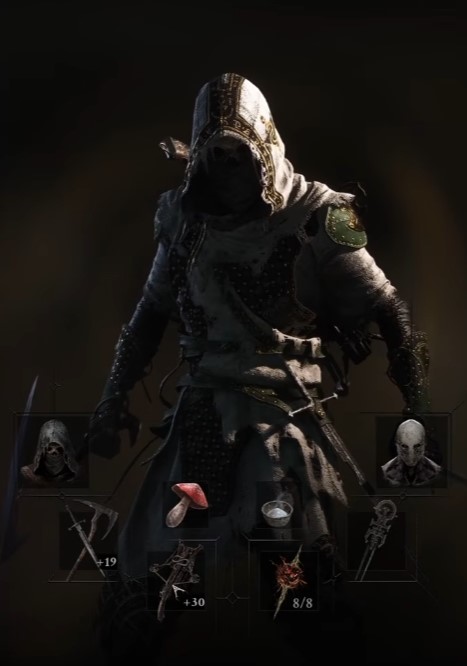
Here’s what I mean by that: weapon upgrades are not your damage source. I see players dumping Tarforge parts into their Axe and Dagger, thinking raw damage will carry them. It won’t. The real damage comes from the poison burst detonation, so your upgrade priority should be unlocking the permanent infusion slot, not boosting base stats.
| Weapon | Role | Why |
|---|---|---|
| Crossbow | Primary poison applicator | Fires 4 projectiles per tap with Splitting Stone, each applying a stack |
| Axe and Dagger | Resource generation + fallback | Fast attacks return resolve; Duality Stone doubles poison stacks per hit |
If you’re looking to max out the weapon’s base stats anyway, I’d point you to the All 5 Tarforge Upgrade Locations guide to speed up the process.
Tarstone Loadout: Support Stones for Exploration
Before I get into the combat core, let me cover the support stones I run for survivability and resource sustain. These are the ones that keep the build functional during exploration and elite fights, not just boss encounters.
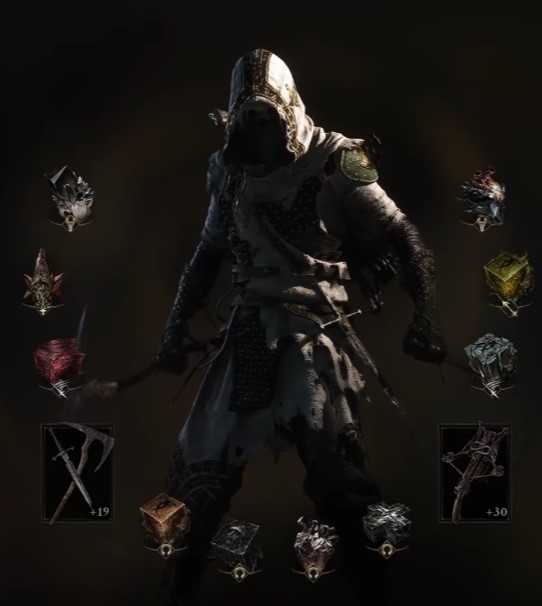
- Devout Stone: Generates 28 resolve when killing enemies in 2-3 shots. This is your fuel for sustained crossbow use. Without it, you’ll be starved for resolve between fights.
- Marksman’s Stone: +12% critical hit chance for ranged damage at level 2. I stop here. Level 3 only adds 3% more, which is a waste of materials when the combat stones matter more.
- Vitality Stone: +30% critical damage at level 2. Level 3 adds another 10%, which is actually significant when combined with Marksman’s Stone. I prioritize this one.
- Spite Stone: Ranged damage increased by 150% when health is at 40% or below. I swap this out depending on the fight. Staying at low health on Tiel is risky, so I only run it when I’m confident in my dodge timing.
Tarstone Loadout: Combat Stones That Break the Game
This is where the build actually comes together. The combat tarstones are the mechanical core, and they’re what turn the Crossbow from a weak sidearm into a poison-stacking machine.
- Splitting Stone: This is non-negotiable. It reduces weapon damage but increases projectiles per shot. With the Crossbow, one tap fires four projectiles, and each one applies a poison stack. That’s four stacks per trigger pull from a safe distance.
- Duality Stone: Makes the Axe and Dagger deal two attacks per light attack, giving two poison stacks per hit. I mainly use this for resource gathering, since each hit returns resolve. It’s not the primary stacker, but it’s useful in a pinch.
- Serpent Stone: Adds poison stacks on melee damage. I skip this. Melee is rarely used in this build, and the materials are better spent elsewhere.
The Hack Stone Infusion Is Non-Negotiable
If you take nothing else from this guide, understand this: the Hack Stone at level three is the entire build. It permanently imbues all four crossbow projectiles with poison, which means every shot from the Crossbow stacks poison without any additional resource cost.
Without Hack Stone level three, the build does not function. You’ll be burning resolve or consumables to apply poison, and that kills the entire pacing. Get this infusion first, before anything else.
Now, about active weapon abilities: I don’t use them in this build. The focus is entirely on passive effects and the shell ability. You can slot whatever you like, but I’ve found that the passive synergy is what carries the damage. Spending resolve on active abilities takes away from your ability to spam the crossbow.
Shell Skills: Poison Burst and the Synergy Chain
Poison Burst is the centerpiece of this entire strategy. When you perform a shadow strike, it detonates all poison stacks on the target, dealing 6 damage per stack. With 50-99 stacks, that’s 600+ damage in a single hit. I’ve one-shot bosses with this. I’ve forced phase transitions that grant a free riposte, which is essentially a second free damage window.
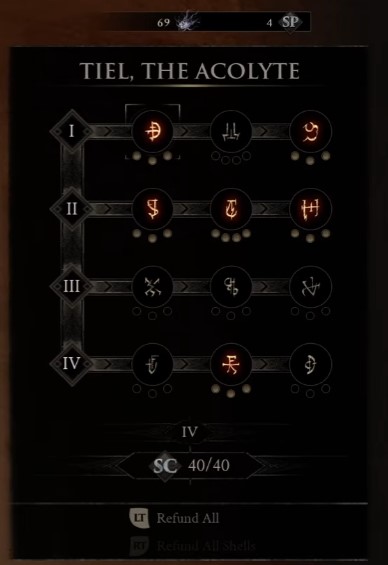
But the skill tree matters just as much as the ability itself. Here’s the order I prioritize:
- Escalation: Inflicts 10 poison stacks on shadow strike, so your stacks don’t reset to zero after detonation. This is what allows you to chain bursts without re-building the full stack count.
- Shadow Dash upgrades: Increase perfect dodge frames and deal stagger damage. A perfect dodge triggers a shadow dash, which is your main repositioning tool.
- Shadow Clone: Created on shadow dash, it distracts enemies and gives you time to reposition and continue stacking poison. This is a survivability tool that directly enables the ranged playstyle.
- Plague Bearer: Provides poison immunity and turns poison clouds from Poison Burst into healing. This is a 50/50 priority for me. It’s excellent, but only if you have levels to spare.
- Death Mark: Improves shadow strike DPS, but shadow strike is not your main damage source. Poison Burst is. I only pick this up after maxing everything else.
Boss Fight Strategy: The Exact Loop I Use
The boss fight rotation is deceptively simple, but it requires discipline to execute consistently. Here’s the exact sequence I run:
- Spam the Crossbow to stack poison. I aim for around 6 shots or 8 taps, which gets me into the 50-99 stack range.
- Use Shadow Dash to reposition when the boss closes distance. The shadow dash has i-frames, though I’ll warn you, it can be buggy if the enemy is moving. I only dash when I’m confident the boss is mid-attack animation.
- Shadow Strike to detonate. Once the stacks are high enough, I fire off the shadow strike and watch the health bar evaporate.
This is far more powerful and safer than fishing for backstabs. I’ve tested both approaches, and the ranged burst loop consistently outperforms melee execution on every boss I’ve fought.
Warning: Shadow Dash can be unreliable if the enemy is moving toward you. I’ve had the i-frames not register and taken hits I should have dodged. Always dash perpendicular to the boss’s attack, not straight through it.


