
I spent the first week of the Deep North update running around lost, freezing, and dying to things I couldn’t pronounce. Then I figured out the actual loop: kill Fader, build the Frost Foundry, farm Blood Gold off petrified trolls, and turn molds into the best weapons in the game. This guide is that whole path, start to finish.
If you’re still in the Mistlands or haven’t beaten Fader yet, this isn’t for you. Come back once you’ve got a level 4 Black Forge and a portal network that actually works.
What You Actually Need Before You Go
Don’t walk into the Deep North cold. Here’s the checklist I wish someone had handed me.
- Beat Fader. His special drop is what unlocks the new Ember Pile, which is the whole foundation of Deep North crafting.
- Unlock the Eternal Pyre. It produces embers over time, and embers are the endgame resource you’ll burn through constantly.
- Upgrade your Black Forge to level 4. Everything new gets crafted here first.
- Craft a shovel at the Black Forge: 5 Fine Wood, 4 Flat Metal, 2 Embers. You only really need it if you want to build where the snow is deepest.
- Set up a portal in the Deep North so you can bounce back for a rested bonus and haul materials both ways.
- Bring your Mistlands grappling hook. The dungeons here are vertical and it saves a ton of time.
- Hunt seals at the coast. They’re passive and easy. Combine their pelt with embers to make Ember Charges, which you need to harvest new metals and blow up petrified trolls and frozen ponds.
Note: Baby seals drop no pelt. Don’t waste arrows on them. Adults hang out near the forest edge and ice flows.
How Ember Charges Work
This is the one crafting recipe you’ll use more than any other.
- After Fader, use his drop to craft the new Ember Pile.
- Collect from it like wisps, just faster.
- At a regular Workbench, craft Ember Charges using Ember Pile output plus Seal Pelt.
- Each craft gives you 10 charges.
Farming Blood Gold Off Gammeltrolls
Blood Gold is the backbone of every new Nord weapon, and it comes from Gammeltrolls, the new giants wandering the Deep North.
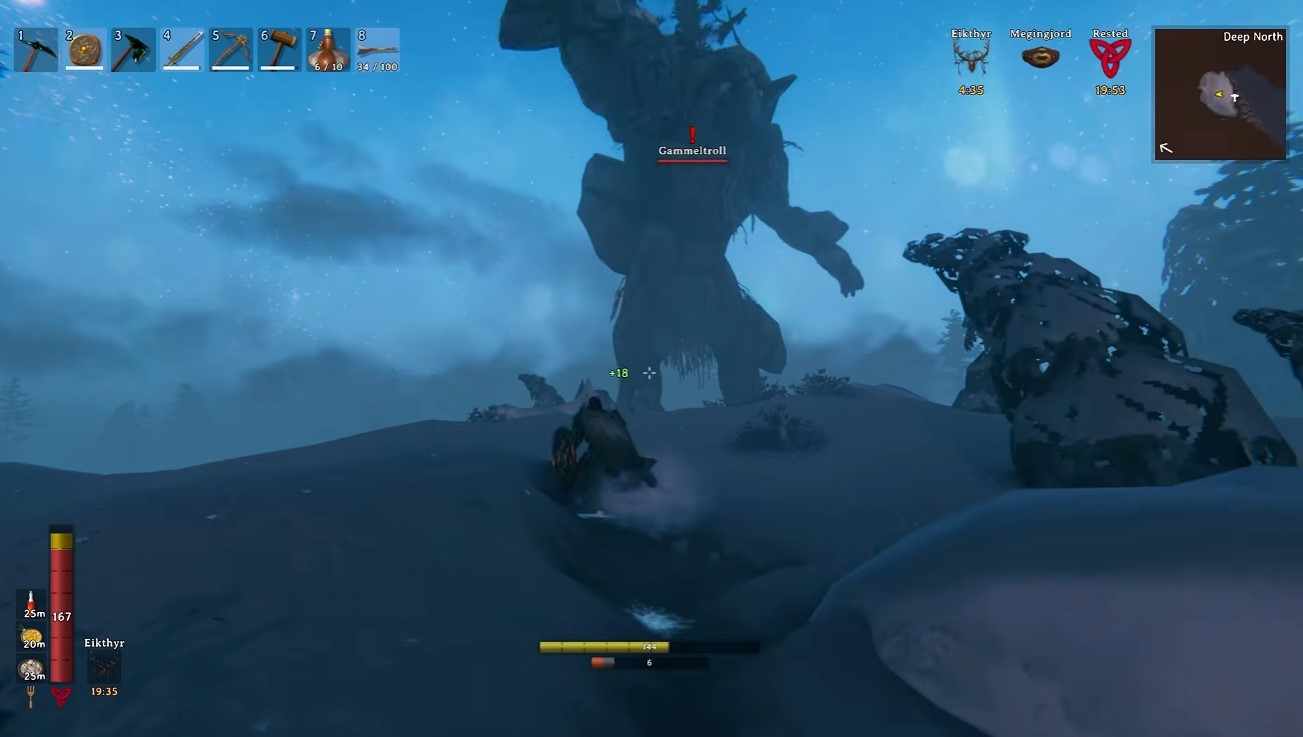
Here’s the fight, and it’s simpler than it looks:
- Get super close as fast as possible. If they start throwing trees, you’re in trouble, because those hit like a truck.
- Sit right under their feet, time your rolls, hit a couple times, roll, repeat.
- When they die they don’t fall over, they turn to stone. Throw an Ember Charge at each leg to blow them up.
- Mine the Petrified Tissue from the top down. More charges are needed now than in the preview, so bring extras.
- Refine Petrified Tissue in your Blast Furnace back at base to turn it into Blood Gold.
Each troll nets roughly 40 to 50 Petrified Tissue, which converts to the same amount of Blood Gold Bars. Since you need about 20 bars per new North weapon, that’s roughly two weapons per troll.
Tip: Put your portal right next to the trolls with a chest in front. Sticking it between two petrified trolls is the most efficient setup I’ve found.
One thing worth knowing: Gammeltrolls seem to respond to noise. Building or destroying stuff in settlements draws them in more often, and coastal forward bases aren’t always safe.
Where to Find Frost Cores and Weapon Molds
Frost Cores and molds both live in the Winding Tunnels, found exclusively inside the massive buildings scattered around the map.
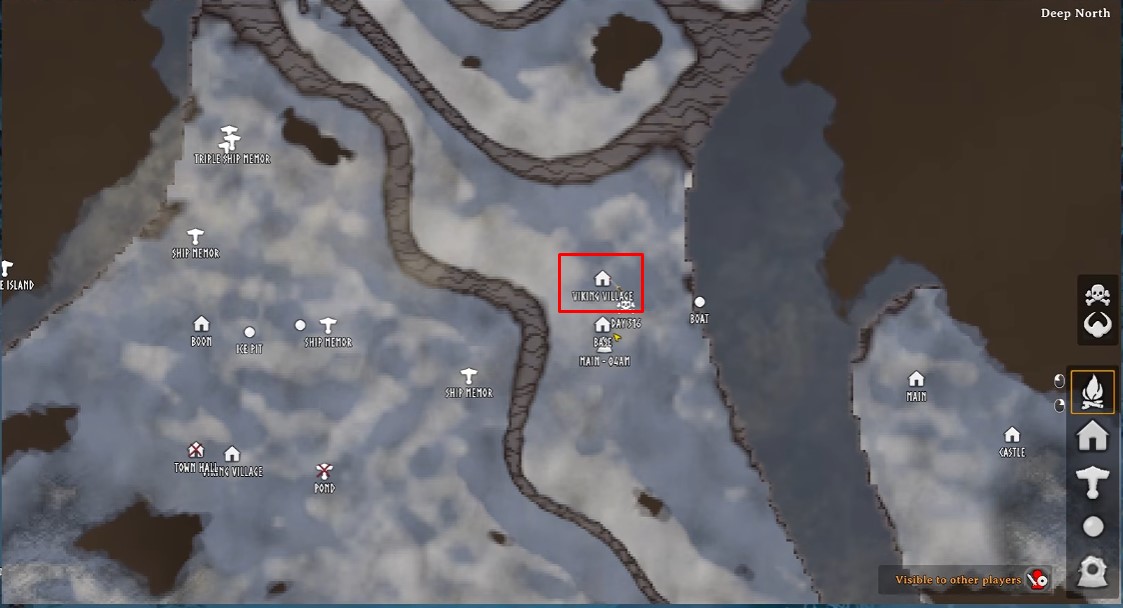
- Look for Viking villages first, since they usually have a town hall. Repair it and drop your portal in the middle.
- Head inside and find the tunnel entrance. No key needed for these.
- Break every pile of rubble you see. They almost always contain new molds for weapons and tools.
- Grab every Frostcore you can. Yields are random, so one run might give you 33 and the next 20.
- Break through the wardrobe-like areas for extra tunnel sections. Check the wardrobe at the entrance and the attic at the top of the building too, since their barrels can hide molds.
Enemies inside are manageable if you handle them right. Ale Kings go down fast to slashing damage, so take them out before they reach you. Eyeless Ones pop up randomly in rooms, and a normal sword swing staggers the standard ones quickly. One and two stars are a different story entirely, so be careful. Kill every single one anyway, because they drop Long Claws, which you need for one of the best new trinkets.
Tip: Clearing one or two Winding Tunnels should get you every weapon variant recipe, especially if you focus on one weapon type.
Building the Frost Foundry and Frigid Kiln
Once you’ve got Frostcores banked, it’s time to convert molds into actual gear.
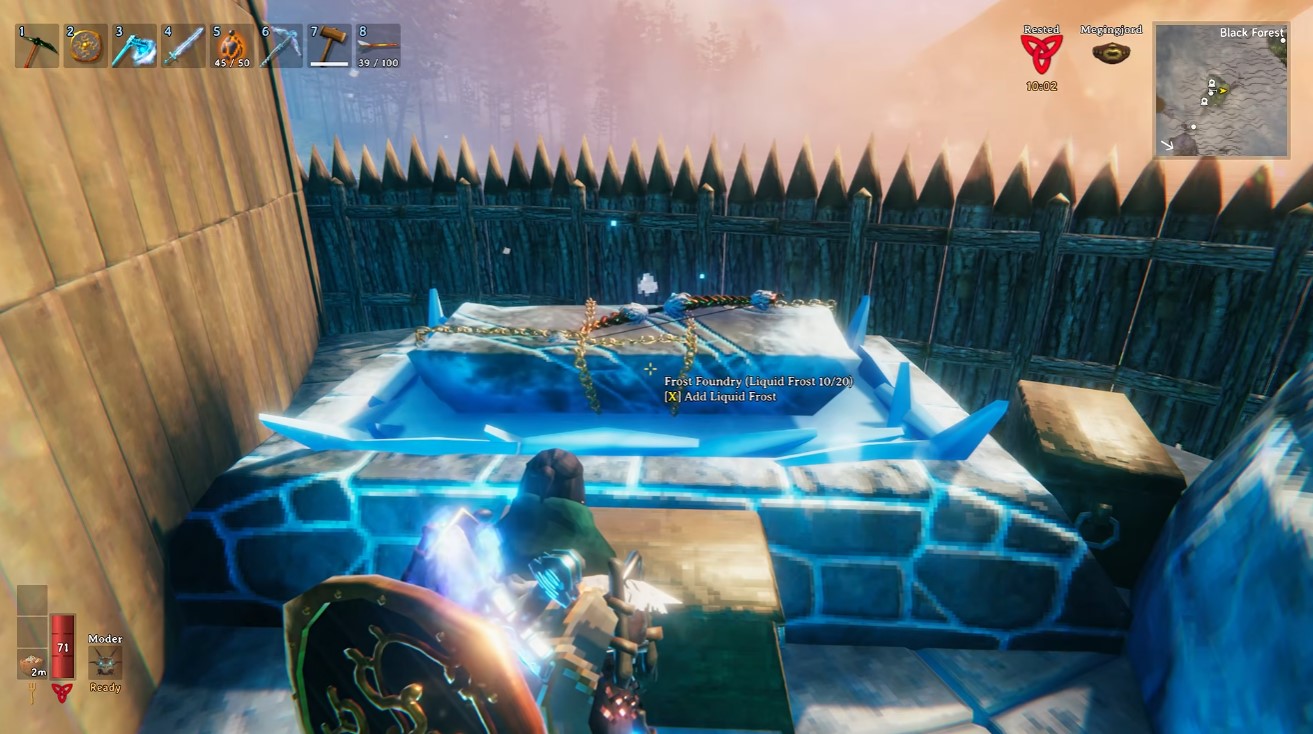
Frost Foundry materials:
| Material | Amount |
|---|---|
| Iron | 15 |
| Stone | 20 |
| Frostcores | 10 |
The Frigid Kiln needs Frostcores, Ice, and Stone. You load it with Ice to produce Liquid Frost, which the foundry consumes.
For Ice, farm the frozen ponds scattered across the Deep North. Blow them up with Ember Charges and you’ll get about 200 ice per pond. Ice lakes work too, just break them open.
Warning: The Frigid Kiln is massive. Give yourself space, and make sure you can reach the back where you load the ice.
Turning Molds Into Weapons
Here’s the full crafting flow, using the Nord Bow as my example.
- At the Black Forge, craft the base Nord weapon. For the Nord Bow that’s 20 Blood Gold, the mold itself, and 10 Timber Wood. The cast pops up in your inventory.
- Take the cast to the Frost Foundry. Interact with the stone on top, not the bath itself, or it won’t work.
- Wait for the process, which consumes 5 Liquid Frost. When it finishes, you’ve got a Nord Bow and new upgrades are unlocked.
- Head back to the Black Forge to make the stronger versions.
The two upgraded bows are the Aether Thunderblood Bow and the Frostfire Bow.
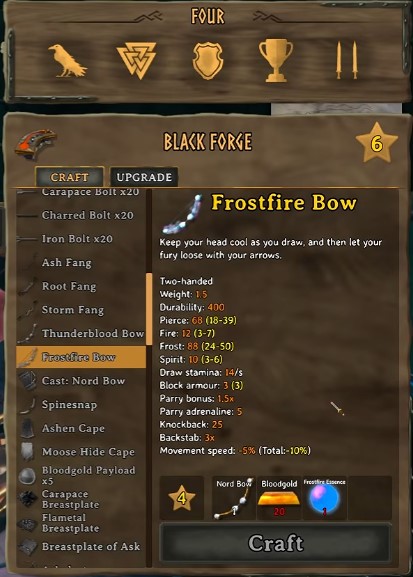
The Frostfire Bow deals extra spirit, frost, and fire damage. The Thunder Blood Bow scales with lower HP, which is interesting for specific builds but not most situations. Both need either Frostfire or Thunder Blood Essence to make.
Getting Essence, Memorial Coal, and Dungeon Molds
This is the part that separates a decent weapon from a great one, and it all starts underground.
- Craft Intricate Keys with molds to enter the harder dungeons. They drop plentifully in the Winding Caverns, and sometimes Vexans drop them too.
- Go to the very bottom floor and find the Braziers. Break them to get Memorial Coal.
- On that same bottom floor, find the weapon racks. Break them for more weapon molds and potentially armor molds.
- In the center of the bottom floor, break a crystal to trigger a Jotun Raid somewhere random in the world. This lets you farm constantly since mobs keep spawning, and killing them gives about a 3% chance to drop molds, both weapon and armor.
- Target specific enemies for specific sets: Caulders drop the Rope set, dual axe guys drop Heavy Armor blueprints, and two-handed enemies drop the Vanguard set.
For Essence, sacrifice 3 Memorial Coal at an altar found randomly across the world. That summons a Viking Spirit.
Take him out and he drops one of the two resources, either Frostfire or Thunder Blood Essence. If you’re hunting a specific one, you might have to run this a couple times. You can summon multiple Viking Spirits at once to farm efficiently.
Finally, bring the essence back to the Black Forge, combine it with the standard Nord weapon, Blood Gold, and the essence to craft the upgraded version. It can be pushed even further with more Blood Gold.
Endgame Trinkets Worth Chasing
Two trinkets round out a Deep North build, and both are worth the detour.
Next Stabber is found at the Black Forge, all the way at the bottom. It regenerates HP faster, makes running and attacking cost less stamina, and gives an instant boost of HP and armor.
Witch Crown is the new spellcaster trinket, giving health, stamina, and either regeneration, plus an instant boost to those. It requires Norna Threads and Hexen Trophies.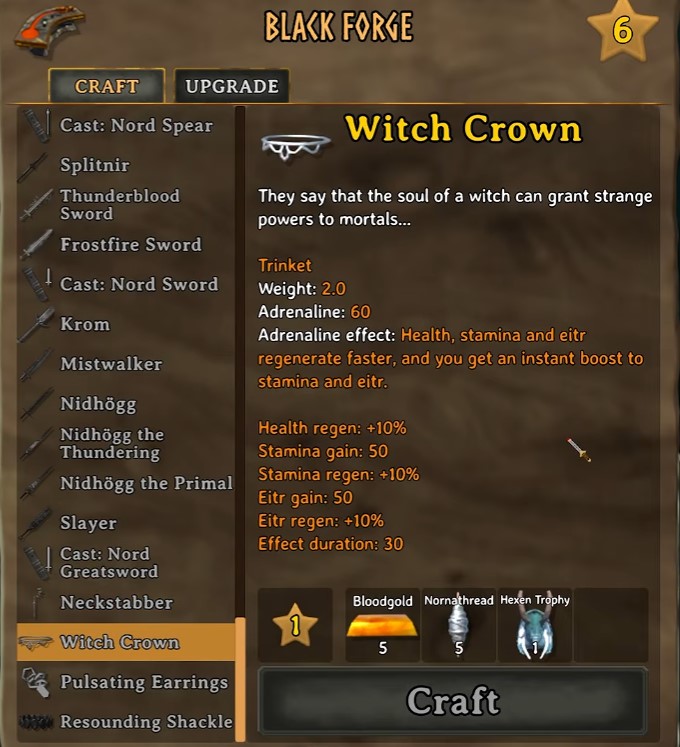
Norna Thread is also needed to make your own Standing Loom, which is an upgrade to the Golder Table. That’s what unlocks all the magical stuff at the crafting station.
Speed Tips for Farming Runs
A few habits that shaved hours off my grind:
- Get the Grappling Hook first. The dungeons are vertical, so it makes going up and down way easier.
- Place your portal close to trolls with a chest in front for fast resource collection.
- Repair Viking village town halls and put your portal in the middle as a base of operations.
- Break every pile of rubble and weapon rack, no exceptions. That’s where the molds are.
- Check wardrobes at tunnel entrances and attics for hidden molds.
- Summon multiple Viking Spirits at once to farm essences faster.
The Deep North grind is real, but once the Frost Foundry is humming and you’ve got a Frostfire Bow in hand, it all clicks. Get the prerequisites sorted, farm trolls for Blood Gold, and hunt molds on every tunnel run. That’s the whole loop.
More Guides:
- Valheim 1.0 Deep North Guide: How to Craft Frost Foundry, Blood Gold, and Nord Endgame Gear
- Valheim 1.0: How to Get the Grappling Hook and Craft It at a Workbench
- Valheim 1.0 Beginner’s Guide: Combat, Base Building, and Progression Tips
- Valheim 1.0: How to Get More Inventory Slots Without Mods


