
Rivage is a first-person sci-fi escape room game set on a stranded spaceship. You play as Miranda, searching for your missing crew while every puzzle pushes the story forward.
What makes this game different is the power limit. Each loop gives you only a few energy blocks, so you must decide which doors to open and which areas to skip. When the power runs out, you loop back through the arcade machine and try again.
This guide walks you through the whole game: every access level, every major puzzle, all 7 Tarot Cards, and both endings. Controls listed use keyboard and mouse. Keys can be rebound in the Options menu at any time.
Overview
Rivage is a first-person puzzle game with a sci-fi setting. You play as Miranda, exploring a stranded spaceship for clues about the missing crew. Solving puzzles reveals more of the story.
The power limit is what sets this game apart. The ship is running out of energy, so each action you take has a cost. Unlocking a door or entering a new area burns through your supply. Once the power is gone, your exploration hits a dead stop. That is when you loop back through the abnormal arcade machine near the Kitchen and start over with a fresh set of power blocks.
This walkthrough covers the entire game: each access level, every major puzzle, all 7 Tarot Cards, and both endings. The steps assume keyboard and mouse controls, and I note the loop points so you don’t waste power on the wrong door.
AUTOMATIC GAME SAVES SYSTEM
Rivage saves your progress automatically, but only at one specific moment: right after you finish a loop. There is no manual save and no quicksave key. The save fires when the loop closes and you reappear at the arcade machine with a fresh set of power blocks.
This timing matters. If you quit the game and load it again, you resume at the start of a new loop, not at the exact spot where you stopped. Any progress made mid-loop that you did not carry through a completed loop can be affected.
Editor Warning: Do not quit the game in the middle of a loop if you are chasing the Optimizer achievement. Reloading pushes you into a new loop, which counts toward your total. I learned this the hard way on an early run and wasted two loops just from closing the game to take a break.
Most achievements in Rivage unlock naturally as you solve puzzles and move through the access levels. You will pick up the majority of them on a normal playthrough without any extra effort. The exceptions are the missable achievements — ones tied to special requirements or optional actions that are not needed to finish the game.
I flag each missable achievement in the relevant walkthrough section as it comes up. There is also a full list on the Achievements page if you prefer to plan ahead.
The Optimizer Achievement (Missable)
The one missable achievement to keep in mind from the very start is Optimizer. It unlocks when you complete the entire game in 25 loops or fewer on the arcade machine.
Your first run will likely go over that number. That is fine. You can start a new game at any time and attempt the speed condition separately, so a slow, thorough first playthrough does not lock you out of anything.
| Achievement | Requirement | Missable | Notes |
|---|---|---|---|
| Optimizer | Complete the full game in 25 loops or fewer | Yes | Counts loops on the arcade machine. Quitting mid-loop and reloading adds a loop, so plan your sessions carefully. |
If you want Optimizer on your first attempt, treat every power block as a budget and avoid reloading unnecessarily. Otherwise, finish the game at your own pace, then start fresh and route the loops tightly once you already know every puzzle.
COLLECTIBLES
A couple of optional pickups are scattered across the Rivage. They do not block progress, but grabbing all of them unlocks an achievement, so it is worth knowing what to watch for before you start looping.
What to Collect
Two collectible types exist in the game:
- 7 Tarot Cards — hidden across different rooms of the ship
- Arcade Token — locked inside a safe; you must work out the correct code to open it
The Tarot Cards are the main collectible. All seven are placed in fixed spots, but each card face shows a unique symbol that changes from playthrough to playthrough.
Editor Warning: The symbols on the Tarot Cards are randomized per save. A screenshot from someone else’s run will not match yours. Hold R to photograph every card the moment you find it. You will need those exact symbols later for the TarotRecipe puzzle near the end of the game.
The Arcade Token is different. It sits behind a safe lock, so you cannot simply pick it up. Find the code, open the safe, and take the token.
Collect all seven Tarot Cards plus the Arcade Token and the achievement is yours.
LAST PAGE OF THE GAME DESCRIPTION FOR THE RIVAGE SCI-FI THEMED ESCAPE ROOM GAME
Rivage supports keyboard and mouse or a controller, but the button layout changes based on which you pick. Rebind anything from the Options menu whenever you like. This walkthrough uses keyboard and mouse throughout, so every input listed here matches that setup.
The core inputs to memorize before you start:
- WASD — walk, or rotate an item while inspecting it
- M1 — interact with objects
- Q — pick up items
- F — turn the flashlight on when an area gets dark (press twice later once you have the HV lens)
Your HUD stays open on the left side of the screen at all times. It holds the things you will check most: passwords you have found, videos you have collected, and your screenshot folder. Holding R snaps a screenshot of whatever you are looking at. Pressing E then zooms into that photo so you can read the fine detail.
Editor Warning: The HUD is your only reliable notebook in this game. There is no journal and no quest log. If you see a code, a symbol, or a card number and it is not in your HUD yet, screenshot it before you walk away. Looping does not always bring you back to the same room with power to spare.
That screenshot workflow matters more than it looks. Passwords, tarot symbols, and scheduling hints all live on walls and screens you may not revisit. Hold R, press E, and the image is saved in the folder inside your HUD. You can open the folder any time the power is on.
If you are still deciding whether the game is worth your time: the puzzle set is engaging on its own, but the real hook is the added pressure of choosing when to loop and how few loops you can get away with. The setting rewards slow exploration — objects are placed with care, and the environments tell the story without much text. The HUD keeps every clue a click away, which removes the frustration of hunting for something you already found. I think most escape room fans will get a lot out of it.
Rivage Part 1 Getting Access 1 & Pod Bay Access Walkthrough Guide
Every loop starts in Miranda’s room. Treat this first pass as a free exploration run, because you have no power blocks to lose yet.
Head to the computer on the desk and click Forgot password. The hint points to the title of Miranda’s published book. That book sits on the desk right beside the computer, so the answer is Stardust. Once the computer unlocks, press the blue arrow at the bottom to read emails. Open the Optima Vault email and note the safe date: 10/09/2435. Hold R to screenshot this if you don’t want to memorize it.
Now turn to the desk across from the computer. On top of the small wooden drawers is a CD player. Open the third drawer down and take the CD, then insert it into the player to collect a recording.
Walk toward the doorway and look to the right. You’ll spot the safe that needs a code, but you still need one more hint before it opens. Step out into the hall and grab the floating memory cube first.
Next, check the crate to the left of the map. Unlatch both buckles and move both handles to open it. Read the pamphlet inside — it explains how the safe input works.
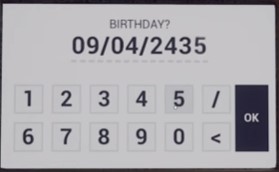
Return to the safe. Type /000/ first. This switches the display to a DD/MM/YYYY format, where you enter the date from the email: 10/09/2435. Slide the glowing green ring on the right side to open the safe. Pick up the I.D. card in front of the cabinets. Look at the back of the card and hold M1 to scan the barcode for level 1 access.
Kitchen Puzzles and the Dock System
With level 1 access active, go out to the hall, take a left, and approach the Kitchen door. Press Open on the front panel. This costs 1 power block.
Inside the Kitchen, check the desk on the left first and pick up the Dock System clue. It confirms three batteries are spread across three separate areas. Walk forward to the table and booth on the left, then press the green button on the golden disc to start the hologram picture. Rotate the image until all lines join on every side to solve the puzzle. Once it’s done, look up at the ceiling and screenshot the mark it reveals — you’ll need this pattern for the dock kiosk.
Editor Warning: The vending machine in the Kitchen also gives you the Take a Break achievement. Input any valid slot code at the keypad to grab a drink before you leave. It’s easy to miss if you’re only focused on the battery hunt.
Move into the lounge area, the one with the fish tank, and collect the battery directly below the equations board.
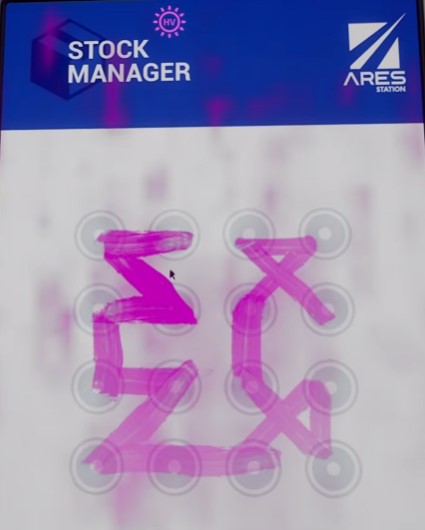
Step onto the kitchen platform with the island, fridge, and counters. Grab the second floating memory cube here. Turn right at the platform edge and you’ll find the dock system kiosk. Draw the pattern you screenshotted from the ceiling above the hologram puzzle:
- Start in the left corner and go straight to the right.
- Move through the middle row, all the way left, to create a diagonal line.
- Go straight down to the bottom left corner.
- Cut diagonally to the very middle.
- Go right to the middle right circle.
- Go diagonally left, then one step right.
With the dock system unlocked, press the Robot Area button (costs 1 power block). Inside, find the Emergency Pharmacy dispenser on the wall to the right. Insert the first battery into the slot under the handle. Look to the left of the laptop for the second battery, and slot that in too. You’re now one battery short.
Go back to the dock system and press Cultivation (costs 1 power block). In the Cultivation area, climb the steps and collect the battery beside the locked box.
Return to the dock system and press Robot Area once more — this spends your last power block. Insert the final battery into the Emergency Pharmacy dispenser and pull the handle. On the screen, select Pod Bay Access to print the card.
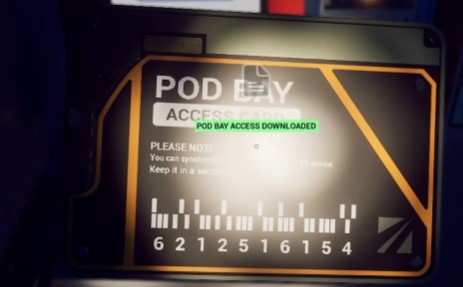
As with your level 1 card, flip the new card over and hold M1 to scan the barcode. Scanning saves it permanently, so it stays with you through every loop.
Editor Warning: Printing the Pod Bay Access card also triggers the Escape Artist achievement. Make sure you scan the card before you go anywhere else — an unscanned card won’t carry over after looping.
Your First Loop
You can’t progress further without power, so it’s time to loop. Head up to the kitchen platform and go through the door on the left into the laundry and storage room. Interact with the arcade machine to loop back. Using the arcade machine this first time also unlocks the Trickster achievement.
Once you loop, the Pod Bay is open to you. Level 2 access comes next, so move into Part 2 when you’re ready.
Rivage Part 2: Getting Access 2 Walkthrough Guide
With the first loop done and the Pod Bay Access card in hand, the ship opens up. Leave the bedroom and take the Kitchen door in the hallway. Walk straight and unlock the Pod Bay Access door.
Inside the Pod Bay, a second vending machine sits on the left. The Multi-Pass is inside it, but the machine only opens from the back, and that needs another pattern draw later. Ignore it for now and head straight, then right toward the pods.
Walking down the steps toward the pods, grab the floating memory. Turn right and open the only unlocked locker, which belongs to Miranda. Take the key sitting on top of the red box. Read the pamphlet about fixing broken access cards while you are there.
Go back to the Kitchen. Use the Dock System to switch to the Cultivation area. This costs 1 power block. Climb the steps and look at the locked box. The key you just picked up opens it, but the notches must be aligned first.
Press Q to view the key, then rotate the notches to match the opening:
- Rotate the key so the round head faces you.
- Rotate the first notch straight up.
- Rotate the middle and last notches straight down.
Open the box and take Amaan’s broken keycard.
Carry the broken keycard back to the Pod Bay and walk straight to the Card Builder terminal. Before inserting anything, look at the card and screenshot both the front and back. This saves you from picking it up later just to read the numbers and barcode. Insert the broken card into the front slot.
On the screen, enter the Identifier number from the front of the card: 2-5-6-0-1-3-6.
Next, rebuild the barcode by moving the dark and light lines to match the original. This is simple except that three numbers are missing. Go to the bedroom and open the safe to check Miranda’s level 1 access card. The back of that card gives you the missing barcode numbers: 3, 8, 6.
Finish the barcode on the terminal, then press Print. Printing costs 1 power.
Editor Warning: Screenshot both sides of every access card before you move on. Once a card goes into a slot or gets picked up, checking the barcode again wastes a trip.
Take the Level 2 access card from the machine and scan the back barcode to save it permanently. Power drops again here, so loop through the arcade machine.
Multi-Pass achievement — Print an access card. This triggers the first time you use the Card Builder to print Amaan’s level 2 access card in Part 2.
After looping, return through the Kitchen door and turn right. Past the lounge, the Level 2 access card now unlocks the Lobby.
Go past the anomaly zone and look at the computer. Press Forgot Password and the hint tells you the password is the first and last name of the Horizon Probe creator.
Turn left and look at the probe display. Press Play Audio. The recording gives you the first name: Igor.
Now look at the second display, the floating rock. The front screen is dead. Check the back of the display and pull the yellow handles to open it.
To re-power the display, place all the power charges into the empty slots to make 12V. Each slot decides the voltage it outputs. Here is the correct placement:
- Blue = Top Left
- Red = Top Left, below Blue
- Pink = Top Right
- Green = Bottom Left
- Yellow = Bottom Right
With power restored, go to the front and press Play Audio. This recording plays in fast-forward. To understand it, stand inside the anomaly zone. Listening from there gives you the last name: Petrov.
Return to the computer and type the password: igorpetrov. On the desktop, click the wifi symbol at the bottom, then press Update K9. Hold M1 to scan the QR.
Slow Motion achievement — Unlock the Lobby Computer. Type the correct password on the Lobby computer after playing both model display audios and re-powering the second display.
With the update done, level 2 access doors open. Start with the Connector hallway, right off the Lobby.
Walking through, pick up another memory cube.
Continue past the memory, straight ahead, until you reach a hole in the ship. On the table to the left is Amaan’s journal. Read it, then take the soda can on the same table and screenshot the front and back, including the barcode.
On the table to the right, pick up the audio recording and listen to it.
About one power block remains at this point, so spend it carefully. Go back to the Kitchen and unlock the Pod Bay door. Head to the lockers and open Amaan’s locker, right beside Miranda’s.
Inside the locker, check the tablet and screenshot Amaan’s birthday date. Grab the CD here too, for the CD player in Miranda’s room.
Loop through the arcade machine. Once you are back, go to Amaan’s door in the hallway and unlock it to enter his bedroom.
Read every loose manual page in the room first. Each one holds a line of code you need to know:
- One on the low green table across from the computer.
- One on the floor to the right of the green table.
- One on the desk with the computer.
Rivage Part 2: Getting Access 2 Walkthrough Guide (CONTINUED)
With the manual pages in hand, turn to Amaan’s computer and click Forgot Password. The hint points to his favorite soda. It is the same can sitting near his workstation in the Connector hallway: Cosmik.
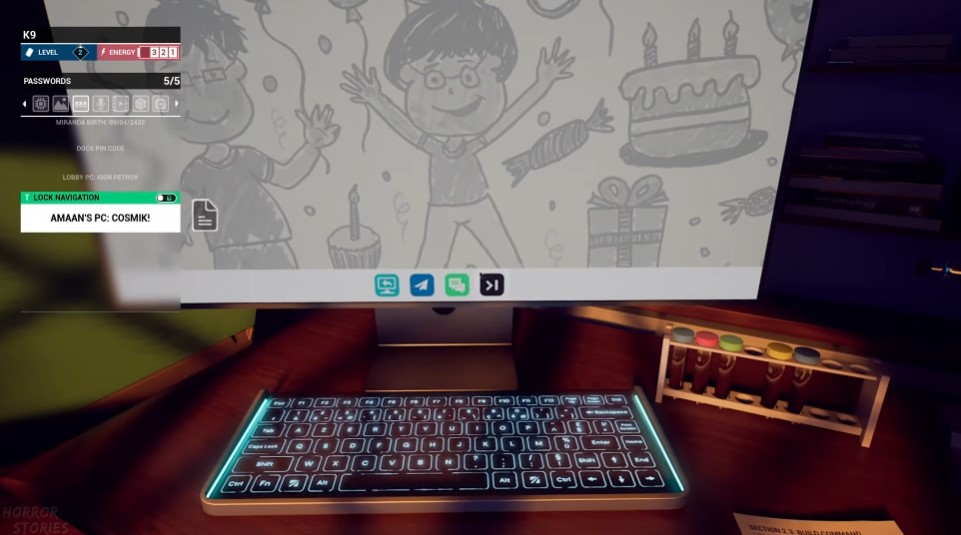
Enter the password to unlock the computer, then read through every email and message. When you are done, press the black terminal button. The terminal accepts the code lines you collected from the loose pages. Start with:
BUILD hyperviolet.qb
Wait for the build to finish. Then type:
COPY flashlight.exe MIRANDA.V
Editor Warning: Type each command exactly as written. A single wrong character and the terminal rejects the line with no clear error message. Retype the whole command instead of editing it.
Once the copy finishes, your flashlight gains the HV lens. Press F twice to activate it. This is a blacklight. It reveals hidden writing, blood traces, and fingerprints that are invisible under normal light.
Scanning Amaan’s Room with the HV Lens
Switch on the HV lens and sweep the room. Screenshot anything that looks useful:
- Whiteboard — the Chip bag. Zoom in tight on the barcode numbers.
- Bathroom sink — the pill bottle. Get a clear shot of the flower name printed on the back.
The safe in his room can wait. Leave the bedroom for now. If you want to get ahead, return to the Connector hallway and read the marked pages in Amaan’s journal with the HV flashlight before moving on.
Now head into the Pod Bay room. Find the vending machine on the left holding the Multi-Pass. Aim the HV flashlight at the keypad to expose the unlock pattern, then trace it in to open the machine.
Restocking the Vending Machine
With the machine open, press Manage Stock at the bottom. You cannot add credits until the low-stock items are refilled. Enter these CP codes:
| Item | Where to Find the Code | CP Code |
|---|---|---|
| Cosmik! Soda | Connector hallway | CP379087 |
| Mr. Lime Bar | Kitchen vending machine — type 020 to dispense it | CP208674 |
| Chips | Whiteboard in Amaan’s room | CP687575 |
Next, press the + button beside Credits 0/3. Add as many credits as the machine allows. Now enter the dispense code for the Multi-Pass: 024.
Take the card and scan its rear barcode to register it permanently, just like the earlier access cards.
Editor Warning: Scan every card the moment you receive it. The Multi-Pass opens any door marked Multi-Pass, and skipping the scan means you must dispense another. The vending machine stock is limited.
Any door labeled Multi-Pass now opens for you. When you are ready, continue to Part 3.
Rivage Part 3: Getting the Quantum Cell Walkthrough Guide
The Multi-Pass unlocks the Garage in the Pod Bay area, just past the vending machine where you picked it up. Grab the floating memory cube at the front of the room, then turn left into the next space. Straight ahead sits the Orbital Scout. Read the note to the left of the frame to learn what parts are missing.
Walk up the steps in front of the Orbital Scout and pull the yellow handle. Then push the red button on the left side of the frame. The frame opens, and you can now install the four pieces.
| Part | Location |
|---|---|
| Radioactive Cartography Board | On the cart holding the Orbital Scout procedure instructions |
| Data Storage Collector | Climb the ladder near the Garage entrance to the upper level. Beside the computer, next to an audio recorder. |
| Adaptive AI Navigation Suite | In the room with the 3D printer. On the desk with the multicolored-buttoned safe and computer — left corner. |
| Wavelength Sensor | Past the Orbital Scout frame, on the desk with the journal |
Install all four parts in the frame. Climb the ladder to the second level. At the end of the balcony, to the left of the computer, the Stellarmap is waiting.
Routing the Stellarmap
The Stellarmap puzzle asks you to build a safe route that lets the probe collect all 6 data pieces and return to the ship. Zone colors matter: yellow is data, green is an enhanced zone that restores health, red is a corrupted zone that drains health, and white is neutral.
Check this guide to follow this exact chain.
When the probe is back at A.R.E.S with all six data collected, press Send Scout.
Editor Warning: One wrong jump into a red zone can drain the probe’s health before it reaches every data point. If the run fails, re-check your last two or three hops against the list above — the error is almost always there, not at the start.
Voyager Achievement and the Probe Audio Sequence
Routing the probe safely to all six data points on the Garage Stellarmap unlocks the Voyager achievement.
Finishing the Stellarmap also gives you a playable audio file: Unknown Particle Waves. Press Play, and the file saves to your HUD. Climb back down the ladder and take the audio controller pad from the desk with the computer.
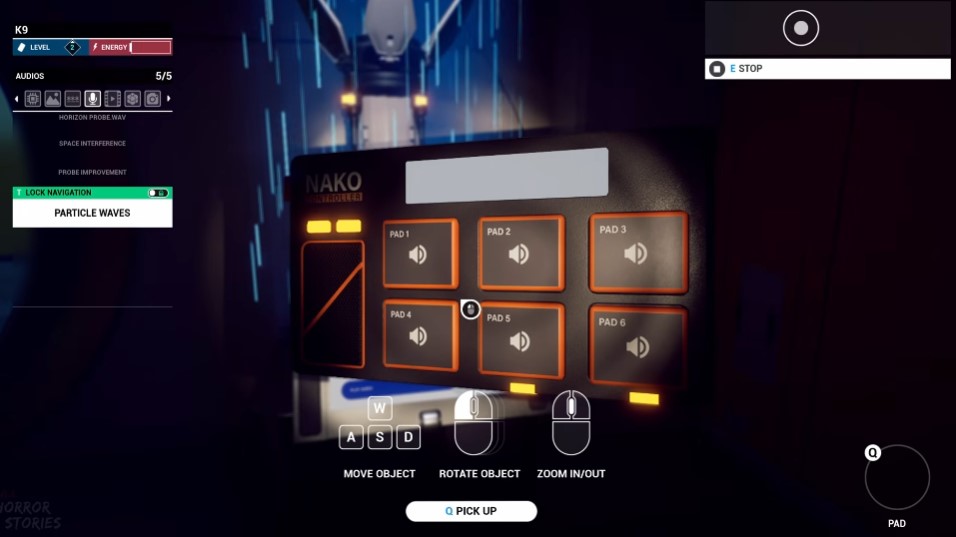
Leave the Garage and head to the Lobby, where the Probe model stands. Face the probe and play Unknown Particle Waves again. Then recreate the sound order on the audio controller:
- Pad 3
- Pad 2
- Pad 1
- Pad 4
- Pad 5
- Pad 6
Play them in that order. The probe projects a screen on the wall to the right. Screenshot the display — hold R, then press E to review the photo if you need it.
Unlocking the Garage Computer and Finding the Quantum Cell
Return to the Garage. If your energy is gone, loop first. Climb to the second level and look at the computer near the Stellarmap. The screen shows a symbol pattern matching the one the probe projected. Fill in all the circles to match the screenshot, and the computer unlocks.
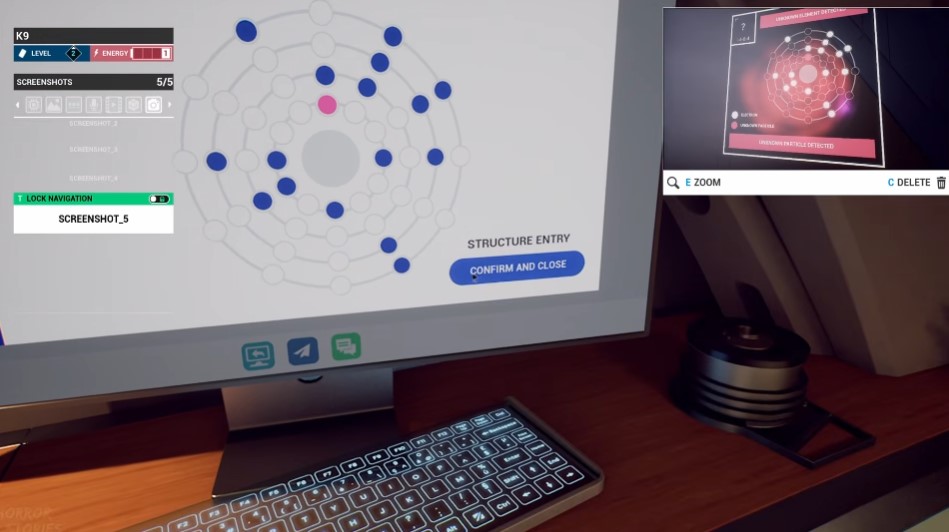
On the home screen you can play three audios and read the emails and messages. Find the email from Jahi to Johnny. It contains a password: 780812. Screenshot it so you do not have to reopen the computer.
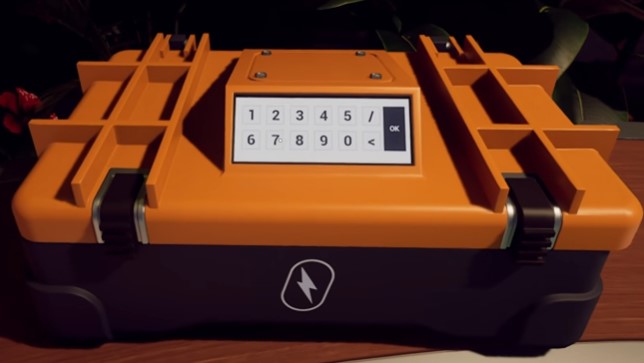
Walk back out to the Kitchen and look at the orange and black box by the entrance from the hall. Enter the email password: 7-8-0-8-1-2.
The box opens, and inside is the Quantum Cell. This item grants one extra charge of energy when placed in the slot next to the Kitchen door. It also fits similar slots elsewhere on the ship to power different devices.
Editor Warning: The Quantum Cell can only be used once per loop. Spend it on the door or device that saves you the most backtracking — not on the first slot you pass. A wasted charge usually costs a full extra loop.
With the Quantum Cell in hand, the next area is open to you. Continue in Part 4.
Rivage Part 4 Getting Access 3 & Railway Access Walkthrough Guide
The Quantum Cell changes how much you can do in a single loop. Instead of saving it, put it to work right away.
Slot the Quantum Cell into the empty slot next to the Kitchen doorway and pull the handle. This adds one permanent energy block to every loop from now on.
Editor Warning: The Quantum Cell can only be used once per loop. Spend it on the door or device that saves you the most backtracking — not on the first slot you pass. A wasted charge usually costs a full extra loop.
Using the cell for the first time unlocks the Person of Power achievement.
Collecting the Observatory Clues
Head through the Pod Bay and into the Connector hallway. Take a right where the memory was and follow the path to the Observatory door.
Inside, go left and climb up to the platform with the vending machine. Grab the floating memory cube. On that same platform, read the laptop messages. Walk down to the center of the room and check Amaan’s tablet. Screenshot every flower slide — you will need the plant names soon.
Beside the tablet is a medical file. Screenshot the post-it note reading “Planta Center.”
Then move right to the second computer. Click Download to save the picture of the front of Jahi’s I.D. card. Read the messages and emails while you are here. The exchange between Jahi and Johnny tells you that Johnny’s fingerprint opens the shutter.
Cultivation Plant Sequencer Puzzle
Leave the Observatory and return to the Dock System in the Kitchen. Switch to the Cultivation area and sit at the computer. Loop first if your power is gone.
The Observatory files give you the password: 5-X-L-H-E. Enter it.
First you must pick three plants for the Sequencer. These are the ones listed on Amaan’s tablet. To confirm them, check the plant diagram in the Kitchen doorway, the medicine bottle in Amaan’s room, and the plant in the Lobby. The three plants are:
- Fire Lily
- Escargot
- Mavors
Now arrange their element combinations into one sequence. Click the circles and hexagons to cycle between elements. The correct layout is: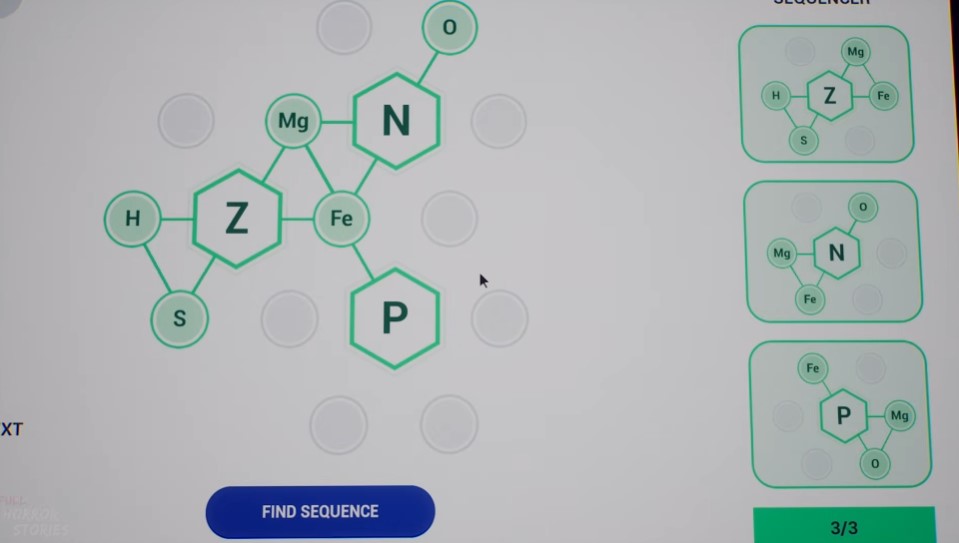
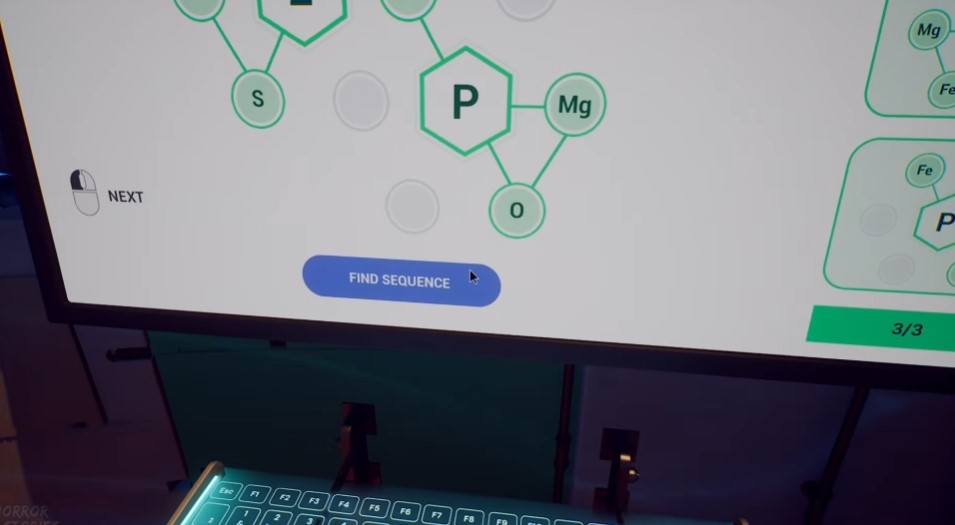
- Z in the left hexagon
- P in the bottom hexagon
- N in the top hexagon
Finish the sequence to reveal information about the Aion plant. Screenshot the class name — this unlocks the Gardener achievement.
Entering the Lab
Loop again through the arcade machine. Grab the Quantum Cell immediately and place it back in the Kitchen doorway slot for the extra energy block. Then go through the Lobby door and into the Connector hallway.
Follow the hallway around to the left until you reach a computer. Enter Aion’s class name: Chronoservus. Press Open. This costs two energy blocks, which means you enter the lab with no power left — that is normal.
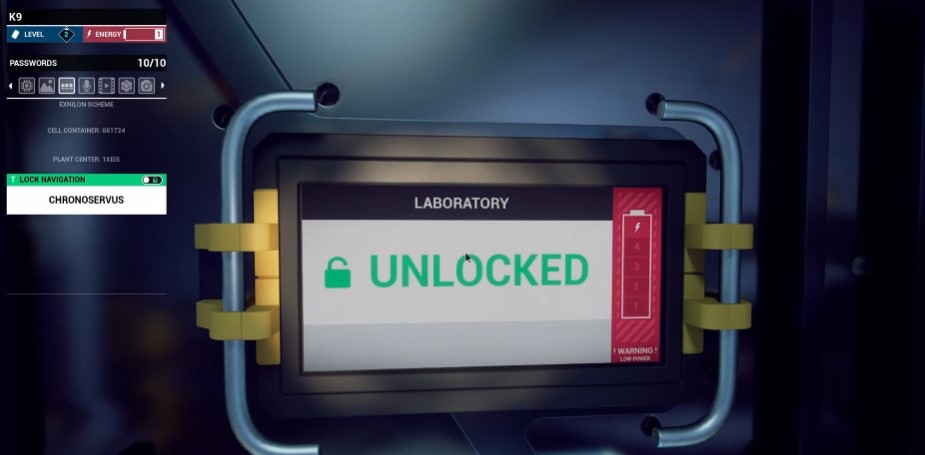
Inside the lab, walk left to the large doorway and pick up the floating memory cube.
Lab Fingerprint Hunt
The memory shows a fight between Johnny and Jahi. Listen closely to identify the items used in the struggle. Then press F to switch on your HV flashlight. Blood trails lead to the items you need. You are rebuilding Johnny’s fingerprint from four scans.
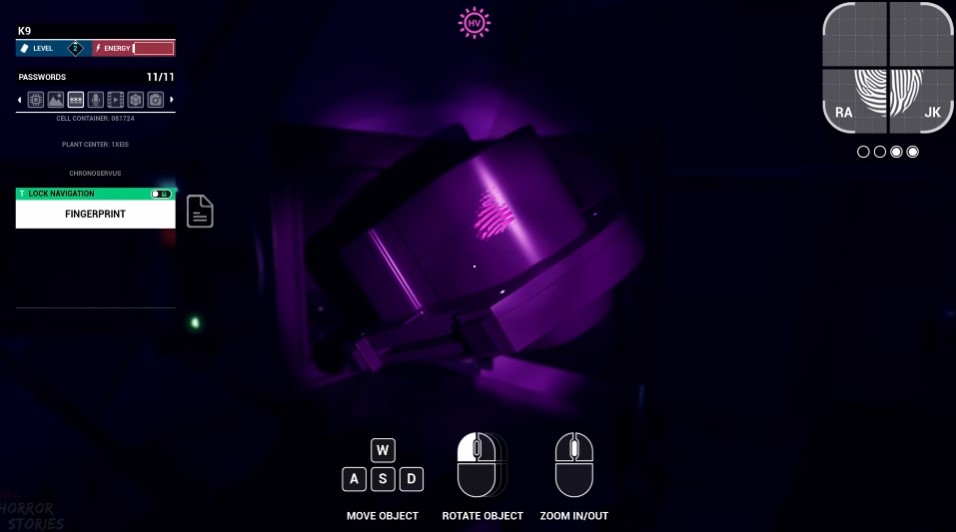
The first two are simple:
- Fingerprint 1 — from the memory spot, walk right to the second fridge. A small vial sits there.
- Fingerprint 2 — walk right of the entrance to the computer. The pipe lies on the floor in front of it.
Fingerprints three and four are locked behind puzzles.
Switch Panel Puzzle — Fingerprint 3
Find the panel in the corner to the right of where the memory was. Open it and you will see empty slots. Four switches are scattered around the lab:
| Switch | Location |
|---|---|
| Switch 1 | On the counter left of the hangar door |
| Switch 2 | On the counter right of the hangar door, past the panel box |
| Switch 3 | Near the computer, in the cabinet below the locked capsule |
| Switch 4 | On the same counter as Switch 1, inside the cabinet, further down |
Carry them one at a time and place each one in the panel. When all four are in, arrange them to total exactly 29:
- Top row, left slot
- Top row, middle slot
- Top row, right slot
- Middle row, left slot
Once it opens, check the dispensed lenses and scan the fingerprint off them.
Capsule Puzzle — Fingerprint 4
The last fingerprint is on the object locked inside the capsule near the computer. The computer emails hold Rafael’s drawings as a hint. Two drawings are hidden in the lab:
- Drawing 1 — on the counter left of the hangar door
- Drawing 2 — on the switch panel counter, further down
Both drawings have a small block in the left corner with a pattern on it. Go to the capsule and copy those patterns onto the top and bottom grids. This frees the final item for scanning.
Rivage Part 4 Getting Access 3 & Railway Access Walkthrough Guide (CONTINUED)
Take the item out of the capsule and scan it for the last fingerprint piece.
With all four fingerprint parts collected, loop again at the arcade machine. This time, bring the Quantum Cell with you when you head back to the Observatory.
Inside the Observatory, find the generator on the front left side, before the stairs. Place the Quantum Cell in the slot, then scan Johnny’s fingerprint.
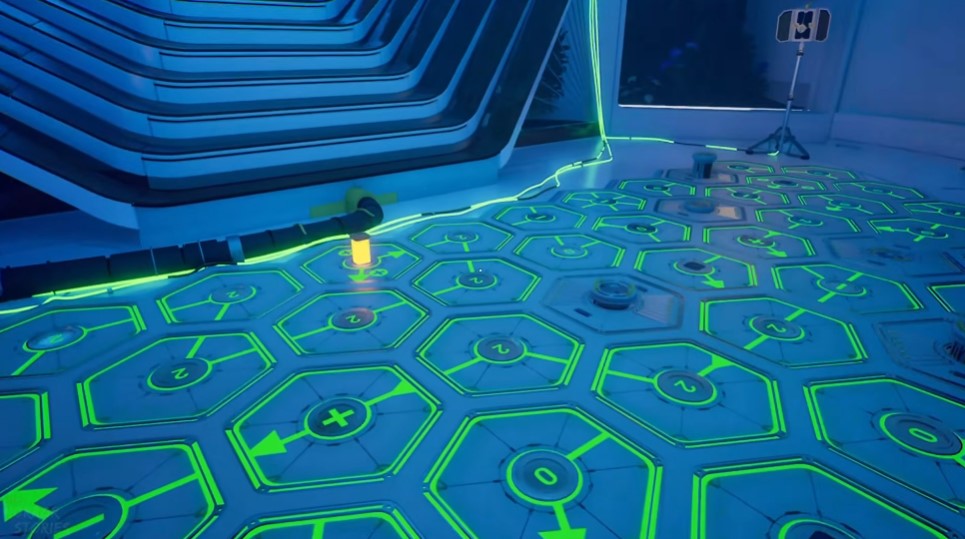
Walk down the steps. Two special lights now power a puzzle. Your goal is to build a path of light to the tall red-lit pillar on the right side. Rotate the thick lit pillars toward the skinny pillars, then rotate the floor tiles.
Editor Warning: This puzzle has a real learning curve. The pieces move in ways that take time to read, and there may be more than one valid solution. Expect a few failed attempts before it clicks.
Start by routing the lights through the pillars to the far left skinny pillar (it starts already lit) and the skinny pillar directly in front of the stairs.
Once those two are lit, rotate them so their arrows point inward:
- Pillar in front of the stairs — point away from the stairs, angled more to the left
- Pillar on the left side — point down, toward the stairs
With those set, work outward from both skinny pillars and rotate the floor tiles to build a connected path. The lit path shows glowing yellow. If it turns red, that route is wrong and you need to reset that section.
When the tall pillar lights up green, the path is correct. Go to the top of the stairs and pull the handle to open the shutter.
Two achievements trigger here:
- Newton — awarded for completing the light puzzle in the Observatory (place the Quantum Cell in the generator, then scan Johnny’s fingerprint from the Lab)
- Dazzled — awarded for observing the sun after opening the Observatory shutters
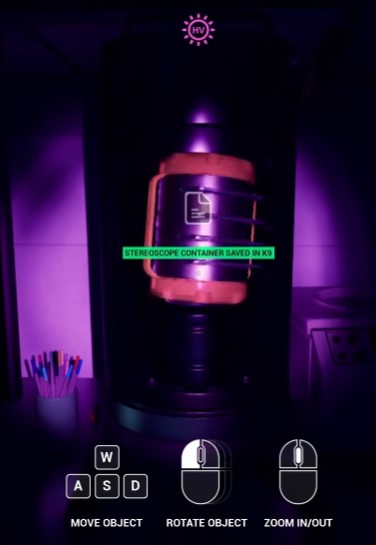
Turn away from the handle. Directly behind you is a computer powered by the sun. On the home screen, open the Steroscope.pic document and select Download. This gives you the back of Jahi’s access card.
You now hold images of both the front and back of Jahi’s ID. Leave the Observatory. Head back to the Conservatory and collect Amaan’s broken access card from the box again — you will need the key from Miranda’s locker. Then go to the Card Builder in the Pod Bay.
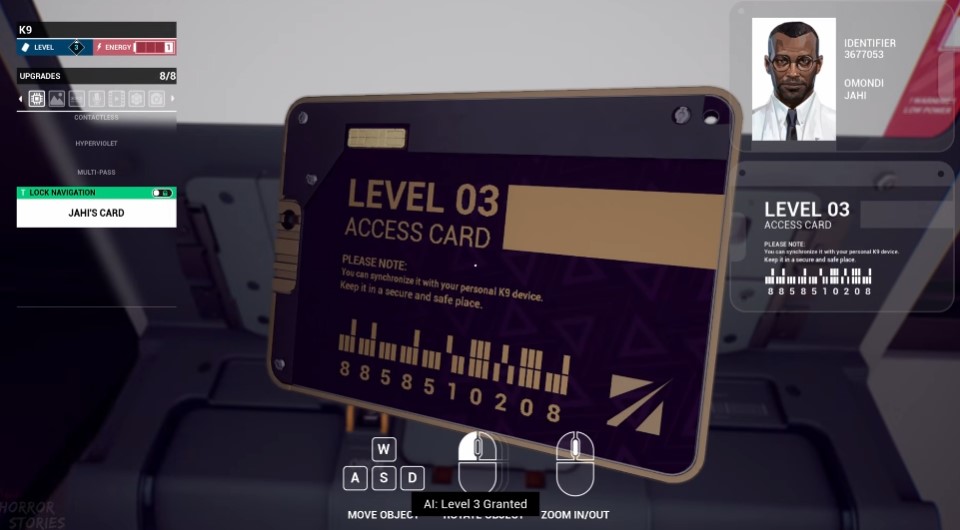
Place the broken access card in the slot first. Then enter the Identifier code from the front of Jahi’s ID: 3-1-6-8-4-0-1.
After the identifier, look at the image of the back of Jahi’s ID and recreate the barcode pattern exactly as shown.
Take the card out and scan the barcode on the back to save it. You now have level 3 access. Go straight to the lockers in the Pod Bay and open Jahi’s locker.
Inside, pick up the CD you can play in Miranda’s Room. On the second shelf, take the Railway System card and scan the back.
Tarot Card 7 Location
This one needs a few steps. Open Amaan’s safe in his room using the birthday from his tablet email, found in his Pod Bay locker, and guess the year: 20/07/2406. Then take the key from Miranda’s locker and duplicate it on the plate in the train. With both keys, unlock the cabinet inside Amaan’s locker — adjust the notches so the keys fit. Tarot Card 7 is inside the cabinet.
With Access 3 and Railway Access in hand, more areas open up. The walkthrough continues in Part 5.
Rivage Part 5: Getting the Cubik’s Cube & Access 4 Walkthrough Guide
With Access 3 and Railway Access in hand, fresh areas open up. Start this loop inside Miranda’s Room before you leave. On the wall to the right sits a projector screen with no signal. Open the panel with the Wi-Fi symbol, located to the left of the screen.
The panel needs the circle and square sockets rearranged into the correct colors. The target combinations sit in a row above the grid. Solutions may vary, so use the list below as your reference:
- White Square
- Green, Blue, Yellow Square — Cyan Circle
- Green, Blue, Cyan Square — Blue, Green Circle
- Blue, Red, Pink Square — Blue, Red Circle
- Red, Green Square — Red, Green Circle
- Red, Blue, Green Square
- Red, Cyan, Cyan Square — Blue, White Circle
- Pink, Yellow Square — Red, Yellow Circle
- Pink, Red Square — Red, Blue Circle
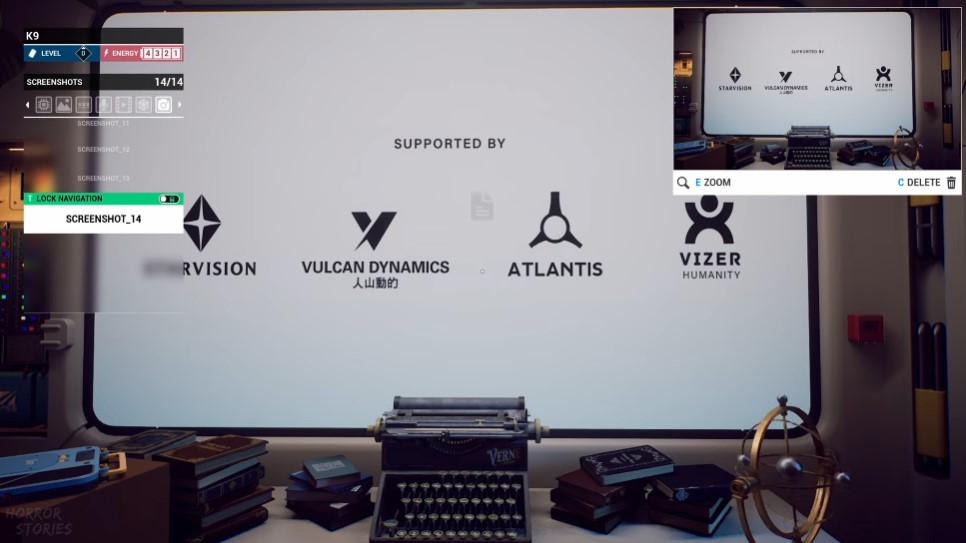
Once the connection is restored, a video plays on the screen. Take a screenshot of the sponsors shown at the end of the video. You need this image later.
Powering the Train and the Data Disk
Walk to the Kitchen and pick up the Quantum Cell. Do not use it there — carry it with you. Head through the Pod Bay door and enter the Garage.
Inside the Garage, climb the ladder and slot the Quantum Cell into the train’s power slot. Pull the handle to activate it, then board the train using the Railway Access card taken earlier from Jahi’s locker.
Turn left inside the train. You’ll find a duplicator plate next to a note. Play the audio recording to understand how it works. Any item placed on this plate is saved across loops and duplicated in the process.
Editor Warning: The duplicator plate only keeps one item at a time. Placing a new item overwrites the previous one, so plan ahead before you commit.
Tarot Card 7 and the Laboratory Run
Open Amaan’s safe in his room using the birthday from his tablet email in the Pod Bay locker: 20/07/2406. Take the key from Miranda’s locker, then duplicate it on the plate in the train. With both keys in hand, unlock the cabinet inside Amaan’s locker — adjust the notches so both keys fit. Tarot Card 7 is inside.
Now turn right on the train and open the control panel to pick a destination. Press the Laboratory button. The train drops you at the top balcony of the Lab. Grab the floating memory cube as soon as you arrive.
Just past the memory cube, collect the Data Disk. You can’t use it here, so place it on the duplicator plate in the train to save energy next loop.
Move right and lower the shortcut ladder down to the lower lab floor. This is the first time you’ll see the Lab with working power. Directly under the upper level, beside the red microwave, a computer is now active.
Select Forgot Password on the computer to reveal a hint: Ares’ Sponsor. The answer is in the sponsor video from Miranda’s room — the sponsor is Vulcan Dynamics. Log in to read the emails and control the microwave, though you still need the correct item to place inside it. Leave that for now.
Rafael’s Laptop and the Hexadecimal Repair
Board the train and return to the Garage. You may still have one energy block left, but re-loop here instead of pushing forward. After the loop, grab the Quantum Cell from the Kitchen, power the train in the Garage, and collect the Data Disk from the duplicator plate. Then press the button to travel to the Lobby.
On the balcony above the Lobby, take a left to find Rafael’s desk. Slot the Data Disk into the laptop to browse the anomaly documents. Screenshot the Microwave page for later.
Next, switch to the .metadata terminal. Repair the corrupted code so map.pic becomes viewable. Compare the examples above the red line against the broken lines below to find the missing characters:
- .datadisk/map.pic — missing: 61, 6D, 61, 70
- .filetype:picture — missing: 65, 63
- .id:rafaelalmeida — missing: 3A, 61, 6C, 65, 61
- .site:aresstation — missing: 74, 74, 69, 6F, 6E
To recover the password, check the drawings hung on the wall behind you. It’s written on the picture of the desk: gj4c5mt — missing code: 73, 67, 6A, 34, 63, 35, 6D, 74.
Completing this repair unlocks the Developer Achievement — Complete the hexadecimal puzzle. It’s earned by fixing the damaged code on Rafael’s computer in the upper Lobby, using the Data Disk from the upper Lab. This one ties back to Part 5 content.
After the repair, open map.pic and screenshot it. You need the layout to unlock the safe ahead. Before you leave, take the Security card off the desk and place it on the duplicator plate in the train. Then ride the train back to the Garage.
The Garage Safe and the Cubik’s Cube
Using map.pic from Rafael’s computer, unlock the safe with the colorful buttons in the Garage:
| Row | Button Sequence |
|---|---|
| Top | Green, Blue, Yellow |
| Middle | Green, Yellow, White |
| Bottom | Yellow, Red, White |
Inside the safe, you find the Cubik’s Cube artifact. You still don’t have the information needed to use it, so hold onto it for now.
On the train, placing the Security card on the duplicator plate unlocks the Doppelganger Achievement — Duplicate an item. This is earned by saving any item on the duplicator plate in the train so it survives the loop.
Separately, Tarot Card 7 is tied to a second task: solving all sides of the Cubik’s Cube like a normal Rubik’s Cube. Doing so teleports you to a different Garage balcony, where the card waits on the bench in front of you. Expect to come back to this once you’ve found the Cube’s solving instructions.
Rivage Part 5: Getting the Cubik’s Cube & Access 4 Walkthrough Guide (CONTINUED)
Loop again at the arcade machine to reset your power blocks. Rebuild your route: grab the Quantum Cell, return to the Garage, and take the train to the Lab.
At the Lab, walk to the terminal on the center balcony. The Security card unlocks it. Press the download button first to store permanent access — after this you never need the card again. Then press Release.
Unit Gear Puzzle
Climb down the ladder and open the panel on the front of the Unit. Inside sits a set of gears. You need to place each gear so every sequence lines up. One gear is missing, so this pass gives you nothing to solve — grab the piece with four notches instead. That piece starts in the bottom-left position when the panel opens.
Loop once more to collect the duplicated gear, then head back to the Lab and slot it into the panel. Now rearrange the gears so the notches match the shapes along the bottom and the starting gear at the top. Each sequence shifts the gears, so watch the notch positions carefully before you lock anything in.
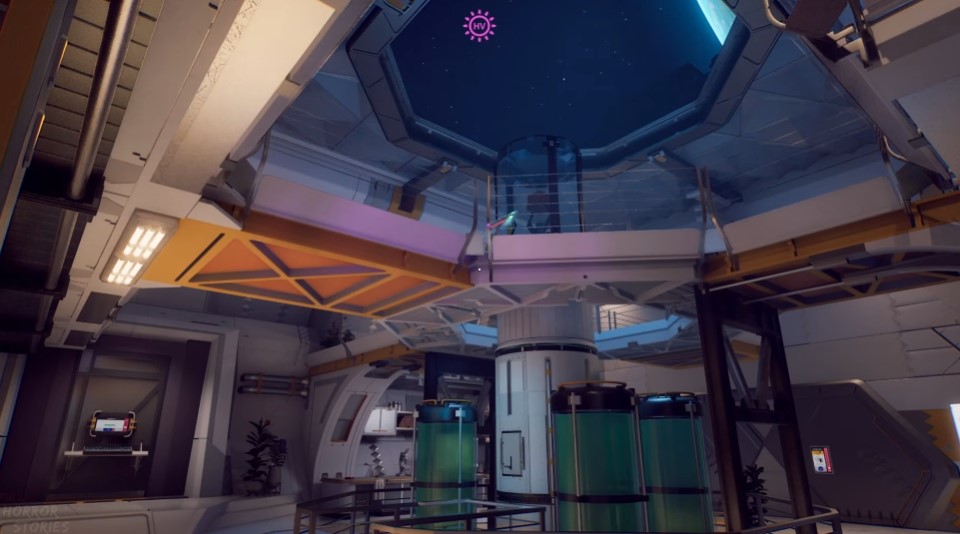
- Sequence 1 = Square + Triangle + Circle
- Sequence 2 = Circle + Triangle
- Sequence 3 = Square + Triangle
- Sequence 4 = Square
- Sequence 5 = Square + Triangle + Circle
- Sequence 6 = Circle + Triangle
Editor Warning: Finishing this gear puzzle unlocks the Lockpick Master achievement. It only triggers here, when you repair the Unit in the Lab. If you skip the repair and move on, you lose the achievement for that run.
Unit-01 and the Cubik’s Cube Hints
With the Unit repaired, climb back up to the terminal and press Open Unit-01. Inside the orange box is a document marked 2/2. This pairs with the map.pic file on Rafael’s computer. Screenshot the document — you need it to work out how the Cubik’s Cube opens.
Now that you have both clues, the cube can lead you to Rafael’s hideout and the next access level. Start a fresh loop so you have full energy, then go straight to the Garage and take the cube from the safe you opened earlier.
Solving the Cubik’s Cube
Your clues may not match mine. The location you need and the diagram on page 2/2 can differ for each player, but the solving process stays the same.
Check note 1/1 first — the one you found on Rafael’s computer on the Lobby’s second level using the Data Disk. The yellow sign shows a number. For me it was a 2, which points to the anomaly spot in the Lobby. Stand on that spot with the cube before you begin. The yellow circle in the Garage is the other possible spot.
At the circle, open page 2/2 of the hint. This is the diagram you collected from the Unit puzzle. The circles, or pies, represent cube corners. A filled slice tells you which black line to press to rotate the cube.
Follow your own diagram, not mine. My cube solved with these steps:
- First pie — pink on top, green left, white right. Find that corner and press the left line on the pink top.
- Second pie — blue on top, pink left, white bottom. Find that corner and press the left line on the white piece.
- Third pie — two yellow halves, meaning the middle yellow piece with the two arrows. Find the yellow center and press the matching arrow.
- Fourth pie — yellow on top, red left, green right. Find that corner and press the right line on the green side.
- Fifth pie — two white halves, meaning the white center piece. Press the matching arrow.
- Sixth pie — blue on top, white left, red right. Find that corner and press the top-left line on the white piece.
- Seventh pie — pink on top, green left, white right. Find that corner and press the top-left line on the green piece.
After every correct move the cube glows gold. If it does not glow, the step was wrong — adjust and try again. Once all seven are done, you are teleported to the Shed.
Shed, Level 4 Access, and Rafael’s Locker
Step forward in the Shed and take Rafael’s ID from the workbench. Scan the barcode for level 4 access. There is an audio recording to your right — worth a listen before you leave.
Nothing else is in the Shed. Open the Cubik’s Cube, rotate any piece, and you return to the Lobby.
Head to the Pod Bay and open Rafael’s locker with access 4. Hold M1 on the QR code to download the schedule to your K9 HUD. Grab the CD from the locker too and play it in Miranda’s room — it holds an important hint.
Loop once more before continuing. With level 4 access now in hand, a few different paths open up. Move on to the next part of the guide.
Rivage Part 6: Getting Access 5 Walkthrough Guide
With level 4 access, two major paths open up. You can enter the Greenhouse through the Lab, or you can enter Rafael’s room. Both teach you how to build the missing piece for the train. The order does not matter. I went to Rafael’s room first to sort out the incinerator and the garbage disposal.
Loop once. Leave Miranda’s room and go into Rafael’s room, one door down from yours.
Tarot Card 2: Microwave Expansion
Grab the 1/100 scale tarot card from Rafael’s bedside. You now need to enlarge it using the microwave in the Laboratory. To find the correct settings, take the data drive from the upper area of the Lab to the PC in the upper area of the Lobby. Use the special item slot on the train to carry it.
Plan for two loops: one to grab the data drive, and one to deliver it to the Lobby. Plug the drive into the PC and read the file about the Microwave phenomenon. It gives you the exact settings:
- Time: 25 minutes
- Temperature: 450
- Defrost: On
- Express: On
Open the microwave when the timer finishes to grab Tarot Card 2.
Tarot Card 4: The Xylophone Sequence
In Rafael’s room, look for a drawing of colored rectangles on the wall. These represent keys on the xylophone in the Lobby. Go there and press the keys in the order shown in the drawing. The Horizon Probe will extend an arm holding Tarot Card 4.
Rafael’s Computer and the BlackVector Program
At the computer in his room, press the “Forgot Password” button. The hint reads Maezinha. If you listened to the CD in Rafael’s locker, you know this is the name he calls Miranda. Enter the password: Miranda.
On the desktop, open Seek.TXT. Read the messages first. You learn Rafael has a program called BlackVector that can disable the incinerator. Switch to it at the bottom right of the screen.
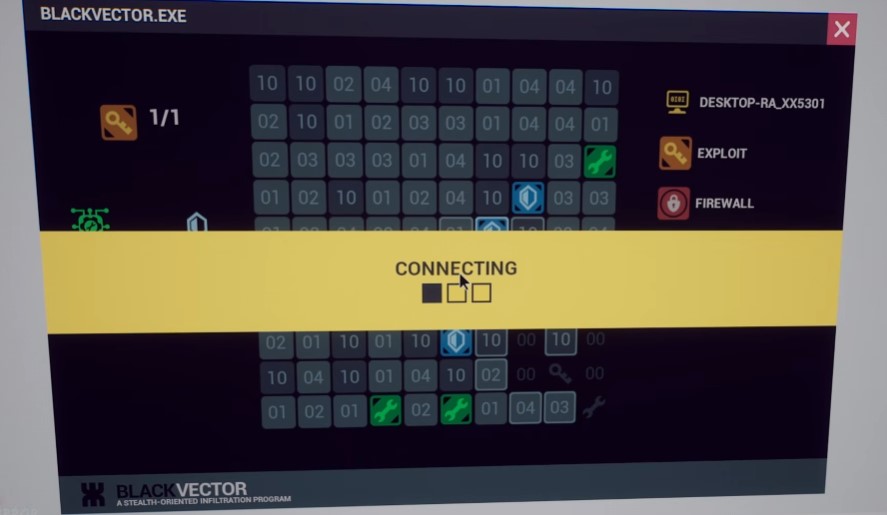
This program runs two cycles. In each cycle, move the computer icon to the key, then to the firewall icon. You get 10 moves per cycle. Landing on green wrenches or using shields blocks extend your count.
Editor Warning: Do not attempt the incinerator run right after solving the firewall puzzles unless your loop timer is fresh. After lowering the security, you have roughly 2 minutes to reach the incinerator before it locks again. Loop first if you are short on time. Pull up the schedule program from Rafael’s locker to track the windows.
The Incinerator and Garbage Disposal Rush
At the very start of a fresh loop, move fast. Follow this order:
- Enter Rafael’s room and run BlackVector on his computer. Complete both firewall puzzles to disable the security.
- Head straight through the hall to the Kitchen. Grab the Quantum Cell and slot it into the Power Relay for +1 energy.
- Skip the Pod Bay route. In the Kitchen, take the left through the large round door into the Garage. Run to the Incinerator near the ladder and press the red button on the screen. The capsule opens — take the tool inside.
- Bring the tool back to the Kitchen. Use it on the garbage disposal next to the fridge. Grab the USB stick inside.
- Unlock the Lobby and go to the computer. Plug in the USB stick, then cancel the computer update.
Saboteur Achievement: Stop the PC update. To earn it, lower the security with the BlackVector program on Rafael’s computer, grab the USB stick from the garbage disposal, plug it into the Lobby computer, and cancel the update in the Robot Area.
Once the rush is done, relax. As long as you beat every time on the schedule, you can head to the Dock Station and switch over to the Robot Area. The computer there will be fully working. Download Blueprint.pic.
Garden Entry: Chess and the QR Hex Puzzle
Loop again and take the other path with your level 4 access. At the start, grab the Quantum Cell and carry it to the Garage — you can now pass through the Kitchen door to save energy. Use the cell to power the train and ride to the Lab.
In the Lab, unlock the Greenhouse door. Inside you will find a chess board and computer, a solar-paneled box, and a large chest. Grab the floating memory in front of the chess board.
This collectible needs your real phone. Scan the two QR codes in the game: one on the Lobby computer (the K9 update) and the other in Rafael’s locker. Note the URLs they generate. At the Garden computer, you will find two open tabs. Enter each URL exactly — include the http:// prefix, the trailing numbers after each name, and the /s. Each one reveals a list of hexadecimals, one for black and one for white. Screenshot both.
Next, ride the train to the upper level of the Lab and grab the Data Disk. Place it on the duplicator plate in the train so it carries over to your next loop. Take it to the upper level of the Lobby and plug it into Rafael’s laptop. On the laptop, open the hexadecimal dictionary used to repair the corrupted map file. Translate both lists from the Garden computer to get the black and white piece positions on the chess board.
Editor Warning: Chess positions differ per player and per playthrough. Do not follow a screenshot of another player’s board — always translate your own QR codes.
Return to the Garden and place the pieces in the correct spots. A drawer opens with Tarot Card 6 inside.
The Sun Box and the Constellation Controls
At the controls with the sun symbol, keep the left slider on the sun. Press the large sun rotation button until the sunlight lands on the locked sun box beside the computer bench. When the sun icon on the box turns green, it unlocks — inside is a book of constellations.
Now move the left slider down to the moon. Press the large constellation button on the right. Three constellations appear in the sky: one green, one yellow, and one blue.
Rivage Part 6: Getting Access 5 Walkthrough Guide (CONTINUED)
Three constellations hang in the night sky after you press the large button: one green, one yellow, one blue. Pull out the constellation book you took from the sun box. Flip to the bottom of each page — every constellation has its own unique line pattern printed there. The sky version and the book version will not match by shape alone, so match them by pattern instead. Take a screenshot of all three patterns before you close the book.
Walk to the large chest near the Shed. You need to input all three patterns into the chest lock, and each pattern must match the color of the constellation it belongs to. Get a color wrong and the chest resets. When all three are in correctly, the lid opens. Inside is the handle to Jahi’s door.
Editor Warning: The chest colors and constellation patterns are randomized per playthrough. Your screenshots will not match anyone else’s. Always shoot the book pages before entering anything.
Astronomer Achievement — awarded after you match the sky constellations to the book inside the Garden sun box and use those patterns to open the chest.
Opening Jahi’s Room
Return to the bedrooms hallway. Place the handle into the slot on the exposed panel, then rotate it until the power meter fills completely. The door to Jahi’s room unlocks once the meter peaks.
Jahi’s Room Collectibles
Inside the room, head to the safe and enter the birthdate you can read off the pocket watch to the left of the wall diagram: 21/05/2426.
Editor Warning: The safe needs the separator sequence first. Type /000/ before you punch in the date, or the code will not register.
Pull the Vinyl from the open safe and carry it to the record player in Miranda’s room. Play it there to save a copy onto your K9.
Now go to the Lobby and stand inside the yellow circle. Play the recording from your K9. The opening of the audio is Morse code spelling out letters. Write them down. Use the Morse code poster in Jahi’s room to translate the dots and dashes into letters.
Take the decoded letters back to the record player in Miranda’s room and press the matching lettered buttons. The drawer slides open with Tarot Card 5 inside.
The Clock Gears Puzzle
A clock sits on a table toward the back of Jahi’s room. Open it up — several gears are missing. Turn to face the wall opposite the clock and study the diagram; it shows every missing gear and the exact position each one needs.
You get the gears by opening the clocks scattered around the room and reading the numbers stamped on them. Take a gear, drop it into the matching slot on the diagram, and repeat. Here is where each numbered gear sits:
| Slot | Gear | Location |
|---|---|---|
| 1 | Clock Gear 12 | On the table beside the clock |
| 2 | Clock Gear 48/8 | In the display at the head of the bed |
| 3 | Clock Gear 60/8 | In the clock left of the wall diagram |
| 4 | Clock Gear 64/8 | In the clock right of the bathroom doorway |
| 5 | Clock Gear 60/15 | In the clock right of the wall diagram |
| 6 | Clock Gear 45/10 | In the clock right of the closet |
| 7 | Clock Gear 40 | In the standing clock left of the bathroom doorway |
With every gear seated in its correct slot, wind the clock counterclockwise. Time reverses, and the computer on Jahi’s desk repairs itself.
Chronos Achievement — awarded for filling the clock with the correct gears per the wall diagram and winding it back to fix the computer.
Jahi’s Computer and the Train Component List
Press the Terminal button at the bottom of the repaired computer. It works exactly like Amaan’s terminal. The manual sheets lying around Jahi’s room teach you which commands to run. First attempt to extract a file and the terminal refuses — it wants admin rights. Type this:
- ASROOT EXTRACT DataLensArchive.qpak
That surfaces a readme file. Open it with:
- CAT Readme.note
The readme tells you the next steps to view the train components file. Run these in order:
- BUILD DataLensInstaller.qb
- Datalens.exe DataLens train_components_list.dtl
The component list opens on screen. Screenshot it before you leave — you need it at the printer in the Garage.
Assembling the Regulator
Head to the Garage and unlock the level 4 printer. Select the four components named on Jahi’s list:
- Chip
- Sensor
- Power
- Frame
Now fill the three material slots below the screen with the items you pulled from the computer in the Robot Area after halting the update:
- Copper
- Wood
- Ammonia
Confirm the build and press Assemble. Collect your Regulator from the right side of the machine.
Assembler Achievement — awarded for assembling the Regulator with the correct components and materials.
Unlocking the Train and Fusion Core
Walk straight up to the train. To power it, place the Quantum Cell into the power relay just outside. Then set the Regulator into the slot above the duplicator plate in the left corner.
Editor Warning: The Regulator stays installed even after you loop. You only place it once — do not waste a loop re-doing it.
From here the train connects you to the Fusion Core.
Fusion Core: Two Routes
Expect to loop again for power before this next stretch — grab the Quantum Cell first and head straight back to the train. Once aboard, press the button to ride to the Fusion Core.
Two paths open from this stop. Step onto the balcony above the Garden first. Lower the shortcut ladder so you do not have to walk the long way again, and play the audio recording on the workbench beside it.
Then cross to the other side of the train — the room with the spacesuits on the left wall. Unlock the level 4 access door to reveal a broken walkway leading to a control room. Look left and collect the level 5 access card. Scan the barcode on its back to add it to your K9.
One extra pickup waits at the far end of the walkway: a floating memory cube. Grab it before you leave.
Back to the Garage — Pod Bay and Jonny’s Locker
With level 5 access in hand, ride the train back to the Garage. Continue into the Kitchen and open the Pod Bay door. Inside you can crack open Jonny’s locker.
Read the document stored there and take the CD. Play the CD on the record player in Miranda’s room to finish this stretch of Part 6.
YOU COMPLETE THE Rivage Part 6: Getting Access 5 Walkthrough Guide
With level 5 access secured, one step remains before Part 7: loop again to refill your power. Run back through the arcade machine so you start the next stretch with fresh energy blocks.
You can now move on to the final part of the game. If any Tarot Cards, the Arcade Token, or other collectibles are still missing from your log, this is a good place to spend the spare loops you have. Finish those pickups now, while level 5 access lets you reach almost every locked area without rebuilding progress.
Editor Warning: Do not rush into Part 7 with an empty collectible list. Loop power is cheap, but access is not. Once you start the endgame, backtracking gets harder and you risk locking yourself out of a clean 100% run.
Rivage Part 7 How to Get All Endings Walkthrough Guide
Level 5 access is the last key you need. With the Fusion Core card in hand, the game opens two paths: the standard ending and the secret ending. Which one you get depends on how much side content you finished along the way.
Ending 1: The Standard Ending
Ending 1 is the default result of normal progress. Collectibles do not matter for this one. If you solved the puzzles and reached the end, this ending is waiting for you.
Start in the bedroom hallway with level 5 access. Unlock Jonny’s door. Instead of his room, you will see a blue portal in the doorway. Step through it.
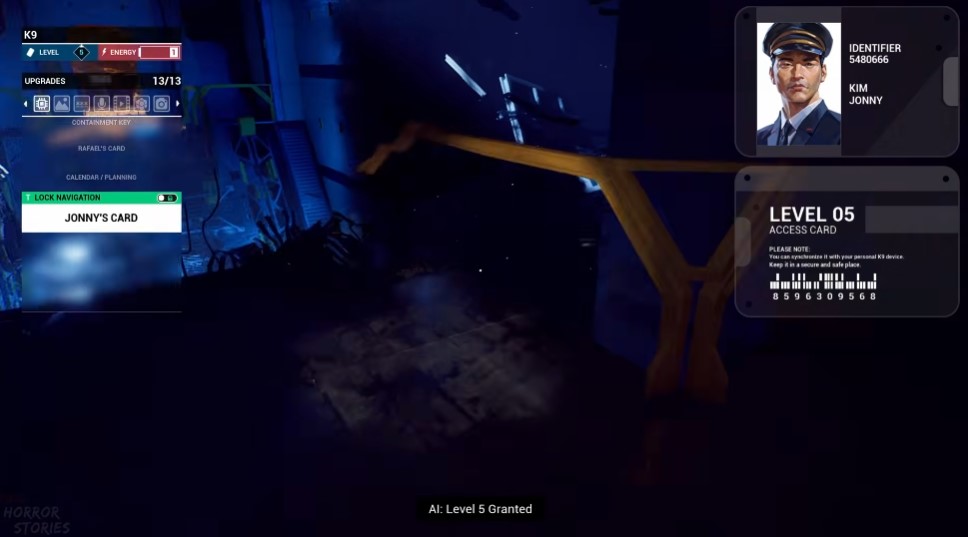
Traveler Achievement: Unlocked by using level 5 access on Jonny’s room and passing through the portal.
The portal drops you in the Fusion Core control room — the far side of the broken walkway you saw from the train. Approach the console. You must have energy remaining for it to power on.
- Click the Pods option on the screen.
- Select Pod 01.
- Click Unlock.
- Pull down the yellow handle on the right side.
Go back through the portal. From the hallway, enter the Kitchen, then walk straight into the Pod Bay. In the row of pods, the first one on the left is now unlocked. Press the Open button on its screen. The final cutscene plays.
Escape Room Achievement: Unlocked by completing the full game and reaching the first ending.
Ending 2: The Secret Ending
Ending 2 requires all 7 Tarot Cards and screenshots of the symbol printed on each one. If your collection is incomplete, finish it now before starting the final steps. One card was gated behind level 5 access, so you can grab it at this point.
Locating the Hidden Letters with the HV Flashlight
Seven numbered letters are hidden on walls around the station. Switch on the Hyperviolet (HV) flashlight to reveal them.
| Letter Location | How to Reach It |
|---|---|
| Bedroom hallway | Direct walkthrough route |
| Upper area of the Garage | Climb to the upper level |
| Upper area of the Lobby | Via the train, or look up to the left corner of the balcony from the lower Lobby |
| Observatory | Standard access |
| Upper area of the Greenhouse | Via the train to the Fusion Core |
| Jahi’s Bedroom | Standard access |
| Fusion Core | Through the portal in Jonny’s doorway — requires level 5 access |
Arrange the letters in numeric order to spell a seven-letter word. That word is the filename of a .qpak file stored on Amaan’s computer. The letters change every playthrough, so write yours down as you find them.
At Amaan’s computer, run the command extract XYZABCD.qpak, replacing XYZABCD with your word. This pulls out TarotRecipe.note. Then run cat TarotRecipe.note to read it. The file holds a manufacturing recipe. Build it at the manufacturing machine in the Garage, which needs level 4 clearance.
The Arcade Room and the Symbol Safe
Once all 7 cards are found and their symbols recorded, go to the room with the arcade machine off the Kitchen. Entry only happens when your energy runs out.
Find the safe near the note about the Arcade Coin. It shows the same symbols that appear on the Tarot Cards. Hold the center knob and rotate the arrow to each symbol, following the card order.
Editor Warning: Both the symbols and the card names are randomized per player and per playthrough. The game will not track this for you — keep your own record before you touch the safe.
Take the Arcade Coin from inside. Walk to the arcade machine, but do not click the screen. That action starts a new loop and wastes the run. Look down at the front panel instead and insert the coin in the slot.
The screen switches to a minigame. Use WASD to move and M1 to fire, similar to the Galactica arcade games. Shoot hostiles and avoid taking hits. Your score sits in the top left corner. You need above 6,530, which only happens if you reach the end and survive the boss.
Editor Warning: You get three lives. Dodge more than you shoot — trading hits loses the run. If you keep dying, cap your FPS at 30 in the settings. The slowed speed makes the boss fire easier to dodge. Losing all lives forces you to retry in a later loop.
After setting the new high score, press the screen to loop again. This time you wake up into the secret ending cutscene.
Back to the Past Achievement: Unlocked by using the Arcade Coin from the arcade room safe, beating the minigame for the new high score, then looping to trigger the secret ending.
Conclusion
Both endings sit behind one final choice: finish the run, or finish the collection first. Grab the 7 cards, hunt the HV letters, and the secret path opens on your next loop.


