In this guide, you’ll find screenshots and detailed text descriptions on how to find all but one of the code locations. These codes, when combined, form the password to get into the super_secret.rar file that is in the game’s folders. This file contains behind-the-scenes content and concept art, among other things. To access this file on Windows, navigate this path: This PC > (C:) > Program Files (x86) > Steam > steamapps > common > Amnesia Rebirth. The .rar file will be in that last folder.
Foreward
Additionally, if there are any requests for other kinds of guides, feel free to leave them in the comments and I’ll try my best to put those together as well.
Shout-out to the Frictional Games Discord[discord.com], and the many Reddit users and forum posters who did the hard work in initially finding these!
Code #1
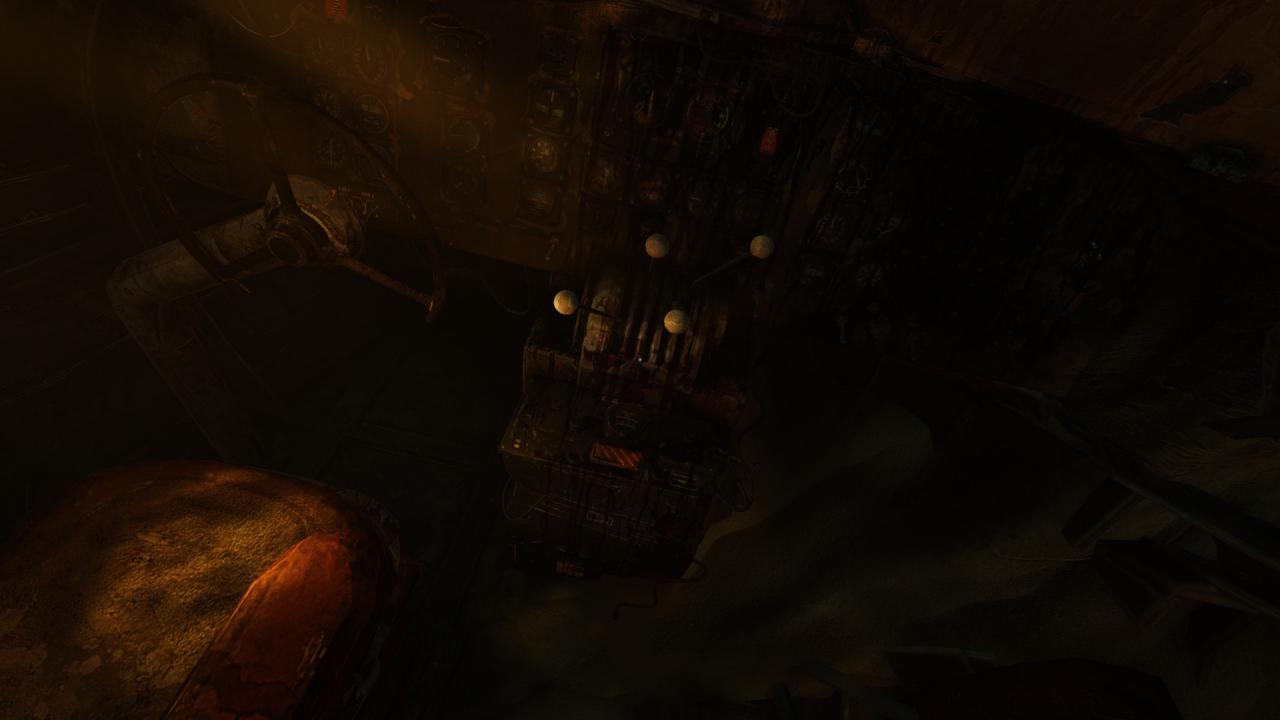
After you pick up Anastasie’s notebook, make your way to the front of the Cassandra, where you’ll hear Anton attempting to contact the crew members who stayed behind in the Caves. Eventually, he’ll end the transmission to save the battery, and the plane’s radio will fall silent. Ignore Anastasie’s complaints about the heat, and wait by the plane’s radio for approximately ten minutes. Eventually, another transmission will begin, and a deep voice will list off the code 7UI8 about six times before ending the transmission.
Code #2
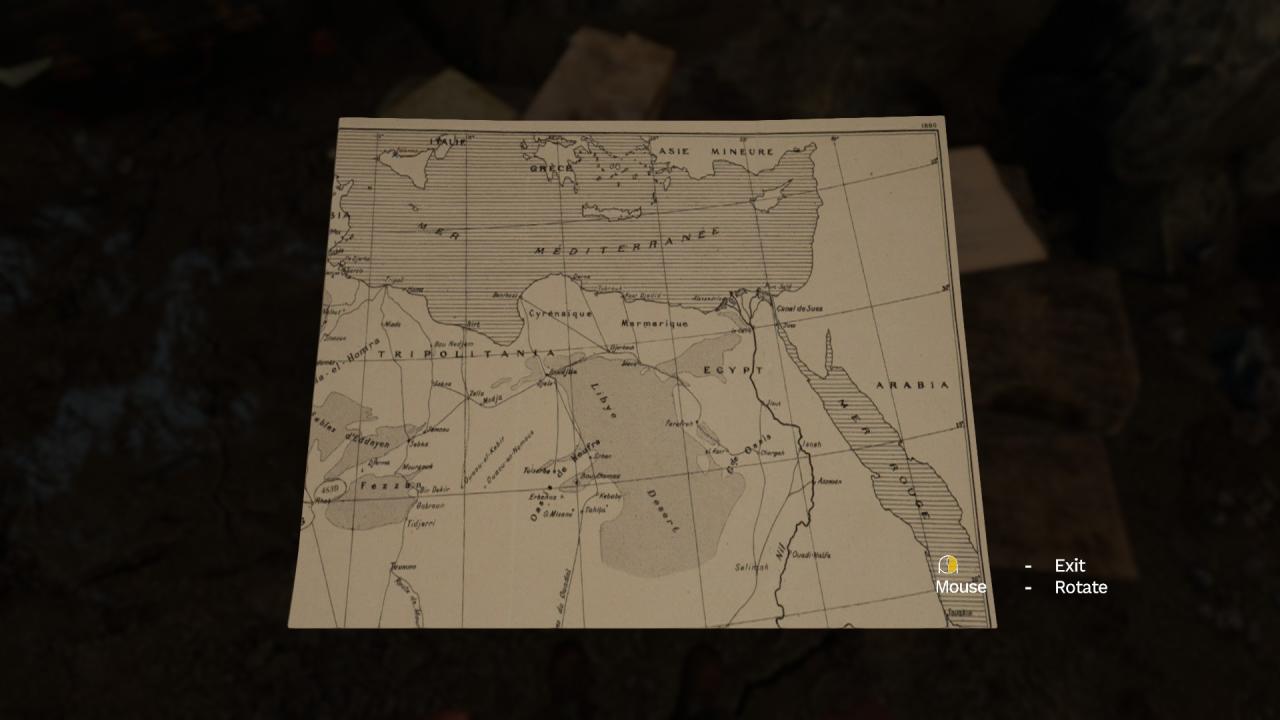
In the Caves, after the memory of Anastasie touching Salim’s face as Anton stitches his wound closed, walk forward a little bit. There will be a table on the right with a map, the Crew Roster note, and the Asset Tally note (which is underneath the cardboard box). Pick up the map and flip it over. On the bottom left side of the back of the map, to the left of the word “Fezzan,” will be the code 4S3D circled in black ink.
Code #3
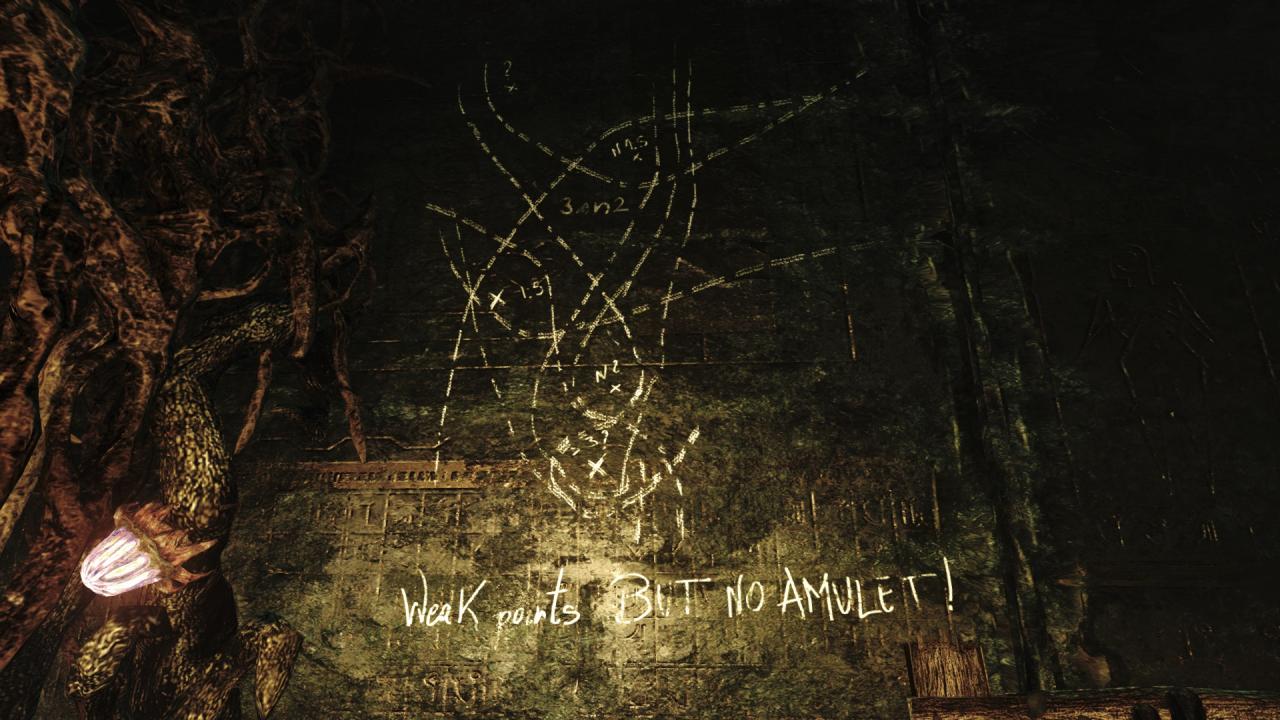
There is a point in the Dark World where you must make your way along a narrow ledge to progress, pushing rocks out of your way to get across. On the other side, after either sliding down a short slope or stepping down a couple of ledges, you’ll find yourself at the foot of a large, toppled statue of Tihana holding an Orb. Next to this statue is a small, square building. Head inside the building, where you’ll see the remains of a long-dead campfire and the desiccated corpse of Herbert. On the wall next to him is scrawled writing and various drawings. Above the text that says “Weak points BUT NO AMULET!” is a drawing that appears to be a map of the aforementioned weak points. Approximately in the middle of this map, above and slightly to the right of the number 1.5, will be the code 3AN2.
Code #4
Code #5
After the puzzle with the wheels and counterweight in the Cistern, you’ll descend a series of stairs that’ll take you to a gate that must be opened with another wheel. When you step through, the gate will close behind you. You’ll find yourself in a hallway that is shrouded with a mess of goop, bones, and a corpse. The hallway will be blocked about mid-way, and you should be able to just make out a staircase and glowing blue plant on the wall in the distance. Be careful not to get too close to this staircase until you’re ready to progress, as in Classic Mode, there’s a Ghoul that’ll spawn in the hole in the wall. It’ll drop down and patrol this area for quite some time, and I’m not sure if it ever leaves. This Ghoul also spawns in Adventure Mode, but it makes its way downstairs and walks around for a short time before leaving. As long as you don’t run right up to it, you should be fine.
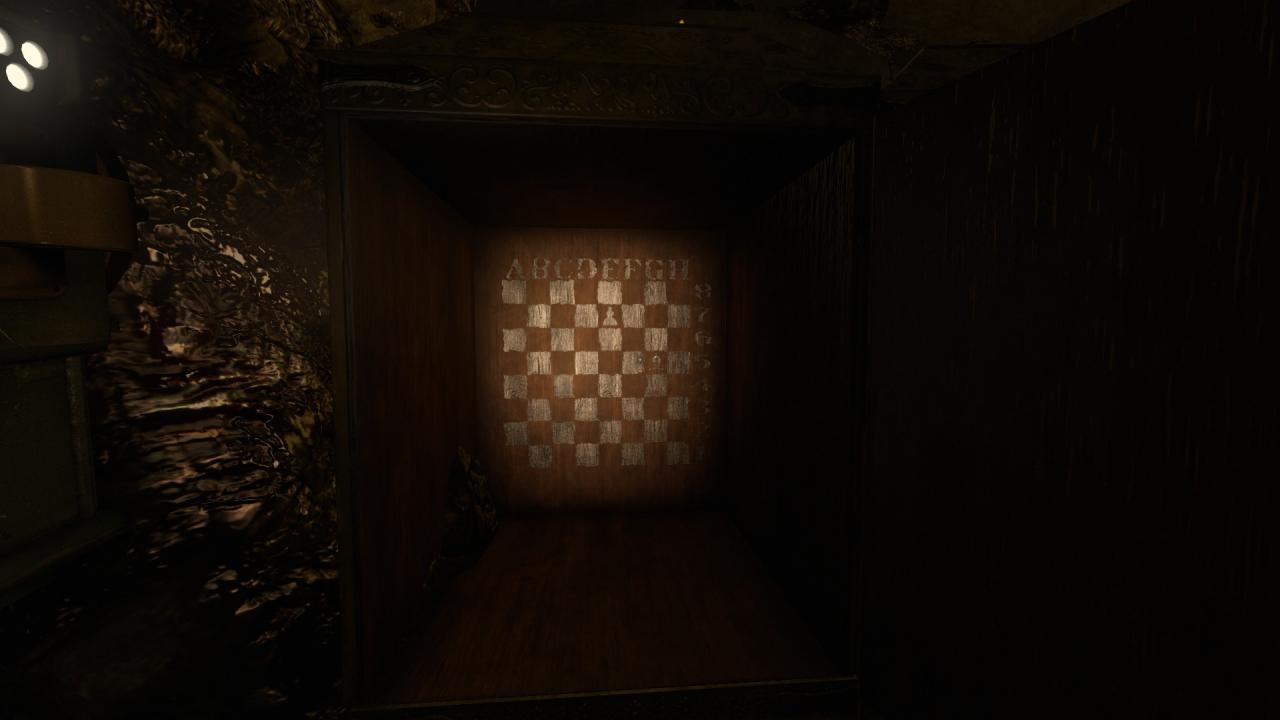
Head through the doorway on your left. If you’re in the correct room, you’ll see a pillar consisting entirely of goop in the center. Now head through the only other doorway in this small room. In front of you, you should see two beige cabinets, with some candles on top of the right-most one. Make your way around these cabinets, passing them on the left. Open the door of the cabinet that has the candles on top of it. It’s extremely hard to see without using a match or your lantern, but on the back panel of this cabinet is painted a chess board. There are two pieces painted on the board: the left one sitting on space E7, and the right one sitting on space G5. Combine the two of these positions to get the code E7G5.
Code #6
At a point in the Laboratory, you’ll come across a room with a single man being tortured in a Vitae-collection pod. From the point-of-entry of this room, coming from the direction of the room with the map of the Vitae pipelines on the wall, make your way past the unfortunate man, moving around the Vitae-collection pod on the right. There will be a short half-wall in front of you; pass this on the left. Beyond the support column on your left side, you should see a doorway. Make your way inside.
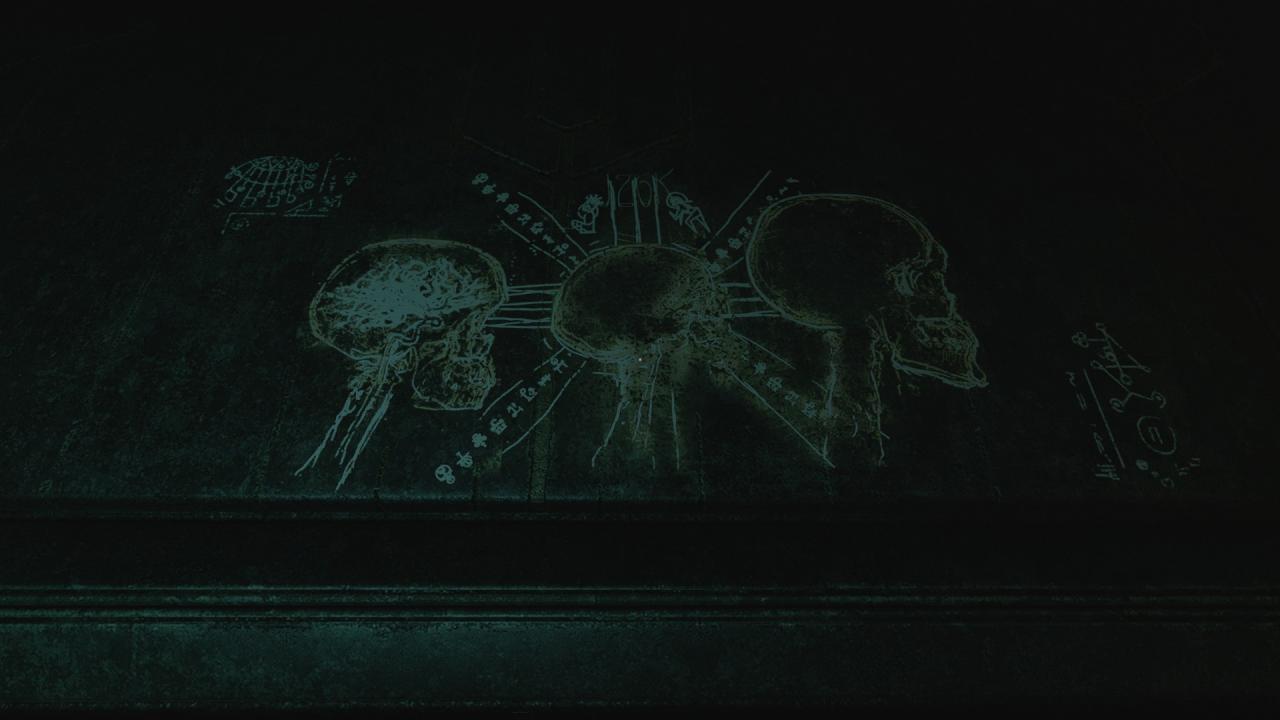
On the left-hand side in this new room, you should see a circular chair with a cloth on it, and a table with the Process Subject 1145SV note, Process Subject 1144SV note, Process Subject 1143SV note, and Cylinder: Breakthrough. Above this table are several markings and drawings on the wall, including three skulls next to each other. The code is actually hidden here, but is not perceptible from on the ground. Jump on top of the chair, and then jump on top of the table. Above the middle skull in the aforementioned drawing, you should see in very faint ink the code J26K.
Code #7
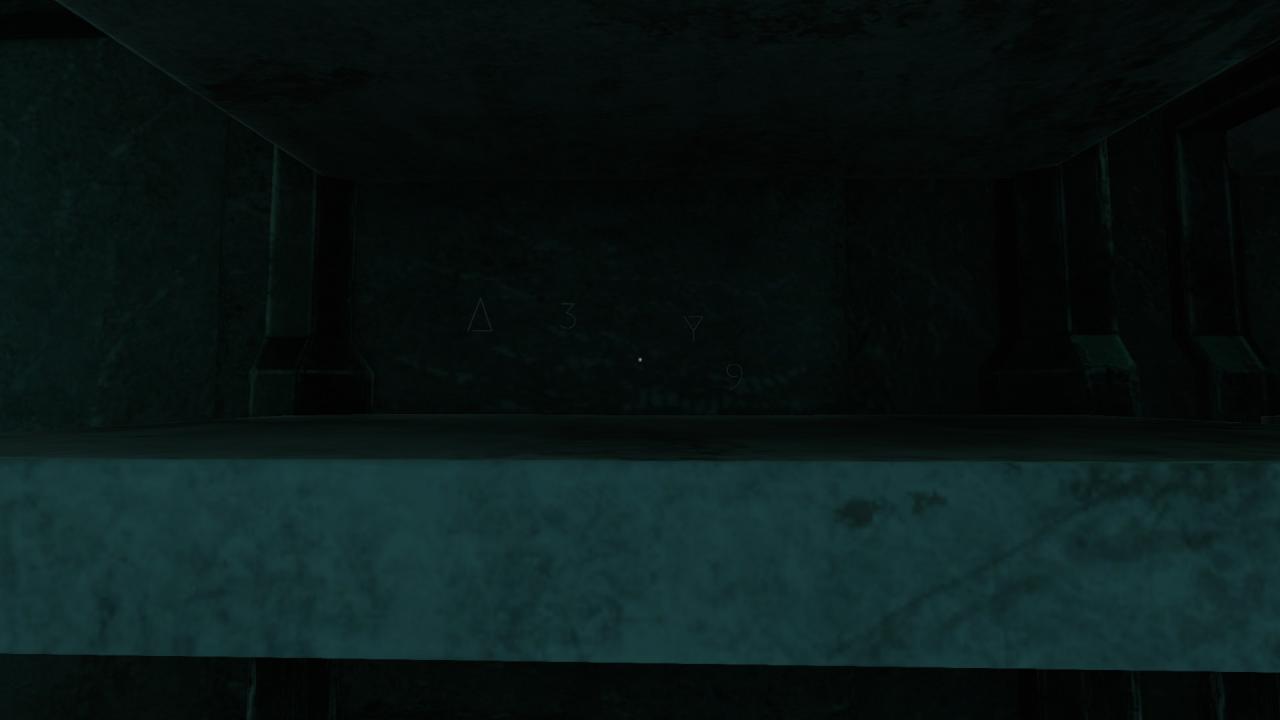
In the Tower, after the elevator fails, you’ll have to leave via the emergency hatch in the ceiling. Once in the elevator shaft, there will be a vent with a grate covering its entrance. Pull this grate open, and follow the vent through until you find another grate that you can push off of the vent completely. Drop down, and you’ll find yourself in a dark room with a small table in front of you. Turn to your left, and you’ll see two shelving units pushed up against the wall. The shelving unit nearest you, on the left if you’re standing in front of both of them, has a few metallic objects on its top shelf. Move these objects off of the shelf. On the wall behind where they were, you’ll see a triangle, the number three, a funnel shape, and the number nine. In one of the myriad languages of the Other World, the triangle represents the letter A, and the funnel shape represents the letter Y. With this knowledge, combine the digits and you’ll get the code A3Y9.