Analysis of the various weapons options, and damage-related cards, available in Back 4 Blood.
Introduction
Welcome to this guide on the various weapons options available in Back 4 Blood. This guide will cover weapons analysis, attachments and damage-specific cards. I will also throw in some recommendations and tips here and there, because I’m nice like that. Of course, all of this should be obvious from the title, but I’m a traditionalist and every guide needs an introduction.
Disclaimer – The information in this guide is based on my own experience and research unless otherwise noted from the Credits. This was largely conducted on Veteran, though I’ve played enough Nightmare to form judgments on it. I will not be covering melee cards as I’ve not played enough melee to be confident of my view, and this analysis is better suited to a dedicated melee guide regardless (of which there are several).
TL;DR
This section is for those of you reading this who think they know the game very well already, and are only visiting this guide to try to find minutiae they might not know. Or possibly to try to find errors to point out.
For you, I have compiled a list of what I believe are largely unknown points below, so you can skip the rest of the guide.
– You should be running 2x scopes, or failing that 4x scopes, on shotguns
– The UMP45 actually hits harder, per-bullet, than most assault rifles
– Although the game sometimes lists increased firepower on AP and HP ammo, this is a display bug and they in fact do nothing for your damage output
– All weapons have some level of bullet penetration, although this is usually no more than 10% of bullet damage unless it’s a sniper rifle
– Reload speed is the single most important stat for sniper rifles
– The ‘Firepower’ stat on weapons is a function of damage-per-second, not a measure of actual damage; in testing, the Super 90 actually has the same damage per-pellet as the AA12, for instance
– The TEC 9 counts as an SMG for achievements despite being a sidearm
– I hate the M1A with a burning passion rivalled only by my lust for Japanese jelly beans
Glossary
AR – Assault rifles
Common – Shorthand for Common Infected, a holdover term from Left 4 Dead referring to the standard, easily mown down zombies all over the map
CQC – Close-quarters combat; in this guide, generally used to refer to <3m ranges and/or shotgun and melee specialisms
DPS – Damage-per-second, a carry-across term from MMOs. Mostly relevant in terms of damage output against specials and bosses
Duals – Dual primaries, i.e. the Two is One and One is None card. This is my term rather than a community term, but hey, here’s hoping it catches on
Horde – An attack, usually telegraphed, by a large number of Commons. This will typically happen either as a result of an in-game trigger (e.g. activating a map-specific object) or as a result of a Horde timer which is visible on the left side of your screen on some maps. Note that unlike Left 4 Dead, Hordes include automatic spawns of several Specials which will frequently overlap in species
LMG – Light machine gun
Uptime – Time spent actively firing at or engaging an enemy; most commonly used to refer to reload times (where time firing is uptime and time reloading is downtime)
Special – Shorthand for Special Infected, a holdover term from Left 4 Dead referring to any non-Common, non-Boss enemy; categorised into Tallboys, Stingers and Reekers, then subcategorised further
SR – Sniper rifle
Sweeping – The act of clearing out non-alert commons upon entering a new area; most commonly relevant in larger, open areas. A generally under-recognised role, sweeping is most certainly a role in itself and completing sweeping efficiently leads to faster clears, lower chip damage taken from rogue commons, and lower ammo consumption across the board
A note on Two is One and One is None
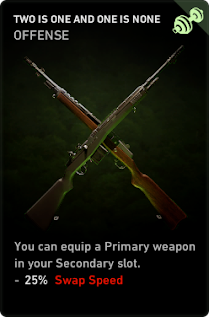
This card, hereafter referred to as ‘Duals’ to spare my lazy fingers, has something of a warping effect on weapon choices as it heavily mitigates certain weapons’ weaknesses and changes the ammunition economy heavily. There are, generally speaking, two reasons to take Duals – either you effectively want a more powerful secondary, or you’re running a hybrid build.
The former option, upgrading your secondary, indicates that you still consider one weapon your primary weapon. You will still consider taking cards which benefit that weapon type only, and you will fall back to your second primary only in situations which warrant it. Where this is the case, you will most commonly want to take an SMG as your ‘secondary’ weapon as both SMGs and SMG/pistol ammo in general are rarely used by most builds. This will allow you to have a plentiful supply of backup ammo and a near guarantee of a relatively powerful fallback option. The most common reason for running Duals in this way is if you want to run SRs as your primary and so will need a strong option for dealing with hordes.
In the latter case, a hybrid build, you should generally avoid running weapon-specific cards unless they’re particularly powerful. While in theory you could justify any combination of weapon types for a hybrid build, in practice you’re effectively choosing ‘shotgun plus X’. This is because you should be choosing your weapon types based on use-case, and for CQC the shotgun is near-peerless – meanwhile, LMGs, ARs, SMGs and to a lesser extent SRs all fall into the same use-case, being midrange sweeping and anti-Special. Use of hybrid builds allows for multiple people running a specific weapon type without too many issues; however, if your group includes someone running a weapon type as primary, hybrid-users should allow them priority in weapon choice due to superior uptime.
Under no circumstance should you use two weapons which use the same ammunition type with Duals (e.g. AR and LMG, or two shotguns). While doing this does provide some benefit, it works out to being a waste of a card as you get no damage or ammunition benefits from doing so. Also note that secondaries are far from useless (at least the Desert Eagle and TEC 9, anyway), so be sure you definitely are using the benefit from this card if you decide to run it.
A note on card efficiency and higher difficulty levels
The single most common mistake I see being made by people theorycrafting builds in Back 4 Blood is to forget that card selection is an economy in itself. Essentially this means that cards are rare – you get one per map (unless you happen to find something relevant for purchase). Given how powerful cards’ effects are, their limited supply means each card you include needs to do a lot of work to justify its existence.
Yes, you can (for instance) stack five reload speed cards for use with a Super 90 to have fantastic uptime. But the trouble is, you’ve just burned five cards to basically just create a slightly harder-hitting AA-12. Meanwhile, you could have taken cards like Down In Front, Face Your Fears, Marked For Death (etc. etc.) which have a substantially bigger effect on your effectiveness (and indeed, your team as a whole).
This is particularly true on Nightmare, where you will be hammered by borderline unfair attacks from the second you step out of the saferoom. Your first 2-3 cards have to be the most powerful things you can possibly do during that period, because if you walk out with garbage cards thinking ‘this will all come together later’, you’re going to get steamrolled, you’re going to ragequit, and you’re going to leave a whining post in the Steam discussion forums about how Nightmare difficulty is too hard and you want it made easier.
This is why copper-farming cards tend to be poor. Sure, everyone likes having more money to spend – but they don’t actually do anything for you. You’re burning a resource you have incredibly limited access to in exchange for slightly more of something you can find freakin’ everywhere. Every card you put in your deck – every card, without exception – has an opportunity cost. It’s on you to select cards which aren’t going to be a waste of your most precious and most limited resource.
Weapon quality/rarity
All weapons have both a quality level (shown as a number and a star by the weapon’s name) and a rarity (the colour of the weapon’s name). The two show functionally the same thing, which will going forward simply be referred to as the weapon’s quality. For clarity, white weapons (basic starting weapons) have a base quality of 5*, green uncommon weapons 20*, blue rare weapons 35* and purple epic weapons being 50*.This weapon quality has a direct and extremely significant impact on the damage output of a weapon – upwards of a 100% base damage increase going from a 5* to a 50* one. However, it is important to note that the quality number shown on your weapon is not its true quality in most cases. This is because the game modifies quality level based on attachments – 2* for green attachments, 3* for blue, 4* for purple and 5* for gold/legendary. While these attachments do increase the visible quality level of the gun, they do not have an effect on its damage output (unless it’s an attachment which boosts damage, obviously).
The key take-away from understanding weapon quality is that you should always swap to a weapon of higher quality, provided it’s of a type your build uses (and it isn’t a sucky weapon, see the section below for analysis). While the value of comfort and familiarity are undeniable, you simply will not survive on any reasonable difficulty if your weapon is under-levelled relative to the enemies you’re facing. In some rare cases attachments can have a substantial impact on how a weapon operates – reload speed on SRs is the main one – but for the most part, take the prettier colour gun.
Weapon Attachments pt. 1
There are four attachment categories, and within each, a number of subtypes. I have provided brief analysis below of each subtype, but will not go into detail on every available attachment – for that I instead direct you to Lordreaper12’s excellent attachment spreadsheet (see Credits for link). Note that not all weapons can receive all attachment types. Additionally, some weapons have broken (red) attachments which are a hindrance until replaced. Finally, note that a card is currently under development (at time of writing) to allow players to remove attachments from weapons – once implemented, it will be optimal for only one player per team to run this card and to perform an attachment removal service for others.
As above, prioritise weapon quality over attachments wherever possible.
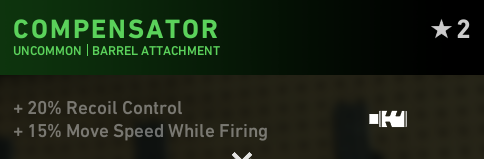
Compensator – Recoil control and movement speed while firing. Generally this shouldn’t be necessary, as few weapons have substantial enough recoil to need improvement (and those there are are usually not worth using). A handful of weapons (most notably the M249) can find some niche use of this. The movement speed while firing is essentially irrelevant in most cases.

Laser Sight – Accuracy. This should be the go-to for most weapons, mostly because it substantially improves hip-fire accuracy. SRs can actually hit something without ADS, and ARs can headshot reliably on close-in Commons. Somewhat redundant on shotguns.
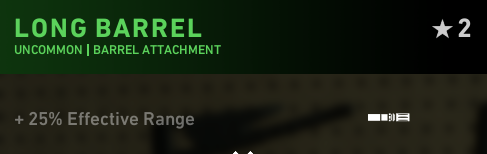
Long Barrel – Effective range. All weapons in B4B have damage fall-off at longer ranges. Long Barrel attachments mitigate this. However, in practice this is generally pointless – it’s rare that you’ll need to get that much damage down at extreme ranges unless you’re sweeping commons (in which case a silencer will usually do that job better). Has some niche use on SRs for picking off incoming Tallboys. Note that this will usually improve your boss DPS (since you won’t usually want to be particularly close to them), but building your weapon for something you’ll see a couple of times per map at most is not a winning strategy unless you’re really struggling to handle them.
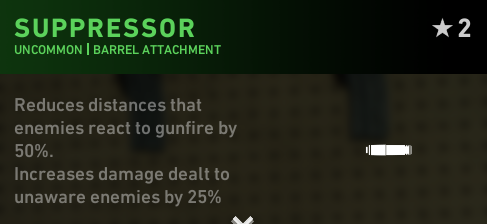
Suppressor – Reduces enemy reactions and increases damage to unaware enemies. Also rather niche, and virtually useless in public lobbies. In a coordinated team, however, 1-2 people with suppressors can sweep Commons as the team moves without any of them reacting. This is entirely unnecessary on Recruit, but on harder difficulties the substantial damage increase from the suppressor can allow for headshots to one-shot reliably irrespective of weapon quality, making Sweeping far smoother and conserving ammunition.
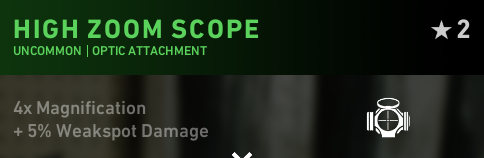
High-Zoom Scope – 4x magnification plus weakspot damage. Generally this will be the least useful of all optics types – there is almost never a situation where 4x magnification is necessary -unless you’re not planning on using ADS much in which case the weakspot damage is nice.
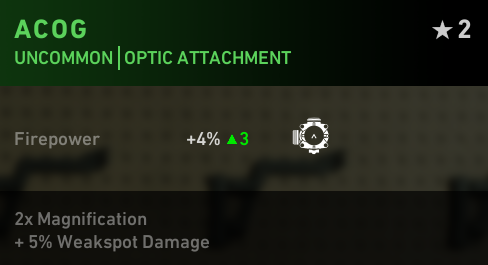
ACOG – 2x magnification plus weakspot damage. A better option, best suited to SRs for tapping weakspots from range. Avoid on any weapon you’ll want to fire full-auto, as the increased zoom amplifies recoil effects – though having said that, the bonus weakspot damage functions whether you’re scoped or not, so you may want to slap this on your AA12 for burst damage despite how ridiculous you feel in doing so. Note that although the game claims there’s a damage boost from this mod, there isn’t. It lies.
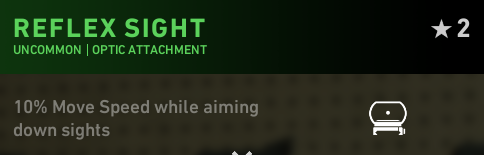
Holo-Sight/Reflex Sight – Movement speed while in ADS. Both do essentially the same thing, so which you use will be down to personal preference and/or what you managed to find. My preferred option on virtually all weapons is Reflex, but that’s just me. Note that the movement speed while in ADS, although not particularly useful, does make Sweeping slightly smoother.
Weapon Attachments pt. 2

Extended Mag – Magazine size. Never bad, and usually very helpful given the tiny size of many clips in this game. Most useful on the AA-12 and fall-back secondaries, however, as these are the weapons most likely to be used in desperate circumstances when you really don’t have time for a reload.
Fast Mag – Reload speed. Functionally very similar in uptime to the extended mag for most weapons, which you use will often be down to personal preference. However, note that reload speed has a disproportionate effect on pump-action shotguns and bolt-action rifles as it affects the downtime between shots.
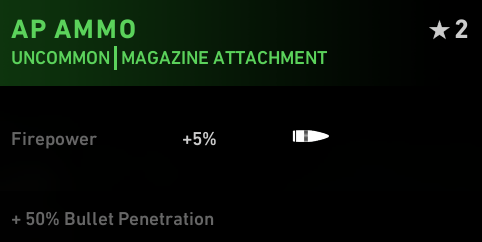
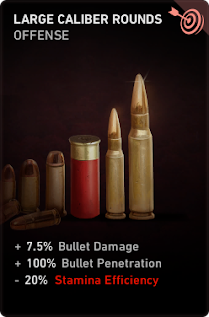
AP Ammo – Bullet penetration. Quite a niche stat while has two theoretical uses. Firstly, allows you to hit multiple Commons with a single bullet so long as they obligingly line up for you; cases where this happens are rather rare in practice, and when it does happen those Commons are usually pretty easy to deal with already. Secondly, does provide some assistance with dealing damage to armoured weakspots once these start appearing on Corruption cards – but the damage increase doesn’t tend to be all that noticeable. More alarmingly, this attachment has the side effect of drastically increasing the chances you’ll clip a Hazard by mistake – and while birbs are fairly easy to spot and avoid, alarmed doors and cars are far less so. Generally speaking, avoid this attachment, as anything that needs penetration usually has it by default.
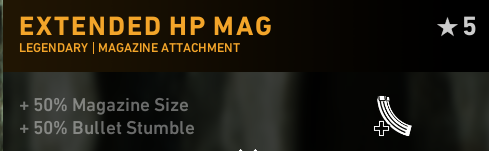
HP Ammo – Bullet stumble. Although technically any enemy type can be stumbled (which amounts to a short-duration stun), you’ll most commonly see this happen to Tallboys. Typically you’ll only get a stumble animation after the target takes a substantial amount of damage in a short period of time – for instance, unloading an auto-shotgun or firing an M95. HP ammo can improve the speed at which the stun takes effect, which can be lifesaving (but rarely is). Hit-or-miss, but it’s acceptable if it’s all you’ve got.
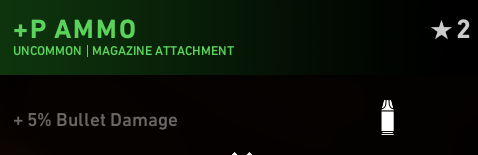
+P Ammo – Bullet damage. Standard, boring, but fairly effective. If you can hit a breakpoint (particularly one-shotting Commons or weakspot Stingers) this gets a lot better. Note that this is potentially more ammo-efficient than the magazine size/reload speed attachments, which may be relevant in public lobbies or if your team likes to run multiples of one weapon type. Note that AP/HP Ammo can sometimes display in-game as increasing Firepower – this is a bug, as you can test for yourself on the firing range. Interestingly, the name of this attachment is shared by a brand of powerful diuretics available in-universe.
[N.B. Not actually true, but I wish it were. Oh god do I wish it were.]
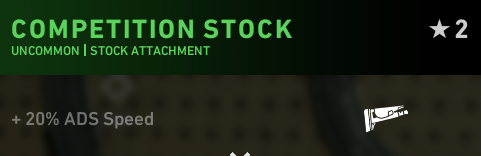
Competition Stock – ADS speed. None of the stock types are especially valuable, but usually you’ll want to be choosing between this one and the Tactical. ADS speed helps with hitting headshots and weakspots in stressful situations, so I tend to favour this one.
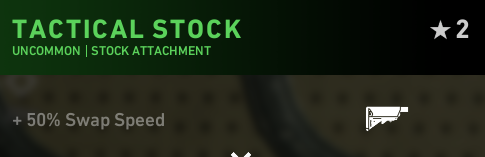
Tactical Stock – Swap speed. You’ll see the benefit fairly rarely, but when you do need it, it comes in clutch. This is a must-take on a lot of Duals builds, particularly ones relying on LMGs and Admin Reload.
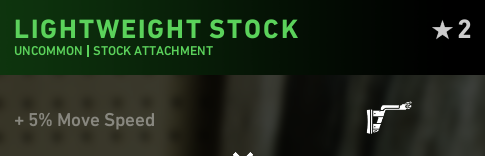
Lightweight Stock – Movement speed. The weakest of the three, movement speed is rarely particularly valuable given the importance of sticking with your team and the rarity of situations where rushing is necessary. Even when you need to rush, unless everyone on your team has a speed boost, you’ll wind up getting split up or having to wait for them. Can occasionally come in clutch, but so can basically anything.
Assault Rifles
As with most games (and indeed, reality), ARs are the generalist choice of weapon; they’re suitable for all ranges and useful in all situations. Unlike most games, however, ARs require a decent amount of skill to use effectively. On any difficulty above Recruit you should be aiming for headshots on Commons as a matter of course, while using short bursts of fire at centre mass for runners or small groups.
Choices of attachments are fairly free, with a reasonable argument being available for most options. Furthermore, while there are differences between each weapon, these are relatively minimal – you should therefore always take the best quality option available, prioritising comfort thereafter. The main exception to this is the Ranch Rifle, which is poor and should be avoided in most circumstances.
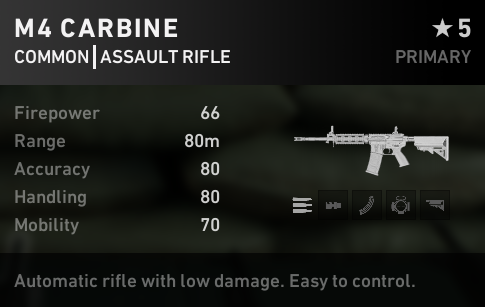
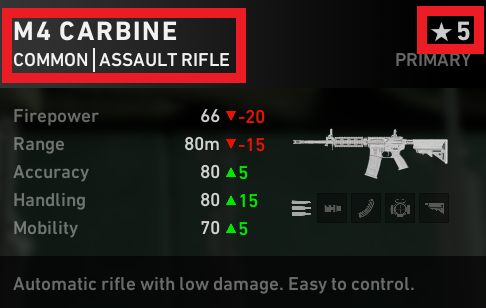
Base bullet damage: 10.0
Magazine: 25
Walker’s starting weapon and usually fairly easily acquired, this AR is middle-of-the-road in all aspects. Its main selling point is lower recoil than the other ARs, which shouldn’t matter too much as you should rarely be firing on full auto; it does, however, assist with keeping sustained fire on a weakspot. That said, it has relatively low bullet damage compared to the alternatives; the combination of low recoil and low damage can lead to inefficient usage of ammo. It’s a carbine, not a rifle, so the developers are all kinds of wrong on this one.
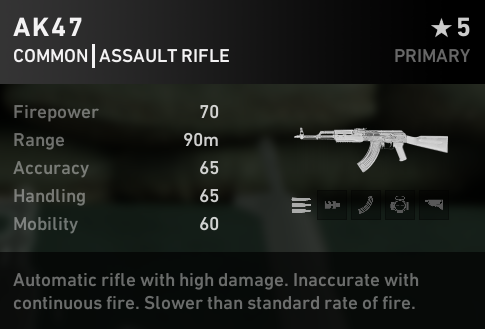
Base bullet damage: 14.0
Magazine: 20
Karlee’s starting weapon, the AK has relatively high bullet damage for an AR (although still lower than the SCAR); this can lead to it hitting Common one-shot breakpoints more easily. It has substantially more recoil than its competitors, however, which can be problematic if you’re not used to controlling it – though, as above, this should rarely become relevant. The favourite of megalomaniacal dictators in third-world countries everywhere.
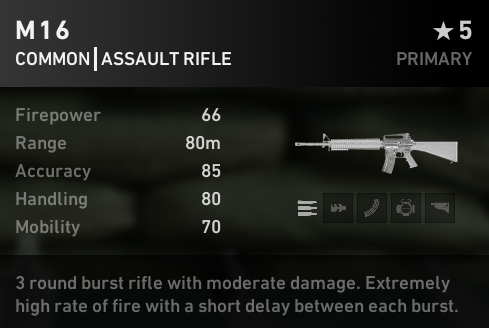
Base bullet damage: 14.0
Magazine: 20
Rather an unusual AR due to its burst-fire characteristics. While in other games the burst-fire is a mixed blessing, in B4B this is nothing but a detriment – it ensures you can’t be ammo-efficient at sweeping Commons while also making it more difficult to output sustained damage into Specials’ weakspots. This doesn’t make the weapon unusable – particularly if rifle ammo is uncontested – but does make it weaker than its competitors; it is recommended that you only use an M16 if its quality is higher than what you have. Like most M16s in games, stuck on burst-fire even though there are M16 variants which allow for fully automatic fire, primarily because that’s how most kids think these things work.
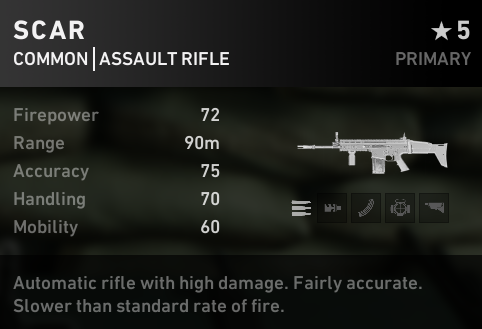
Base bullet damage: 15.0
Magazine: 20
Arguably the ‘best’ AR, the SCAR combines modest recoil with good bullet damage. It has a lower rate of fire than the M4 or AK, but not to a substantial extent and its other characteristics allow for a comparable, if not superior, DPS output. Named after the villain in ‘The Lion King’.
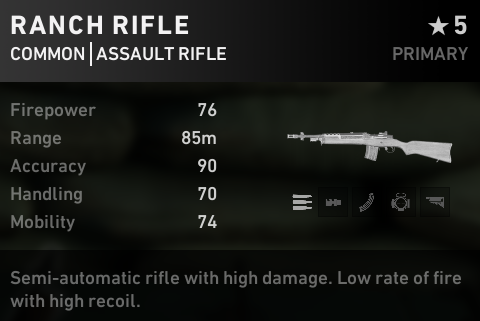
Base bullet damage: 22.0
Magazine: 15
Mom’s starting weapon, the Ranch Rifle is a single-shot AR with a 15-round clip. It can charitably be described as a niche choice, and more accurately described as terrible. Despite having higher bullet damage than the other ARs it still struggles to hit any non-headshot one-shot breakpoints; meanwhile, its recoil makes staying on-target on weakpoints more difficult. Furthermore, due to the combination of not-actually-very-high bullet damage and no automatic fire, it can struggle at dealing with hordes. Avoid this weapon wherever possible. Underperforms substantially compared to the Mayo rifle, but is comparable to the BBQ rifle [that’s right, I made a condiments joke, come at me].
Assault Rifle Cards
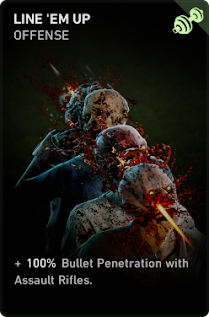
Not good. Bullet penetration is questionably useful at the best of times, let alone at the cost of a card. If you really want some pen, take Combat Training so you at least get some damage out of it.
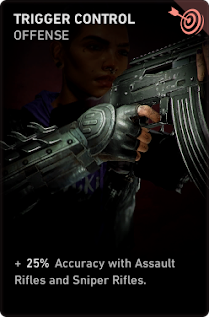
The first of many similar cards, so get used to hearing me say (or rather, reading me write) – solid card, you’ll want it in your deck if you’re running this weapon type. How deep in, on the other hand, is an open question.
Slightly better than it is for SR-users, as ARs actually have a reason to hip-fire. Still isn’t good enough to burn a card slot on, though.
Light Machine Guns
LMGs have an awkawrd niche in B4B; their biggest handicap is their usage of rifle ammo, which your AR-carrying teammates won’t be particularly happy to see you unloading wantonly. That said, the only time you should be firing on full auto is when you would do so with any other gun – when firing into a Special. Resist the temptation to open up against Commons, as this is both wasteful and unnecessary – stick to short bursts to allow the bodies to hit the floor and ensure your shots are hitting things that matter.
LMGs are, in essence, ARs which trade their sweeping ability for better sustained damage output. They are surprisingly useful, in public lobbies in particular; here, players are often competing for Common kills, frequently isolate themselves by accident or design, and will struggle to focus fire on priority targets. Having access to the ability to simply hose down a Tallboy without regard for weakspots is a boon in these circumstances. In more coordinated teams the LMG’s niche falls away, although it can still be used as an alternative to (or support of) the AA-12 as the team’s primary problem-solver.
As a further note – if you want to use LMGs as your primary weapon group, it is recommended that you spec into Duals and Admin Reload. This will allow you to avoid reloading for substantial periods, swapping to your secondary (likely an SMG) only for long enough for your LMG to reload. Not taking these cards can, paradoxically, lead to you spending even more time reloading than you otherwise would – you’ll need to retain a minimum level of ammunition in case you need to hose down a Tallboy (or, on Nightmare, three), so you’ll have to reload at 50% magazine capacity.
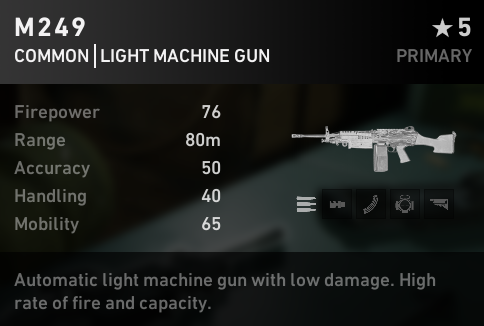
Base bullet damage: 13.0
Magazine: 80
Of the two LMGs available, this is the anti-Special (and anti-ammunition) choice. It has lower bullet damage than the RPK, as well as higher recoil – but a substantially increased rate of fire lead to a much higher DPS output. A compensator is strongly recommended to assist with keeping its prodigious recoil under control, as without one it can be challenging to maintain fire on a weakspot. Generally the better of the two LMGs for doing things that LMGs do. When firing on full auto, screaming as loudly as possible until the magazine goes dry is compulsory.
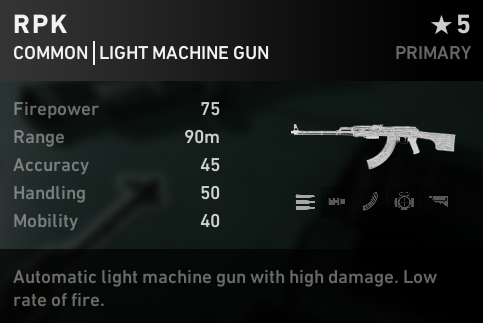
Base bullet damage: 18.0
Magazine: 40
Essentially an oversized AK-47 which trades awkwardness of use for a bigger clip and more bullet damage. Like its smaller cousin, its recoil can be tricky to manage if you’re not used to it; unlike the AK, however, you actually have a reason to get used to this one. When compared to the M249, the RPK unfortunately falls short; it loses out on DPS and clip size, and in exchange only really gains a limited ability to sweep (a role which ARs and SRs already do substantially better). A niche weapon in an already niche category. Should really be called the AK-48.
Light Machine Gun Cards
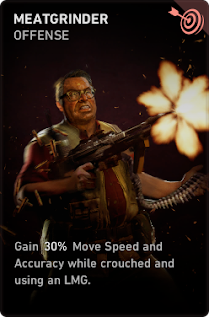
Not… -that- bad, actually. Allows for some quite accurate hip-fire with a laser-sighted LMG; you’ll want to be crouched regardless for Down In Front, so could be usable. That said, still probably not worth burning a card slot for, even with the movement speed added in.
Submachine Guns
While in most games the benefits of SMGs are mobility and better hip-fire, these aren’t anywhere near as relevant in B4B; as a result, SMGs wind up being categorised for the most part as ‘better pistols’ (or, if you prefer, ‘worse ARs’). That said, they’re capable of surprisingly good damage output due to their generally low recoil and high rate of fire; they certainly aren’t awful. It is simply unfortunate that they lack the bullet damage for sweeping and the magazine size for Special-killing, which results in them getting shunted into a backup role.
SMGs are, as a category, very well designed; they all feel different to fire, but all perform similarly enough to one another that which one you use can simply come down to personal preference. The only one which stands out is the Uzi, which tends to underperform relative to the rest.
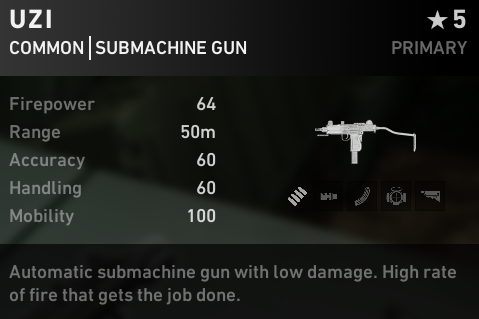
Base bullet damage: 10.0
Magazine: 32
Evangelo’s starting weapon and by far the most common SMG encountered early, the Uzi unfortunately lacks merits relative to the other SMG options; its bullet damage is low, its rate of fire is decent but not incredible, and it has some minor recoil issues. Still perfectly serviceable, but replace it with something else as soon as quality permits. Named after a famous Chinese League of Legends player.
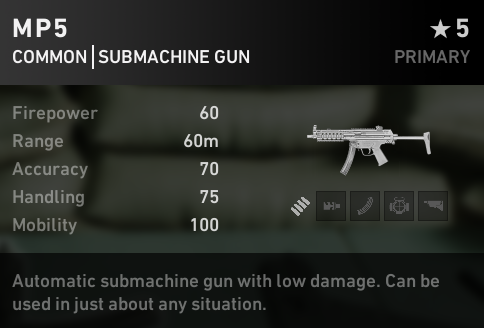
Base bullet damage: 11.0
Magazine: 25
The more generalist SMG, performing fairly well in all areas. It can largely be thought of as a slightly better Uzi, having better bullet damage and recoil but slightly lower fire rate. Doc’s starting weapon. Named after the super-advanced file format used for music in the B4B universe.
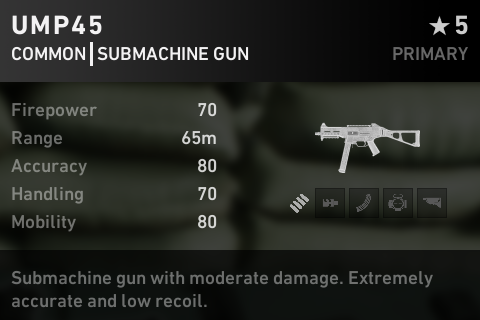
Base bullet damage: 13.0
Magazine: 20
The closest thing you’ll find to a miniature AR, the UMP both feels and acts like one. If you like to play with ARs but your group already has several AR-users, the UMP is a good compromise. Named for the number of UMPs in the average R&B track.
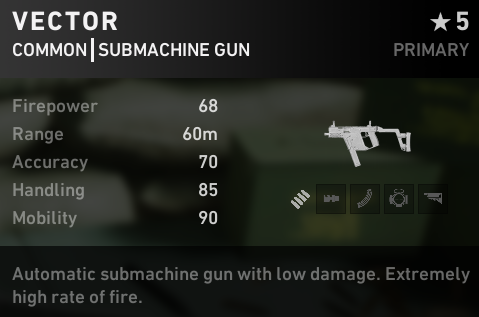
Base bullet damage: 11.0
Magazine: 19
While the UMP45 is a smaller AR, the Vector is a larger TEC 9. It has an even smaller clip than its counterparts but, curiously, an extremely high rate of fire with very little recoil. The Vector’s DPS output is phenomenal during its uptime, but the speed at which it empties its clip severely limit it. If you can get your hands on an Extended Mag (or at very least a Fast Mag) its performance skyrockets. For what it’s worth, I adore this weapon in spite of its faults. Named after a doctor specialising in cybernetics with questionable taste in friends.
Submachine Gun Cards

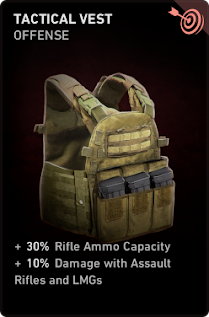
Much like all the other similar cards, if you’re running SMGs, you will probably want this card. 30% ammo capacity helps a great deal for getting through the longer maps, and 10% unconditional damage boost is nice too. Particularly useful for SMGs as they tend to have lower damage than their counterparts.
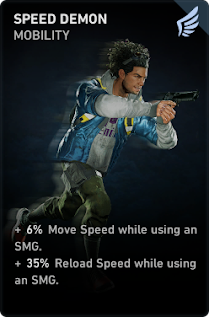
35% reload speed is actually pretty good, but the fact remains that reload speed just isn’t a valuable stat unless you’re running SRs. Given the tiny Vector clip you might be tempted, but in the end, avoid.
Sniper Rifles
Although there are three entries in this category, there are really only two sniper rifles – the M95 and the Phoenix – and these are the ones I refer to in this section. SRs, although niche, are nowhere near as weak as many in the community seem to think. They’re obviously very effective at dumping damage into weakspots – this much anyone can tell you – but they’re also perfectly good at sweeping and not awful at dealing with hordes so long as you’re aware of one thing – reload speed affects bolt cycle time. While an unmodified SR will take a relatively long time to eliminate single Commons (which in turn causes slow sweep speeds), with a fast mag and a single reload speed card SRs quickly outpace ARs due to not needing to aim for headshots.
SRs innate bullet penetration makes them fairly solid at dealing with hordes, too, so long as you can predict their approach path and position appropriately. You don’t need to be getting mass-kills with each trigger pull, of course, but simply putting two Commons down with one bullet is usually enough efficiency gain to allow the SR-user to hold down one angle alone.
Nonetheless, it is recommended that SR-users run Duals with a good SMG in their back pocket – not least because SR-sweeping is very ammo-inefficient.
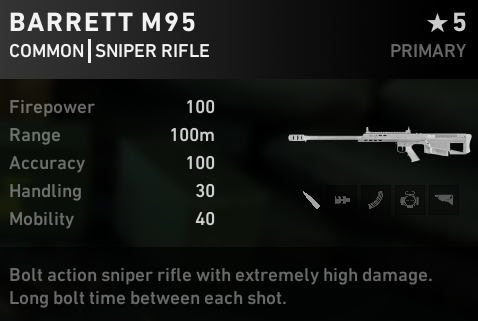
Base bullet damage: 120.0
Magazine: 5
The big boy, you will not find higher bullet damage anywhere in the game. It hits like a truck (albeit a very small truck), but as a trade-off, both the bolt-cycle and the reload time is substantially longer than the Phoenix.
Generally, this is not a trade-off worth making. The Phoenix already hits plenty hard enough to do the SR’s job, so with the vast majority of targets the M95’s extra damage is simply overkill. Having said that, if you’re swapping to a higher quality M95 the damage step-up will be sizeable, so don’t be too picky. If you do find yourself with an M95, bear in mind that it hits hard enough to get a stumble animation out of a Tallboy from 1-2 headshots, irrespective of weakspots, letting you generally deal with them alone. Named after a player-character in Final Fantasy VII, despite him never actually using a gun without it being embedded in at least one limb.
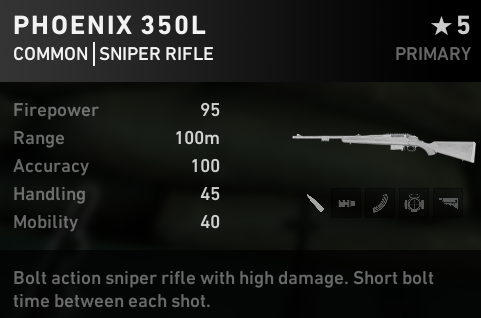
Base bullet damage: 90.0
Magazine: 5
Essentially, this is -the- SR of the game. It hits hard enough, assuming quality-parity, to one-shot any non-Tallboy Special with a weakspot hit – including Snitches, on Veteran at least – which is extremely valuable. With a modest amount of reload speed, the bolt-cycle is barely noticeable. Like the M95 it only holds a five round clip, but since you’re already incentivised to favour reload speed this is much less of a concern than it might be. As with the M95, always take a Fast Mag if you find one – an Extended Mag might give you more rounds, but it won’t get them into the chamber any faster. Presumably named by someone with an extremely poor understanding of what a phoenix is.

Base bullet damage: 38.0
Magazine: 10
The red-headed stepchild of the SR family, this rifle should be treated like one and despised [disclaimer: this is a joke, please don’t cancel me]. It is, effectively, a Ranch Rifle with a smaller clip and worse hip-fire. In theory being a semi-automatic SR should mean it can deliver frequent high-damage punches to weakspots; in practice, its recoil is far too high to maintain weakspot damage in any but the most favourable (or suicidal) of circumstances.
Avoid this weapon at all costs. It is literally worse than a Desert Eagle, and when your primary is worse than your secondary you know you have issues. If you’re Jim, who starts with one, learn to love your revolver until you can find a Phoenix. Unlike the other entries, I will not be closing this entry with a joke because I hate this weapon too much for comedy.
Sniper Rifle Cards
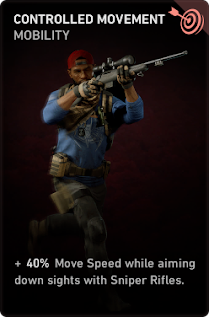
Absolutely terrible. There is no reason why you need to boost your movement speed while in ADS, let alone this much. Don’t waste your cards.
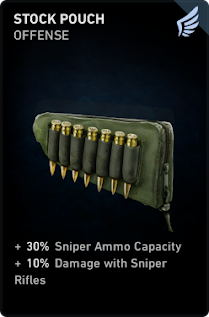
Just like all the other ammo cards, you’ll want this in your deck if you use SRs. In this case, though, it’s more for the ammo than anything else.
Almost certainly not worth it for an SR-user. SRs are already plenty accurate when in ADS, and they’re inaccurate enough from the hip that you probably shouldn’t be taking pot-shots even with this card. Even if this were good enough to enable SR hip-fire, it still wouldn’t be valuable enough to burn a card slot on. Avoid.
Shotguns
A class of weapons which are extremely powerful in their niche, shotguns excel at holding down specific areas and dealing with hordes. Later-game shotguns also become Special-killing powerhouses; as well as this, shotguns have arguably the best weapon-specific cards besides melee weapons. As a result of all these factors, every team should have at least one shotgunner to be competitive.
That being said, shotguns fall into the CQC position that melee also competes with. Generally shotguns will be substantially easier to use and work around, as well as coming online earlier; however, melee has a power ceiling far beyond anything else in the game. Which is used will depend on your group (and player preferences), and there is room for both to an extent. However, try to have no more than two CQC players in any given group – more than this will lead to difficulties sweeping and reduce the number of people available to reinforce any given side of your group when defending a fixed point.
Incidentally, while recommended for all players in general, shotgun-users in particular should prioritise the Down In Front card (assuming they’re not playing on Recruit, of course). In any given situation Shotgunners are most likely to be in the front (and so most vulnerable to being tagged by less-than-competent allies), while also having arguably the highest damage potential from a misfire (aside from SR-users who are supposed to be the marksmen and therefore less prone to have an ‘incident’).
N.B. Pellet counts are from my own count on the firing range; I think they’re accurate, but not 100% certain. Like any good guide-writer, my approach to accuracy is to whine ‘but that’s hard‘ and give up after a few tries.
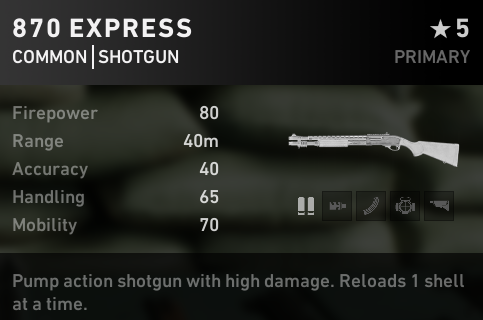
Base bullet damage: 8.0
Pellet count: 8
Magazine: 8
Your bog-standard pump-action shotgun, Holly starts with this alongside her bat (or more accurately, has this as a secondary weapon for enemies slightly outside bat’s reach). It’s underwhelming but does the shotgun job acceptably well in the early game; unlike later shotguns, its damage output against Specials is mediocre. Remember that, like SRs, pump-actions get dual benefit from reload speed as it also improves the speed that they pump (heh heh). Replace with one of the two auto shotguns as soon as you find one. Named by someone who mistakenly believed they were naming a train.
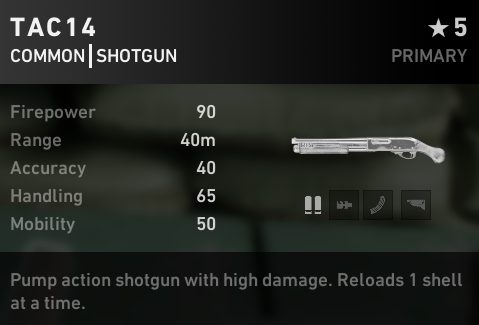
Base bullet damage: 10.0
Pellet count: 12
Magazine: 3
Hoffman starts with this, and he is not particularly happy about it. Functionally identical to the 870 Express, it has better per-shell damage output but a laughable three shell capacity. Given that both reload shells individually, the only real difference between the two is how often you have to hit the ‘R’ key. Just like the 870, replace ASAP (with a better shotgun, obviously, not that M95 you found in a closet). Its full name is ‘Teamkillers Are Cool 14’.
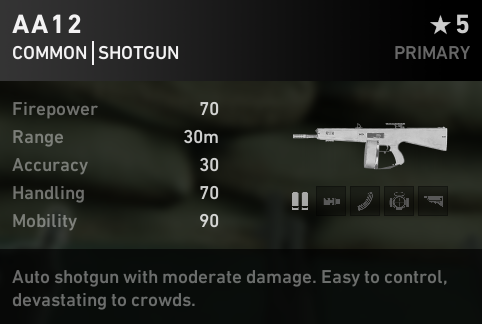
Base bullet damage: 8.0
Pellet count: 7
Magazine: 12
Now we’re talking. The AA12 is without doubt the best shotgun in the game; it has a serious argument for being considered the best gun in the game, period. It has a nice chunky magazine which reloads fairly quickly, enough punch to put down a Common with one shot on any difficulty (provided reasonable range, anyway), and most importantly, the ability to unload shells extremely quickly. This makes it phenomenal at bursting down Tallboys who, if not killed outright, will invariably be stumbled by the damage output.
The only thing the AA12 doesn’t do well is sweep, for obvious reasons. Trust your AR and SR players to sweep for you, don’t get greedy and waste shells trying to do their job, and in return they will trust you to protect them from hordes, hold down chokepoints, and obliterate any Tallboy who looks at them funny. Also note that the 2x scope is optimal on the AA-12 despite common sense suggesting otherwise, simply due to the damage boost. This gun’s very existence makes the setting and premise of the game implausible, because anyone holding one is essentially immune to everything, everywhere, ever.
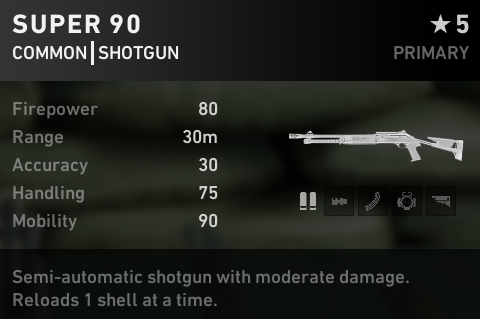
Base bullet damage: 8.0
Pellet count: 9
Magazine: 6
Inevitably the Super 90 must be compared to the AA12, as the premium weapon in the class. The result of that comparison is… unfavourable, but reasonably close.The Super 90 boasts somewhat superior per-shell damage due to pellet count compared to the AA-12, but that is essentially its only selling point. The AA12 wins for magazine size, reload speed and DPS – and therefore is superior for doing the two things shotguns exist to do, i.e. kill Tallboys and hold the line.
That being said, this doesn’t mean the Super 90 is bad. Not at all – it does the job and it does it well. It’s simply unfortunate for it that the AA-12 does the job excellently. Use the Super 90 if you haven’t found an AA12 yet, if you’re using shotguns in a hybrid build and your primary shotgunner wants the AA12, or if you’re an idiot hipster who thinks stacking 200% reload speed is a good idea.
Shotgun Cards
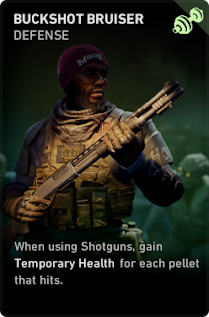
Although in theory this card is fantastic – 7+ health per shot, not considering penetration! – in practice it never seems to do as much as it should. I suspect it may be tracking how many total enemies are hit by any given shot, rather than how many pellets hit. I recommend you run Face Your Fears instead, as it works universally.
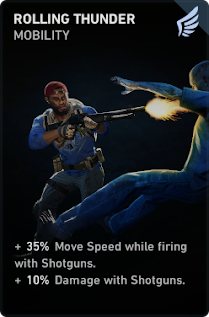
Not good enough. The movement speed while firing is basically irrelevant, so you’re basically just taking a card with 10% shotgun damage on it. There are better options out there.
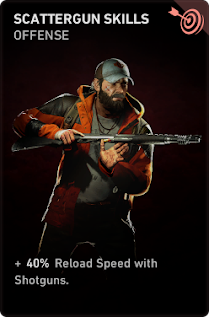
Much like Mag Coupler, would be good if the AA12 didn’t exist. Since it does, you don’t need this card.
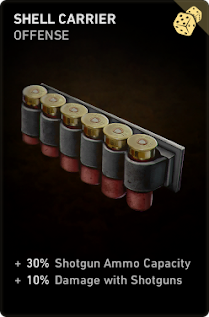
As with the other similar cards – if you’re using shotguns, you’ll probably want it. If you’re not, you definitely don’t.
Sidearms pt. 1
Sidearms (or secondary weapons as they’re usually referred to in-game) are very much a mixed bag, running the gamut from absolute garbage (The M1A Belgian) through various flavours of mediocrity, all the way up to ‘pretty good actually’ (TEC 9 and Desert Eagle). However, this is only if you’re considering them as what they are – secondary weapons. As standalone choices (i.e. if considered in the context of Duals), everything shifts downwards, the Desert Eagle and TEC 9 are underwhelming and everything else becomes worthless.
As such, when considering the relative merits of these guns, don’t think of them as weapons in isolation. It’s not just a TEC 9 – it’s a TEC 9 and also a bonus card slot because you didn’t take Duals. That’s worth a lot, especially on Nightmare where drawing cards from your deck is a luxury, not a right.
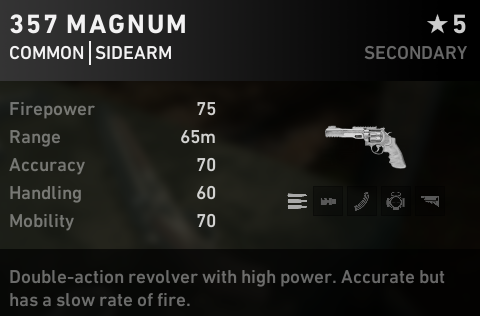
Base bullet damage: 20.0
Magazine: 8
The best you can say about the Magnum is that it’s not completely awful. It effectively acts as a substantially worse Desert Eagle, doing the same job – allowing for sweeping with your secondary – but with a slower reload speed and a LOT more recoil. Its only point of superiority over the noble bird is that it uses rifle ammo, which is far more plentiful than sniper ammo (at lesat assuming nobody’s carrying an M249).
Incidentally, Jim starts with one of these, and it’s effectively his primary weapon because the M1A is so very, very horrible. In practice, don’t take one of these if you’re the SR-user – you already have an SR which does the sweeping job far more effectively. Instead, look to the TEC 9 to give you some measure of anti-horde capacity. Named after a famous private investigator.

Base bullet damage: 10.0
Magazine: 12
Doc’s starting sidearm and a study in mediocrity. It functions exactly the same as every other pistol in every other game. Importantly, however, it is the only gun which actually fits Holly’s ‘pew pew’ voice line.
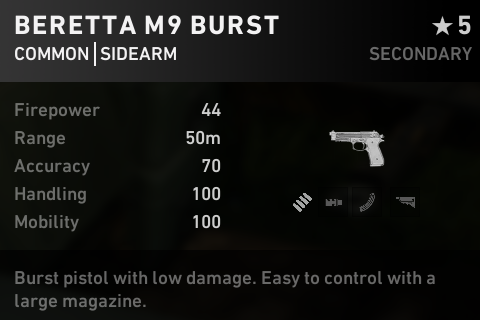
Base bullet damage: 10.0
Magazine: 12
Identical to the M9 but only fires in three-round bursts, which has no real benefit but makes the kick worse. Take this if you have such a severe inferiority complex that you won’t even allow yourself mediocre things. Note that the designer of this weapon cunningly sidestepped the issue most burst guns have – overkill – by putting the burst function on a gun with no stopping power.
Desert Eagle
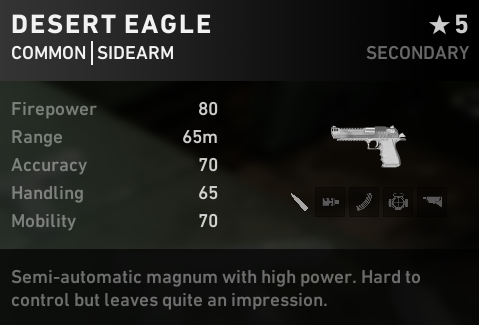
Base bullet damage: 28.0
Magazine: 7
Much better. The Desert Eagle is the ideal sidearm for the shotgunner who wants to be able to help out with sweeping, but not enough to take Duals – it packs enough of a punch to one-shot a Common from a chest shot on most difficulties and has a good reload speed, which is about all you can really ask for. Don’t make the mistake of thinking it can function as a SR – it can sweep, but it can’t kill Specials particularly effectively. Also note that it uses sniper ammo, so don’t over-use it if you have a SR-user because they’ll probably need that stuff at some point. ‘Desert Eagle’ is actually the gun’s Native American name, but its real name is long lost in the mists of time.
Sidearms pt. 2

Base bullet damage: 12.0
Magazine: 15
Basically it’s the M9 but better in every way. Still extremely generic, though. Take this pistol if you want to pistol at things with your pistol. Walker starts with this, as is only fitting for the most generic character in the game. If for some reason you’re using this a lot, it is a legal requirement for you to start every round by telling your team to ‘glock and gload’. [N.B. [i]Okay, that was the single worst joke in this entire guide. I can only apologise. But not enough to delete it or come up with anything better[/i].]
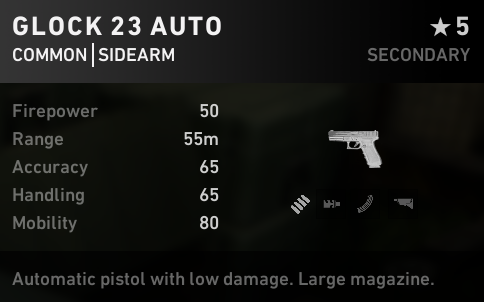
Base bullet damage: 10.0
Magazine: 15
Identical to the Glock 23, but with the added bonus of missing roughly 50% of its rounds due to the ludicrous recoil and losing 16% of its bullet damage for no adequately explored reason. Would be borderline usable for emergency situations if the TEC 9 didn’t exist. Named ‘Auto’ because it’s actually capable of transforming into a car; unfortunately, as it can only hold 15 bullets’ worth of fuel, this doesn’t come up much. [N.B. [i]Serious competition for the joke above[/i]]
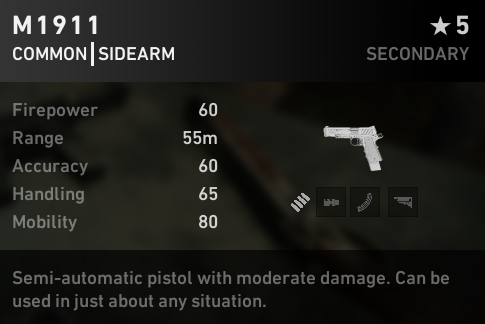
Base bullet damage: 15.0
Magazine: 8
Hoffman’s starting pistol, this isn’t actually too bad as far as pistols go. It has acceptable punch given it hits harder than an AK-47, and so long as the zombies aren’t running at you very quickly that’s often enough. Unfortunately it gets outscaled pretty quickly. Named because even though it’s a pistol, it’s still 1911 times better than the M1A.

Base bullet damage: 9
Magazine: 20
Karlee’s starting pistol and the other side to the Desert Eagle’s coin; where the birb makes you a pseudo-sweeper, this makes you pseudo-horde control. It’s easy to underestimate the TEC 9, as its bullet damage is poor and its clip size is mediocre; what matters, however, is that it has fairly minimal recoil and a high rate of fire. This means that despite its unassuming appearance, it can put out DPS comparable to an SMG. Just make sure you’re aiming it at the weakspot, or if you want to actually deal damage, take Duals and replace it with a Vector. Note that, despite being a sidearm, this counts as an SMG for achievements. Also note that despite being heavily associated with street crime and school shootings, carrying this gun does not make you any edgier. You heard me, Karlee.
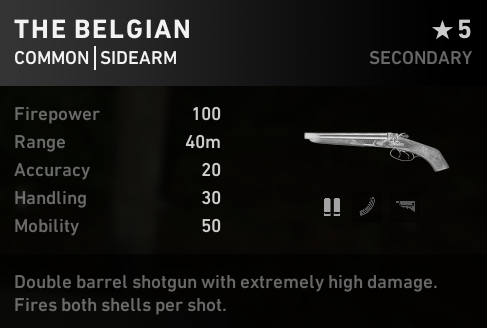
Base bullet damage: 8.0
Pellet count: 12
Magazine: 2
Mom’s starting secondary, and kind of a multi-layered joke. On the one hand, it’s a double-barrelled shotun that still only gets one shot, which is funny. On the other, it can still do more damage in one shot than an M1A, which is also funny. Unfortunately, the comedy drains away once you start actually using this weapon, which is too awful for laughs. Note that although this is a sidearm, it uses shotgun shells and counts as a shotgun for achievements – this is a purely academic fact, however, because you’ll never actually fire it. Named ‘The Belgian’ because it’s small, inoffensive, politically irrelevant and shares a land border with France.
Sidearm Cards
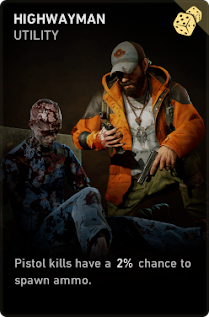
No. Absolutely not. If you’re that desperate for ammo you should be running a max ammo boost, not fishing for a 2% chance to get a handful of rounds. Better yet, just play Hoffman. Do not take this card.
While this card is worth taking if you’re focussing on SMGs, it really isn’t worth taking just to bolster your sidearm damage. In this context, do not take.
Melee weapons
Melee doesn’t really compete with firearms in many ways, so I’m mostly including this section out of a sense of completeness. Metagame-wise, though, it competes with the shotgun for the role of CQC in any given team.
On Veteran, you’ll find that melee locks down a tight section more effectively than a shotgun will due to the lack of downtime; however, melee is worse at dealing with Specials, and is much worse at area coverage. Melee can also fill the ‘damage sponge’ role more effectively than any other role once it has some cards built up. It mostly comes down to what your team wants to use.
On Nightmare, on the other hand, melee is the hail Mary play. It doesn’t come online until you’re several cards in, and carrying a weak player on Nightmare for that long is a real struggle. Once it does come online, however, melee becomes a real powerhouse (assuming the melee-user isn’t crippled by trauma, at least). The sheer number and variety of melee-oriented cards available give the role a lot of variance, and you’ll need to experiment to discover your favoured way of using it.
As far as individual weapons go, you’re effectively making two decisions – do you want a wide or narrow swing? And do you want a fast or a slow swing? This gives you your choice – wide/fast (machete), wide/slow (bat), narrow/slow (fire axe) or narrow/fast (hatchet). Slower/narrower swings are higher damage and so more suited for putting down Specials, wheras wider/faster swings cover more area and so are better for killing Commons.
General Weapon/Damage Cards pt. 1
Although it might seem like this would be good for everyone, in reality the reload times of most weapons are close enough to their swap speeds that you don’t really benefit from this. Sure, you could also run a swap-speed card; alternatively, you could just run one reload speed card and one other card, and you’d get about the same benefit. The only real reason to use this card is if you’re looking to run LMGs, or you really love the Super 90 for some reason.
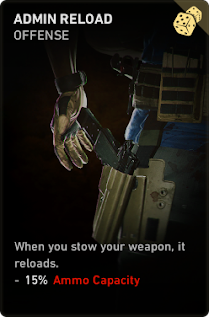
Terrible. Pistol/SMG ammo is extremely plentiful and should never be an issue, and you’ll never need to use your Desert Eagle this much. Note that despite what a surprising number of people think, this does not work with Duals – you’re equipping a Primary weapon in your Secondary slot, not turning your Primary weapon into a Secondary.
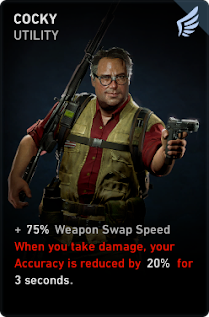
Garbage. No matter how much you think you want swap speed, and no matter how good you think you are at avoiding damage, it’s really not worth risking losing a chunk of your hip-fire accuracy because of some stray Common. Avoid.

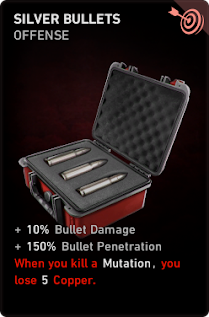
The most generic of generic damage cards, its only real stand-out feature is the bullet penetration (which, as explored in the Magazine Attachments section, is questionable at best). Avoid in favour of the more efficient damage cards like Shredder, Confident Killer etc.
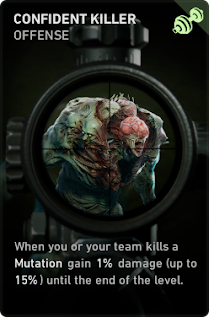
A very good card – the later a map goes, the more difficulties you’re often having as ammo runs low and health follows it. Getting a stacking damage boost helps substantially to mitigate this. However, it is a far more selfish boost than Shredder or Marked For Death, so this should usually be lower priority unless you’re running something that desperately needs a substantial damage boost.
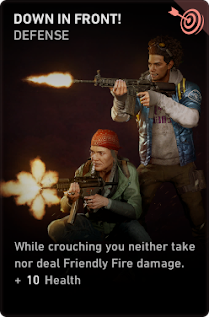
Okay, yes, I know, it’s not actually a damage card. However, if you’re even remotely concerned about FF (which you should be unless you’re playing on Recruit), taking this card will give you a huge amount of freedom in movement and firing. As a result, it actually ends up being a functional damage boost, even not a direct one, for the vast majority of players. I strongly recommend this card for everyone.
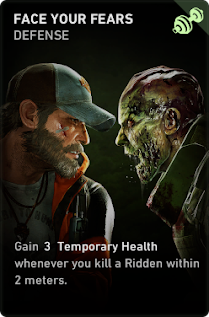
Also not a damage card, but included because it’s in direct competition with Buckshot Bruiser. As noted in that entry, prioritise this one over that one, as Buckshot Bruiser does not seem to be working as advertised.
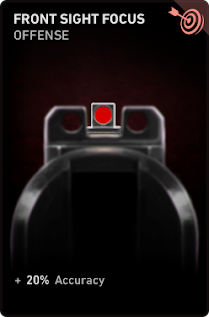
Not great. Accuracy mostly helps with hip-fire, as B4B’s guns are all pretty accurate when firing in ADS, and while a barrel slot is a fair trade for improving your hip-fire, a card definitely isn’t. Might be acceptable as the last card in your deck. Maybe.
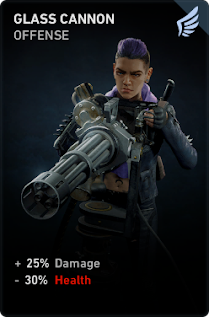
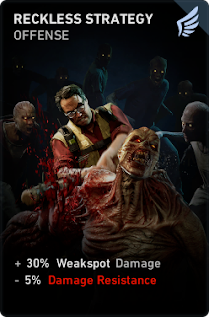
Ballsy. Isn’t actually too bad if you’re good at avoiding damage – 25% damage is a lot. That said, note that it’s 30 PERCENT health, not just 30 health – taking health boosts doesn’t help much. Nonetheless, can work well, especially in combination with cards like Face Your Fears. Consider taking Fresh Bandage and/or Saferoom Recovery, however, as Trauma is going to be a real problem for you.
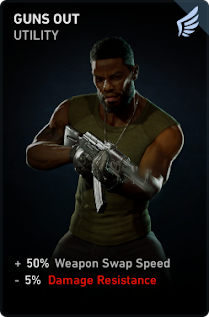
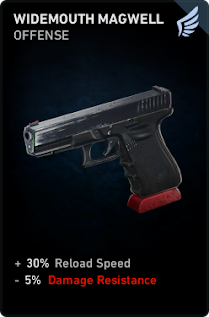
Probably the best weapon swap card, as 5% damage resistance isn’t too much of a price to pay. Unfortunately, as with the other weapon swap cards, the impact just isn’t enough to be worth a card slot.
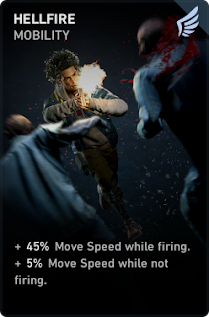
Terrible. You really don’t want to boost your speed much while firing – all you’re doing is making yourself less accurate. At least it has 5% movement speed on it, but still not worth taking in many circumstances.
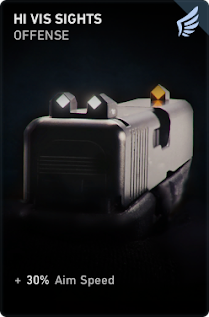
Not good. Aim speed is good in general, but much as with Front Sight Focus, it’s good enough for an attachment slot and definitely not good enough for a card. Avoid.
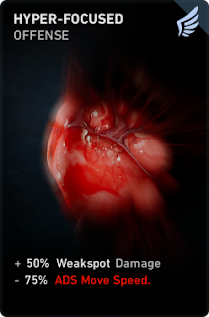
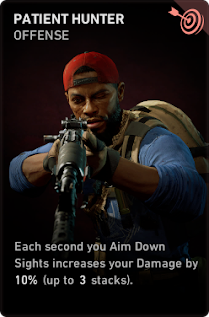
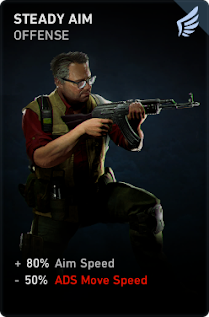
This is actually a really good card which most people seem to overlook. The loss of ADS movement speed really doesn’t hurt much since you’ll rarely be moving too much in ADS anyway; meanwhile, 50% is a LOT of extra damage. Seriously consider this if you’re able to hit weakspots reliably, especially if you like to work the wide angle to help with Tallboys.
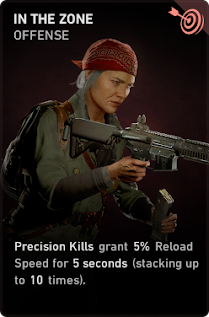
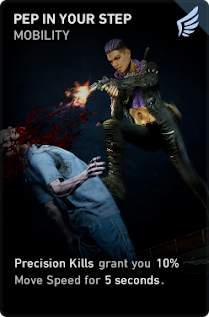
Garbage. Precision kills are the fancy term for headshotting Commons, and when you’re headshotting Commons you’re typically not pressured at all. Improves sweep speeds by a miniscule amount, and does at least give SR-users a reason to aim for headshots (not that they want one).
Not good. Makes you deal more damage against weakspots, while also making it much harder to aim for them. If you’re thinking about taking this, don’t. Take Hyper-Focused instead. That said, has some nice synergy with Quick Kill if you’re able to burn two card slots (which, on any reasonable difficulty, you’re not).
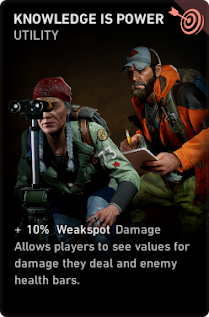
Not completely worthless, but extremely underwhelming compared to other cards. On the other hand, seeing damage numbers – while useless most of the time – is pretty nice for writing guides. So there’s that.
Not great. 50% better performance than Combat Training – which is extremely underwhelming as a card – in exchange for quicker stamina drain. That is not an acceptable trade.
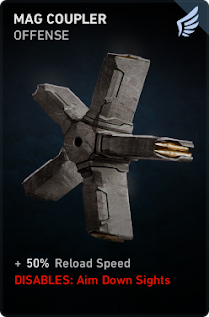
50% reload speed is actually pretty good, but nothing is worth losing your ADS for (unless you’re melee, anyway). Has some niche appeal for shotgunners, but realistically the AA12 doesn’t care about reload speed that much – and while other shotguns do, you shouldn’t really plan your build around guns you’re going to ditch at the earliest opportunity.
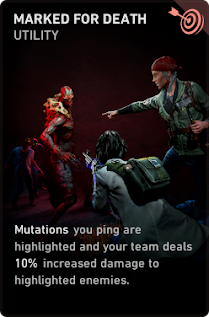
A fantastic card, this amounts to a 10% damage boost for your entire team against Specials. I haven’t gotten around to testing whether the damage boosts stack yet, and that’s basically the only reason you wouldn’t run this in every deck you ever made.

Ironically, a card you’d take to avoid using optics. Much like the other accuracy cards, not really worth it.
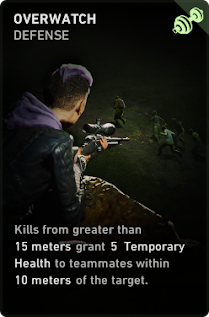
Mediocre game, worse card. There’s no reason your team should be this split up in most circumstances – and there’s no reason to take a card which will almost never be used unless someone screwed up badly. Avoid.
Not bad, but not as good as people seem to think. The issue is the situations this is actually going to be relevant – the times when you have time to sit in your scope for several seconds are the times when you don’t really need the damage boost all that much, wheras the times when you really need a boost, you won’t have it. You could make an argument for taking this on a SR-user, since they’ll usually see Tallboys coming and can wait for them to come into optimal range – but personally I would take something more reliable like Marked For Death instead.
General Weapon/Damage Cards pt. 2
Not worth it. In theory could be handy for running gauntlets – one quick headshot for a 10% speed boost – but gauntlets are rare enough that you won’t see enough benefit. Besides which, you’ll be leaving your team behind.
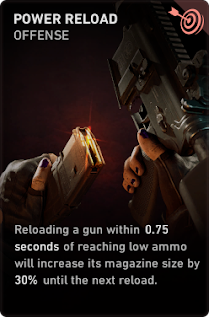
What exactly constitutes ‘low’ ammo is still up in the air. Regardless, this card isn’t worth it – you’re burning a card slot for what amounts to a chance to maybe get an Extended Mag for a while. Avoid.
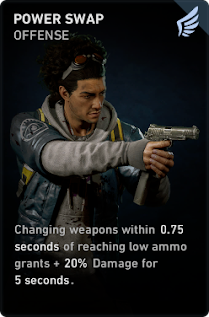
Has some nice synergy with Admin Reload, assuming you’ve figured out what ‘low’ ammo is. That said, far too situational and far too short-duration for a 20% damage boost; if it was 50%, I’d be considering it.

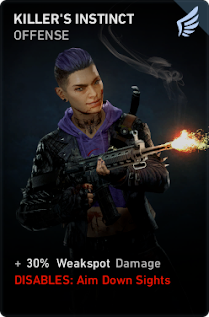
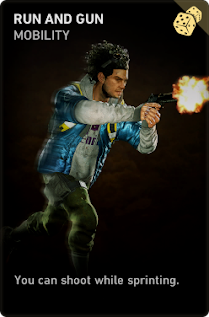
Not actually too bad, overall – while it disables ADS, the accuracy boost is big enough to potentially make ADS unnecessary if you’re good at aiming for pixels. Probably not worth burning a card slot over, though. On the other hand, if you’re desperate to turn this game into Left 4 Dead, this is a good start.
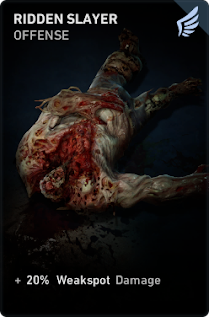
Not bad at all – 5% damage resistance is small enough that you won’t really feel a difference, and 30% weakspot damage is sizeable – but unfortunately it’s competing with Hyper-Focused which is simply better, and weakspot damage isn’t critical enough to be worth stacking. Take Hyper-Focused instead.
Surprisingly usable overall – most of the reload speed cards have some nasty side effects which are better off avoided. That said, reload speed isn’t important enough to be worth burning a card on unless you’re a SR-user (and even then it’s questionable).
Not too bad, but doesn’t quite pull enough weight to make the cut. Even if you want a selfish damage boost, Confident Killer is going to stack quickly enough to be superior to this. If you want weakspot damage, take Hyper-Focused; if you want damage, take one of the good generic damage cards.
No. Absolutely not. There is no reason why you’d want to take this unless you’re utterly stumped by gauntlet events or you habitually abandon your team. Garbage card.

Has similar issues to In The Zone, in that the only time you’re going to be stacking a lot of precision kills are times when you’re under no pressure or threat. Those are the times when you really don’t need damage boosts. Take something more general instead.
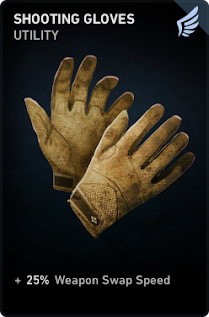
Not good enough for a card slot. It might be tempting if you’re running an LMG/Admin Reload build, but even then, it just isn’t worth it. It makes swapping feel a lot better, certainly, but shaving less than a second off that swap time is virtually never going to matter. And even if you’re absolutely set on taking a weapon swap card, Guns Out is usually going to be better.

Not bad, but not great. Although you can stack the damage boost quickly, unless you’re using an LMG you’re only going to get the full boost by the time you’ve basically emptied your mag already. If your team is also firing, they’ll get the benefit… but even then, it’s going to perform similarly to, or worse than, Marked For Death. Still better than most damage cards, but both MFD and Confident Killer will outperform this.
Definitely interesting, and if it was all damage boost instead of bringing penetration into the mix it’d be potentially good. As it is, bullet penetration is barely even useful, and 10% damage boost isn’t enough to cripple your personal economy over. Avoid, but be sad about it.
Wow, that’s a lot of aim speed. If only aim speed were a relevant stat, this might actually be good. As it is, avoid.
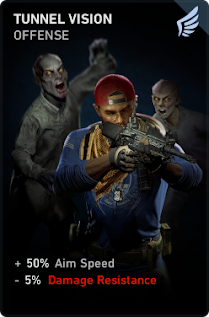
Even if you want aim speed desperately – and you don’t – Steady Aim would be better. Don’t take this.
There’s a whole section for this card at the start of the guide. I’m not going to repeat myself here, damnit!
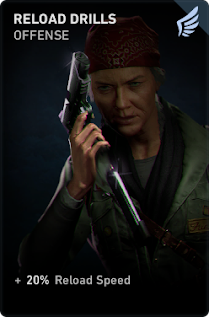
Not awful for those who need reload speed (read: SR-users). However, while 5% damage resistance isn’t too substantial, nor is 10% reload speed – on balance I’d favour Reload Drills over this as 20% is usually plenty with a Fast Mag.
Credits
B4B Card Compendium (Various contributors) – Easily-accessed card database. Also the source of my card images. Can be accessed here: https://docs.google.com/spreadsheets/d/1zURAO8DELx_EN1D8YkuJ8hw_WQ2jY1mcLE4D8ElMYUo/htmlview?pru=AAABfNXMInA*TFcDfGKCIb7o3cPSuBZIMw#
Back 4 Blood Weapon Attachments spreadsheet – Lordreaper12 – accessible here: https://docs.google.com/spreadsheets/d/1d8yVDoB3xwjKy6KQi85kii-Lig8JIErnomdB4FRoX4A/edit#gid=0
The M1A – for engendering such a feeling of loathing in me that I authored an entire guide dedicated to insulting it
More Guides:
- Back 4 Blood: Melee Build Guide (Tank/Healing)
- Back 4 Blood: Doc Support Deck Build
- Back 4 Blood: The Messiah™ Build
- Back 4 Blood: How to Kill a Snitch without Alerting a Horde
- Back 4 Blood: Swarm Mode Guide (PvP)