Remember, every run in dead cells will be different. The weapons and abilities at your disposal might not exactly fit into one of these builds, but every build has an element of flexibility, certain weapons, or abilities that can be swapped out for others. Without further ado, here is a list of 10 builds in Dead Cells that wreck hard!
Assassin’s Dagger / Phaser Build
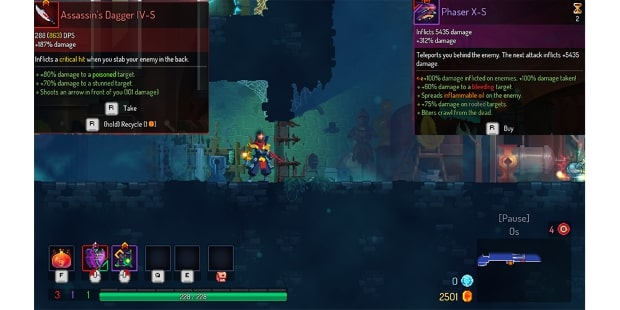
The ultimate assassin build. Teleport behind enemy after enemy inflicting devastating critical strikes. As the name implies, absolute necessaries for this build are the Assassin’s Dagger and the skill Phaser. The most important mutation to carry with this is Scheme, which gives you a damage bonus after using a skill.
What the Assassin’s Dagger / Phaser Build Excels In
Burst damage. After teleporting behind an enemy you can fit in three or four critical hits before the enemy reacts, dishing out massive damage.
Devastates single targets. The Phaser’s low cooldown allows you to teleport behind an enemy over and over, dodging many of their attacks.
It is easy to use. The Assassin’s Dagger and Phaser require little management. Teleporting has its perks.
Area Damage Build
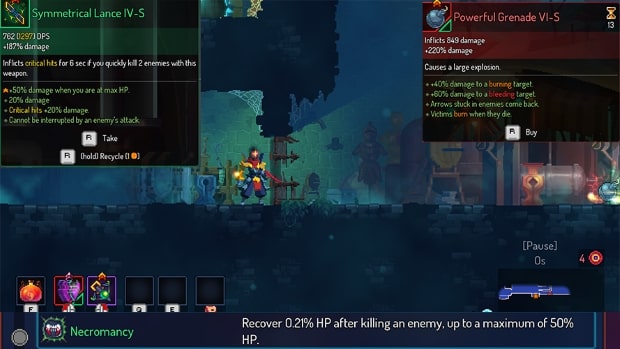
Dead Cells is a mix of mob-filled biomes and bosses. This build focuses on bringing the pain amid mob-filled encounters. It will turn the tide in frantic fights with enemies on all sides. The Symmetrical Lance’s massive range will immediately clear out the weaker foes with the Powerful Grenade’s explosion enough to stun stronger enemies, buying time to complete the Lance’s three-hit combo.
What the Area Damage Build Excels In
Well, Area Damage. The Symmetrical Lance as a primary weapon is an excellent foundation to deal damage all around you.
This build is at its best in biomes filled with enemies.
With the Necromancy mutation, this build has excellent sustain, allowing you to tank hits without having to dip into your supply of health flasks (important on higher difficulties)
Ice Build

This build maximizes safety, keeping enemies unable to move or moving at around 50% speed. Pairing Freezing based abilities with a heavy-hitting survival weapon like the Broadsword gives you time to complete the monster (but absurdly slow) combo, capitalizing on the extra time you have to strike. This build is also compatible with heavy, two-slot survival weapons like the Heavy Crossbow or the Explosive Crossbow.
What the Ice Build Excels In
Safety. This build prioritizes safety, eliminating enemies before they strike or slowing them down.
Combos. The extra time is perfect for dealing the hurt with a huge weapon.
Versatility. This build works well in both normal biomes and boss fights.
Ranged Root Build

A build for those wishing to stay as far out of danger as possible. The Ranged Root build functions around maximizing the damage of the Marksman’s Bow. The Bow’s Crit with the damage boost from Tranquility and enemies caught in the Wolf Trap make the single (or multiple, with piercing mods) target damages go through the roof.
What the Ranged Root Build Excels in
Safety. This build centers around being far enough from enemies that they are no threat to you.
The crit damage from the Marksman’s Bow at range allows you to end some engagements before the enemies even notice you are there.
Best for focusing on one enemy, like boss fights.
Speed Build

The Speed build is a self-sustaining brutality build based around the speed buff (gained from killing 5 enemies in a short period) and the Swift Sword, which crits when there is an active speed boost. This build is all about striking fast and hard and sprinting from one engagement to the next. The mutations Velocity and Frenzy increase the duration of the speed boost and give you lifesteal, giving it massive sustain to keep you around 100% health.
What the Speed Build Excels In
It increases your chances of opening timed doors, a great boon in any run.
Versatility. The secondary weapon slot and both ability slots are open to the best pickups found in each biome.
Cruising through normal enemy biomes. The Velocity mutation allows you to have the speed buff up for the whole time.
Bleed Build
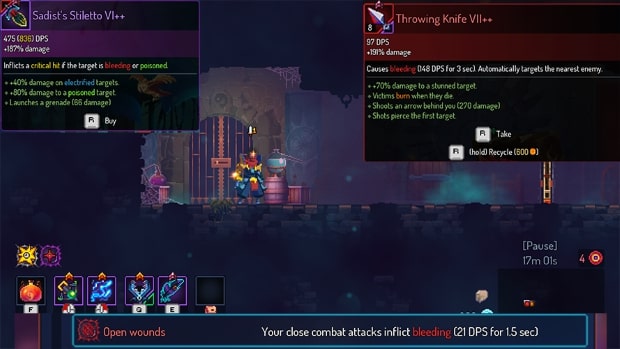
The bleed mutation is different from the other DOTs in the game. Specifically, if you stack enough bleed on an enemy the enemy will explode, causing all the bleed damage stacked on an enemy to be dealt at once. The beauty of this build is that every enemy is susceptible to bleed damage. Bosses bleed too.
What the Bleed Build Excels In
It is easy to build upon. There are many weapons and abilities suited to this build.
It is great in both boss and normal biomes.
Synergize between weapons and abilities to apply as much bleed as possible.
Infantry Bow / Grappling Hook Build

Similar to the Assassin build, this build does immense single target burst damage. The crits are a little easier to land, since instead of the Assassin’s Dagger’s “strikes from behind” the Infantry Bow crits as long as enemies are close to you. Similar to phasor, the grappling hook has a very low cooldown.
What the Infantry Bow / Grappling Hook Build Excels in
Similar to the Assassin Build, but better suited for combat in biomes.
The Grappling Hook pulls enemies, making them come to you.
Grappling Hook and Infantry Bow combos still devastate bosses, making it an excellent choice for normal biomes and boss fights.
Giantkiller Build
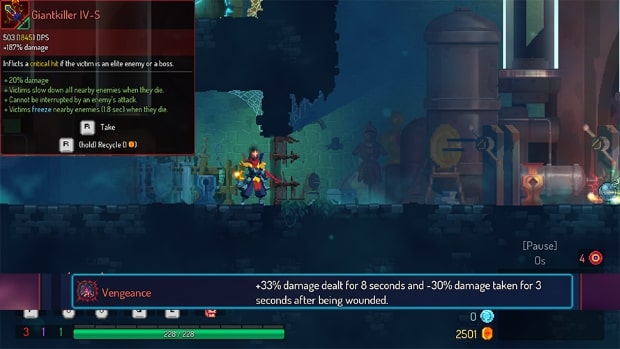
This is the build for killing bosses. The Giantkiller is a huge sword that crits when attacking bosses and elites. On higher BC levels elites are a dime a dozen, giving the Giantkiller time to shine. Although it carves through elites and bosses like a hot knife through butter, it is important to keep another weapon to deal with the riff-raff within each normal biome.
What the Giantkiller Build Excels In
Slaying elites and bosses.
Versatility. The Giantkiller scales with both Brutality and Survival.
The Giantkiller drives this build, keeping slots open for another weapon and skills.
Turret Build

Oh, turrets. Is there anything better? There are six turrets in the game, each with its own special flair. They all have one thing in common: slaying enemies. Pair up two turrets however you like and watch as they tear through normal enemies and bosses alike.
What the Turret Build Excels In
Super-versatile. It is easy to upgrade this build with turrets of higher levels found in every biome.
Similarly, there are loads of tactics weapons that work with this build to make it however you like.
Turrets are reliable, with a steady DPS dealt out upon all enemies.
Alchemic Carbine / Hokuto’s Bow

The build of all builds. A combination of some of the most powerful weapons in the game, a mixture of safety and reliability, the mark from Hokuto’s bow supercharging the poison of the Alchemic Carbine. A Tactics build at its core, it can be paired with turrets or grenades, or any number of skills to complement the DPS of this poison build.
What the Alchemic Carbine / Hokuto’s Bow Build Excels In
Safe damage. The DOT of the poison grows as long as enemies are in the cloud left by the Carbine shots, giving you plenty of time to maneuver while enemies are wasting away
Open skill slots allow this build to grow in power even when unable to find new primary or secondary weapons.
Dominates in both normal biomes and boss fights.