
The Green Shield Bug Part is one of those materials you’ll need more of than you think. It drops from a single creature type in the Bridge biome, and while the bug itself is common, farming it efficiently requires knowing exactly where to look and how to approach the fight. This guide covers the spawn location, the safest kill method, and what else you’ll get from each kill.
Where to Find Green Shield Bugs in the Bridge Biome
The Green Shield Bug is a common spawn on the right side of the Bridge biome. You don’t need to hunt for a rare spawn point or wait for a specific time of day — these creatures populate the area consistently, which makes them a reliable farming target once you know the route.
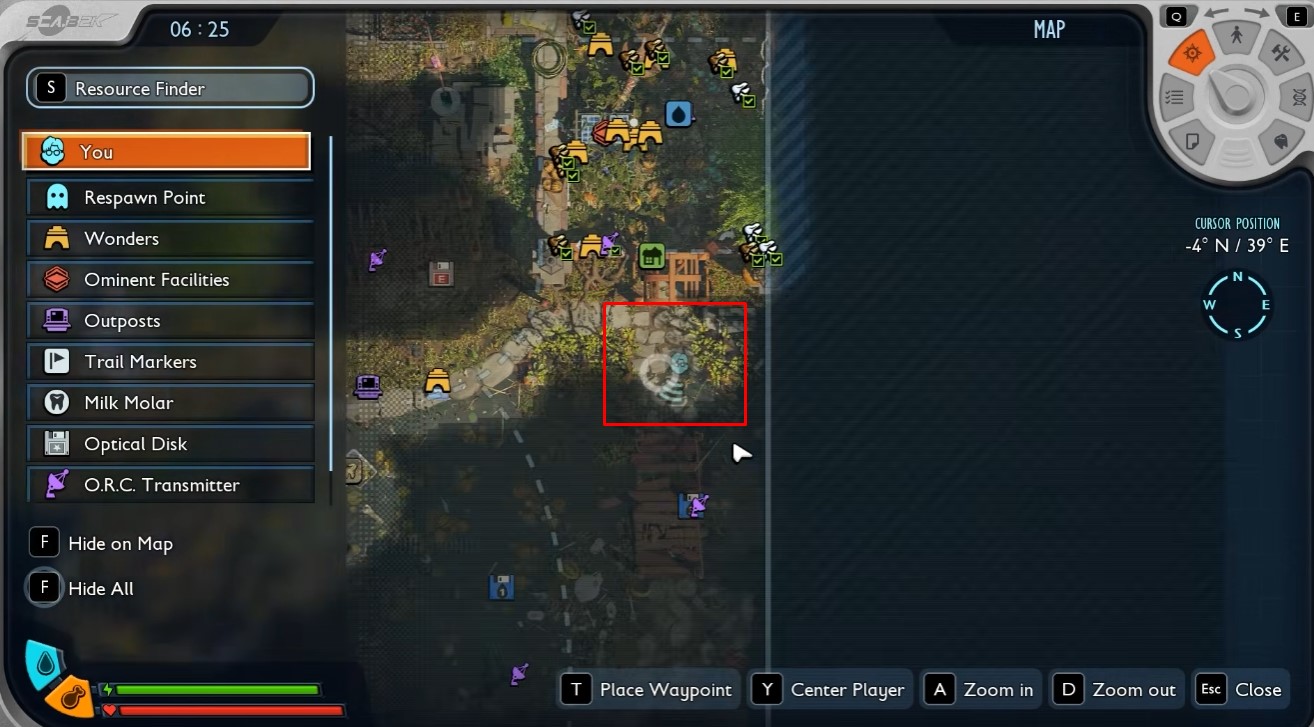
Head to the right side of the biome and scan the ground level first. The bugs blend into the environment reasonably well, so move slowly and look for the distinctive shield-shaped carapace. Once you spot one, you’ll likely find several more within a short walking distance.
How to Defeat the Green Shield Bug Safely
Before engaging, understand two things about this creature: its weaknesses and its attack behavior. The Green Shield Bug takes increased damage from fresh damage and stabbing damage, so adjust your loadout accordingly before you start the fight.
| Damage Type | Effectiveness |
|---|---|
| Fresh | Strong |
| Stabbing | Strong |
| Smash | Standard |
| Ranged | Standard |
The attack strategy matters more than raw damage output. Approach the creature from behind to initiate the fight — this gives you a free opening and keeps you out of its frontal attack arc. The bug’s main threat comes from its gas-based attacks, which is why you should equip a gas mask before engaging. Without it, you’ll take avoidable damage that compounds over multiple farming runs.
Here’s the step-by-step kill routine that works consistently:
- Equip your gas mask and a fresh or stabbing damage weapon.
- Approach from behind and land the first hit.
- Maintain position behind the creature — it has limited turn speed.
- Attack in short bursts, backing off when it telegraphs a gas release.
- Repeat until it drops.
What the Green Shield Bug Drops
Each kill yields two items: the Green Shield Bug Part and a second drop described as a “super item.” Both come from the same creature, so there’s no need to farm multiple enemy types for these materials.
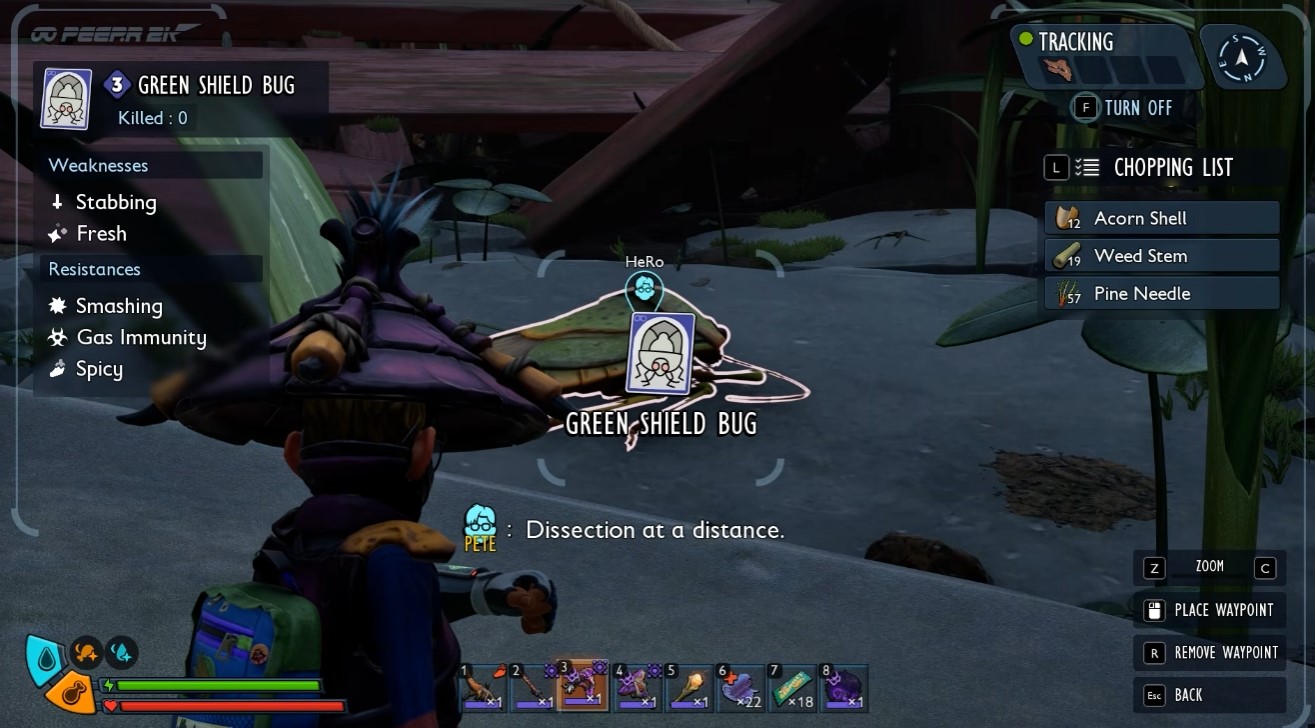
The second drop is the rarer of the two, and you’ll need several kills to accumulate a meaningful stockpile of both. Since the bugs are common in the Bridge biome, a focused farming run of 10–15 minutes should net you enough parts for most crafting recipes.
If you’re also working on other Into the Abyss materials, check out How to Get Tick Fang Guide — the Tick uses a different spawn pattern and drop mechanic, so it’s worth knowing the distinction before you go hunting.
Farming Route and Efficiency Tips
The most efficient loop starts at the right edge of the Bridge biome and sweeps inward. Clear the area, collect your drops, then circle back — the respawn timer is short enough that you’ll rarely wait.
A few practical notes from extended farming:
- Bring multiple gas masks. The durability loss adds up fast when you’re chain-killing.
- Skip the ranged approach. The Green Shield Bug closes distance quickly, and you’ll waste more time repositioning than you save.
- Prioritize the super item drop. The Green Shield Bug Part comes reliably, but the second drop is what bottlenecks most crafting trees.
For players working toward endgame gear, the materials you gather here feed into broader crafting chains. If you’re planning your armor progression, How to Unlock the Tier 4 Striped Armor covers the full unlock process for the new armor set — worth reading before you commit to a farming grind.
Final Notes on Farming Green Shield Bug Parts
The Green Shield Bug is one of the more forgiving farming targets in the Into the Abyss update. The spawns are dense, the kill is straightforward with the right approach, and the two-drop system means every kill progresses your material stockpile. The main friction points are the gas mask requirement and the need to maintain rear positioning during fights.
Once you’ve got the route down, you can clear the right side of the Bridge biome in under five minutes per pass. That’s roughly 10–12 kills per hour if you’re moving efficiently, which translates to a steady supply of both drops.


