This guide is beginner friendly, so I will go over both easy to learn combos and more complex high damage combos.
This is a work in progress and I’ll be adding more optimal combos in future. If you have suggestions or feedback please comment below!
Note: If you love this guide, please rate it via SteamComunity.
Intro
 Welcome to my Jolyne Guide for JoJo’s Bizarre Adventure: All Star Battle R
Jolyne’s got a really fun, fast playstyle. She has a super jump, a parry and a lot of Ora Ora.
I’ve written this to be as beginner friendly as possible, with explanations of different combos and moves while also including some more complex combos.
If you want to skip the explanations and get straight to the combos, head down to the Cheat Sheet section at the bottom.
If you know some better combos or if I’ve made a mistake somewhere please let me know in the comments and I can update my guide to reflect.
This guide is a work in progress, so I’ll be updating it periodically.
Notation and Button Guide
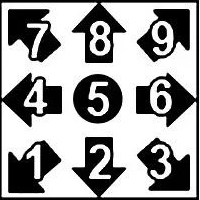
4 is left, 6 is right, 2 is down, 8 is up and 5 is neutral.If you’ve played Street Fighter or other non-anime fighting games, this notation may feel a bit alien to you, but once you get used to it, it’s very intuitive. For example, a quarter circle forward input would be written as 236L and a DP input would be written as 623L.
- L – Light Attack
- M – Medium Attack
- H – Heavy Attack
- S – Stand on/off
- A – Assist
- HHA – Heart Heat Attack
- GHA – Great Heat Attack
j indicates that an attack is during jumping, so jM means jumping medium attack.
Ok, with these basics out of the way, onto Jolyne’s moves!
Jolyne’s Special Attacks & Command Normals

- 6H – Whatever It Takes To Win!
- 236 L/M/H – Sweet Dreams, Creep!
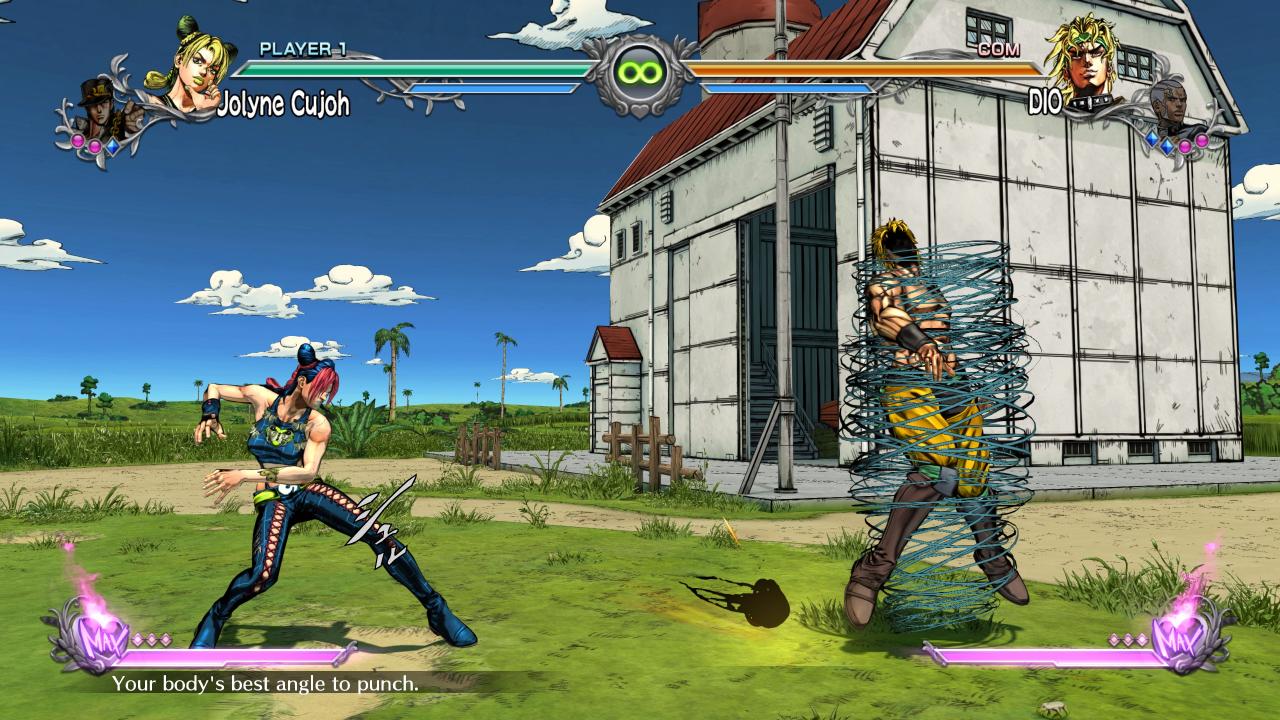
- 63214 L/M/H – Your Body’s Best Angle To Punch
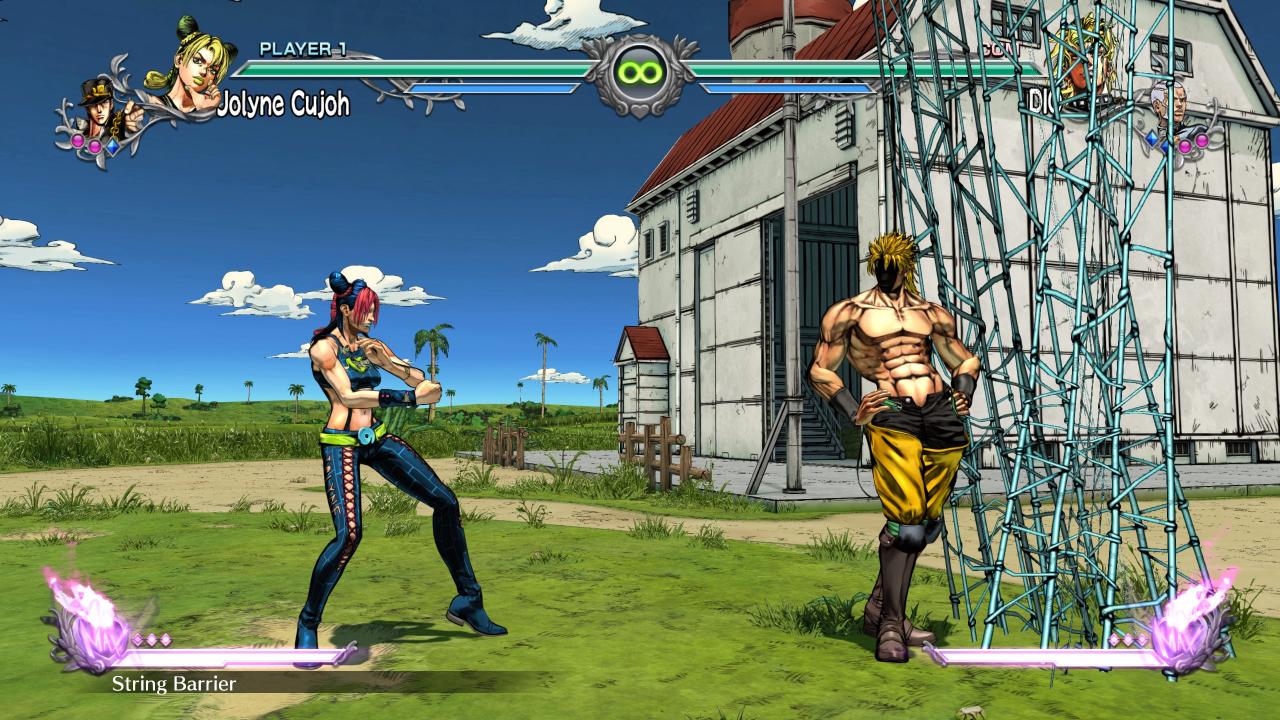
- 22 L/M/H – String Barrier
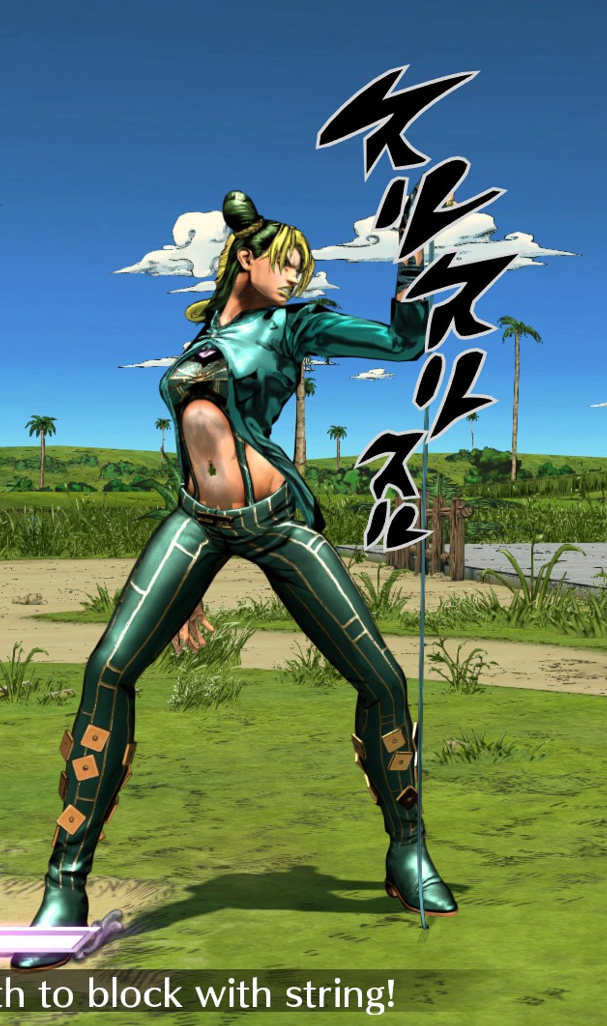
- 412 L/M/H – I Don’t Need Strength To Block With String! (This is her parry move)
Stand ON
- 236 L/M/H – So You’re The Enemy, Huh?
- 623 L/M/H – Don’t Wait! Just Attack
- 2 L/M/H – I Won’t Cut My String Yet! (during Don’t Wait! Just Attack)
- 1H/2H/3H (in air) – Stringing Me For A Ride!
- 27/28/29 – With My String! (Press down and then quickly an up direction to activate)
Heat Attacks
- HHA – 1,000 Throws [Requires 1 gauge of HH]
- 236 L+M or M+H or L+H (any 2 attack buttons)
- GHA – Time To Retire You! [Requires 2 gauges of HH]
- 236 L+M+H (all 3 attack buttons)
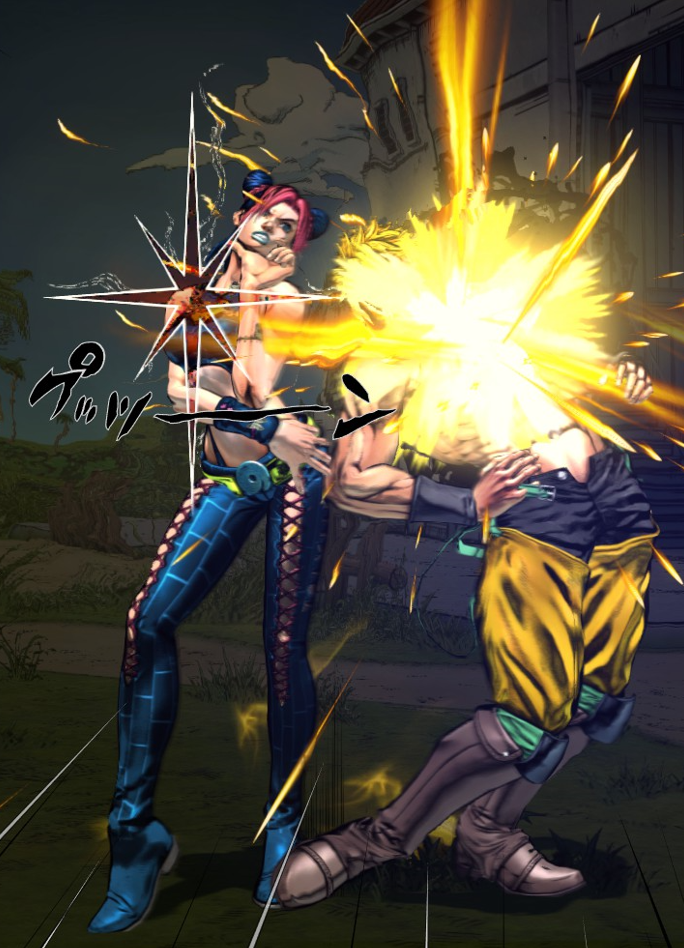
- 236 L/M/H – Sweet Dreams, Creep!
This is Jolyne’s Lightning Legs, she kicks out with a flurry of Ora Ora kicks which can be combo’d into her HHA. - 412 L/M/H – I Don’t Need Strength To Block With String!
Jolyne draws a string from her hand to the ground, any attack that touches the string will be countered by Jolyne’s kicks automatically. The different attack buttons modify how long Jolyne will take this parry stance. Light behind the longest and Heavy being the shortest.
- 63214 L/M/H – Your Body’s Best Angle To Punch
Jolyne casts out a thread which reaches across the bottom of the screen, if this hits your opponent, they will be wrapped in string while Stone Free punches them.
- 27/28/29 – With My String! (Press down and then quickly an up direction to activate)
This is a lot more straight forward than it looks, simply press a down direction and then an up direction quickly in order to activate this. Jolyne can use this movement to get into place and in the middle of combos. It’s a super jump.
- 22 L/M/H – String Barrier
Double tap down plus an attack button to set up a vertical weave of thread that can be used to catch your opponent out from behind or use it to create space between you.
Using this while your opponent is knocked down can lead to some great Oki potential*
 *Translator’s note: Okizeme (起き攻め) or Oki referes to pressuing an opponent while they are getting up after being knocked down
Combos & Explanation
The easy combo system in ASBR allows you to easily pull of a combo by just pressing 1 button repeatedly. The draw back is that the easy combo version does less damage than if you were to do the inputs normally.
You can input the easy combo by spamming L like this:
- L > L > L > L > L
I have you have 1 bar of Heat Gauge, it will automatically add the HHA to the end for you also.
However if you want to do it properly for that extra bit of damage, Jolyne’s easy combo consists of the following:
- 5L > 5M > 5H > 236H > HHA
The combo damage difference can be seen here:
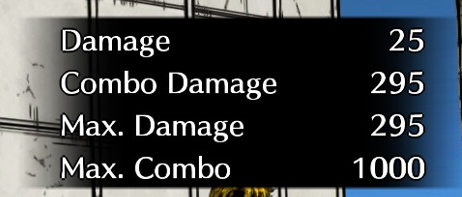
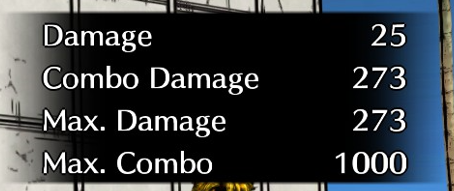 …It might not look like much, but that extra damage can be the difference between losing and winning.
This opener is used quite often in these combos, so I will abbreviate 5L > 5M > 5H as 5LMH from now on.
For example: 5L > 5M > 5H > 236H > HHA becomes 5LMH > 236H > HHA
Now, let’s use that basic combo as a basis for some other fun combos.
We can squeeze a 6H after the initial light, medium, heavy and see what happens.
- 5LMH > 236H
- 5LMH > 6H > 236H
Adding 6H takes us from 168 damage to 182 damage, nice!
Now that we’ve added that 6H, let’s swap out will then allow us to combo into “What Angle Is Best To Hit You From?”, however only the light or medium versions will land. This results in a 182 Damage meterless combo.
- 5LMH > 6H > 63214M
This is a nice option, but cannot be combo’d into HHA like the previous combo, so keep that in mind.
GHA requires 2 bars and can be executed as part of this basic combo:
- 5LMH > 6H > GHA
Once you’ve mastered Jolyne’s basic combo, we can do a few things to extend it.
We can use our assists to add some additional meterless damage, but with Jotaro specifically we can do Jolyne’s basic combo twice in a row if we time things right.
- 5LMH > 236H > assist > 5LMH > 236H
This results in a 435 damage meterless combo.
In order to pull this off you need to delay activating Jotaro’s assist until after Jolyne’s kicks have connected. Once Star Platinum is juggling your opponent you can dash forward and begin another combo just before the assist finishes.
The video below demonstrates this in action.
You only have a limited number of assists per round so keep that in mind.
Now onto some more complicated combos:
If you recall from the previous section, in stand mode Jolyne can use a thread to pull herself into the air, we’ll use this to our advantage combining air attacks with this combo:
I’ve written these as 29, but you could also input 19 for these if that’s more comfortable.
Stand ON
- 5LMH > 29jH > 5LMH > 29jH > 2M > 623H
This results in 248 meterless damage.
The string jump timing is quite strict and you need to let go of the direction in order to perform the jumping attack.
This can also be combo’d into HHA for 312 damage with the following variation:
- 5LMH > 29jH > 5LMH > 29jH > 2M > 236L > HHA
But Sophie, what if I start the combo without my stand on?
Well, person reading this right now, I’m glad you asked. You can activate your stand in the middle of a combo at the cost of half a Heat Gauge.
Stand OFF
- 5LMH > S > 5L > 5M> 29jH > 5M > 5H > 29jH > 5M > 623H
We activate our Stand after our initial LMH and are rewarded with a 264 damage combo.
We can also deactivate our stand in the middle of a combo in order to disconnect Jolyne from Stone Free and move independently while our opponent get’s Ora Ora’d
Starting with Stand ON
- 5LMH > 29jH > 5LMH > 29jH > 2M > 623M > S > 5LMH > 6H > 63214M
288 Damage off this one.
You read that right, in certain situations you can even taunt in the middle of a combo.
Whenever you knock down an opponent to the ground, you can perform a special zoomed in taunt.
In the following combo we can set up Jolyne’s String Barrier (22M) before taunting in order to juggle the opponent after the animation is complete.
Stand ON
- 5LMH > 29jH > 5M > 5H > 28jH > 236M > S > jH > 5LMH > 6H > 63214M > 22M > Taunt > 5LMH > 6H > GHA
This combo is only possible in the corner but will do 585 damage and a lot of bonus emotional damage to your opponent.
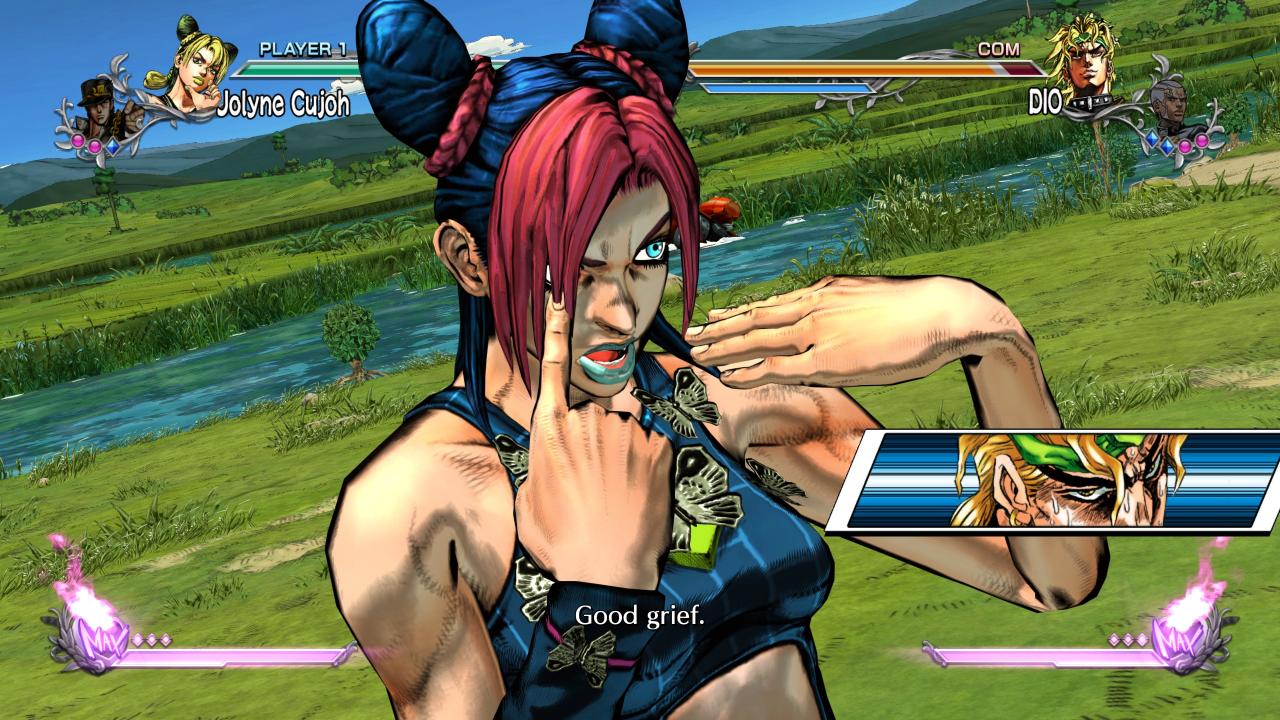
やれやれだわ
 Puttsun Cancel (PC) lets you cancel an attack to extend a combo. This is similar to Roman Cancels in Guilty Gear.
Press all 3 attack buttons at once during a move.
Jolyne will strike a pose and プッツ―ン will appear next to her.
You’ll now be able to move or attack again. This costs 1 bar of Heat.
If you remember our Jotaro assist combo, you can accomplish a similar combo by performing a PC instead of assist.
- 5LMH > 6H > 236H > PC > 5LMH > 6H > 236H
In this example you’ll deal 269 damage.
Cheat Sheet
Here are the combos without any of the flavour text or explanation so you have them handy.
Stand OFF
- 5LMH > 6H > 236H
- 5LMH > 6H > 236H > HHA
- 5LMH > 6H > GHA
- 5LMH > 6H > 63214M
- 5LMH > 236H > assist > 5LMH > 236H
- 5LMH > S > 5L > 5M> 29jH > 5M > 5H > 29jH > 5M > 623H
Stand ON
- 5LMH > 29jH > 5LMH > 29jH > 2M > 623H
- 5LMH > 29jH > 5LMH > 29jH > 2M > 236L > HHA
- 5LMH > 29jH > 5LMH > 29jH > 2M > 623M > S > 5LMH > 6H > 63214M
- 5LMH > 29jH > 5M > 5H > 28jH > 236M > S > jH > 5LMH > 6H > 63214M > 22M > Taunt > 5LMH > 6H > GHA (Corner Only)
By mscupcakes