This is a complete guide with pictures of the location of all 10 collectibles on the map KF_Rig for the achievement Marine Research.
The collectibles are ordered in a logical order so you can get them in almost one single path.
Preparations
IMPORTANT
Some of the collectibles seem to not have fixed spawns, so this guide will be updated with every one I find. Because some of these would require me to completely change the whole guide, I just added them at the end after a while. I do believe I have found every possible location though.
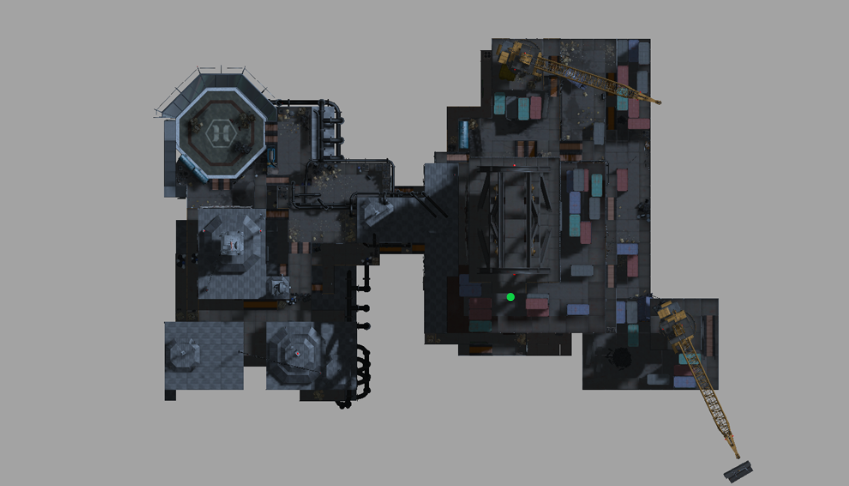
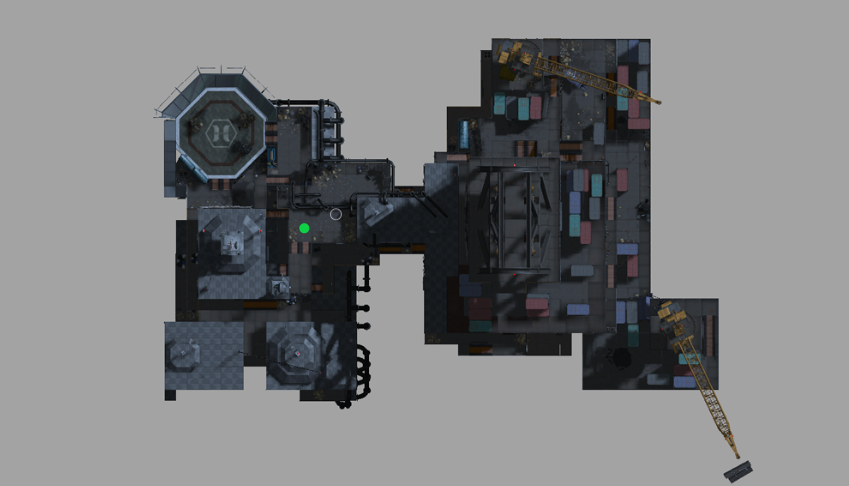
The locations on the top-down map are not exact, it is simply so to point you in the right area. The descriptions and pictures of the locations alone should be enough for you to find all the collectibles!
The Hunt
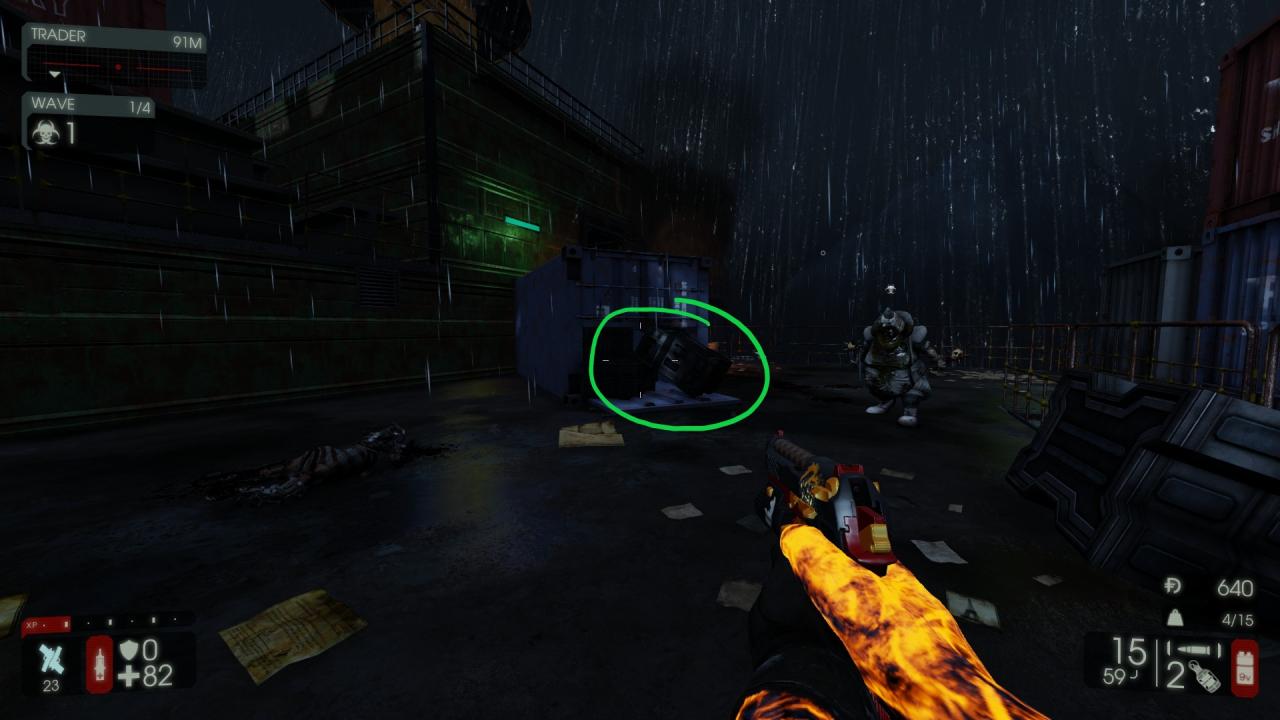
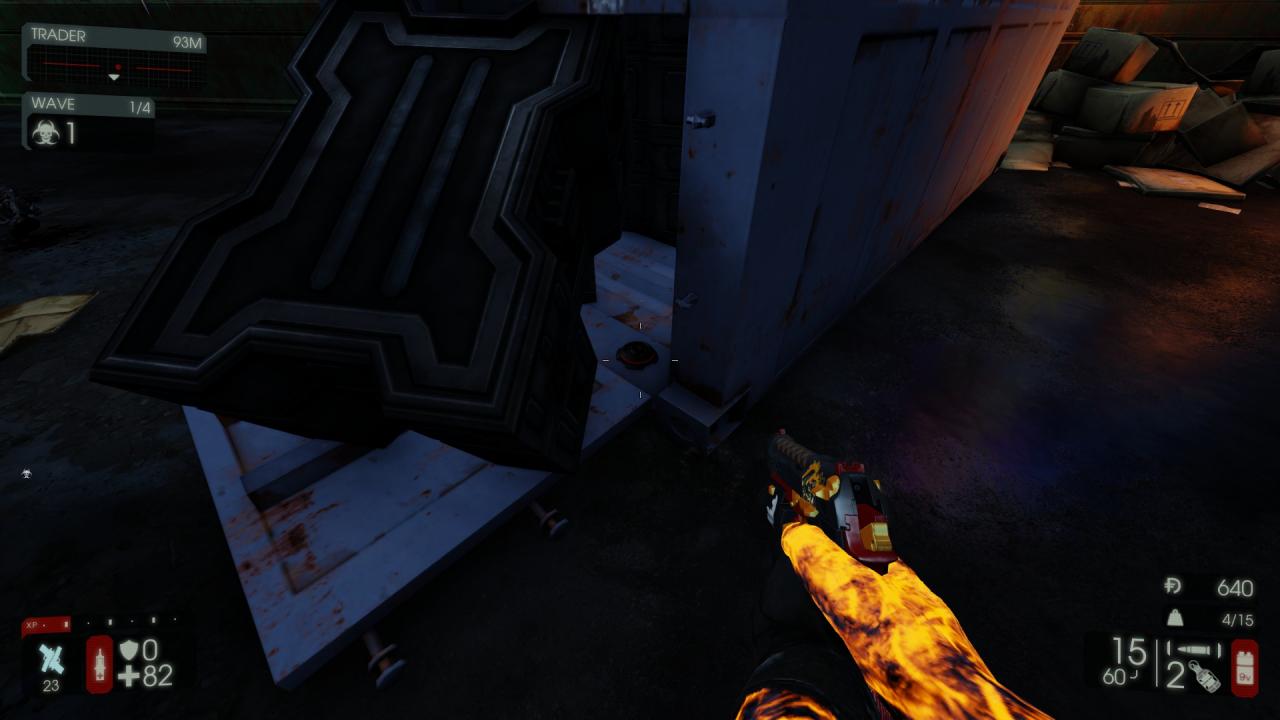
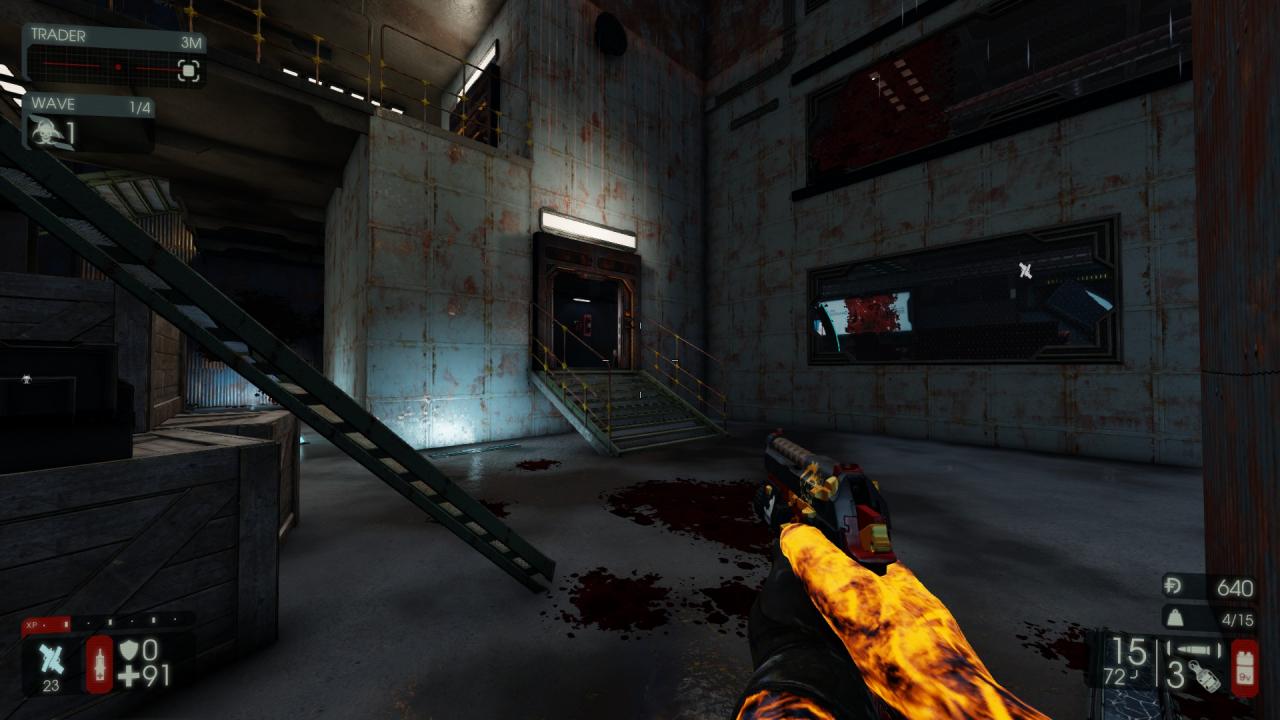
At the starting area near the center, run up to the blue container. The collectible will be on the ground.

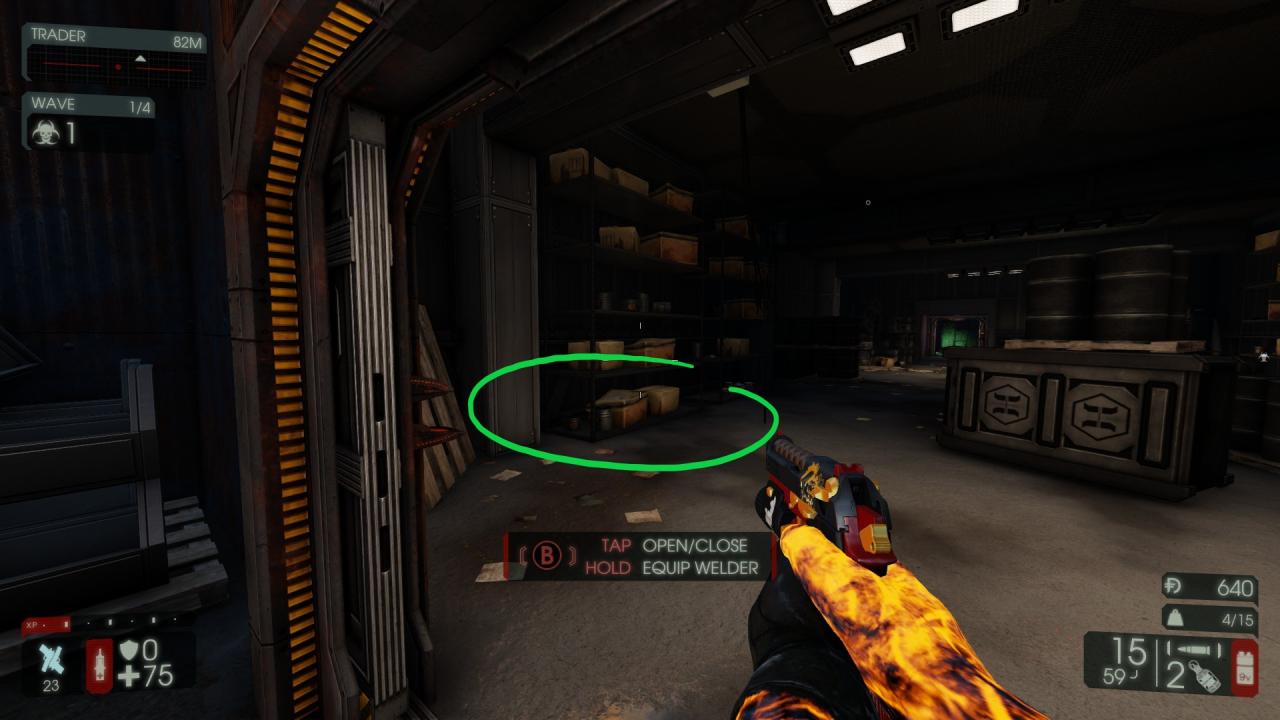
Run down the stairs next to the blue container and run all the way to the back then turn lefft into the room. When you enter, the collectible is on the left on the bottom of the shelf.

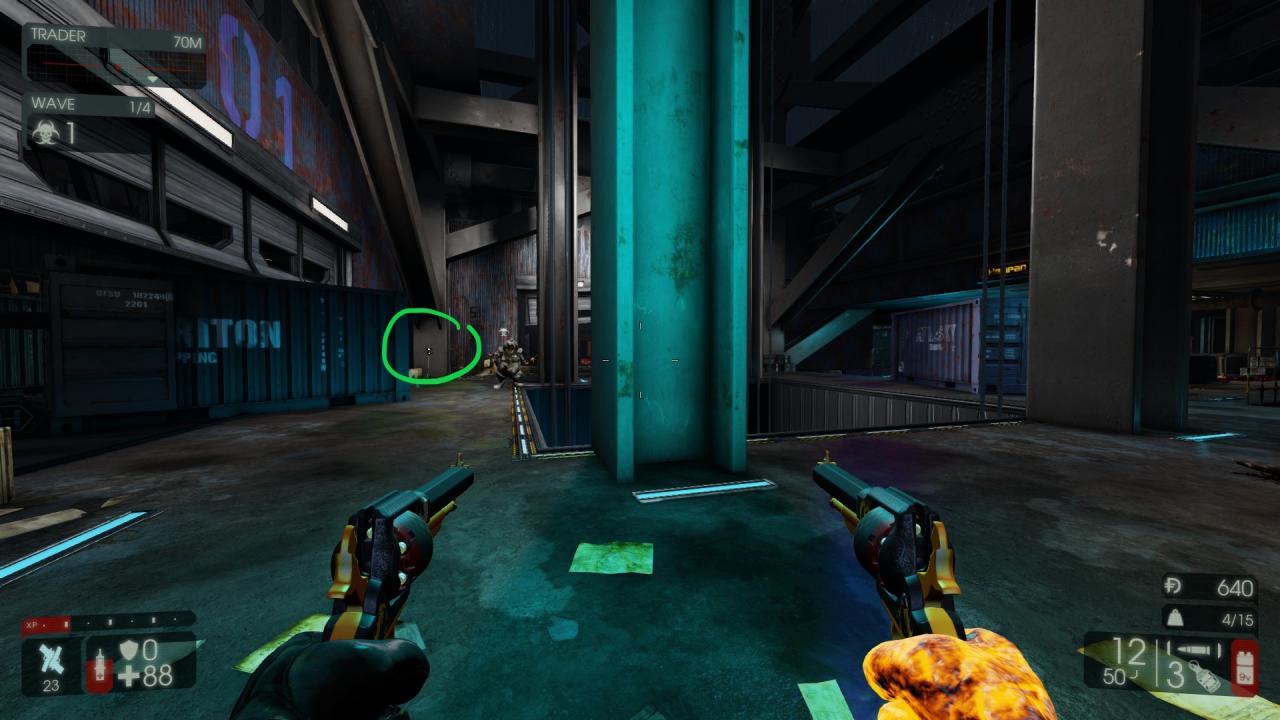
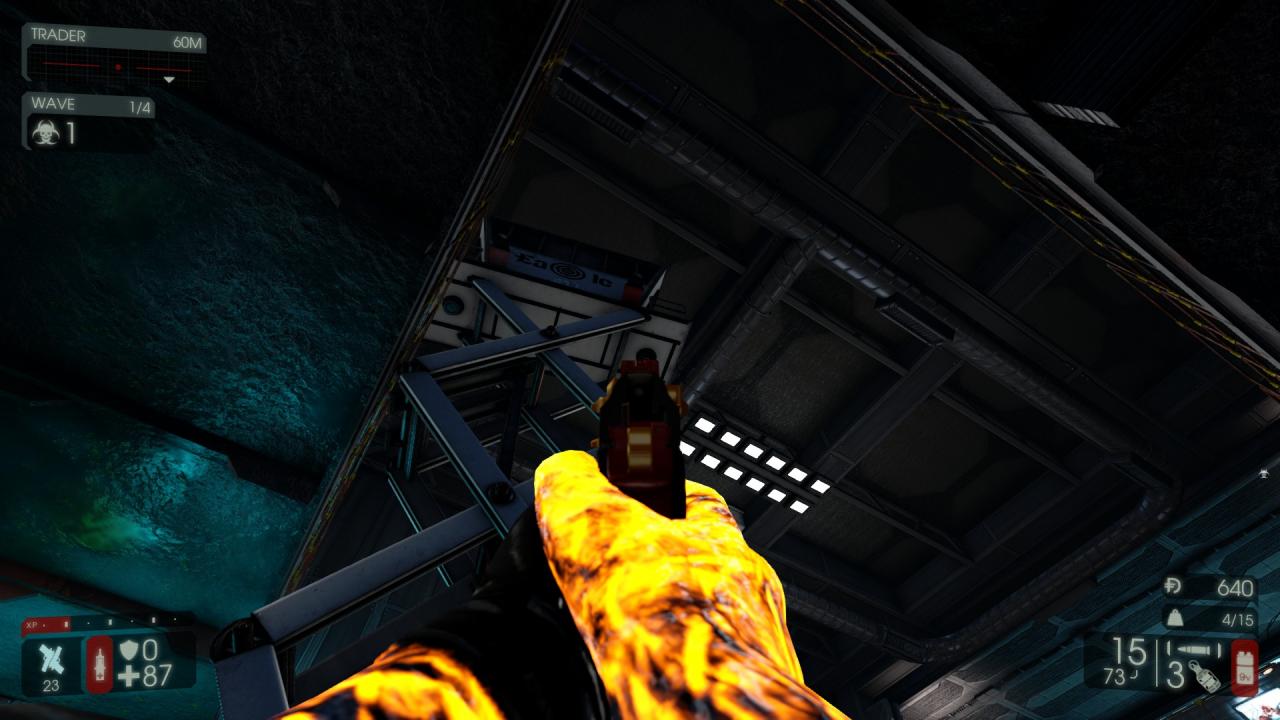
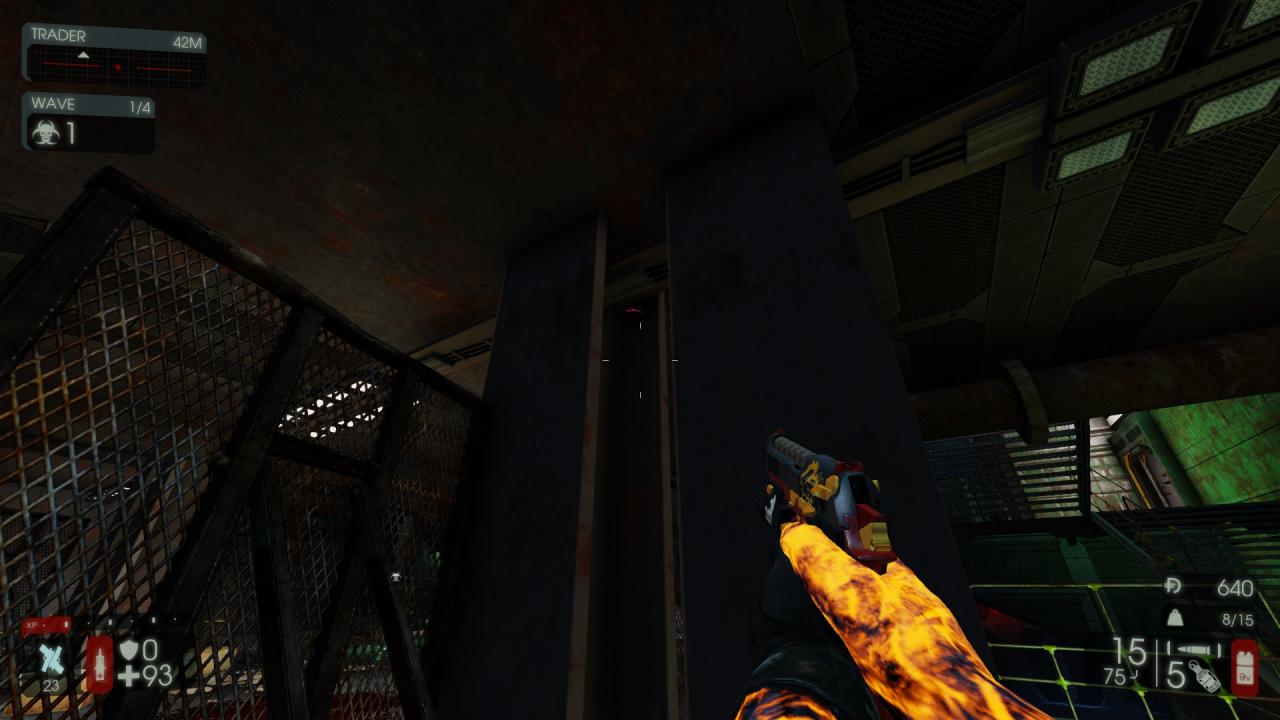
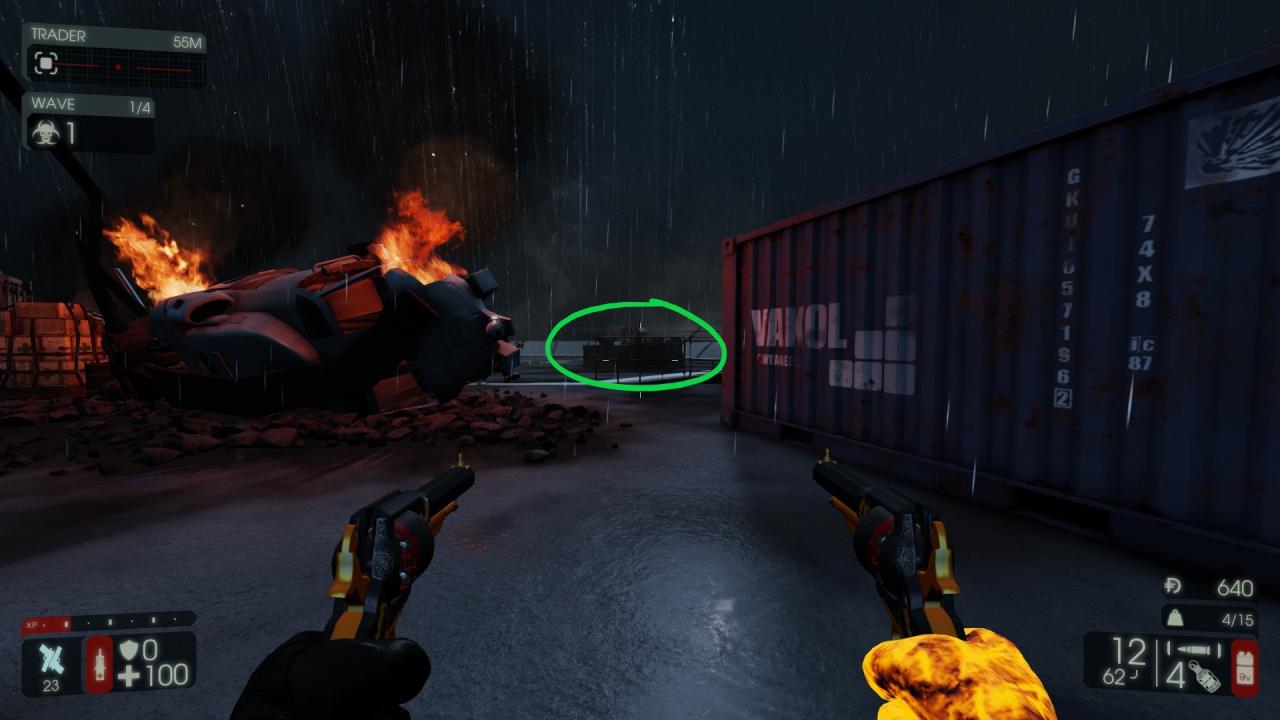
Now run up to the center square area through the shaft with all the black boxes. When you reach the top face the south side of the map. The next collectible is on the wall next to the left pillar behind all the boxes.

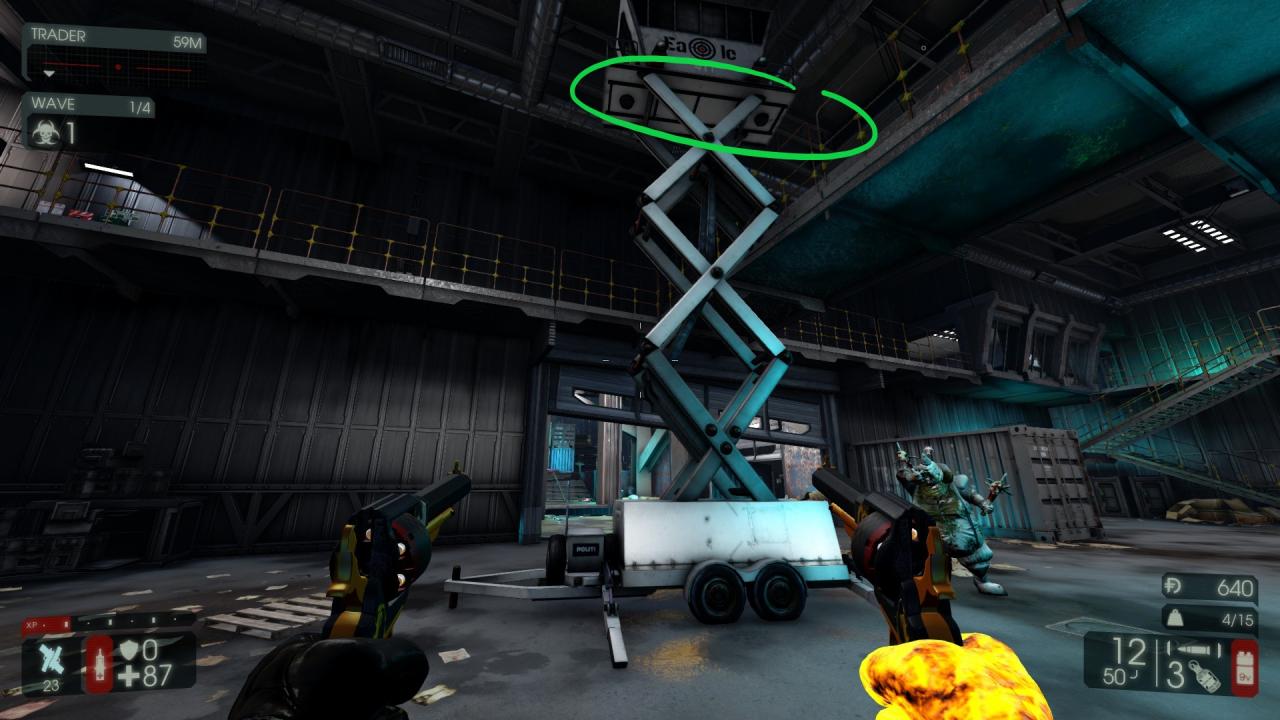
Run into the room right next to the beam and look up at the white crane. The collectible is on under the white crane on one of the two black rings.
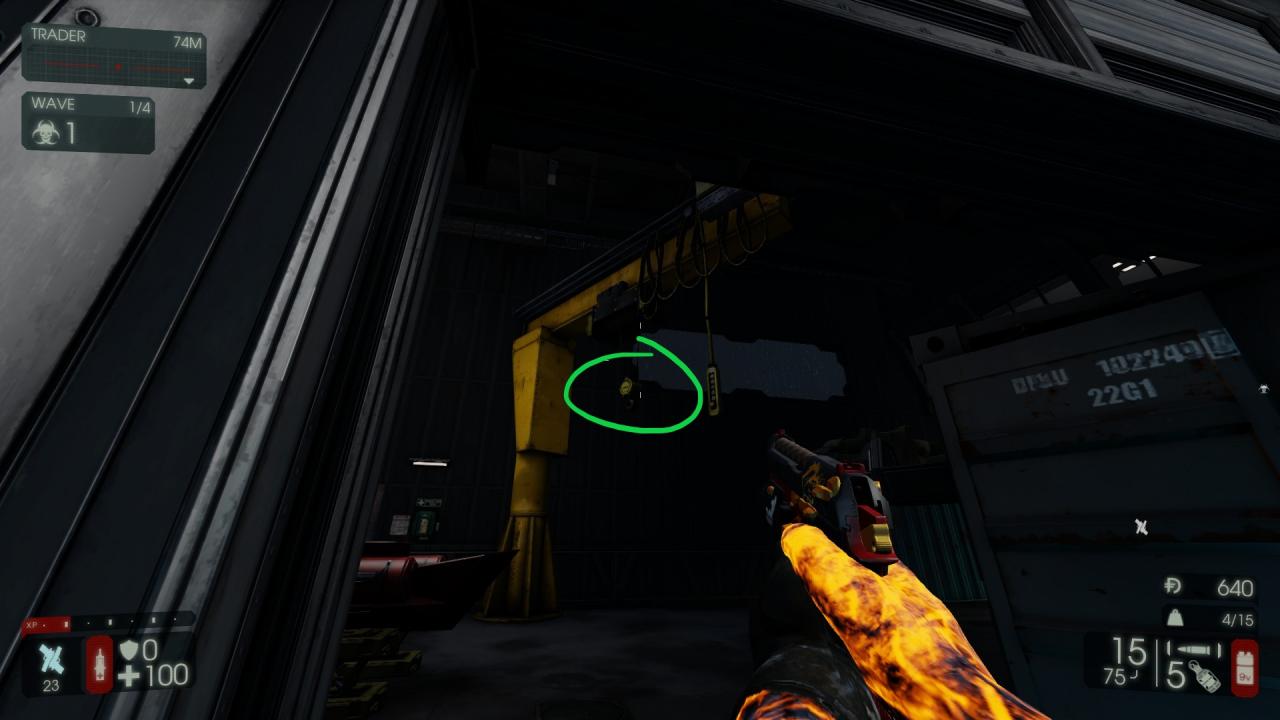
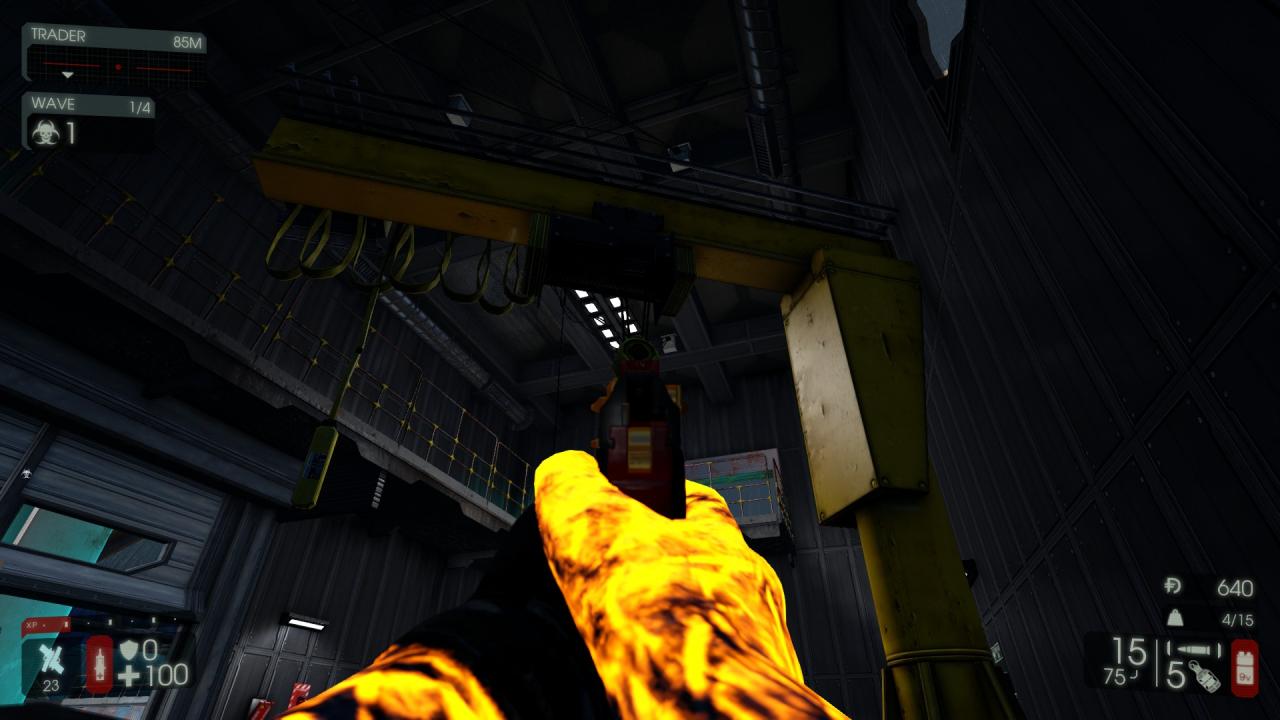
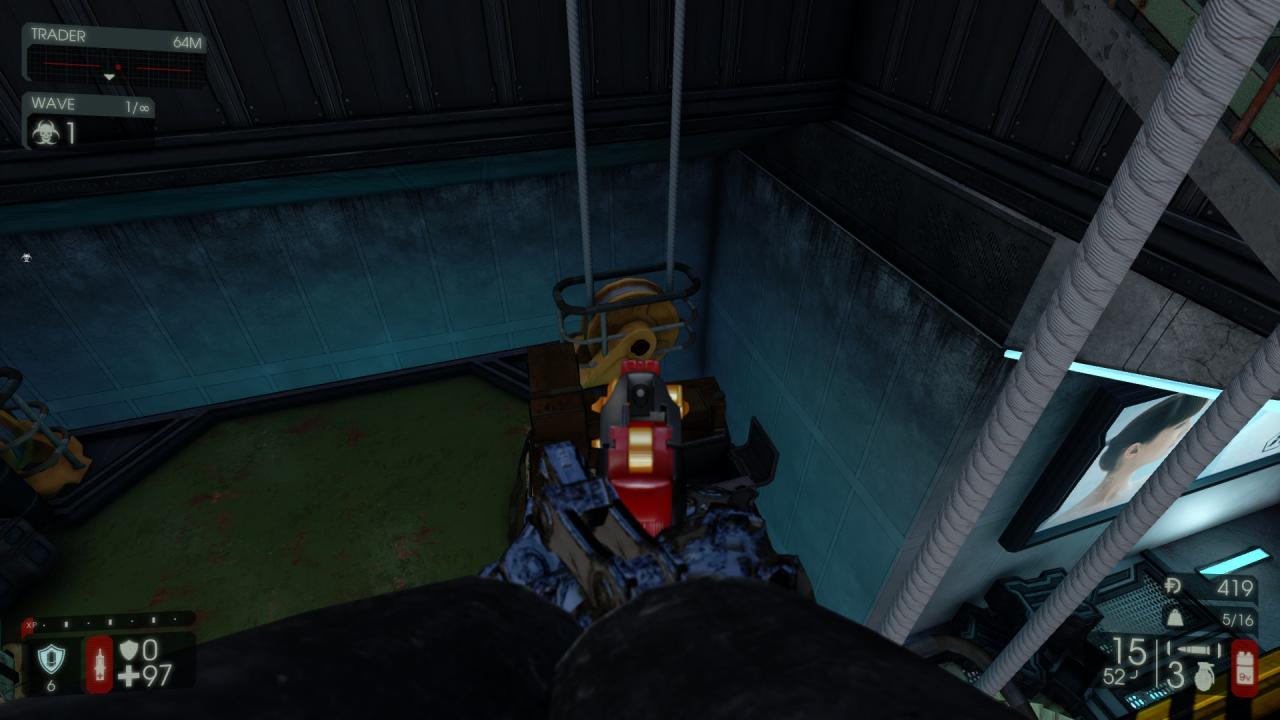
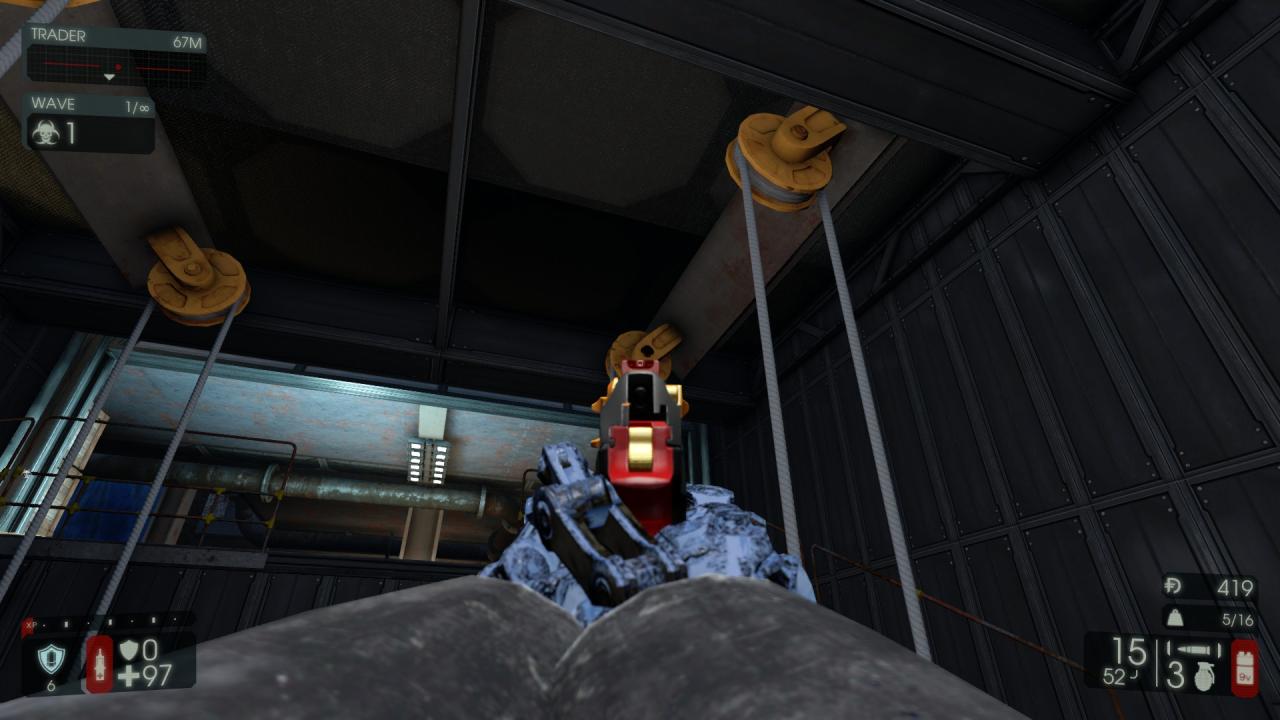
In the room next to the previous one find the yellow crane attached to the ceiling. The collectible is found on one of the pulleys of the crane.

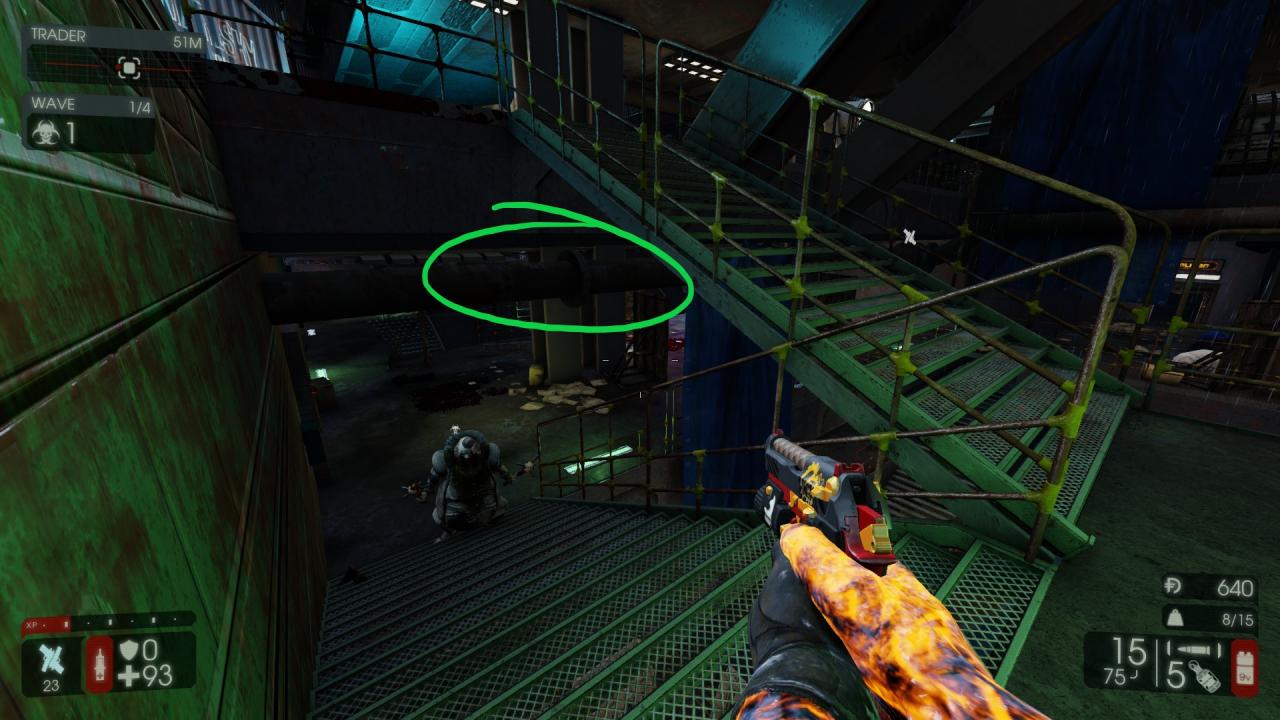
Run to the middle floor bridge connecting the two main areas. The collectible is inside one of the I beams.

Run up to the main level of the bridge and advance onto the elevator slab leading down to the lab. Jump onto it and shoot the following two collectibles that are on the yellow pulley systems.

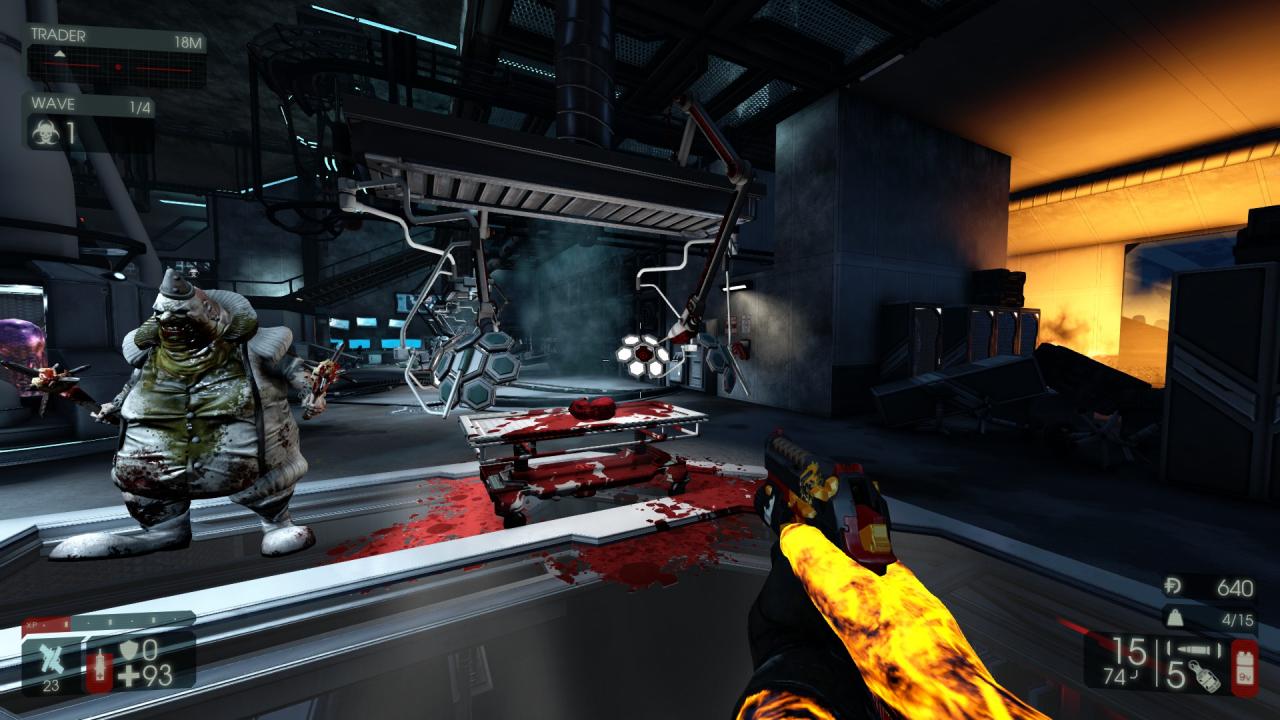
Jump down to the lab, run all the way down and face the operating tables like on the photo. The collectible is in the center of the lamp.

Run out of the lab through one of the doors (the one leading to a red room & leading to the helipad). The wall facing the exit from the lab will contain the 10th collectible.
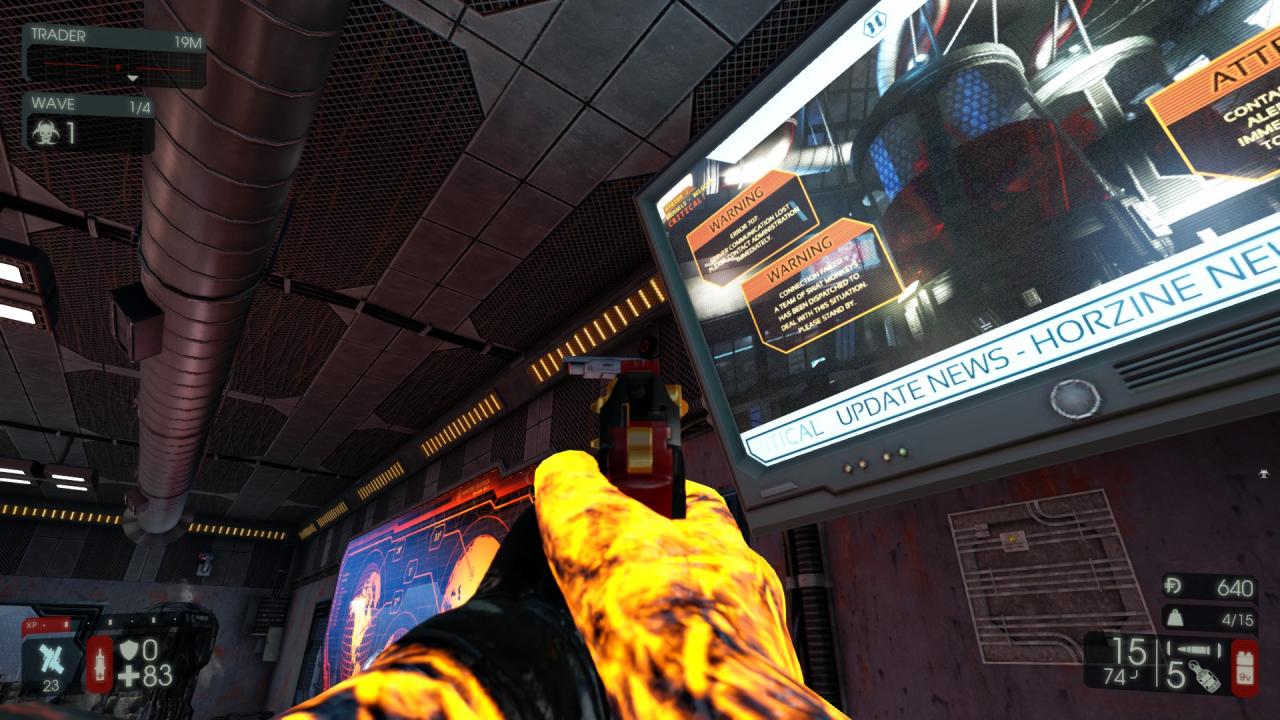
On the helipad side of the map run into the building with the name mass hall. One collectible will be on the bottom floor next to some boxes right after the door leading in, the other one on the top floor right next to a camera.
Run to the helipad, at the center between the boxes you’ll find the next collectible.
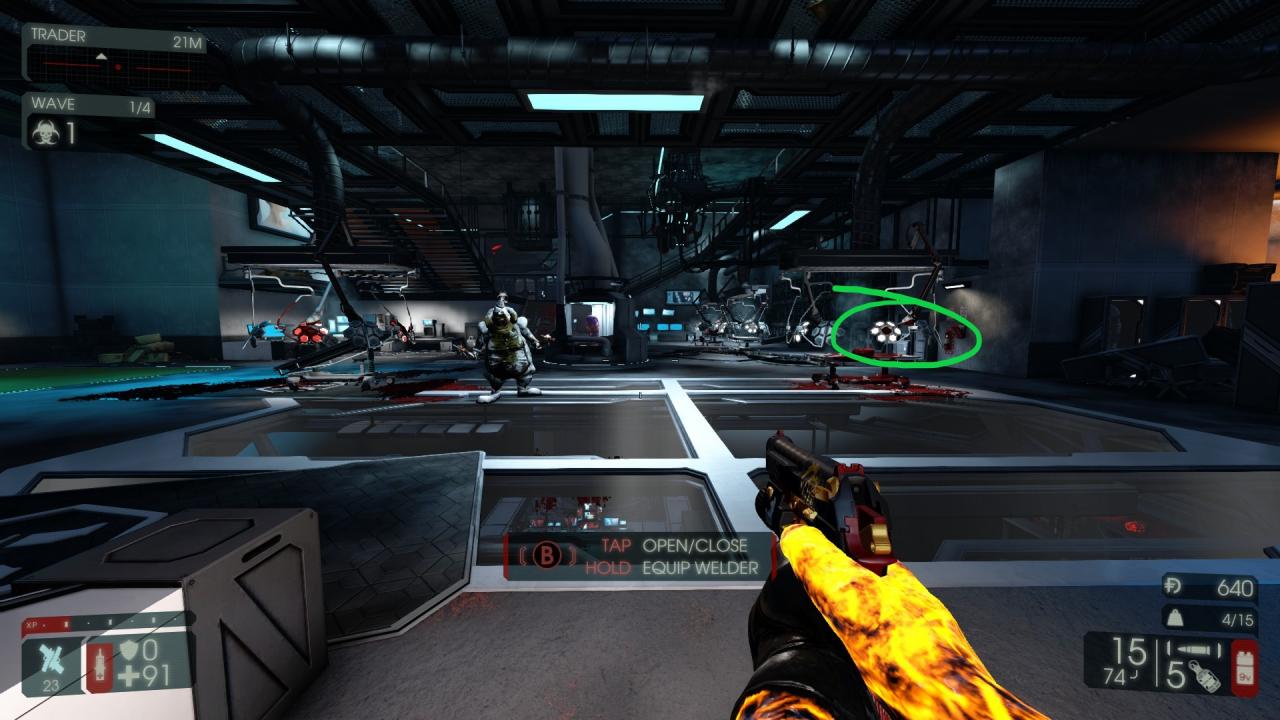
Right at the center area where you found the yellow crane & white crane collectible, 3 other collectibles can spawn: one on the corner of the top container, another on the inside of the bottom container and the last one on a pair of black boxes right before the staircase.

Run to the top floor of the hangar area, and run out on the catwalk so you can see the huge yellow crane. The collectible is on the round bottom part of it.
Note:
Addition (Credit to KStu)
- If you go out the door right next to #12 (the one above the security camera) and take a left, there’s one in the center of a vent on the side of the building.
- On the floor between #11 and #12, there’s one behind the counter inside the freezer.
- On the floor below #6, there’s another almost identical one on the ceiling inside the opposite (west on the map) support beam.
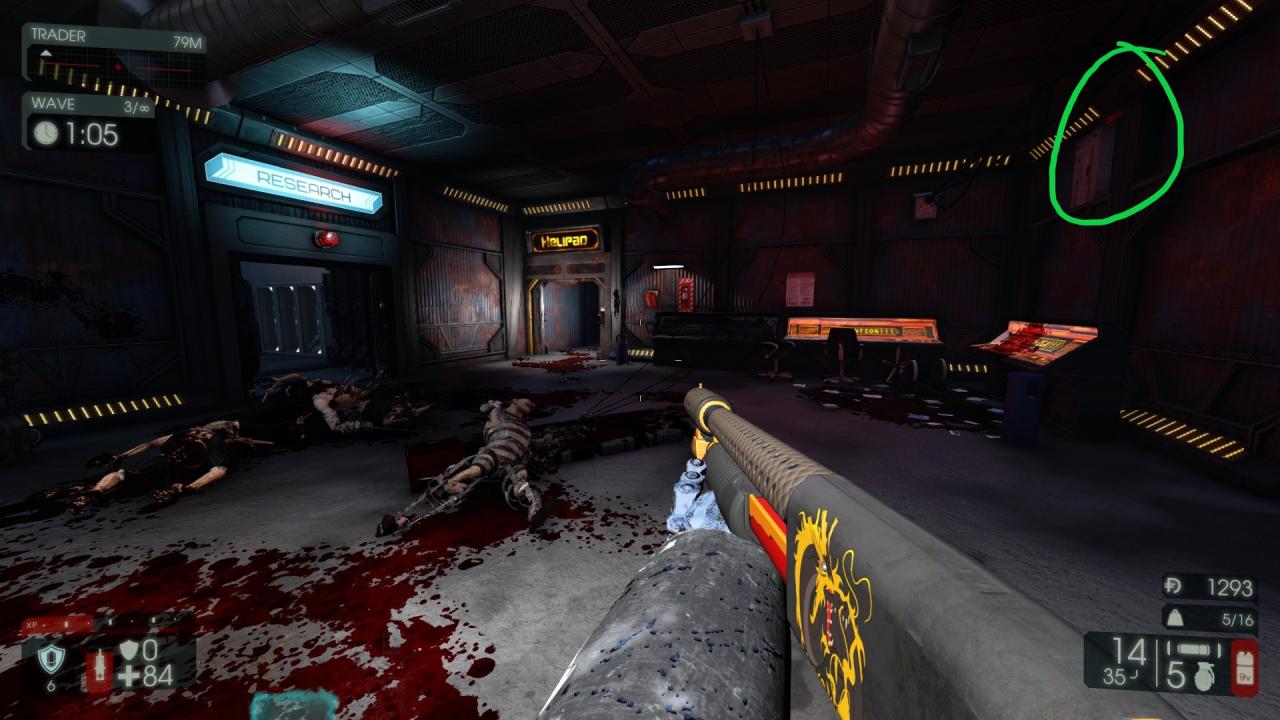
- Directly to the right of where you’re standing in the picture for #9 with the green circle, there’s one behind the broken monitor hanging off the wall.
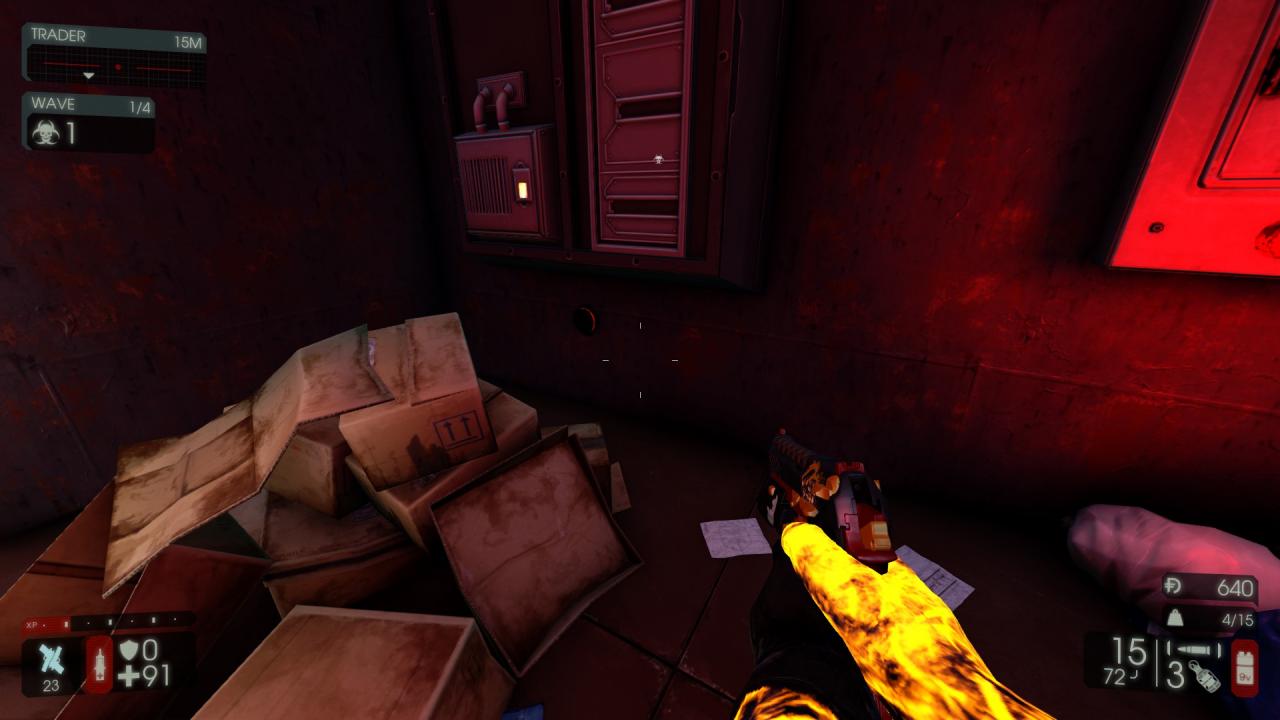
- In the room kind of opposite of #2 with the fire and the trader pod, there’s one barely visible on top of the blue tool chest (the one farthest from the stairs).
By Ju1ceD
More Guides:
- Killing Floor 2: the “Marine Research” Achievement Guide (All Collectable Locations)
- Killing Floor 2: How to Find Collectibles with Console Commands