A guide to the Core Suppression events in the game Lobotomy Corporation. Extreme spoiler warning!
Introduction
This guide is a work in progress.
———–
Well now you’ve done it, manager. You did all the missions for one of the sephirah (most likely Malkuth) and have unlocked a Core Suppression. The resident sephirah is freaking out, scary flashing lights and blaring alarms are going off, and you’re probably ♥♥♥♥♥♥♥♥ your pants. Don’t worry my skittish friend, this is a good thing!
For you, anyways. Less so your agents, who are about to have a very bad day at work.
Core Meltdowns are boss fight-style events that are unlocked once you’ve completed all the missions for the sephirah who distributed them, filled out their department to full at least once, and made it to a certain day. These events represent the final milestone needed to seal off the department the sephirah are running from Qliphoth Meltdowns, as well as dealing with their mental issues and lingering traumas. Some important things to know about Core Meltdowns before we continue:
- 1. Core Meltdowns are theoretically optional: You are never pressured into doing a Core Suppression if you have it unlocked. You are capable of doing them any day the game allows, but are able to skip doing them if you don’t feel like it. That being said, completing all the Core Meltdowns is a requirement to complete the game, so you’ll have to finish them sooner or later.
- 2. Core Meltdowns are very difficult: it is no small feat to call these events the hardest challenges the game can throw at you. Preparation and skill are required in equal measure. Prepare to lose many good Agents to these events.
- 3. Core Meltdowns are permanently finished upon completion: meaning you never have to re-do a Core Meltdown if you’ve done it once already. In addition, completing Core Meltdowns confers powerful and permanent bonuses to your game that are worth earning and can dramatically increase the effectiveness of your facility.
Upon meeting the above stated requirements, you will be treated to a cutscene in which A ruminates on his past with the respective sephirah. Afterwords, a ribbon that states “MANIFESTATION OF QLIPHA DUE TO SEPHIRAH BREAKDOWN/ Suppression of Sephirah’s Core Required” will appear on the screen, and you’ll have unlocked the respective Sephirah’s Meltdown.
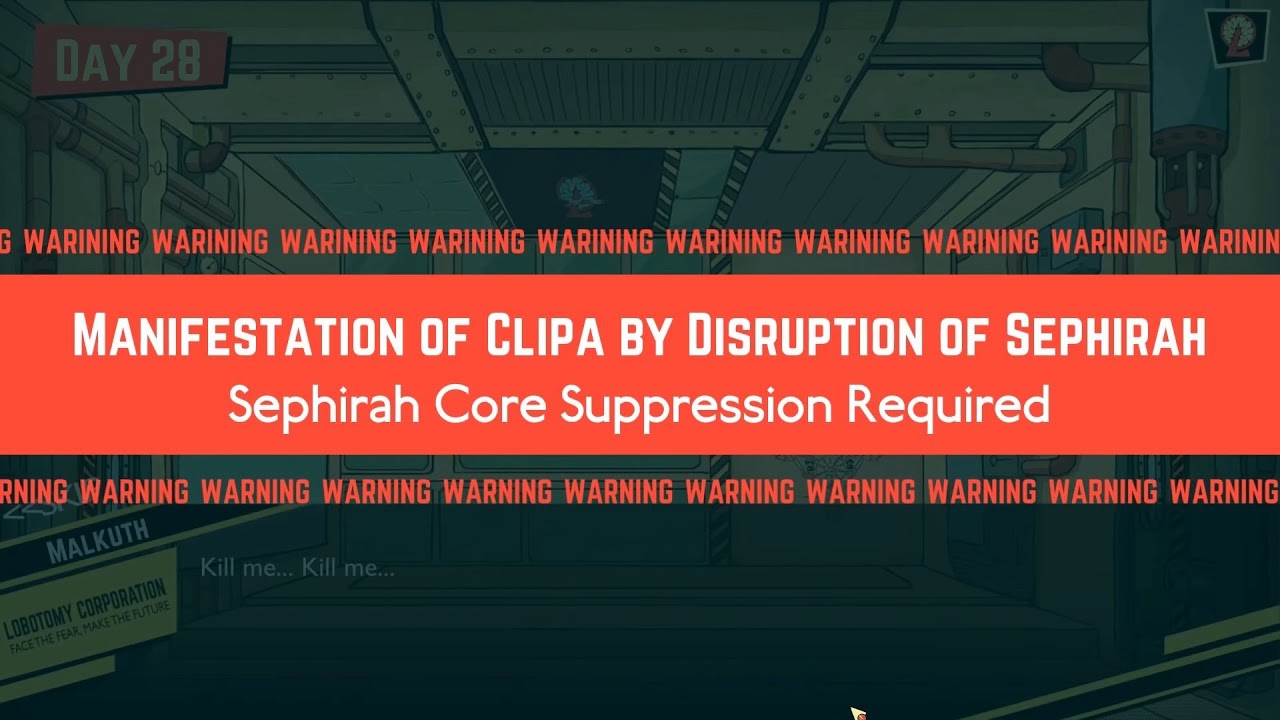
Afterwards, you will have to manually activate the Meltdowns by pressing the “Sephirah Core Suppression” button that will pop up above your departments header. Pressing it will move everyone out of that department and prevent any abnormality within said department to suffer from a Qliphoth Meltdown, which is a help considering the reaming your agents are about to get. Your objective in the Meltdown is stated upon activating it, and make sure to remember what exactly the win conditions are!
With that out of the way, lets get into each and every Meltdown in the game.There are a total of ten: Malkuth, Yesod, Netzatch, Hod, Tiphereth, Gebura, Chesed, Hokma, Binah, and Keter, and each will be given a rundown of how they work and strategy to counter their methods of messing your day up.
Core 1: Malkuth, The Willingness to Stand Up Straight
- FIRST ACCESSIBLE: DAY 21
- SKILLS TESTED: Memorisation, Adaptation
- DIFFICULTY: 2/10
- TO FINISH: Reach Meltdown Level 6 and meet the Energy Quota.
- MELTDOWN LEVEL ONE: Malkuth will mix the work orders of every abnormality in the facility in the same way. For instance, assigning an agent to perform Fortitude work on an Abnormality can instead have the Agent perform Insight work, while working on Attachment could instead have an Agent perform Fortitude work. The order is randomized and changed each meltdown.
- MELTDOWN LEVEL FOUR: Malkuth removes your ability to cancel work orders. If you send someone to do a job, they’ve been sent to do that job. No take-backs!
Malkuth’s Suppression is the first one unlocked, and is accordingly the easiest. It’s not so easy that you can sleep through it, but it is fairly simple once you understand how it works. Your first objective every Meltdown is finding two of the four work types. Find an easy-to-work-with abnormality, like One Sin or Punishing Bird, and assign any work to them. Then, take note of which work your agent actually performs, and write that down. Repeat the step with the same abnormality, and write down that result as well. Now that you have to work results, you can deduce the remaining two work types via process of elimination.
Do NOT work on any dangerous abnormality unless you know the work types for the current Meltdown! Certain abnormalities can punish you for doing the wrong work type with them, like Spider Bud. You have plenty of time to figure out the work order and are not under any sort of time limit, so don’t lose your head. Remain calm and be patient as you sus out what each work order is. Once they’ve been figured out, feel free to work on the tougher abnormalities you have in stock and generate energy.
During the climax of the fight, Malkuth will block your ability to cancel work orders. Thus, the above statement applies even more once you get to this stage of the fight.
Outside of these potential hazards, Malkuth’s day should be no problem at all.
Core 2: Yesod, The Rationality to Maintain Discretion
- FIRST ACCESSIBLE: DAY 21
- SKILLS TESTED: Memorisation
- DIFFICULTY: 2/10
- TO FINISH: Reach Meltdown Level 6 and meet the Energy Quota.
MELTDOWN LEVEL ONE: All elements of the games user interface, from Abnormality menus, to Agent stats, to even the pause screen, are blurred. This effect increases in intensity with each meltdown.
MELTDOWN LEVEL TWO: All elements of the facility are blurred as well. The facility becomes a mess of blurred pixels when zooming out too far.
Yesod’s Meltdown is the second easiest in the game after Malkuth, and might even be easier than hers depending on your skills with memorisation. Ultimately, this day is all about remembering where certain abnormalities are located and which work types they enjoy. If you’ve been playing the game long enough to unlock this fight, this should be a breeze.
For an additional layer of strategy, set up your Agent order beforehand and designate agents to work on specific abnormalities. Let’s say our Control Department has, from left to right, One Sin, Punishing Bird, Crumbing Armor, and some random tool. Well, we know that of these three, Crumbling Armor *really* responds well to Fortitude work, so when setting up for the day, take your agent with the highest Fortitude and best Red-resistant armor and place him in the third slot of the department. Then, always make sure your agents go to their respective assigned abnormalities, so the Agent in the first slot always works on One Sin, the Agent in the second slot always works on Punishing Bird, etc. We’ll call this strategy “Agent Assignment via Placement”, since we’ll be using it for the tougher fights down the road. Try and get a feel for it now.
As for Ordeals, make sure you zoom in the camera and keep track of what your agents are fighting. While you’ll likely be dealing with Dawn and Noon trash, you’d be surprised what you can miss by moving the camera away from Agents in danger. You don’t want to see a sudden First or Second Trumpet alarm pop up, especially towards the end of the day, so keep track of where everyone is and what they’re fighting. If things get too hot, don’t be afraid to pull your units out of the fight and send them back to the department main room to heal.
This fight is only a problem if you struggle with memorisation, but LobCorp’s gameplay is so repetitive anyways that you might already be able to manage your facility to this level without even practising.
Core 3: Hod, The Hope To Be a Better Person
- FIRST ACCESSIBLE: DAY 21
- SKILLS TESTED: Adaptation, Abnormality Choice, Day Planning
- DIFFICULTY: 6/10
- TO FINISH: Reach Meltdown Level 6 and meet the Energy Quota.
MELTDOWN LEVEL ONE: Hod will debuff the stats of all units by -15.
MELTDOWN LEVEL TWO: Hod will debuff the stats of all units by -25.
MELTDOWN LEVEL FOUR: Hod will debuff the stats of all units by -35. Uh oh.
Let’s both be honest with ourselves for a minute. THIS fight is most likely why you checked this guide, and if not, it’s the one that first gave you a serious speedbump. Well, we’ve all been there, and I’ll be upfront with the difficulty of this fight: Hod’s suppression is without a doubt one of the four hardest suppression in the game. It’s the bottom four, but one of them nonetheless. You’re in for a ride.
First off, Hod’s suppression is the first that requires genuine thought and preparation when attempting. You must have a facility that avoids abnormalities that punish working on them below a stat threshold, which can take a lot of time and restarts to prepare for. Abnormalities like Punishing Bird, Old Lady, and Laetitia are prized, while ones like Porccubus, Spider Bud and Red Shoes should be avoided.
Unfortunately, the energy threshold will likely be high enough that you NEED to have at least some abnormalities in your facility that pose an instant-death threat to your workers. To that end, try and take ones that won’t cause mass carnage like Singing Machine or the aforementioned Red Shoes. Losing one or two workers to prevent a meltdown in a department is often a necessary sacrifice to prevent enemies from breaking out.
Begin the day by focusing on abnormalities you know are dangerous to work with and will become impossible to work with later, like HE and WAW units. Once you dip below their stat threshold, ignore them and never work with them again for the rest of the day. Your goal early on is to acquire as much energy as possible to coast off of later. That being said, don’t stock your facility with more than one or two WAWs: you want to be able to make a healthy amount of energy later, and too many WAWs in your facility can take up space that would be better suited for TETH units with easier stat restrictions.
Ordeals can pose a serious threat here. The stat maluses applied to your units can make even the baby easy Dawn Ordeals punch quite a bit harder than usual, so it’s often necessary to rely on higher tier gear to survive an encounter with them. Try and have a backlog of some HE and possibly even a WAW set before going into this fight. Remember that E.G.O. equipment is carried over when you return to Day 1, so perhaps get familiar with some higher tier abnormalities and attain their E.G.O. before attempting this day.
If you’re persistent and patient, this day is winnable. The difficulty jump from the other suppression is severe for sure, but you can beat this day with a little bit of determination.
Core 4: Netzach, The Fearlessness to Keep on Living
- FIRST ACCESSIBLE: DAY 21
- SKILLS TESTED: Memorisation, Adaptation, Agent Safety
- DIFFICULTY: 3/10
- TO FINISH: Reach Meltdown Level 6 and meet the Energy Quota.
MELTDOWN LEVEL ONE: All sources of healing are rendered null. Instead, agents heal to full health and sanity upon every Qliphoth Meltdown.
In contrast to the hell that is Hod, Netzach’s Meltdown is incredibly easy. It can still pose a threat, but if you’re judicious about your management, you’ll be fine.
The same lessons learned in Hod’s meltdown apply here: identify which abnormalities are dangerous to work with (in this scenario, which ones take off a lot of health from your workers) and work with them at the beginning of each meltdown. Use the weaker abnormalities to finish off your progress and farm more energy and do it again.
Since you only take damage once you’ve earned a “bad” E-Box in the work process, any abnormality with easy-to-earn Good or Very Good work results is key to survival this day. Abnormalities like Snow Queen, Firebird, Laetitia, Child of the Galaxy and El Llanto de la Luna are excellent to bring to this fight.
For even easier completion, use the Agent Assignment via Placement strategy outlined in Yesod’s guide. Take your strongest and best equipped Agent and make sure he’s the one who always opens the Qliphoth Meltdown with working on whatever deadly abnormality you have in that department.
Ordeals, as usual, can pose a threat. Try to use ranged weaponry as much as possible in this fight, with options like Fourth Match Flame, Beak, and especially Magic Bullet and Solemn Lament being incredibly helpful for dealing with them. If agents in one department get particularly beat up and there’s an abnormality there you want to work with, send in an applicable, healthier agent from another department to help pick up the slack.
Lastly, we’ll discuss a useful technique that we should also learn for progression: I call it “One Sin Qliphoth Trigger”. Basically, once the Qliphoth Counter is almost filled up, send a weak Agent to work on One Sin and trip it over to the next level. This is also helpful for basic gameplay to trigger Ordeals once you’re ready for them. Remember that the Qliphoth Counter only increases whenever you enter work with an Abnormality, meaning you have full control over it.
Overall, Netzach’s fight should be pretty easy all things considered. With him done, we can move on to the Briah Sephirah.
Core 5: Tiphereth, The Expectation for the Meaning of Existence
It’s symbooollliiicccc!
- FIRST ACCESSIBLE: DAY 36
- SKILLS TESTED: Adaptation, Risk Management
- DIFFICULTY: 5/10
- TO FINISH: Reach Meltdown Level 10.
MELTDOWN LEVEL ONE: All departments have their Qliphoth Immunity restrictions lifted. Every department can now suffer from a Qliphoth Meltdown, even if they previously gained immunity through clearing their respective Meltdowns.
This Meltdown is honestly pretty easy in theory. All you have to really contend with is the Meltdowns in each department, but you’ve dealt with that before until now. So you may be asking- how is this fight almost as hard as Hod’s? The answer? This is the first mandatory fight you’ll have against a Midnight Ordeal thanks to the requirements to finish the fight being getting to Meltdown Level 10, and these can be deadly. So instead of focusing much on how to beat this day, we’ll instead be going over how to beat each Midnight Ordeal.
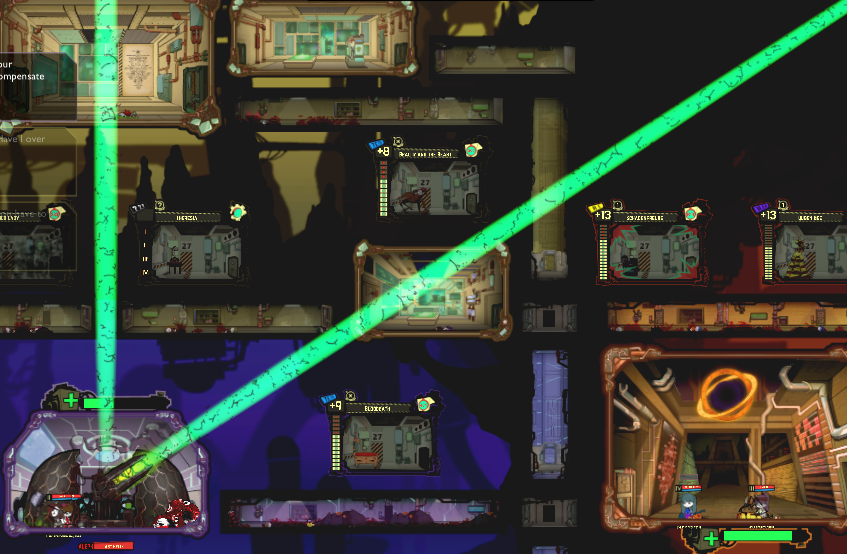
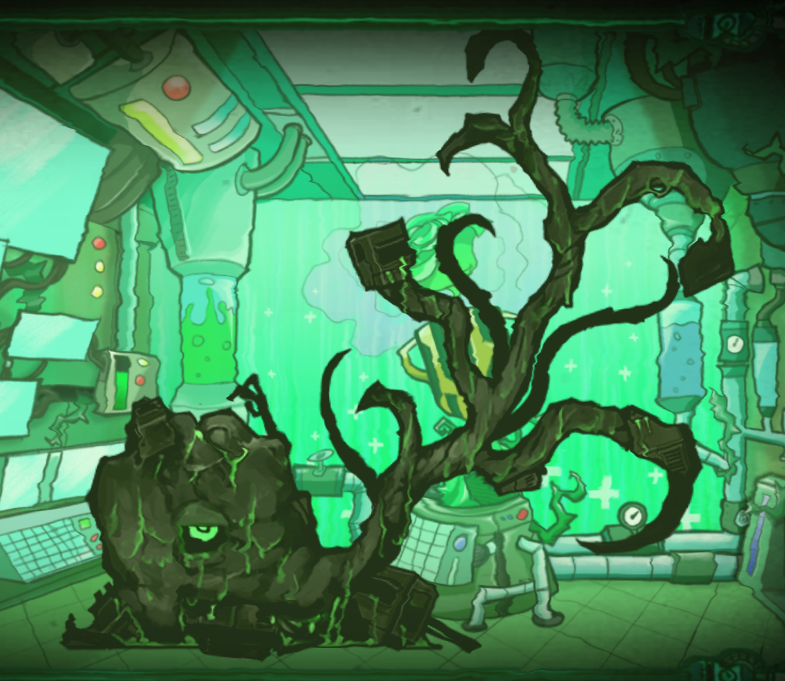
The Green Midnight is the easiest of the three in my opinion. Before it begins, gather every employee and put them in a single elevator near the Information Department, preferably on the left side. Then roll the Qliphoth Counter over and initiate the fight. The Green Midnight will spawn right next to you, but don’t worry, he’s immobile. Instead, he’s going to fire a massive ♥♥♥♥♥♥♥ laser throughout your entire facility in a clockwise motion, which is certain death if touched for long. However, the laser moves pretty slow, so you can beat on it for a while and then move your employees back into the elevator when the laser comes close. Then, head to a lower floor within the elevator as soon as it’s safe, and then move back once the laser passes overhead. Resume the beatdown, and he’ll die eventually. Try to avoid Very Short ranged weapons, as they might get clipped by the laser and get disintegrated.
The second easiest of the three in my opinion. Before it begins, move everyone into an elevator somewhere in your facility, and then roll the counter over and begin. The Amber Midnight will spawn two massive worm-producing heads that teleport to different department rooms within your facility. Your job is to simply wait for the head to come close to you, back off when it produces worms, and hide in an elevator while waiting for it to show up again. You’ll see when the worm heads will appear in a department room by the flaming mark on the ground- any employees caught on top of that when it spawns will be instantly killed, so play it safe and slow. Once both heads are down, clean up the remaining worms and call it a day.
Otherwise known as “Sorry Kid, You’re ♥♥♥♥♥♥!”. No joke, Violet Midnight is one of the toughest fights in the game and is MUCH harder than his two contemporaries. It might even be best to legitimately restart the day and try for the above two if you can. If you want to press on, then…
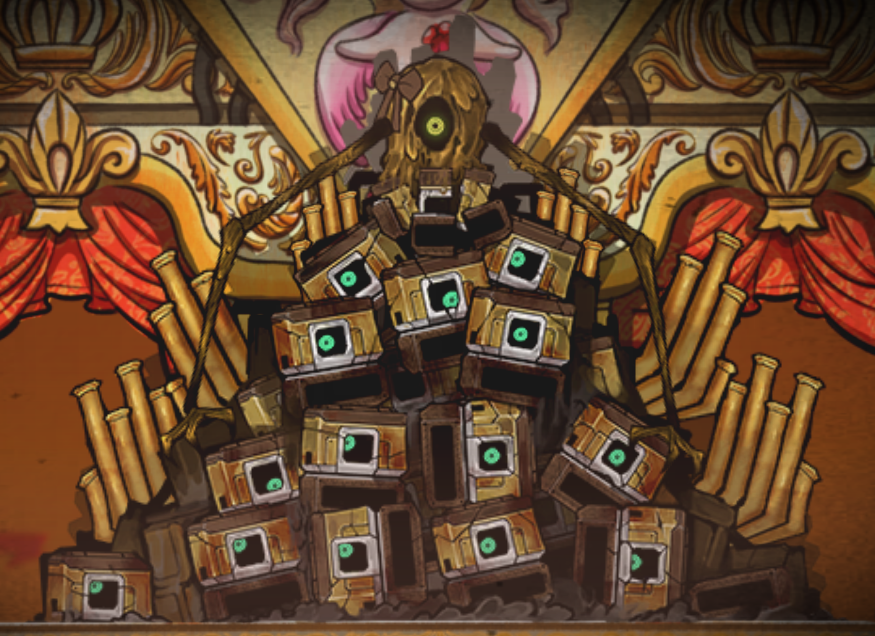
The Violet Midnight spawns four Obelisks in four different parts of the facility. Each Obelisk is coloured one of the four damage types, which they absorb. The Red Obelisk, for instance, absorbs red damage. The objective of the fight is to kill each one of these Obelisks, but that’s MUCH easier said than done. You see, each Obelisk has a specific attack they use to defend themselves and a specific weakness to one of the other four elements, meaning you need to split up your team into four groups, micro them all at the same time while dodging these attacks, and making sure you don’t lose your agents all at the same time. Sound fun?
The Red Obelisk is weak to Black damage, and shoots a Red Claw attack that stretches in a straight line horizontally. The Black Obelisk is weak to Red damage, and shoots a Black Thorn attack that stretches in a straight line. The White Obelisk is weak to Pale Damage, and uses a White Tentacle to wipe across your screen in an arc shape. Lastly, the Pale Obelisk isn’t weak to anything and uses a Pale Eye to follow you around and zap you with Pale Damage.
The only real advice I can give for this fight is “get good” and use the Rabbits on the last Obelisk once it gets low enough. You need to pay attention to each of your units and make sure not to bunch them up into one group. If you do, the Obelisks will regenerate faster than you can kill them. You’ll need several ALEPH gear sets to take on this fight.
—–
Ultimately the difficult of this Meltdown is highly dependent on which Midnight Ordeal you roll. Green and Amber are pretty easy while Purple is a serious threat. Good luck and prepare to restart a lot. Note that you do not need to collect enough energy to meet the energy quota to end the day. You only have to make it to Qliphoth Meltdown 10. As well, you don’t have to even kill the respective Midnight Ordeals once they spawn, but trust me when I say that killing them is way easier than micromanaging your facility with them around. Also don’t bring any “breach on X employee deaths” abnormalities like Big Bird or Clouded Monk to this fight- they WILL breach when the Midnight Ordeal spawns and make your life hell.
Core 6: Gebura, The Courage to Protect
WARNING! THIS FIGHT REQUIRES HIGH AMOUNTS OF PREPARATION AND WILL PROBABLY KICK YOUR ASS THE FIRST FEW TIMES!
- FIRST ACCESSIBLE: DAY 36
- SKILLS TESTED: Micro-Management, Abnormality Suppression, Learning to Not ♥♥♥♥♥♥♥ Blob
- DIFFICULTY: 8/10
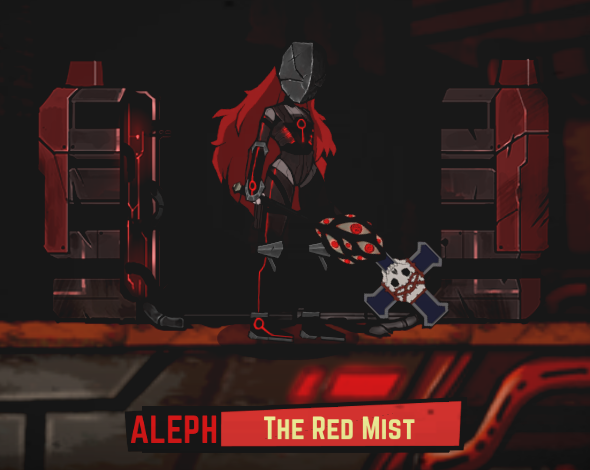
- TO FINISH: Suppress The Red Mist.
MELTDOWN LEVEL ONE: Gebura spawns as an enemy unit known as the Red Mist. She needs to be suppressed four times to win this Core Meltdown.
Oh boy, this is the big one. If it wasn’t Hod that caused you to look at this guide, it was probably Gebura. Easily one of the toughest fights in the game if you’re under prepared (and still pretty tough if you are), The Red Mist is one tough cookie. Rather than slap your day with some annoying work debuff and call it a day, Gebura likes to get hands on. And by hands on, I mean hands on your ♥♥♥♥♥♥♥ guts, since she directly spawns in as a robotic enemy known as The Red Mist.
PHASE ZERO: PREPARATION
Before we fight Gebura, we have to do a lot of preparation. Here’s what we have to do:
- Obtain a healthy supply of ALEPH-tier E.G.O. weapons and suits. Pink, the E.G.O. of Army in Black, and Sound of a Star, the E.G.O. of Blue Star, are crucial to our success. Other weapons like Mimicry, Twilight, and Justitia are helpful. Smile is another great one.
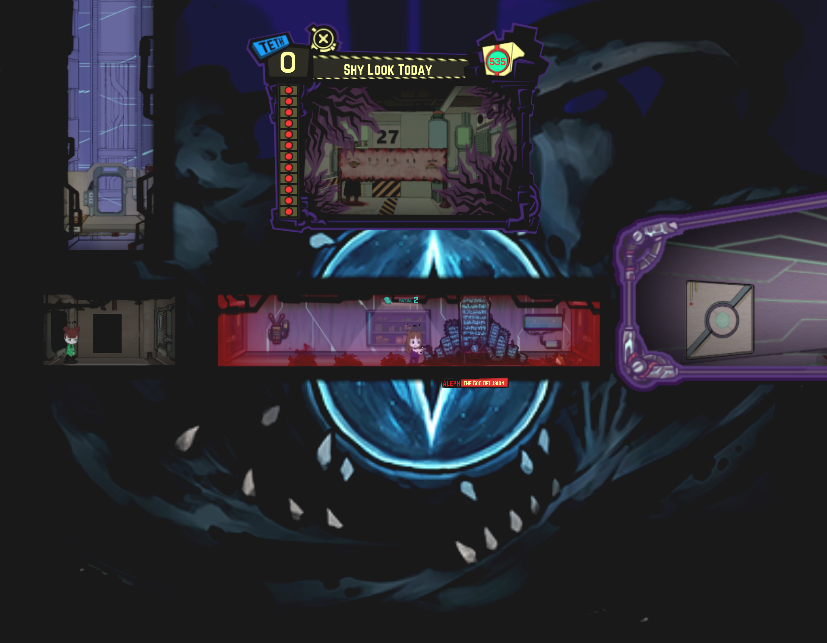
- Prep our facility. Stocking up on some deadly ALEPH abnormalities like Blue Star and Nothing There is very helpful to clearing the fight if things go south, for reasons that will be explained later. In addition, the tool abnormality known as Shelter from the 27th of March is essential. We also need Der Freischultz or Riding Hood.
- Mentally prepare. Get familiar with the pause button, because you’re going to be using it a lot. Same with your Research Bullets.
With that out of the way, let’s get into the fight.
PHASE ONE: PENITENCE AND RED EYES
Gebura spawns in at the top part of the Disciplinary Team main room. She will wander back and forth, but will not leave until she has taken enough damage. Gebura has two attacks.
- Her first attack is swinging with Red Eyes or Penitence, dealing Red or White damage respectively to an area in front of her.
- Her second attack automatically triggers upon taking 1/3rd of her HP away. A portal will open at the left or right side of her room, as well as along many of the corridors of the facility. She will then whip out Gold Rush (an ALEPH tier weapon!!) and charge into the portal network, sprinting all over the darn place. She will then end her charge at one of the department rooms, exploding anything in there for massive Red damage.
This phase is easy, but teaches us a lot about this fight. For starters, Gebura hits hard but is very predictable– she will ALWAYS charge at 1/3rd HP, will always attack whatever is in front of her, and won’t leave her room until she Gold Rushes. My recommendation here is to practice getting Gebura’s HP down low enough for you to trigger her more dangerous moves, and then get familiar with getting the hell out of her way. In particular, Gold Rush does not affect elevators at all, meaning you can minimise the potential threat to your team by shunting them into an elevator and leaving one ALEPH user to trip her Gold Rush attack and tank the hit. Overall, an easy phase once you get it down.
PHASE TWO: MIMICRY, DE CAPO AND HEAVEN
When Gebura loses all her HP, she moves into her second phase. She tosses her weapons aside, charges using Gold Rush once more, and then lands in another department. She then chucks the Heaven E.G.O. weapon to one of her sides (which goes through every department in a line until it exits the screen) before equipping Mimicry and De Capo. This phase is much harder than her first, and accordingly Gebura gains four new attacks.
- Gebura does three quick swipes with De Capo, dealing White damage in an area in front of her.
- Gebura swings Mimicry in a huge arc in front of her, dealing massive Red damage in a wide cone.
- Gebura chucks Heaven to her side, just like she did when moving to her new department.
- Upon having 1/3rd of her HP bar depleted, Gebura will throw De Capo to another department before charging up Mimicry and warping there herself, dealing massive White damage with the De Capo toss and even more with the Mimicry toss.
This is the killer phase for a lot of people. The most important thing to know is that, at this point, using WAW weapon and suit users to attack Gebura is suicide. She does so much burst damage that it’s more of a liability to keep anyone WAW and below around, lest they get caught by one of her attacks, die, and begin a mass panic that ends up with a third of your facility dead. In particular, Gebura’s Heaven spear toss is a tool specifically designed to punish bringing anyone that isn’t an ALEPH user along for the fight, since it does so much damage that it’s almost guaranteed to kill anyone wearing WAW and below gear. Other than that, this Phase is relatively simple: use your micromanagement skills to go in, do some damage to Gebura and duck out before you take too much. Consider using nearby elevators to try and dodge her spear attack, as it’s the deadliest thing she can throw out in this phase.
PHASE THREE: JUSTITIA AND SMILE
When Gebura loses all of her HP, she will throw her weapons to the side (dealing MASSIVE damage to anything on the same elevation as her, so watch out), before equipping Justitia and Smile. Gebura has four attacks in this mode.
- The Heaven spear toss.
- Swinging Justitia in front of herself, dealing Pale damage in a line as the sword releases a shockwave.
- A ground shockwave attack with Smile that slows everything in the room before dealing massive Black damage in an area around herself.
- Her Gold Rush attack.
This phase is, on paper, much harder than her second phase, but in reality thanks to Korean Jank Programming, is actually her easiest. You see, Gebura is weirdly programmed in this phase- her tracking is pretty bad, meaning she will rarely get within melee range of any of your Agents. This is why we brought Sound of a Star and Pink along with us, since we can use them to enter her current room while she’s on the other side of it and sit outside her melee range and pelt her with ranged attacks until she dies. While this is happening, move your remaining units to another part of the facility- preferably the elevators in the Asiyah layer, but generally as far away as possible. Once her health is almost completely depleted, move your ranged units back to the pile and use Der Freischultz or Red Hood to trigger her final and deadliest phase.
Core 6, Part 2: The Hunt
In her final phase, Gebura goes all Goblin Slayer/Guts/Edgy Anime Swordsman on us and opens her mask, as well as tossing Smile to the side and unsheathing Justitia into Twilight. Then the carnage begins.
- Gebura will begin to glow red. As she does, she will mark an employee on the map and begin rapidly charging towards their position. Once Gebura makes contact with her marked target, they will explode in a massive whirlwind of every type of damage at once. However, if Gebura can’t make contact with her target for 20 seconds, she will grow tired and be stunned.
- Gebura can also pull a new spin on her Gold Rush attack and throw it into the portals she creates, following after it. Once she reaches the end of her trip, Gebura will attack everything in the department room she lands in and will get stunned.
This phase is arguably Gebura’s most difficult one. Your objective is to simply get as far away as possible while slowing Gebura down with research bullets. Once she’s stunned, dogpile onto her and try to kill her ASAP. Gebura’s defences in this phase are severely weakened, meaning you can kill her in one rotation with enough damage. Repeat this until she’s dead. If Gebura is using the Gold Rush attack, keep track of which department she’s ending in and call in the Rabbits once she’s stunned- they’ll take care of her in seconds.
This is the first fight in the game to punish blobbing, which is the process of taking all your employees, right-clicking on a problem, and watching as they make it go away with pointy sticks and guns. Gebura’s massive area of effect attacks and high damage output mean one wrong move and several employees can panic at once, which encourages you not use this tactic. Instead, a team of coordinated ALEPH Agents stand a better chance against Gebura, than a facility of WAWs, since they can take the occasional swipe without being reduced, literally, to a red mist. Oh, that’s why she’s called that!
Gebura’s major weakness is her predictability. Gebura will always do the same things at the same time each time you fight her, which makes repeated attempts easier and easier. Her hunt phase in particular is rather easy to deal with despite the threat it brings to the table due to this.
In particular, there are two methods to dealing with Gebura’s fourth and final phase. The first is identifying the marked target and moving him away from the blob of your employees while he gets jumped by Gebura, and then loading him down with all the Red/White/Black/Pale shields to protect him from getting chunked. Once Gebura is stunned, rally your employees and kick her ass. The second is the “elevator dodge” strategy, which is performed by putting all your employees in one elevator, baiting Gebura into the one just below you, and then dodging her as she enters the room your employees used to be in. This is rather tricky to pull off but eliminates the risk of the targeted employee dying, in exchange for putting your entire facility at risk and guaranteeing a full restart if it connects. Pick your poison.
Lastly, there is a heretical strat that involves using the Shelter from the 27th of March. For lore reasons, Gebura takes increased damage from abnormalities. Shelter from the 27th of March causes more and more abnormalities to breach as you use it. You can see where this is going.
I do not recommend using this strategy as it means you don’t learn to properly fight Gebura, which will make one of the later days much harder since you won’t have the experience necessary to take her down without many casualties. There’s nothing wrong with relying on it if things go wrong and you just want to finish the day, but using it as the dominant strategy will bite you in the ass eventually. If you need to use it, at least unequip all the E.G.O. from your agents and go do something else for half an hour.
With that out of the way, Gebura is finally defeated. Well done! Now you just have three more Meltdowns to go.
Core 7: Chesed, Those who are Faithful and Trustworthy
- FIRST ACCESSIBLE: DAY 36
- SKILLS TESTED: Adaptation, Abnormality Management
- DIFFICULTY: 4/10
- TO FINISH: Reach Meltdown Level 8 and meet the Energy Quota.
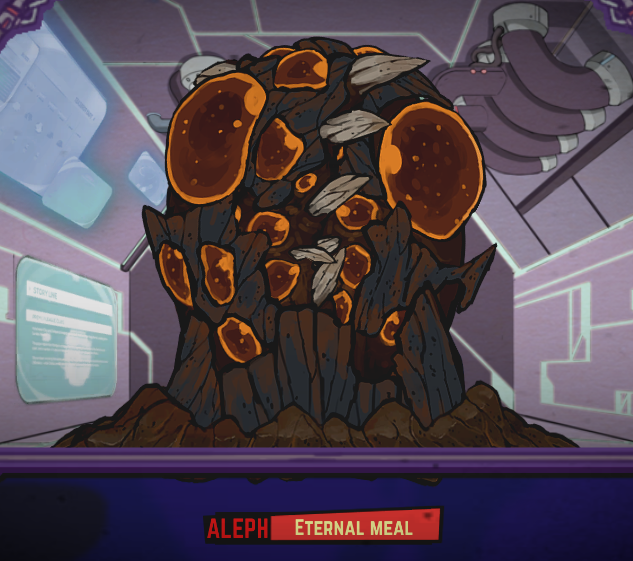
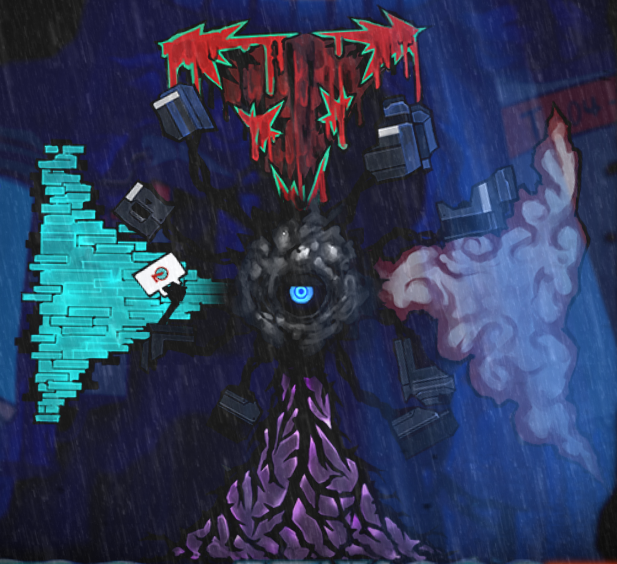
MELTDOWN LEVEL ONE: Chesed illuminates one section of his cross shape, corresponding to one of the four damage types. This damage type does five times as much damage as long as this shape is lit up. Each Qliphoth Meltdown changes the damage type projected.
MELTDOWN LEVEL TWO: Chesed illuminates two sections at once, boosting two damage types.
MELTDOWN LEVEL THREE: Chesed illuminates three sections at once, boosting three damage types.
Chesed’s fight is much easier than Gebura’s, but it’s about as luck-dependent as Tiphereth’s. In general, pay attention to which damage type is lit up and just don’t do that damage type. There’s really not much to discuss here other than applying what we already know- be careful when working with higher-tier abnormalities, watch out for Ordeals, always go for Good work results, and mind your worker’s HP. Be patient and you’ll be fine.
Core 8: Binah, The Eye Facing the Fear; Breaking the Cycle
- FIRST ACCESSIBLE: DAY 41
- SKILLS TESTED: Adaptation, Abnormality Suppression, Abnormality Management, Crisis Management
- DIFFICULTY: 9/10
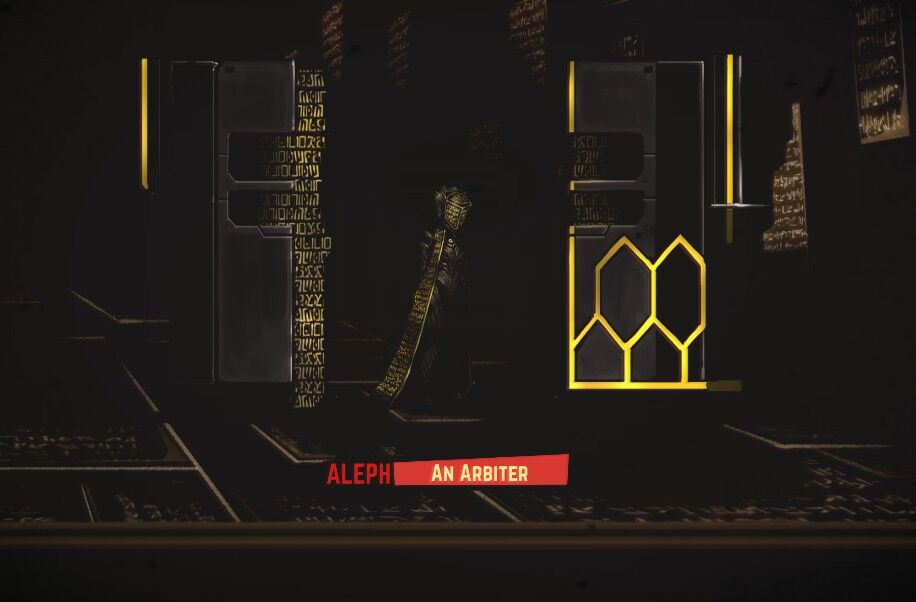
- TO FINISH: Defeat the Arbiter.
MELTDOWN LEVEL ONE: Taking a page from her rival Gebura, Binah takes the form of her old, pre-sephirah self and goes on a rampage throughout your facility. She needs to be suppressed thrice in order to win this battle.
Binah can be considered a similar fight to Gebura, but far more complicated. What she lacks in frontloaded power, Binah more than makes up for with strong, facility-wide attacks and deadly debuffs. Your objective is to clear special Abnormality Meltdowns that Binah produces called “Meltdown of X”, which are colour-coded. Each Meltdown fuels a different part of Binah’s kit, and taking them down is key to defeating her.
PHASE ONE: THE MELTDOWN OF FOG AND GOLD
Binah spawns in the Extraction Team main room and begins randomly marching about the facility. She has a number of attacks to help her in messing up your day.
- Firstly, Binah opens the fight by applying her Meltdowns to different abnormalities around the facility and then attacking agents in other departments, dealing Black damage by spiking them with some kind of dark fog.
- Then, Binah begins to walk. As she does, she becomes cloaked in a thick mist that causes everyone in the same room as her to walk and attack slower. She also gains heavy resistances to all forms of attack.
- While walking around, Binah has two attacks. The first is a pillar attack that she shoots along a horizontal line through your facility, causing Meltdowns in any abnormality containment unit the pillar passes through. As well as, you know, dealing a ♥♥♥♥ ton of damage. Her second is a horizontal, room-contained “fairy” attack, where she slices the corridor in front of her. Both of these attacks can do any type of damage in the game and are colour-coded to their respective type.
- Lastly, any containment unit Binah walks past will gain a normal red Qliphoth Meltdown, even if the department has immunity. Stay on the ball and prevent your abnos from breaching, since Binah is completely immune to ALL abnormality damage.
The two Meltdowns in this phase are Fog and Gold. Clearing the Fog Meltdowns removes the fog debuff around Binah and dramatically weakens her defences, while the Gold Meltdowns will stun her when cleared. Upon reducing her HP to zero, Binah moves into her second phase.
PHASE TWO: THE MELTDOWN OF WAVES
Binah regains her HP, reapplies her old meltdowns, and even adds a new kind of Meltdown to her chaotic ensemble while resuming her merry jaunt. Otherwise, she remains the same.
Her new Meltdown is called the Meltdown of Waves, which correspond to a black wave-like attack that sweeps throughout your facility and deals heavy damage to anything it touches. Eliminating this attack is EXTREMELY IMPORTANT, since the waves can positively wreck your facility and interfere with the fight against Binah. Upon depleting her HP, Binah transitions into her final, and deadliest, phase.
PHASE THREE: THE MELTDOWN OF PILLARS
Binah regains her HP one last time and eliminates all her other Meltdowns while introducing her final one: the Meltdown of Pillars. She then stops in place and begins charging a deadly pillar attack in all eight directions, before launching it if the attack isn’t cleared in time. She also gains total damage immunity while this happens. Regardless of whether or not the meltdown was cleared, Binah will move to another department and perform the attack again, but lose her damage immunity while moving. While in her third phase, Binah will prevent you from pausing. Once her HP is brought to zero in this phase, Binah will be defeated for good.
While Binah is far less likely to immediately wreck your ♥♥♥♥ like her fellow sephirah Gebura, Binah’s methods of battle are arguably even more deadly to your facility than anything The Red Mist could put out. Simply put, this battle is about managing a kill team against Binah will preventing any of her Meltdowns from reaching zero. The last thing you want is to deal with her and some breaching abnormality at the same time, since her extremely high damage output and immunity to abnormality damage is a dangerous combination. The approach to her fight must be more methodical and less reactionary than Gebura’s.
My method for dealing with this fight is creating a team of ALEPH-equipped attackers to chase down Binah and whittle her HP down while letting the rest of my facility deal with the Meltdowns. Much like Gebura, bringing any WAW-equipped employees is just asking for a mass panic to happen, and they’d be better off sitting safely in their departments and taking care of Meltdowns. The key to this fight is learning to pause to deal with the Meltdowns at the beginning of each phase- they are the priority over Gebura every single time. To that end, I would reorganise your departments thusly:
- One designated ALEPH fighter for each department at the very bottom of the order
- Four well-equipped and trained WAW Agents to handle the meltdowns
That way, you never mess up and drag a powerful Agent away from the fight while you try to clear a Meltdown. Make sure that at least one person in each department can handle any abnormality kept there. You really don’t want to have Nothing There breach during this fight, or any other abnormality for that matter- stopping Binah’s Meltdowns, as I have said multiple times so far, is the priority over everything else.
Dealing with the final phase is extremely tricky. Because you can no longer pause, it can be difficult for anyone who lacks some seriously good micro skills to clear all the Meltdowns. Thankfully, there exists a tool just for this occasion: Backwards Clock. Having it in your facility and in an easily reachable place is a must for this fight, since it stops all Meltdowns from happening in your facility in exchange for taking the life of one of your Level V Agents. A worthy sacrifice in my book, since the cost for failing to prevent her pillar attack is either a lot of dead Agents or facility-wide meltdowns. Backwards Clock will only work once however, so make sure you build a charge for it and commit to using it to stop the Meltdown of Pillars. As well, make judicious use of the Slow Research Bullets to keep her impaired as she tries to march to a new department and fire off her attack again. You can hopefully kill her in one clean rotation.
With Binah gone, there’s only one core left… our old friend Hokma.
Core 9: Hokma, The Eye Embracing the Past; Building the Future
- FIRST ACCESSIBLE: DAY 41
- SKILLS TESTED: Adaptation, Abnormality Management, Time Scale Adaptation, Pause Adaptation
- DIFFICULTY: 9/10
- TO FINISH: Reach Meltdown Level 10 and complete the Energy Quota for the day.
Qliphoth Expression of Hokma: Unfrozen Eternity
MELTDOWN LEVEL ONE: Hokma has enough of you making that stupid ligma joke with his name and takes control of the facility’s TimeTrack2 protocol to mess with you. You can no longer control the flow of time by increasing or decreasing it, and pausing will instantly kill or panic a random employee, increasing by one for every additional time paused. As well, Qliphoth Immunity is disabled for every department.
MELTDOWN LEVEL SEVEN: Hokma increases the time scale of the game slowly, but steadily, with each Meltdown gained. He caps out at the maximum of 2.5x increased time scale.StrategyWhile less overtly complicated than Binah’s fight, Hokma’s is just as dangerous. It’s smart to look at this game as “Tiphereth’s Core Suppression, but Harder”, since many of the same factors apply, and thus many of the strategies used there apply here. Much of the difficulty of this fight comes from the fact that you can’t pause without risking the death of your agents, which makes dealing with the lack of Qliphoth Immunity in your departments a very scary proposition.
While managing the time scale might seem intimidating at first, you’ve probably gotten good enough at managing your facility to adjust for the inability to pause or control time. However, even without the time scale increase, the later parts of the fight are very dangerous if not managed properly thanks to lacking the ability to pause. Lots of abnormalities going off at once can lead to a disastrous domino effect of multiple abnormalities breaching if you can’t clear all the Meltdowns, so be prepared to pause and let some of your agents die in order to beat this fight. Hokma doesn’t want to let go of the past, but we need to show him that even when things disappear, we can carry on without them. As a result, when you get to the later parts of the fight when things begin speeding up, it’s okay to pause and lose some agents to keep things under control. Try to minimise the amount of times you pause, and our old friend Backwards Clock is a huge help in this situation as well. Learn to scan your facility for meltdowns and adjust, and for the love of God, if you choose to pause, make sure all the Meltdowns are cleared before unpausing.
Lastly, if you get Violent Midnight, just restart. If you’re good enough to do it with the inability to pause and increased time scale, you’re almost certainly a god among men. Amber Midnight is dangerous due to its consuming bite attack, but is otherwise not much of a challenge, and Green Midnight is as always kind of a joke.
Now we move on to the final few days… the Keter Suppression.
Core 10: Keter, Proving Oneself, Fatigue and Waiting
The final five days of Lobotomy Corporation take the form of an advanced challenge. Each day introduces new concepts to the fray and is mostly a “final exam” type challenge. You’ll likely need to prepare for it pretty extensively, so here’s what to look out for:
- At the bare minimum, you should have lots of WAW gear and almost every single piece of ALEPH gear available to you. While WhiteNight’s set isn’t mandatory, it is very helpful, and Twilight should be relatively easy to obtain in the days leading up to Day 46.
- Have a mix of strong, easy to work with WAW and ALEPH abnormalities alongside lots of weaker TETH and HE ones. Queen of Hatred is a massive no-no, as is King of Greed. Melting Love and Silent Orchestra is just asking to have a bad time, while WhiteNight can as helpful as he is game ruining. Be very considerate with how you build your facility.
- Your facility should be filled to the brim with Level V units. Not a single one should be anything less than a Level V decked out in WAW gear. In addition, try to bring as many powerful Gifts as you possibly can- ones given from ALEPH units in particular are very useful.
With all this obtained, you should be ready to complete the final few days.
- SKILLS TESTED: Adaptation, Abnormality Suppression, Abnormality Management, Crisis Management, Literally Everything
- DIFFICULTY: 6/10
- TO FINISH: Suppress the Midnight of White and reach the Energy Quota for the day.

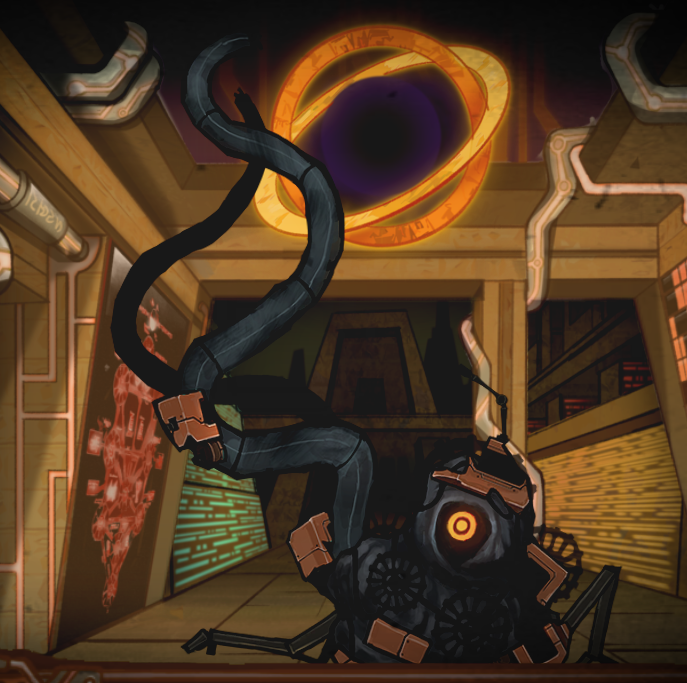
Things are about to get difficult. As you might notice, your Ordeals have been changed to White Ordeals: from now on, you will only receive these Ordeals within your facility. The guy to the left of this text is the Midnight of White, otherwise known as The Claw, and he’s our target for today. He’s backed up by entities known as Fixers- extremely powerful, technologically augmented superhumans sent by the Head to kick our ♥♥♥♥ in and stop us from expelling the Seed of Light. Well, they’re gonna need to send a lot more than four guys and John Wick by way of Scarecrow to stop us- oh, wait, never mind, they’re killing everyone.In total, there are four Fixers, each corresponding to (as you might have already guessed) a primary damage type, which they are completely immune to. The Red Fixer is a strong single-target melee combatant who fires horizontal lasers, the White Fixer is a tanky debuffer who can make herself immune and White damage in massive swipes around the facility, the Black Fixer is an AOE specialist who causes Qliphoth Meltdowns in whatever department he dies in, and the Pale Fixer is a deadly assassin who specialises in dealing debilitating Pale damage to anyone who crosses his path. Each level of Ordeal introduces new Fixers into your facility: Dawn brings one, Noon brings two, Dusk brings all four, and Midnight spawns the Claw.
The strategy for beating the Fixers is pretty simple for each one of them. The weakest is the Black Fixer, who can be pretty reliably swarmed and beaten down because he attacks so slowly. Simply blob him while pausing to move people out of the way of his hammer attacks, and then fix whatever Meltdowns he causes on death. Next hardest is the Pale Fixer, who thankfully only spawns during the Dusk Ordeal. My method for taking care of him is simple- put someone in Twilight or Paradise Lost and 1v1 him, while backing up your agent with healing bullets. If you’re really in a hurry, try peppering him with ranged attacks from behind while he deals with the melee attacker. Next up is the Red Fixer, who can be pretty tough to defeat. It’s recommended to pull the same tactic outlined on the Pale Fixer with him, but make the melee attacker be someone in Mimicry so they can regenerate most of their health by attacking him. On death, he shoots out a very long sweeping laser attack in a cone in front of him, so make sure to apply Red Shield Bullets on anyone caught in the blast before it strikes them. Last is the White Fixer, who is extremely tanky. While her attacks are slow, they cover wide parts of the facility and can finish off people who just finished abnormality work or dealing with one of her comrades. The best solution is to simply leave her for last and then blob her once she’s alone. When you hear the bell ringing, stop attacking her. She just applied a buff that reflects all damage done to her back at whoever sent it, which can wreck people if they’re carrying mismatched E.G.O. gear. While the Fixers can be tricky to deal with, you’ll get lots of opportunities to have intimate knowledge with how these little ♥♥♥♥♥ work.
Last up is The Claw. The Claw ain’t too bad to deal with, and if you’re lucky, you’ll only see him this once! He has three abilities.
- The first is Serum R. After injecting the amber vial on his back, the Claw speeds forward and impacts the other side of the floor he’s on, dealing a ♥♥♥♥ ton of damage to anyone who crosses his path.
- The next is Serum K. After injecting the green vial on his back, the Claw heals for a small amount of his HP after a delay.
- The last is Serum W. After injecting the blue vial on his back, the Claw targets multiple employees throughout your facility, and after a long charge time, warps to every single one and deals a massive amount of Pale damage.
The most effective way to deal with the Claw is exploiting his downtime between abilities. You see, the Claw can pretty reliably be knocked out of his moves by dealing a ton of damage to him, and he has a lot of time inbetween his attacks where it’s possible to just beat him to death. The dominant strategy is to put everyone in the facility in an elevator, wait for him to come to your floor, wait for him to charge using Serum R, dodge his charge, and then beat him to death. If you can get lucky and have a strong enough facility, he’ll die in one rotation. And with him dead, the day is over.
Day 47: FATIGUE AND WAITING - SKILLS TESTED: Adaptation, Abnormality Management, Crisis Management,
- DIFFICULTY: 7/10
- TO FINISH: Reach Qliphoth Level 6 and reach the Energy Quota for the day.
The gimmick with this day is that each Qliphoth Counter lap causes another Asiyah Sephirah Core Suppression mechanic to spawn. That’s right, ♥♥♥♥♥! You gotta finish a day with Malkuth, Yesod, Hod, AND Netzach’s stuff going off. Thankfully, they each come in one at a time.
This day is likely to be the most frustrating one you face in the whole game. But you’ve come this far- apply knowledge gained previously here and you will succeed. Keep track of mixed work and memorise your abnormality locations, while identifying who should work on what abnormality and when to stop working on them due to Hod’s stat malus. For reference, her stat malus this day is a whopping -50, which is enough to take someone from Level EX to Level IV. Be warned. As well, this day can make fighting Fixers a serious problem when Netzach’s health regen debuff is applied, so don’t be afraid to call in the Rabbits if things get dicey.
Core 10, Part 2: Regret and Atonement, Freedom and Redemption
- SKILLS TESTED: Adaptation, Abnormality Suppression
- DIFFICULTY: 4/10
- TO FINISH: Reach Qliphoth Meltdown Level 10 and obtain all the energy needed for today, or suppress the Red Mist again.
Yup, it’s a Red Mist rematch, but you need to deal with Chesed’s damage boosting debuffs before she spawns at Qliphoth Meltdown 5. To quell your immediate question: no, Chesed’s damage bonus does not apply while Gebura is out causing a rampage. Thank god. Even better, Gebura’s HP has dropped by 40% this time around, making her very easy to suppress. That being said, Chesed will turn his damage bonus back on if you decide to stick with his path of beating this day, so be warned about committing to one or the other. Personally, Gebura is way easier to beat, since the idea of dealing with the Claw while he’s boosted by Chesed is a terrifying one.
This is a pretty simple day, all things considered. If you didn’t learn to properly fight Gebura it can be difficult to overcome her here, even with her HP reduced by such a large margin, Plus the Shelter from the 27th of March strategy is out, since that risks a ton of your agents getting wiped out. The elevator dodge strategy is the only really acceptable way of getting through this day without losing some of your units- and trust me, there’s an inevitable culling that will be going on in Day 49. You want all hands on deck for that.
As for the Fixers that spawn, they’re easy to kill so long as they don’t match Chesed’s boosted damage- if they do, don’t even bother fighting them. Just call in the Rabbits and let them deal with it. It might take a little bit of luck to not get a Fixer matched up with the proper damage type, but if you haven’t gotten used to RNG yet in this game I don’t know what to say.
Day 49: FREEDOM AND REDEMPTION - SKILLS TESTED: Adaptation, Abnormality Suppression, Abnormality Management, Crisis Management, Literally Everything, Holy ♥♥♥♥♥♥♥ ♥♥♥♥ It’s All Going Wrong
- DIFFICULTY: 11/10
- TO FINISH: Reach Qliphoth Meltdown Level 10 (lol) and obtain all the energy needed for today, or suppress An Arbiter again.
Alright, you’re finally here, at what is unequivocally the toughest day in the game. Binah and Hokma put you in a tag-team match from hell. Hokma prevents you from pausing while Binah spawns at Qliphoth Meltdown Level 5. Binah has similarly had her HP cut, but that’s small solace compared to the sheer carnage about to unfold in your facility.
There’s no real way around it- people are going to die today. You’ll be lucky if you make it out of today with more than half of your requisite employees. Dealing with Binah’s attacks and meltdowns without pausing is incredibly hard, so Hokma will take the lives of your employees with each time you pause to stop Binah’s meltdowns. Even if you use Backwards Clock again to stop her third phase, that’s only one single phase, and don’t be surprised if you end the day with a majority of your staff dead, most of your abnormalities breached and the Third Trumpet resoundingly blaring in the background.
Hokma’s path to completing today is completely unreasonable. No human being can get to Qliphoth Meltdown Level 10 while dealing with Binah and the time scale increase. While An Arbiter is disabled at Meltdown Level 9, getting to that point is pure suffering. It’s just asking for a wipe once some of the Fixers spawn in, and even worse once the Claw decides to tango. Good luck dealing with Pale Fixer while Binah’s breathing down your neck and releasing Blue Star, you ambitious ♥♥♥♥! Ultimately, today just comes down to beating Binah down before too many of your agents die and then limping over the finish line, clutching the remaining people you’ve got left as tightly as you can. Hokma’s path is theoretically possible, but considering the steep cost and extreme difficulty in doing so, taking out Binah is the best solution to getting through today.
And with that, you’ve done it. Carmen’s plan has been realised. Well done, manager.
Final Comments, and General Strategy
- Learn not to blob as much. Blobbing is cool and fun at first, but a lot of lategame abnormalities, Ordeals, and Core Meltdowns are designed around punishing you for doing this via the mass-panic mechanic. If one unit dies or panics, then every unit around it receives a heavy hit to their sanity. This can stack, meaning three people going insane at once can be a chain reaction as everyone else receives the sanity attack three times in a row, goes insane, and then spreads it further. Blue Star in particular punishes this severely.
- Be patient with learning how the Core Meltdowns work. While I hope my guide is helpful, it’s only so useful in place of practice and patience. The more difficult Meltdowns such as Gebura and Binah’s will take many attempts before completing them, but remember- they’ll fall eventually, and once they’re cleared, you never have to do them again.
- Justice is the hardest stat to train in the game because it’s arguably the best for general purpose play. It governs attack speed and work completion rates in ways that make the game much easier to play- finishing work in 30 seconds is far better than finishing work in a minute, since the Agent can enter the fray and support their allies in battle. Look for opportunities to train Justice however you can, and try not to spend too much LOB on it. It’s far more efficient to level up your other stats and work on Justice as you go.
- Learn to restart your playthrough. While it is possible to complete every Core Meltdown in a single playthrough, it is not advisable to do so. You will lack the resources necessary to more efficiently complete these encounters. In particular, Hod’s, Gebura’s, Binah’s, and Hokma’s rewards are extremely good and almost warrant a full restart on their own. I’d shoot for Binah and Hokma’s rewards at the same time then pull a full restart to prepare for the final week instead of completing one, restarting, and then doing the other, but proceed as you please. You will return to the final days much quicker than you’d think.