
This is my full rundown of every achievement in Nocturne, split into the story unlocks, the rhythm-combat challenges, and the easily missed ones. If you are working toward 100% and want to know exactly what each one demands — and where the tricky ones hide — this should cover all of it.
I put this together because a handful of these achievements are genuinely sneaky. Some can only be grabbed at a specific moment in the story, a couple are locked out forever once you pass a certain point, and the ranking achievements require a bit of planning around difficulty. I have flagged the ones where I would slow down and double-check before moving on, so you do not have to replay a chapter like I nearly did.
Story Achievements
The bulk of the list comes from simply pushing through the campaign. These unlock as you advance the plot, so there is not much to strategize here — just beat each major fight and keep going. I have listed the bosses below so you know what you are walking into at each chapter’s end.
| Achievement | How to Unlock |
|---|---|
| Perfect Sync | Calibrate your latency. You can do this at any time through the Latency Calibration option in the Options menu. |
| Chapter 1 | Defeat the final boss of Chapter 1, Yako. |
| Chapter 2 | Defeat the final boss of Chapter 2, Glaucus. |
| Chapter 3 | Defeat the final boss of Chapter 3, Kai. |
| Chapter 4 | Defeat the final boss of Chapter 4, Supremus. |
| Chapter 5 | Defeat the final boss of Chapter 5, Ellen. |
| Chapter 6 | Defeat the final boss of Chapter 6, Wei. |
| Chapter 7 | Defeat the final boss of Chapter 7, Sue. |
| Chapter 8 | Defeat the final boss of Chapter 8, Nocturne. |
| The End of the Beginning | After defeating Nocturne, when given the option, choose to save Maya over Kimothy. |
| The Beginning of the End | After defeating Nocturne, when given the option, choose to save Kimothy over Maya. |
That final pair is worth pausing on. You are making a binary choice at the very end, and the two achievements are mutually exclusive, so you will need a second playthrough or a save replay to collect both.
Gameplay Challenge Achievements
These all come from the rhythm-combat side of the game, and the good news is that most of them can be cleaned up after you finish the story. Combat challenges, rank grinds, and stagger tricks are all fair game in post-game, which takes a lot of pressure off during the campaign itself.
Full Combo rewards you for achieving a full combo in any level — just note that autoplay does not count, so it has to be a real run.
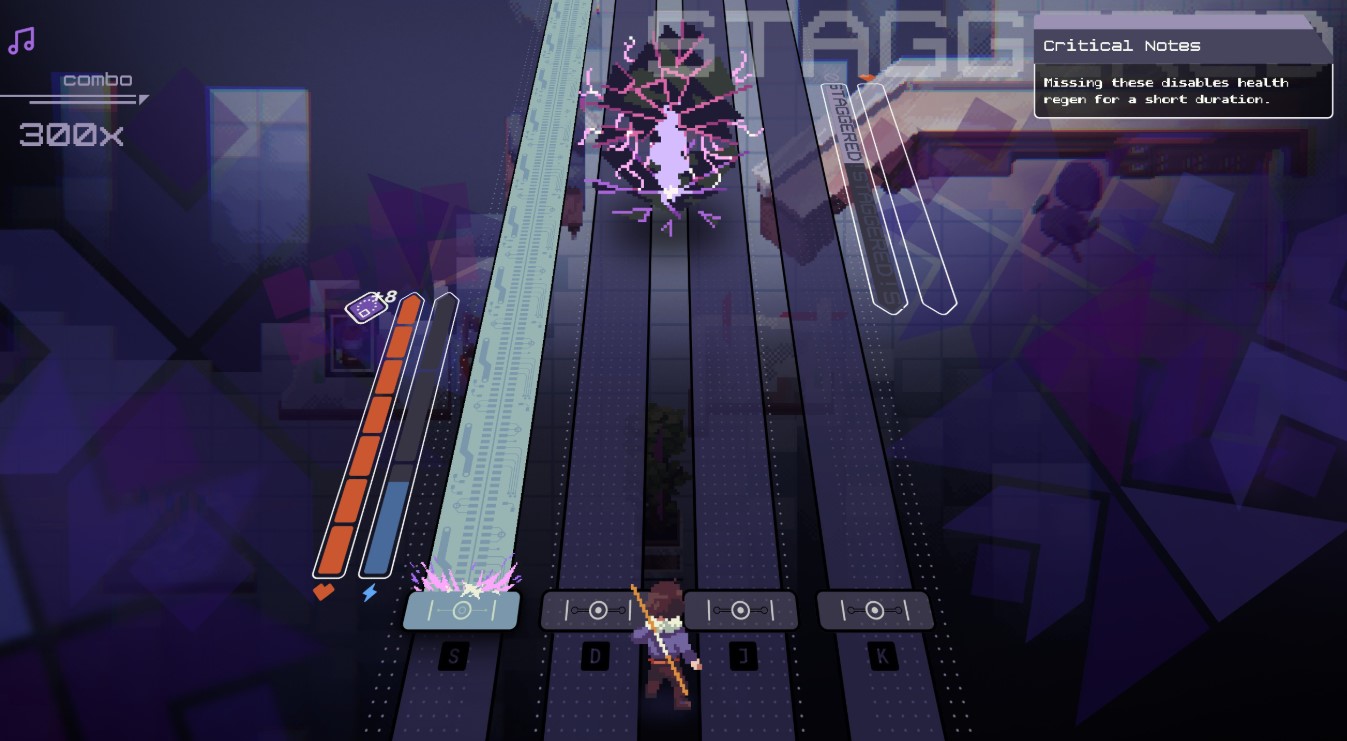
Stagger is simple in concept: stagger an enemy, which happens when you deplete their health to zero.
For In sync with the silence, you need to land a Riposte. This only becomes possible after you finish Chapter 3 and pick up the Ancient Katana. A Riposte is performed by attacking right before the enemy’s attack connects. The timing window differs from enemy to enemy, so watch the attack animation closely to find the right beat — that timing is everything here, and I found it pays to study the windup rather than guess.
They’re so satisfying to hit asks you to hit 20 mines (the red notes) in a single level and survive — which means you also have to complete the level, not just rack up the hits.
Keep it going is a 50-second stagger on a single enemy within one level. Longer boss fights make this far more manageable. If you are stuck, my advice is to hold off until later chapters when your level is higher, then use arcade mode to drop back to an early boss and stagger it with ease. Hitting an enemy while it is staggered also extends how long the stagger lasts, so keep the pressure on.
Ninja like reflexes needs 10 crits in a row. Again, a boss level works in your favor since they attack more often, giving you more chances to chain them.
Space Ninja requires you to successfully riposte a Catena, an enemy found in the void section of Chapter 5. The Catena’s attack animation is fairly long. To land the riposte, you have to attack right before the two streaks of its attack hit you — but after they emerge from the enemy. That split-second distinction is the whole trick.
Rank Achievements
The rank achievements stack, so going for Rank S+ will sweep up the rest along the way. The catch is the same for all of them: every melody in the game has to be cleared at the required rank or better, and it all has to be done on the same difficulty level. Mixing difficulties across songs will not count.
| Achievement | Requirement | My Rating |
|---|---|---|
| Rank D | At least D rank on every melody in the game, on the same difficulty. | Skip |
| Rank C | At least C rank on every melody in the game, on the same difficulty. | Skip |
| Rank B | At least B rank on every melody in the game, on the same difficulty. | Optional |
| Rank A | At least A rank on every melody in the game, on the same difficulty. | Optional |
| Rank S | At least S rank on every melody in the game, on the same difficulty. | Essential |
| Rank S+ | At least S+ rank on every melody in the game, on the same difficulty. | Essential |
Because they all share the same same-difficulty condition, I would pick one difficulty early and stick with it for the entire run. Locking yourself into a single setting from the start saves you from redoing songs later.
Missable Achievements
This is the section where I would keep one eye on the guide while playing. Several of these can slip past you permanently if you are not watching for them, and a few even lock out once you enter Chapter 8’s final area. Here is what to watch for.
| Achievement | Location / Trigger |
|---|---|
| Found you! | Find Kimothy during Hide and Seek at Satoru’s during Chapter 1. After first arriving at Satoru’s house, Kimothy hides — do not progress the dialogue. Instead, head into the trees to the right of the campfire. Keep searching that tree area until the inspect prompt appears, then interact to unlock it. |
| how did you know? | Chapter 1, when Kimothy asks you to enter a code. Ignore him and input the code 1384 instead. This unlocks the door and grants the achievement. |
| That hurt my brain | Chapter 3, after Kimothy interacts with a glitched pillar, heal the corruption on it. |
| EMP | Use the EMP item to end a level before the song finishes. The EMP can be found in Chapter 8, in a room after battling Nocturne in Kai’s form. You can pull this off in post-game arcade, but only if you already picked up the EMP consumable during the story. |
| The most powerful Crawler | Chapter 3 — find the Ladybug and complete its level. It is in a hidden room in Kai’s lab. In the room with the switch in the top-left area of the lab, there is a small, seemingly empty hall to the right of the switch. Go down it and inspect the wall at the end to open a secret door hiding the ladybug. This cannot be done post-game — you must have encountered and defeated the ladybug during the story. |
| Well that was useless… | Find the Broken Capacitator, located in the top-left corner behind some drawers in Kimothy’s room in Asayla’s shop in Yama. |
| DUCK | Find the duck around the map. It appears across multiple chapters (after Chapter 1, and most likely before Chapter 8). At the pond just below the crystal at Bert and Martha’s house, look at the bottom-left of the pond to spot a duck. Just seeing it unlocks the achievement. |
| Just one more, please! | Chapter 5 — when reading stories to Kimothy, read through all 3 story options. |
| but this is the best part! | After beating the Chapter 6 boss and before moving on to Chapter 7: in Asayla’s house, after talking to her on the balcony, talk to Satoru and Kimothy watching TV in Kimothy’s room. |
| It’s still got a lil’ fizz | Chapter 1 — when Kimothy asks for the soda, do not give it to him. Keep the soda in your inventory without using it until the very end of the game, then when given the choice, save Kimothy to earn the achievement. |
| I was saving those for later… | Have 99 potions in your inventory. This means specifically the consumable named potion — not general consumables. A seller in Yama sells potions for 300 TKS, and more can be found in chests throughout the game. |
| I knew someone would try this | Stagger an enemy with the pool noodle. Find it in Chapter 4, in a chest in the top-left of the pool room in the downstairs left wing (just above the room with the piano) of Kitsune’s (Yako’s) mansion. Easiest on bosses whose health you can whittle down slowly, or on very early game bosses (Chapter 1) with much less health. Can be done post-game, but only if you grabbed the Pool Noodle during the story. |
| BONK | Hit the final boss with the pool noodle. Same location as above — Chapter 4, chest in the top-left of the pool room in the downstairs left wing (just above the piano room) of Kitsune’s (Yako’s) mansion. Much easier in post-game arcade mode: equip the pool noodle, open the final boss level, hit it once, then exit. Can be done post-game, but only if you obtained the weapon during the story. |
| MAX LEVEL | Reach level 20 within the story. This cannot be done post-game, and once you enter the final area of Chapter 8 (underneath the statue found at the very beginning of the game), you cannot go back to grind more enemies. I would equip the Master Textbook (bought from a seller in Yama) early and use it during boss fights — that makes this one far more comfortable. |
A few of these are worth stressing before you dive in. MAX LEVEL is the one I would treat as a hard timer — hit level 20 before the Chapter 8 finale, because the door closes on enemy grinding once you step underneath that statue. The pool noodle achievements are similar in that you cannot fake them post-game unless you already own the weapon from Chapter 4, so that chest is worth a detour.
For the pickups that hide rather than fight — the Broken Capacitator, the duck, and especially the ladybug in Kai’s lab — slow down and inspect the walls and corners. The ladybug room in particular has you checking a short hallway that looks empty at a glance.
Conclusion
That is the whole list. Most of the challenge sits in the rank grind and the handful of you-only-get-one-shot story moments, so plan your difficulty early and keep an eye out during Chapters 1 through 5. Get those missable ones on the way through, and the rest will fall into place after the credits roll.


