Guide to efficiently getting 100% Achievement completion in Pacific Drive.
Overview & Introduction
This is a great game and I think is best enjoyed not stressing out or mapping out the achievements before playing, my goal here is to point out potentially missable and grindy achievements, to make things easier for you so you can best enjoy the game without fear of missing out.
Pacific Drive has 49 unique achievements, with only 2 “missable” achievements due to the run-based style of gameplay that allows infinite replay-ability. These missable achievements are the first I point out in this guide, and are the only ones I recommend reading prior to playing the game. Story based achievements + a few others that call out interesting game moments have spoiler tags, I will do my best to avoid including any information on story or gameplay mechanics that could be viewed as spoilers, but if you are particularly sensitive to spoilers, I encourage you to avoid this and any other guide.
Based on available data, expect a normal 100% grind to take approximately 32+ hours.
There are many great accessibility features in the menu that can make the game easier I’m told; enabling them may impact your ability to earn achievements, but it sounds like the game will warn you if the specific change will impact things or not, so pay close attention to that.
I encourage you to play the game however is most fun for you, but I personally found the default settings appropriately tugging on my resources and forcing interesting decision points about what to repair, craft, or upgrade.
Missable Achievements

Scan an Anomaly while the storm is approaching
I believe this is missable, as there are a finite amount of Anomalies to scan in your playthrough. You will be scanning many Anomalies in this game, but this is best to knock out early so you don’t have to worry about it later.
When playing the game, simply Scan (Hold C on Keyboard, LB on Controller) an anomaly while the storm is approaching. If you missed the opportunity to do this in your first save, you can easily knock this out within the first hour of a new save, however, it’s simple enough to do if you’re aware that you need to be doing it. If you’re reading this guide before playing this game, this will make sense once you play the first hour of the game.
I believe this needs to be a new anomaly that you have not yet scanned. I attempted this on an anomaly that I had previously scanned and the achievement did not trigger, however it did trigger on a new anomaly scanned. If anyone has successfully re-scanned the same anomaly to get this achievement please let me know!

Return from the Well with Tobias’ favorite cryptid equipped
I have not confirmed if this is missable or not, but it’s best to achieve this when first prompted. Towards the very end of the game, you will be provided a specific Bobblehead that belongs to one of the main characters that talks to you through the game, there will be a specific voice line about bringing this Bobblehead with you at this stage in the story.
Simply equip this Bobblehead in the Detailing station as soon as it’s provided to you. This is very hard to miss, but putting this on your radar so it’s even more obvious to do for the achievement.
I don’t believe the trophy description is particularly spoilery, but blocking it out of an abundance of caution as it contains names of places you’ll go and people you’ll talk to.
Grindy Achievements

Unlock everything in the Fabrication Station
This will likely be the last achievement for most players, apart from the obvious resource grind required to unlock the resources, many research options will require that you scan specific anomalies. Some late game anomalies may be elusive to you and require some extra time to find, scan, and grind resources after you’ve completed the game.

Install every Auto Shop station and upgrade
Similar to ‘DIY Master’ this will be a grind to get all the required resources to upgrade everything.

Discover 600 Logbook entries
This wasn’t too bad of a grind for me, but your mileage may vary depending on how much you’re remembering to scan every single thing you see + looting unique loot to fill out the Logbook. (Stickers, paints, cosmetics, and logs are all Logbook entries!)
I completed this during the final mission, just 10 minutes before rolling credits. This shouldn’t be an issue as long as you’re scanning along the way.

Destroy 1,000 trees
This was about 70% complete as I rolled credits, and this is with knowing this achievement was on my radar so I would run over most tiny trees as I passed them. You could absolutely progress this further if you hit trees like a maniac, but I was pretty conservative in my efforts until I got later game bumper upgrades & easier repairs at the Auto Shop.
I have found that you can also kick trees which I’m hoping counts towards this. It may serve you well to kick trees whenever you pass by a small one on foot, as to avoid damage to your vehicle while progressing this achievement. I will attempt to confirm this and update the guide based on my findings!
High Priority Achievements

Drive several miles with a Bunny on your car
This is the perfect example of this achievement. I have had a few opportunities to complete this easily that I squandered. Bunny anomalies are the small balls of junk and spikes that roll around, and attempt to latch onto you. While most Bunny anomalies will hurt you or your vehicle, keep in mind that there are at least two Bunny anomalies that are beneficial:
- Friendly Bunny – Heals your car HP over time
- Bolt Bunny – Recharges your battery over time
If you’re aiming to reach 100% achievement completion in a timely manner, I recommend trying for this if you enter a junction and meet some or all of these criteria:
- One of the aforementioned Bunnies is present in the Junction
- The Junction is Perpetual stability so there is no timer on the Storm
- You are not low on fuel
- The other Anomalies in the zone are not actively dangerous to you or the Bunny
I have only attempted this once, but Abductor anomalies kept pulling the bunny off and I was unable to complete it. I attempted to transfer to a new Junction with the Bunny on my vehicle, and it did not travel with me, so don’t attempt that.
As I have not yet completed this, I do not know the specifics in which this must occur. How many miles is several? Does getting in and out of the car reset progress? Is it cumulative or does a bunny detaching from the car reset progress? Any insight you can share is appreciated!
Until I know more, I’m assuming you need to drive at least a few miles concurrently while the Bunny is attached, but fingers crossed that this is cumulative throughout the game! (Progress is not tracked in Steam like many other progress based achievements)

Get electrocuted, acid-burned, and physically hurt all within a minute
I have also not yet completed this, but am on the lookout for the perfect opportunity to achieve this.
Most Acid damage types don’t appear until the second biome, so I’m hoping to find a Cough Box or any other type of Acid based anomaly that is near a Spark tower or anything else that might shock me. Once I find those two near each other, I’m hoping I can cheese the physical damage by either shutting the rear door on my head, jumping off a high point, or run into some spikes.
I will update once I learn more about where good opportunities are presenting themselves.

Escape through a Gateway while the car’s wheels are airborne
Opportunities for this may be scarce, so it’s best to achieve this if you ever see a chance to do this.
Be mindful of the different anomalies that will make your car airborne, and any interesting terrain or ramps that may line up with the extraction location. You should be lucky enough to see this before you complete the game, as the anomalies that launch you into the air are plentiful, it’s just a matter of finding the right angle.

Fully charge a car battery from under 50% using only natural energy sources
I will do my best to update this with what qualifies as a “natrual energy source” but I was able to complete this by being below 50% battery, and having a Bolt Bunny anomaly attach to my vehicle and quickly charge to full. There seem to be other anomalies that will charge you so I’m guessing those will also qualify.
There are also several car mods and tools that you can build to charge your battery, these are worth a try if you are unable to find an anomaly to complete this. I will research this and update the guide as soon as I know more.

Fix six status effects on the same car component
This will likely pop from normal gameplay, but putting this on the list of things to be mindful of in case you’re constantly swapping out new parts to your gear.
I achieved this by repeatedly fixing a leaky side mounted fuel container, which seems to be prone to have the leaky status effect easily under light damage. I assume re-fixing the same window being broken repeatedly will fix this as well, but I found myself just rocking the broken glass look for most of my playtime.

While driving, remain airborne for six seconds
This isn’t too difficult, but it’s a good one to keep an eye out for. I was on the lookout for the perfect set up, low gravity, speed anomalies, and the anomalies that launch you into the air, but I think I did this before I found the low gravity junction.
While it damaged me badly, I was able to achieve this by hitting a ramp that had the speed + floating anomalies, and despite hitting some trees well before six seconds, the trees helped me stay airborne long enough that the achievement triggered.
I have also had a friend report that they triggered this achievement just by driving over a bridge, so it may be a bit forgiving on the coding and prone to cheese like this. It won’t hurt you to stop on a few bridges or drive slowly over them while you’re working on this achievement and haven’t found the other ideal conditions yet.
Run Specific Achievements

Complete a run with at least two junctions, and with the car always having a low or empty fuel tank
This achievement may sound intimidating but if you kit your car correctly, it’s quite easy if you prepare for it. As far as I can tell, having under a quarter tank of gas is what constitutes as having a “Low Fuel Tank” which is indicated by a low fuel icon in the car’s dashboard.
The way I accomplished this, was by adding several empty fuel tanks to the vehicle so that the quarter tank value was actually quite a lot of gas. Just be mindful of other factors like what MPG your equipped engine uses.
There is a battery powered motor that may be an easy method to accomplish this so long as your gas is “low” when you start, but building the tanks for the roof and side car mounts will be easier resources to invest in my opinion.

Complete a run with at least three junctions, and without the car ever being in park
This one may be completed naturally if you don’t regularly put your car in Park before getting out, but it’s also very easy to accomplish this on a run you do specifically to achieve this. I recommend pairing this with another run in this section of the guide as you will most likely be booking it to extraction without any unnecessary stopping.
Make sure you uninstall the auto-park seat mod if you’ve installed it previously!
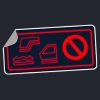
Complete a run with at least three junctions, and without any panels, doors, or bumpers on the car at any point
I haven’t attempted this one yet, but I’m assuming it’s relatively straightforward if you set out to only accomplish this, and aren’t trying too hard to loot or complete any other objectives. Just plan your route safely before you depart, and only stop to get Anchors so that you can safely extract. Drive safely!

Complete a run with at least four junctions, and without breaking or removing any car parts
This achievement will likely pop naturally while progressing through the story, but in case you like to swap parts frequently, just keep this one in mind. It’s simple enough to combine with another one of the achievements in this section of the guide in which you’re just extracting and not exploring as much as a regular run.

Complete a run with at least two junctions, and with twice the anchor charge necessary to escape through the Gateway
This one will pop naturally if you loot anchor’s before you enter the final Junction you extract in. If it’s still pending for you, just pick a run in which you grab each anchor possible and it will trigger no problem.
Wrap up – Part One

Complete a run with at least seven junctions
This will likely occur by the end of the game for you, but in the event it doesn’t, just make sure you complete a long run by hitting as many Junctions as possible before you extract.

Equip or install something in every possible slot on the car
This will happen later in the game once you’ve unlocked more upgrades for your car. These new slots are all unlocked in the Fabrication Station.

Discover your Remnant Ghost, and retrieve any lost items or equipment it held
This was actually the achievement that made me realize there were no guides yet and inspired me to create this guide! I was confused about what this achievement might be, as there is a Junction status called “Turncoat” that this achievement icon is reminiscent of.
It has nothing to do with that, and instead, is related to visiting the location of where you died and scanning the “ghost” anomaly of your car from what I can tell. I have yet to die (subtle brag) so I haven’t tried this yet. To achieve 100% you’ll need to die at some point for both this achievement as well as unlocking everything in the Fabrication Station.

Kick a Tourist, Tour Bus, or Ticking Tumbler Anomaly
Tourists are a very common and very explody Anomaly that you’ll encounter often. They look like mannequins and will only move when you are not looking at them. If run into, they will explode and hurt you, so I was putting this achievement off thinking a Tour Bus would be a safer thing to kick, but that was not my assessment once I learned what they were. I am happy to report that the regular Tourist I kicked did not explode, but I apologize if that is not your experience!

Unlock over half of everything in the Fabrication Station
This will happen naturally while playing the game, and more importantly, while working towards the DIY Master achievement to unlock everything in the Fabrication Station.

Deconstruct a resource
One of the first upgrades your Auto Shop will get, is the Matter Deconstructor. You are meant to breakdown tools, car parts, and other items to receive a partial refund of the raw items used in crafting that item. Simply put one of the raw resources into the deconstructor to unlock the achievement. I recommend duct tape as I think that was one of the few resources I never found myself wanting for, and many of the other resources are used more heavily for crafting and research.

Fully decorate your car by equipping one of each kind of cosmetic item, and applying a paint or decal to installed car parts in every possible slot
As the description states, apply cosmetic items from the Detail Station to every available slot. You will discover cosmetic items throughout the game, just make sure you deposit them into the Detail Station.
These cosmetic items are blue backgrounded items, and were most frequently found in the following places for me:
- Friendly Dumpster
- Deco Vending machines in Gas Stations
- Back of Trucks (Make sure you loot these always!)

Drive an exceptional distance
In this case, exceptional = 100 Miles. You can track this in both the Steam Achievements and more easily, your save file will tell you how many miles you’ve traveled. With normal gameplay, I expect most will achieve this prior to completing the game, and will certainly complete it on the journey to 100% achievements.

Liberate and equip a part from an abandoned car
Near half way through the game, I expect you’ll unlock the “Liberator” tool. Use this tool on a car door, panel, or wheel to remove it from the abandoned vehicle, and then attach that part to your car.
It’s important that you attach the new part to your vehicle while you are still in the Junction. If you bring the reclaimed equipment back to the Auto Shop to equip it, the achievement will not trigger.
The Liberator was a finnicky tool to use in my experience, sometimes activating it would use charges too quickly or ineffectively. Make sure you’re close to the part you’re targeting and don’t hold the trigger too long unless required.

Replace all of the car’s original parts
This triggered much later in my playthrough than I expected, I think I kept an original steel door much longer than I realized. Simply swap out all 5 doors, 5 panels, and 4 wheels, and the achievement will pop. The new parts don’t need to be upgrades, they just need to be different.
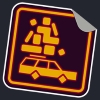
Load enough items into your car to fill 150 inventory grid slots
This is much easier than I expected, I didn’t have a good grasp on how many slots I had, but between a medium upgraded storage in the trunk, and one rooftop storage, I had this achievement pop without even having to try. If it didn’t pop for you during the course of your achievement grind, simply buy one or two rooftop racks and get lootin!

Escape through a Gateway after the storm has completely collapsed
When triggering a Gateway to extract through, you will see two waves of storms. The initial storm will be represented on the A.R.C. monitor as a yellow grid that encompasses the map and does medium radiation damage. The initial storm will be followed by a more intense storm of higher radiation damage, represented as red swallowing the map of the A.R.C. monitor.
If this achievement doesn’t naturally trigger for you, just make sure on a run where your car is in good shape, linger near the Gateway until the red part of the storm swallows the map whole, then drive through the Gateway. You’ll have plenty of chances to knock this out during the course of the game.
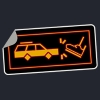
Give your car a few swift kicks (maybe it’ll help?)
Simply walk up to your car and kick it a few times. I achieved this in the Auto Shop. Kick is bound to “F” on keyboard by default.

Discover 300 Logbook entries
You will achieve this during the course of normal gameplay, and will need to complete it while working on towards the ARDA Lorekeeper achievement for 600 entries.
Wrap up – Part Two
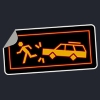
Get hit hard by your car
This is an easy one to force to happen, just make sure you don’t have the Auto-Park Utility Mod. I think I had it happen naturally without having to stand directly in the path of the car, just getting hit by the door or jumping on the hood while moving might work for you.

Forget to put the car in drive before hitting the gas 20 times
This can be forced very easily, but I’ll admit, it happened to me naturally. Just make sure you knock this out before you install the Auto-Park Utility Mod, or simply uninstall it.

Diagnose and cure a Quirk
The game will talk you through this, but it can be a bit intimidating and overwhelming with everything going on when it gets introduced. I had many quirks in my car that I never even identified as being a problem, but had one obvious one return several times. There are some upgrades you can unlock for the Quirk identification system to make it easier, but I worry that may cause friction with this achievement, but this is just speculation. To be safe, achieve this before unlocking any upgrades, but it’s probably fine.

Reach 88mph
While possible to achieve this without the help of any anomaly, you will encounter many golden ball anomalies which will immediately accelerate you past 88mph. Drive through the first one of these you can safely drive through without smashing into any solid objects on the other side and this will trigger no problem!

Distract an Anomaly with a light source
I’m not sure if you can do this with any Anomaly, but the easiest and most abundant way to achieve this is my lighting a flare, and throwing it near an Abductor anomaly.

Invent something new after installing the Zone Scanner
This may as well be story-related and unmissable, but I don’t recall this part of the game on if it absolutely forces you to do this or not. Either way, if you haven’t done this.. you haven’t played the game yet!

Return to the Auto Shop after scanning five Anomalies or resources
Same as above, this is basically a must-do during the course of normal play, but I don’t consider it a “story” achievement. You will achieve this near the very start of the game, no problem.
Story Achievements

After making contact with Oppy, plan your first route into the Zone from her Auto Shop
Install the Zone Scanner above the Auto Shop

Successfully test Oppy’s theory and return to her Auto Shop

Activate the Zone Stabilizers in the Outer Zone, and escape back to the Auto Shop

Gain access to the Mid-Zone, and escape from there to the Auto Shop

Find Oppy’s secret hideaway in the Auto Shop, and deliver the hard drive she stashed in there to Francis and Tobias

Uncover some of the Zone’s history in the Mid-Zone, then escape back to the Auto Shop

Return to the Auto Shop after recovering data ARDA hid in the Red Meadow Research Facility

Gain access to the Deep Zone, and escape from there to the Auto Shop

Overcharge the car’s ARC Device, and escape back to the Auto Shop

Return from the Well
More Guides:
- Pacific Drive: Junction Conditions Guide
- Pacific Drive: Pro Tips for the New Driver
- Pacific Drive: Harvesting and Materials Guide
- Pacific Drive: Hidden Endgame Reward
