I enjoy using underwater tunnels. I think the problem people have with them is you can not save paths within a habitat blueprint which often leads to frustration and inconsistent tunneling results.
This guide shows the mechanics of how to easily tunnel at a minus 0.50 path elevation which results in minimal path and terrain distortion. This enables prior tunneling habitat blueprints with after placement consistent tunneling results.
This is not a decorating guide and it does not include a number of construction techniques. The intent is to make underwater tunneling more fun.
Section One: Why Underwater Tunnels Can Be Frustrating.
Section Two: Quick Explanation Of Method
Section Three: General Information/ Screenshots Showing Process/ Some Construction Tips
Section Four: Manipulating Underwater Terrain (Bridges, Rivers, Lava Flows)
Section One: Why Underwater Tunnels Can Be Frustrating.
Tutorials I have watched show how to make an underwater tunnel: Keep adjusting your digging until you are below the water obstruction notice. This produces a distorted path and terrain in a trench. The tutorials then give ideas on how to cover up/ improve your tunnel. The problem is we can not freely adjust a path underground like we can in the air for the floating water trick. The best available to us are increments of 0.50.
What I have not seen is how to consistently tunnel a path elevation of minus 0.50 below the water resulting in minimal path and terrain distortion which would lead to easy personal and workshop habitat blueprints.
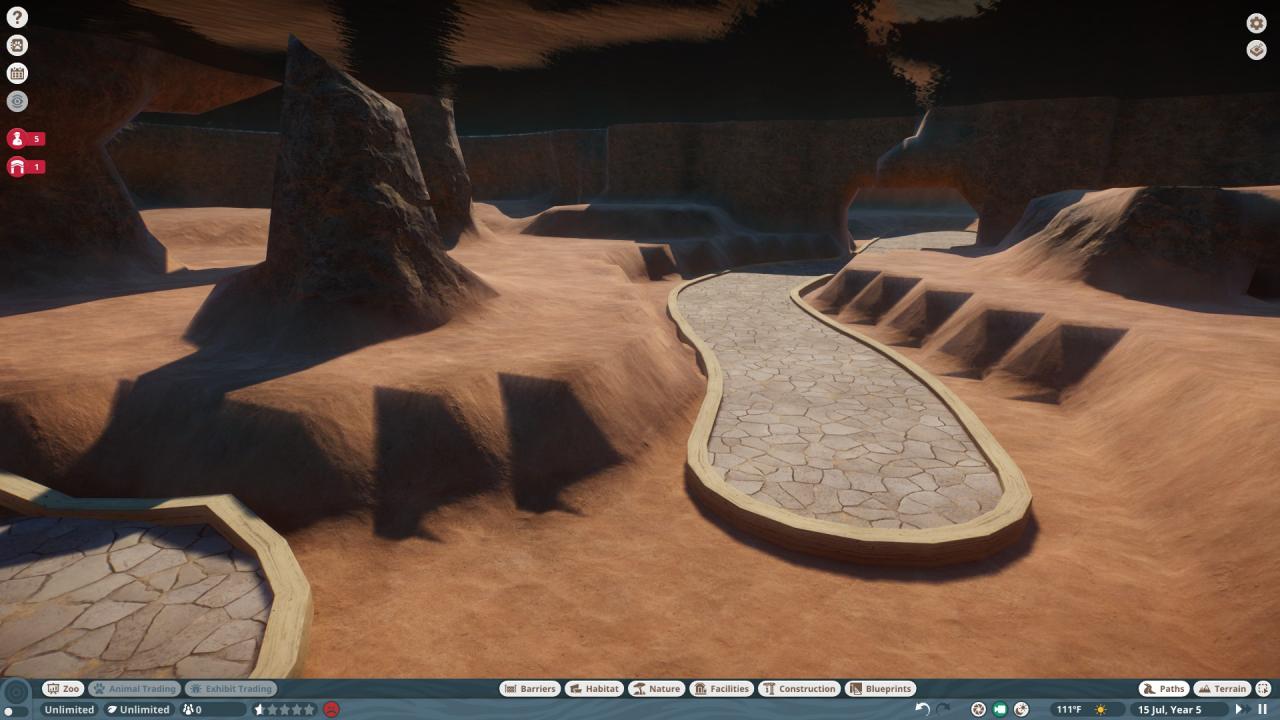
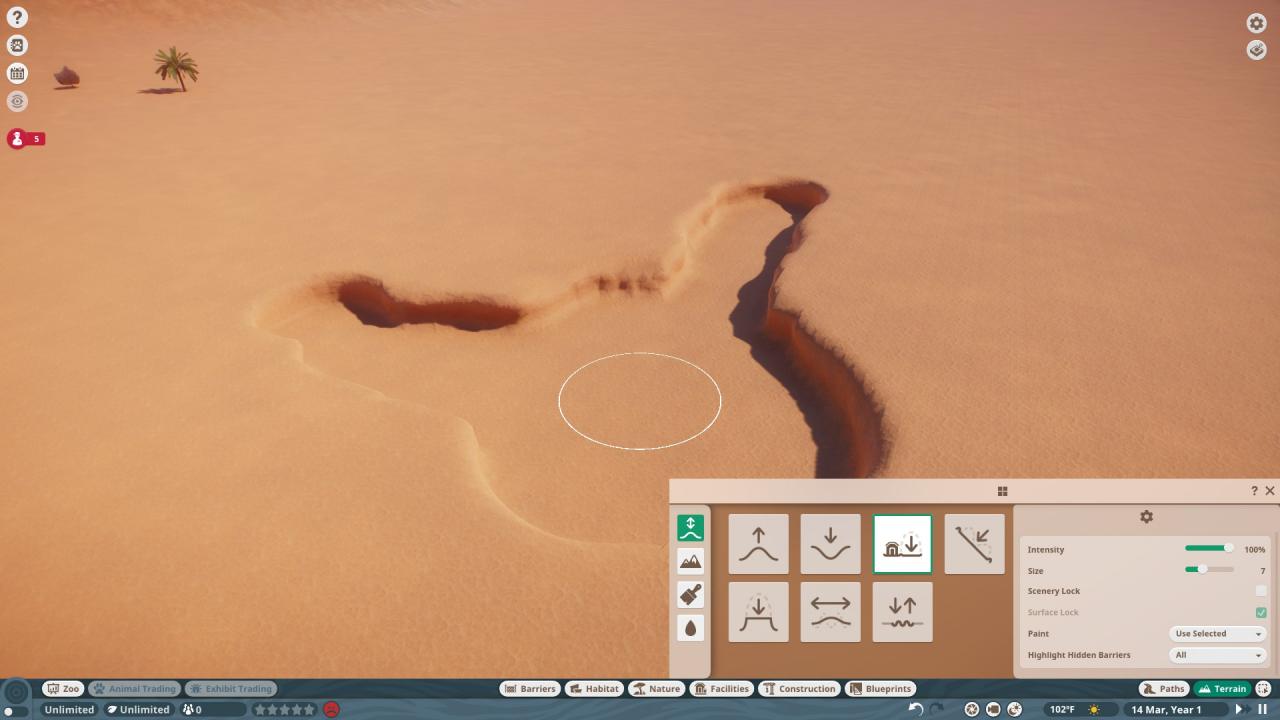
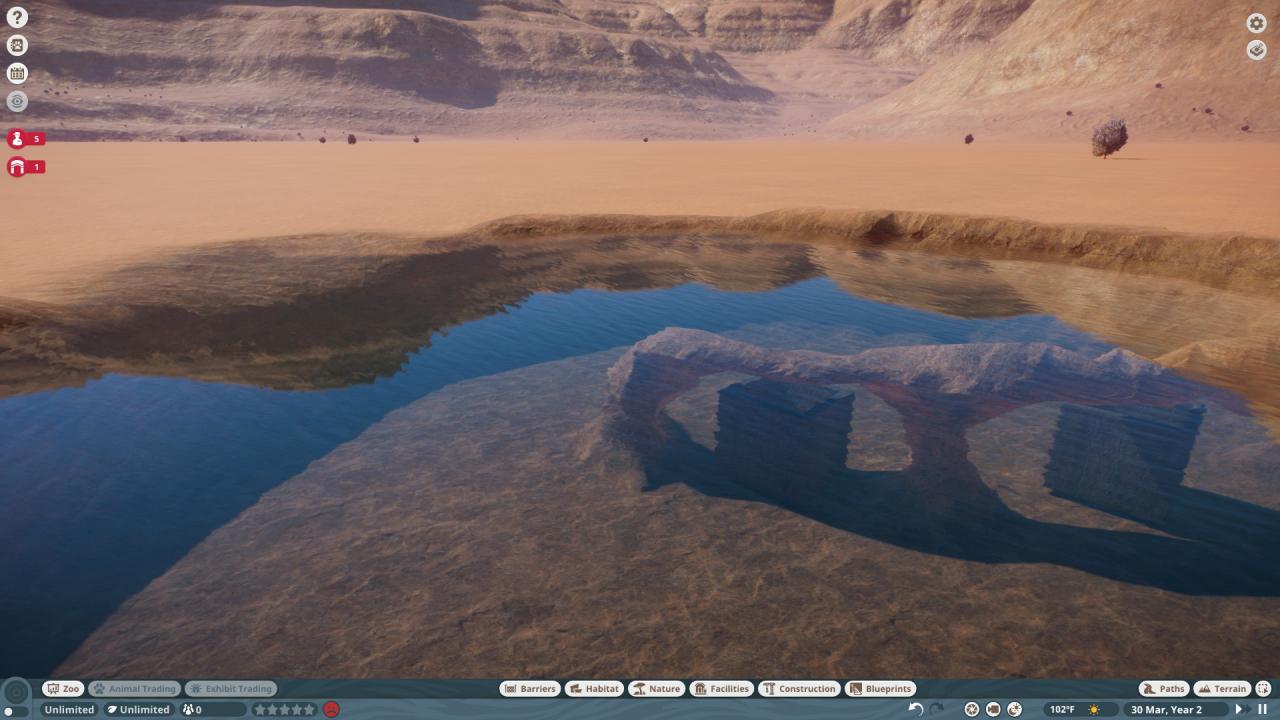
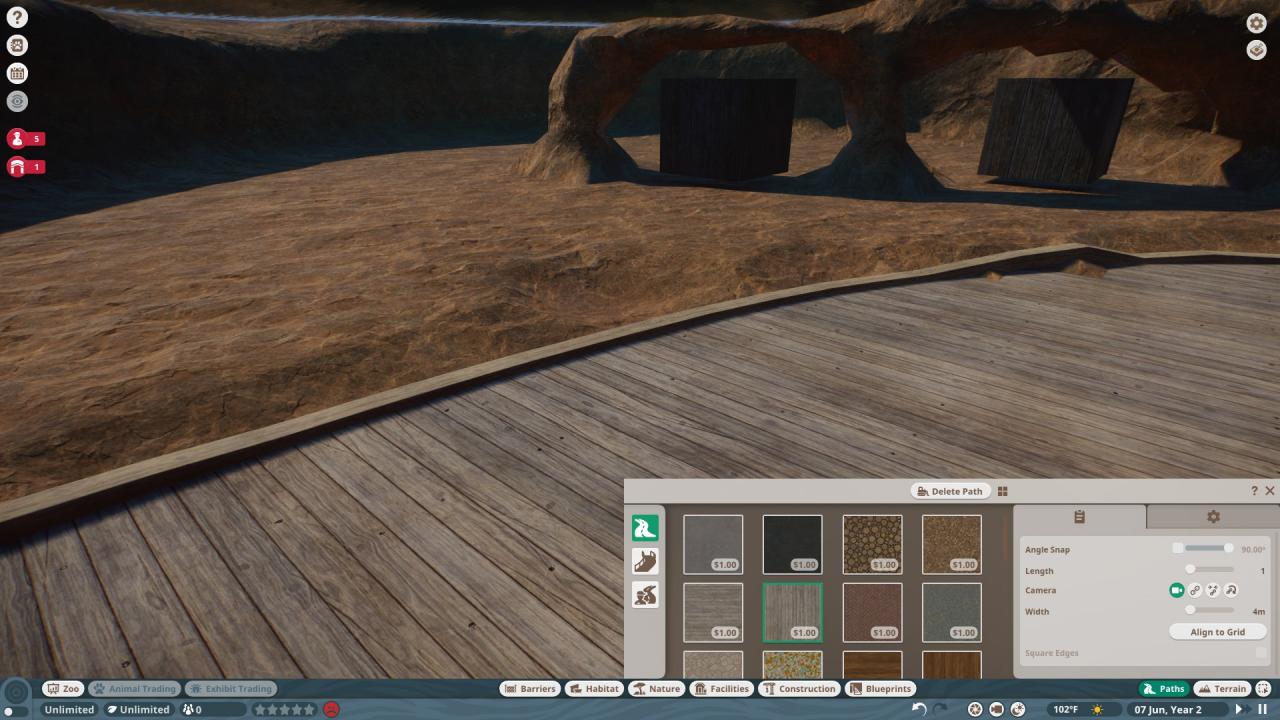
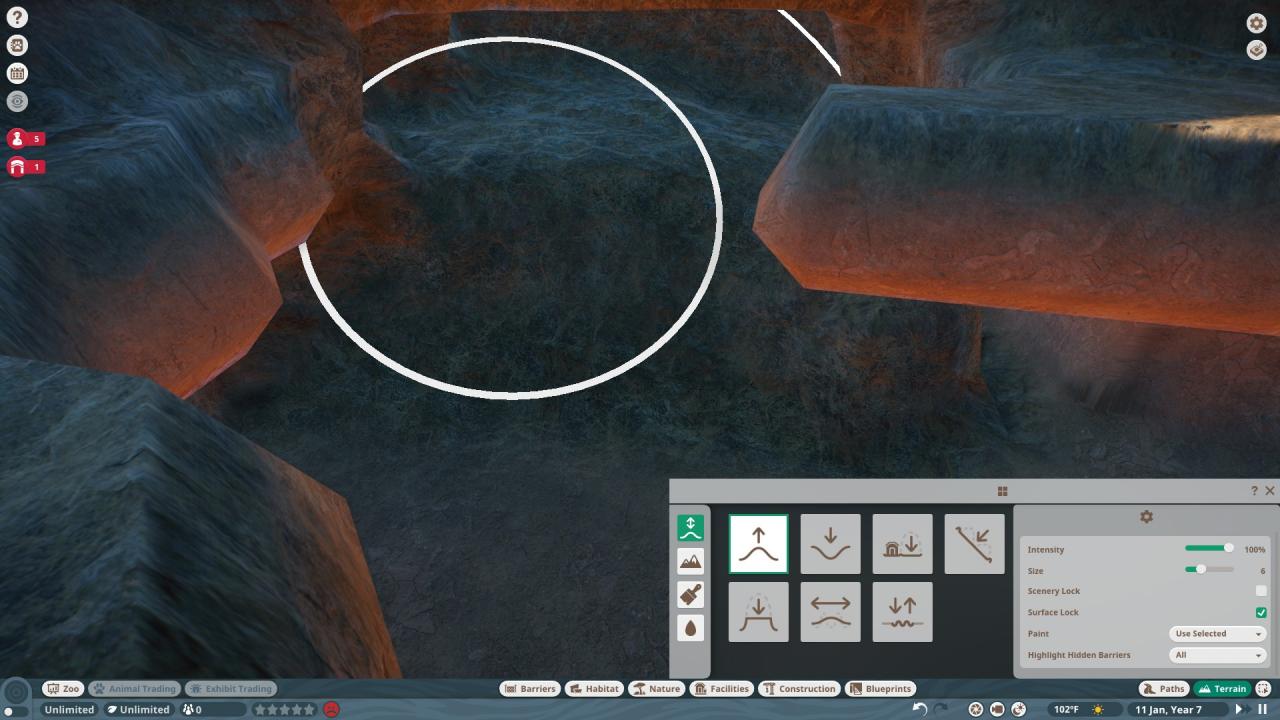
The first screenshot shows the familiar path and terrain distortion.
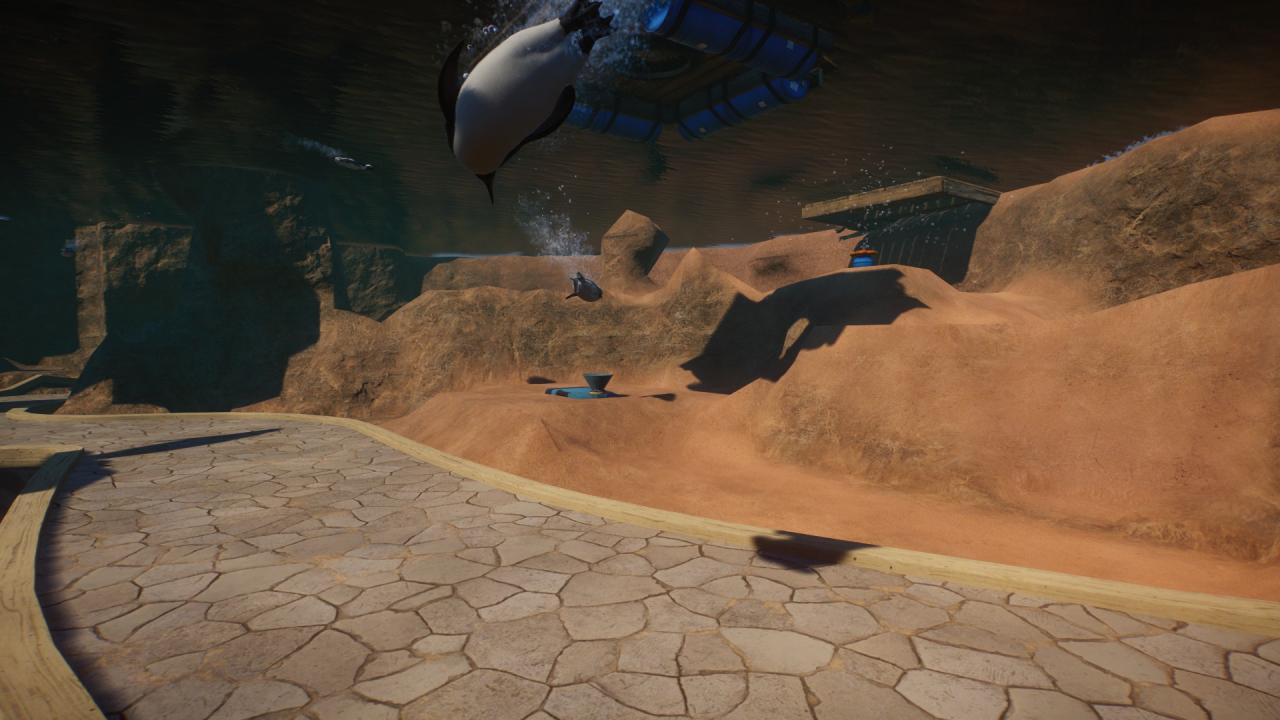
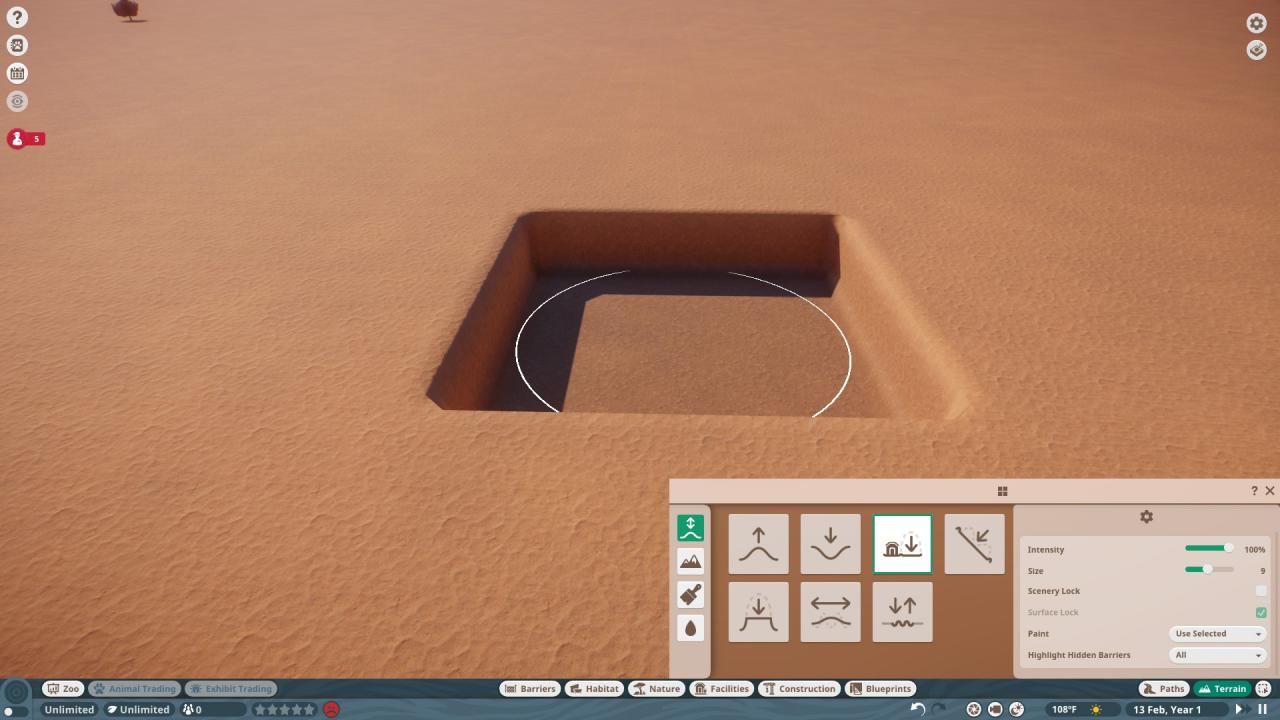
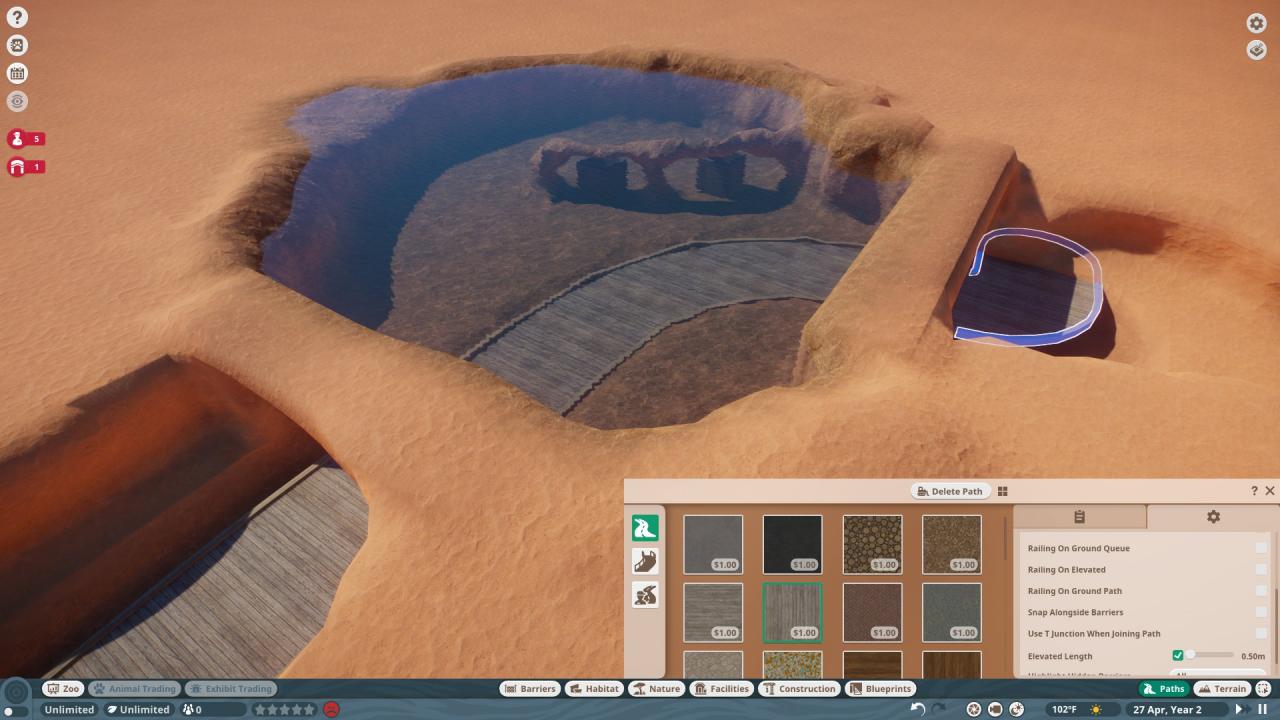
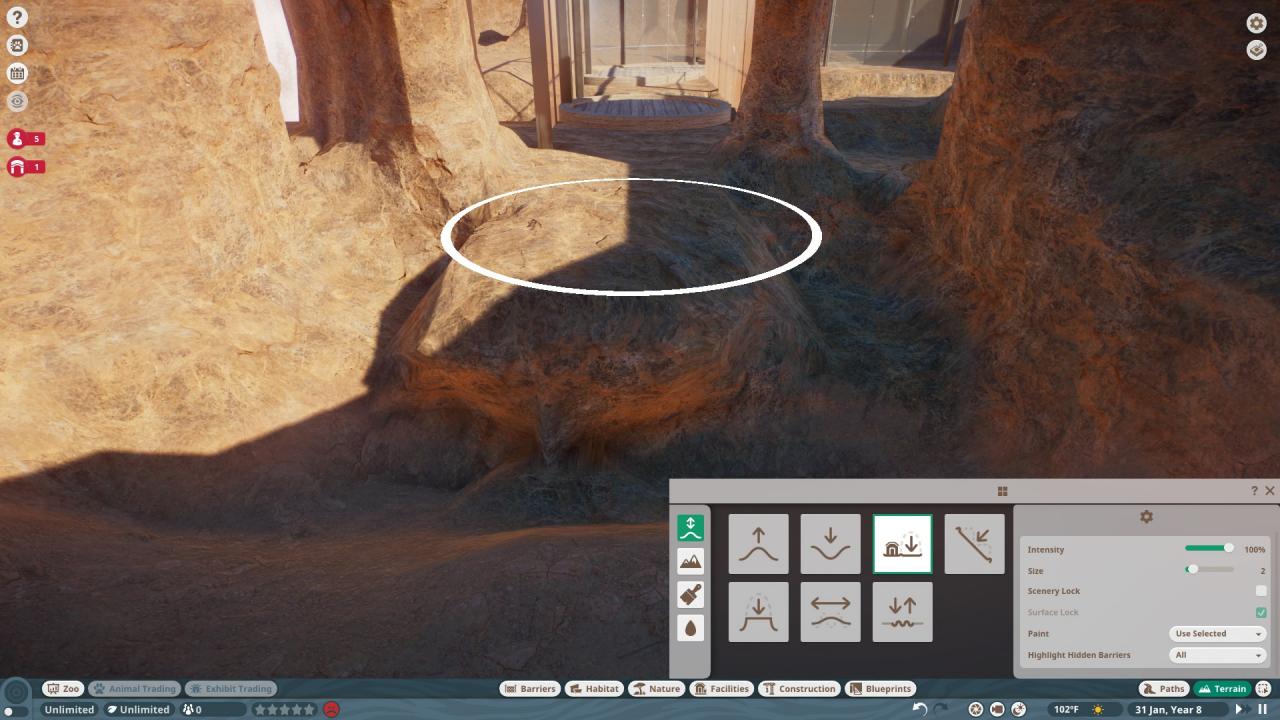
The second screenshot shows how carving out the terrain can
improve the looks but is time consuming and relies on terrain skills.
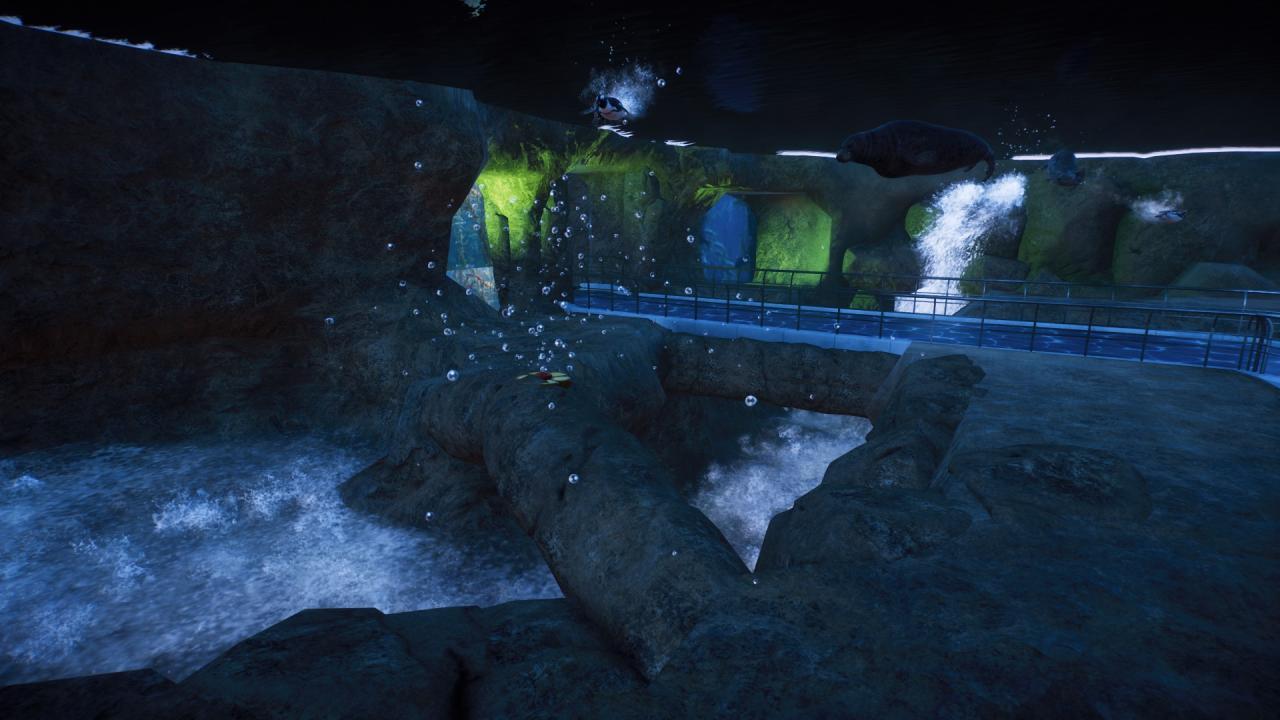
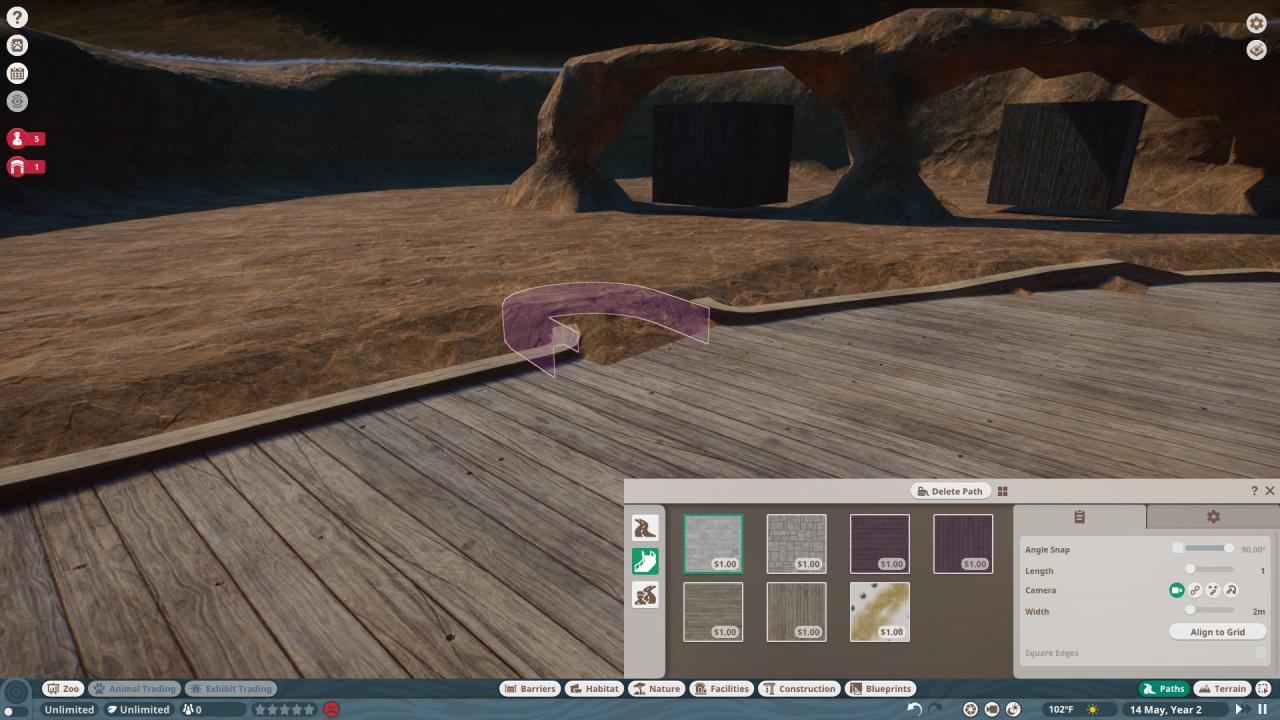
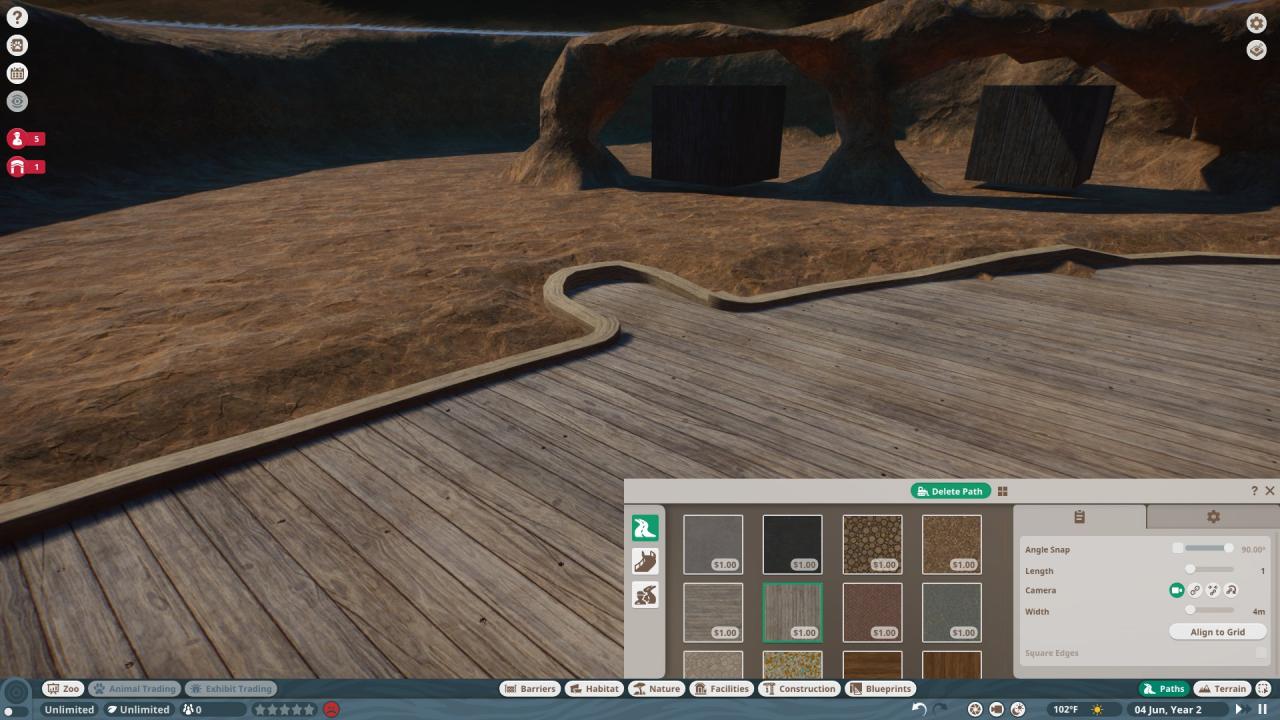
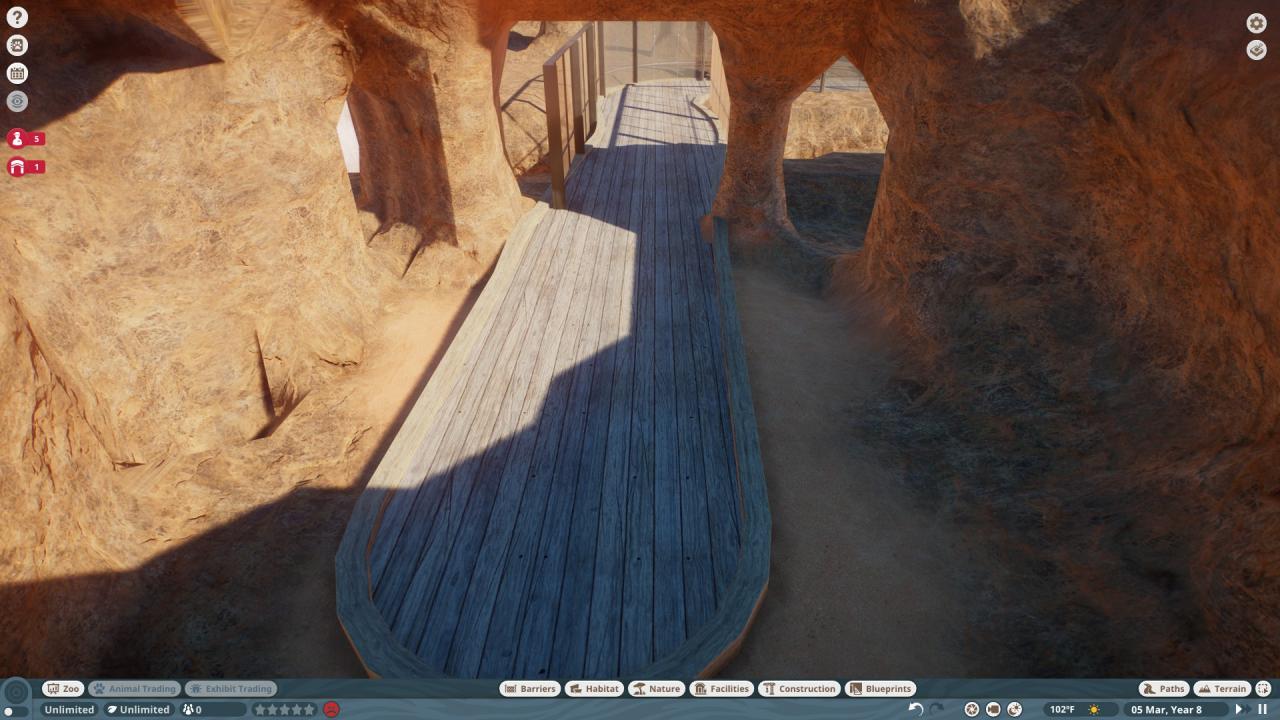
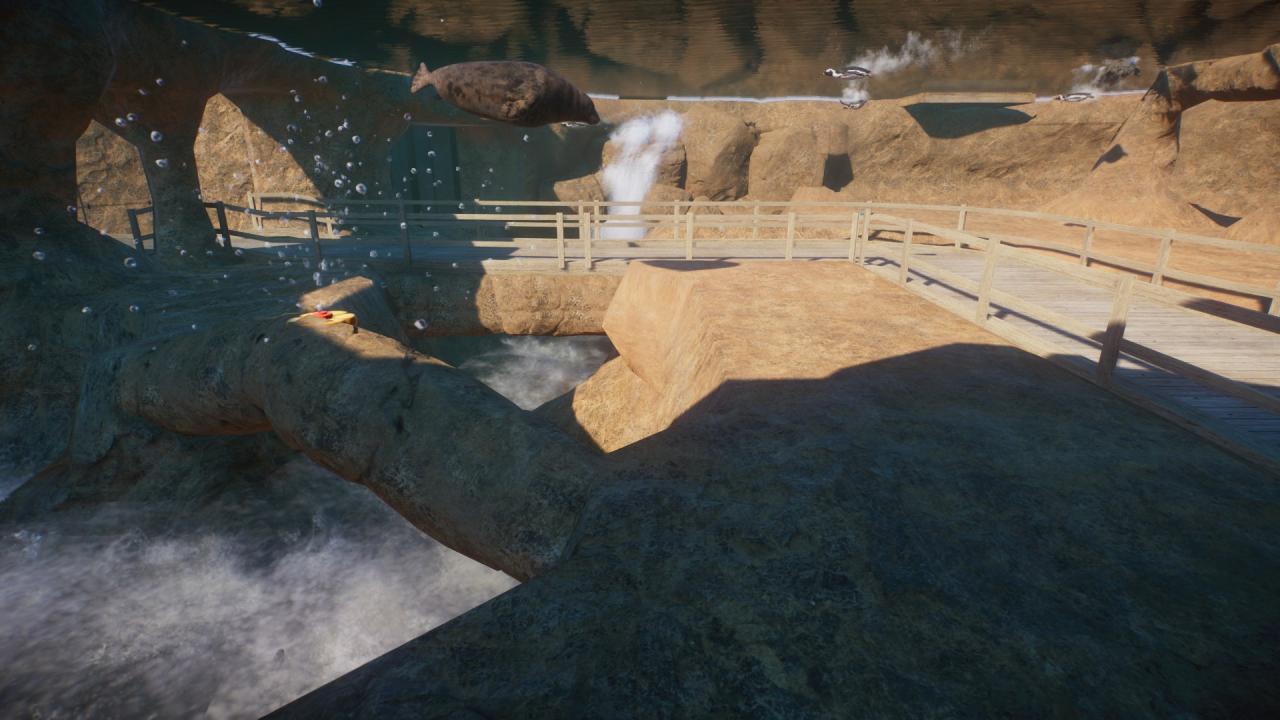
The third screenshot shows a path that is only 0.50 below the lake bottom
with no path or terrain adjustment.
Section Two: Quick Explanation Of Method
Water is in one meter increments. You can not tunnel into water so you have to tunnel below the lowest meter level of that water.
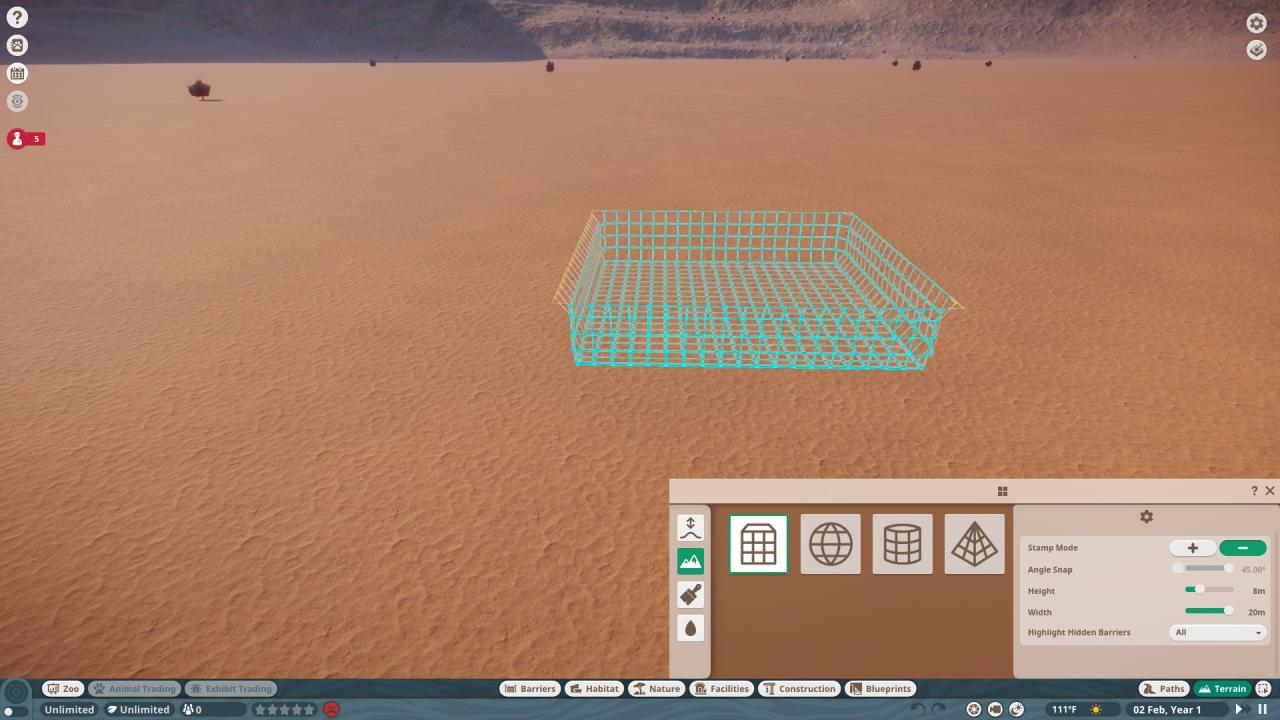
1. Set the terrain minus stamp to 8 meter height and 20 width. Make your hole.
2. Use flatten terrain tool to carve out your lake and two cul -de-sacs. *
3. Set terrain plus stamp to 9 meter height and 4 width then wall up the cul-de-sacs.
4. Provide lake entry point for your animals; add water and animals to test lake entry.
5. Delete water and do your terrain work; add water.
6. Chose path width and set elevation to 0.50 and turn on tunnelling. Be sure those two
are all that are on.
7 In a cul-de-sac place path and pull down mouse to get the 0.50 stair (do not use “J” key
as that can produce a ramp). At the minus 0.50 tunnel to the other cul-de-sac.
* NOTE: Do not make holes in the bottom of the lake. Even if you then use the flatten
terrain tool your tunneling can be messed up. For the same reason, only use the flatten terrain tool on the bottom of the lake, not anywhere else.Other than this warning, do whatever terrain work you want on sides and bottom of lake.
Section Three: General Information/ Screenshots Showing Process/ Some Construction Tips
If you have not yet done so, go to settings and disable Terrain Collision.
On path tab uncheck all options (flatten terrain, etc.)
I recommend do your building in Sandbox and save prior path tunneling
work as a habitat blue print. (You can save in sections for later silk screening if desired.)
You can be less than 8 meters deep but you will reach a point where the
underwater feeder will not work and you will also start to get distortion.
I use 8 meters as it is a good level for a mixture of seals and penguins.
This is not a terrain guide so I am not going to go into why you should
not make holes in the bottom of the lake and then cover them up with
flatten terrain tool. Just do not do it.
If adding projection screens with fish videos include in terrain work so you can pull terrain
through to give them depth.
Some construction pieces are in screenshots. I do not use tunnel covers because I like an open look; if you use them, you can blueprint them.
Do your entry points to taste. I like one small pond with the rest of the lake nontransversable
so I can section off the habitat and keep the animals in the front. Also lets the juveniles drink
and wade in the pond.
Plan for the future. Be sure your lake will be large enough for the
animals’ animations/population growth and if you intend the path to
handle crowds. Will you have connecting underwater habitats/ path
to surface a climber habitat, etc.
When you are happy with the terrain/construction work add a barrier and make a habitat blueprint before any tunneling work.
Congratulations, that is probably at least 90% of work you will not have to repeat.
(Many are basic but I do not know who will be reading this.)
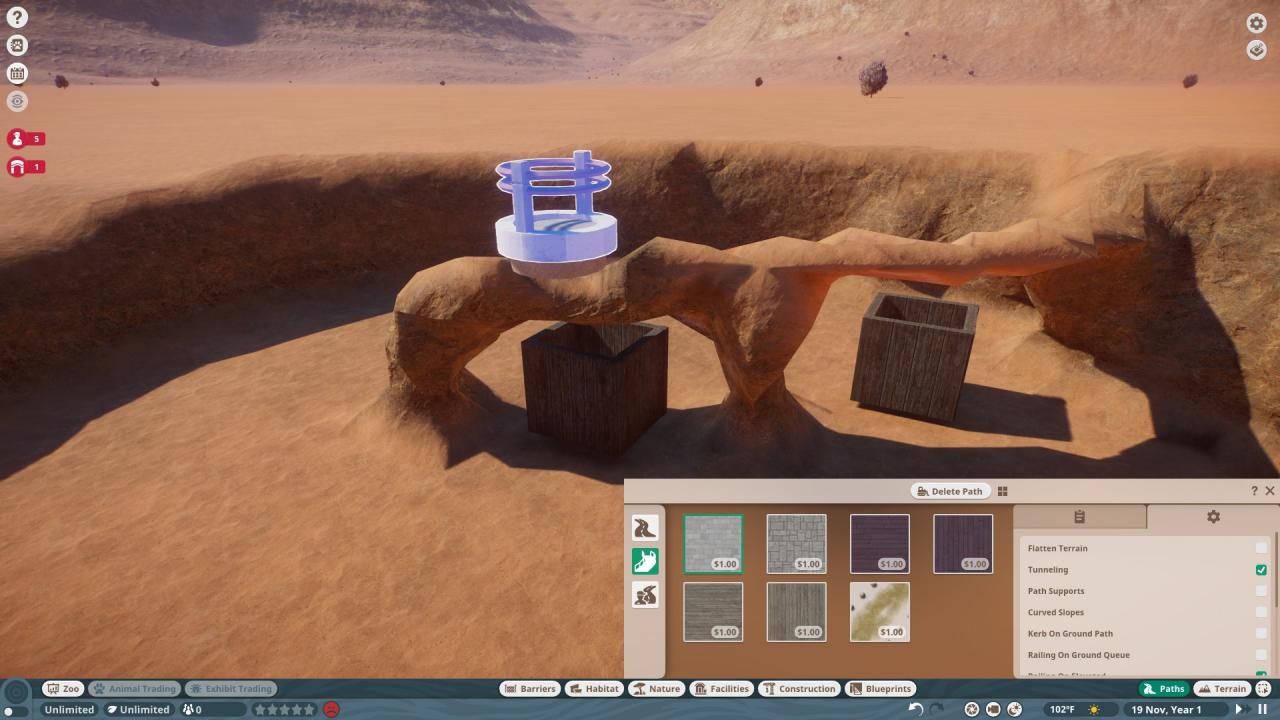
The 4 meter boxes under the arches guarantee the African Penguins can pass under and
a que path with tunneling on makes a good top trimmer (you can then pull and push to adjust) so arches are under the water.
Do your tunneling from a cul-de-sac.
Smooth out any bumps using que path (tunneling on) ,switch to regular 4 meter path, overlay and delete the nub. Rough rock paint also helps. (Tip: If you do an angled path but want a smooth curve, delete pieces of path on each side of bend, hold control key down and place a piece of path where bend should be, then join the two sections of path from this single piece.)
Getting rid of tunneling marks at entrance. Leave at least one cul-de-sac connected to water path
(you can do that one too but after you reconnect the other cul-de-sac). Delete path, turn off tunneling, set flatten terrain tool to size 2 and from the interior pull toward you to flatten out terrain removing the tunneling marks. From interior path lay a path into cul-de-sac.
 [/screenshot]
Section Four: Manipulating Underwater Terrain Fun (Bridges, Rivers, Lava Flows)
Terrain under the water’s area of influence can be manipulated. This can allow some
interesting features such as bridges, rivers, lava flows (special effects water color changes),
ponds with real water, etc.
Tunnel a path down into the terrain. Since it is below water you can use control x to place path piece and tunnel around. Delete path above where you want bridge so you can tunnel that out then add back path for a bridge.
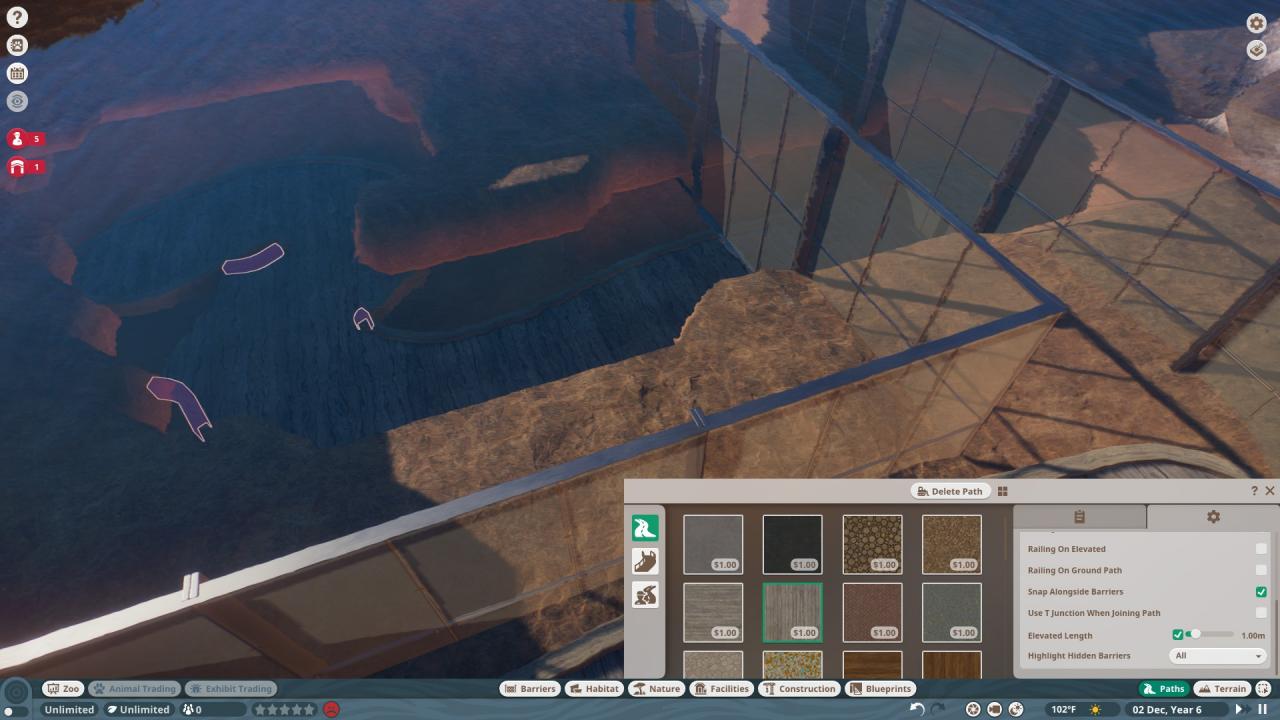
Use terrain tools pull, push, etc. to make river bed.
Bubble machine on artificial rock. Artificial rocks for waterfall and
bridge sides.
Add a few artificial rocks along river edge and you have a starter habitat for under $5,000.