A step-by-step guide to Sailwind’s controls, ship operations, and missions for first-time sailors.
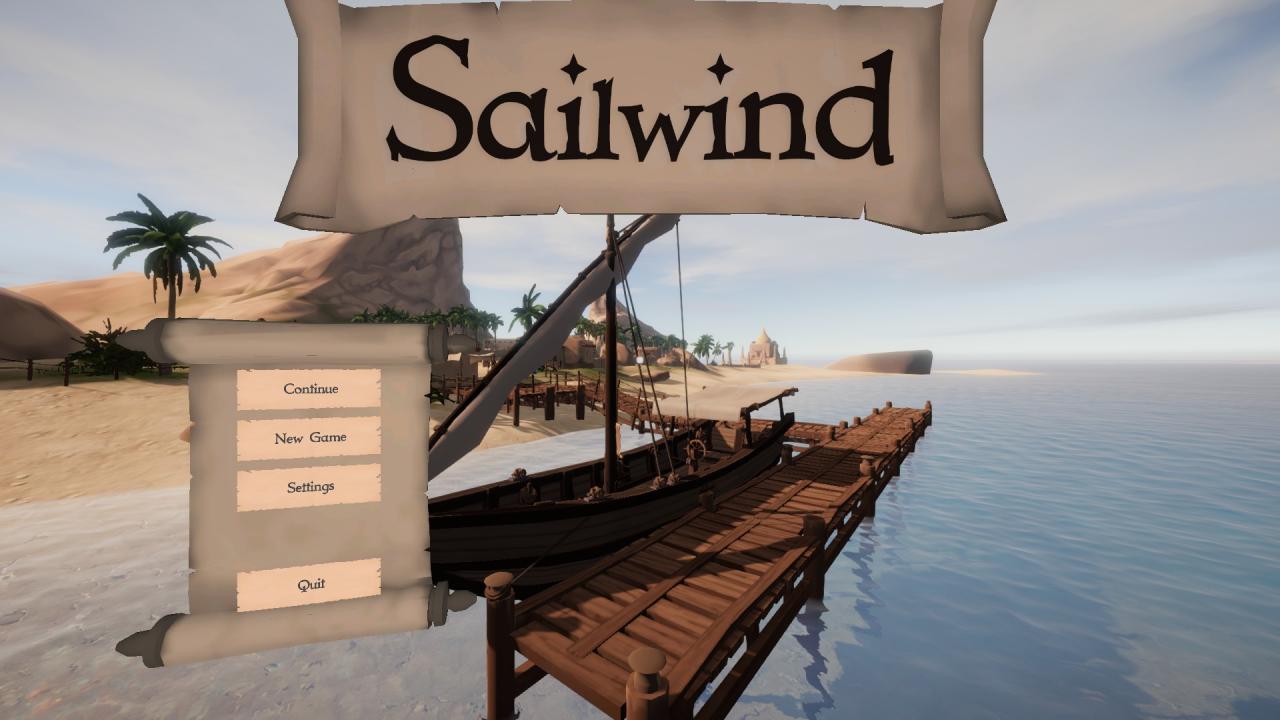 The New Game option is where we will start. Select that and you will be taken to the start location menu
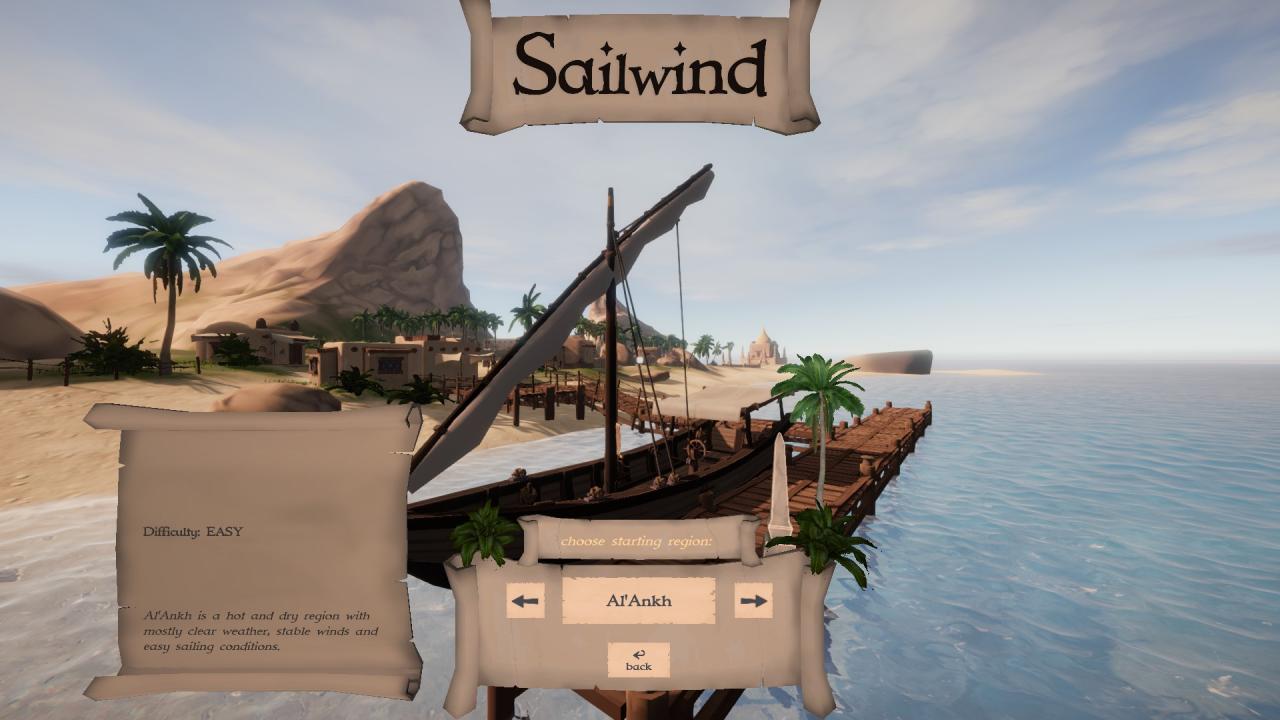 This includes a few bits of information, and the ability to explore your starting options. We will assume you start in Al’Ankh, since it is the best for beginners. Select Al’Ankh by clicking its name to continue to your ship! The game has begun!
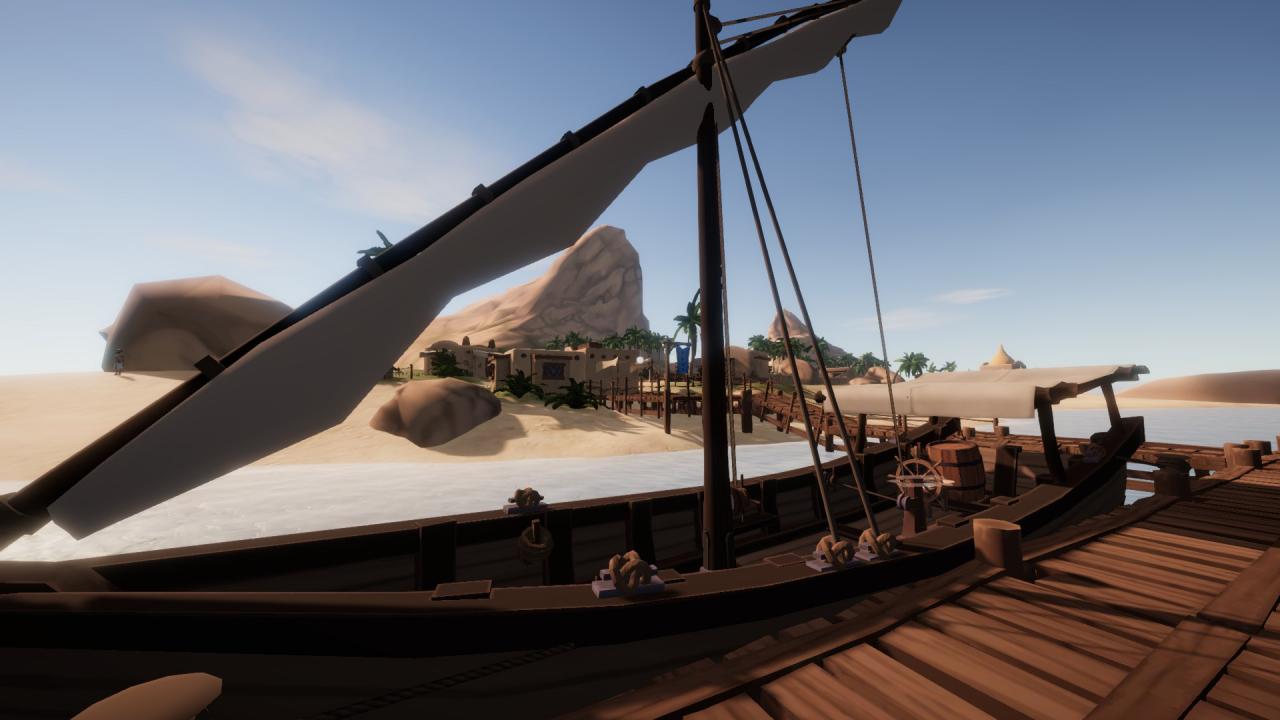
Depending on your style, you may want to accept a mission first but we will practice getting the ship underway and mooring her back to the dock before we put cargo anywhere.
The first step is to use WASD to move, the mouse to look, the space bar to jump, and shift to run. You can practice by running, jumping, etc. onto your ship.
You will then likely be greeted by a helpful instruction to find the sailing manual.

If you look around your ship, you will find a small table with a bunch of junk on it.
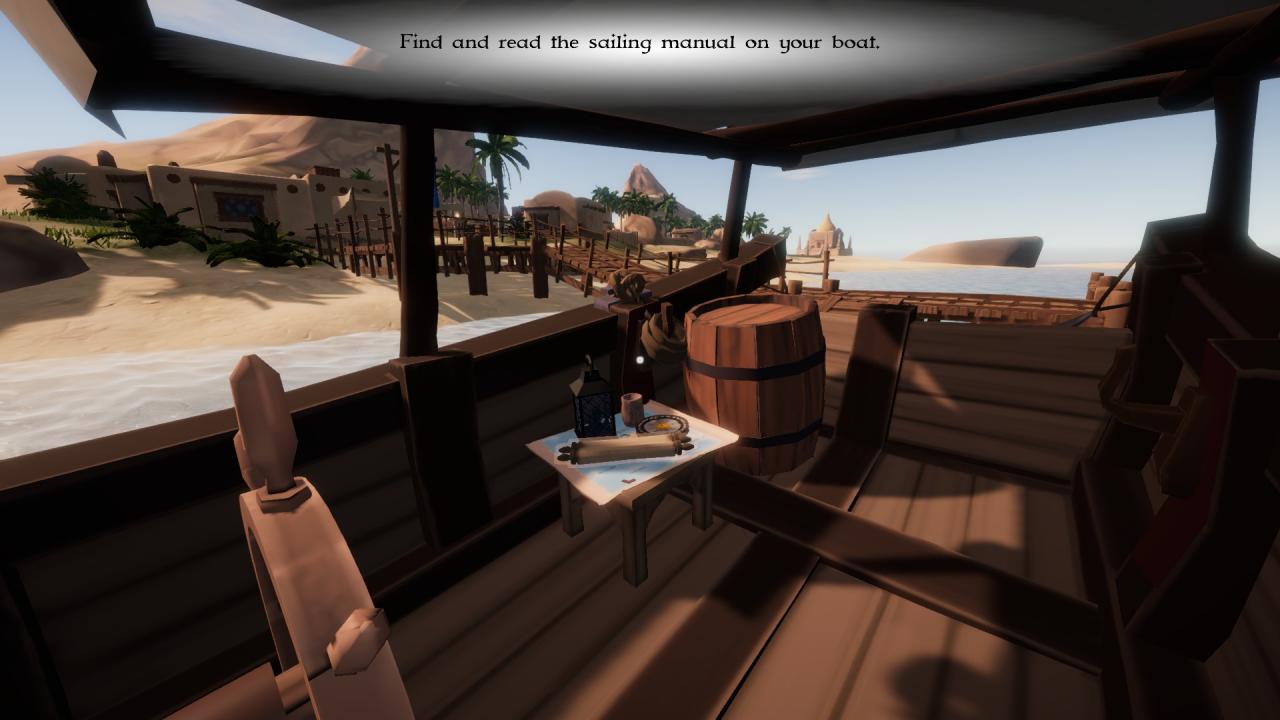
The scrolls among that junk are the sailing manual and you can pick them up to read by highlighting them with your gaze and clicking with the left mouse button.
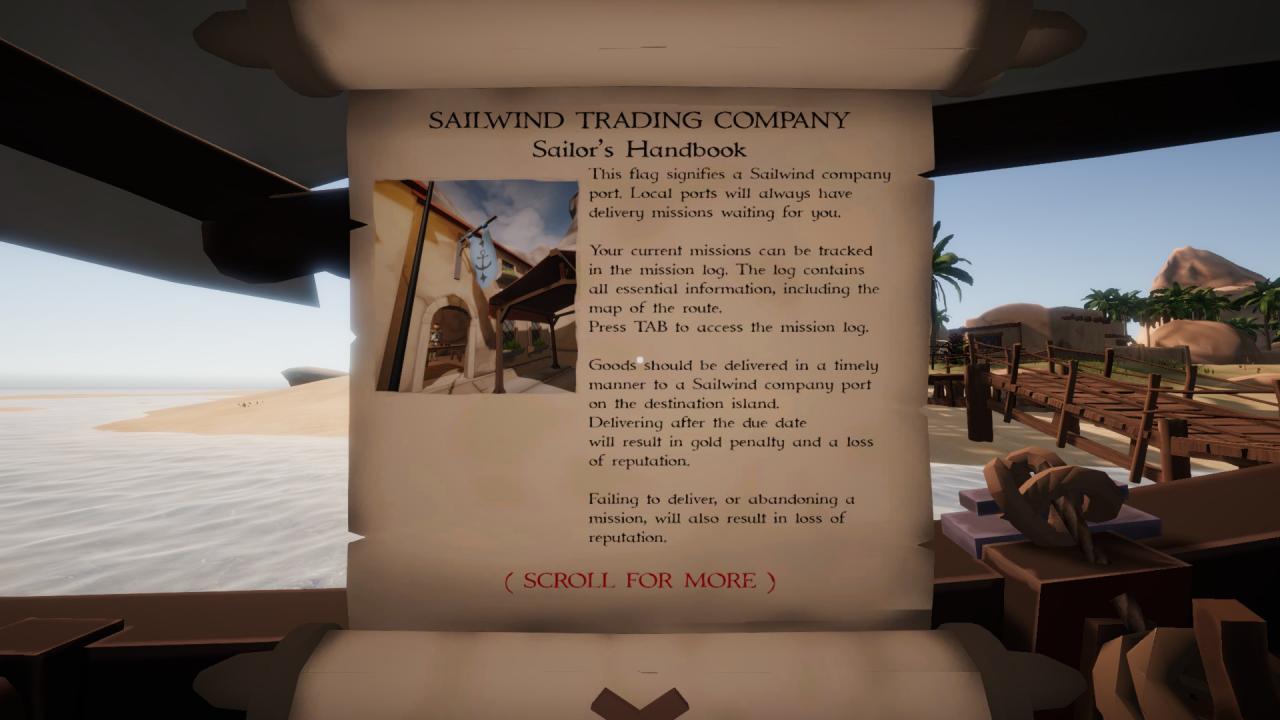
This is an incredibly helpful start, and worth the read, especially the bit on sailing technique.

For now, give it a good read and then toss it aside– time to get underway!
(Toss it aside by clicking the left mouse button!)
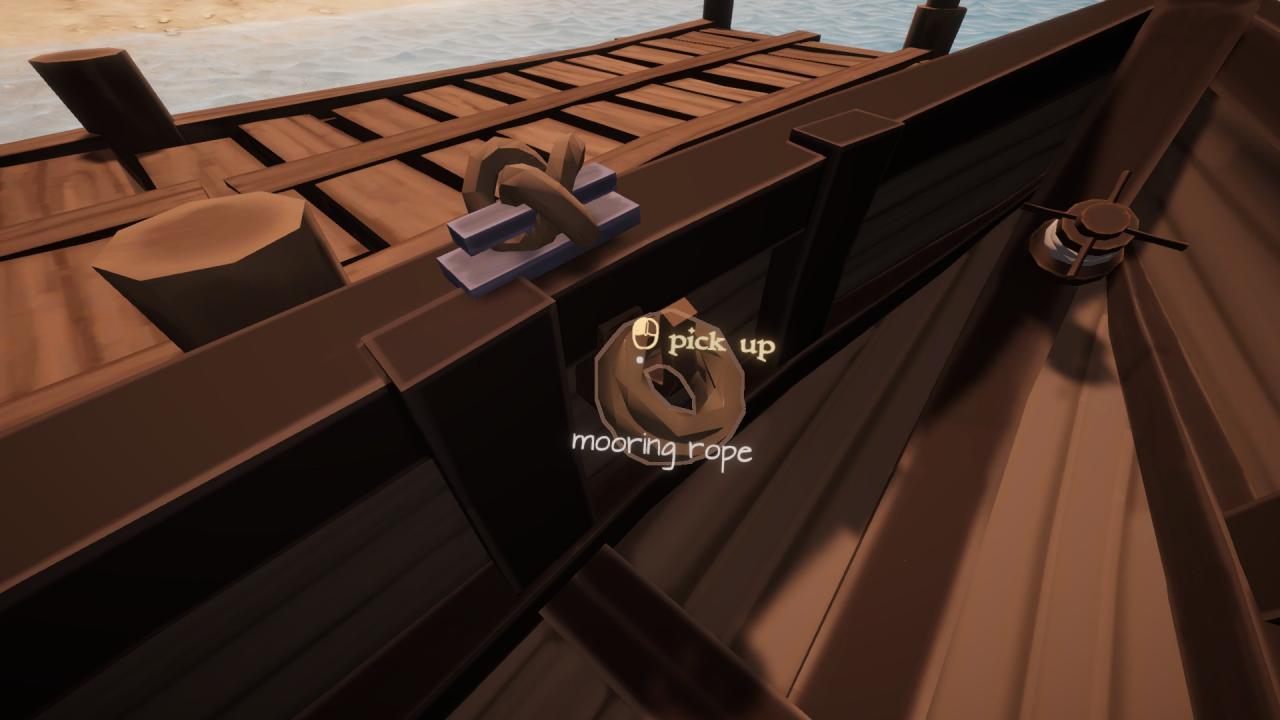
You may have noticed a new instruction: Untie the mooring lines
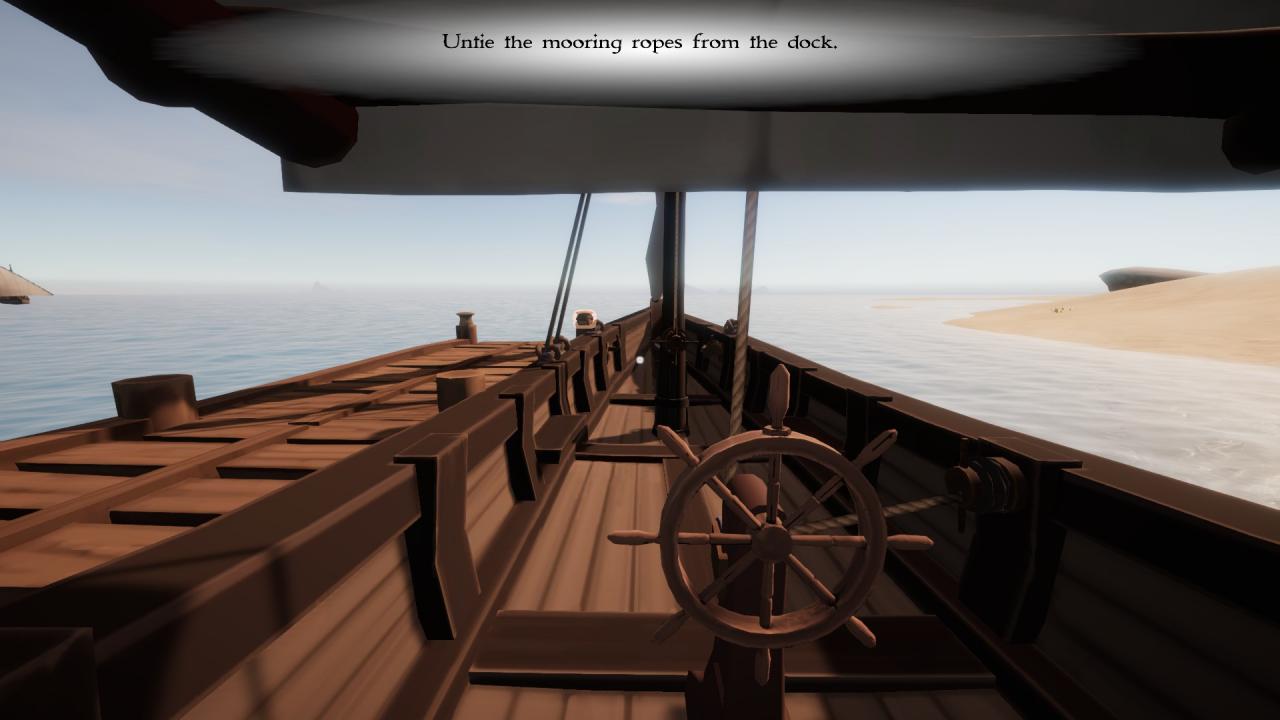
The mooring lines tie your ship to the bollards, which are part of the dock. To get underway, we need to undo and stow them. You can find the mooring lines on both sides of your ship, one set near the bow (front of the ship), one set near the stern (back of the ship). We can hop onto the dock to better see where they are attached. Here are the aft mooring lines
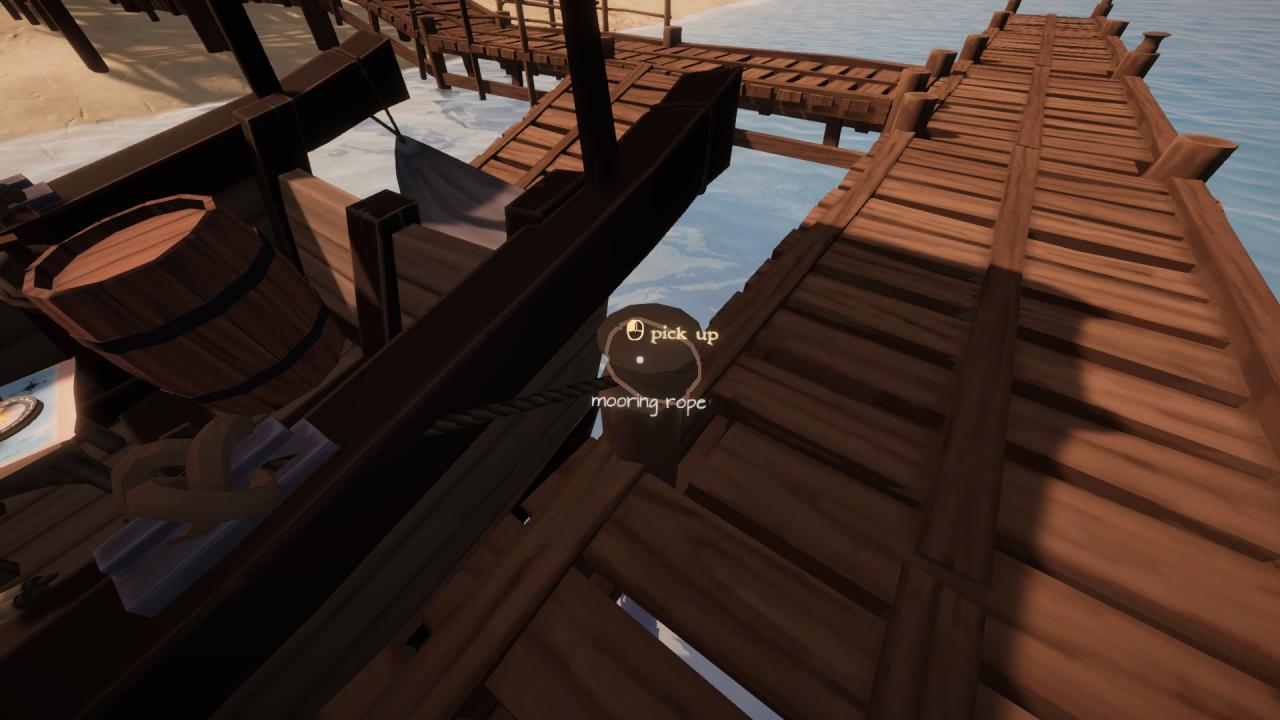
You can pick them up off the bollard with the left mouse button and carry them back into your ship. You’ll notice a line of rope from your hand to your ship where they are stowed. Simply left clicking without highlighting anything should return the mooring lines to the stowed position on the ship. Do this for the bow and aft mooring lines (two in total)
We are now technically underway, but we won’t go far until we…

The halyard is the specific rope that hoists the mast up or allows it to unfurl. To control it, we let it out or bring it in with a winch located on the main mast of your ship.
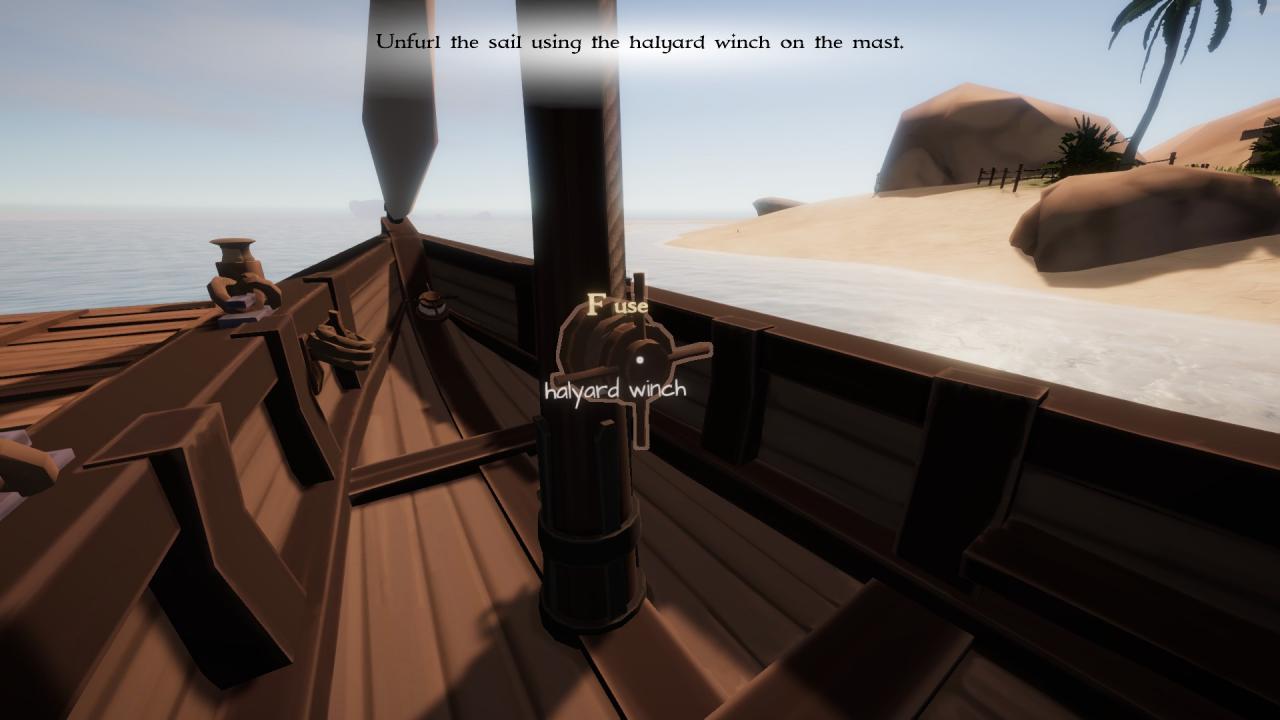
Highlight the halyard winch and use the left mouse button to activate it. W and S lets the halyard out and reels it back in. We don’t have to keep our eyes on the winch to make it work, so use this time to look at the sail and watch as it raises and lowers with the controls. When we have it fully unfurled (sail is locked to the bottom positon) then you may notice the ship lurch to the side and start to make way. We are sailing!

This view is accomplished by pressing C while standing on the ship. Third-person-view is helpful in a lot of ways, but we mostly sail without it since you can’t work the controls from this view. The next control is the sheet winch, and we should do as the next tutorial message says:

On this ship, the sheet winch is located next to the ship’s wheel, and looks like this:
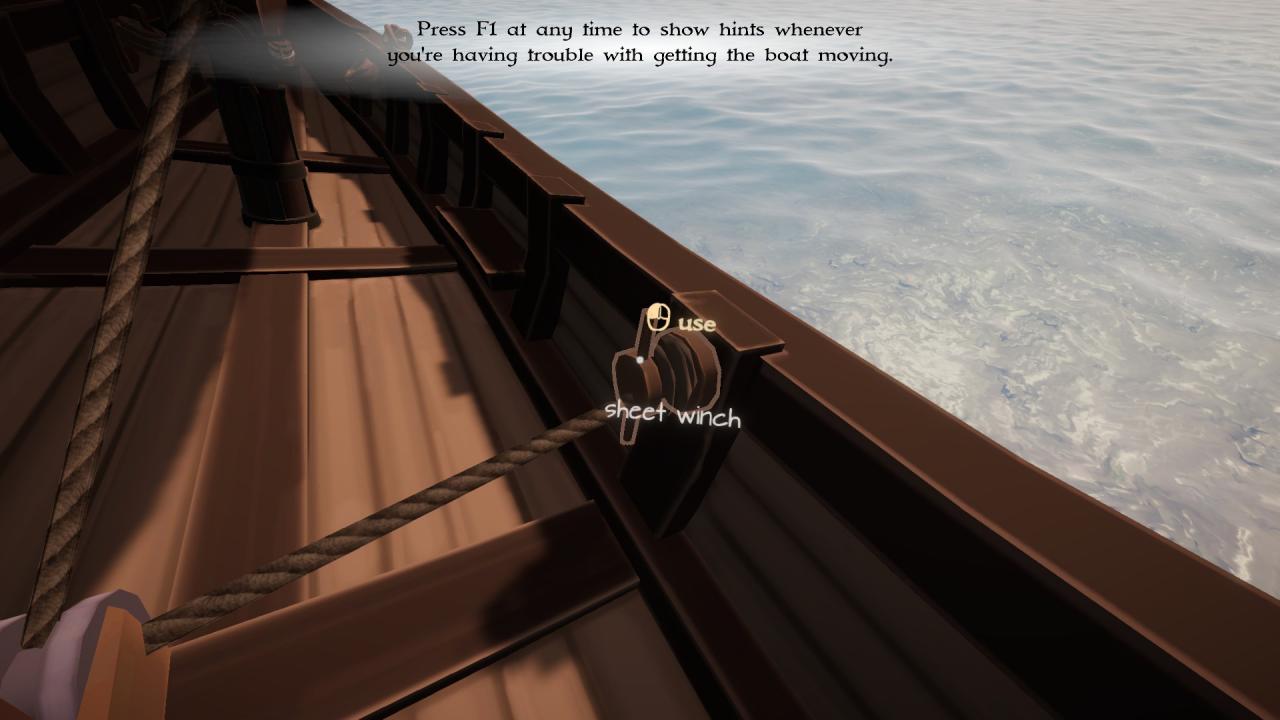
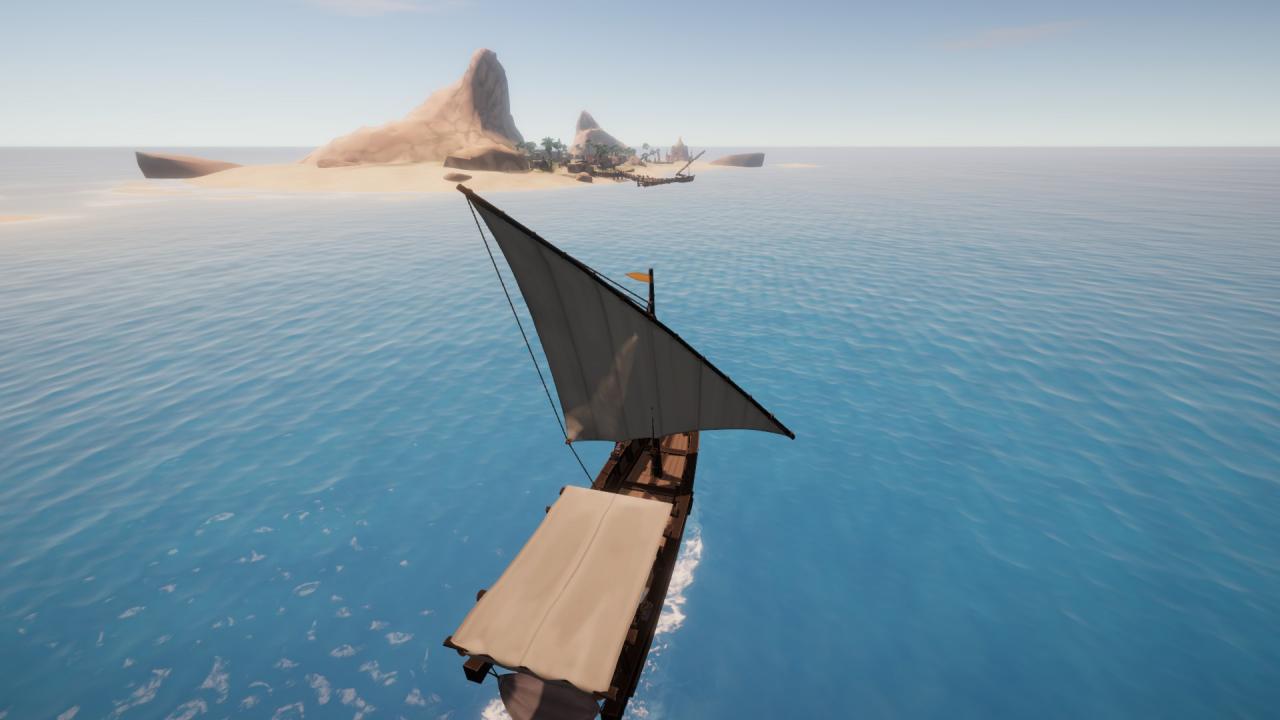
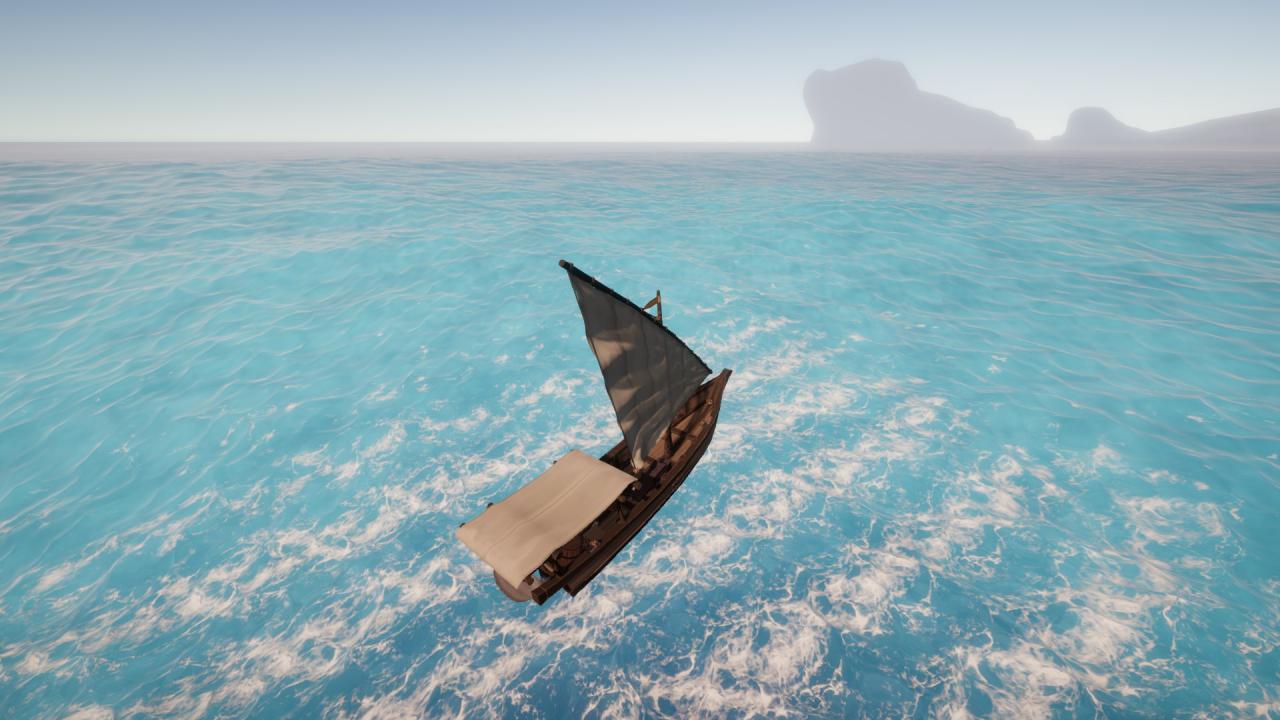
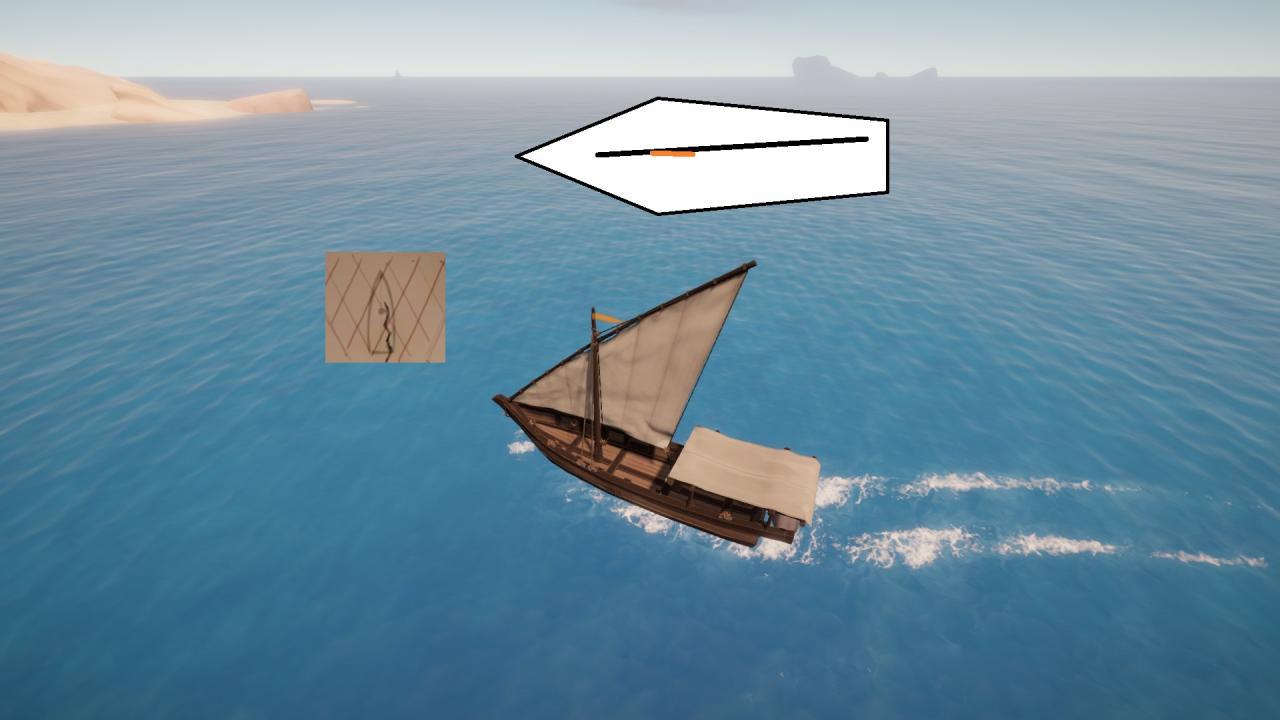
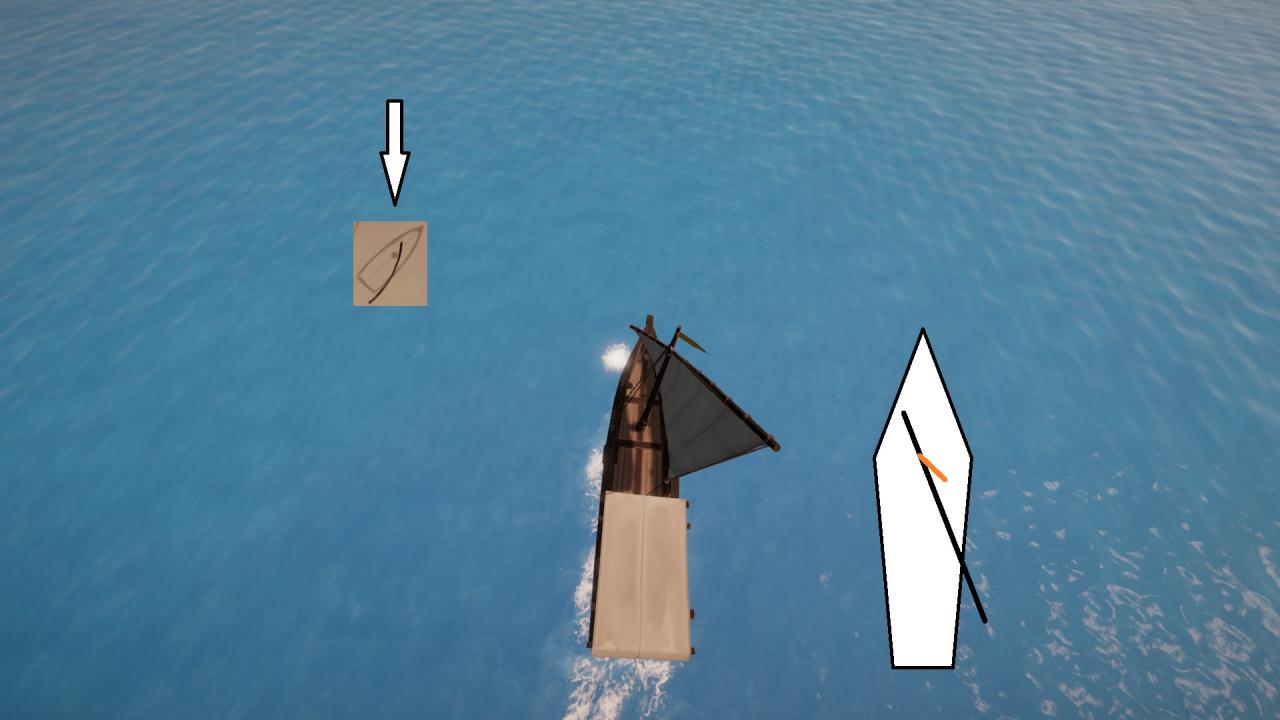
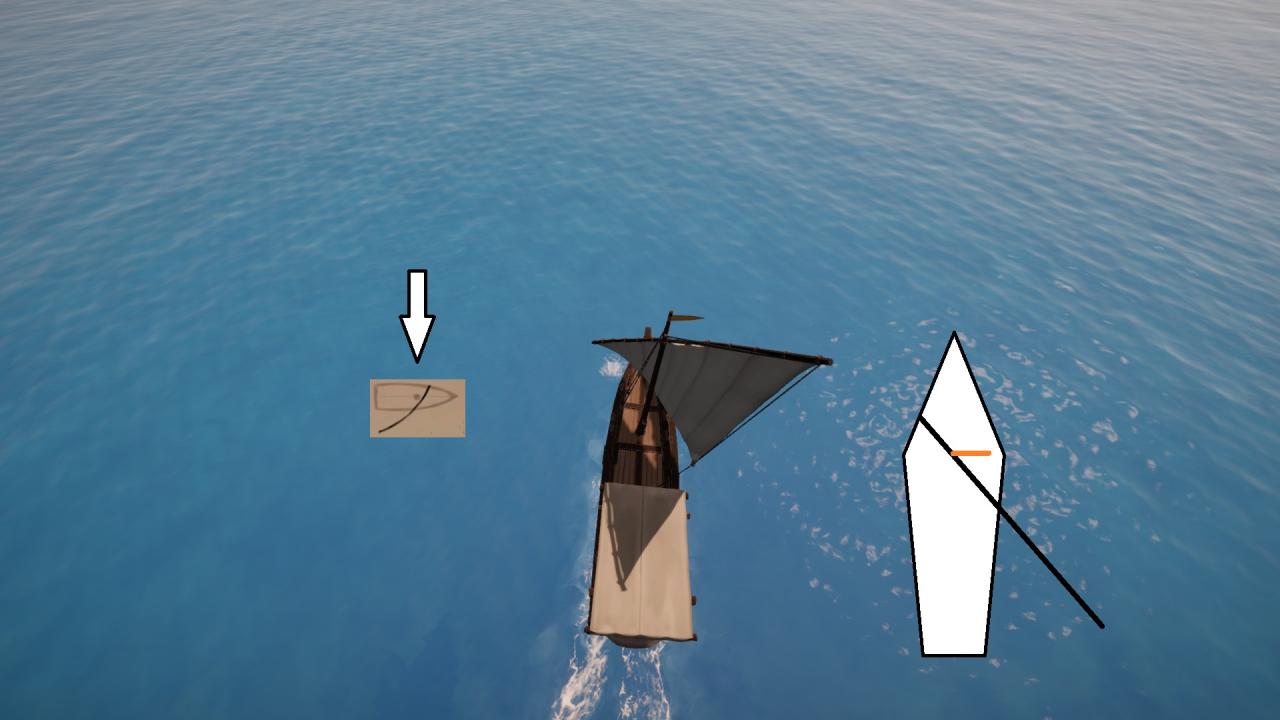
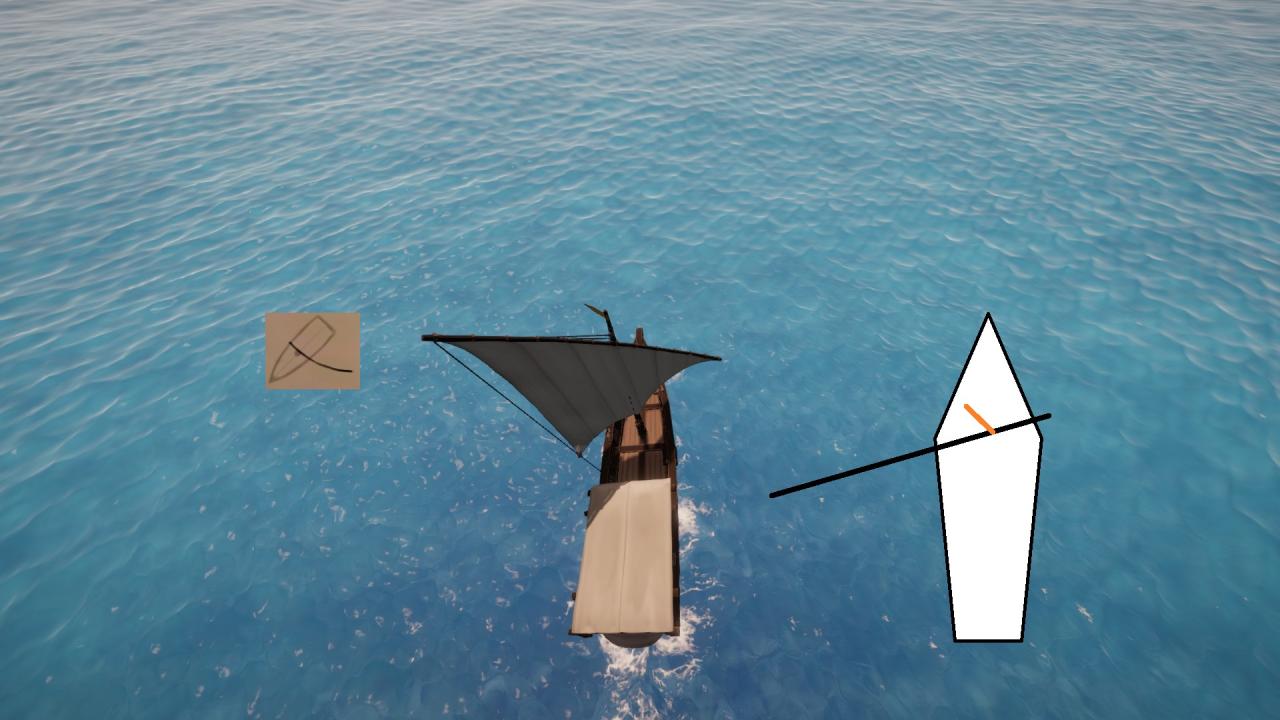
The sheet is the line that controls the sail’s angle with the wind. For now, we can experiment with what angles work best, but we will learn more about proper use later. We control the sheet winch the same was as the halyard winch: use W and S to let the sheet in and out. Try this and see how the ship reacts! A rule of thumb for now is to try and keep the sail and the vane close together but with a few degrees of separation, with the vane in front of the mast. This is a simple example of a ship under sail and a diagram showing the sail-vane relationship:
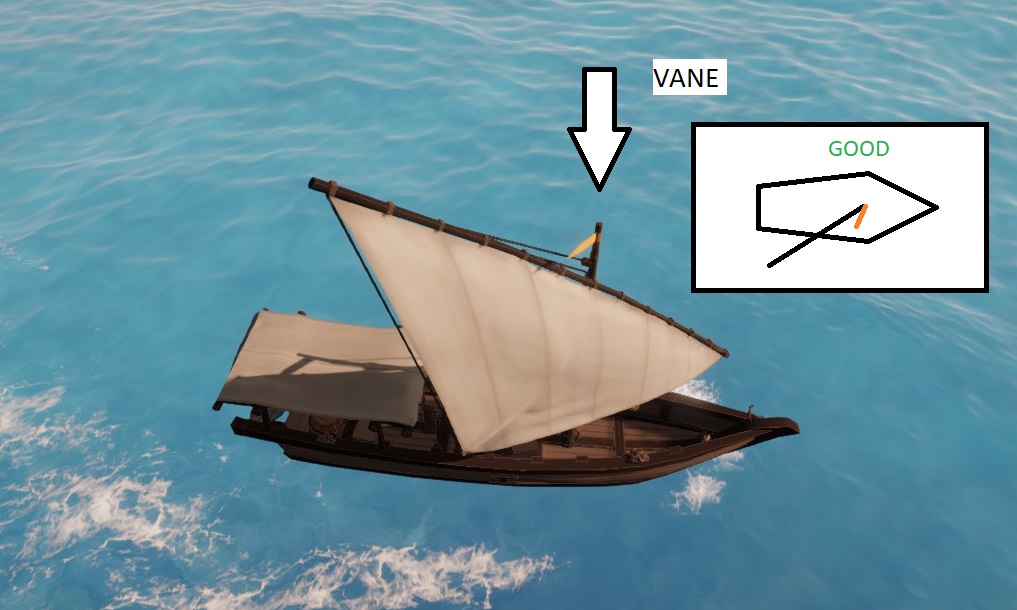
Keep in mind, this can be mirrored to the other side of the ship, too! We will learn more about sailing in another section. For now, we will use the last control: the ship’s wheel.
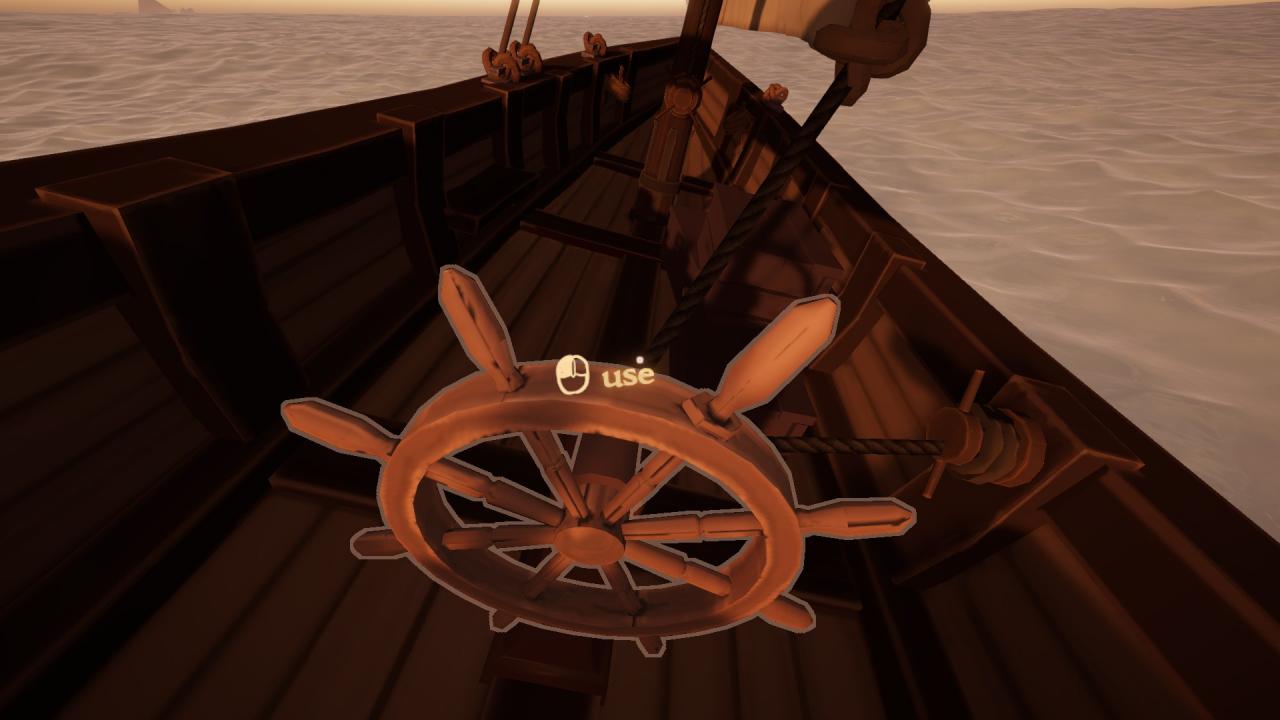
The ship’s wheel controls the rudder and will steer the ship so long as it is moving through the water. Clicking on it with the left mouse button lets you control the wheel with A and D. Practice steering with the wheel and sail around! If we turn too much, the ship may lose power because we’ve lost our angle with the wind. The remedy to this is to go over to the sheet and either pull it in or out until we have wind again. Keep in mind if the ship’s bow faces into the wind, the vane will be pointing straight aft, and you won’t go anywhere! Practice a bit then head back toward the dock for the next part of this guide…
Hopefully we have had our fun doing circles near our starting point. The next thing to learn is how to dock so we can take on cargo!
Depending on the wind, it could be easy or quite difficult to get back to the dock from wherever you are. In this guide, we will go through the basics, so don’t worry if your approach is less than graceful. As of writing this now, you can hit the dock pretty hard without doing any damage!
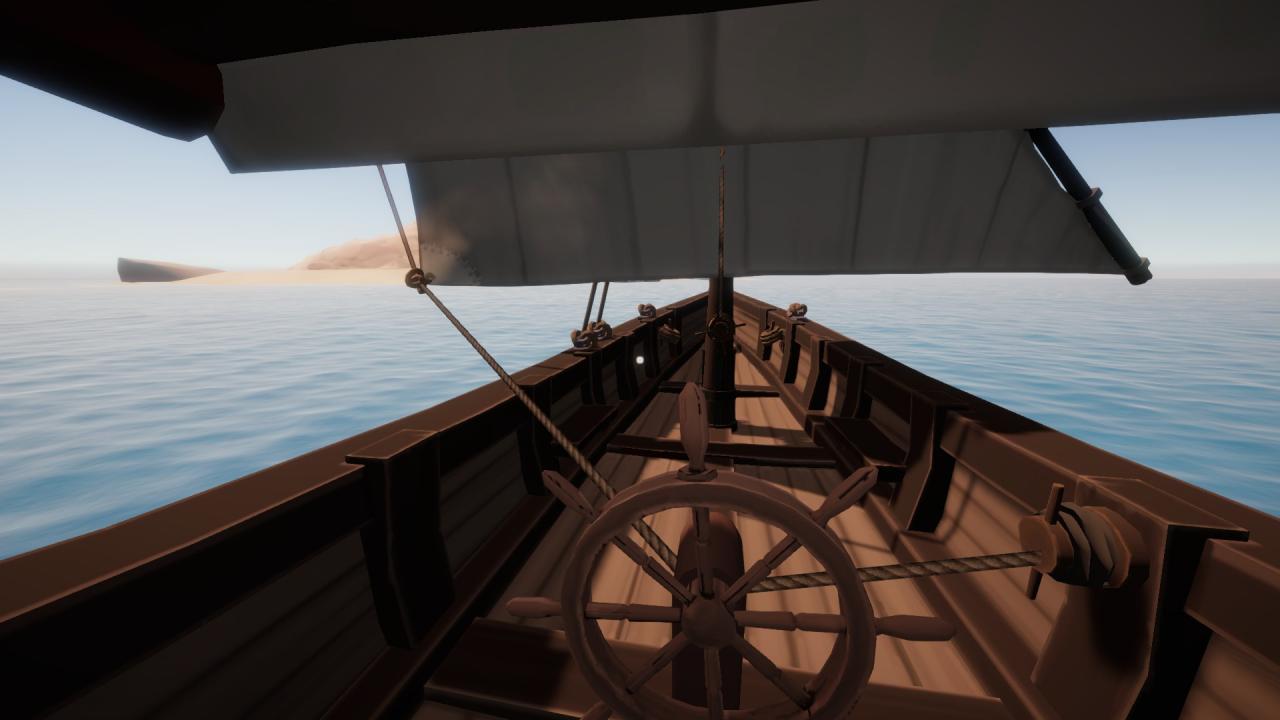
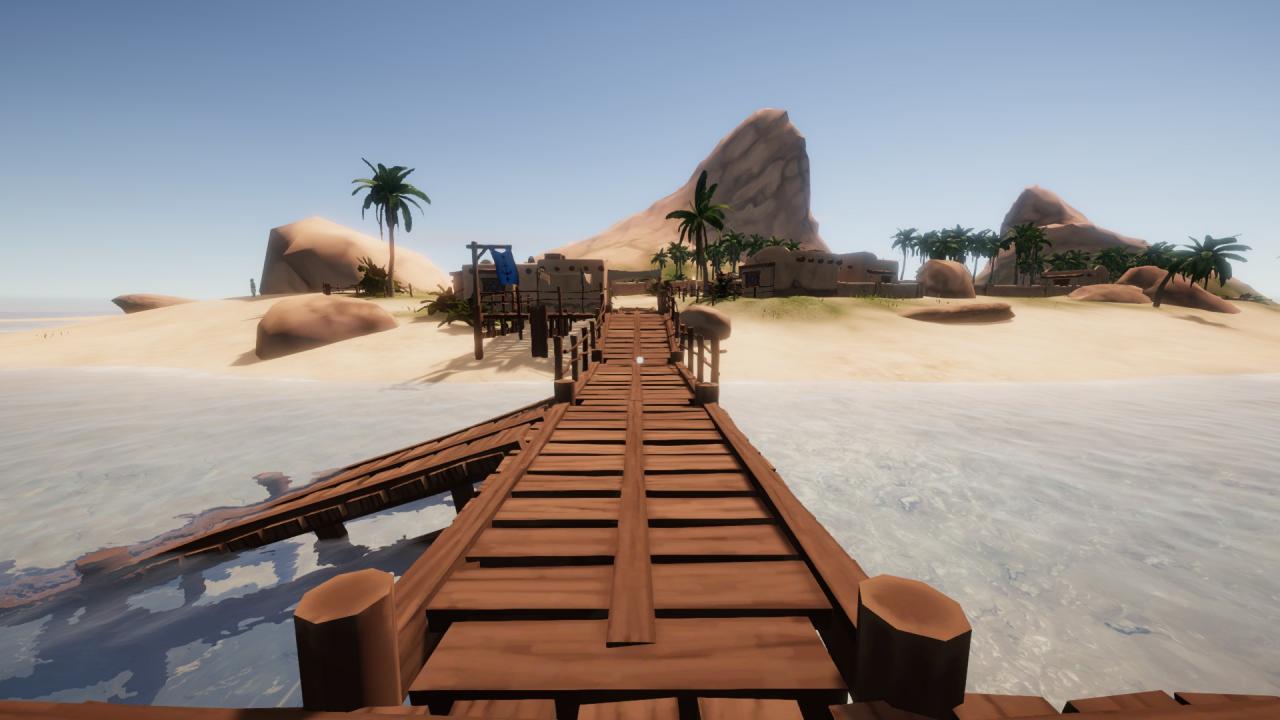
This is a typical view of a docking approach to Neverdin, the place we start at in Al’Ankh.
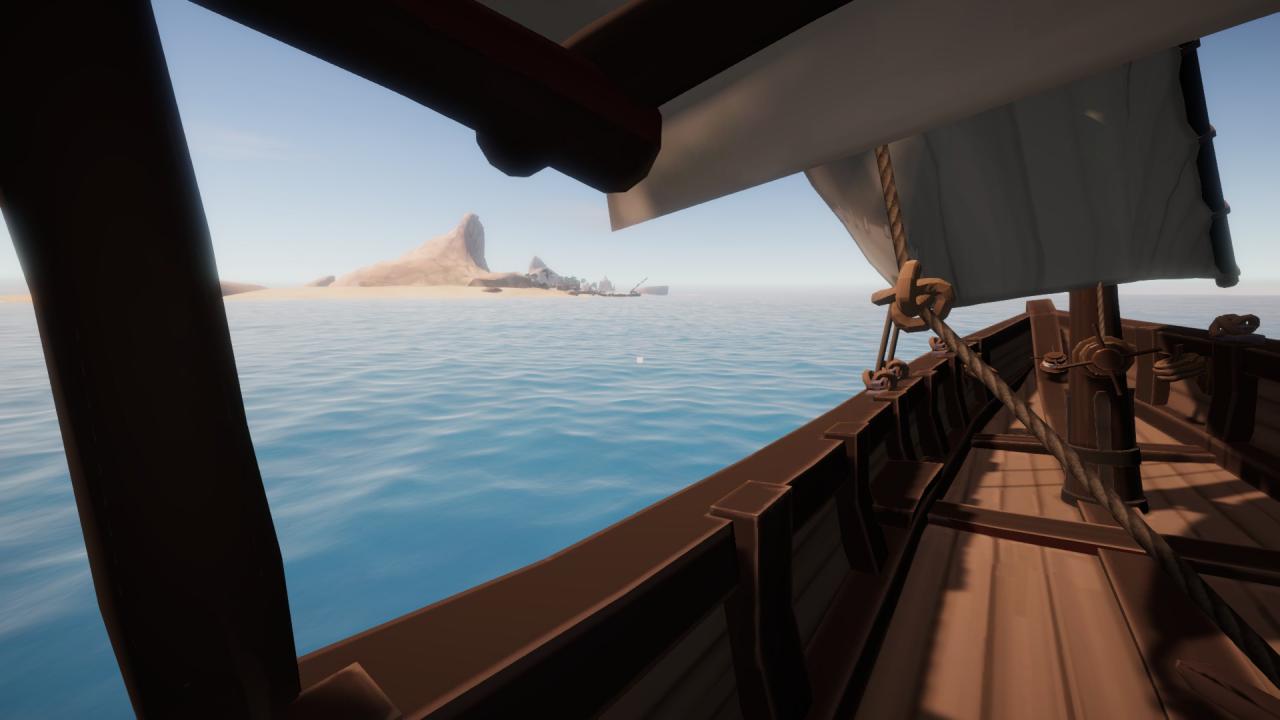
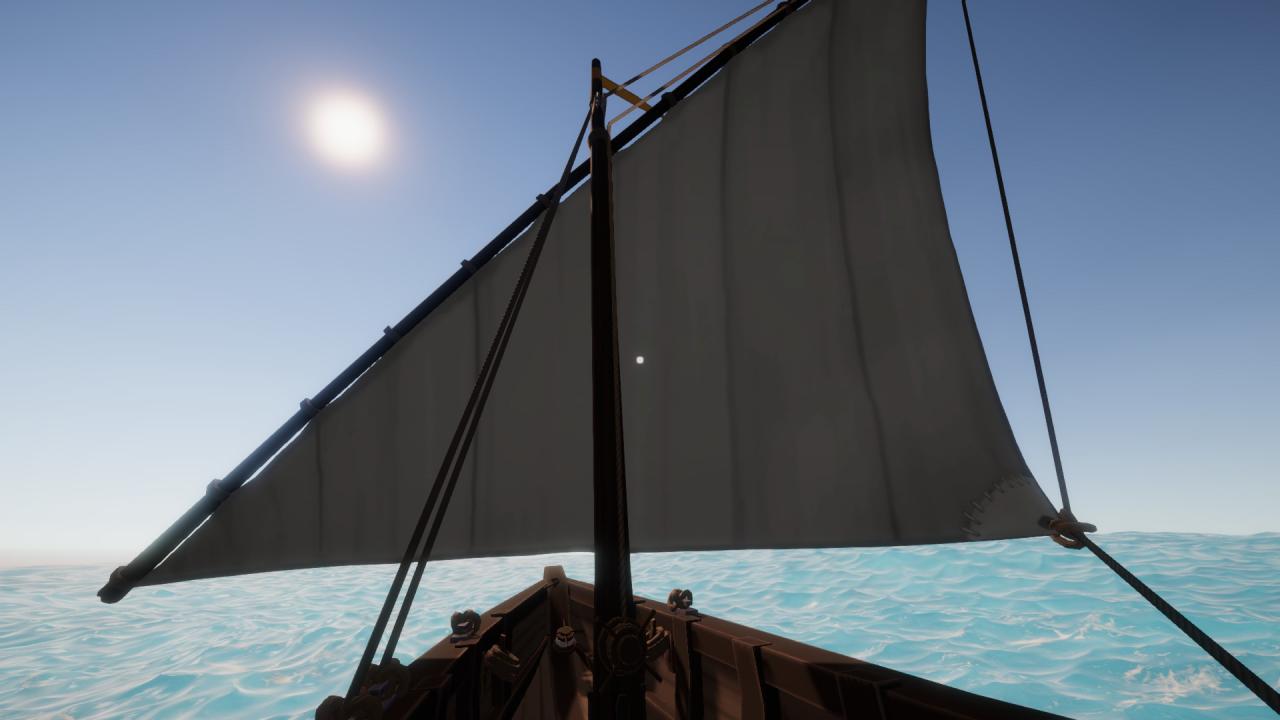
A quick note: your view from the ship’s wheel may look a bit like this:
Having the sail get in our way is a normal part of sailing. We should feel comfortable leaving the ship’s wheel and walking around to get a better view. If you haven’t learned already, we can also use C to get a better view.
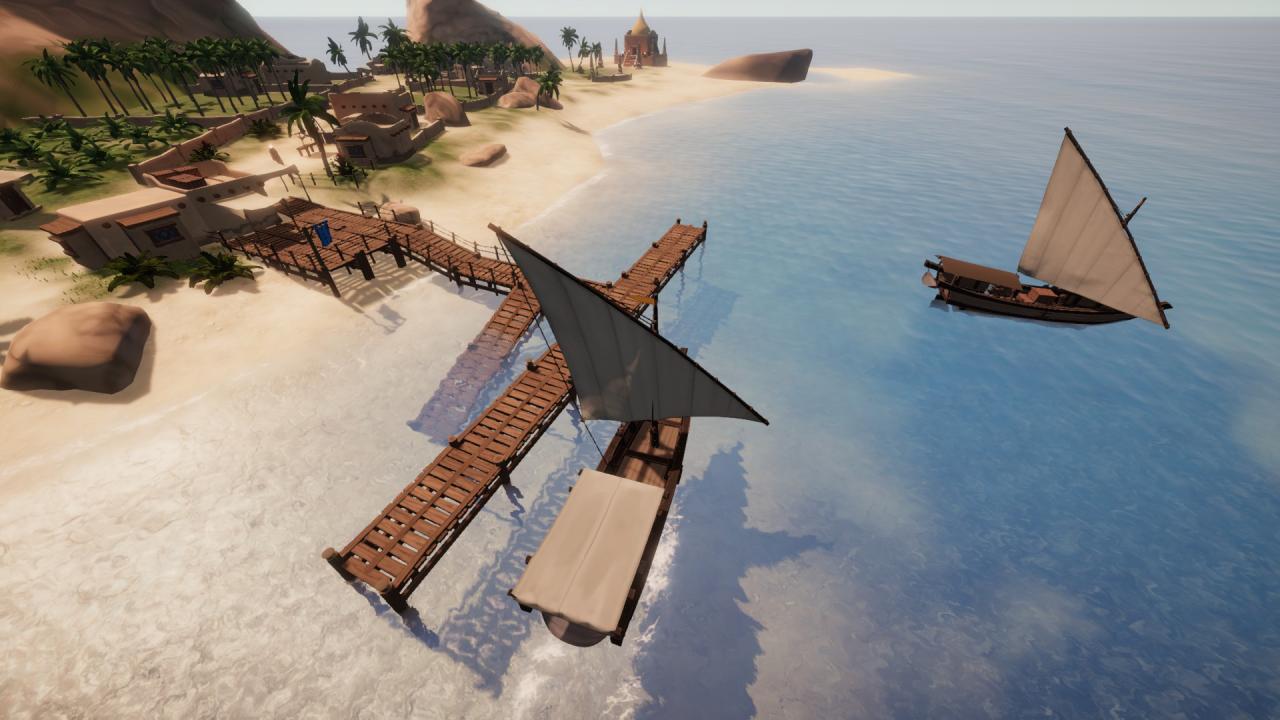
With this view we can better see the vane, and also make an approach to dock easier. Let’s get to it! Sail your ship up alongside the dock. Once you start getting close, we may want to slow down. There are two ways to do this:
- Let the sail out with the sheet so it loses power. This is great because we can bring it back in to easily control your approach speed if we go too slow.
- Hoist the sail with the halyard. This will help you stop, but is a little harder to do from the wheel, and will require us to run back and forth between the mast and the wheel.
With good steering and sail management, we will be within arm’s reach of the dock in no time!
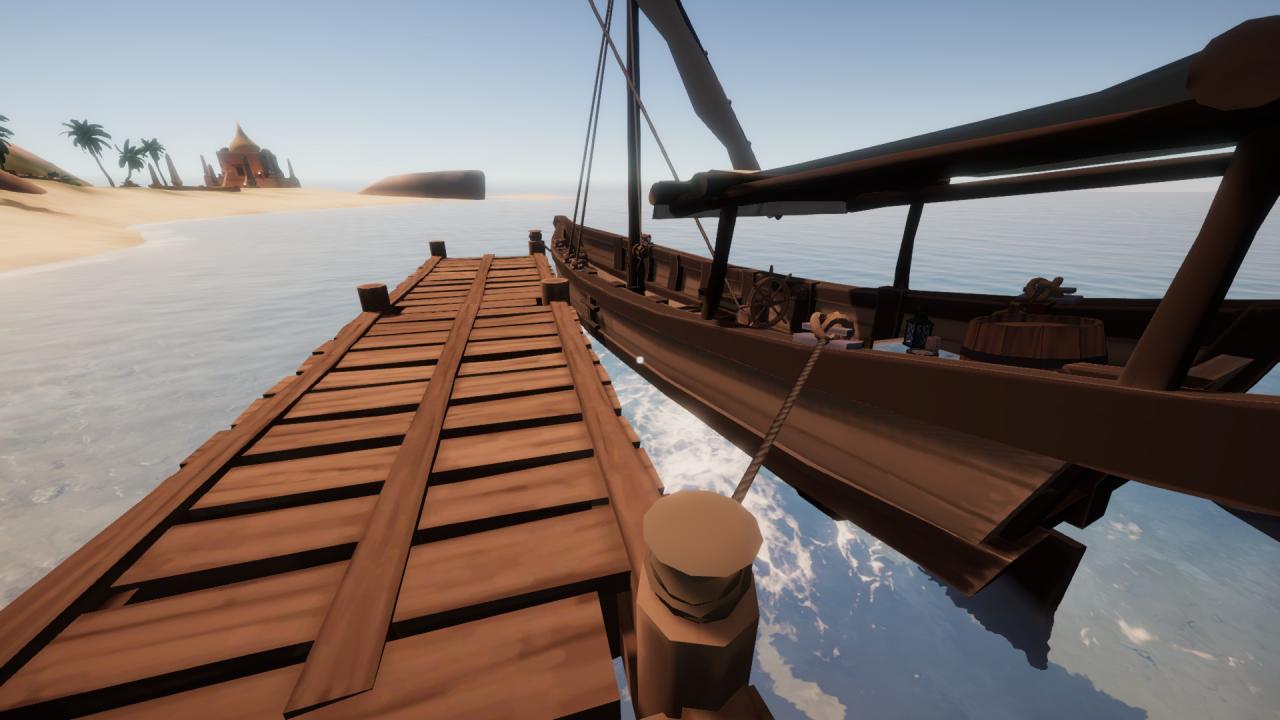
This next part might require some finesse, but that’s why we practice! Come to a stop next to the dock and let your sail completely out with the sheet, or stow it with the halyard (maybe both, whatever it takes to stop the ship!). Grab either the bow or stern mooring line and hop off the ship onto the dock.
Find a bollard and left click on it with the mooring line in your hand and it will attach the ship to the dock. Once we have one mooring line attached, we can rest easy, but we will want to get both lines attached to keep the ship in position for loading cargo.
The last thing we may want to do is to stow the sail with the halyard and bring the sheet all the way in to make sure the ship is not trying to sail against its mooring lines. Once both mooring lines are attached and the sail is stowed, we are ready to move on!
Sailing around is fun enough, but we will need to gain money and reputation to upgrade our ship and progress in the game. We do this by taking on and completing cargo transport missions.
Starting from the dock of Neverdin where we first met our ship, we may notice a blue flag with an anchor on it.
That marks the building where we will manage our missions. Walk up the docks and in through the door on the left where we will find an NPC.
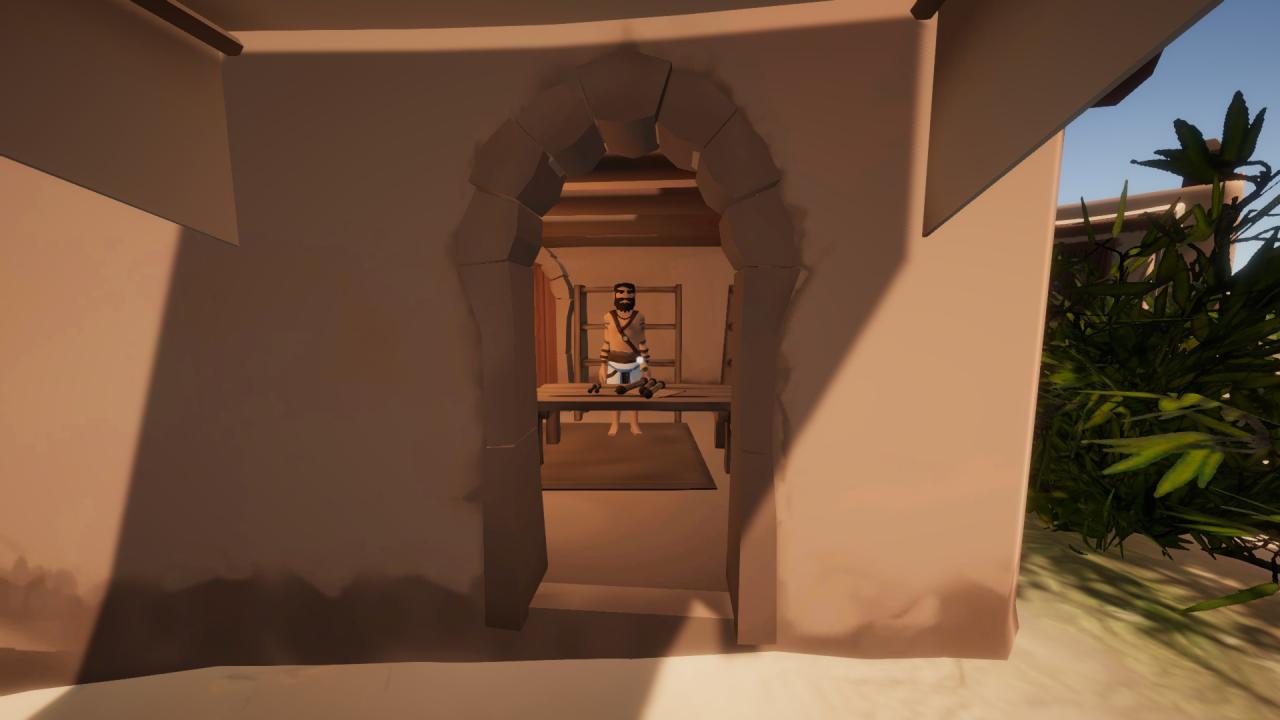
Ignore them, and focus on the set of scrolls on the desk.
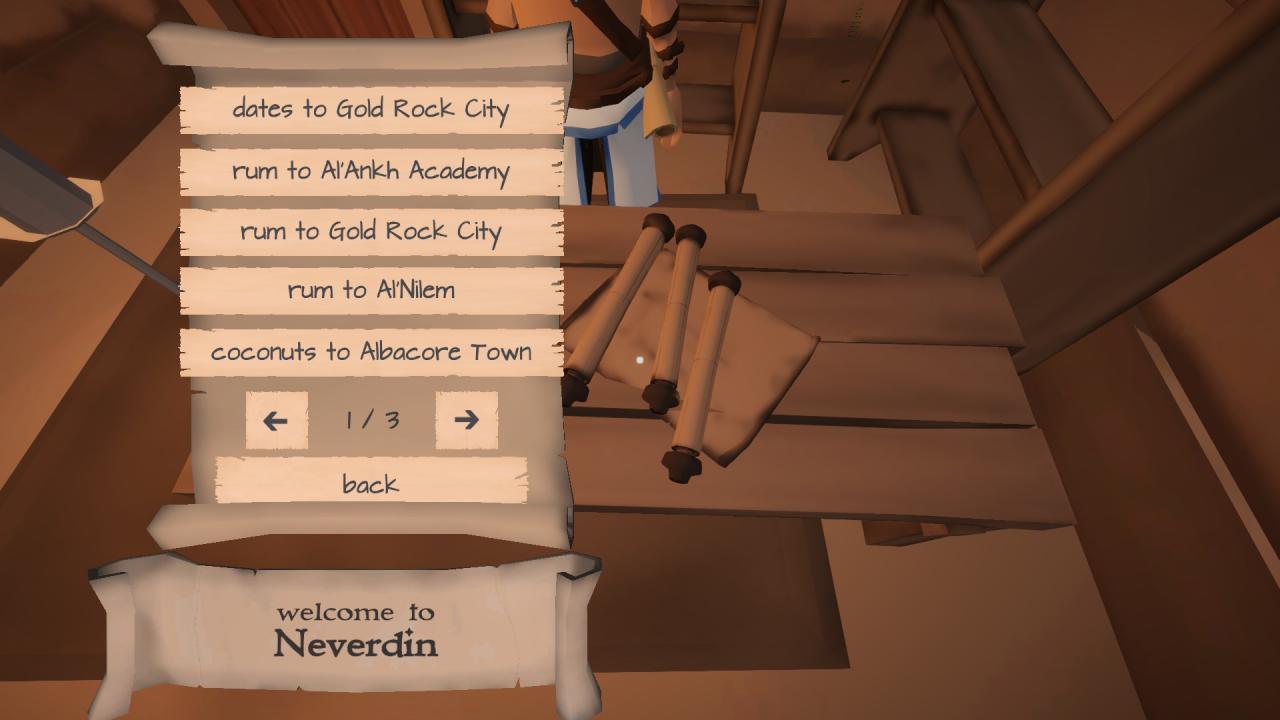
Clicking on the scrolls will open the mission menu. This menu lets us know where we are (Neverdin) and the cargo transport options from here. The missions are listed with their cargo type and destination in order of payout from high to low. For this guide we will choose whichever mission sends us to Gold Rock City. We should pick whichever Gold Rock City mission comes up first. Once we learn how to navigate, we can choose any mission, but Gold Rock City is easy to find without knowing how to navigate, so it is a good first mission. We will notice clicking on the mission in the menu opens up more details about it:
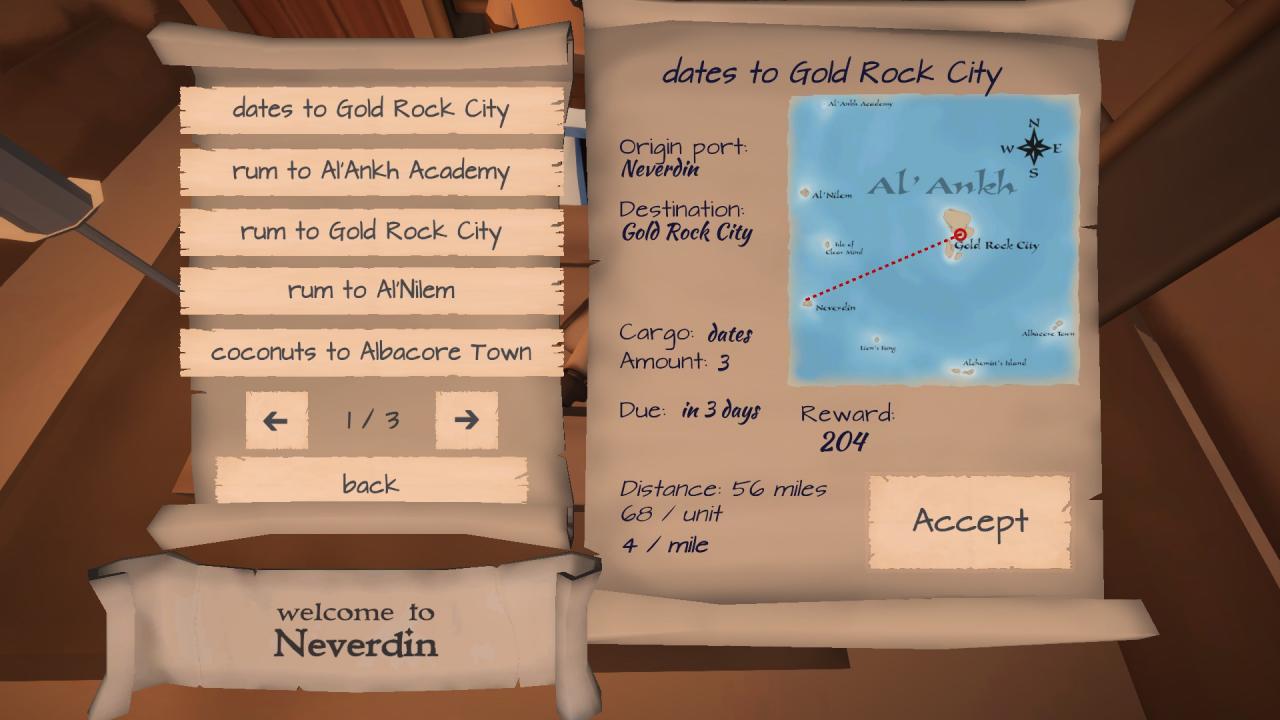
The details include
- A map of our route
- A breakdown of the cargo, including type and number of crates/barrels
- The amount of time we have to deliver the cargo
- The payout from successfully delivering the cargo
- A breakdown of how the payout was calculated
Usually, we will want to study this information a bit more, but for the purpose of this guide all we need to know is to pick a mission with Gold Rock City as a destination. The rest will be covered in a more advanced section. Select Accept to start the mission!
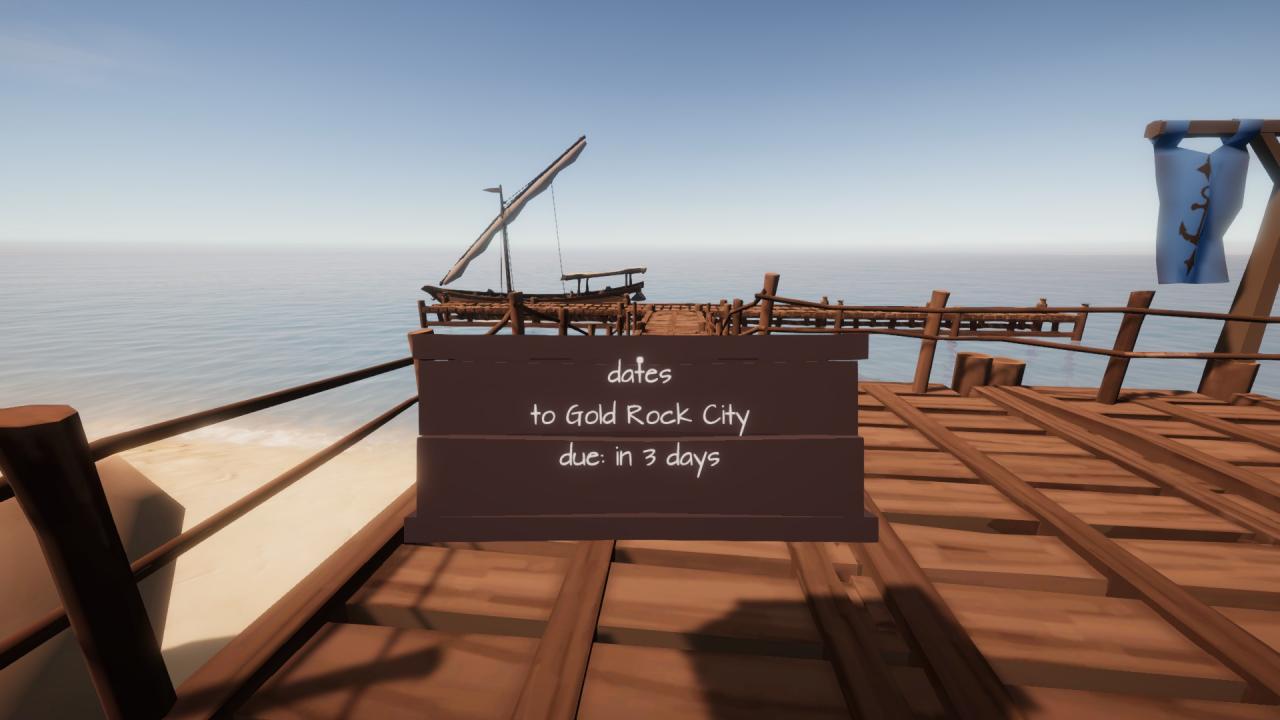
After accepting the mission, the cargo we are responsible for will appear outside the office. Look around outside and find the crates or barrels that have been prepared for us.
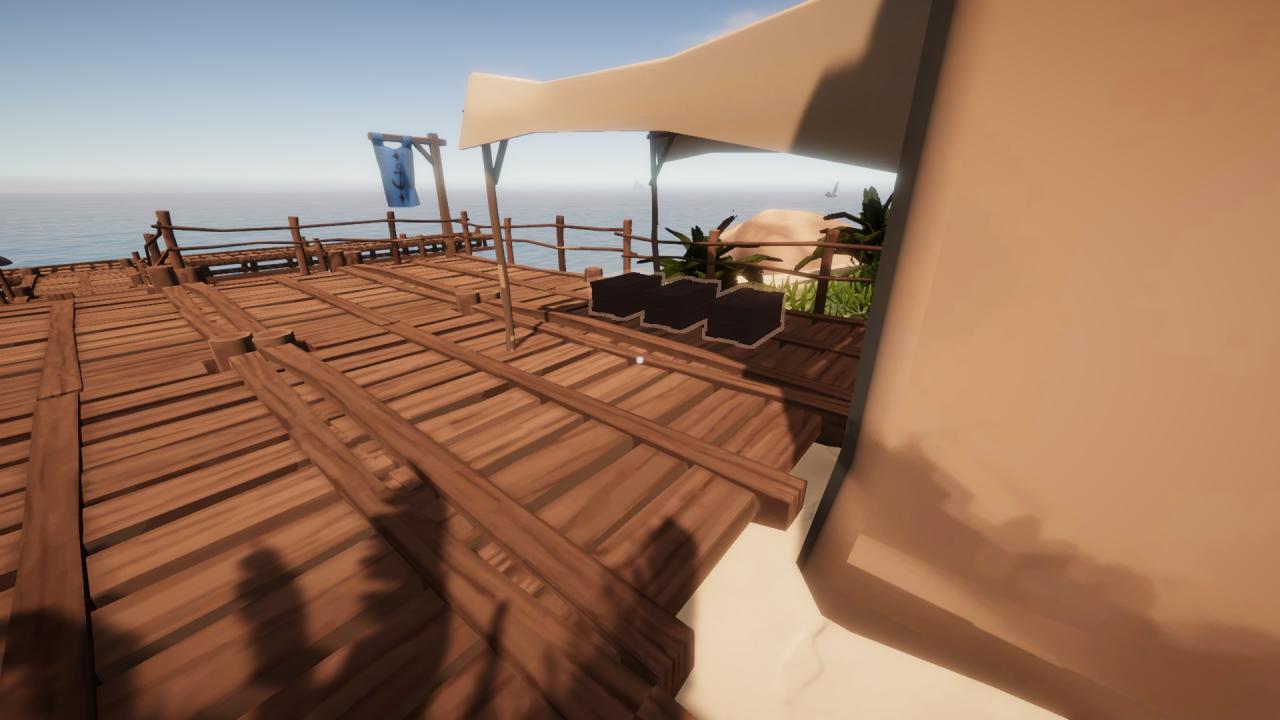
We will know they are ours because they will be highlighted so we can see them through walls from far away. If you walk up and highlight them, we are invited to pick them up with the left mouse button, and some helpful information is displayed about the cargo.
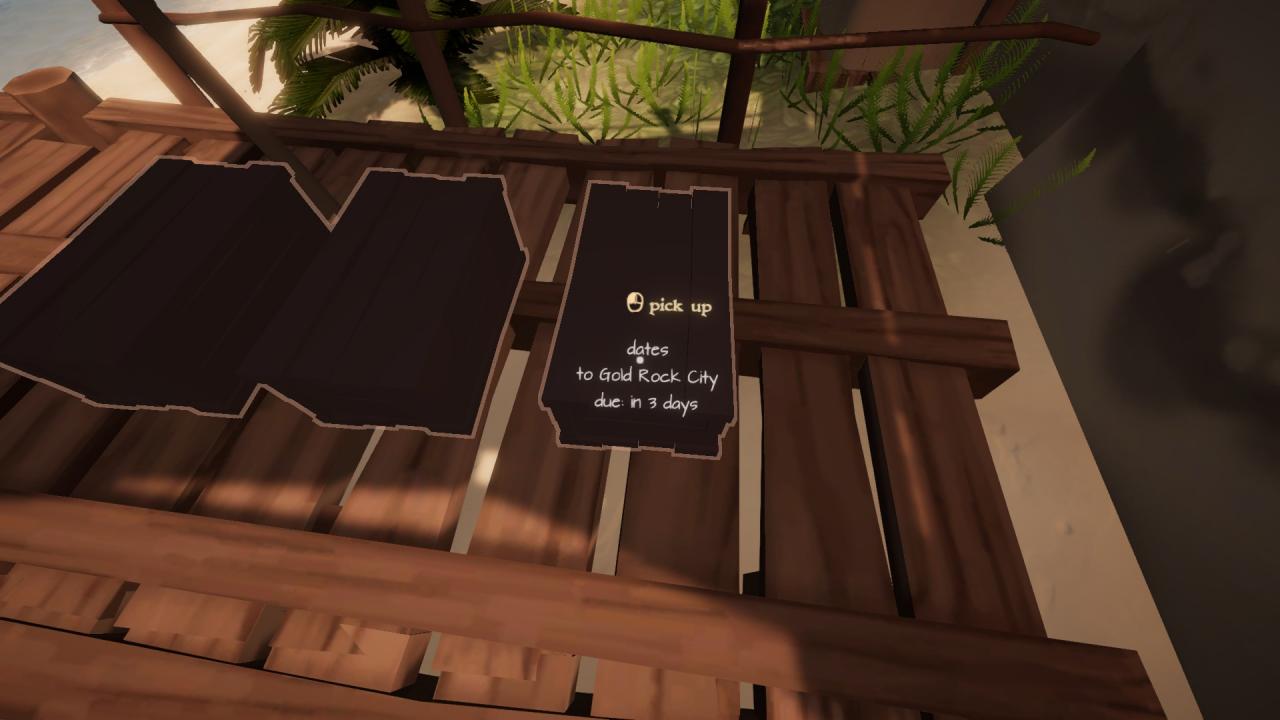
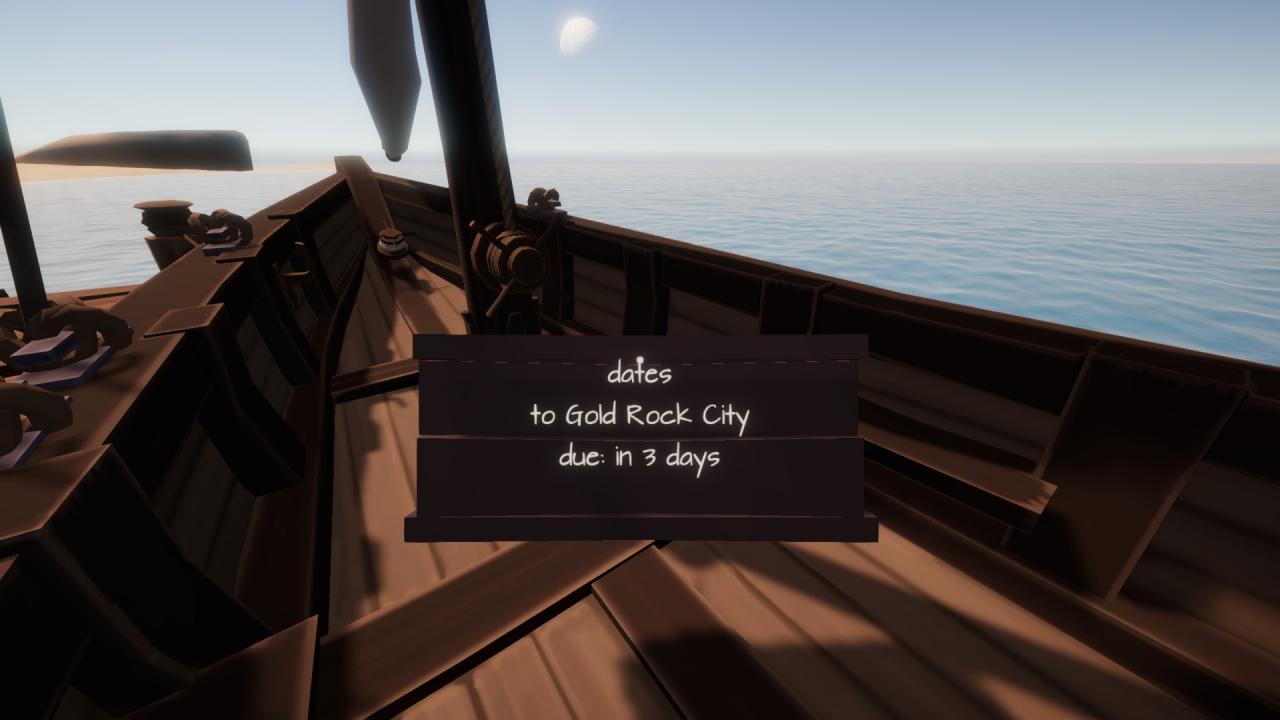
Since we don’t have any crew, we will have to load this cargo ourselves! Pick up each crate or barrel and bring them to your ship.
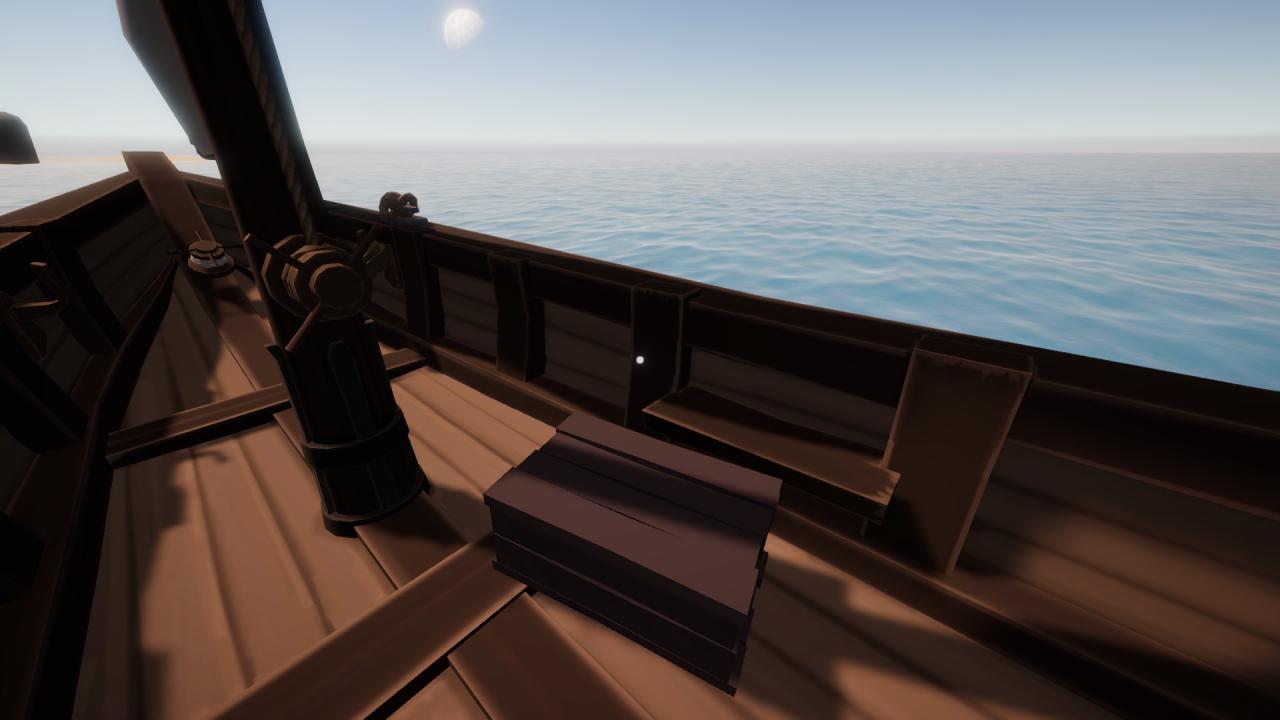
We are our own load master in Sailwind, so find a good spot and click the left mouse button to drop the cargo. You will notice the crate or barrel may turn red. This means the placement is currently invalid. Click the left mouse button to drop the cargo where you stand, and arrange the cargo on your ship in a way you like.
Be sure to place it somewhere it won’t fall out, because if you lose cargo at sea, it’s as good as gone!
Repeat until all cargo is onboard!
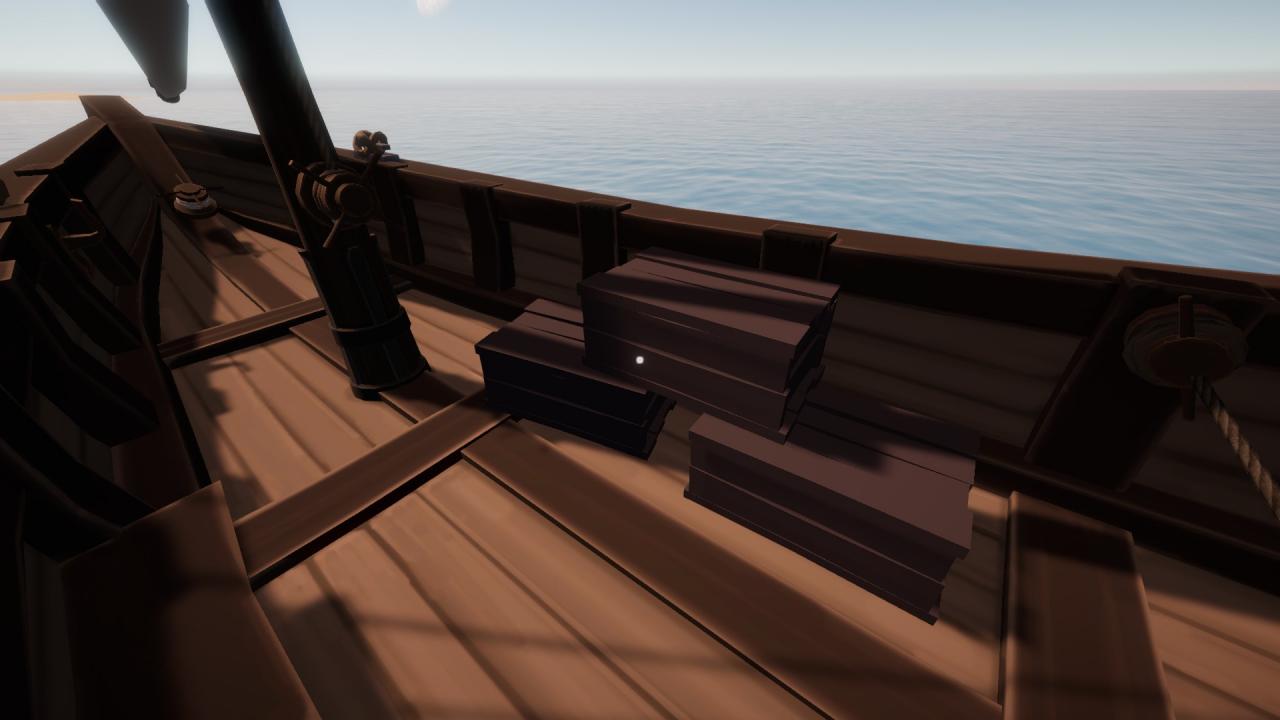
We now have an active mission, with cargo onboard! All that’s left to do is sail to the destination and deliver the cargo to the office there. In the next section, we will learn the basics of surviving so we can live long enough to get the cargo to Gold Rock City.
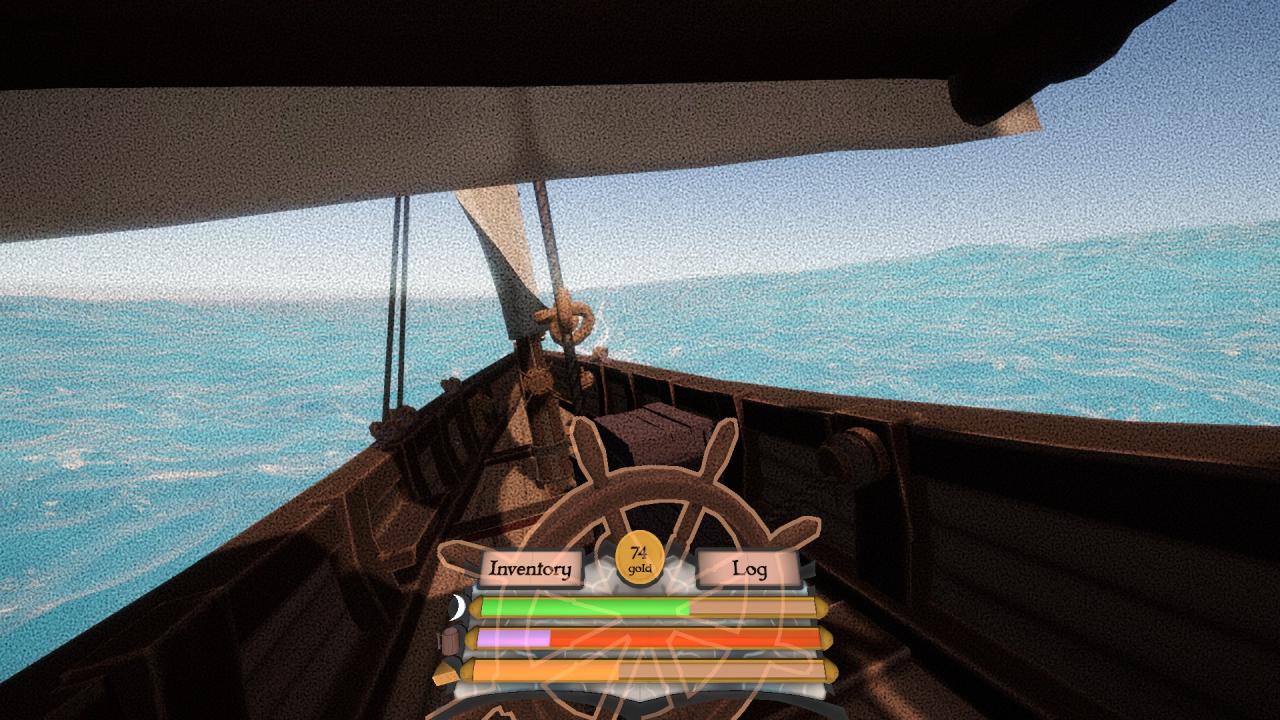
In sailwind there are three survival stats. You can see them any time by pressing the TAB button, which also displays your inventory and enables access to your logs.
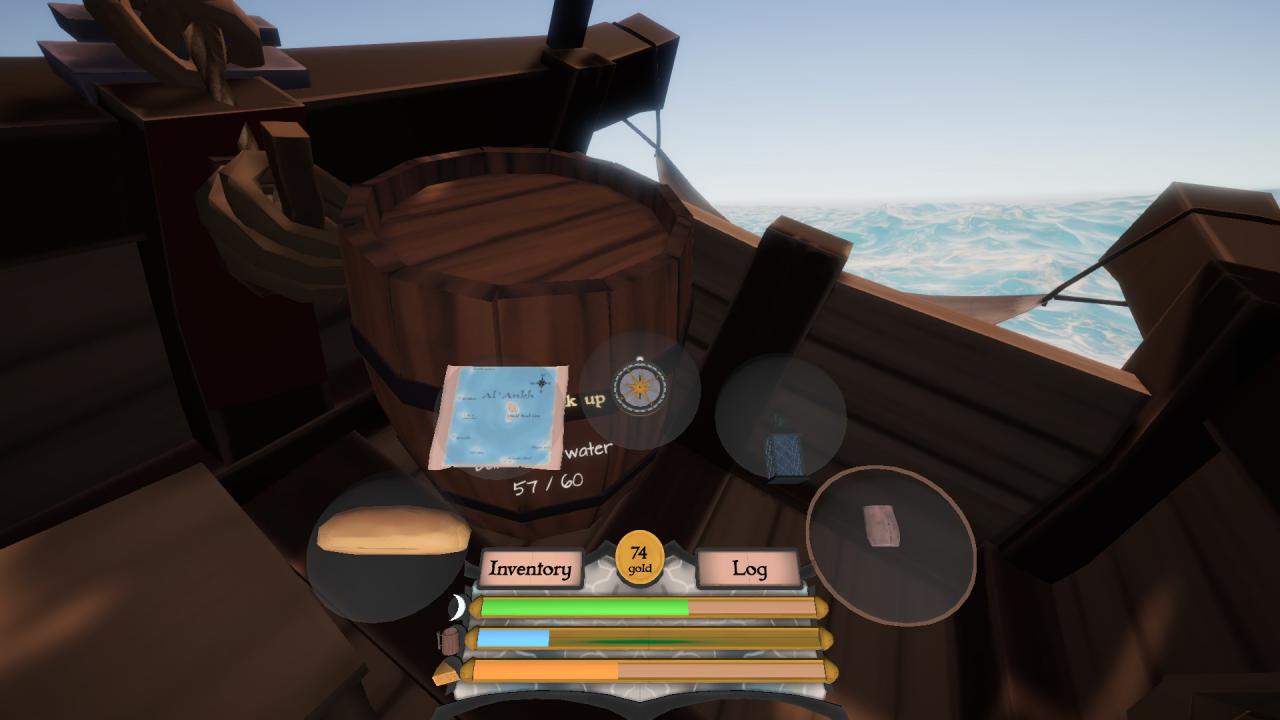
The the top bar is energy, and is green. The middle bar is thirst, and is blue. The bottom bar is hunger, and is yellow.
In Sailwind, the sun rises and sets and the nights can be long and boring. Luckily, we need to sleep, so we can pass the night in our hammock to regain the green energy bar and to pass the time until we can see again. The green bar starts full, but will deplete as the day goes until it pops up and flashes red, accompanied by a grainy effect on our view.
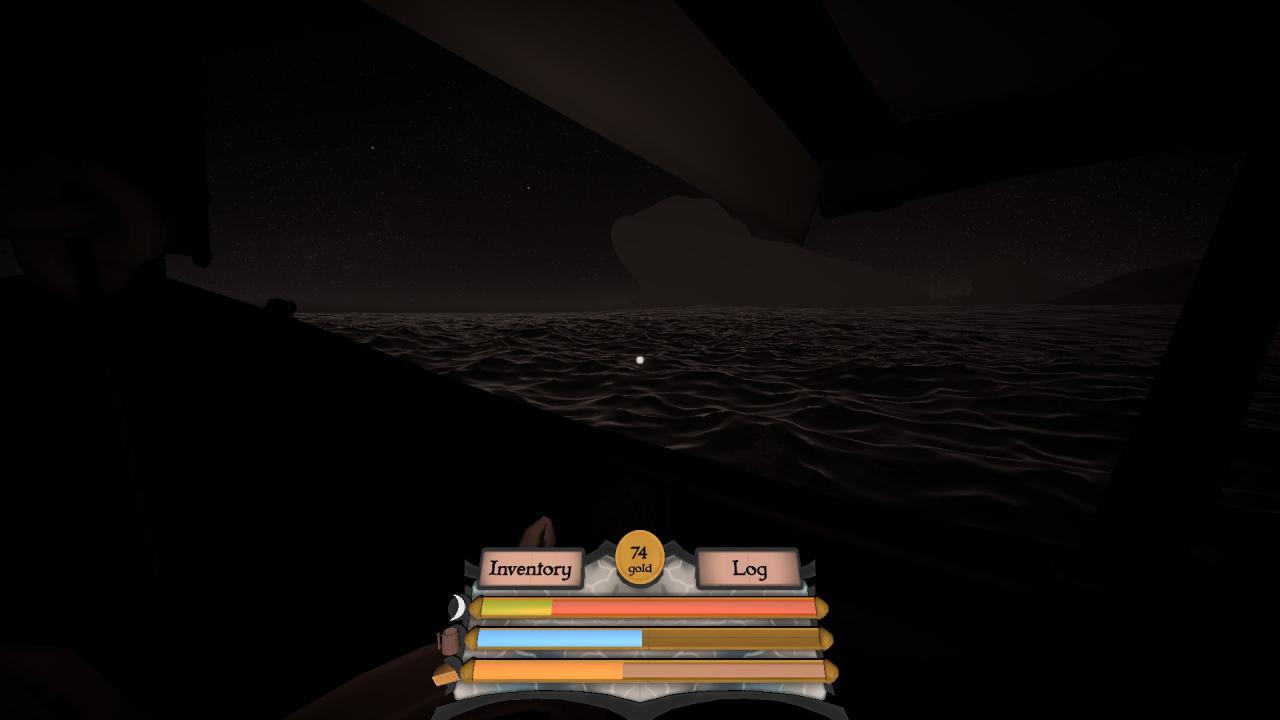
That’s how we will know our character is tired and it’s time to sleep. We can survive with this condition for some time. The red flashing is just a warning that our character is getting tired. If we let the green bar completely run out, bad things can happen, so we should find the hammock to get some sleep.
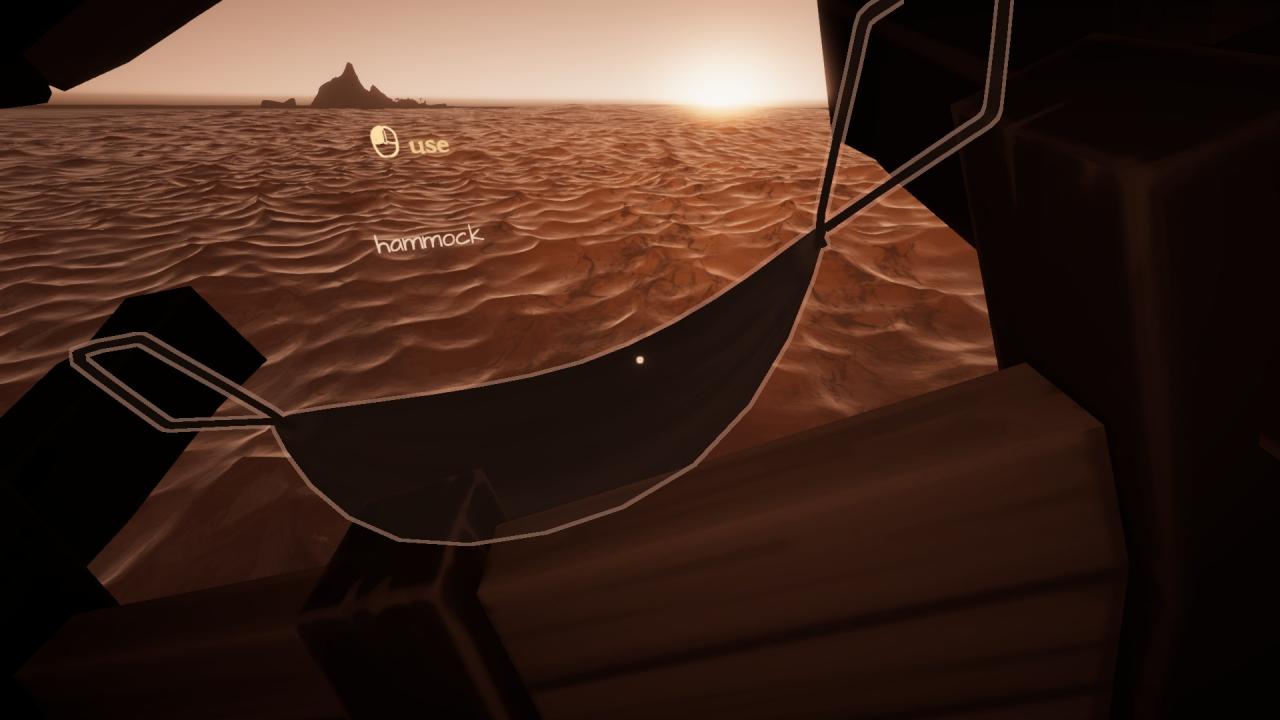
This is the hammock at the stern of the ship. It can be used with a left click which will settle our character in for some rest. Before we do this, though, we should make sure the ship is in a stable condition, because it will continue to move as we sleep! So either haul in the sails, anchor the ship, or, if we feel a little risky, we can point the ship in the direction we want to go and sleep as it sails on.
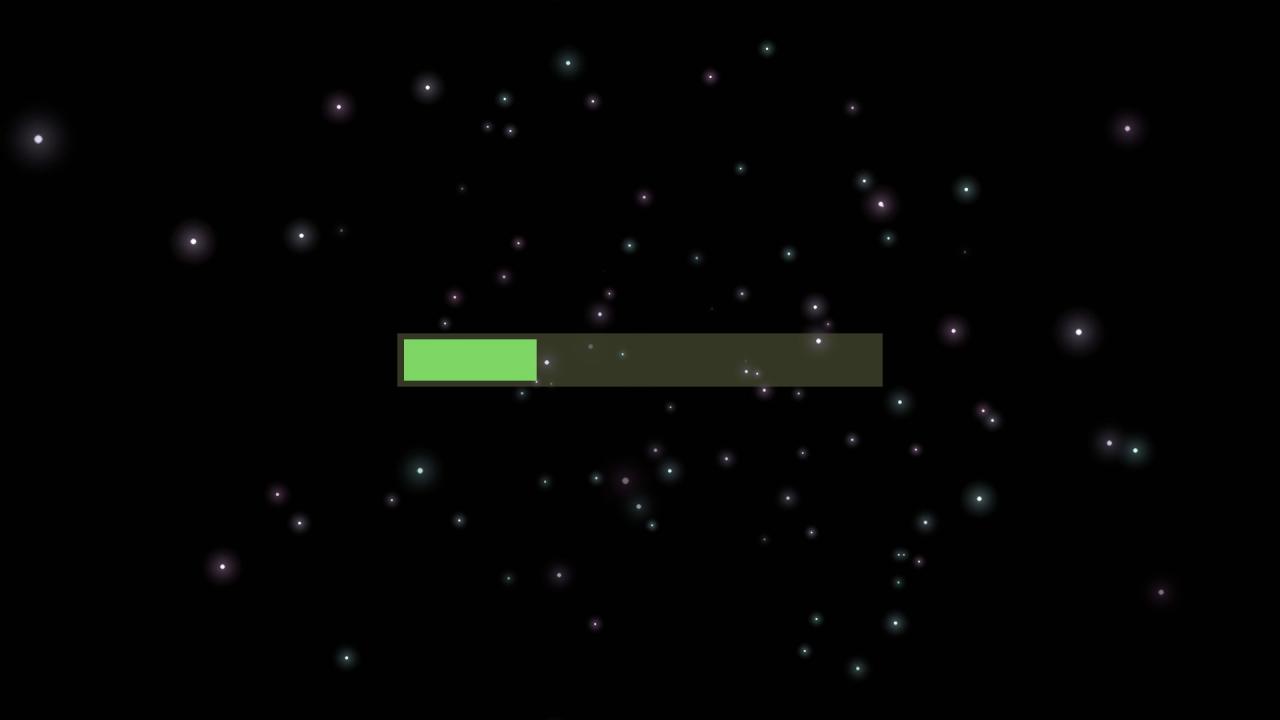
The sleep screen shows the green bar refilling, and we will see our character wake up periodically. If we would like to leave the hammock, we can right click as our character awakes. If we wait, though, our character goes back to sleep and will continue on until the green bar is full.
When we wake, we should take stock of our surroundings to see how we’ve drifted in the night. Also note the other survival stats have likely depleted in the night. We will explore how to satisfy those next.
The blue bar represents your character’s hydration level. Like the sleep bar, this stat depletes as the day goes. When it gets low, we will see a similar effect as sleep: the bar will flash red and there will be a film grain effect on our vision.
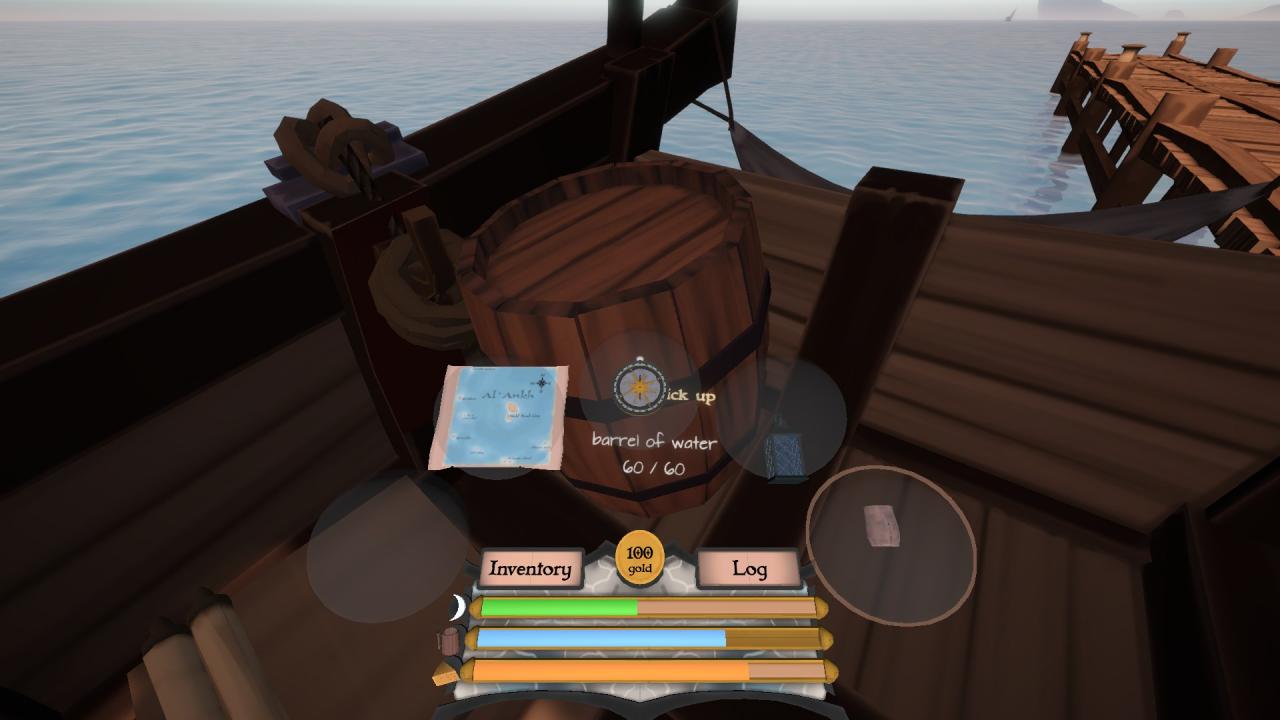
When we see this, we should think about drinking some liquids. Part of preparing for a voyage is making sure there are enough drinks with you to survive the time at sea. Fortunately, the game will start with some food and a barrel of water on board.
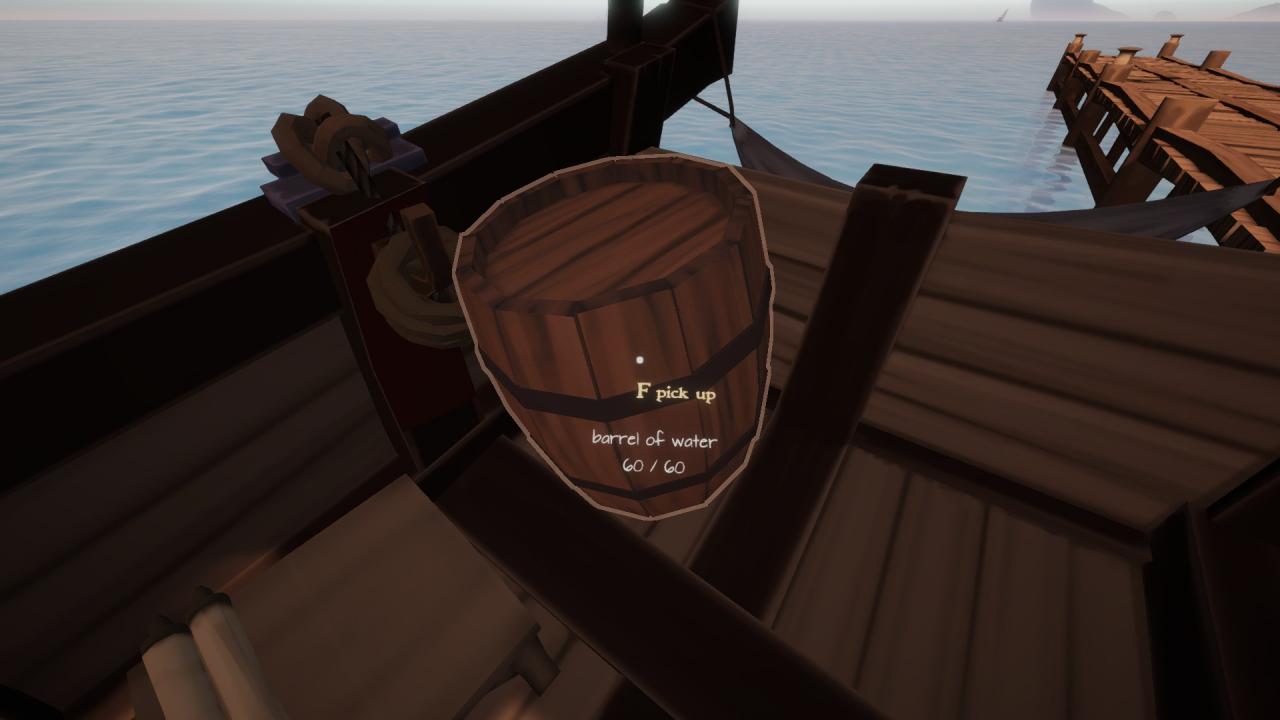
The water barrel includes 60 drinks. We know this will be plenty for a trip from Neverdin to Gold Rock City, so no need to pick up a new barrel. Just in case, we will explore how to buy barrels like this and extra food later.
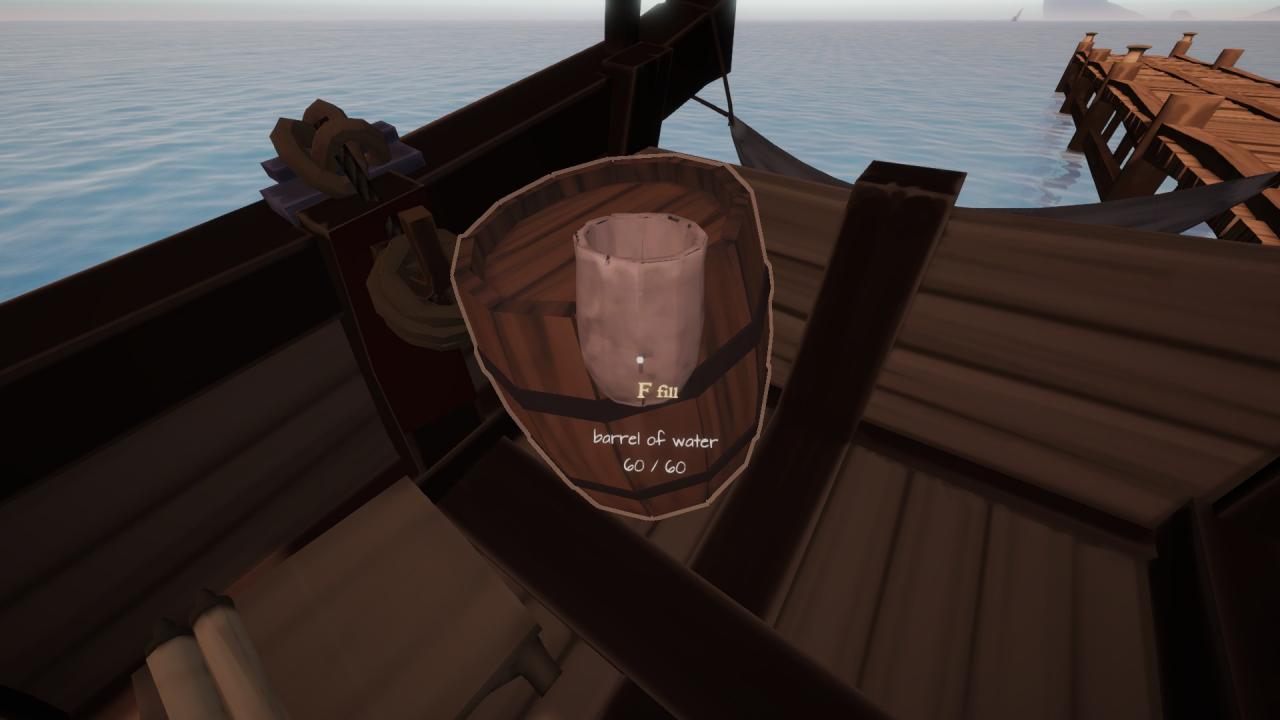
When we are thirsty, though, we can find the cup (starts among the junk on the table by the ship’s wheel) and equip it with the left mouse button. To fill the cup for drinking, highlight the water barrel with the cup and left click.
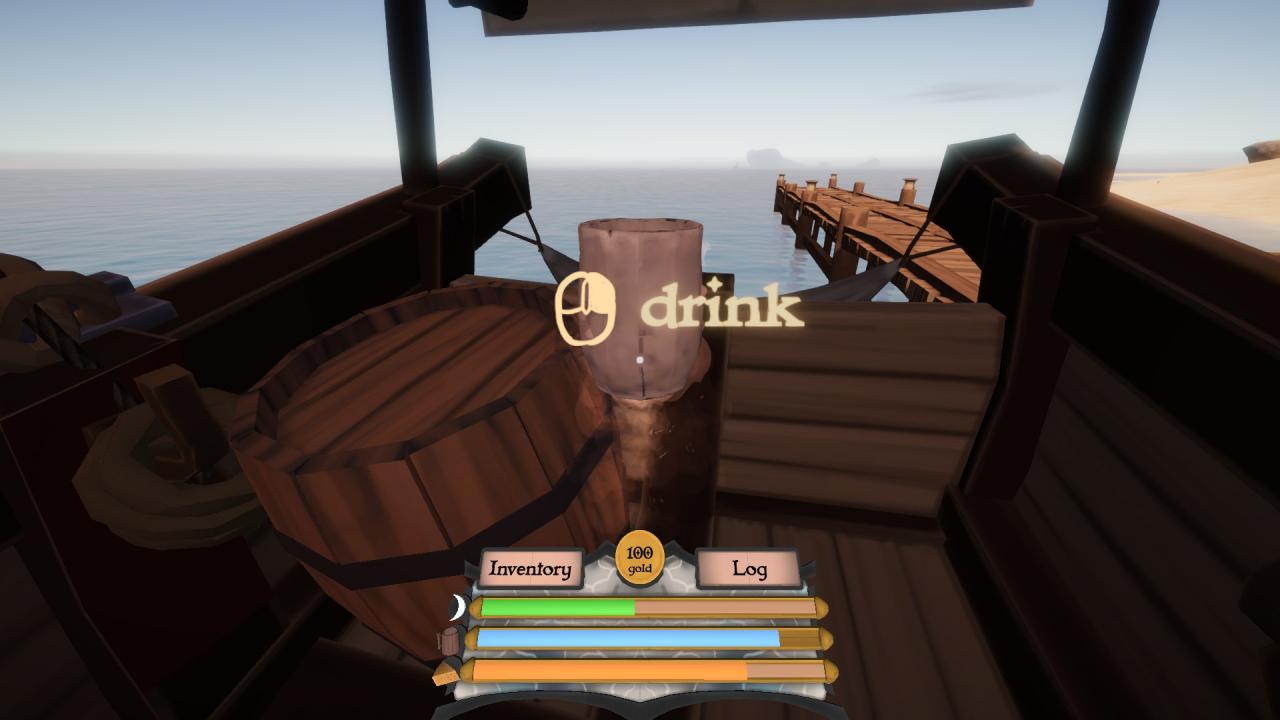
Finally, to drink the water, we use the right mouse button. We can repeat this as much as we need to fill the blue bar. Put the cup back somewhere safe. A good move is to open our inventory while holding the cup (tab).
Then left click an empty inventory circle to place the cup there for our later use.
Before we set off to get our cargo from Neverdin to Gold Rock City, we should stock the ship with food and water. As of update 0.11, the ship starts with food onboard along with the rest of the starting materials. However, we should learn how to purchase things before we leave, just in case…
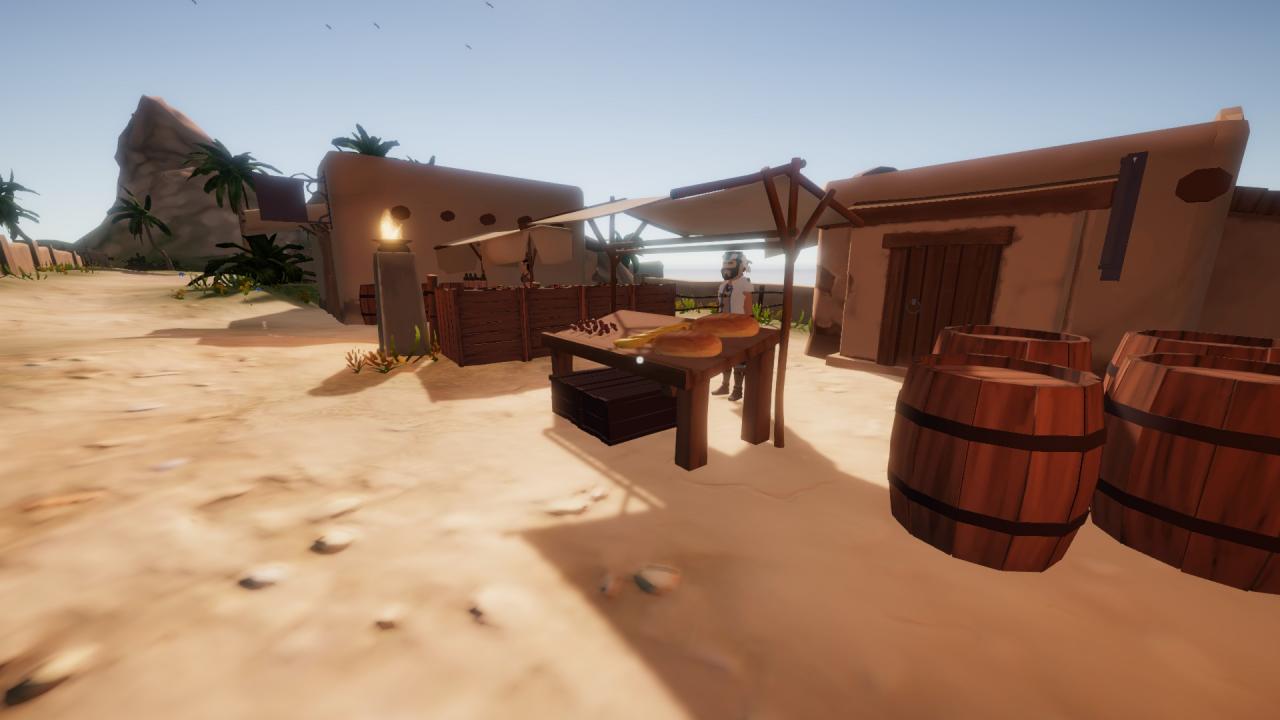
If we are at Neverdin, we can start at the dock and go past the mission office to a small market where we can buy water and other drinks.
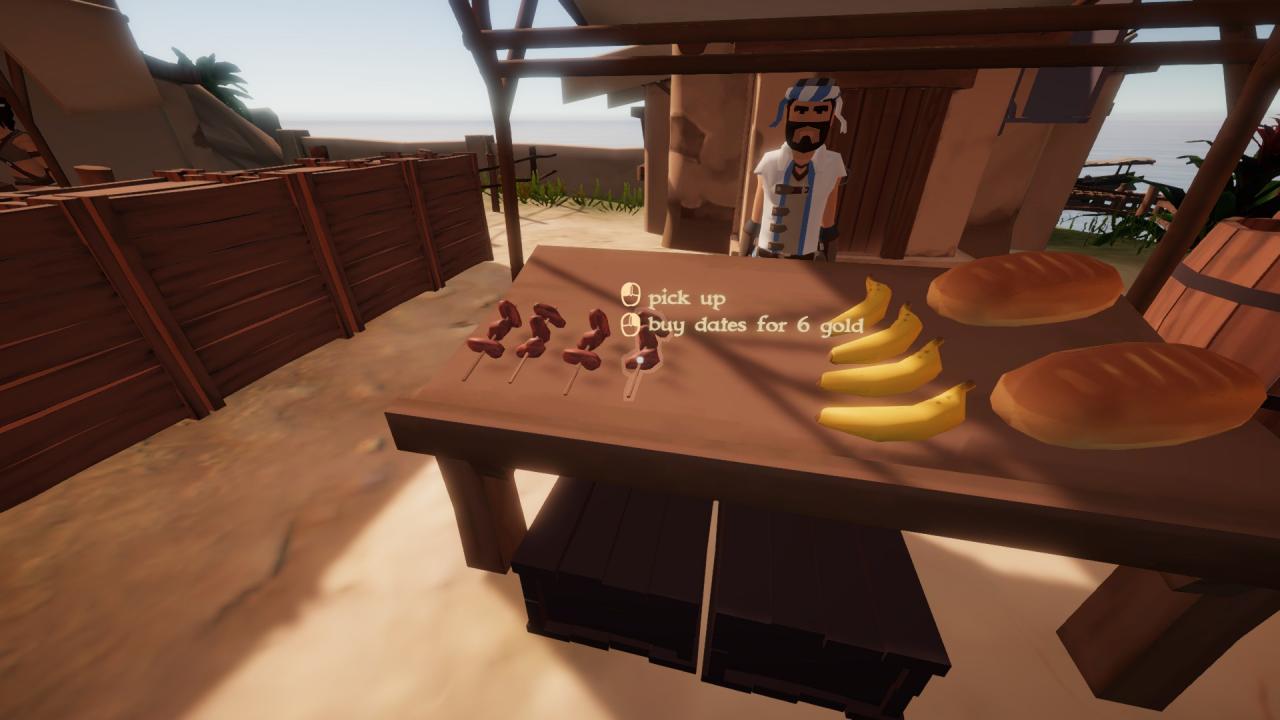
Right clicking on the food items allows us to buy them and bring them to our ship. When we right clock the food, our character will pick it up immediately. This allows us to either carry the item to the ship, eat it right there, or to store it in our inventory. It is a good idea to carry a food item in our inventory at all times for emergencies. Otherwise, we can just buy what we need for the voyage. Be sure to explore all that the market has to offer. We may even find boxes of food rather than individual pieces, which are better suited for shipboard storage.
Just like the other stats, our character expresses their hunger with a flashing red food gauge and a grain effect.
When this happens, we should find our stashed food on the ship or in our inventory. Pick it up with left click unless it is in a crate (then it’s a right click). Eat the food by holding the right mouse button. Be sure to explore how much different foods fill your hunger gauge. This will let you know how much of a certain food you need to pack for a trip!
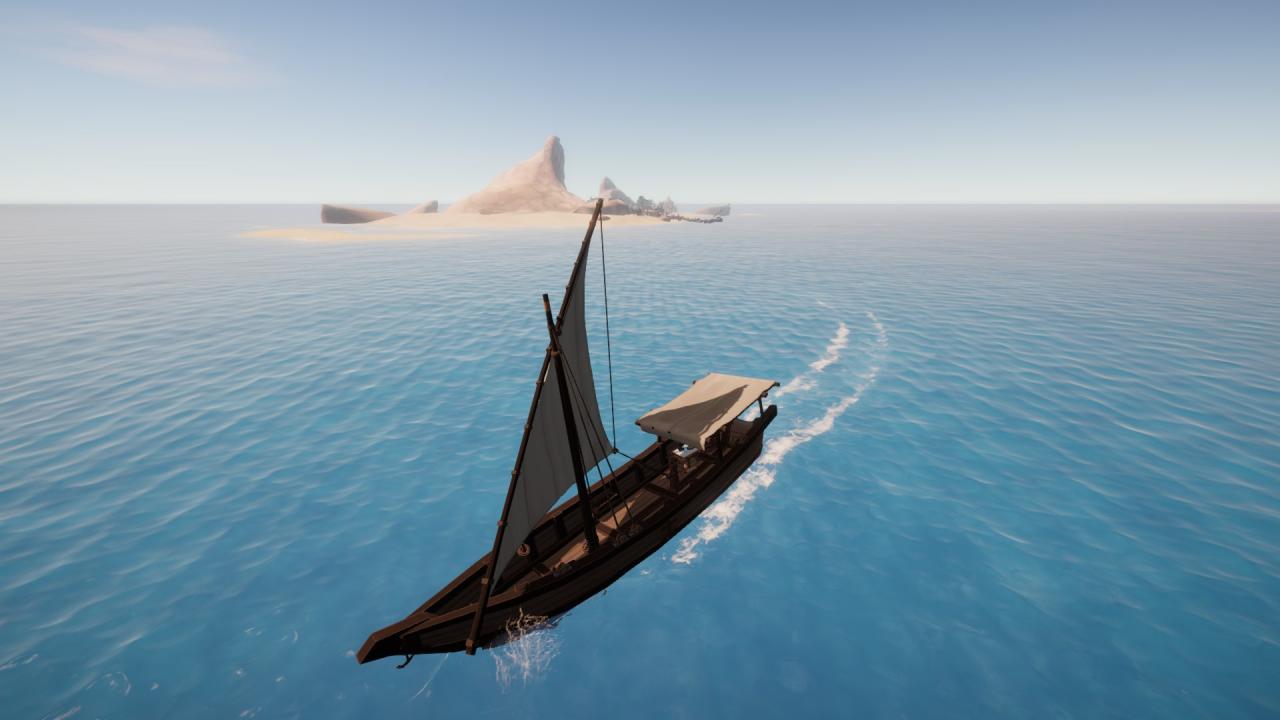
At this point, we could have cargo onboard for an active mission, or simply want to go from island to island. In this section we will learn the very basics of sailing in Sailwind. This guide assumes we are taking cargo from Neverdin, the Al’Ankh start point, to Gold Rock City, an easy-to-find destination.
So long as the sail is tight and not flapping, we will be making way. If you hear fluttering, see the vane is aligned with the sail, or see the sail is deflated or flapping, we are luffing.
That’s the sailing term for not making thrust.
If the sail is full, the ship will start to move, but there is a most efficient sail position, which we will need in order to go anywhere in a timely manner. Remember the sailing manual? It had a very useful diagram for making thrust at sea.
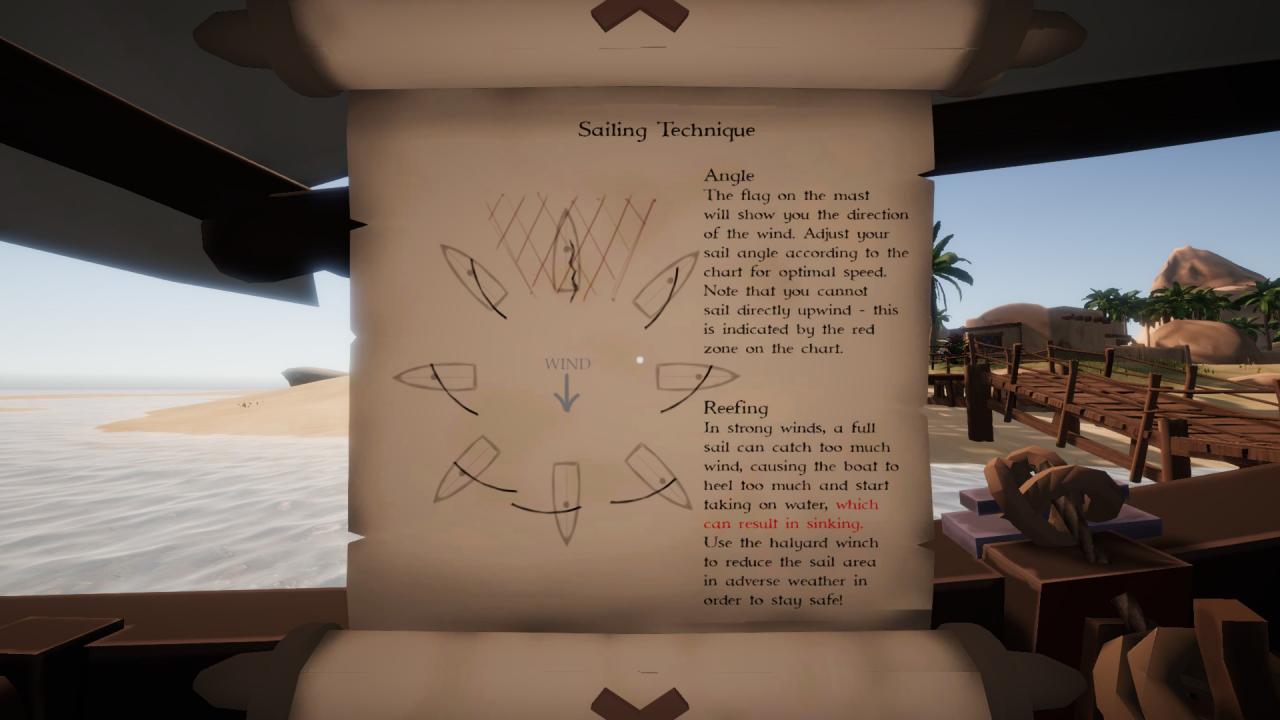
It shows the wind direction, 8 possible sailing directions, and the recommended sail position for each sailing direction. The ship’s direction will be controlled by the rudder with the ship’s wheel. The sail’s angle in the wind will be controlled by the sheet line with the sheet winch. The last thing we need is to get used to using the vane to determine wind direction.
The vane is an orange pennant at the top of the mast. We use it to show the wind’s current flow across the ship. It is a simple flag, so it points downwind!
Once we get underway, a good workflow for setting a course using the wheel, sheet, and vane, is this:
- Use the ship’s wheel to face the ship in the direction we want to go.
- Use the vane to determine the wind’s direction with respect to the ship.
- Use the sheet to angle the sail properly for best effectiveness.
Use the sailing manual for that last step. The vane points in the direction of that central arrow (the wind) and you can use the sheet to make the sail match the angle in the diagram.
In this section we will go through each of the 8 sailing directions in the sailing manual, complete with pictures! We will start with the top of the sailing manual’s Sailing Techniques section, and go clockwise, as if we were turning the ship to the right.
This position has a sailing term for it: Irons. It’s when your bow is facing into the wind, so the vane is pointing astern, and your sail is flapping in the wind. In the Maneuvers section we will learn how to get out of this position. For now, know that it isn’t a good way to sail!
We call this position Close, as in “the wind is close to our bow!” and is as close as we can get to sailing into the wind. We use this position whenever our destination is upwind of us. We will talk about that more in maneuvers.
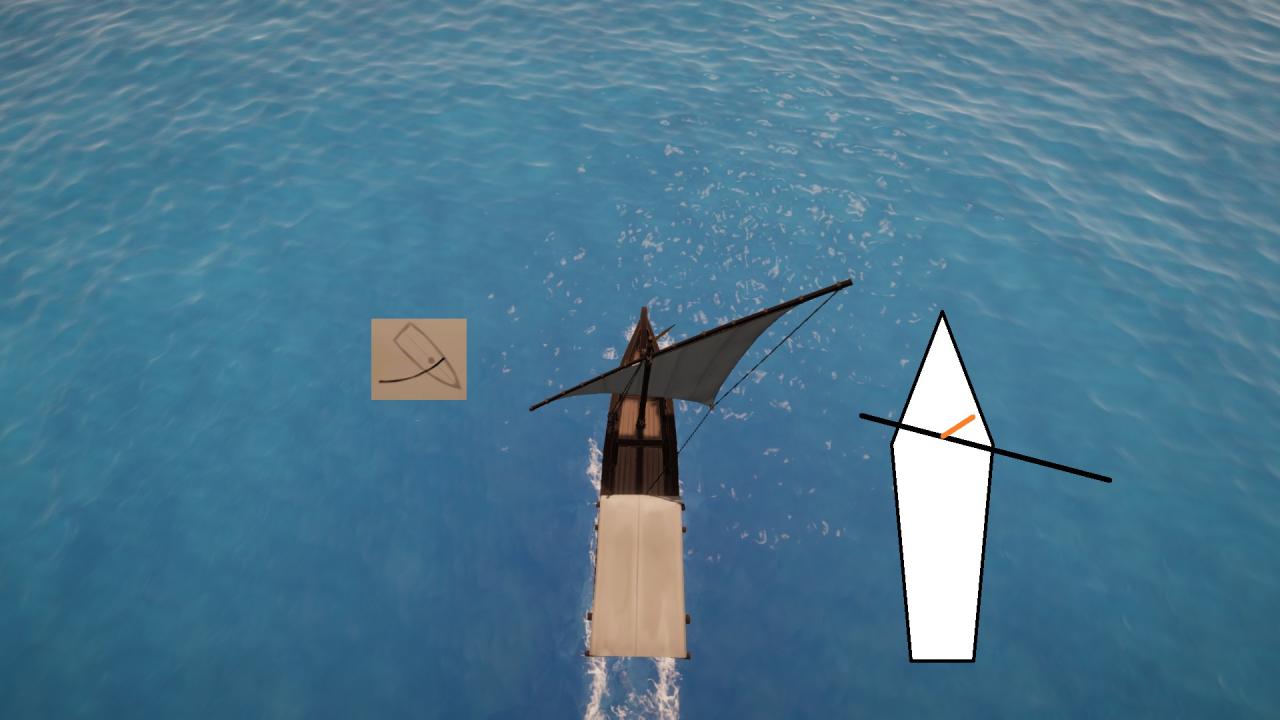
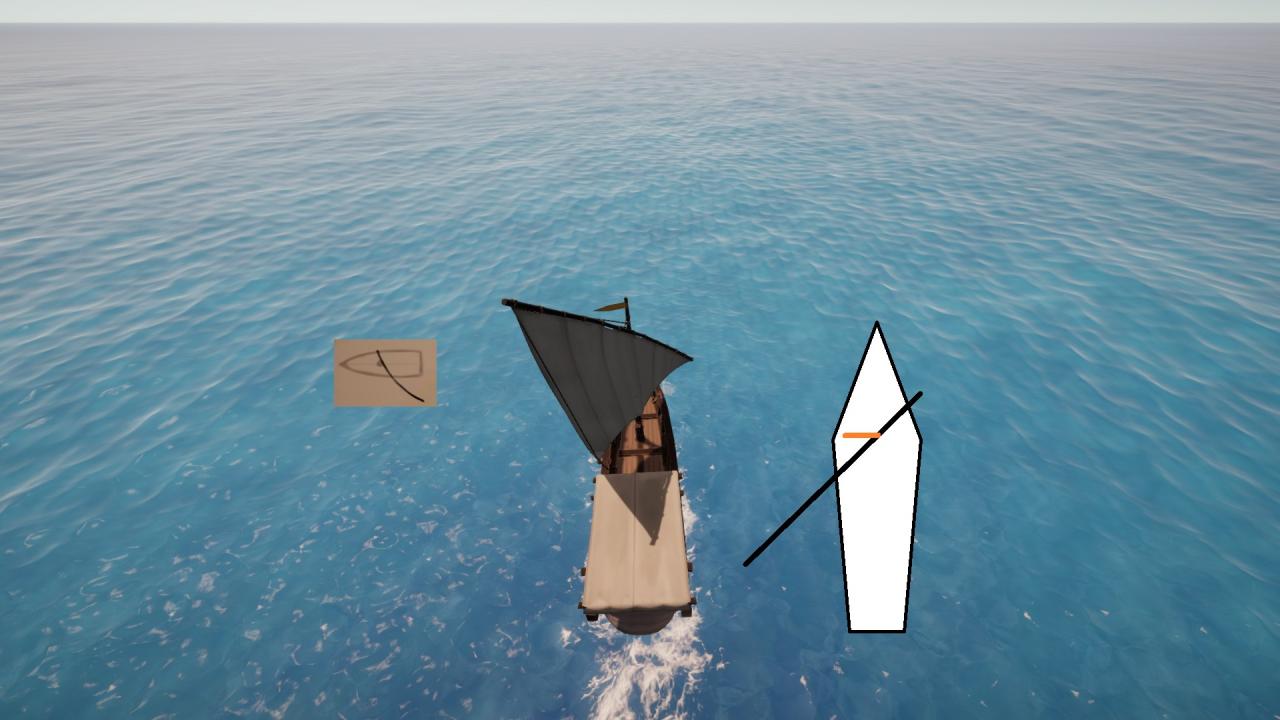
This position is a Beam Reach and requires letting the sail out with the sheet so it has the proper angle.
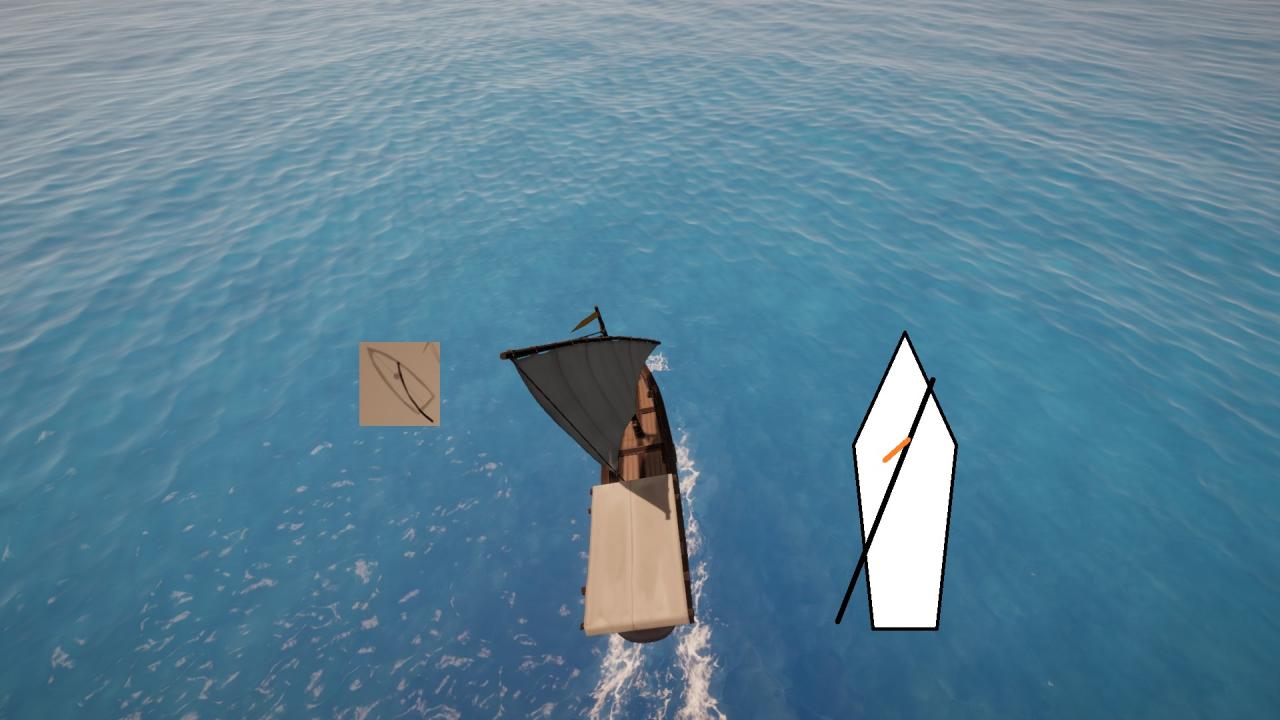
The next position is a Broad Reach. We will have to let the sail out even more with the sheet when in this position!
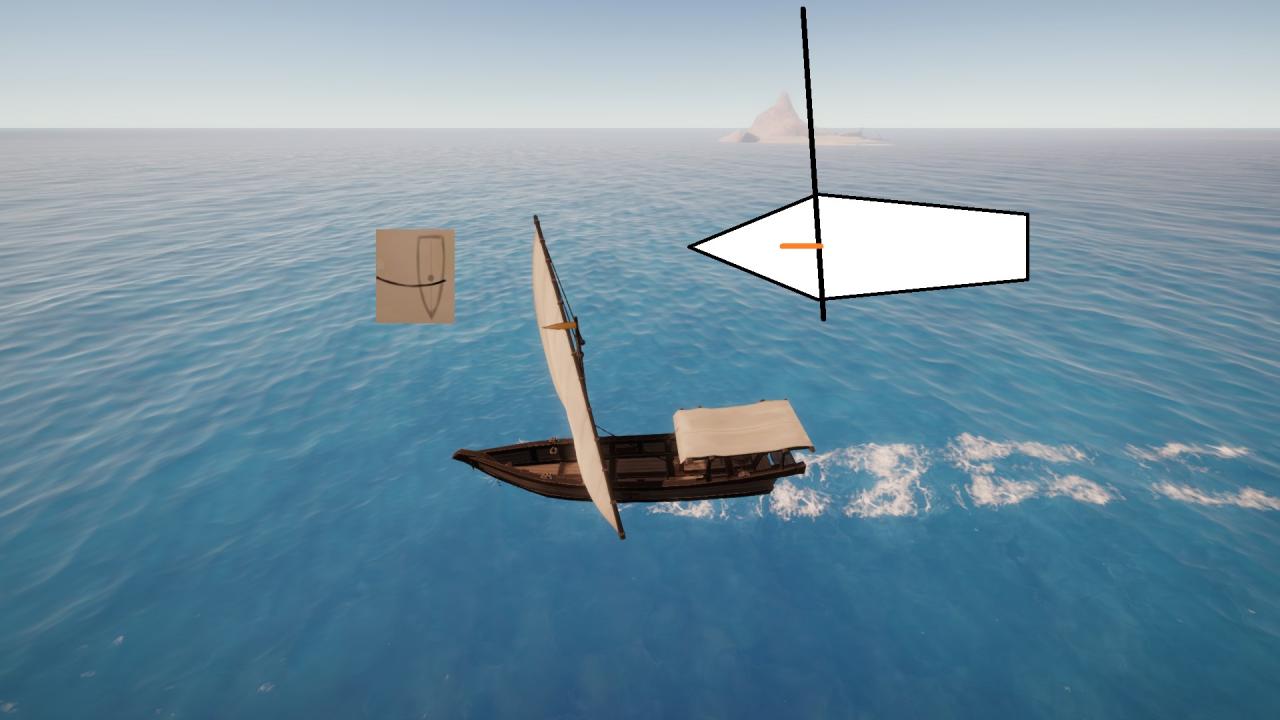
This last position is a Run and we will have to let the sail completely out to use the most of the wind we can!
As we turn through the run position, the sail will flip to the other side, a maneuver called a jibe.
For the Broad Reach on the other side of the wind, we will want to bring the sail back in a bit with the sheet. Because we are pulling the sheet against the wind, we may notice the sheet comes in slowly (that’s because we’re pulling the line against the force of the wind pushing on the sail!)
If we continue turning right, we will find ourselves in a Beam Reach again, but the sail is on the other side!
Finally, we can turn all the way to the Close position again! If our destination is upwind, we can use this position along with the other close position to make our way there. Going between the close positions requires a maneuver called Tacking, which we will talk about next!
Having trouble with the sail switching sides as you sail? Need to sail upwind? There are two maneuvers all sailors should be able to do at sea: the tack and the jibe. Both of these maneuvers are used to flip the sail to the other side of the ship by turning through the wind. The difference is where the ship’s bow is going during the maneuver. A tack has the ship’s bow pass through upwind, and a jibe has the ship’s bow pass through downwind. During a tack, the sail will switch sides relatively slowly as we use the ship’s wheel to turn the ship through the wind. A jibe is a little more fun: the sail will flip wildly from one side to the other!
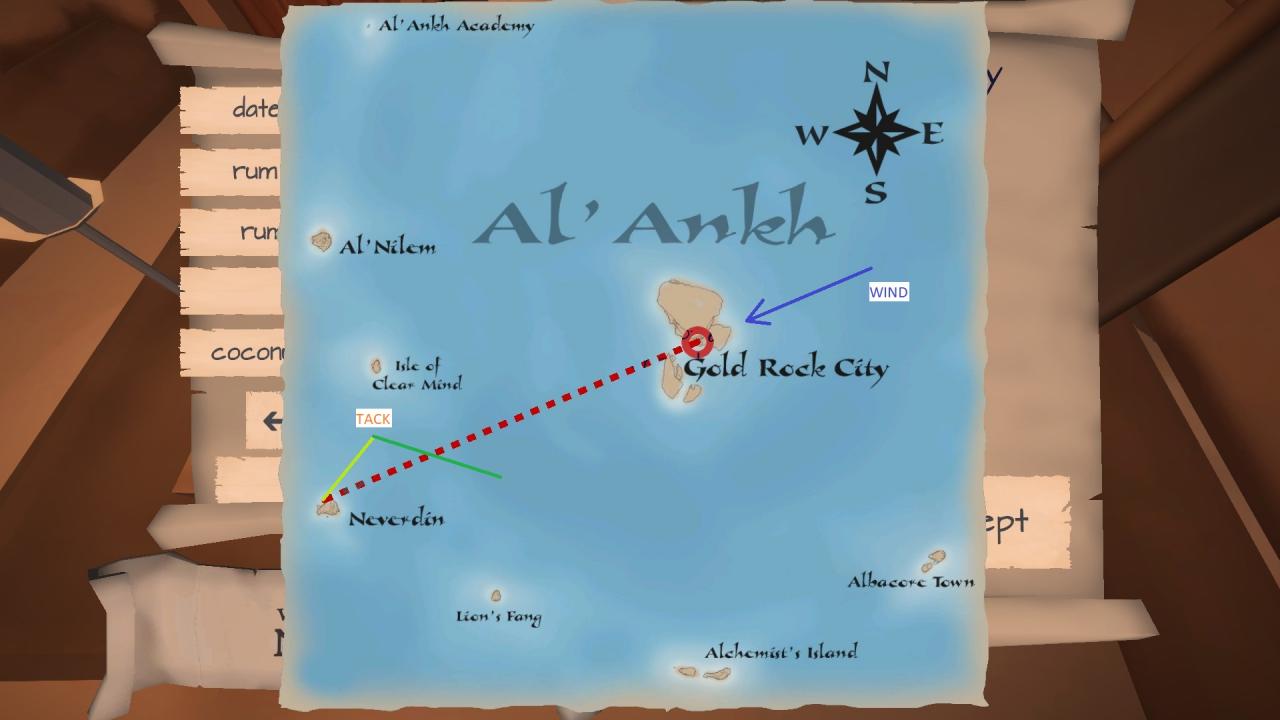
Sailing upwind is a basic maneuver we will definitely need for Sailwind. Remember the map? Let’s use it to visualize sailing upwind.
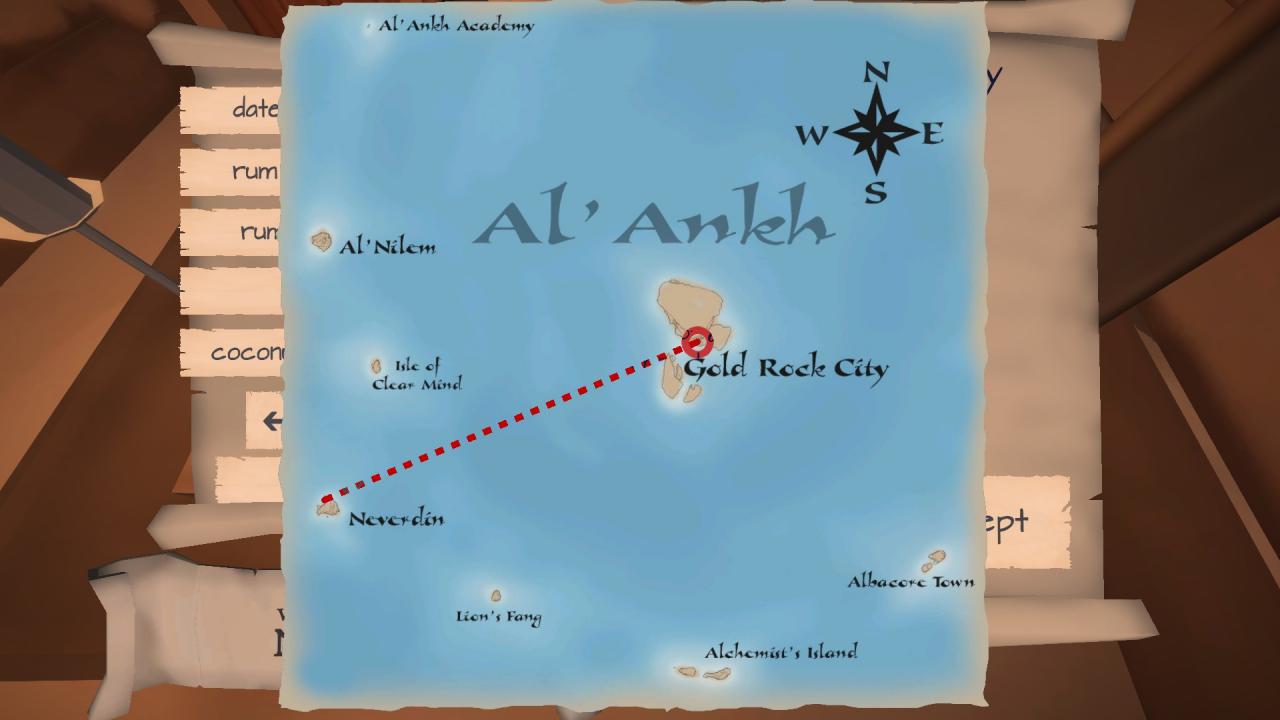
Say we are sailing from Neverdin to Gold Rock City… but the wind is blowing at us from Gold Rock City! How can we sail directly into the wind? We can’t! So we will alternate Close sailing positions on either side of the wind. We start by staying close to the wind, but off to one side:

If we keep doing this, we will end up off course, though! So at some point, we will switch (requiring us to tack!). Then we can sail for a bit in the close position, but going the other way:
Still, if we continue in this position for too long, we will miss Gold Rock City. So we will eventually tack again and go back the original direction. Repeat this and we will eventually sail upwind all the way to our destination!
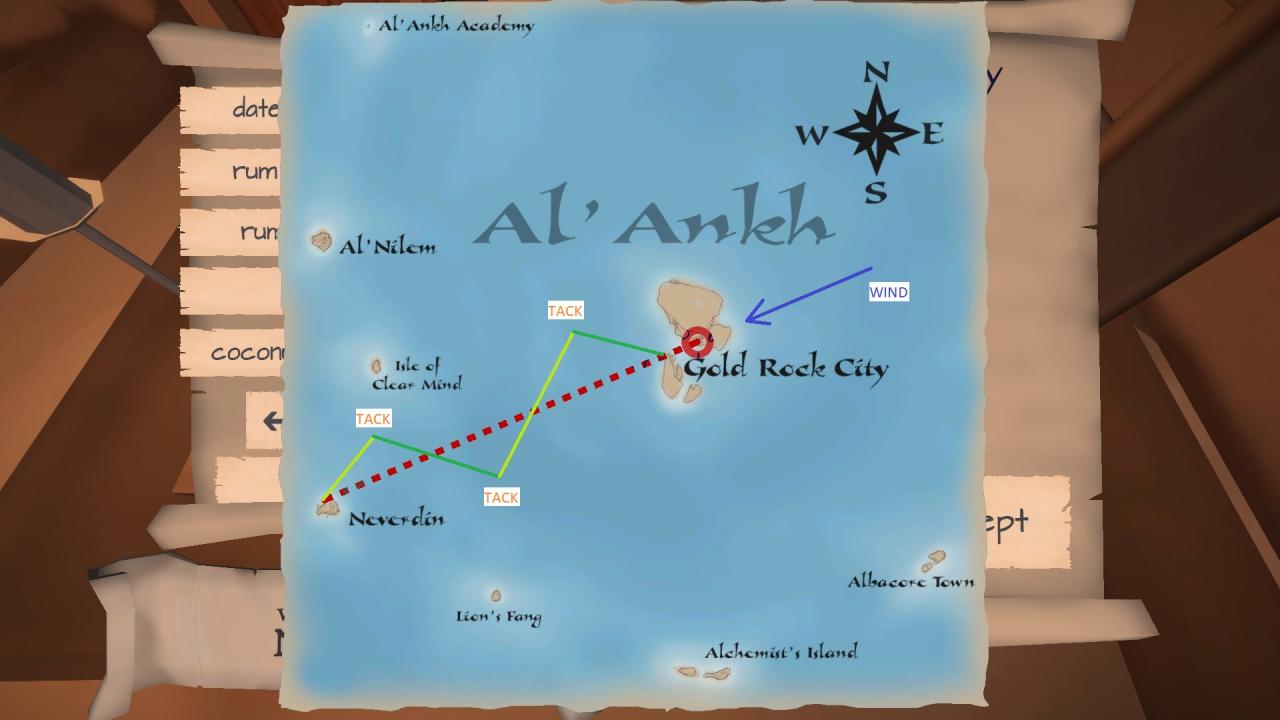
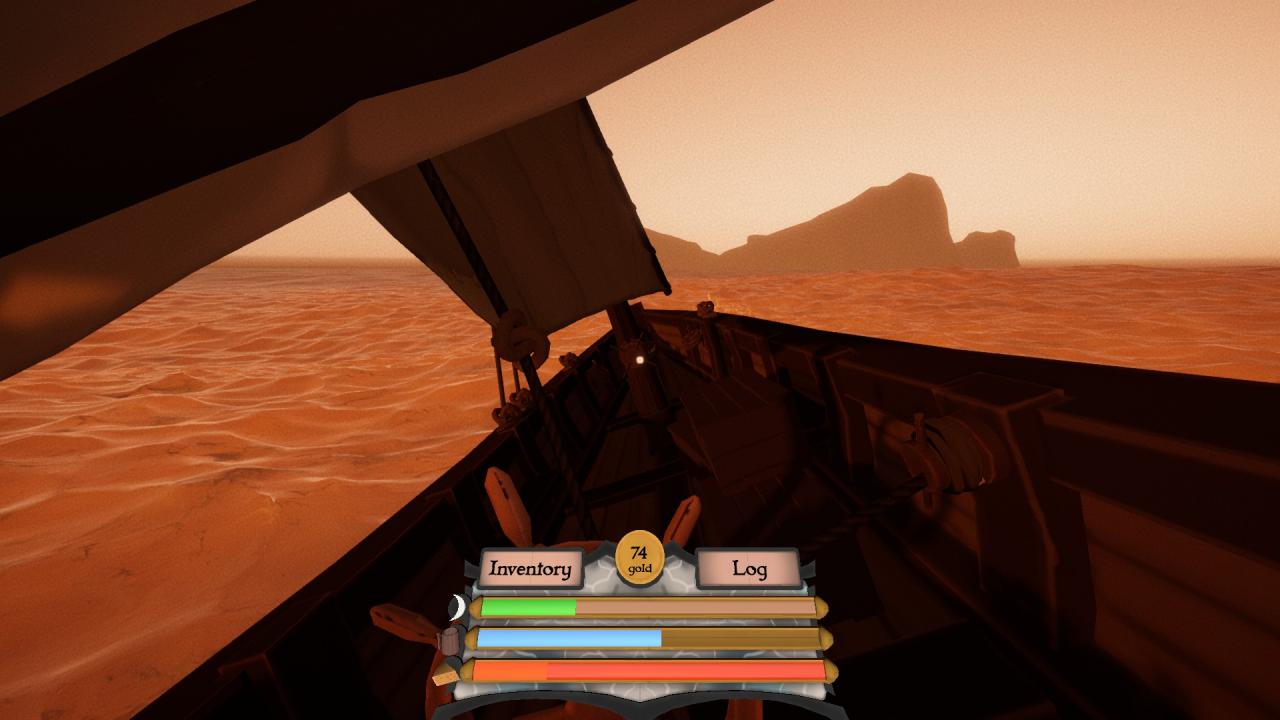
This will require us to tack multiple times, in a zig-zag pattern. Luckily, gold rock city is easy to spot from anywhere in Al’Ankh, so we can use its relationship to our bow to judge direction. However, when we get into navigation, we will need the compass to help us manage our direction.
Another helpful maneuver is getting into and out of Irons. Irons is useful to bring the ship to a stop in the water. Just point your bow into the wind so the vane points astern, and wham! We are in Irons! To get out of irons:
- Let the sail out a bit with the sheet, so the sail is free to rotate in the wind.
- Turn the ship’s wheel all the way to the left or right, causing the ship to turn as the wind pushes it backward. This might take a while, so be patient!
- Once the sail is off to one side, straighten the wheel out and then pull the sail all the way in with the sheet. This will let the sail catch the wind.
- Go back to the wheel and turn the ships bow away from upwind and you will catch the wind again!
By i950