Gameplay explanation with tips & tricks, full item glossary and structured achievements section for 100% secrets and completion.
Intro
The final 3 sections contain a run-through of all 10 achievements in a logical order for completion. These sections also detail other gameplay mechanics where an understanding is required to gain the achievements, such as Chests, secret levels, and the Bestiary. Note: the achievements sections contain spoilers – I’ll make modest use of spoiler tags but you have been warned!
To activate full screen, go to Options > Setting; turn on Full Screen, and change Window Size to Fit.
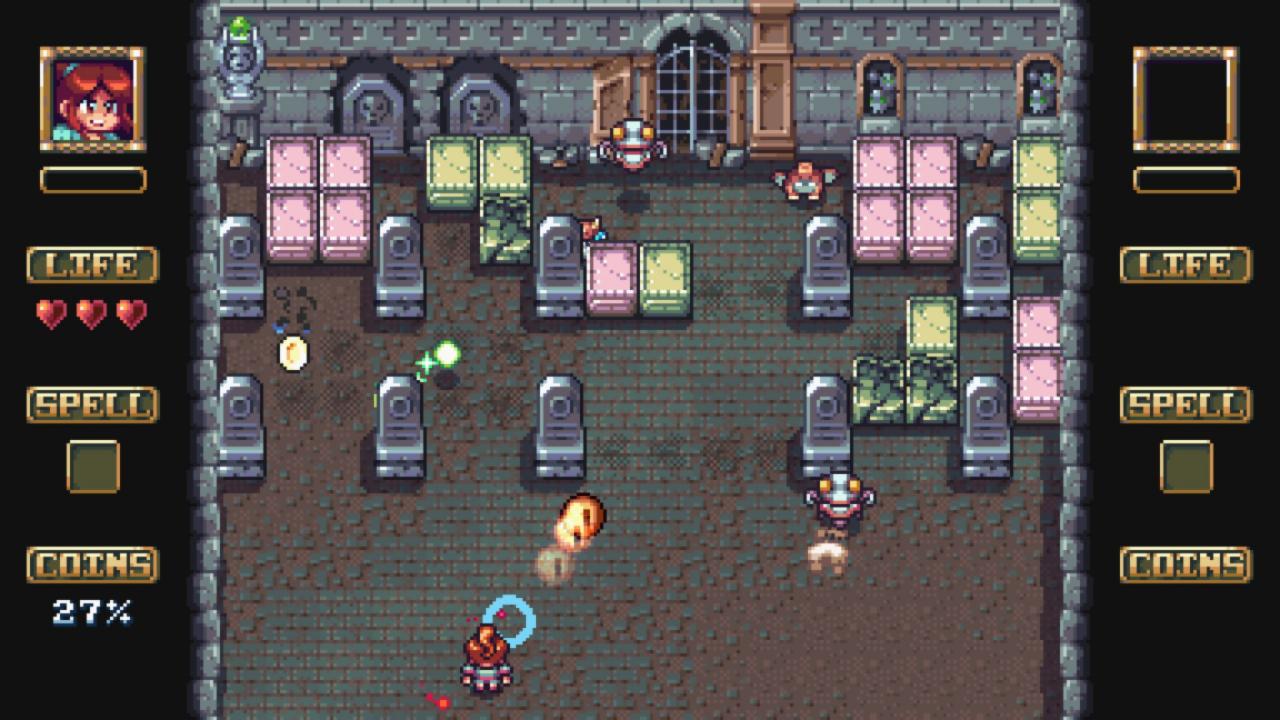
How To Play
- Destroy all bricks and monsters to beat regular stages… Enemies respawn until the bricks are destroyed!
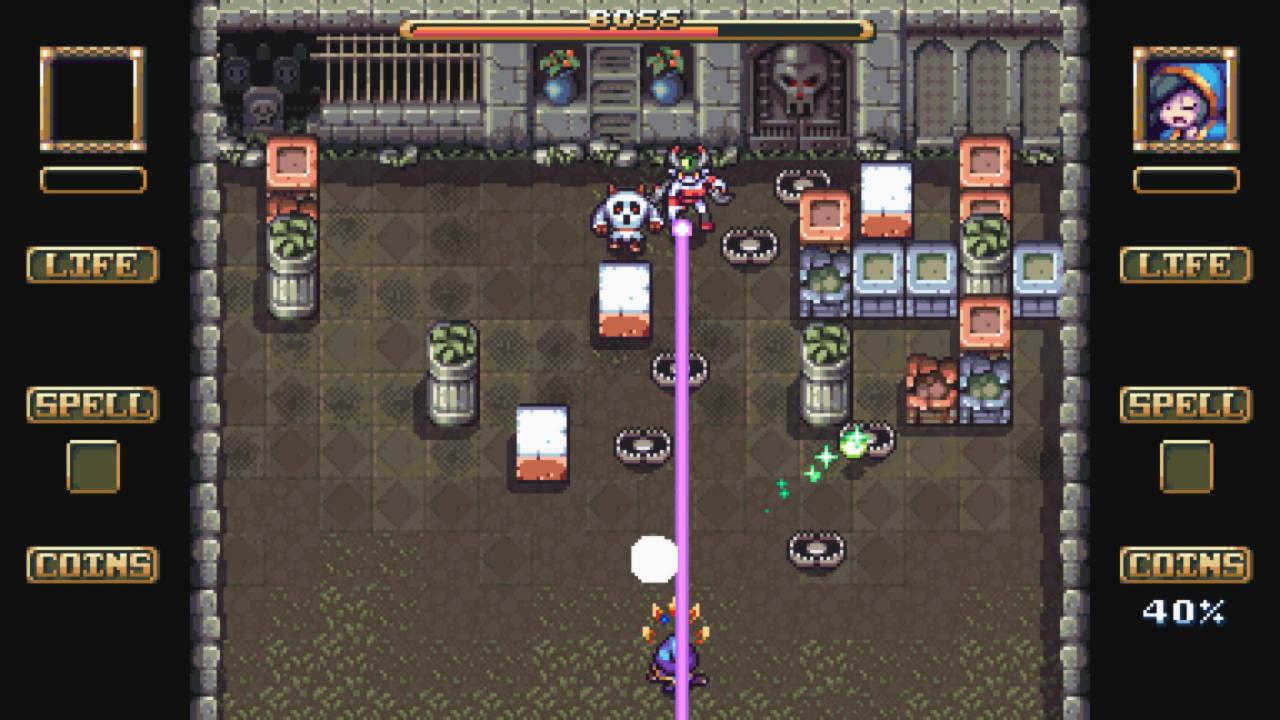
- Defeat the boss to beat boss stages. You don’t need to destroy all the bricks.
- You lose if you run out of hearts… If the ball leaves the bottom of the screen or if you’re hit by a projectile or enemy, you lose a heart.
- In two player cooperative, BOTH players lose a heart when ANY ball is lost… Try to coordinate with your partner!
- Press the ATTACK button to hit the ball, hit nearby enemies or destroy incoming projectiles.
- Press and HOLD the ATTACK button to charge a strong attack… the strong attack can repel projectiles.
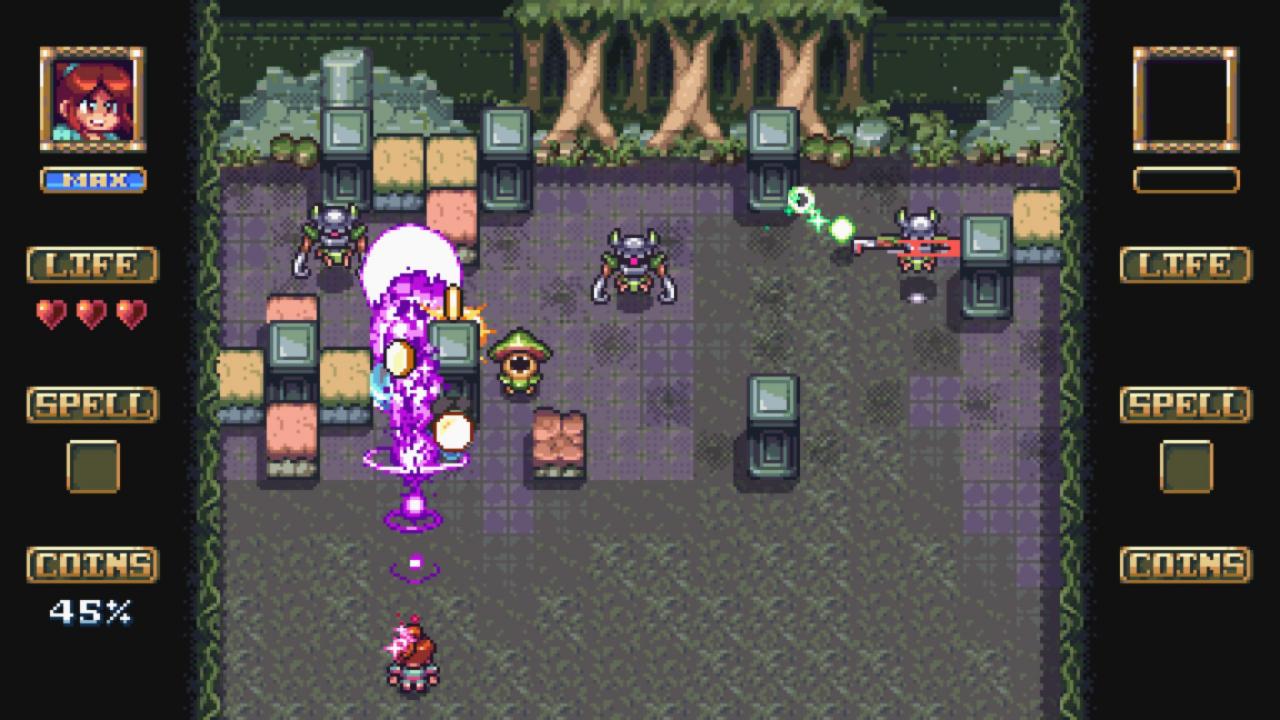
- Press the SPELL button to perform a magic attack… spells are available after picking up a Spell power-up item!
- Destroy monsters to get POWER-UP items… There are three types: PLAYER items and BALL items take effect immediately, while SPELL items are used with the SPELL button.
- Collect enough COINS for chests to appear… they contain collectables and other interesting goodies!
Gameplay Basics
- Standard hit: Press attack to swipe in front of you in an arc, sending the ball away from you at medium velocity according to your position relative to the ball at the point you strike it. Note: always try to hit the ball even if it looks like a lost cause – you can perform saves from surprisingly low on the screen!
- Charged hit: Per the section above, press and hold attack for a few seconds until you hear an audio cue, then press attack again to activate. This launches the ball at high speed, and furthermore, for the first few seconds after striking the ball will kill a block/monster in one hit, and do more damage to bosses. You can hit and destroy multiple targets if you hit them in very close succession, so try to aim for corners and narrow gaps.
Almost all monster & boss projectiles can be deflected with a charged shot, killing blocks & monsters on contact as a ball would.
Warning: be very careful using charged attacks in close quarters to enemies or blocks – a stray shot deflected back towards the bottom will often be too quick to catch!
- Bounce: The option some might forget about or overlook its usefulness – simply let the ball bounce off your character without attacking for a slow speed hit.
This is great for several reasons – firstly, slowing the action down when things get a bit frenetic, or when there are many obstacles crowding the bottom of the screen (see above on when not to use a charged shot). Secondly, unlike the other 2 options, the ball will always bounce off the player at an identical opposing angle to the hit, making it very predictable to aim and useful to relocate the ball. Finally, you can use this to bide your time for a charged shot without needing to charge it again.
The drawback of this method is that the character’s hitbox is much smaller than the attack arc, which makes it harder to perform, so if in doubt – attack.
Power Ups – Items & Spells
Player Items
These Power-Ups activate immediately and benefit the only player that collected them, and flash green until collected.


Ball Items
These also activate immediately and alter the behaviour of the ball in some way, and flash blue until collected. In co-op (or whilst Double Ball is active), both balls are affected.

Note that this Power-Up can never cause there to be more than 2 balls in play and will therefore not even appear if there are 2 balls on screen. For this reason, it also doesn’t appear in 2P mode, unless one player is K.O. and only one ball remains. Duration: until a ball is lost.
Tip: treat having two balls as a temporary bonus, not the new status quo. Going to lengths trying to keep both will often result in losing both!


Spells
Spells are stored in the slot on the HUD until they are activated using the spell button, and flash red until collected. Each player may carry one Spell at a time – any subsequent Spell collected will over-write the previous one, so it’s usually advisable to use them ASAP! Note that the Bestiary Card also occupies the same slot and will overwrite / be overwritten by Spells (see the Achievements – Coins & Chests section for more info).

Tip: stand between 2 lines of blocks in order to hit both rows for maximum destruction & coin output.


Achievements – Completion
 Lovely Gals
Beat any stage with 3 life hearts!
Probably the first achievement you’ll unlock, and in all likelihood you’ll get it naturally as your skills improve and you progress through the many levels & extra levels of the game. If you’re struggling or want to focus on getting it fast – completely ignore coins; focus on Power-Ups and dodging projectiles, and remember that Chicken and Shield items can save a run.
 Persistent Brats
Beat the final boss and rescue Sachiro!
The final boss, Lord Vanik, is not accessible at first. In order to reach him, you first need to play and beat every normal level on the map – you do not need to find the hidden stages & areas details in later sections of the guide. Once unlocked, you’ll see a cutscene indicating that has fled, and a new area will be connected on the mid-East side of the island.
Note that due to the way the game is structured, you’ll find likely and beat Lord Vanik before any of the subsequent achievements for beating all levels/bosses, hence why I’m covering it first.
The boss fight itself is in two phases, and in my opinion, the first is significantly harder than the second. During the first phase, Lord Vanik will summon large black balls which continuously fire projectiles, and can also send forth a large wave of bats at the player. The bats are very difficult to dodge or destroy when they come directly at you, so avoid standing directly beneath them as they come at all costs! Escape to the side of the screen, and if you must cross the stream (i.e., to get the ball), then do so slowly whilst mashing attack to destroy them. It’s also incredibly effective to repel 3-5 bats with a single charged attack, but don’t get too hung up on trying to do this and give away unnecessary hits. Destroy the black balls ASAP to stop the purple projectiles becoming too overwhelming.
Once you deplete his health bar fully, the second phase begins. Thankfully, he loses his attacks from previously, instead opting to fire off a fan of 5 bouncy fireballs, much like other bosses seen in the game. This fight should hopefully be trivial after the first – repel the fireballs or use the solid walls for cover, destroy the blocks, and bounce charged shots behind him. Good luck!
 Block Rampage
Beat all stages in the game!
Simply win every level on the map, including bosses – no coins or completionist goals required. Many stages are hidden – see True Scouts in the next section for more detail.
 Like A Boss
Defeat all bosses!
Each area has a boss visible on the tile itself once it’s been revealed. For the most part, the bosses aren’t too difficult once you learn their tricks – most have 2 attacks which they perform at random as they move around the top half of the screen, and they will always ‘announce’ their attacks with a taunt to give you a bit of heads up. It’s important to rely on this audio cue to anticipate what the boss will do next, as you likely can’t be always watching them while also trying to manage the ball.
For example, one of the hardest bosses – Xasmine will cry “Look into my eyes!” when she activates her laser, and “Die!” after she teleports near the player but before striking. Listen out for these cues, avoid standing directly in front of her at any time, and when she teleports keep moving to the side, then duck back in at the last second and hit her with a charged shot.
Also note that most (if not all) bosses will deflect balls striking their front, so try to sneak charged shots off the walls and behind them, or hit them while they’re attacking. Finally, given many of the bosses utilise barrages of difficult-to-avoid projectiles, you should try to keep your shot charged to repel them, bouncing the ball off you between volleys where needed (see Gameplay Basics above).
If you’re missing a boss, it’s probably Erin Saver in the hidden sunken city at the top left of the map! See True Scouts below for how to unlock.
Achievements – Coins & Chests
- Green chests spawn at 50% coins, and contain a Bestiary Card
- Red chests spawn at 60% coins, and contain drop a Green Gem
- Blue chests spawn at 70% coins, and drop a Key
Note: chests disappear the moment the final monster on a level dies, so make sure you’ve collected the contents first!
 Full Booty
Get 100% coins in some stage!
This can be a little tricky, but as with the Lovely Gals achievement you may unlock this naturally, so I’d advise not to worry about it too early (you’ll be collecting at least 60% of coins on every map anyway, and it only takes one great run… 😊).
To focus on this achievement, you should prioritise coins over health, and avoid certain Power-Ups altogether. Lightning Storm is a definite no-go, as it can often create impossible splits of coins at different ends of the screen. Magic Bombs can do the same, whilst Double Ball splits your focus too much when the balls separate, so I would avoid these too. Iron Ball is more a matter of preference – it’s great for clearing out blocks and can only be in one place at a time… but just be careful not to bite off more than you can chew! Remember – it’s not a race, you just need to collect them all.
 Huntresses & Players
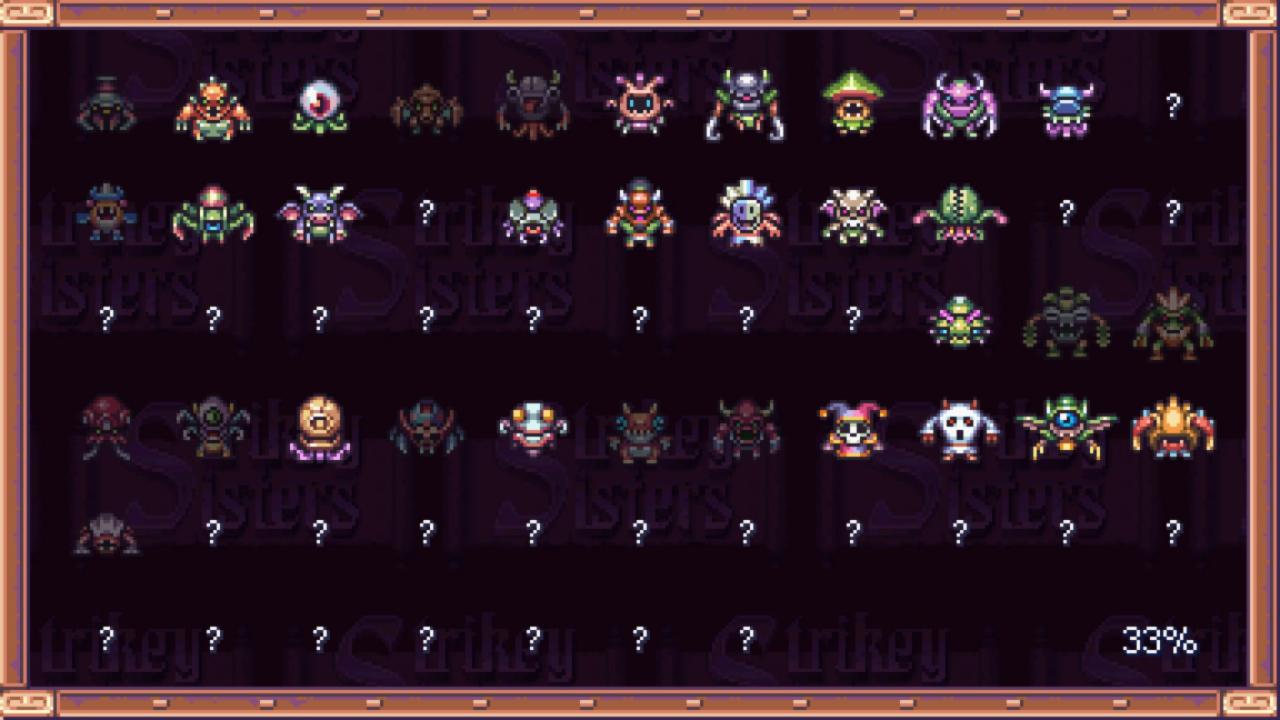
Catch all monsters and complete the bestiary!
As above, every level in the game can spawn a green chest when the player(s) collect 50% of the coins… contained within is a special Power-Up for trapping monsters. Once obtained, the Bestiary Card is launched in a straight line until hitting a block or a monster, the latter when hit will phase out (not dropping a Power-Up) and be added to your Bestiary!
There are 3 ways to check which monsters you need:
- From the title screen, go to Options > Bestiary. Question marks represent unencountered monsters, transparent images represent those you’ve encountered but are yet to catch, whilst solid images are already captured within your Bestiary.
- From the map, when standing over a level you’ve already beaten, you’ll see the monsters featured on the level on the bar at the top of the screen, using the same solid/transparent image system as above to denote those you have/need.
- When you collect the Bestiary Card from the green chest, a target briefly flashes over any monsters currently on screen that you need for your Bestiary.
Note that unlike Green Gems and Keys, you do not need to go on to win the level after capturing a monster for it to remain in your Bestiary. Monsters can only be collected on the map levels, as green chests serve a different purpose on the Extra Levels… more on that later.
 Little Loan Sharks
Get 100% green gems!
Every level has Green Gem to collect. If a gem on a given has not already been obtained, a red chest will appear once the player(s) have collected 60% coins – get the gem and win the level to save your progress! Note – red chests do not appear on levels where the gem has already been collected, and you must complete the level in order to keep the gem.
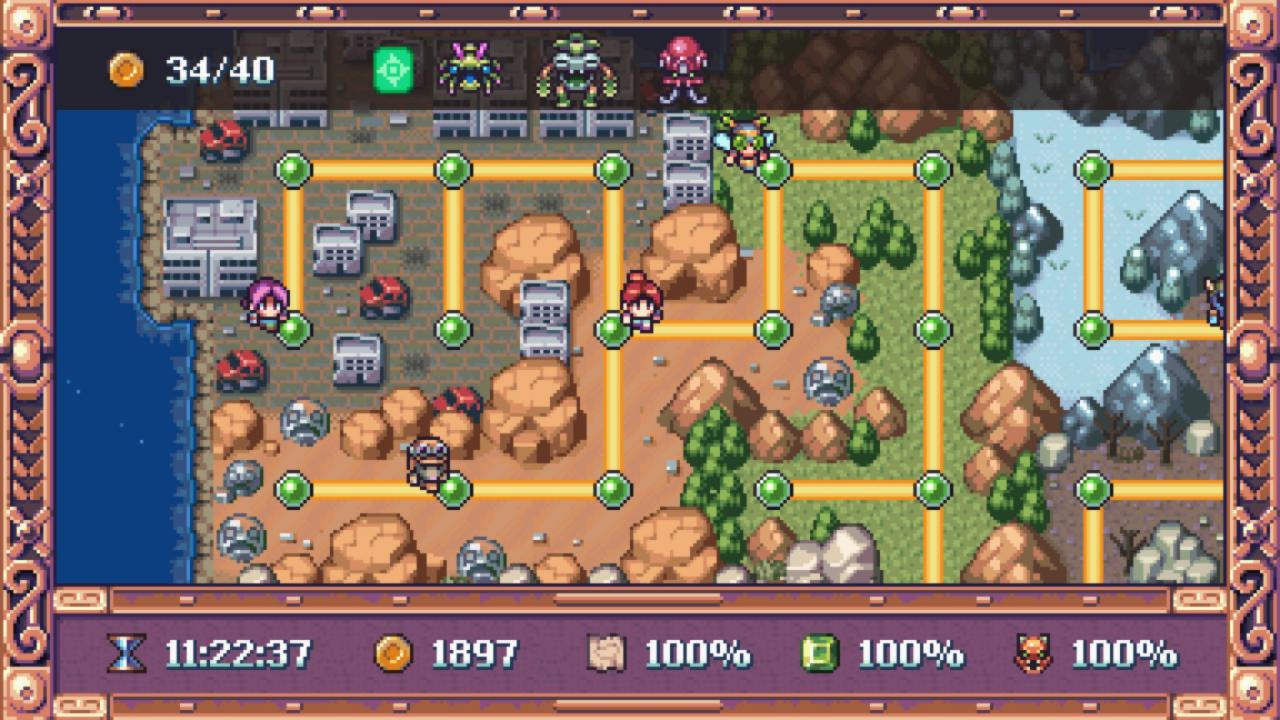
The colour of the marker helps to track which levels still have a gem to collect. Yellow denotes a level that hasn’t been beaten, whilst Blue shows a level that has been beaten but the gem is still outstanding. Once the level is beaten and gem is collected, the marker will turn Green.
 True Scouts
Uncover all the map!
Most levels are uncovered simply by beating the connecting level (Yellow map markers are unbeaten). However, some levels – as well as one entire area – are hidden and require a special Key to be collected from a blue chest on the connecting level.
Blue chests appear when 70% of coins are collected, but only on levels where there is a hidden connection to be found, and where the Key hasn’t already been previously collected. As with Green Gems, you must win the level after collecting the Key in order to save the progress.
When completed, the map forms a perfect 7×9 grid with every space filled in, so be vigilant for clearings in the terrain etc. which might hint as to where the connection lies. As mentioned previously, one area is entirely hidden – the connection you’ll need is shown below:
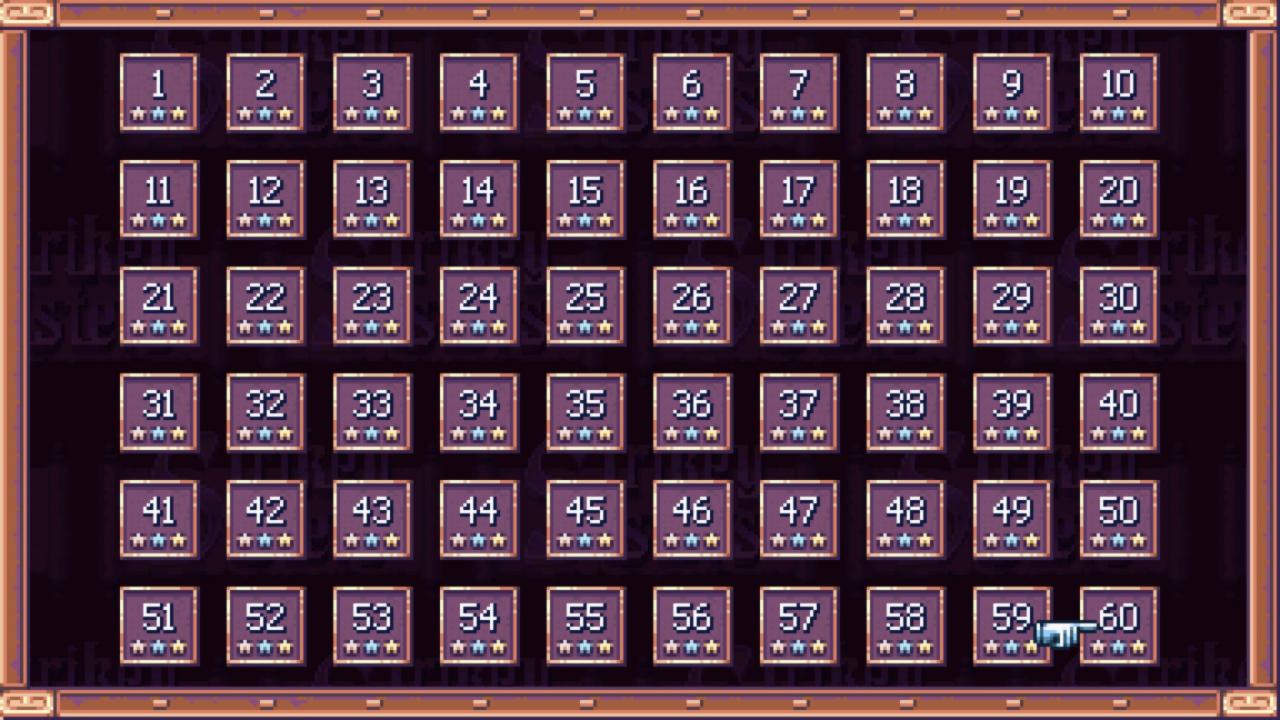
Achievements – Extra Levels
There are two main differences with the extra levels:
- Some monsters of specific types start pre-spawned as with regular levels, however, once play starts every level is capable of spawning any kind of monster at random.
- Chests behave differently, dropping bronze, silver and gold Stars instead of the items found in the map mode.
 Hard Workers
Beat all extra levels!
Simply beat all 60 levels, stars or otherwise. You must unlock the previous level to access the next one.
If this and the next achievement don’t unlock right away, try returning all the way to the title screen and then they will pop.
 All Stars
Get all Stars in extra levels!
Per the ‘Achievements – Coins & Chests’ section, chests appear at 50/60/70% coin collection on each level; you must collect all 3 stars on every level to unlock this achievement. Although the level must be won to save a particular star, they do not all needed to be collected on the same run.
Note: presumably due to a hangover from regular mode in the way the game is programmed, red & blue chests will only spawn if their respective star is needed, but the green chest will always spawn regardless.