Crazy solutions and optimization guide to Scenarios mode.
Intro
As of writing, all solutions were made by me and all save files are labelled version v.0.5.20. If you copy levels 1-3 exactly and get different scores (same version), I wonder if PC specs affect the simulation.
Important Techniques
- Delay the first signal. This is the most important. Trains try to spawn in immediately in most levels. You want trains to wait until it’s clear and then spawn in at high speed.
- No-gap signals where trains may be following closely. Often after merges, and where maximum throughput is supported (levels 1–3 are basic examples).
- Build acceleration tracks at station exits. Trains need to gain speed before merging so a train won’t have to wait for the previous train to exit. You want the station to be able to output trains as fast as trains come in.
- Early split, late merge. You don’t always need to split at the edge of the map, but one thing to note is that an input with multiple destinations can spawn faster when alternating tracks since the path is clear.
- A “corner” is counted by two 45-degree turns touching a train. I.e. longer trains are more vulnerable to corners. Just something to know. Corners are unavoidable in many levels.
I don’t know what updates have done, but saves from February 2023 when Scenarios first came out will see a slight increase in score when you retry them. E.g. level 1 used to score 124. I redid around half the levels from scratch since I didn’t keep saves for them.
Some scores may vary when run multiple times. These are written as:
Level n, median score (peak score)
Level 01–05
- Level 1, 128
Easy. Connect straight tracks, delay the first signal, and fill in the rest with signals.

- Level 2, 120
The bottom train needs to be delayed a lot to synchronize with the middle train.

- Level 3, 167
Practically the same as level 1 but with a bridge crossing the two tracks and adjustment to first signal delay.

- Level 4, 47
ST10 locomotive has piss poor corner performance. Anyway, note the acceleration tracks.

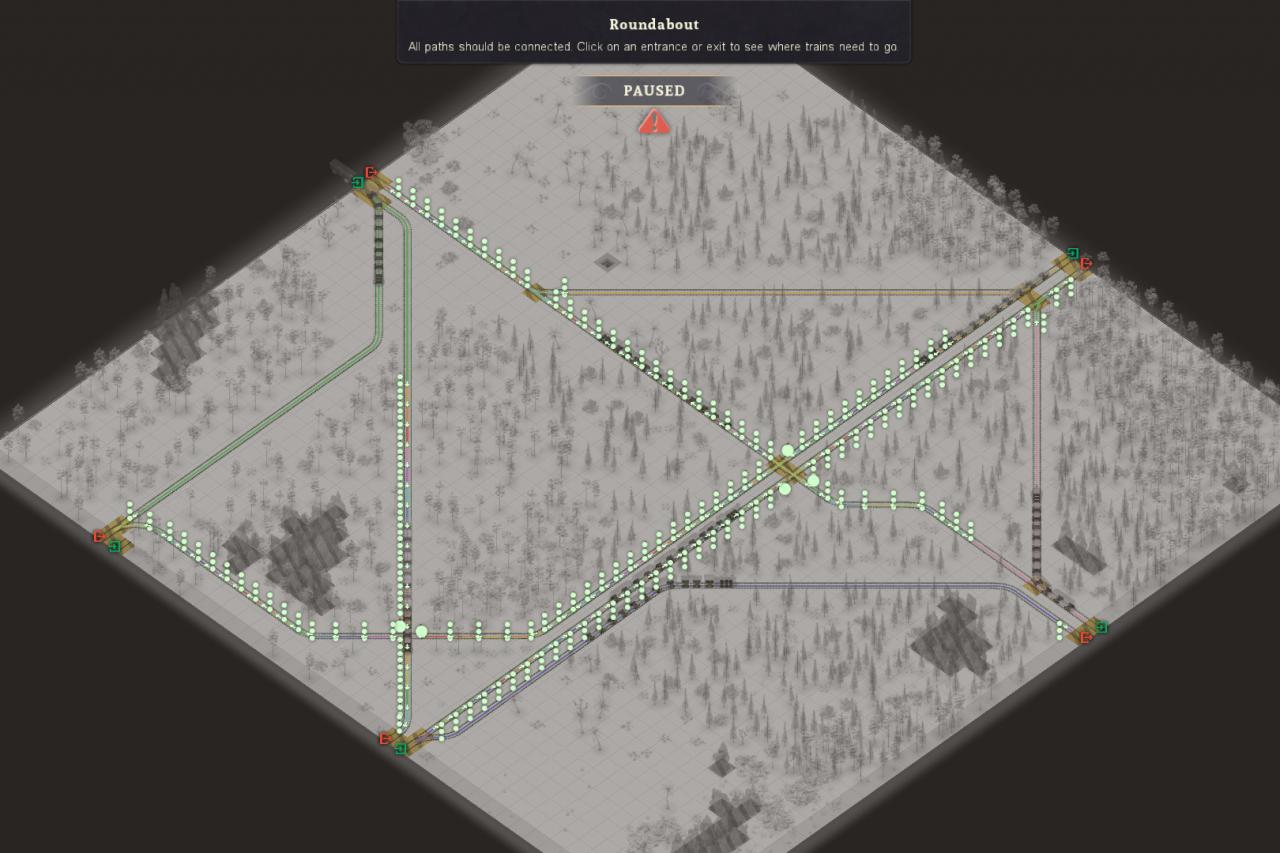
- Level 5 no-cheat, 175
Terrible map. Actual roundabouts are not a realistic feasibility. This isn’t Factorio, which has relatively fast accelerating and short trains. Major first signal delay to cut down congestion. (When I straighten the NW-S curve the score drops to 166 for some reason.)

- Level 5 cheat, 204
You can cheat by completely ignoring the western input. Note it doesn’t let you send 50% trains so don’t bother connecting the shortest route.
Level 06–10
- Level 6, 275 (276)
Fun piping puzzle. Since bridge ramps have 3 tiles between signals, you want as few bridges as possible, and one long bridge is better than two small bridges for the same track. First signal delay: target train spawn-in speed at 30 km/h, preferring 29 over 31 km/h since you don’t want trains to tap the brakes (corner and ramp speed is 30 km/h).

- Level 7, 128
Introducing the steel bridge and ST30 locomotive. First signal delay: let the middle train enter at 43 km/h instead of 50 km/h since the bridges cause a 1-tile signal gap. Ramp speed is 40 km/h but it turns out the 30 km/h corner speed is still a bottleneck so the side trains should enter at 30 km/h.

- Level 8, 106
Dunno, some signaling trial and error and this is what I came up with.
- Level 9, 179 (180)
Finally something that looks normal. Also incredibly strange that the tracks are simply an unmodified steel bridged trumpet interchange. I would split the right turns earlier but no matter what it just doesn’t seem to work as well.

- Level 10, 215 (216)
This map is unbalanced since the NE exit asks for 167% while the other exits ask for 117%. I start with the main NE/SW inputs, then severely restrict the other inputs by barely giving them a signal before each merge. Scores 179 when connecting only NE/SW. Some odd “RNG” involved since if I shorten the stone bridge by one tile or no-gap the NE signals the score drops a few points.
Level 11–15
- Level 11, 270 (271)
I optimized the SW/SE inputs to spawn as many trains as possible then held back NE input so it doesn’t disrupt the southern exit. I wonder if NE/SW can be balanced to squeeze in a few more points, but I will settle for this.

- Level 12, 74
No first signal delay since this can’t handle any more throughput.
- Level 13, 300
Turbine junction. Even number of inputs and exits, nearly symmetrical layout. Delete enough signals so trains flow without stopping.

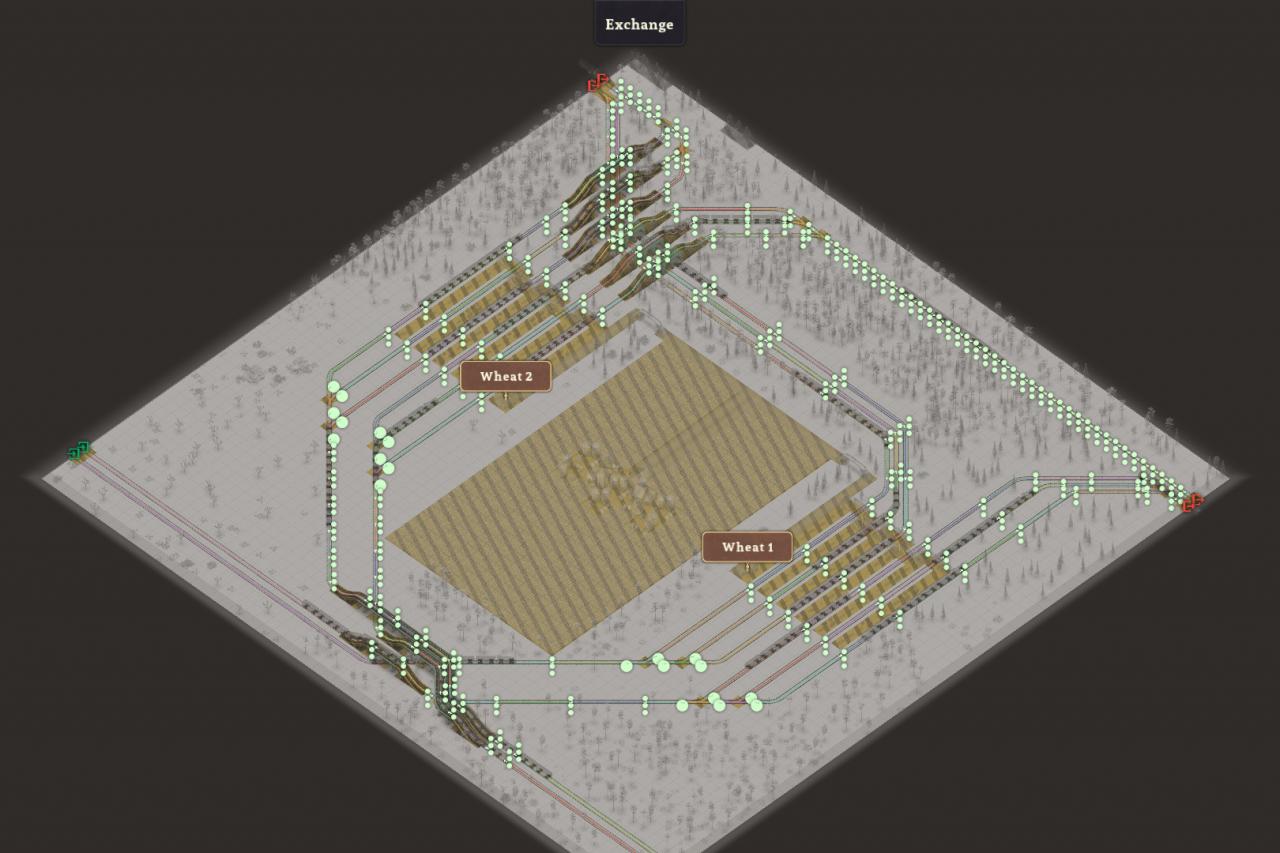
- Level 14, 197 (198)
Scored 201 (202, 204 once) by deleting SW input and adjusting signals. This time there are four balanced inputs and exits plus an extra input.

- Level 15, 83 (84)
Basically three terminus setups side by side.
Level 16–20
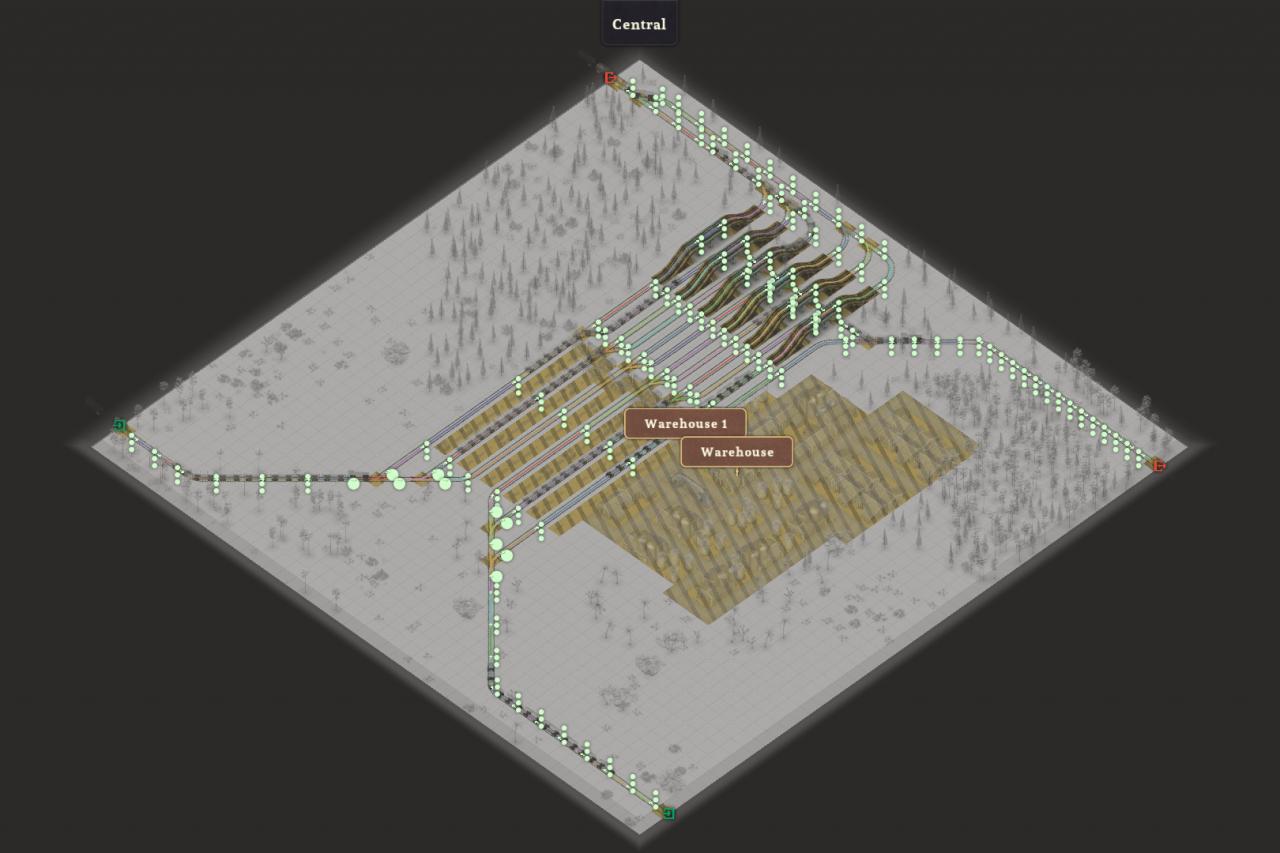
- Level 16, 674
Steel bridge fun. First signal delay doesn’t seem to help at all, I’m guessing because of high power to weight ratio.
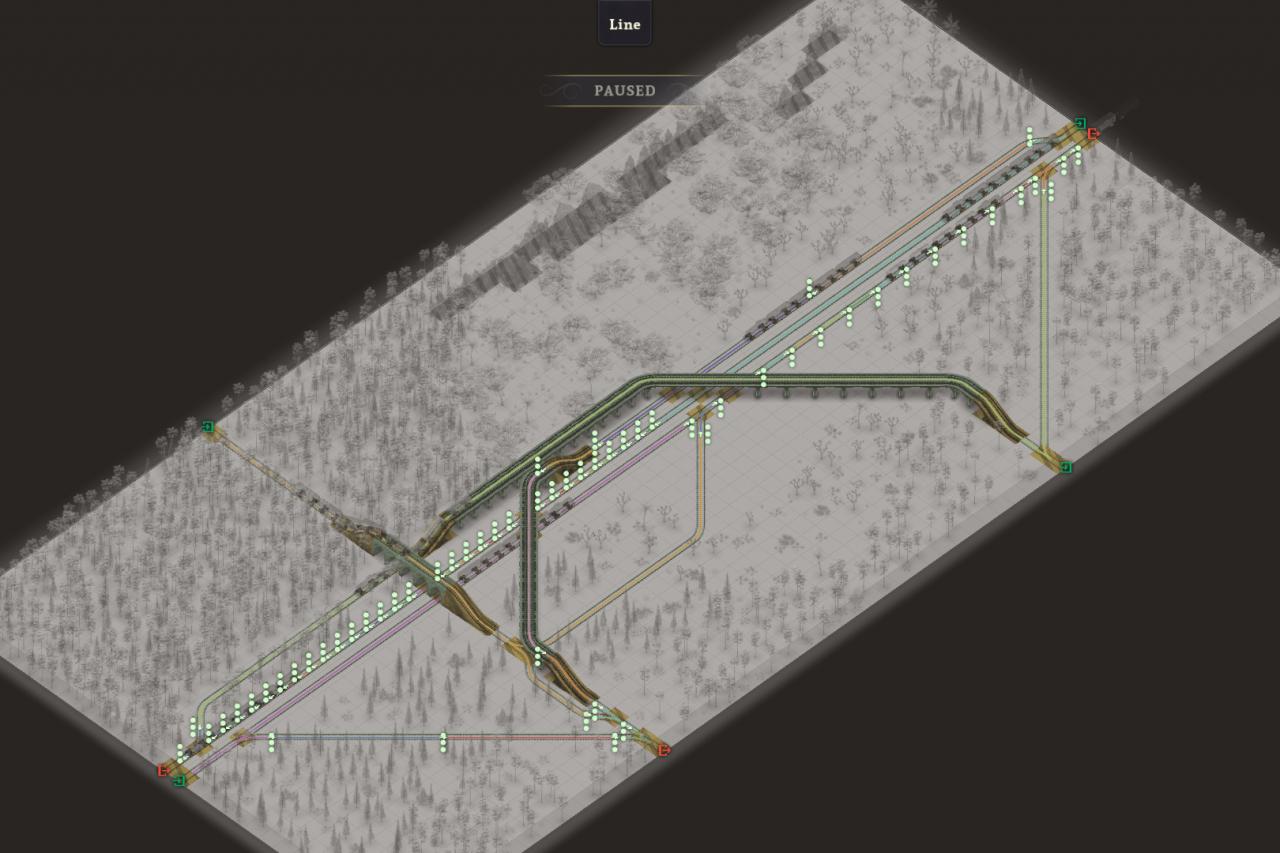
- Level 17 easy, 191 (194)
It’s simply two cloverleafs and two trumpets. Weaving the inner right turns helps slightly.
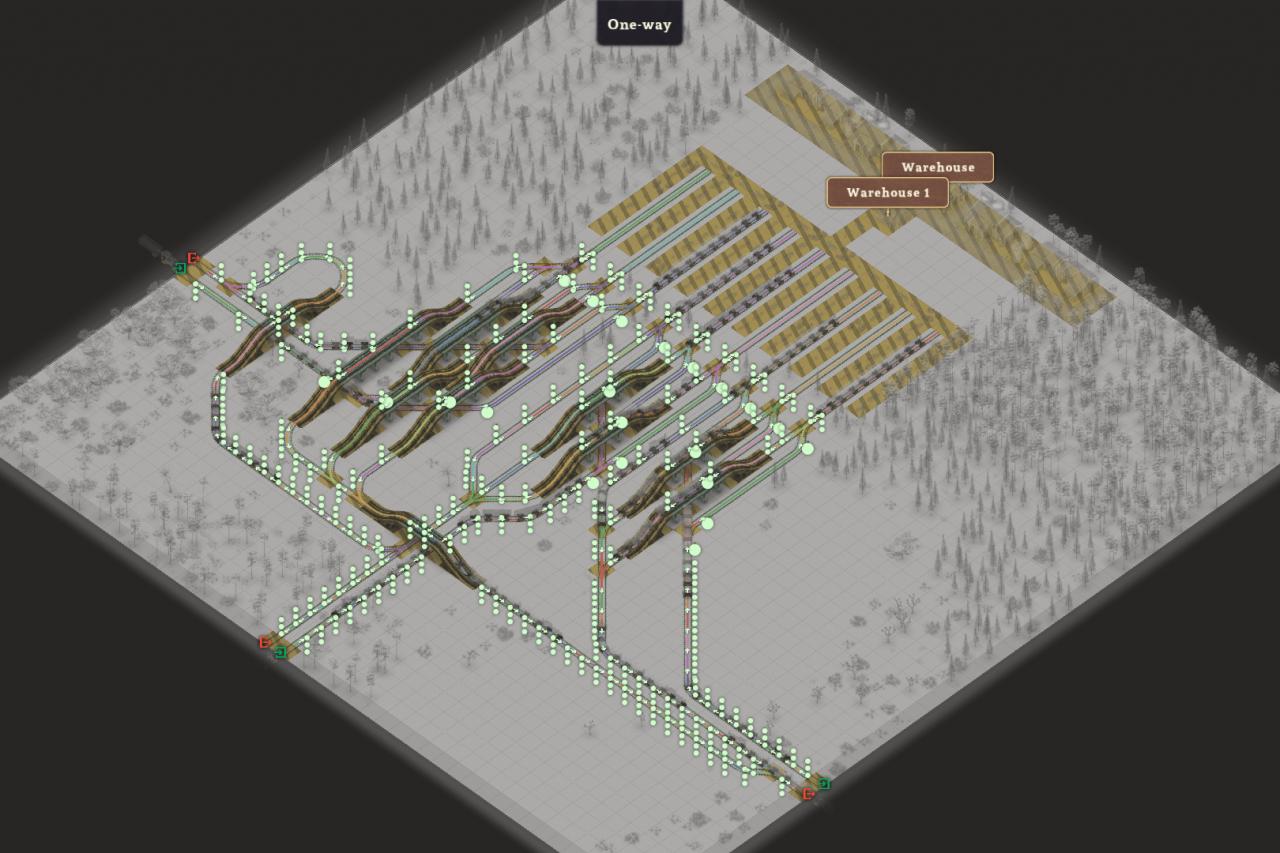
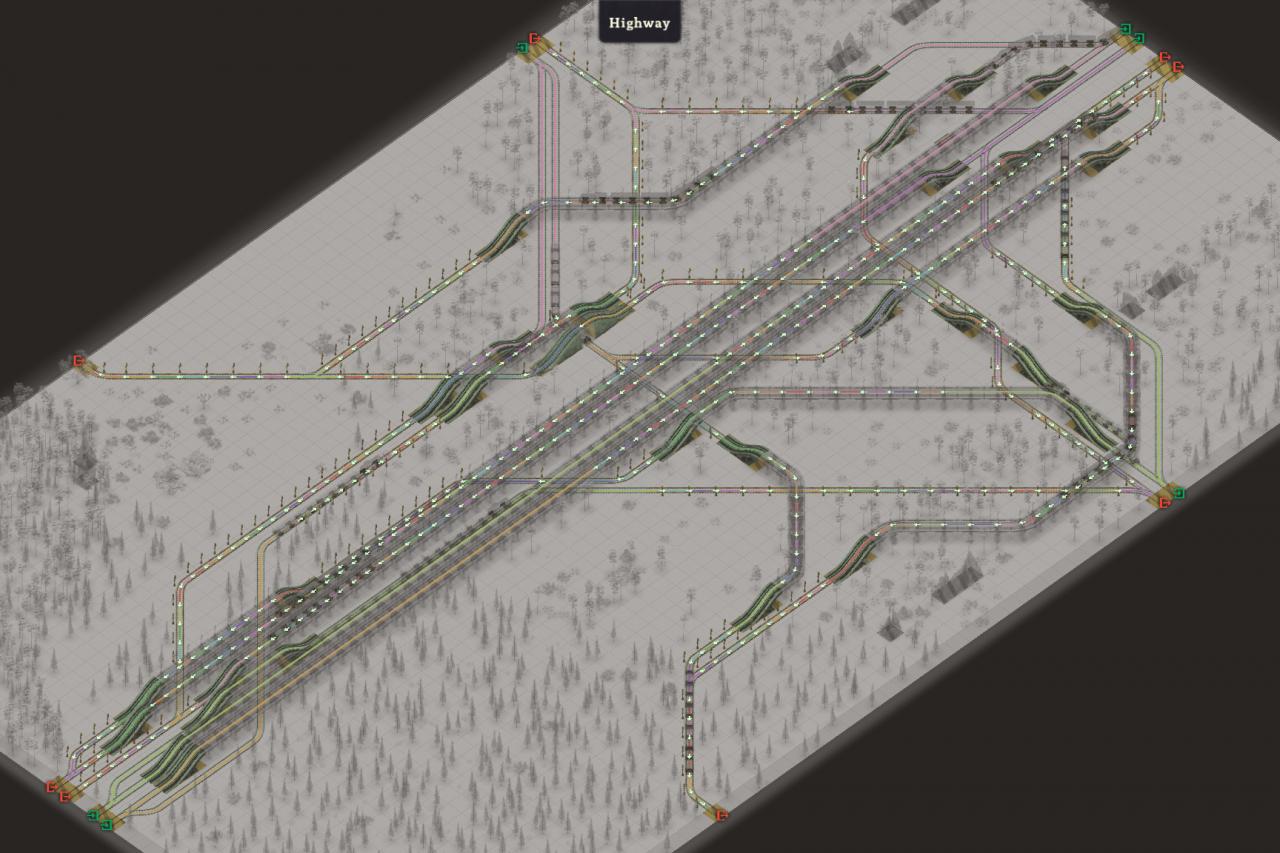
- Level 17 WTF, 201-211
Well, I had an idea to use this 4-lane 3-way braided junction[pub.microbin.eu] and treat this map as one giant 3-way since there’s 6 pairs of inputs/exits. The junction itself does not swap inner and outer lanes so I had to attach a bunch of spaghetti so all inputs can reach all exits. There’s still some congestion so this isn’t the best possible solution. I will have to check out Plagiatus’s solution[media.discordapp.net] from the comments in the other guide some time later (nice cable management, bro).
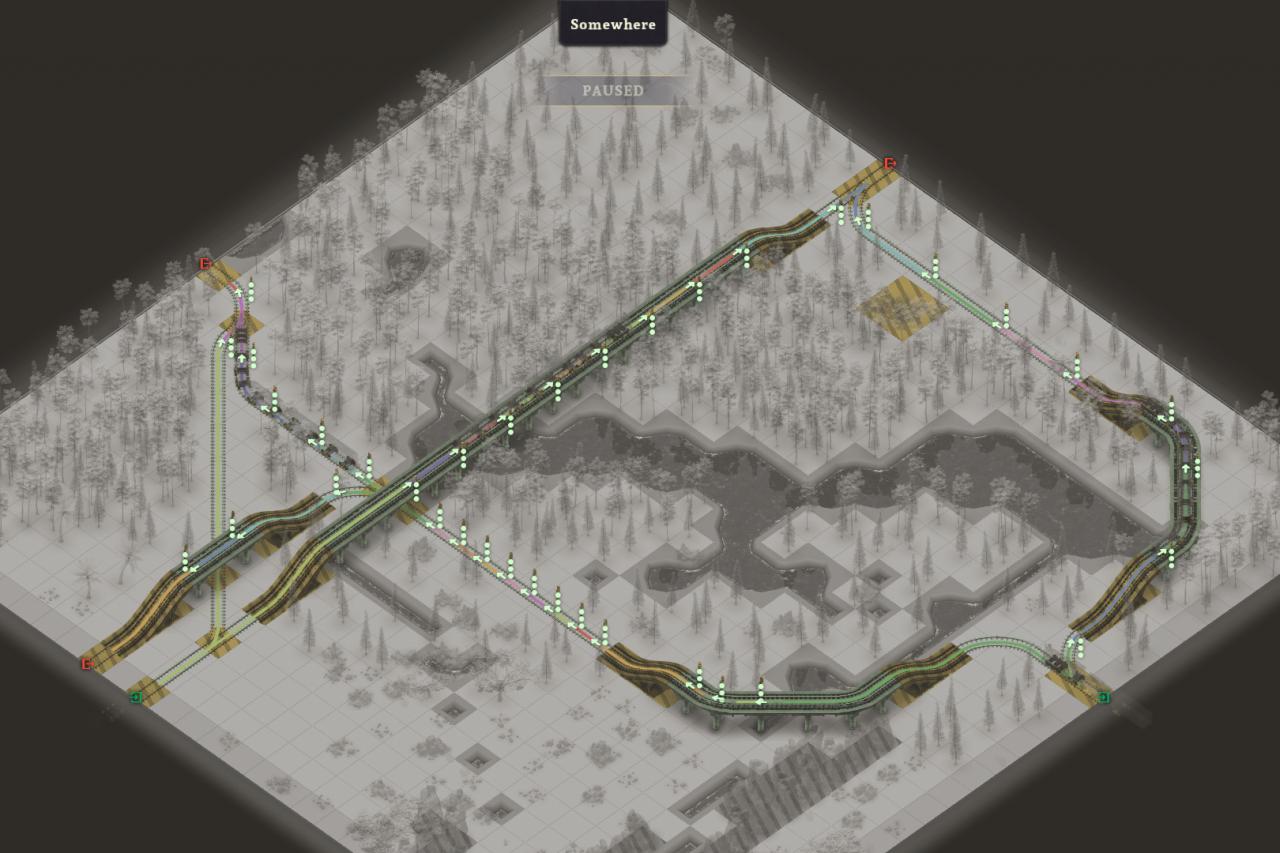
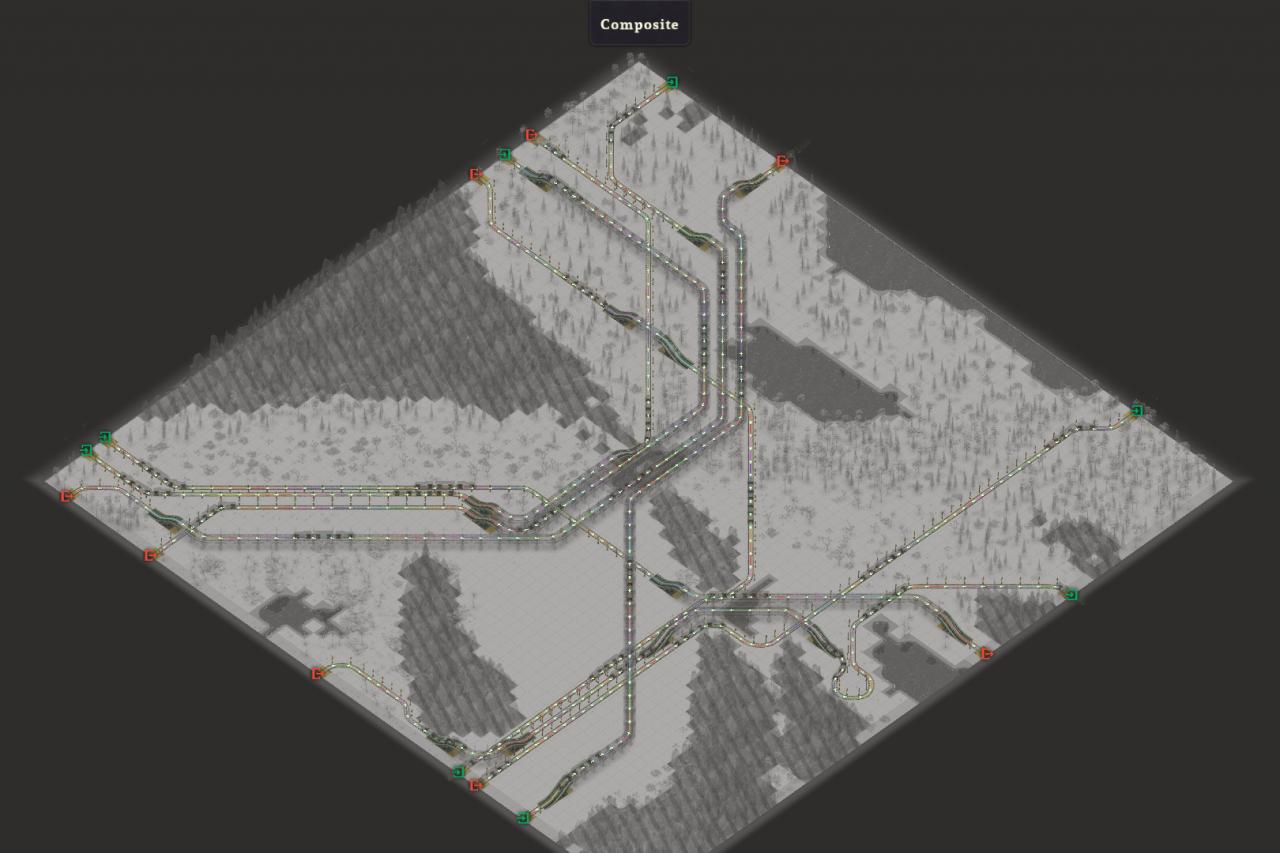
- Level 18, 178 (179)
Good use of acceleration tracks.
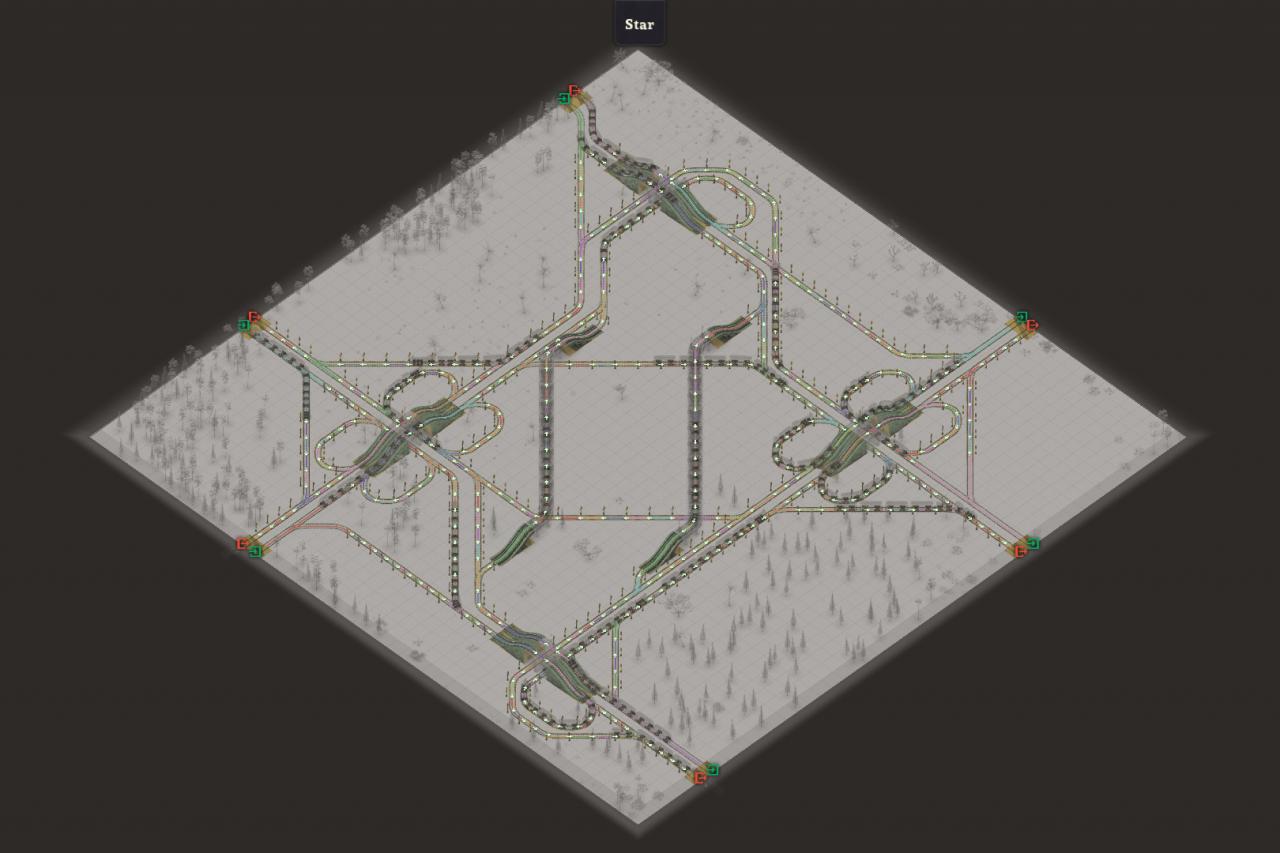
- Level 19, 496
Almost done, I’m getting a little tired…
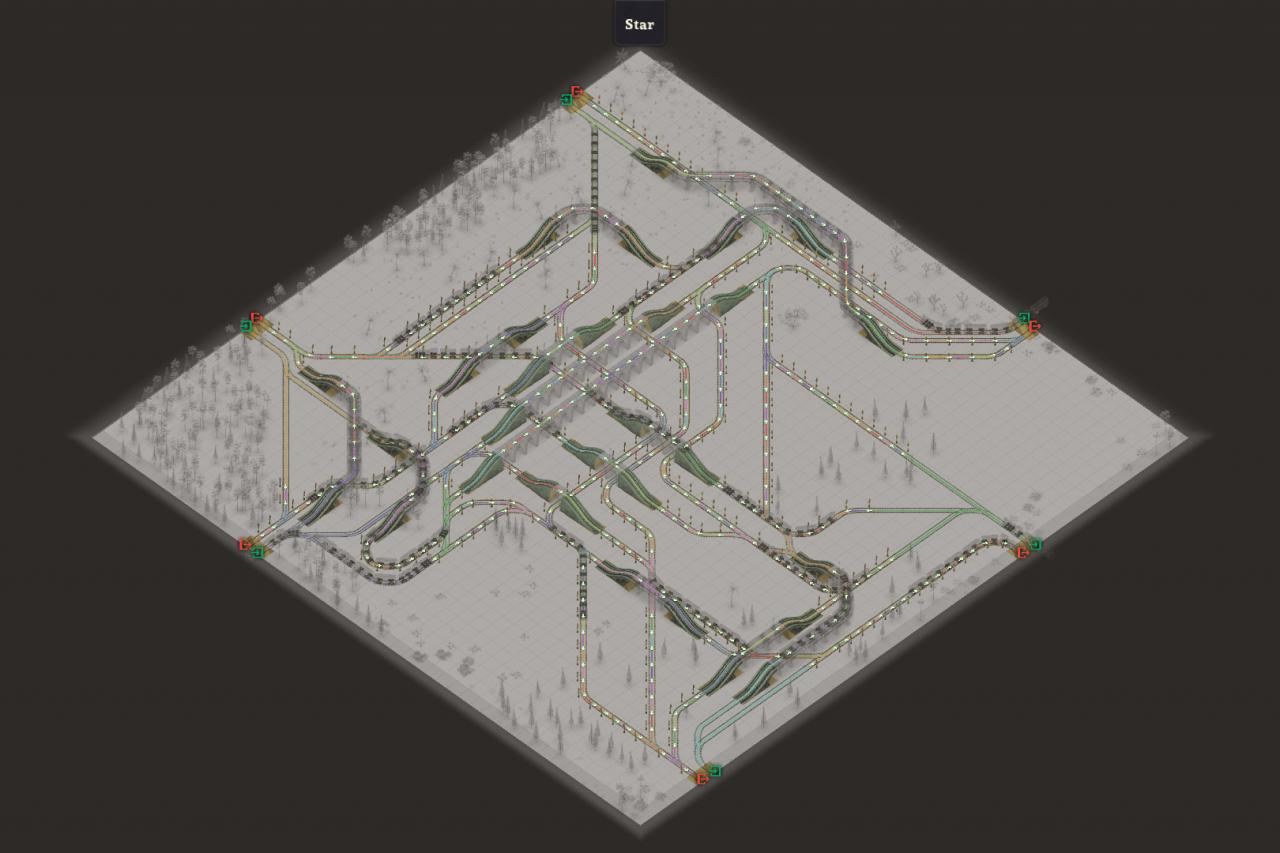
- Level 20, random 494-504 (524 once)
That’s a big junction. Blueprint.[pub.microbin.eu] Score is 442 without messing with signals.
