This is a guide to making flying cars and tanks using the various technologies available, including the so called HoverBug. For me, most of the time I want to be on the ground in tank form, but it is extremely convenient to take to the air when necessary and back down quickly and easily without bothering with hovercraft or rotors or airplane.
Introduction
This guide discusses the many ways to make a Car/Tank that is primarily intended to be on the ground, but also has flight capability. There are actually quite a few ways to do this, but the best involves the usage of the HoverBug.
This is a game defect whereby a hoverpad that faces wheels will assume that point to be the ground which if used correctly allows you to gain unlimited height upon command. It is extremely unlikely to be fixed, simply because the ability that it grants cannot be achieved in any other way currently. The devs have basically said as much so expect it to stay.
This is not the only usable technique however as we will discover, and you can definitely combine multiple techniques for an effective tech.
Impulse Jumper
This oddball involves the usage of the Sonic Lance and its significant recoil to kick the car up into the sky. The main advantage is simplicity. Add sonic lance and gyros and you are good to go. Plus, it is funny. The main disadvantage is it is a Weapon and thus you have to use it every time you need to shoot. Plus you are far along in the campaign by then.
Do not forget to add some kind of thrusters/boosters for steering and ability to move since the sonic lances will not provide any. Having a way to slow your fall is also very helpful so that you could stay airborne without landing if desired. I added some dinky wings which actually did help and keep me off the ground.
Anti Grav Jumpers
The major issue here is that you need a Block Controller Module to turn the anti grav on and off to control flight. Plus you have no built in ability to manuever.Be aware that you need power for the anti-grav to work! Also having some mechanism to slow your fall (i.e. wings or boosters on the bottom, etc) is really helpful to avoid damage upon impact.
Hoverpads with Power Control
This technique uses standard hoverpads and lots of them. It then uses a hoverpad power controller and then you turn the hover power way down or even off. By retaining a bit of lift, you can improve your speed due to less effective weight, but don’t overdo it or you use traction and turning ability.
The idea here is that when you hit Z, this OVERRIDES the hover power controller and you will gain full hover power right away, which should result in your tank jumping into the air. You can then fly around and since hoverpads do have some built-in steering, you will be off to a good start.
Be sure to add some gyros to stay level and try to spread out your hoverpads to cover the entire tank weight as well as possible as this minimizes the need for gyros. You will likely want some thrusters and turners as well. I skipped gyros in this case due to the well balanced nature of this simplistic design.
You can use anti-grav or ballasts as well in order to lighten your tank so that your jumps can gain enough height to be useful.
Rotor-Tank
The idea behind this style of flying tank is to add Rotors of whatever type, generally in the main body of the tank. You can use Z,C to adjust the lift of the tank allowing fine control over altitude gain and effective ground weight of the vehicle.
Linear accelerators and other blocks that have a +/- control are included as “rotors”.
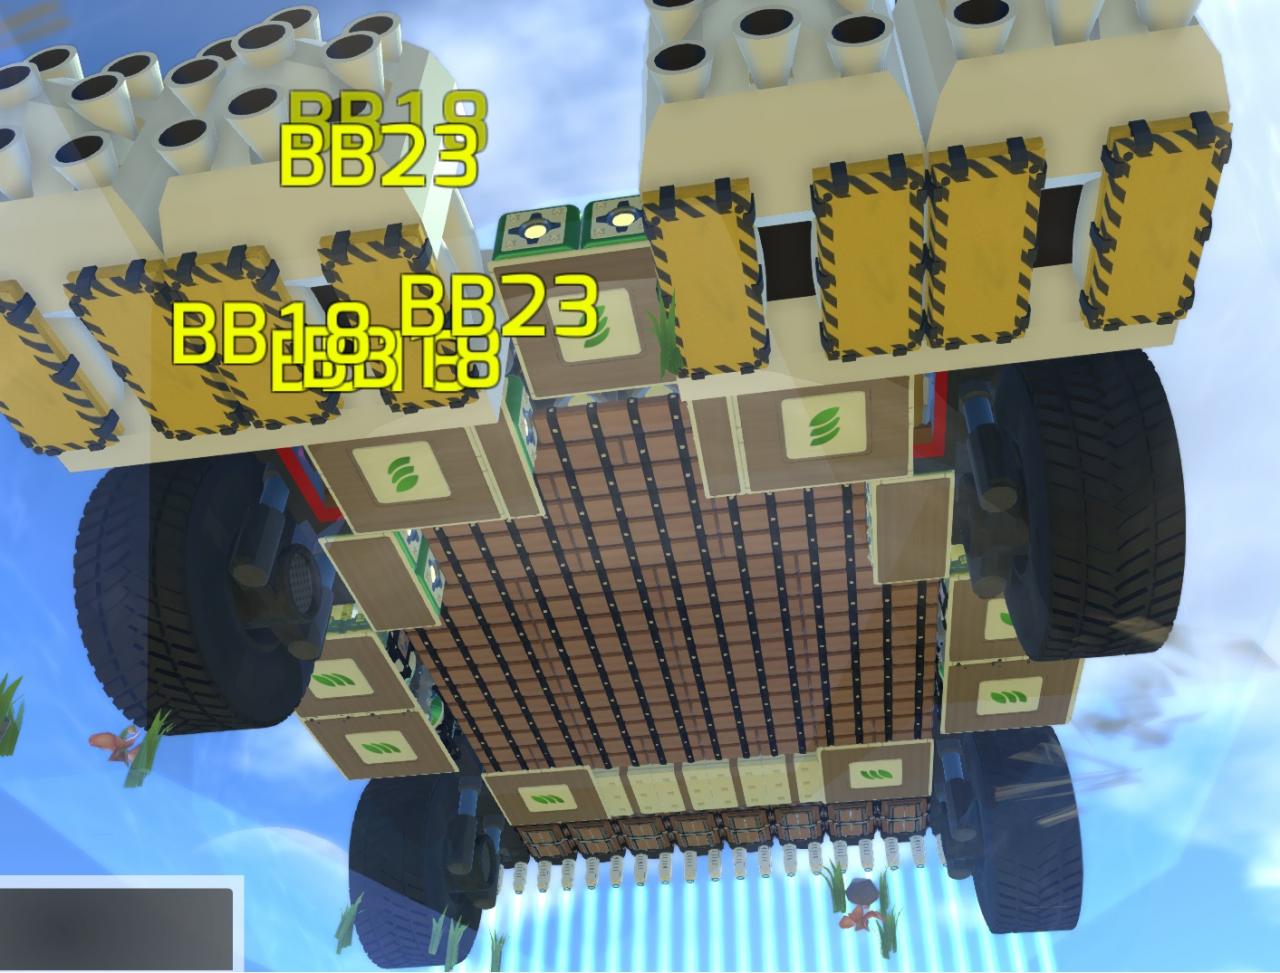
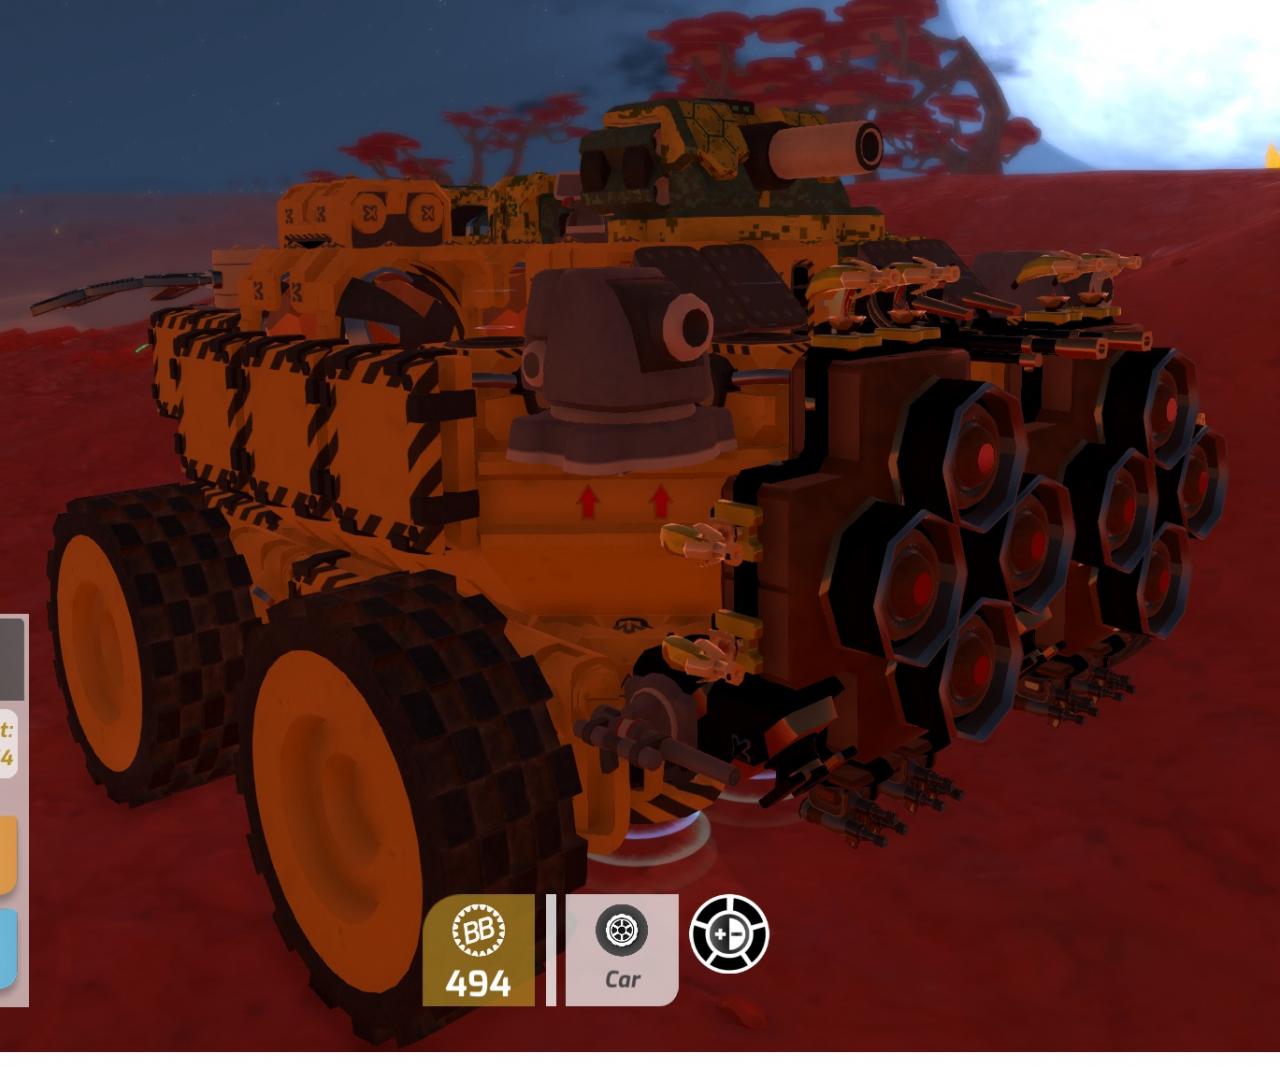
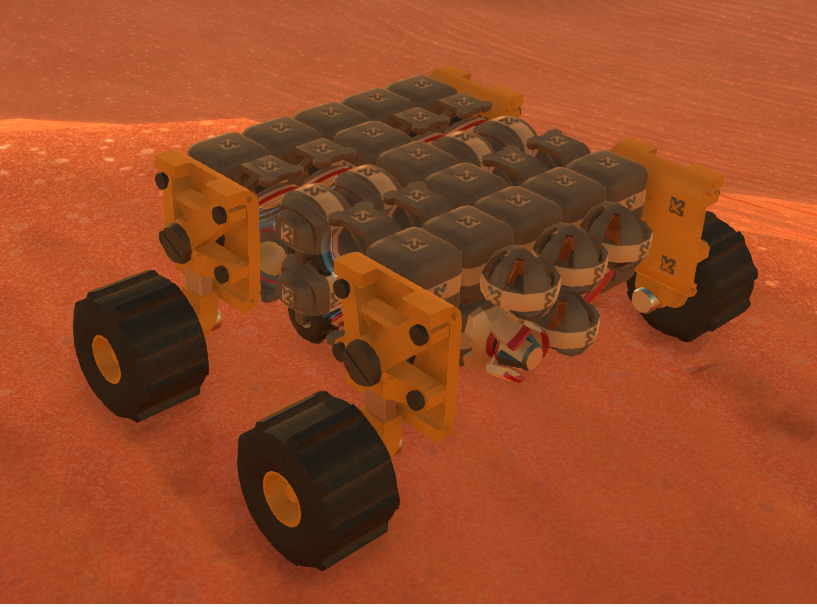
In my example below (which uses modded blocks…I have a guide if you are curious!), I add a lot of hoverpads to offset the significant weight of the tank. It kind of floats by itself actually.
I have the giant new GeoCorp Rotor (see the two upward arrows) integrated into my tank and set to a negative value which keeps the tank firmly on the ground. By adjusting the rotor I can take off into the sky as needed. I have various thrusters and such integrated into the tank.
A big disadvantage of this tank is there is no bottom except for hoverpads, so it is vulnerable to fire from below. To make a battle worthy tank it is important to ensure your shields cover impacts from underneath and you have some explosion resistance.
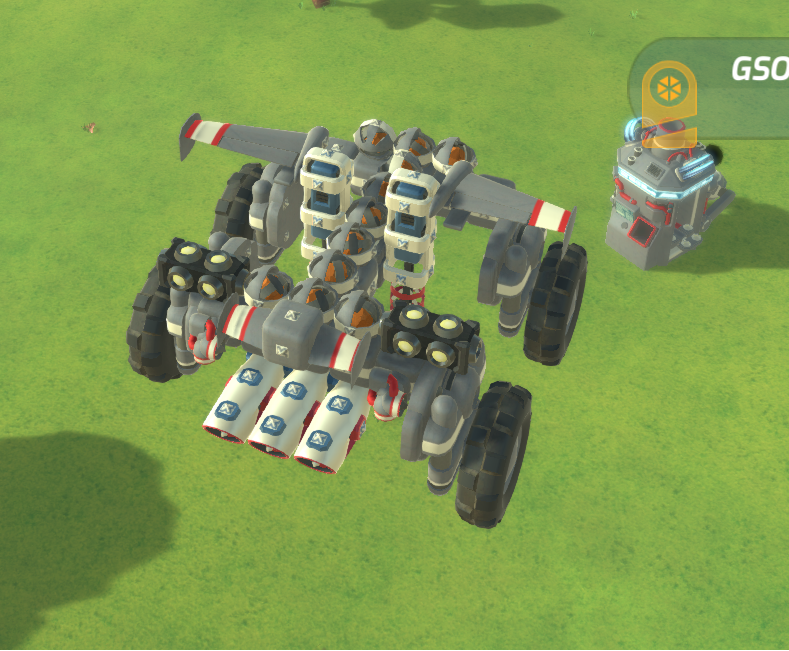
Being early in campaign, this one has no hoverblock controller and uses the rotors to effectively provide similar ability. You can also stack more rotors and the new GeoCorp ones are pretty powerful and have decent anchor points. So they work well for an integrated design. Plus you get them really early on in the campaign.
Here is another early rotor-tank design. I added some bottom mounted guns but still have the weakness of bottom-facing hoverpads exposed.
HoverBug Car Step by Step
As previously noted the hoverbug is likely here to stay and tricks a hoverpad into thinking the ground level is right underneath the hoverpad where the wheels are, instead of its actual level. This means the hoverpad will not “cap out” at a certain altitude.
This also gives the ability for hoverpads to be used as linear engines, some of which can be quite effective.
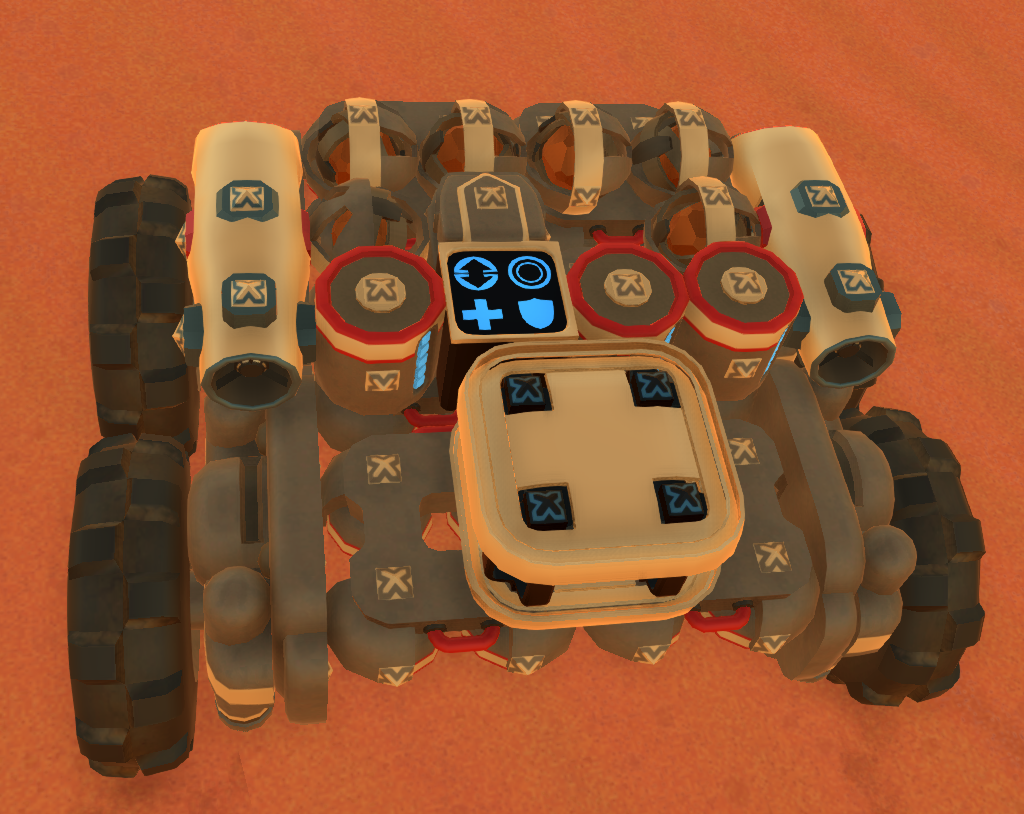
In our first example, we use the first available hoverpad which is the small GSO angled one, grade 3. It also happens to be one of the best!
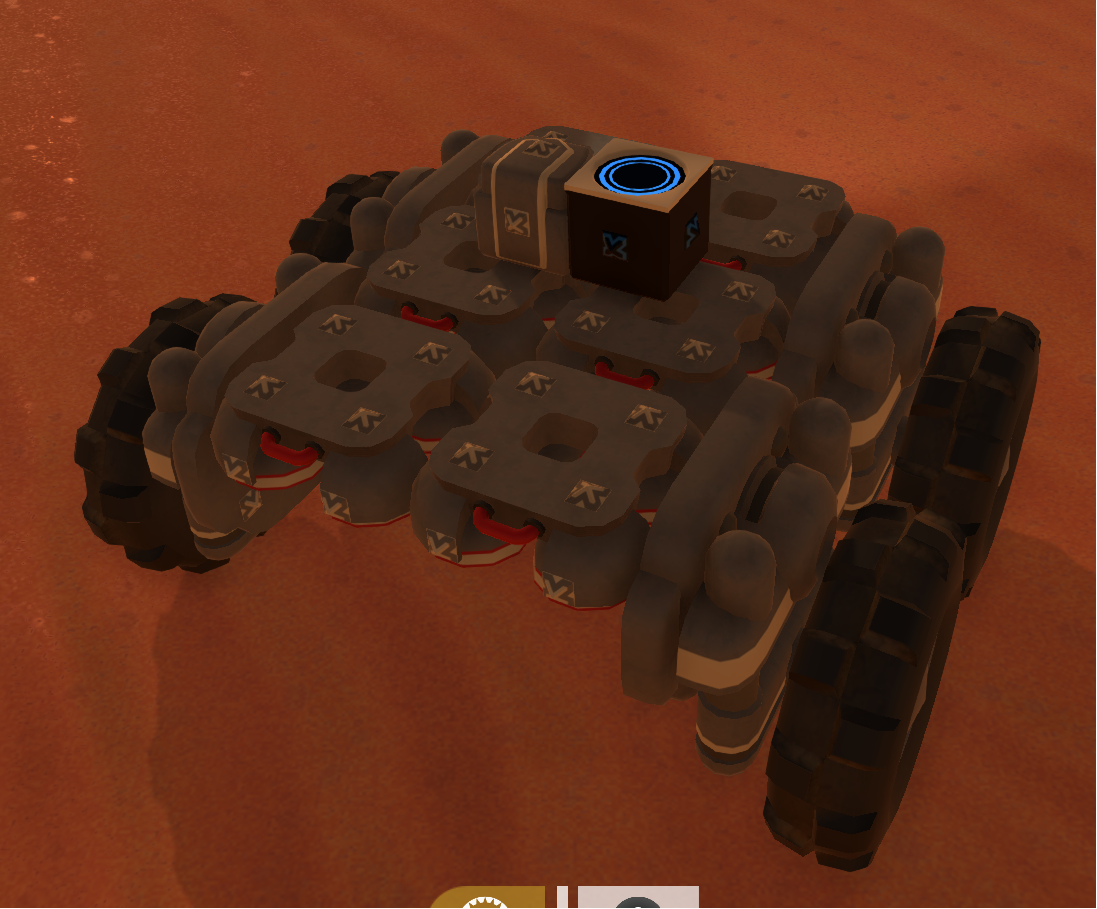
Anyway, here is what you do. Add terrapads as shown in the step1 car below. Notice the ones on the bottom are facing upwards and the top ones are facing downward. They basically are going to counteract each other. Notice we leave a space for the wheels.
Make sure you place all 8 hoverpads! This first picture is just so you can see the orientation better of bottom and top. Don’t copy the pic!
Try to stay in Build Mode so your vehicle doesn’t run off or do anything weird. Having a turret nearby is helpful too in campaign mode since you really don’t want to be interrupted.
Next, add armored wheels all facing the same direction inbetween the hoverpads. Not sure direction does matter but I have seen some instabilities when I have them random directions, so just keep them consistent.

Finish it off by ensuring all the hoverpads are oriented correctly. Then add some gyros. Then add some WEIGHT. By itself it is too light and will likely go berserk. You can also tame it with a hoverpad power controller but its unlikely you have one… and that can mess up performance. Just add guns and wheels.
So, not only does this design have the jump capability, but the same hoverpads also provide a significant Push factor horizontally as well. The pads move around fairly well and vector so you are quite manueverable as well.
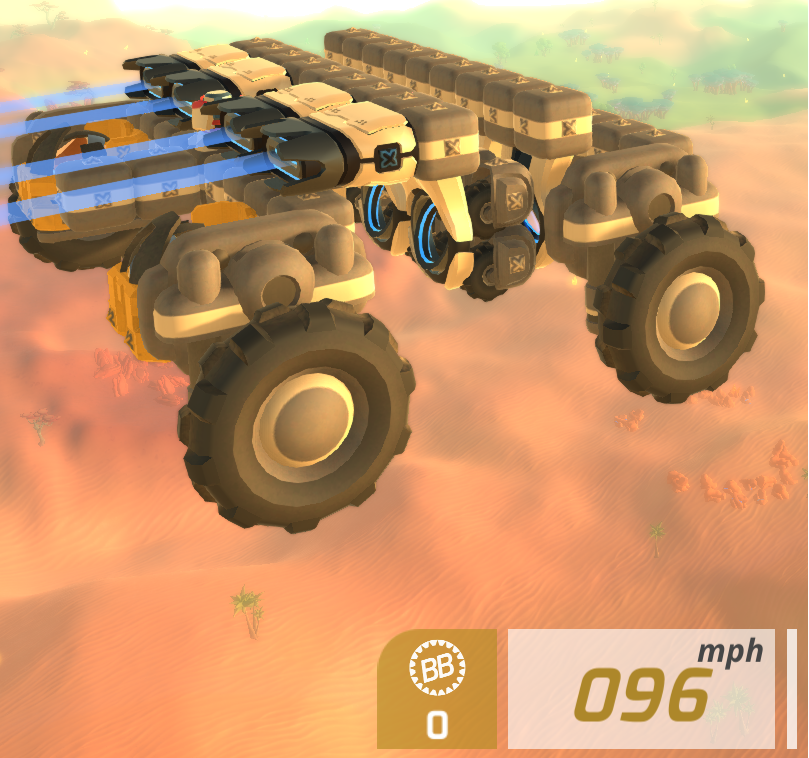
This is the finished minimum project and it hits 119 mph(!) in air OR land and works extremely well with minimal parts, pretty early game.
In an actual design you would likely want to put some batteries in the back instead of normal blocks. Mine as well use helpful blocks instead of regular ones when possible, since all you need is the 1 attachment point to add the hoverpads to.
You can check out my Campaign Money Making guide on how to get the cash for the parts you need as well as how to build them yourself with a fabricator if you don’t happen to find them at various BB locations.
Hoverbug Design Considerations
There are several things to be cautious of when designing.
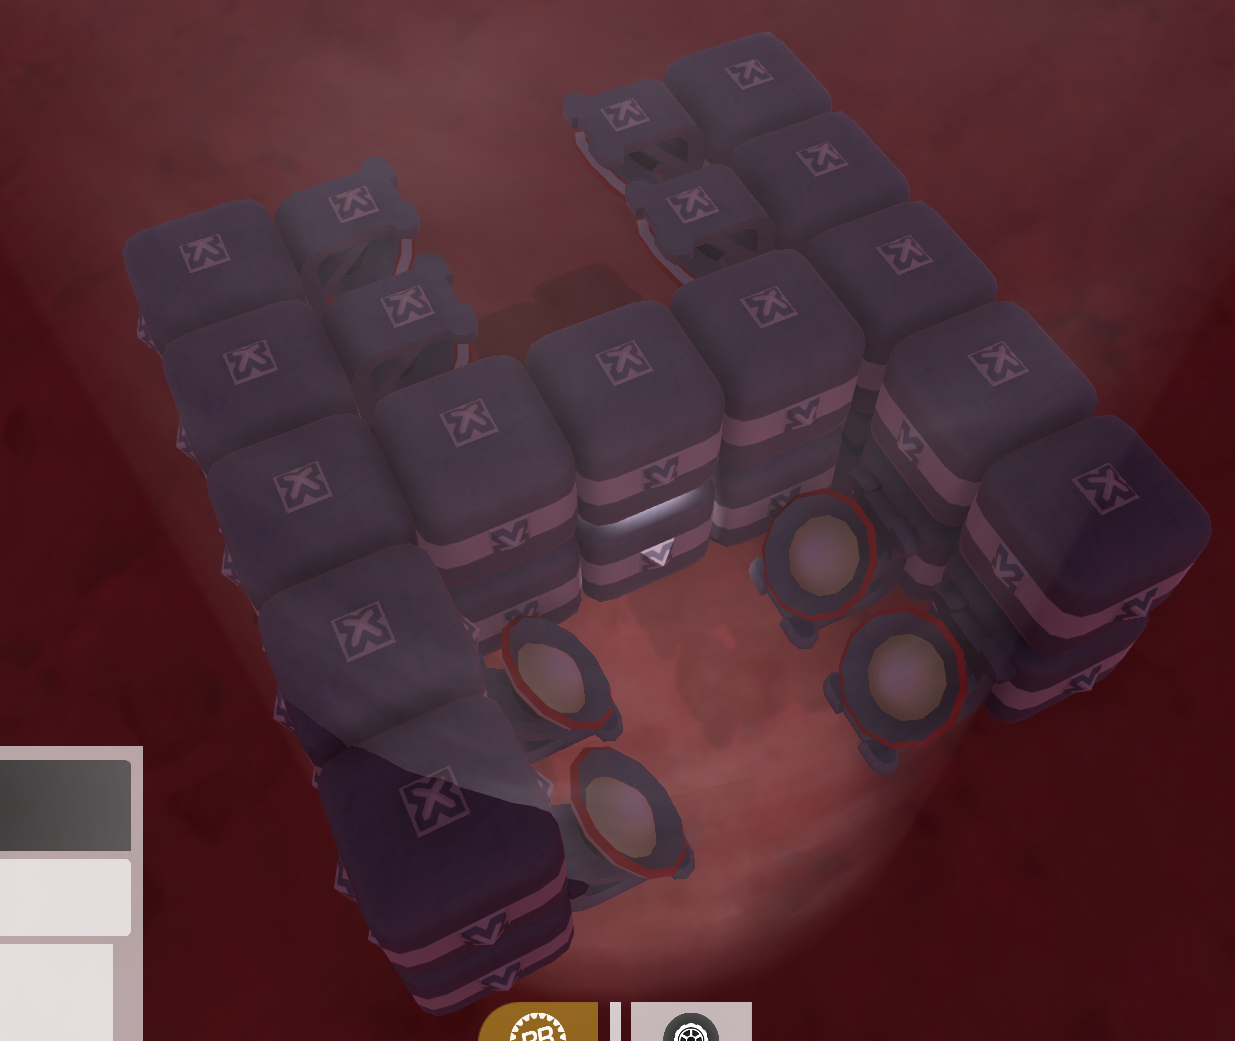
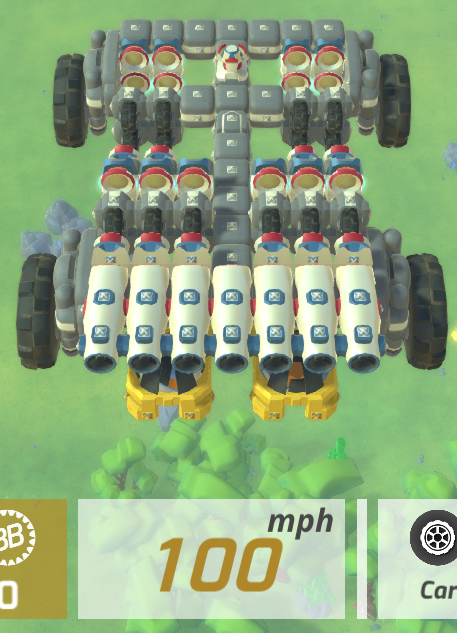
First of all, More is not always Better. Hoverpads have a certain maximum output and will only achieve a certain amount of acceleration and maximum velocity no matter how many you have.
This is an example of using too many venture pads. it literally goes slower than the same version with only 8 total pads. The 12 in the back just add weight and expense for no reason.
However, underdesigning can be a problem too. Some parts are extremely heavy and can turn your awesome jump tank into a “cant quite get off the ground” tank. Which is no good.
When first designing, leave yourself a bit of extra room to add more pads/wheels if needed.
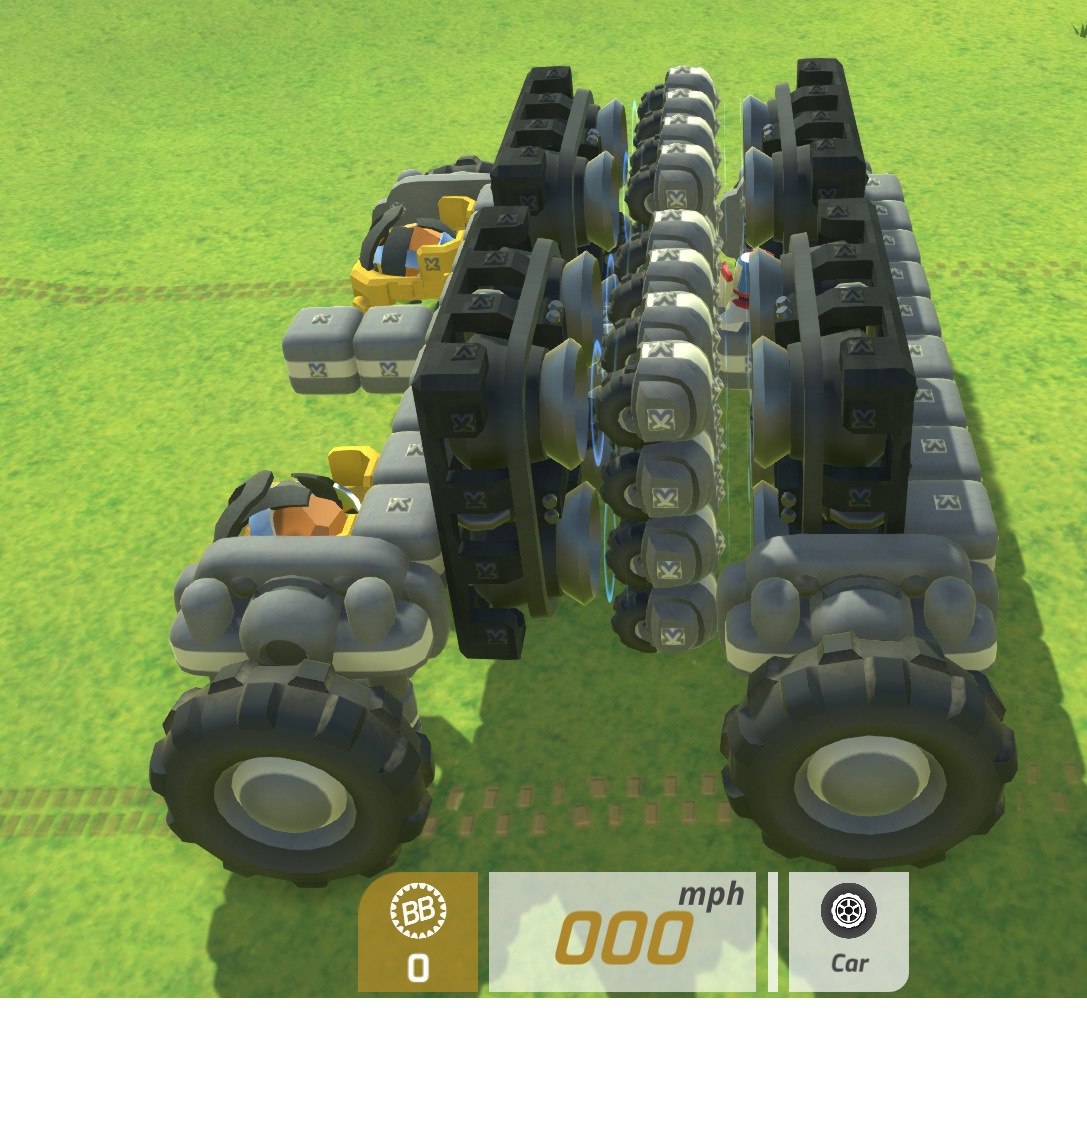
This is a complete failure right here. It uses the pads, but with no wheels inbetween. In theory they should cancel each other out right? Yeah…not so much. This design goes berserk as soon as you exit Build mode.
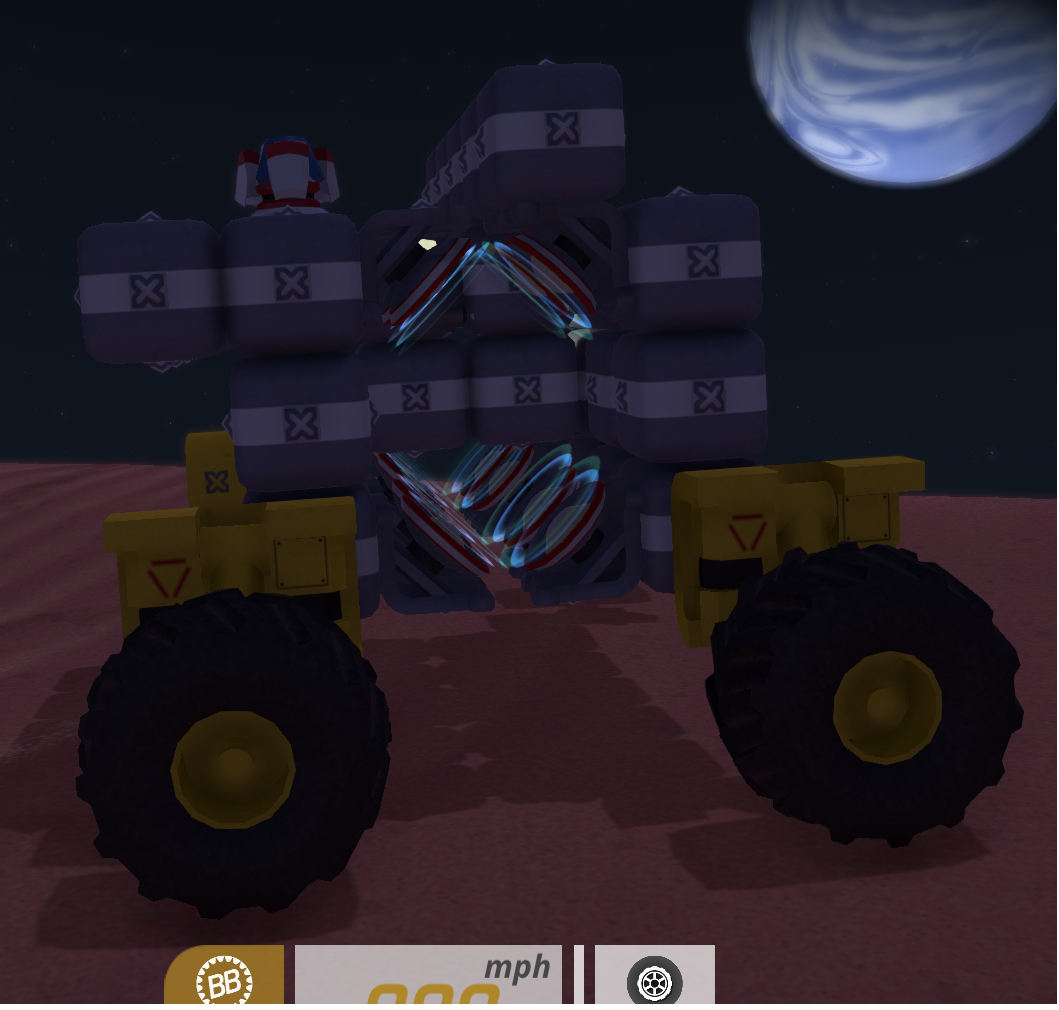
One would think the awesome Hawkeye fortress pads would be great right? Well, they aren’t. Not only is this fugly but it goes a whopping 43 mph in the air with bad manueverability.
There IS one important thing to note however. THis design looks like it ONLY works horizontally right? But weirdly enough that is not true. It actually JUMPs vertically quite a bit better than it goes horizontally.
This just shows you can use just about any ole hoverpad to do the trick. Just make sure they are facing each other with wheels along the ENTIRE SURFACE.
Be aware that ANY wheels inbetween will work. Even Tracks. That said, I like the armored GSO wheels due to their 5 attachment points and they are very modular and easy to add/subtract.
But it is important to have wheel blocks inbetween ALL parts of the opposing hoverpads, not just one part of them.
Hoverbug by Corp
Disregarding unmodded parts, here is my experience:
The best pad by FAR is the GSO 3 angled pad we used before. They are pretty easy to stack and you only need 3 blocks tall and 3 blocks deep to make a set of them, with the outside blocks just needing anchor points so it could be a battery or gyro or whatever. They stack pretty well and have the best horizontal speed capability.
GSO 5 pads are mediocre. Not worth bothering with.
Geocorp pads have a ton of lifting capability but are surprisingly bad with the hoverbug. It took 4 pads to lift a very minimal tech off the ground at all, with a 43 mph sky limit. Ugh.
The hawkeye fortress pads are just awful…somehow. As far as the hoverbug goes. They are very good for hover power technique or just adding extra lift to a hoverbug design.
Better future pads work, but they are finicky. Small ones worked fine although mediocre. Large ones didn’t even work at all due to their weird construction.
Venture 2 block pads are decent, but 75mph is the top speed you get out of them regardless of stacking.
Combining approaches.
As stated before and demonstrated, many times the best way to go is a combined approach that includes hoverbug as well as normal large hoverpad usage and possibly a power regulator or anti-grav or ballasts.
I do not recommend using rotors or other linear lift devices that have a +/- scale that you adjust with Z/C with the hoverbug since your results will be hard to control. I generally prefer just holding Z when I want to jump, but if you plan on doing more long range travel, you might prefer just using Z to adjust to a good height and then manuever to your destination that way.
Combat Considerations
First and foremost you need to ensure you will have enough power to get where you are going! A hovertank will tend to be much more vulnerable especially when flying than a regular ground tank. As such, ensure your shields extend through to the bottom of your tank as well! And ensure there is enough extra clearance there to stop explosive projectiles. You definitely do not want to eat a missile or cannon shot in your underbelly when your shield just barely covers that area!
Therefore you need to be able to store a decent amount of power and have a plan to recharge. Recommended approaches are:
a) Have a Charger saved off that has multiple batteries, chargers, and solar panels that you can drop down and get energy during the day. Worthless at night of course. Plus wireless chargers are expensive and not easy to get.
b) Anchor your own tech by adding a temporary anchor block. Then you can just add or have some solar panels available to top yourself off.
c) You can also use generators to power your tech. By simply having a silo connected to a generator you can anchor and it will start eating the wood you stored in your silo. Make sure your silo can hold onto the wood…venture ones are good for this. Or use a collector instead although it will fill up with junk.
d) once advanced enough you can have mobile refineries, delivery cannons, mobile furnaces and you can gobble up chunks whereever you go to top off your power.
Consider some armor plating of some kind to cover your bottom. DO NOT PUT batteries on your bottom most layer!
You can usually add some blocks to the very front of your tech and run GeoCorp black Rails or Blackhawk rods all the way down the length of your vehicle.
Better yet, add one layer of blocks inbetween your hoverpads if you are using them so you have some attachment points on the bottom. By doing this you can use a lot more options to armor up.
Using big wheels is a good idea for hill climbing plus ability to armor your bottom and even have some undermounted weaponry. Chain guns and cannons are pretty low profile and work well underneath.
Try to avoid exposed missiles under there however. Cruise missiles work great with jumpcars since you can pop up and fire them. Put them in the middle of your tech with other stuff in front to hide them since they jump up several blocks before firing.
Conclusion
That’s about it! I will update as I think of more stuff to add. 🙂
It takes fairly little effort honestly to slap some GSO3 hoverpads in the right arrangement throughout your tank and the jump ability is extremely nice to have! Well worth giving this a try. Just the extra move speed from the linear accelerator effect of the hoverpads is worthwhile.
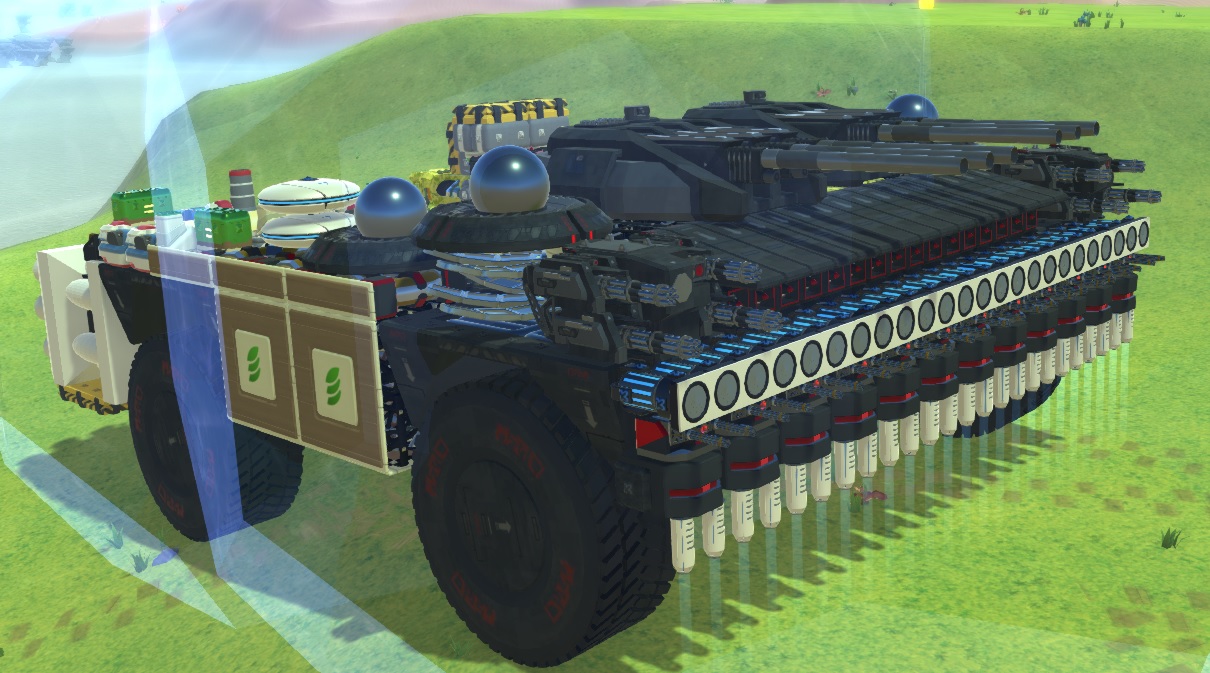
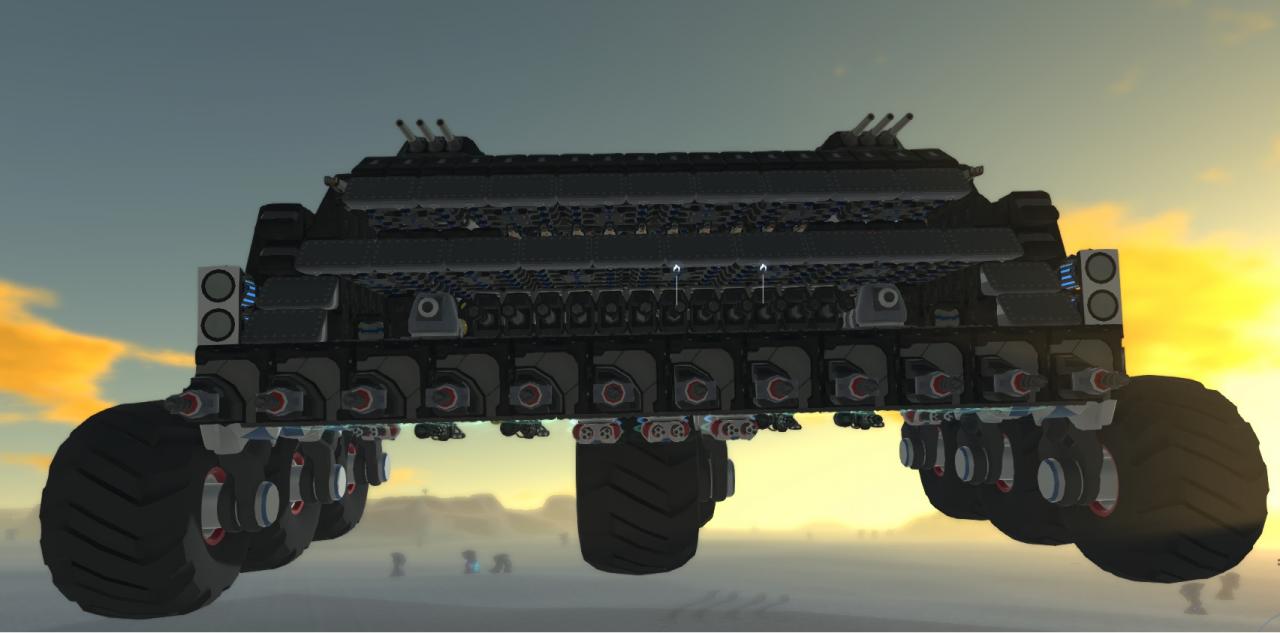
Here are a few shots of my most recent. (modded) I used some armored blocks up front with AP facing back then used a “fence” which is similar to a GeoCorp black railing to cover up all the hoverpads, putting armored plates where appropriate. Shields provide good coverage and repair.
No bottom-mounted guns, but I do have a whole row of canister missiles that are hard to see but embedded under the armor facing forward. They will seek downward. Plus several mortar style weapons that work at height.
It has a massive mobile factory/generator complex on each side for taking care of power.