This guide should help you walk through the many stages of completing the The Beaver Street House.
All of the codes created in this game are random and can therefor not be exchanged. This also includes the morse code the radio gives you.
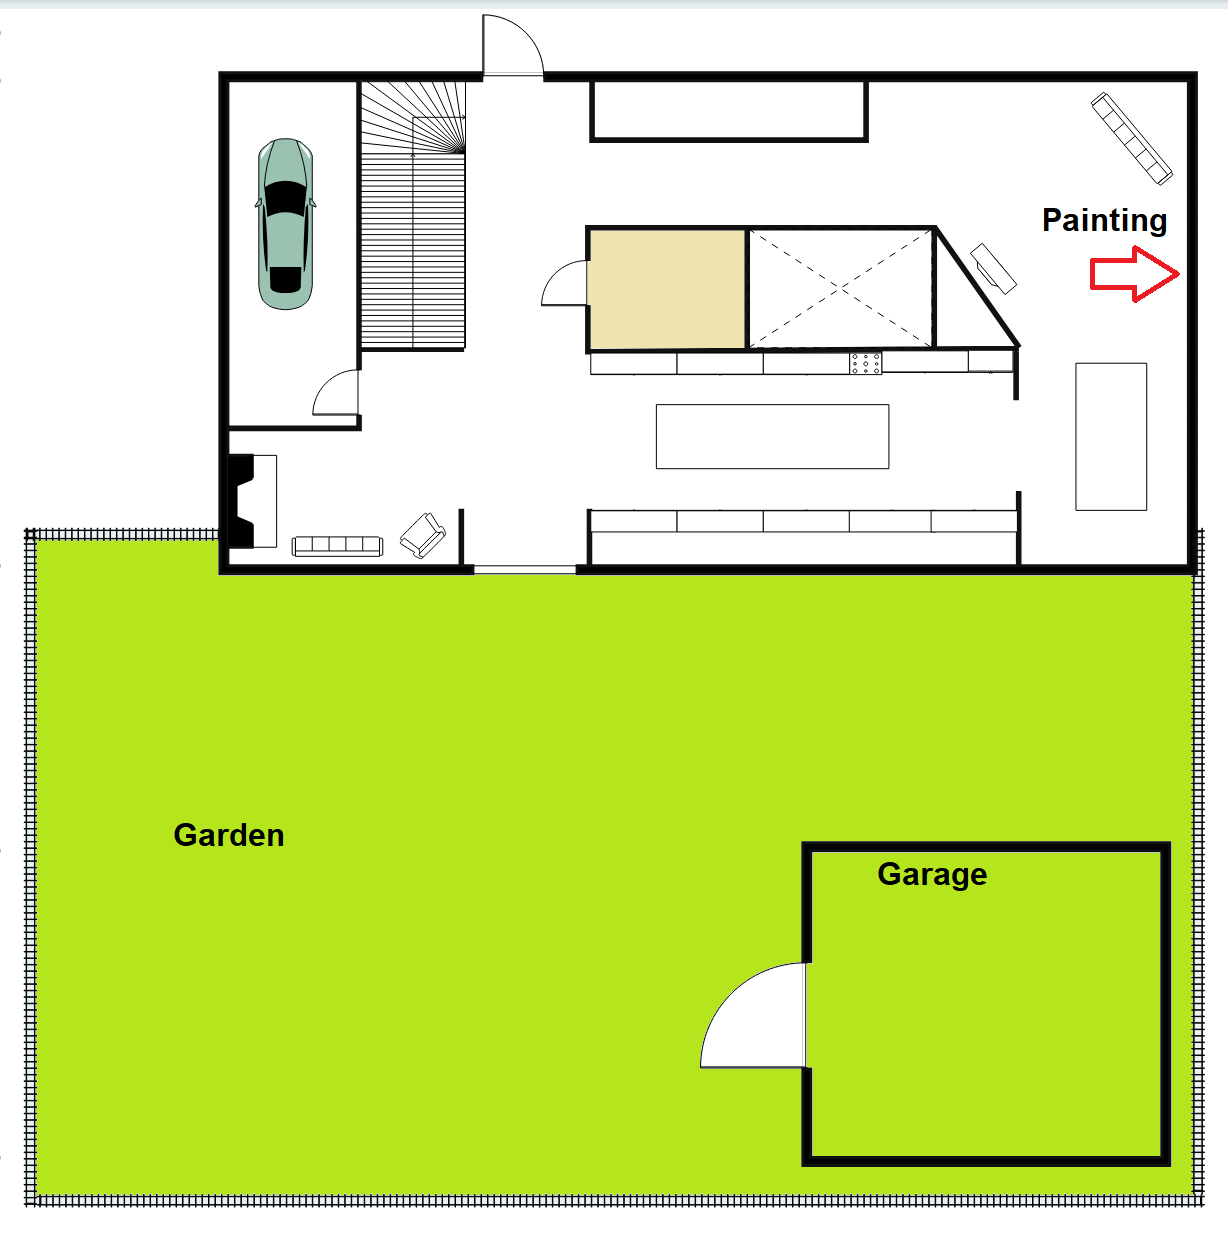
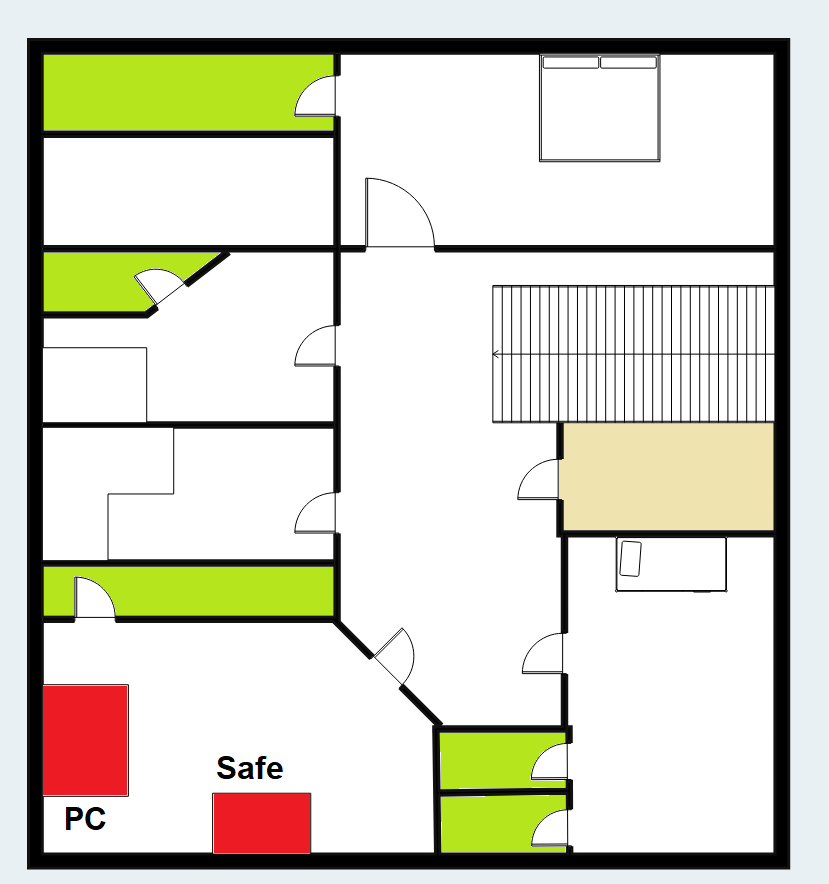
You will find two blueprints of the house I created for the jist of it and to simplify things:
1.Green spots mean you’re completely safe from the ghost.
The ghost can not go outside!
Even if you’re in the garage and get the shaky screen, she can not touch you!
2. Yellow marks bathrooms. You may hide in here on Easy & Moderate. On Demon she might even spawn here. She will open doors and kill you regardless.
3. The scale isn’t correct, I know.
4. If you want to skip the “screwdriver” section to access the keypad info sheet, you can. It’s attached in this guide.
Enjoy!
General Information
Make sure to look on any cupboard and table for keys. The golden keys are for the toilet downstairs & upstairs. One key says “locker key” but actually opens a normal door up OR downstairs.
The big silver key that looks completely out of order opens the wheel-case outside the garage.
You’ll need to find a small wheel and insert it into the case to open the garage.
All keys & items are randomly placed.
Required Evidence
- Dad’s notebook to access the E-Mail address on the phone.
- Keycode with 4-digits for the padlock in the garage.
- Keycode with 4-digits for the phone.
- Access to the “Notes” app on the phone to gain the 5-digit code for the Keypad upstairs. (Office)
- Safe combination from the PC upstairs. (Check the notes)
- The wifi-password to unlock the wifi in the garage (inside).
Additional Information
- Morse code sheet
- Keypad info sheet
Morse Code
Once you found the 4-digit code for the lockbox, open it and take the radio.
You will need to find the 2 batteries for this. These are also randomly placed.
Once the radio is powered you may return to the garage where you’re safe.
Turn the Radio on and tune it to channel 440 122. This code always remains the same.
The first long beep indicates the starting line. You do not have to write this down.
After the first long beep, start to write down the patterns of the beep. After each letter, there will be a slight pause before the next one starts.
It is always a 6 letter word!
And no, it doesn’t make sense. Just random letters. 🙂

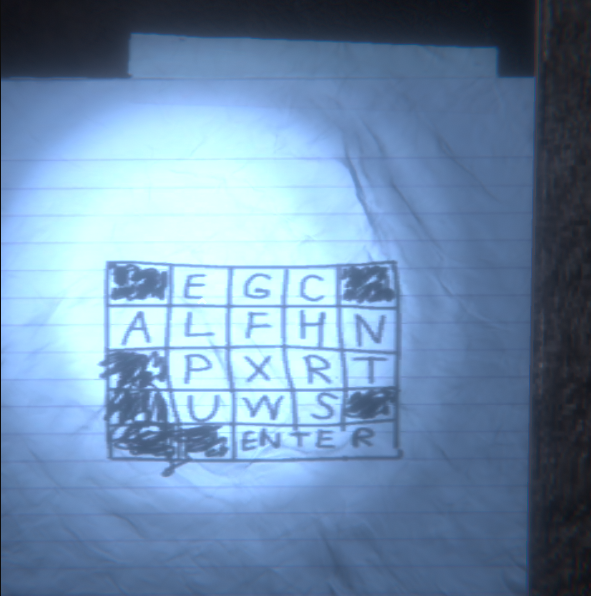
Once deciphered, someone (if you play with more than one person) should shine the flashlight on the keybad of the PC so the person operating the PC can see properly.
Enter the letters and get the front door key.
After this, simply run for the front door. (Pause in front of glass door to catch breath).
Well done.
Blueprints for the house
Thanks to The Stranger for his excellent guide; all credit belongs to his effort. If this guide helps you, please support and rate it via Steam Community. Enjoy the game.