
I put this guide together because collectible hunting in WandNOrder gets messy fast — the same room types repeat, and the game sorts everything by color instead of by name. Here you will find every tarot card, wand, and potion placed by zone and floor, using the official item names.
If you are chasing a single missing item, jump straight to that zone. If you are clearing everything, work top to bottom. I double-checked the color order for each shelf before writing it down, since that is where most searches go wrong.
Overview
This guide covers where every collectible sits across all three zones of WandNOrder. I wrote it as a room-by-room reference, so you can check one shelf at a time instead of wandering the whole map.
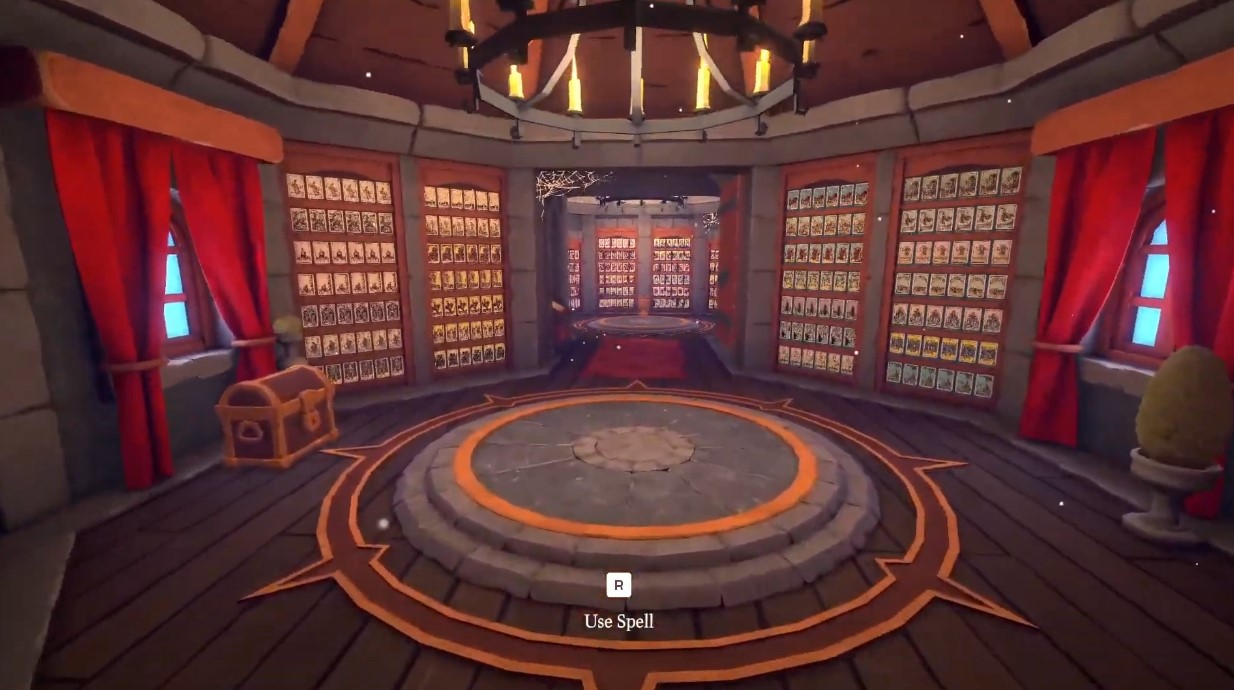
Here is how the zones break down:
- Zone 1 — tarot cards, spread across 2 rooms.
- Zone 2 — wands, spread across 2 floors.
- Zone 3 — potions, spread across 3 floors.
Before you start hunting, read how the items are sorted. Everything follows color and finish, not name. That is the part that trips people up. If you learn the color order once, every table below becomes easy to read.
| Zone | Collectible | Layout | Sorting Logic |
|---|---|---|---|
| Zone 1 | Tarot cards | 2 rooms | Color and finish (purple/blue, gold/silver) |
| Zone 2 | Wands | 2 floors | Box color and trim (gold, silver, bronze) |
| Zone 3 | Potions | 3 floors | Theme, color, design, and size |
Two things stay constant across every table I use here. First, the color of the box or finish tells you where an item sits, so match the color before you match the name. Second, the count in each row matters just as much as the names — the number of items per row is part of how the shelf is arranged. Keep both in mind and you can find any single item without clearing a whole floor.
WandNOrder: All Tarot Card Locations in Zone 1
1 Zone – Tarot Cards
Zone 1 has only two rooms, and both are packed with tarot cards. Every row holds 6 cards. To figure out which slot a card belongs to, look at the number in its name or count the dots along the bottom of the card face. I kept the names exactly as they appear in the game, so expect to see the English versions until an official translation lands.
The Major Arcana come in two colors — blue and purple — and each color splits again into gold and silver variants. That double split is what trips people up, so check the color first, then the trim.
| Card | Color | Trim |
|---|---|---|
| The Hierophant | Blue | Gold |
| The Lovers | Blue | Gold |
| The Chariot | Blue | Gold |
| Strength | Blue | Gold |
| The Hermit | Blue | Gold |
| The Wheel of Fortune | Blue | Gold |
| The Fool | Blue | Silver |
| The Magician | Blue | Silver |
| The High Priestess | Blue | Silver |
| The Empress | Blue | Silver |
| The Emperor | Blue | Silver |
| The Tower | Purple | Gold |
| The Star | Purple | Gold |
| The Moon | Purple | Gold |
| The Sun | Purple | Gold |
| The Judgment | Purple | Gold |
| The World | Purple | Gold |
| The Justice | Purple | Silver |
| The Hanged Man | Purple | Silver |
| The Death | Purple | Silver |
| Temperance | Purple | Silver |
| The Devil | Purple | Silver |
Notice that blue with gold holds six cards, while blue with silver only holds five. If you are short one card on a blue shelf, that gap is usually why. The purple rows work the same way — six with gold, five with silver.
Minor Arcana
The Minor Arcana follow a standard order: Ace, Two, Three, Four, Five, Six, Seven, Eight, Nine, Ten, Page, Knight, Queen, King. That is 14 types in total, but the number is given as 12 kinds in rows of 6. Each suit has its own color, so you can sort the whole group by looking at the card color alone.
- Cups — blue
- Swords — gray
- Wands — red
- Pentagrams — brown
With 6 cards per row, each suit fills a clean set of rows. I found it easiest to clear one suit color at a time before moving to the next, rather than jumping between colors in the same room.
2 Zone – Wands 1st Floor
Zone 2 splits its wands into two floors, and the first floor holds the three schools of Alteration, Necromancy, and Illusion. Just like the tarot cards, the game sorts these by the color of the box and its trim, not by name. What matters is the color of the box and the finish — the position and order of the wand type itself does not matter. Read each shelf left to right: gold, then silver, then bronze.
Every wand comes in a set of 9, laid out in a 3×3 grid. The number sits on the end face near a small emblem, and it also appears in the list. I sort each school the same way so you never have to guess which finish you are looking at.
Alteration — Left Side, Gray
Alteration wands sit on the left. The boxes are gray.
Gold — Exotic
- Radiant Antler wand of Shape
- Runic Chitin wand of Shape
- Cracked Chitin wand of Twist
- Ornate Antler wand of Shift
- Volatile Ivory wand of Shift
- Ancient Fossil wand of Warp
- Polished Fossil wand of Twist
- Haunted Ivory wand of Transmute
Silver — Metal
- Radiant Copper wand of Transmute
- Runic Brass wand of Transmute
- Polished Iron wand of Shift
- Haunted Silver wand of Twist
- Volatile Silver wand of Warp
- Ancient Iron wand of Shape
- Cracked Brass wand of Shift
- Ornate Copper wand of Warp
Bronze — Wood
- Haunted Oak wand of Shift
- Cracked Birch wand of Warp
- Volatile Oak wand of Shape
- Polished Elder wand of Warp
- Runic Birch wand of Twist
- Radiant Pine wand of Twist
- Ancient Elder wand of Transmute
- Ornate Pine wand of Shape
Necromancy — Center, Brown
Necromancy takes the center shelf. The boxes are brown, so keep an eye on the trim color to tell gold from silver and bronze.
Gold — Exotic
- Runic Chitin wand of Death
- Cracked Chitin wand of Grave
- Haunted Ivory wand of Soul
- Volatile Ivory wand of Crypt
- Ornate Antler wand of Crypt
- Radiant Antler wand of Death
- Ancient Fossil wand of Decay
- Polished Fossil wand of Grave
Silver — Metal
- Volatile Silver wand of Decay
- Ancient Iron wand of Death
- Rinic Brass wand of Soul
- Radiant Copper wand of Soul
- Polished Iron wand of Crypt
- Cracked Brass wand of Crypt
- Haunted Silver wand of Grave
- Ornate Copper wand of Decay
Bronze — Wood
- Haunted Oak wand of Crypt
- Ancient Elder wand of Soul
- Volatile Oak wand of Death
- Runic Birch wand of Grave
- Ornate Pine wand of Death
- Cracked Birch wand of Decay
- Radiant Pine wand of Grave
- Polished Elder wand of Decay
Illusion — Right Side, Blue
Illusion is on the right, with blue boxes. This is the last set on the first floor.
Gold — Exotic
- Radiant Antler wand of Shroud
- Volatile Ivory wand of Mirage
- Runic Chitin wand of Shroud
- Haunted Ivory wand of Shadow
- Ornate Antler wand of Mirage
- Polished Fossil wand of Phantom
- Cracked Chitin wand of Phantom
- Ancient Fossil wand of Veil
Silver — Metal
- Polished Iron wand of Mirage
- Ancient Iron wand of Shroud
- Ornate Copper wand of Veil
- Haunted Silver wand of Phantom
- Radiant Copper wand of Shadow
- Cracked Brass wand of Mirage
- Runic Brass wand of Shadow
- Volatile Silver wand of Veil
Bronze — Wood
- Volatile Oak wand of Shroud
- Cracked Birch wand of Veil
- Ancient Elder wand of Shadow
- Polished Elder wand of Vail
- Ornate Pine wand of Shroud
- Haunted Oak wand of Mirage
- Radiant Pine wand of Phantom
- Rinic Birch wand of Phantom
Once this floor is cleared, the second floor uses the exact same sorting rule, so you can carry the pattern straight over.
2 Zone – Wands 2nd Floor
The second floor keeps the same rule as the first: box color and trim tell you the row, and the number on the end face tells you the order. Three schools again, nine wands per type in a 3×3 grid. I walked the same shelf pattern here without having to re-learn anything.
Restoration sits on the left, in blue. Destruction is in the center, in red. Conjuration is on the right, in purple. Within each school, gold (Exotic) comes first on the left, silver (Metal) in the middle, bronze (Wood) on the right.
Restoration
Left side, blue boxes. I kept the source’s spelling as written on the shelf labels, so a couple of names read a little off.
Gold – Exotic
- Radiant Antler wand of Restore
- Volatile Ivory wand of Heal
- Runic Chitin wand of Restore
- Ornate Antler wand of Heal
- Polished Fossil wand of Remedy
- Cracked Fossil wand of Relief
- Cracked Chitin wand of Relief
- Haunted Ivory wand of Cure
Silver – Metal
- Ancient Iron wand of Restore
- Radiant Copper wand of Cure
- Volatile Silver wand of Remedy
- Runic Brass wand of Cure
- Haunted Silver wand of Relief
- Cracked Brass wand of Heal
- Polished Iron wand of Heal
- Ornate Copper wand of Remedy
Bronze – Wood
- Ancient Elder wand of Remedy
- Polished Elder wand of Remedy
- Radiant Pine wand of Rilief
- Runic Birch wand of Rilief
- Cracked Birch wand of Remedy
- Volatile Oak wand of Restore
- Haunted Oak wand of Heal
- Ornate Pine wand of Restore
Destruction
Center, red boxes. Same left-to-right trim order. This is the row I checked twice, because a few names look close to the fire variants next to them.
Gold – Exotic
- Ornate Antler wand of Flame
- Haunted Ivory wand of Ember
- Radiant Antler wand of Pyre
- Runic Chitin wand of Pyre
- Polished Fossil wand of Inferno
- Cracked Chitin wand of Inferno
- Volante Ivory wand of Flame
- Ancient Fossil wand of Blaze
Silver – Metal
- Radiant Copper wand of Ember
- Ornate Copper wand of Blaze
- Ancient Iron wand of Pyre
- Polished Iron wand of Flame
- Cracked Brass wand of Flame
- Runic Brass wand of Ember
- Haunted Silver wand of Inferno
- Volatile Silver wand of Blaze
Bronze – Wood
- Polished Elder wand of Blaze
- Ancient Elder wand of Ember
- Ornate Pine wand of Pyre
- Radiant Pine wand of Inferno
- Cracked Birch wand of Blaze
- Haunted Oak wand of Flame
- Valatile oak wand of Pyre
- Runic Birch wand of Inferno
Conjuration
Right side, purple boxes. Most of these wands carry the portal and rift names, so the list is easy to scan once you know the pattern.
Gold – Exotic
- Ornate Antler wand of Calling
- Polished Fossil wand of Rift
- Cracked Chitin wand of Rift
- Rinic Chitin wand of Portal
- Radiant Antler wand for Portal
- Haunted Ivory wand of Summon
- Ancient Fossil wand of Gate
- Volante Ivory wand of Calling
Silver – Metal
- Haunted Silver wand of Rift
- Ancient Iron wand of Portal
- Runic Brass wand of Summon
- Polished Iron wand of Calling
- Ornate Copper wand of Gate
- Cracked Brass wand of Calling
- Volatile Silver wand of Gate
- Radiant Copper wand of Summon
Bronze – Wood
- Polished Elder wand of Gate
- Haunted Oak wand of Calling
- Runic Birch wand of Rift
- Ancient Elder wand of Summon
- Ornate Pine wand of Portal
- Radiant Pine wand of Rift
- Volatile Oak wand of Portal
- Cracked Birch wand of Gate
3 Zone – Potions 1st Floor
This floor holds potion ingredients sorted under two themes: Moon and Sun. The Moon groups sit in a clear left-to-right order by shelf color, so I suggest reading the colors first before grabbing anything.
Moon Group
Three sections make up the Moon theme. Each one has a different shelf color and a different design on the box, which makes them easy to tell apart once you know what to look for.
| Section | Position | Color | Design |
|---|---|---|---|
| Cryogenic | Left | Blue with white | Snowflake |
| Illusion | Center | Purple with violet | Eye and moon |
| Ethereal | Right | Purple with blue | Spark |
Cryogenic
On the left side, look for the blue-white boxes with the snowflake design. The square and round shapes are grouped together here.
- Small squares: Everfrost Shards, Frostbite Crystals
- Large squares: Halistone Cores, Ice-Wyrm Scales
- Large rounds: Hoarfrost Ice, Permafrost Soil
The potions in this section are:
- Blizzard Condensate
- Glacial Runoff
- Borealis Dust
- Tundra Moss
Illusion
In the center, the boxes are purple with violet and carry the eye and moon design. This section splits cleanly into squares and rounds, each with small and large sizes.
- Small squares: Umbra Ink, Mirage Dust
- Large squares: Twilight Residue, Gloom Shards, Obscurity Mist
- Small rounds: Eclipse Petals, Phantom Petals
- Large rounds: Veil Fabric, Mirror Shatters, Shadow Threads
Ethereal
On the right side, the boxes are purple with blue and show the spark design. I found this one easy to mix up with the Illusion shelf at a glance, so check the spark mark before you pick anything up.
- Small rounds: Polyergeis Kinetic Dust, Dream Thread
- Large rounds: Nightmare Husks, Memory Motes
- Small squares: Astral Filaments, Soul Residue
The potions in this section are:
- Square potions: Wraith Vapor, Banshee Shrikes
- Round potions: Phantom Mist, Wisp Essence
Sun Group
The Sun theme also has three sections. Same idea as the Moon groups, but with warm colors and different designs on the boxes.
| Section | Position | Color | Design |
|---|---|---|---|
| Botany | Left | Dark green with bronze | Leaf |
| Beast | Center | Brown with bronze | Jaw with fangs |
| Aquatic | Right | Dark teal with bronze | Drop and waves |
Botany
On the left, the boxes are dark green with bronze and show a leaf design. The small and large items sit alongside the square ones here.
- Small: Sunbloom Pollen, Bloodgloom Petals
- Large: Witchhazel Bark
- Squares: Ghostcap Mycelium, Whisperweed Spores, Mandrake Root
The potions in this section are:
- Square potions: Ironwood Sap, Cinderthistle Thorns
- Round potions: Nighthade Berries, Silverleaf Tendrils
Beast
In the center, look for the brown bronze boxes with the jaw and fangs design. This one splits into rounds and squares, each with small and large sizes.
- Small rounds: Bearclaw Powder, Stagheart Sinew
- Large rounds: Chimeral Mane, Gryphon Talons, Minitaur Hoof Dust
- Small squares: Boar Bristles, Shadowcat Whiskers
- Large squares: Direwolf Fangs, Jackalope Antlers, Unicorn Horn Shavings
Aquatic
On the right, the boxes are dark teal with bronze and show a drop and wave design. I noticed the small group here mixes square and round items before the large ones start, so remember to check both shapes in the small size.
- Small squares: Siren Scales, Pearl Oyster Dust
- Small rounds: Leviathan Scutes
- Large: Coral Kelp, Hippocampus Tails, Abyssal Angler Lures
The potions in this section are:
- Square potions: Kraken Tentacle Ink
- Round potions: Mermaid’s Tears, Glowfin Roe, Sea Serpent Extract
3 Zone – Potions 2nd Floor
The second potion floor follows the same shelf logic as the first. Each shelf has a picture on the box, so match the design before you match the name. The Moon group sits on the right and center, and the Sun group sits on the left. I still check the picture first — it is faster than reading every label.
On this floor the Moon shelves are Draconic, Anthropomorphic, Enchanted, and Chronomantic. The Sun shelves are Tempests, Celestial, Avian N Reptilian, Incectoid, Pyromantic, Venoms, Geodes, and Metallic ores. Some names here are spelled exactly as the game shows them, so keep that in mind when you search.
Moon – Right Side
Start on the right for the Moon group. Two shelves here are easy to mix up because both use red tones, so look at the design: Draconic shows a dragon, Anthropomorphic shows a doll head.
Draconic is red with bronze and a dragon design.
- Round small: Wyrm Teeth, Drake Blood
- Round large: Dragon Claw Shaving, Drake Hide Scraps, Dragon Scale
- Square small: Drake Sinew, Dragon Bone Meal
- Square large: Dragon Breath Vapor, Wyrm Bile, Dragon Horn Tips
Anthropomorphic is dark orange with white and a doll head design.
- Round small: Clay Homunculus Limbs
- Round large: Stitch-Tread Twine, Golemcore Fragments, Scarecrow straw, Clockwork Spring-Dust
- Square small: Gargoyle Stone Chips, Wax Figure Shaving
- Square large: Mimic Wood Splinters, Living Doll Glass Eyes, Mandrake Sprouts
Moon – Center
Move to the center for the other two Moon shelves. Enchanted keeps the blue and white vial look, while Chronomantic uses yellow and orange with an hourglass. This pair also carries its own potions, listed separately below the ingredients.
Enchanted is blue with white and a potion vial design.
- Small: Ambrosia Distillate, Arcane Oil, Aether Distillate
- Large: Luminescent Sap, Liquid Light, Ectoplasm
Potions:
- Square potions: Vitae Fluid
- Round potions: Pixie Tears, Fountain Water, Mana Drops
Chronomantic is yellow with orange and an hourglass design.
- Square small: Hourglass Sands, Paradox Smoke
- Square large: Timeloop Thread
- Round small: Chronos Shards, Temporal Dust
- Round large: Past-Echo Crustals
Potions:
- Square potions: Youth Dew, Ageing Oil
- Round potions: Epoch Particles, Future-Sight Resin
Sun – Left Side
The Sun group starts on the left with Tempests and Celestial. I suggest reading the storm cloud and star designs here, since the colors (blue with bronze, then blue with yellow) look close under some lighting.
Tempests is blue and bronze with a storm cloud and lightning design.
- Square small: Hurricane Eye Dust, Lightning Striking-Stone
- Square large: Rainstone Shards, Static Gharge, Tornado Funnеel Shreds
- Round small: Thunderclap Resonanse, Stormcloud Condensed
- Round large: Tempest Sparks, Gale-force Wind, Ozone Vapor
Celestial is blue and yellow with a star and rings design.
- Round small: Astral Dust, Stardust particles
- Round large: Lunar Amber, Comet Ice, Meteorite Crust
- Square small: Nebula Vapor, Void Plasma
- Square large: Solarflare Shards, Zodiac Stones, Eclipse Residue
Sun – More Shelves
Avian N Reptilian is red and gray with a feather design.
- Round small: Viper Fangs, Phoenix Feathers
- Round large: Harpy Down, Basilisk Scales, Wyvern Talons
- Square small: Cockartice Eggshells, Raven Quills
- Square large: Chameleons Skin, Thunderbird Beaks, Hydra Fangs
Incectoid is green and light green with a beetle design.
- Round small: Moth Wing Dust, Grub Slime
- Round large: Scorpion Carapace, Firefly Phosphor, Locust Swarm Wings
- Square small: Centipede Mandibles, Wasp Stinger Powder
- Square large: Beetle Carapace, Spider Silk, Cicada Shells
Sun – Center
The center of the Sun group holds Pyromantic and Venoms. Both carry their own potions, so do not stop after the ingredient lists — I nearly walked past the potion rows the first time I checked this shelf.
Pyromantic is orange and red with a flame design.
- Square: Pyroclastic Powder, Magmacore Shards, Ashwood Charcoal
- Round: Salamanber Dust, Ignite Flakes, Dragon’s Heart Ash
Potions: Hellfire Soot, Sulfur Blooms, Cinder Sparks, EmberstoneGrit
Venoms is dark green and yellow with a skull and bones design.
- Square small: Scorpion Stingers, Spore-Cloud Gas
- Square large: Arsenic Crystals
- Round small: Blihtwood Sap, Putrid Slime
- Round large: Hemlock Distillate
Potions:
- Square potions: Deathcap Toxins, Belladonna Extract
- Round potions: Viper Acid, Manticore Venom
Sun – Right Side
Finish this floor on the right with Geodes and Metallic ores. The crystal and ingot designs are clear, but the two shelves share a lot of shiny textures, so check the box color: dark blue with bronze against brown with red.
Geodes is dark blue and bronze with a crystal design.
- Square small: Malachite Powder, Voidsalt
- Square large: Quartz Geodes, Lodestone Chips, Bloomstone Gems
- Round small: Lapis Dust, BrimstoneCrystals
- Round large: Quicksilver Ore, Obsidian Shards, Sunstone Fragments
Metallic ores is brown and red with an ingot design.
- Round small: Quicksilver Droplets, Mithril Filings
- Round large: Orichalcum Ingots, Star-Metal Slag, Fool’s Gold
- Square small: Gold Iron Shavings, Adamantitr Dust
- Square large: Brass Gears, Electrum Wire, Copper Verdigris
3 Zone – Potions 3rd Floor
The top floor of Zone 3 splits into two very different color families, and both are hard to miss once you learn their designs. Abyssal pots go black with red trim, and the artwork is a horned skull. Divine pots are milky with orange, showing wings and a halo.
Abyssal — black with red, horned skull design.
Boxes, square: Demon Horn Dust, Torment Shards, Cursed Bone fragment
Boxes, round: Plague Soil, Voidweed Roots, Hellhound Fangs
Potions, square: Brimstone Tar, Witch Oil
Potions, round: Malevolent Vapor, Crupt Dust
Divine — milky with orange, wings and halo design.
Boxes, small: Seraphic Wax, Halowood Splinters, Grace Shards
Boxes, large: Altar Ashes, Angelic Down, BlessedSalt
Potions, round: Supernal Mana, Divine Oil
Potions, square: Sanctuary Incense, Holy Water Condensate
The Abyssal square boxes sit three to a row, same as everywhere else in this zone, so count them carefully and do not stop at two. On the Divine side, the small and large boxes are grouped separately, which is easy to overlook if you are scanning fast. That is the last stop in the guide.


