WARNING-PREMIUM-GRADE CHEESE
Hello enterprising amazonian flesh-automatons. Do you wish to snap the feeble balance of this game in half? Do you play on invincible because the bandits just move too freaking fast? Do you wish to taste the sweet nectar of godhood-about 13 times? Do have the patience of the 3-4 saints your corpse body is made from?
Introduction-and Disclaimers
Specifically, enemies re-spawn whenever you enter a loading zone, and this includes boss areas-and the bosses in them.
However, this reset does not extend to your currently equipped organs or items.
More to the point it doesn’t extend to Restitution Shards-one of the powerful organs in the game, and a reward for killing said bosses.
This allows you to get multiple copies of this organ-more than the game can reasonably expect you to have.
Do you see where i’m going with this?
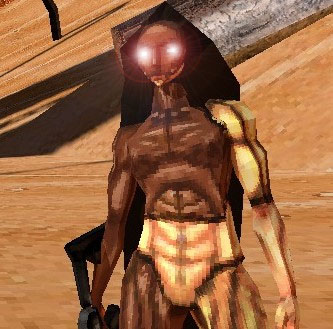
Before you get Durjashe’s immaculate ass to ascend to godhood, though, you need to know a few caveats.
- You must at least reach the end-and kill the boss- of the first area, as well as the various bandit-camps that contain the keys. That last part is beyond the scope of this guide.
- This is a cheesy-as-hell exploit, particularity for how easy it is to do. As such, it may be patched out later, and in general is in bad form. Fun though!
- Rome wasn’t built in a day. While not agonisingly slow it’s probably slower than a normal play-through of the game. Spend 2-3 hours fighting through the game like a normal person, or spend 1 hour grinding and beat the rest of the game in like 5 minutes- your pick.
- The example stats in this guide are slightly lower than full potential for reason explained in spoilers below.
With that said-let’s get into the method!
The Method, In Summary
- Go to the very north-most point of the desert map, with all 5 keys.
- Enter the giant silver pipe.
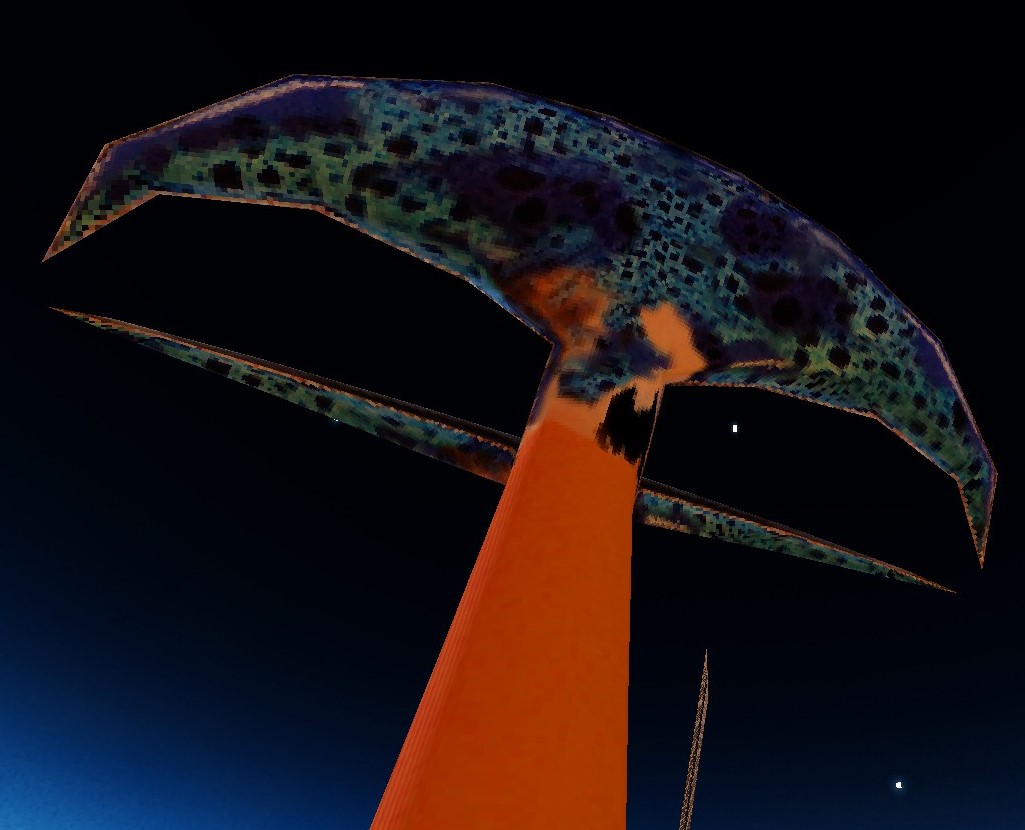
- Fight and kill the Terra-Worm, the Shai-Hulud’s weirdo cousin.
- Rip out the worm’s Restitution Shard, and shove it deep within your quivering Chestgina
- Retreat back to one of the big pipes.
- Save your game.
- Re-enter the pipe.
- Oh hey, the worm’s back! (note-If it does not re-spawn immediately, head back to the original entrance to the area-that’s where the trigger is)
- Kill it again, steal it’s shard again, realise you have two of them now.
- Rinse and repeat until you have 15 shards or are just sick of the entire idea.
Yes, it’s that easy.
Well, easy as killing a giant homicidal worm 15-ish times is anyway.
Net Benefits of CHEESE
So what happens if we slap on like 14 of them?
Each shard gives the following benefits:
20+ max HP
3 Digestion
2 Speed
1 hp regen/second
In effect it makes you Slightly Better At Everything ™.
You can fit a total of 15 (3 rows of 5) of these organs within you abdominal cavity.
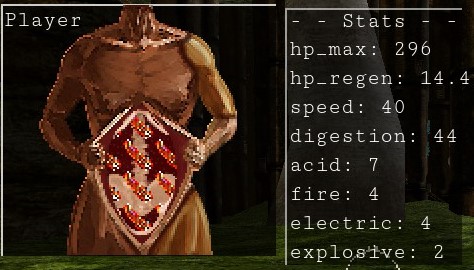
This will give you an approximate total of:
316 max health: You are now a bullet sponge with arms and legs!
47 digestion: Can probably consume and digest solid concrete!
42 speed: Move like Sonic on Crack!
15.4 hp regen: Your hp bar is basically an infinity symbol!
More importantly- these organs NEVER DECAY.
You will have the power of a goddess Forever.
Never scrounge for half-rotting viscera again!
It makes the survival-horror based last third of the game a joke, but to be fair I’m pretty sure it makes the entire game a joke.
Slaying the Great Wyrm
As such, anything and everything we can do to make this less painful is good!
General Advice for Worm Jousting
- Organ Setup- Lungs, lungs, lungs! The big lug can one-shot you not matter how tanky you get, so speed is key! if you’ve gotten the q-Melanin, pyrofly eggs and frox eggs to Frehem, the mayor of Neo Shi-theim, he opens up his fridge for you. This is an excellence source of organs, including the “rabbit” lungs which only take up one slot.
- Weapon Set-up- your best bet is the SMG and the shogun- they are fast-firing, quick to reload and deal decent damage to the worm. The grenade launcher is worse than you’d think here-Terra-worm is a large target but also a very fast target, so you’re liable to miss. The finger-gun can be used in a pinch but will be a fair amount slower, and requires special organ slots to power it up to full efficiency, such as Hydrogen Lungs from pyroflies. At least it has infinite ammo. The Tickler is worse than useless here at they won’t lock onto it’s weak-spot properly and deals next-to-no damage anyway. If you take care of the Bandit Armory for Alher, there’s an easy source of weapons and ammo for you.
- The golden rule is to shoot the worm in it’s Facegina. The inside of it’s mouth is it’s weak-spot and the only way bullet weapons can do damage. While explosives can damage it’s skin they do reduced damage unless they’re shoved into it’s waiting jaws.
- The worm’s main attack is a massive breach that can home in on you even in midair-with it’s mouth wide open, ripe for abuse. Jump away away to the side while opening fire- running toward or away from the worm, as opposed to perpendicular to the worm will probably get you killed.
- Getting hit by a dozen tonnes of worm moving at high speed has the surprisingly realistic effect of being instantly fatal.
- There’s a surprisingly wide range where you can avoid retaliation, but if you’re about to fit nicely inside it’s mouth it’s too late.
- When the worm lands it creates dust and rubble-but it’s not hard to avoid if you keep moving and the one time I’ve been hit by it it didn’t kill me, even at 16 max health. The main risk is the dust obscuring your vision of the next lunge.
- The worm detects and homes in to your footsteps. If you jump at the right moment, you can throw if off it’s aim-and by right moment, i mean “bunny-hop like a madman as it seems to work well enough”
- Sitting on one of the wrecked spaceships will also throw the worm off, as it will target the space junk and not you, allowing for an easy clean getaway. Note that it can destroy them, however.
- The worm’s lunge has a long cooldown period- use this time to reload so you can shoot freely when the worm returns.
- There is a small earthquake and the sound of shattering ground whenever the worm emerges-uses this to locate the bastard and flee from him properly.
- apparently it has another attack where it swims through the ground with one fin up like a shark…I’ve never seen it.
- Sticking around the starting area and only jumping away to dodge is pretty reliable in my experience, while running throughout the whole wide area is liable to get you stuck on an errant satellite and killed.
- The worm’s flying body can kill you even when it’s at zero hp! Don’t try to play chicken with it when it’s dead, just dive out of the way.
- You’ll know the worm is dead when it sprouts vertically upwards out of the ground like a depraved-looking tree. Only then can you loot it.
Advanced Worm Abuse
Now we OPTIMISE.
- Set the difficulty down. Sure it’s lame, but you’re here to break the game in half anyway, so why complicate things?
- You can go to the forest area, score some better weapons and/or organs, come back, and the worm will still respawn. This makes farming it WAY quicker with the additional damage from the Bullpup/Pump Shotgun.
- There is one other organ worth equipping with the Restitution shards- the one-slot Hand Of God, which can be found in the forest map. Namely it’s in an alcove on the western side, behind a giant silver door hiding an arena. It’s on the corpse in the centre of the area. You can have 14 shards and still be feared…
- The Spine-Tiger, the boss of the forest area, also drops a Restitution Shard. However, I personally find that boss way more chaotic and difficult than Terraworm-with one small exception. There is a lone safe area exploited by the speedrun in that area-assuming it’s still current in this edition of the game, you can give it a try as an alternative to worm-slaying.
- Going into third person (` by default) CAN help you dodge, but it also throws off your aim, so it’s up to you.