Do you like using HDR with Steam games, but your screenshots look washed-out? This guide is here to fix this issue!
INTRODUCTION
Do your screenshots look washed-out with HDR enabled?
Here is a comparison between a Steam screenshot and a screenshot made using this guide.Before:
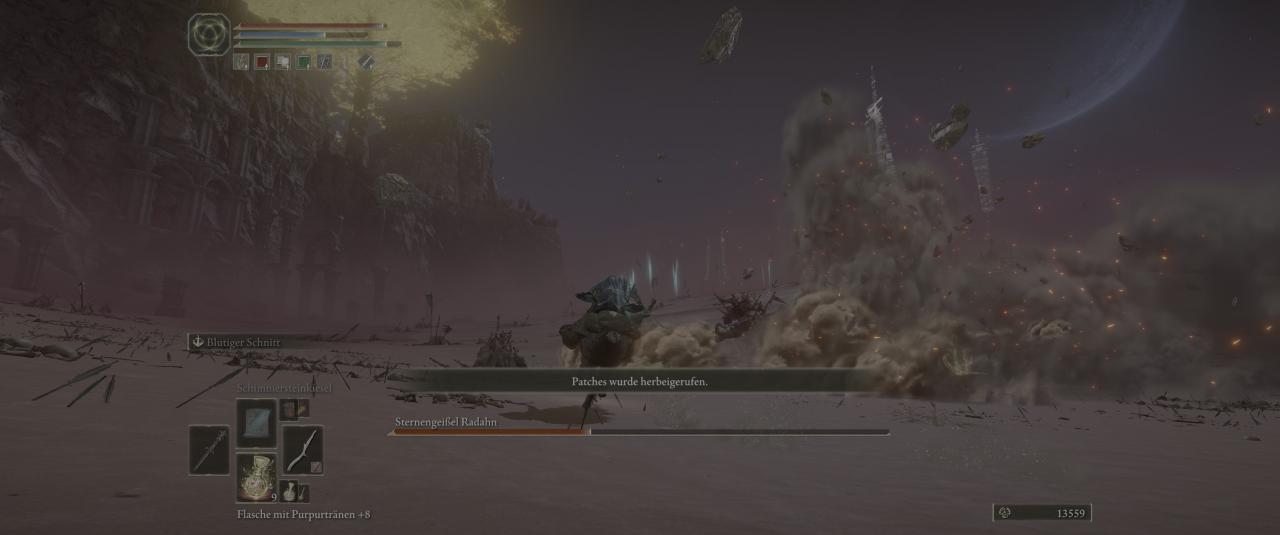
Here is a comparison between a Steam screenshot and a screenshot made using this guide.Before:
After:

TUTORIAL
- Enable HDR in OBS (use a Game Capture source):
- OBS settings -> Video -> (Scaled) Output Resolution & Base (Canvas) Resolution: set to your prefered screenshot resolution, probably your monitor’s resolution
- OBS settings -> Hotkeys -> Screenshot (Output): set your favorite hotkey, don’t use F12
- Convert your screenshots to JPEG: https://png2jpg.com
- Put the JPEG files in the Steam screenshots folder (can be opened via Steam screenshot viewer)
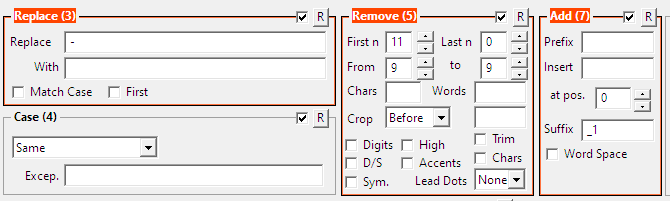
- Use “Bulk Rename Utility” for the JPEGs with the following settings: replace “-” with “”, remove first 11, remove from 9 to 9, suffix “_1”
- Restart Steam
- Upload your Screenshots
NOTES
- The Windows Game Bar is NOT working correctly for Elden Ring HDR screenshots! Both, the HDR and SDR versions, look way too bright and oversaturated.
- As far as I know, Steam doesn’t support jpeg files with HDR metadata, so this HDR to SDR conversion is the closest you may get to true HDR on Steam screenshots.
- I’m not sure, if step 6 is required, but the thumbnail folder can be ignored.
- You have to keep OBS running in the background, while the Game Capture source is enabled and visible (like if you would stream or record the game)
By Berny23
More Guides:
- ELDEN RING: How to Enable DX11
- ELDEN RING: How to Fix Invisible Enemies Bug
- ELDEN RING: Performance Boost and Stability Guide
- ELDEN RING: How to Disable EAC (Offline Play)
- ELDEN RING: How to Remove AntiCheat