After playing for 100+ hours on this fun game, this is my contribution to the other players in the community so they have a more fun (and less frustration) through the gritty world of HWR Reforged.
Kudos to the Dev for making a worthy spiritual successor to A Legionary’s Life. I really enjoyed my multiple runs through this game. This game has definitely come a long way since the original HWR in 2021. Keep up the great work!
This is a work in progress based on version 1.06 of the game. As there are a lot of information to pass down and I don’t have the time to write it all in one sitting, I’ll be updating the remaining sections as time permits in the next few weeks. Plan is to have everything done by early/mild-November.
Introduction
Having play this fun game for 100+ hours and gone through most of the contents in HWR mode, I felt I should put down some practice tips for newer players so this game becomes a more enjoyable (and less frustrating) experience for them.First, this game should be viewed as a rogue-lite game where the game gets easier and easier as you accumulate experiences in the rogue-lite mode mode to build progressively more and more OP characters until you can steamroll through the game.
Therefore, the recommended game mode is the HWR mode where you gain profile experiences and level up after each run, and can generate progressively better and better starting characters using accumulated profile points.
Below is a sample maxed out starting character with default attribute/skill caps:
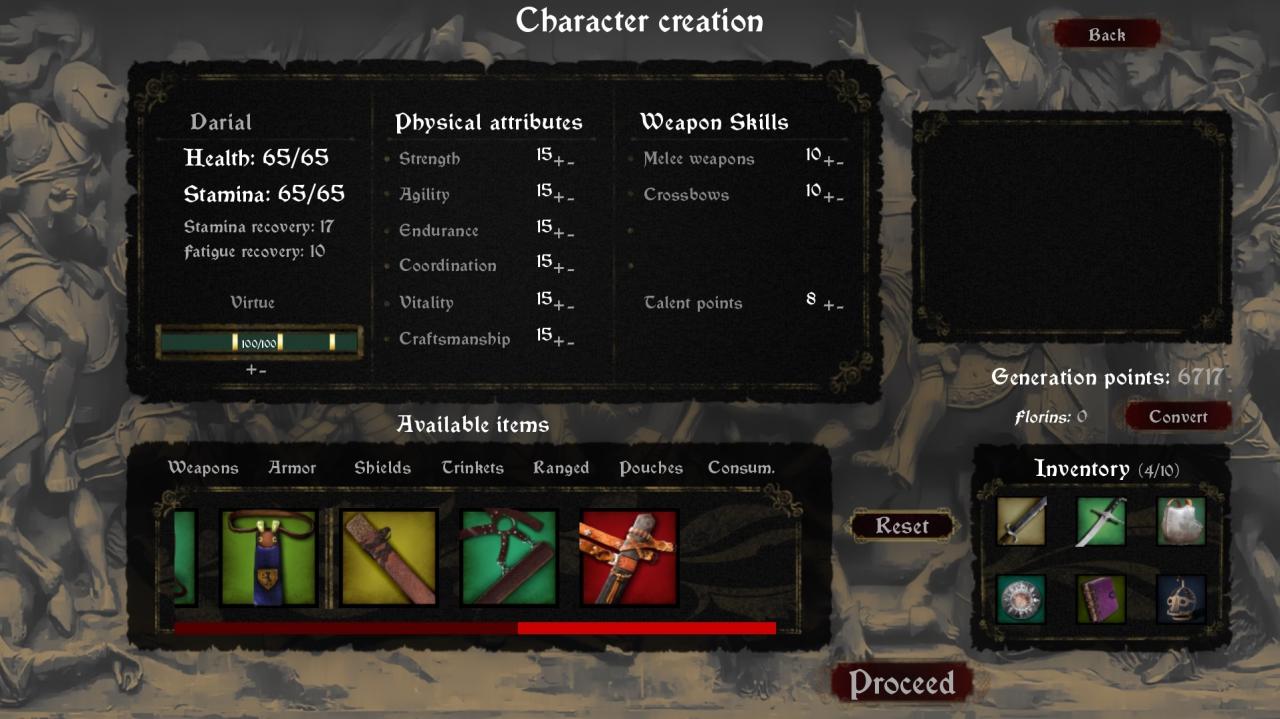
Below is an even more OP starting character once your Profile level is so high (no limit to Profile level) and you have so many Character Generation Points (CGP) that you need to edit the game script to increase the starting attribute/skill caps:
(See the last section of this guide on how to modify the max stat/skill caps for new character creation)
Lastly, this guide is based on version 1.06 of the game and is a work in progress. I’ll update it further in the near future as I have more time.
First Few Runs
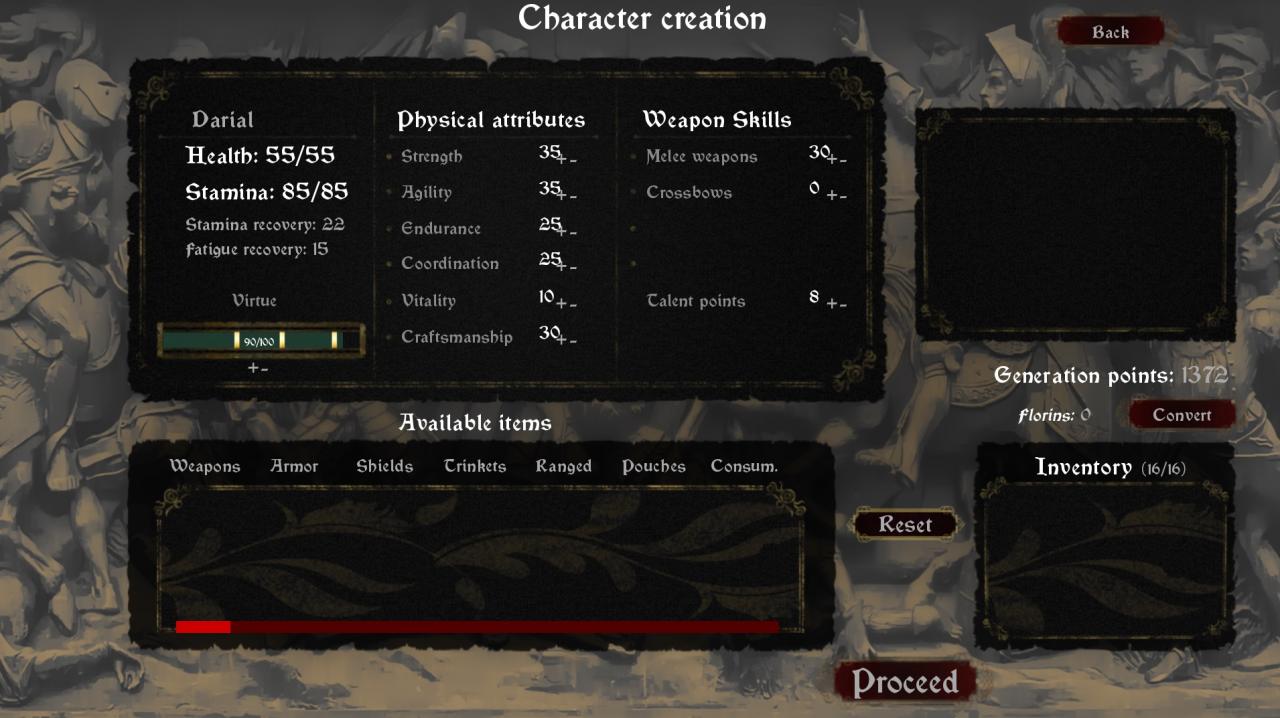
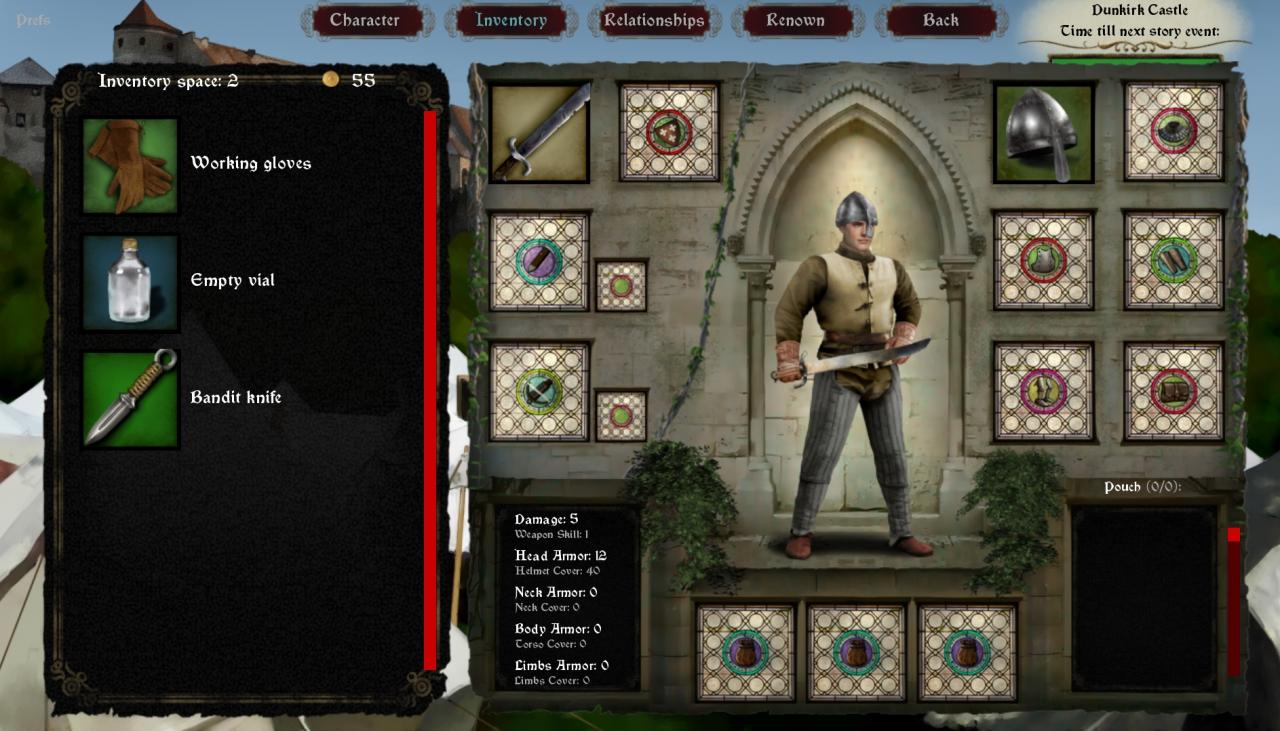
When you start HWR mode for the first time, you are not going to have any Profile level. So your first run will be with a randomly generated character. Just keep on rolling until you get one that has passable stats and equipment, such as Joey below:
As you can see, Joey is a far cry from the buffed out starting character shown in the Introduction section above. Joey’s stats are very low, so he’s not going to survive any heroics and will die a quick death against experienced enemy soldiers. Your goal with Joey is merely to grow and survive as long as possible to maximize Profile points at the end of the run and level up as much as possible for the next run.
Use this and the several subsequent runs to experiment, make mistakes, and learn how to play this game. If a character like this can survive to the beginning of Chapter IV in HWR mode, you have done great!
Now for our poor Joey, he survived the Prologue and the water delivery quest in Chapter I, but died on the battlefield at the end of Chapter I:
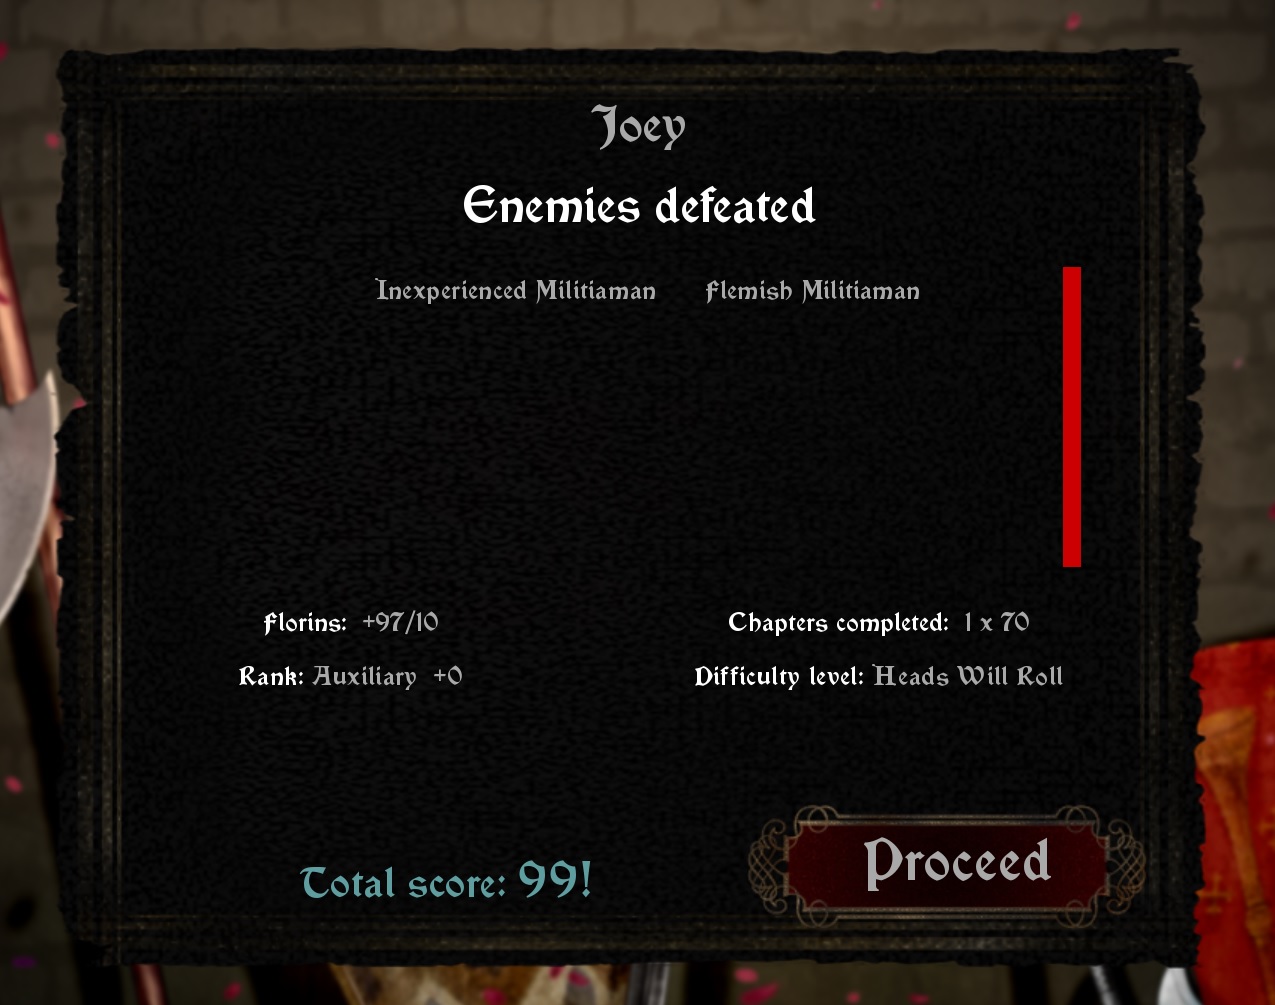
In this very brief run that didn’t even get to Chapter II, Joey contributed 99 points to the Profile, which is almost 2 levels (50 pts per level). So while it sucks to die quickly, you are accumulating experiences toward your eventual OP character.
Once you have done a few runs and your HWR Player Profile level is 20 or so (which should only take a few hours of play), you can then change to Manual Character generation mode. At that point, you should have enough character points to make starting characters that are better than the randomly rolled ones and advance further into the game (and starting to act like a hero).
On later runs where you earn hundreds (or even thousands) of profile exps, you can use CTRL to fast forward the level up progress bar so you don’t have to be stuck at that screen for a while.
Thoughts on HWR Character Generation
Is our destiny already fixed at birth? That’s a philosophical question that has plagued mankind for ages.
Here we have two staring characters, Joey (from the previous section) and OP Character:
Joey was created randomly in HWR mode and selected as the best choice after rolling about 10+ times:
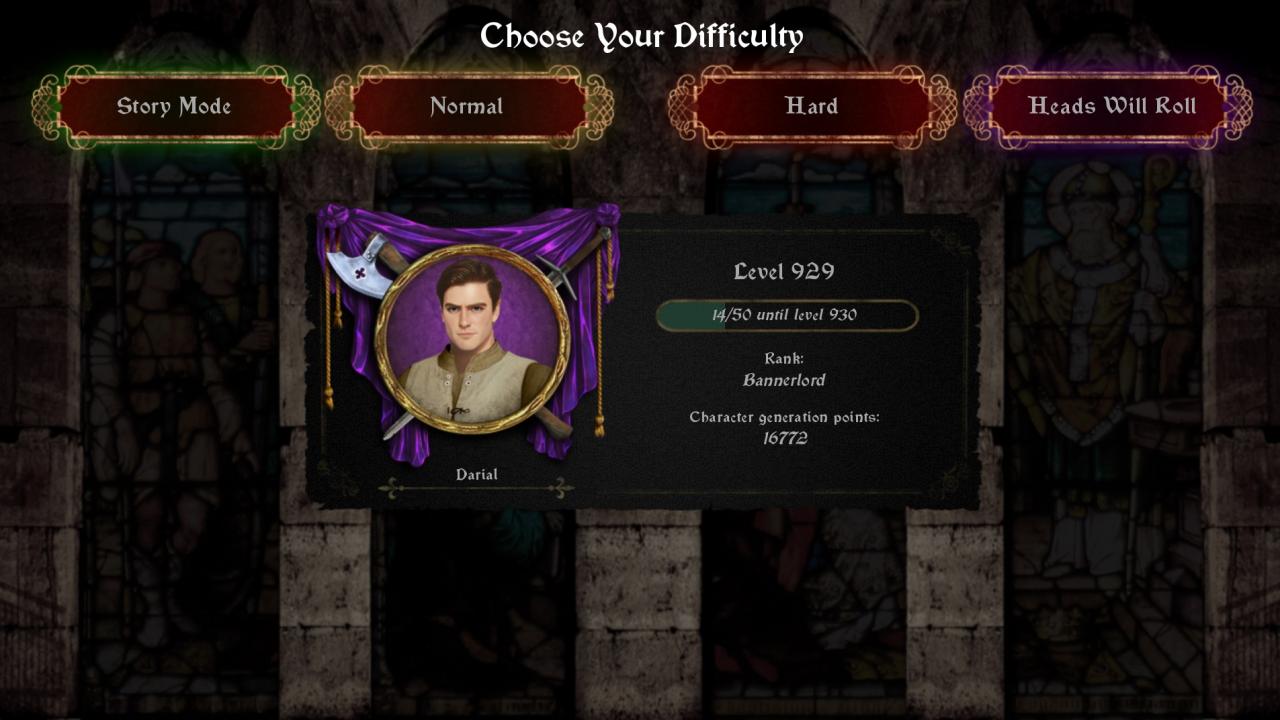
OP Character was created manually in HWR mode with a Profile level of 929 (with default max stat caps):
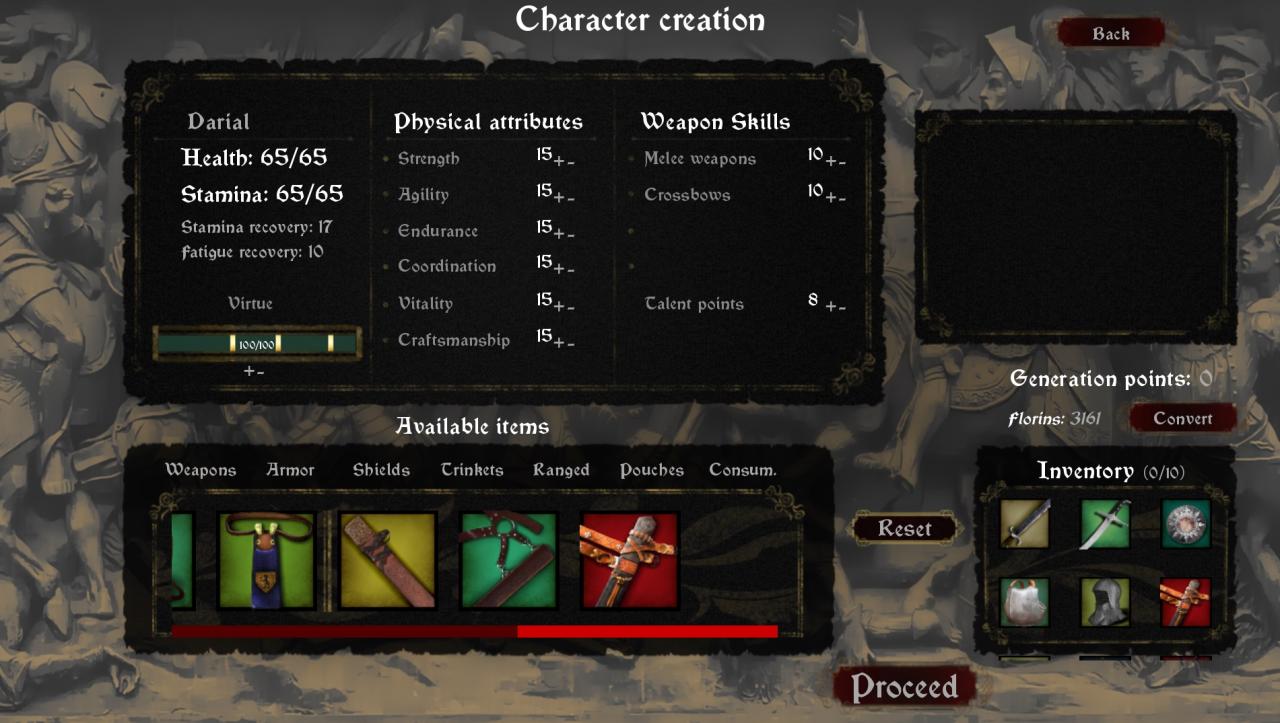
As you recall from the previous section, Joey died at the end of Chapter I. As for our OP character, he had a long and adventurous career, cutting a path of glory through Brittany and Damietta as a legendary mercenary.
Thus, in this brutal world of HWR, the path of a character’s destiny is largely charted at creation. But on a more positive note, level up your Profile enough and you’ll go from Joey to OP after a couple runs and the HWR campaign will become your oyster.
Now once you have a high enough Profile level and Character Generation Points (CGP), you can just max everything out.
However, before you get there, you’ll need to judicially apply your limited resources to maximize your starting character.
First, you need to realize that Physical Attributes are purchased on a sliding scale:
1 – 5: 10 CGP each
5 – 10: 50 CGP each
11 – 15: 100 CGP each
Weapon Skills are also on a sliding scale:
1 – 5: 40 CGP each
5 – 10: 100 CGP each
Talent Points are 200 CGP for first 3, then it goes up to 400 CGP each.
Virtue is 50 CGP per increment of 5 points.
Items are purchased at 1:1 CGP to Item’s florin cost ratio.
CGP are converted to florin on a 2:1 ratio.
And lastly, default Inventory size is 5, but expands by 1 per every 3 Strength. So the higher your Strength, the more starting items you can take from Character Generation.
So with the above in mind, prioritize increasing most of your Physical Attributes to 5 and Melee Weapon Skill to 5 as well when you have a low Profile level and limited CGPs. Weapon talent points and Virtue are luxury stats that you don’t need to be concerned with until after you maxed everything else out.
As for which Physical Attributes to focus on, I would recommend always take Strength to 5 for the extra inventory slot, but also because during the Castle Theft quest in Prologue, having a Strength of 5 or higher will make this quest a lot easier.
After Strength, I recommend Craftsmanship as it is your key to a sustainable income stream.
After Strength and Craftsmanship, I would go with Agility and Coordination. Endurance can wait until later, and Vitality is not a big concern, especially if you are taking the Torture Mask as a starting item:
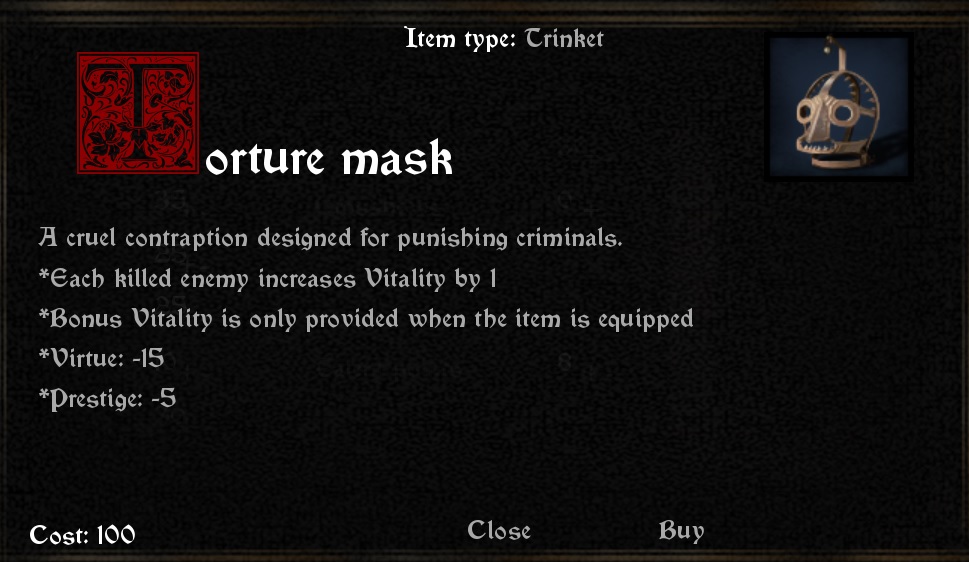
If there is one trinket you should always have with you at the beginning of the game, it’s the Torture Mask. Having 100+ hp by Chapter III means that even the occasional poisoned crossbow bolt to the head becomes an annoyance as opposed to a death sentence. While you may not have enough spare CGP for it at lower Profile levels, it’s definitely something you should start carrying with you as soon as you can afford it.
Yes, it does takes up one trinket slot and is a bit useless while you build it up early game. But that extra 100 hp could be the difference between life and death when Grace and Glory shoot you with their crossbows.
Melee Weapon skill is a bit expensive, but I would recommend put few points in it once you can afford it.
Lastly, don’t worry about the Crossbow for your first few runs. It’s a very deadly niche item and you can mess with it once you are rolling in CGPs, but it’s not suitable for resource starved new players.
Finally, with regard to starting items, it’s discussed in more detail in the Starting Items section below. Just exercise your judgement on what you can take with you based on your CGP and inventory size.
Some suggestions on Starting Items
First, the max number of starting items you can take with you default to 5. For every extra 3 points in Strength, you get an additional inventory space. So choose judiciously. My item recommendations below are for a build with at least 6 strength (7 inventory spaces).
If you don’t have enough inventory space yet due to low Profile level, just cherry pick what works for you.
Lastly, some of the starting items I recommend are locked behind Profile Level or Quest Completion Requirements. Assuming you meet the requirements and they are unlocked, below are the items I highly recommend:
#1: Pick the best unlocked primary weapon of your preference. 1-H axe is a good choice for newbies because it can split shields.
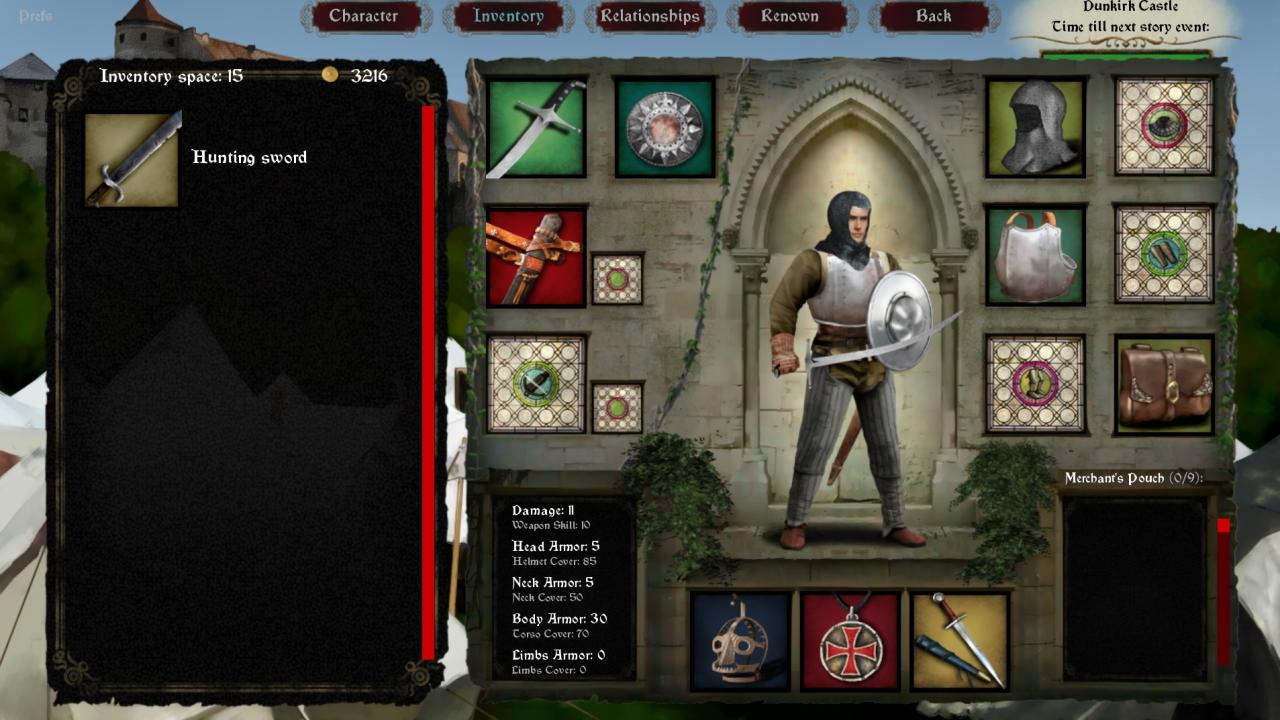
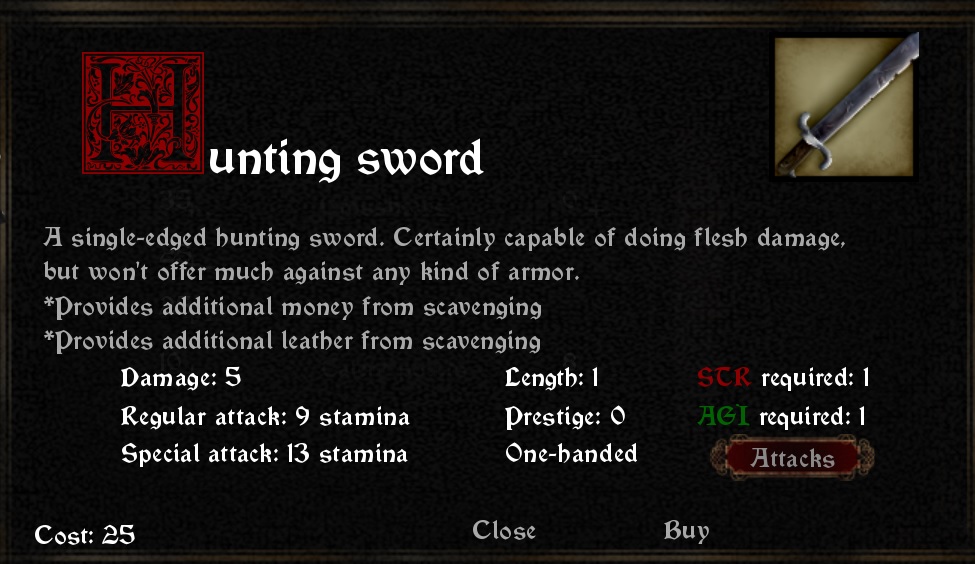
#2: Hunting Sword is recommended because of it’s value as a scavenge run resource enhancer.
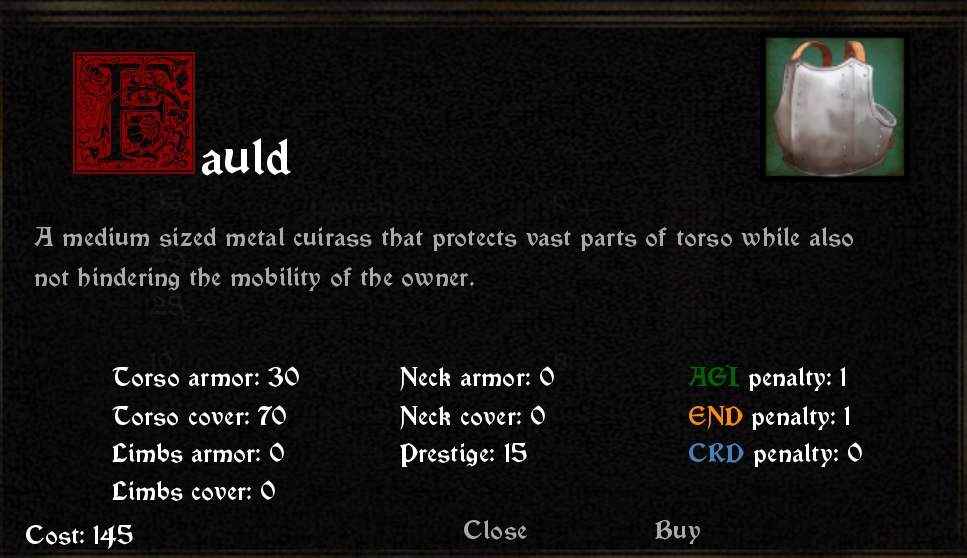
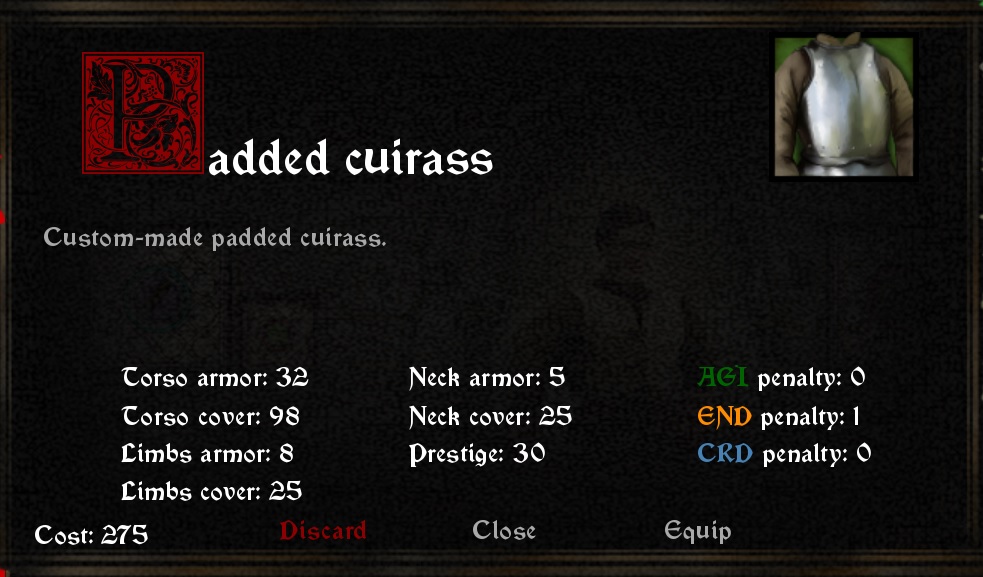
#3: Fauld is one of the two components for the best end-game non-encumbering armor. Once combined with Gambeson via crafting, it can be used to the end of the game. If you don’t pick it up at start, you are not going to see another one until Chapter IV or later. Definitely pick it up now if you can afford it.
#4: A suitable shield. Please see combat section below on why you should go 1-H and Board during your first few runs through HWR. Just pick a shield that you can afford based on your CGP. (Now if you’re a veteran player going with a 2-H, you can skip the shield).
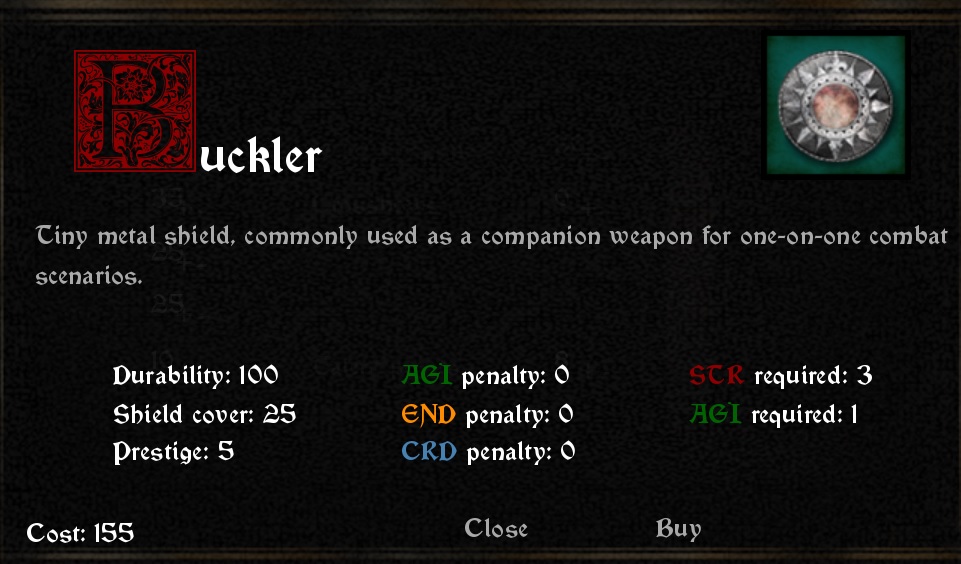
Later on in your meta game progression, after you have split 60 shields in game and unlocked Buckler, it should become your go-to shield during character creation. Buckler is a must if you are using a one-handed weapon/shield combo for the following reasons:
1. No stat penalty
2. Highest shield durability (100) in game
It may have a small coverage area, but it stuns just like any other shield and it should last you all the way to the end of the game. Just the fact that Roger uses a buckler during two of the encounters you have with him should be all the endorsement you need. (Oh, who’s Roger? Wait until you meet him in Chapter IV on the England route…)
Lastly, if you pick up a buckler (or another high end shield), DO NOT use it to shield your comrade at the beginning of the first siege in Prelude as that selection will result in the permanent loss of the shield you are carrying. Just take the 5 points loss in virtue. Not a big deal.
#5: The Torture Mask is the most OP trinket in the current version (1.06) because it grows with you throughout the game. It’s not uncommon for it to give you 30+ vitality bonus by later Chapters. In later Chapters of the game, it turns a crossbow bolt to the neck into just another flesh wound due to the massive number of hps you gain from it. Definitely a must take item.
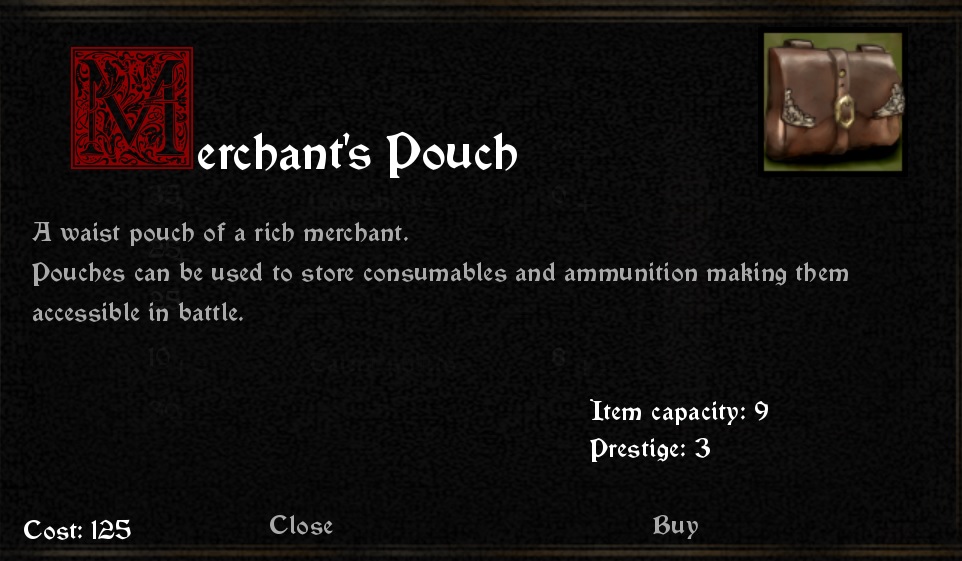
#6: If you still have points left, get the best pouch available to you for convenience. Merchant’s Pouch is an endgame pouch, but if you can’t afford it, not a big deal.
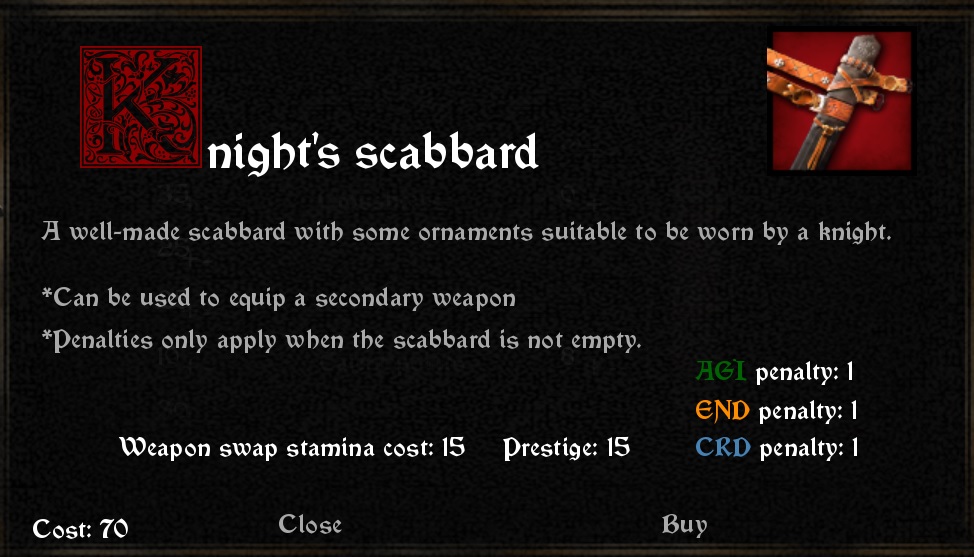
#7: Knight’s sheath, got it for prestige and convenience. Only grab if you have the extra points and inventory space.
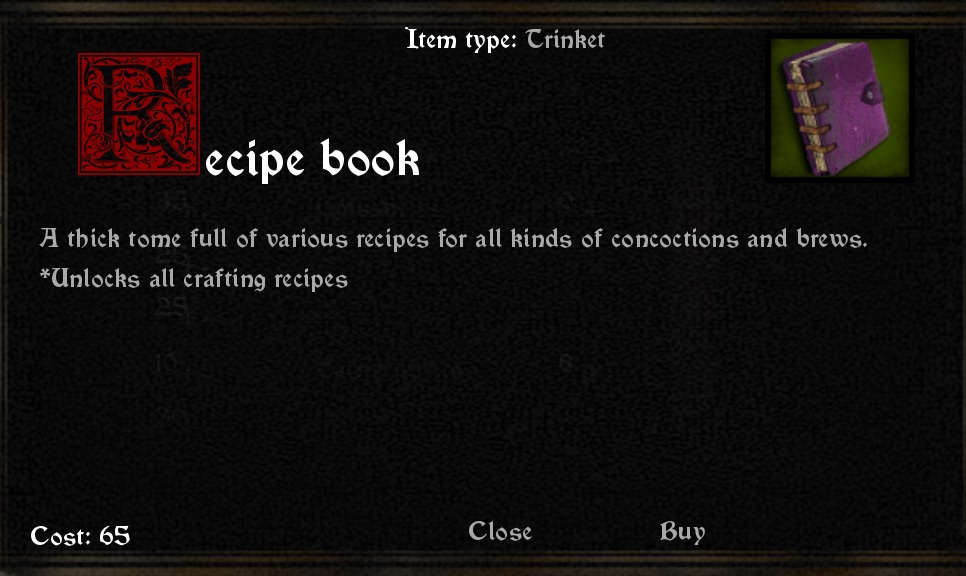
NOT RECOMMENDED: Recipe Book
Fairly useless item, especially for a crafting character. This trinket unlocks all the Recipes regardless of Craftsmanship level when you have it equipped, which seems useful at first glance.
However, all the recipes unlocks once you attain the necessary Craftsmanship level. So this item is completely redundant when you have a starting character with Craftsmanship of 10 or more (which will unlocks all the default recipes already).
This is a very situational trinket that becomes a waste as soon as you can build starting characters with high Craftsmanship skill. I feel obligated to put a big warning sign here because this is the only crafting related trinket available during character creation.
From Isisius:
For starting items to take, the two things I ALWAYS recommend if you can afford them (even before weapons) are the trinkets rabbits foot, and lucky dice.
Rabbits foot mean you pass every luck check in the game (you don’t get hit by a crossbow bolt vising Eva for the first time, you don’t get spotted running out of the city on the spy quest, and like a million other things). I always wear it when I’m not in combat.
Lucky Dice means you can recover stamina in camp without losing money (and actually gaining a bit). Gamble is better stamina recovery than hang out or pray, and doesn’t require alcohol like “drink”, or come with negative side effects like drink or mortify flesh. Honestly I’ve never experimented much with Lute as by the time it came online, I was able to use bathhouses and had a billion dollars <lol>.
With lucky dice, you can gamble any never lose more than one or two games, making it easily the best stamina recovery early and mid game for lower level profiles, and even high level profiles will use it for a bunch of the early chapters.
I also disagree with the approach of the torturers mask as a “must take”. On early profile levels when you don’t have better trinkets, and better stats its good. But you have to be wearing it to use it. And that takes up a slot that you could just use to boost your stats and get hit less. Or boost your damage and hit less. I mean the “oath” you can get from Eva early game is +2 to all stats. I would take that over even 30 vitality, as the fatigue, dodge, and other benefits from the other stats help more than health in my opinion.
Some Tips on Crafting and Making Money
First, once you have sufficient CGP to spare, put your crafting skill to at least 8 in character creation to unlock Potent Medicine recipe, which is a key money making item.
As for how high you should eventually take your Craftsmanship skill to, kony74 noted in discussion forum that from viewing the script files, there is no practical benefit for armor crafting above lvl 25. For consumables, the ceiling is lvl 20, which gives 80% chance for creating 2x items out of one set of ingredients.
So eventually, once you have enough points in Character Generation, max out your starting Craftsmanship so you can maximize your chance of creating 2x items.
The key way to make lots of money in this game is by taking advantage of the 2x item creation chance in crafting. This requires you to get crafting up to lvl 20 ASAP. In very early game when you are poor and broke (Prologue and Chapter I), focus on crafting Bandages and Medicine to sell and make money.
I don’t recommend making Canteens and sell them because Canteens are necessary for combat survival and Leather is also needed to make Waterskins.
The biggest money maker in crafting right now (1.06) is Potent Medicine, which takes 1 Medicine and 1 Waterskin and sells for 90.
So let’s say you with 3 Healing Herbs, you get 2x Medicine, then 4 Leather, you get 2x Waterskins. Then you combine Medicine + Waterskin twice, and net 4x Potent Medicine if you are lucky and sell them for 360 total. If you are somewhat unlucky, you end up with 3x Potent Medicine and sell them for 270.
3x Healing Herbs (7 each) cost 21, and 4x Leather (6 each) cost 24 for a combined total of 45. So whether you sold 2, 3, or 4 Pot. Meds out of this crafting bach, you are making a killing.
Medicine and Healing Herbs are usually readily available at the Trader and/or Camp Physician, so the real constrain on this method is the supply of Waterskins, which require 4 Leather to make. You are never going to have enough Leather because you get 7 from Trader every Chapter, and then maybe 2 – 4 more from scavenging.
So the supply of Leather is extremely limited. Thus, save your Leathers and also buy any Waterskin you see at the Trader, because Waterskin/Leather is your real bottleneck to printing florins. (By comparison, Healing Herb/Medicine are readily available at various Traders)
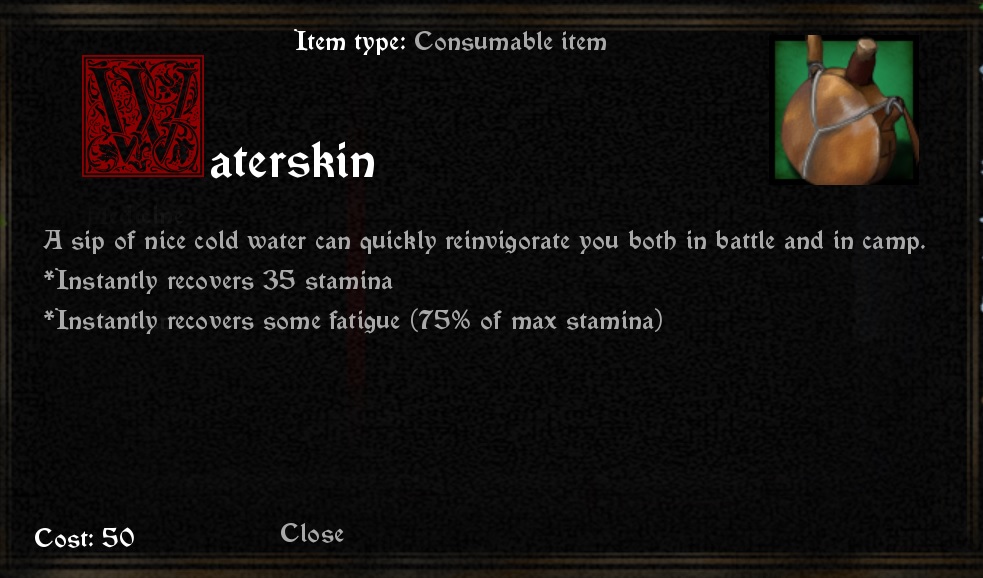 The critical ingredient to make money.
Using this method and selling combat loots on the side, I would typically have about 3k+ in florins by Chapter III and later and money ceases to be an issue.
From gallaghan2000:
I recommend an alternative starting money maker once you have a few points to spare.
1) in early character creation the only important stat to me is strength and maybe a rabbit foot for heists. 5-6 in both strength and crafting is enough to start this and still be successful elsewhere.
2) spend the points on a mail shirt of the red quality, that and a leather cuirass combined should guarantee the requirements for the blacksmith order.
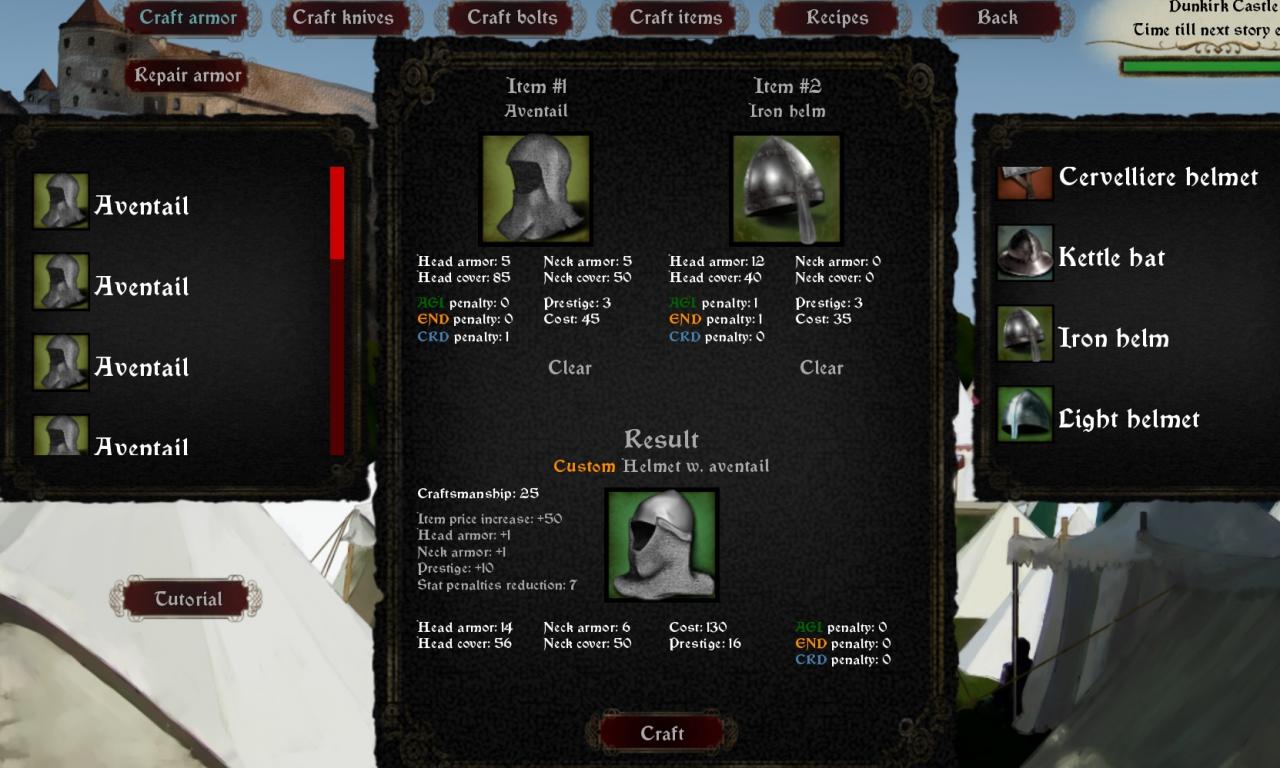
3) the blacksmith has an infinite number of aventails and blacksmith hammers which will accelerate all crafting. By a craft of thirty you should just churn out helms with aventails along with your potent medicines.
During character generation, if you have extra inventory space and CGP after picking up the starting items you want, fill the rest of the starting inventory up with Waterskins. With a high starting Craftsmanship skill, you can start making and selling Potent Medicine from Day 1 of the Prologue at Dunkirk Castle.
Thanks goes to kony74 for testing these armor crafting combos info:
LEATHER – gambeson, leather armor, leather cuirass, reinforced leather armor
MAIL – low quality mail, chainmail, hauberk
PLATE – demi-cuirass, plackart, plackart with leather cuirass, iron cuirass, fauld
The best combo is either Gambeson + Fauld (crafted with Craftsmanship over 25):
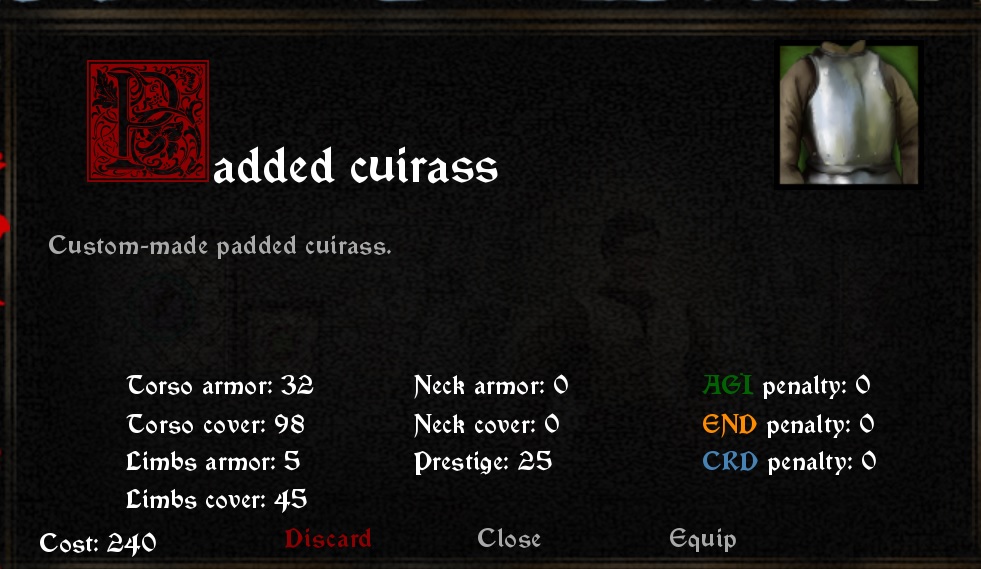
Or Reinforced Leather Armor + Fauld:
As for helms, Aventail (chainmail coif) is the most common first ingredient for helms, with the second ingredient being a hard shell type helm. Experiment around and see what you like.
Now if you want to have a 0 penalty helm (crafted with max crafting skill), the only early game combo that has 0 penalty is the Aventail + Iron Helm combo below. Everything else has a minimum of 1 CDR penalty.
Flow of Combat and Practice Tips
[In Progress]
Turn based combat is the beating heart of this game, and at lower levels, it is more like a marathon than a sprint, with the goal being mere survival as opposed to slaughtering all who come before you.
As the Dev (Death and Rebirth) explained in a forum post, a new player “should try to approach the battles in HWR as if it was a fully survival game. Many of the combat encounters do not have to be ‘won’ for you to proceed – meaning that you actually don’t necessarily have to kill the enemy as the battle will end after some time no matter what.
Thus it might by wise to sometimes play it safe in combat – don’t chase kills that don’t come easy. Maybe consider being a bit more passive even at the cost of losing reputation. In the end your main job is to survive rather than to kill one enemy, lose a lot of resources and then immideately die to the next one.
Also HWR gives you a lot of different available playstyles. If you’re having a tough time with a particular weapon – consider trying another one. Same applies to stat builds – identify the issues that you’re having and try to remedy it through new stat build. If you lack HP – invest heavily in vitality and endurance, getting bashed by shields – invest in strength etc. And, of course, try to keep your stat build in sync with your weapon of choice. With weapons having different move sets many of them strongly rely on some particular characteristic so try to keep that in mind.”
For starting players, a one-hand weapon and shield is strongly recommended. The reason is because the shield increases your chance of survival quiet a bit. Once you have a high profile and enough CGP to generate OP characters with high stats, 2-handers become a lot of fun. But at the lower levels, stick to 1-hander and board so you can survive longer to earn profile points.
The primary stat for shield is Strength, and in the right hands, a shield is a deadly weapon. Shield bash is one of the most OP skills in combat. A successful shield bash will reduce enemy stamina and fatigue, and even stun the enemy on occasion. A stunned enemy loses his turn and cannot defend himself.
In fact, for some tough enemies, stunning them with a shield or another weapon is the only way you could temporarily nullify their defenses and score a hit. So learn to respect and love your shield.
View individual shields as consumable items. They lose durability during combat and often gets destroyed in a long battle. Therefore, always carry at least a backup shield so you have a replacement during down time.
Now in later runs, you could start with a Buckler (durability 100) that will likely last you through the final Chapter if played correctly. But for your first few runs, just treat your low level shield as a consumable.
Now that we have established the importance of a shield for a new player, lets talk about weapon types.
Axe: Probable the best beginner’s staring weapon due to 1-H axe’s ability to break shields. You don’t realize how annoying shields are until you have been on the receiving end of a couple stunning shield bashes.
Sword: Versatile and have find weakness attack skill, which are armor bypassing attacks. However, 1-H sword cannot break shields, so you’ll need to bypass enemy shields via stunning the enemy (using your own shield bash) or sheer luck.
Mace: Has stamina attacks, injury inducing attacks and high angle attack that ignore enemy shield.
1-H Spear: Attack has a chance of bypass armor and spear throw attack could inflict heavy damage and break shields. Big problem with the spear throw attack is that you lose that spear permanently. So this attack seems quite a bit gimped as spears are not readily replaceable like a crossbow bolt. For this reason, I don’t recommend using a 1-H spear.
As discussed above, two hand weapons are for players with enough CGPs to build buffed out characters, so I won’t go into details here.
Suffice to say that if you played enough to unlock the Sword of Justice, Heavy Axe, Pole Axe, Claymore, et al. for new character creation, you’ll know how to use them effectively. Once you have an OP character, it’s actually quite entertaining to cut through the Young Knight that gave you so much trouble in two turns with a poleaxe or some other massive 2-H weapon.
During combat, everyone loses Stamina and Fatigue by taking actions or taking damages. Stamina is easy to see, as there is a big Stamina bar there. However, Fatigue is more insidious as it just continuously build up and your Tireness level gradually increases. You can see your Tireness level by the little face on the shield icon right below your Stamina bar.
Tireness Level 1 is Fresh. 2 is Ok for long fights, but your combat effectiveness significantly degrades if you go into Tireness Level 3 and above. Tireness Level 5 (with the tongue sticking out of the little face) is the max.
The BIGGEST advantage you have over the NPCs is that other than a couple unique bosses, most NPCs do not manage their Fatigue and Tireness Level. So if you
[In Progress]
Camp Life Generally
[In Progress]
Camp Fatigue Recovery Tips
[In Progress]
Thoughts re Virtue
[In Progress]
Prelude & Chapters I – III
[In Progress]
The Prelude and Chapter I through III should be consider the beginner’s portion of this game. For the bulk of these Chapters, the plot is on a railroad track and the unavoidable combat encounters are not that tough when compared with the enemies that show up in later Chapters. So enjoy this introductory experience while it lasts. <grin>
Side Job: Wanted Poster
In early Chapter I, the Earl will ask you to go look for fine wine and you’ll end up at the De Lambert Estate. Once De Lambert Estate opens up as a trading point, you can buy a Wanted Poster there for 1f. If you equip the Wanted Poster while you go on scavenging trips, you are guaranteed to encounter outlaws, and you will earn 40f per kill.
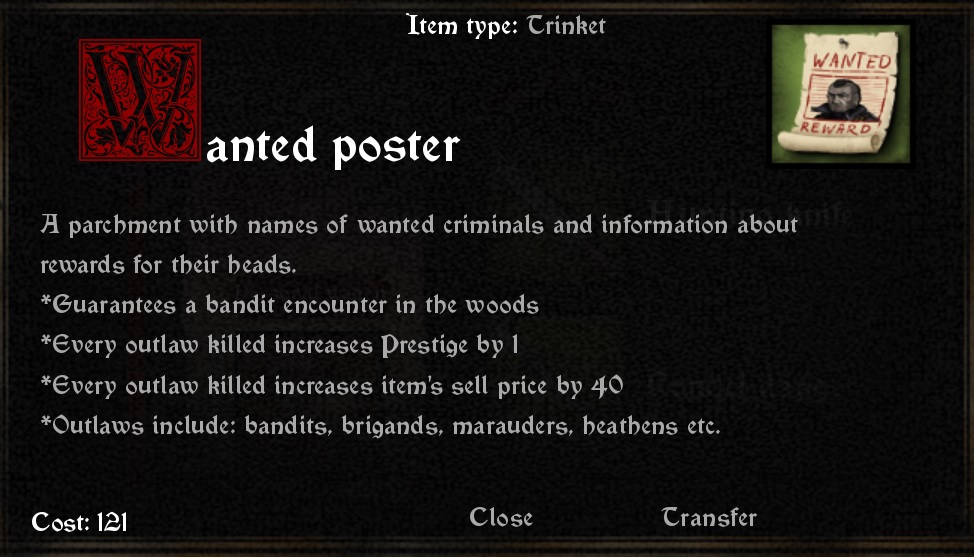 Wanted Poster after 3 bandit kills
I typically get this trinket before I go scavenging during Chapter I, and equip it on my trips for Chapter I – III, then sell it after the scavenging trip in Chapter III. This typically nets a few hundred florins from the poster and the combat loots. Not a bad side job during the early game.
Bartholomew Side Quest 1: Gathering Ingredients for a Potion
You get the quest by visiting him at Camp. For this gathering question, you can get the herbs from scavenging or the Camp Physician and the booze from the Trader. I recommend just buy the items and give it to him right away because this quest has a short timer to it.
After you complete this quest, some time will need to pass. Bartholomew will complete his theft and give you a sheath, a pouch, and a trinket item as a reward for your assistance. At this point, Bartholomew’s items trade will also open up to you (purchase only).
Bartholomew Side Quest 2: The Hustler
This optional quest also happens in Chapter I, after you finished Bartholomew’s first side quest. A Venetian merchant is coming to camp and Bartholomew came up with a scheme to win against him in dice. If you finance Bartholomew, you have a chance of winning some florin, but more likely you’ll lose some of your investment as Bartholomew gets out played.
However, if you have the Lucky Dice trinket in your inventory, you have the option of giving the Dice to Bartholomew. Give the Dice to him BEFORE the money, and then give him the max 100 florin.
The gambling will take place before the end of Chapter I and Bartholomew will give you your share of the winning, which is over 200 florins. However, you’ll also take a small Virtue hit since you guys cheated with the Lucky Dice.
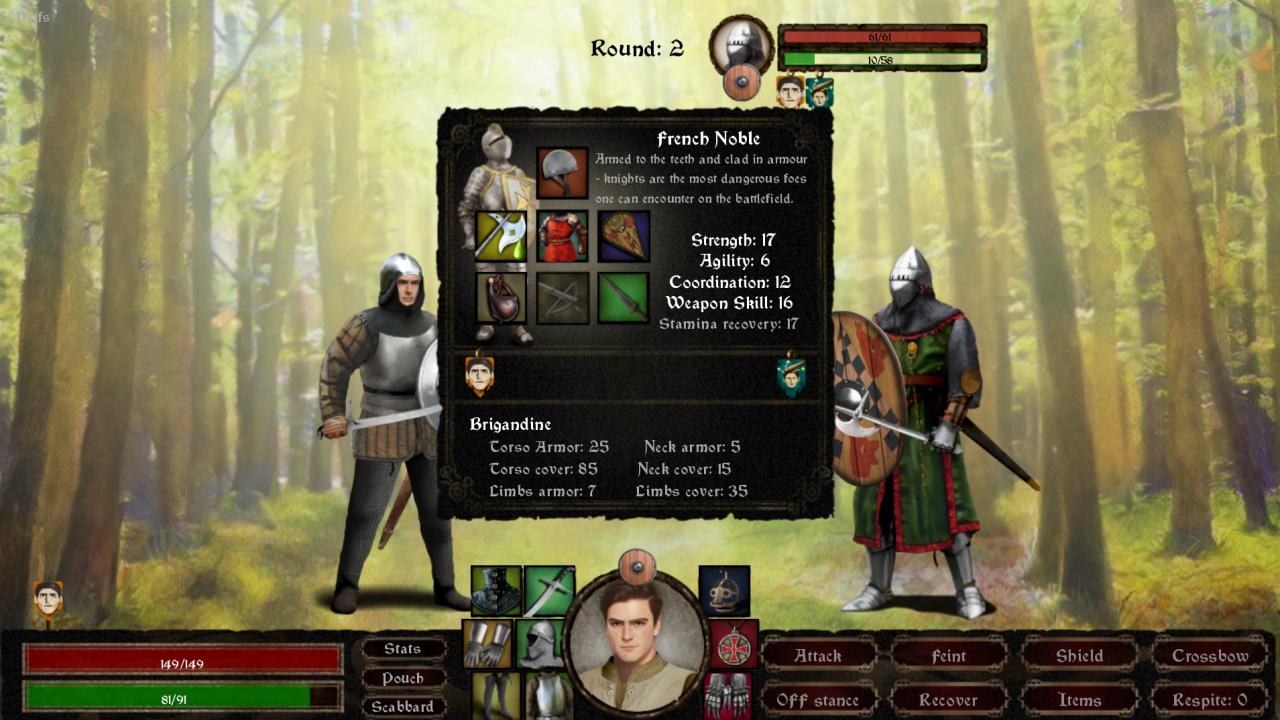
End of Chapter I: Optional Boss – Young French Knight
Young Knight with his polearm is a tough one to beat for new players on their first couple runs. Not recommended until you have a decent manually generated character. See image below for Young Knight stats (which does not change between runs):
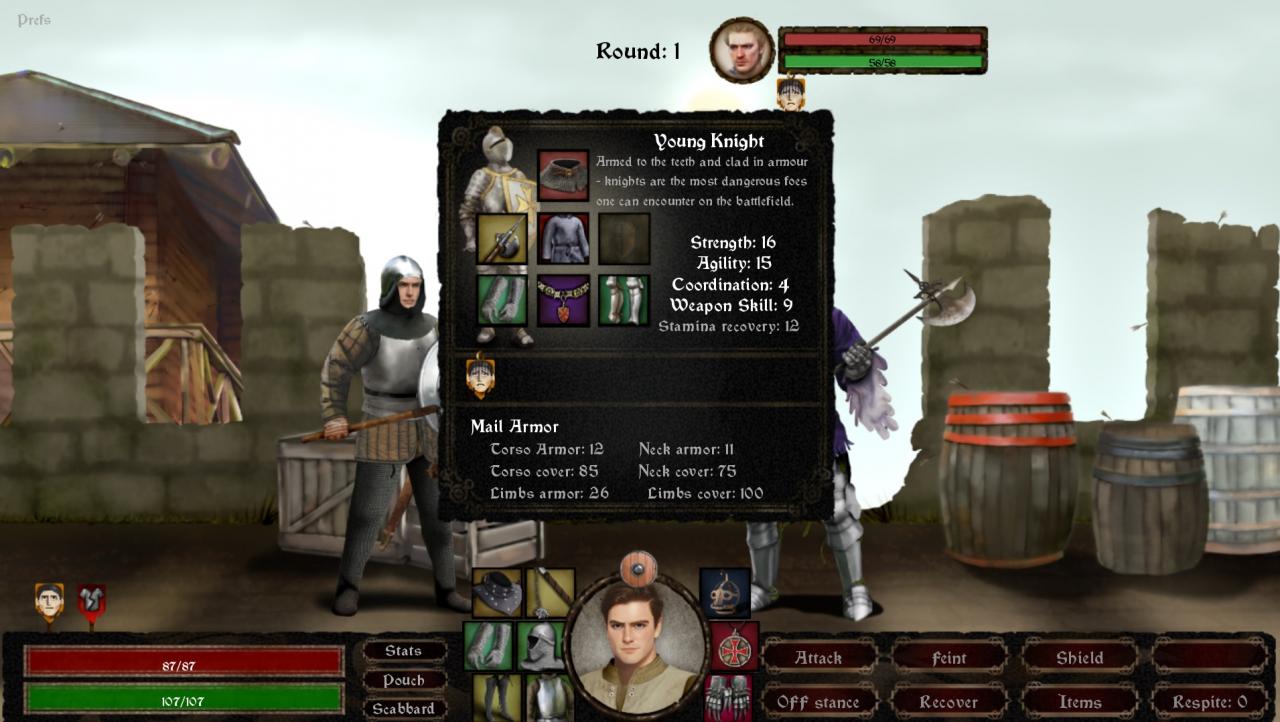
Are you tough enough to duel him all by yourself?
Gather Supply Quest – Village 1 and 2
The gather supply quest is a mandatory quest from the Sergeant in early Chapter III. You can go the high virtue route to earn favors from Eva, or just be a marauding soldier.
Village 1: Pay 50 florin to buy the supplies (Eva route) or chose one of the other options.
Village 2: Pass a virtue check to peacefully gather the supplies (Eva route) or fight to get the supplies.
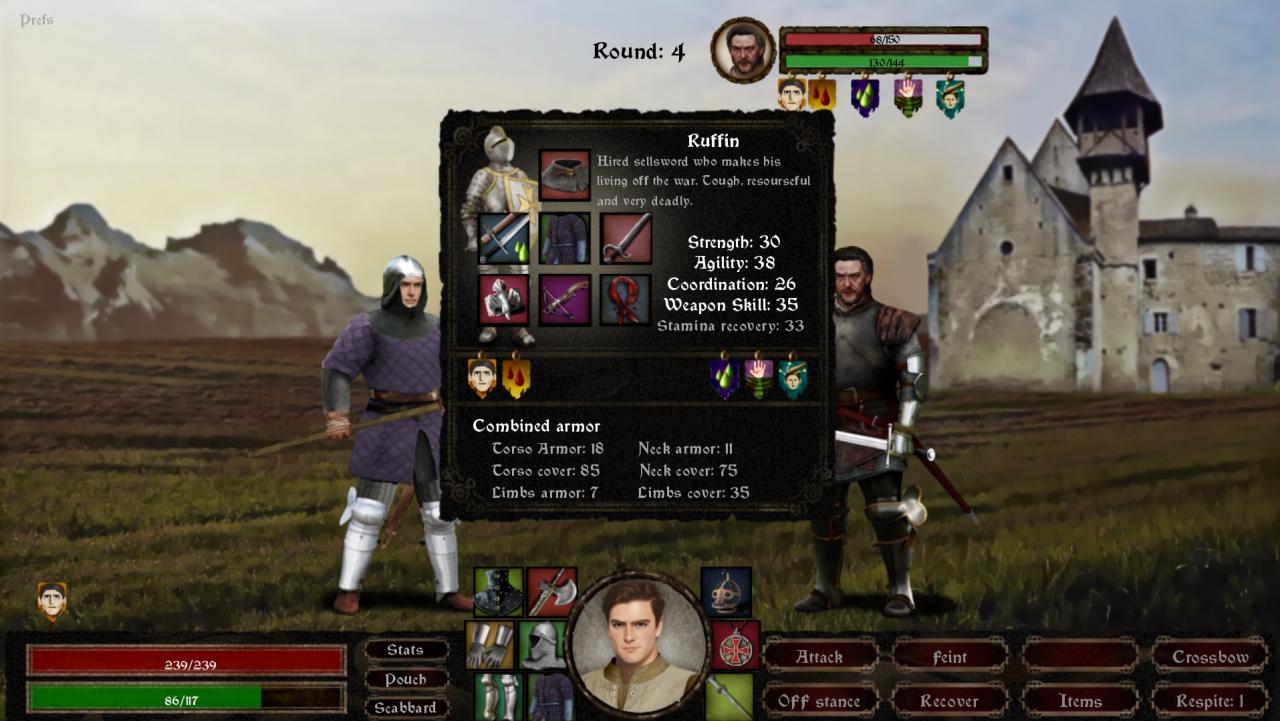
Gather Supply Quest – Village 3: First Ruffin Encounter
You are totally expected to get your ass kicked by Ruffin if you provoke him, it’s a part of the plot. I think my record was getting defeated by Ruffin in 2 turns during one of my early runs. As this not a duel to the death, the story will continue after you get your ass kicked.
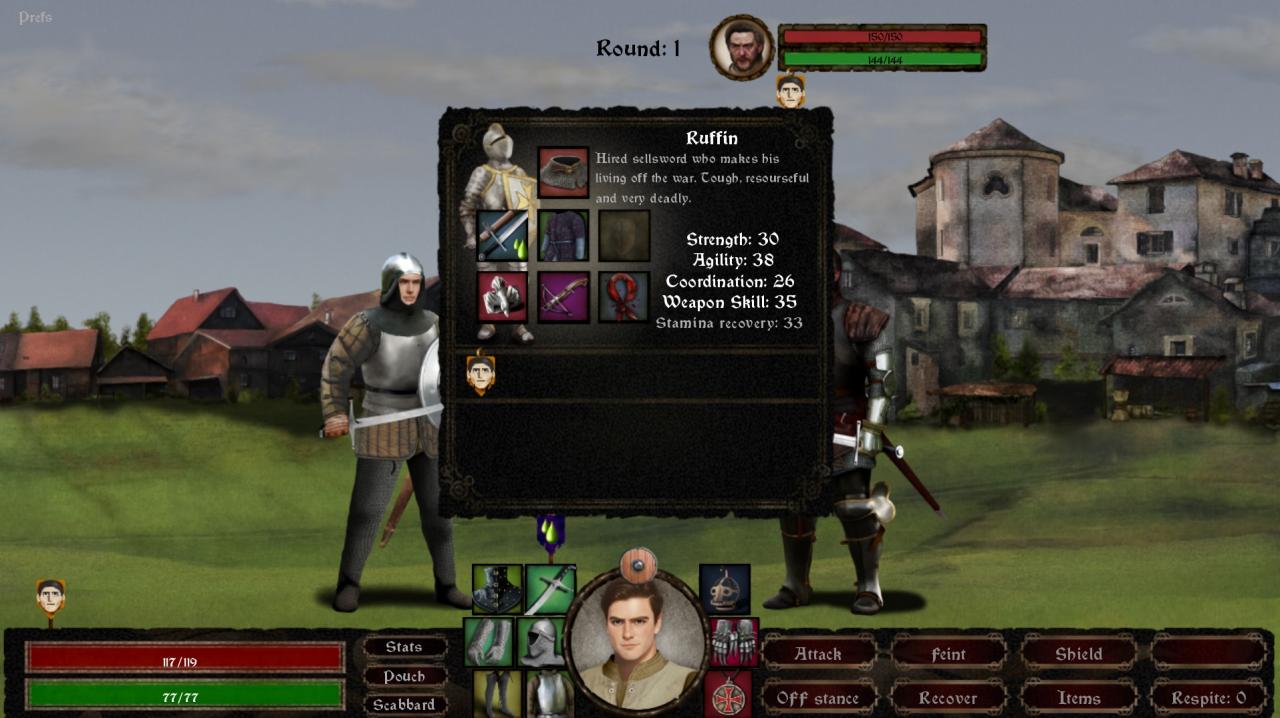
Do you feel lucky, son?
Now on your XX+ run at Profile level XXX+, you will be able to generate an OP character that will defeat Ruffin at this duel. Don’t worry, there’s a story device to address it as well and the show will go on.
After you are done with these three villages, the Sergeant will talk to you and this quest is complete. You can then go visit Eva at De Roche Estate and she’ll let you know how well you did in her view. If you successfully helped Village 1 and 2 and have a high rating with her from prior interactions, she should give you a gift trinket (the Oath, +2 to all physical attributes) for your virtue.
Man of God Quest
Cross pendant, Rabbit’s foot, and Blacksmith’s hammer make a good trinket combo to infiltrate the City as long as you have sufficient Strength and Agility.
Finale – Against the Shield Wall
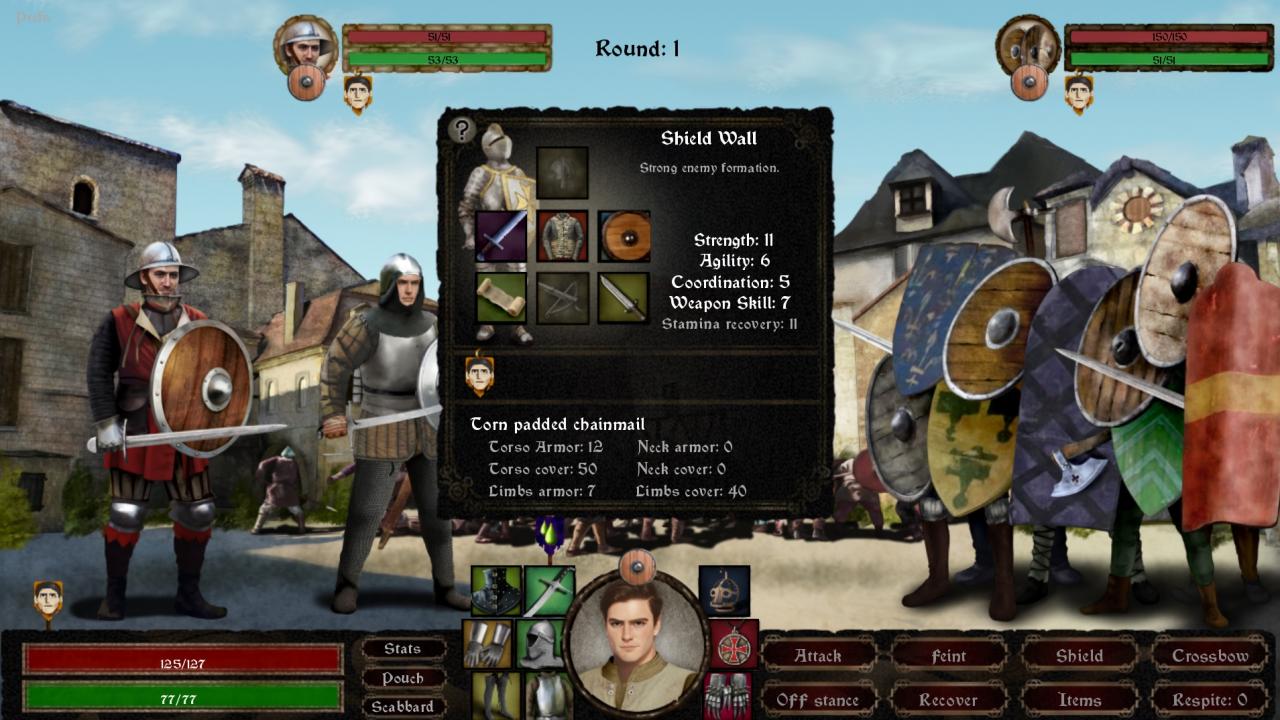
This quest is probably the most important quest of the game so far. Your decision will decide your relationship with Eva, as well as which combat route the end of Chapter III is going to take.
I typically end up choosing to spare de Roche because I can take the influence penalty with the Earl based on my earlier accomplishments in the game. However, if you don’t have close to max influence with the Earl before this mission, you may have to kill de Roche if you want to go to England for Chapter IV instead of Brittany.
Chapter III Finale – Final Battle of Cambari
Chapter III Finale – Battle At the Forest Hunt
England Route (recommended for a high virtue run)
[In Progress]
The Guy Who Won’t Go Away
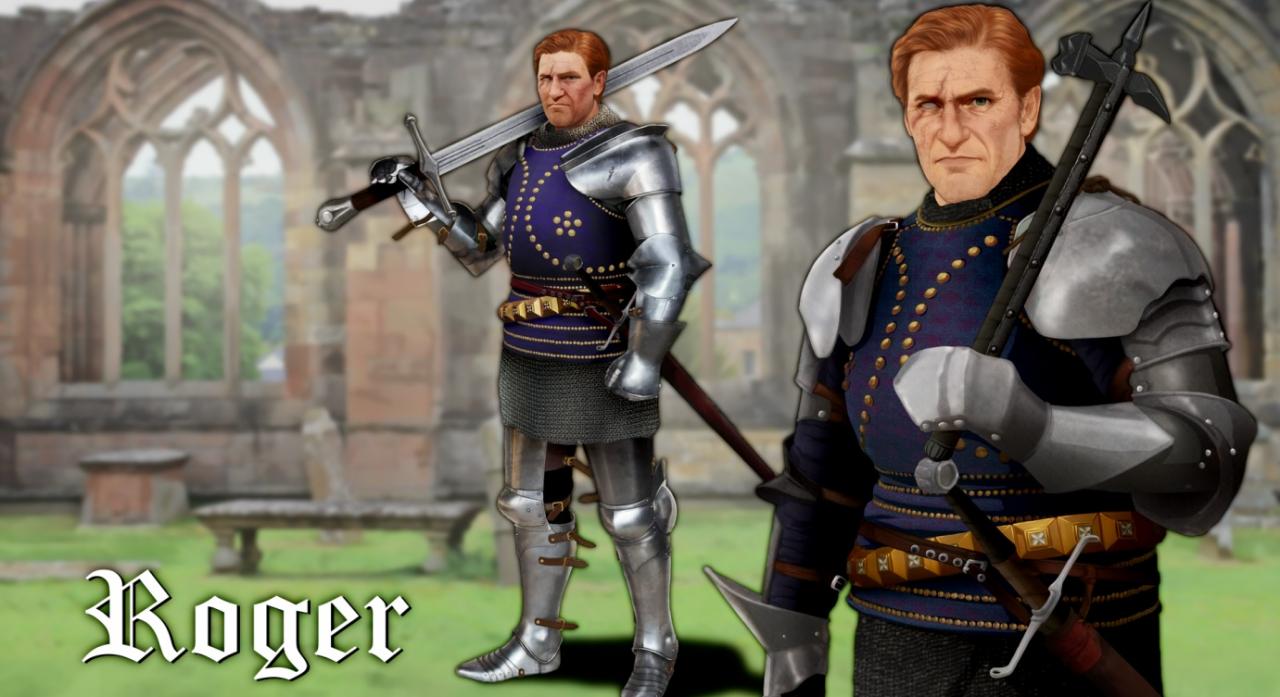
Say Hi to Roger, your nemesis during the English Civil War and Canterbury’s chief enforcer. One of the tougher bosses in the game, he’ll school you in the correct use of shield bashes and pummel strikes (on separate occasions). It’s quite likely Roger will end a couple of your runs prematurely if you are not ready for him and his combat style. Enjoy your multiple encounters with him through these Chapters as he’ll certainly do his best to hammer and pummel you!
Brittany Route (recommended for a low virtue run)
[In Progress]
The Star of the Rennes Show
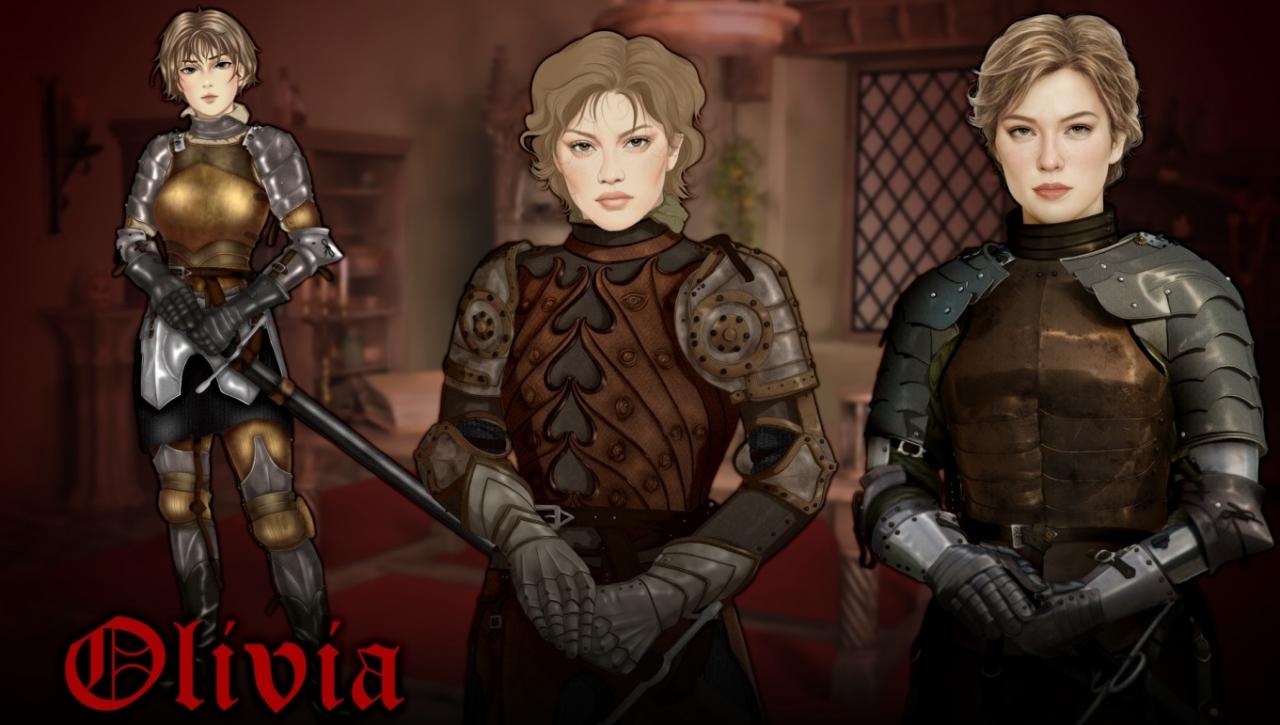
Low Virtue is recommended for this route because a happy ending with Olivia is not possible if you are a high Virtue character.
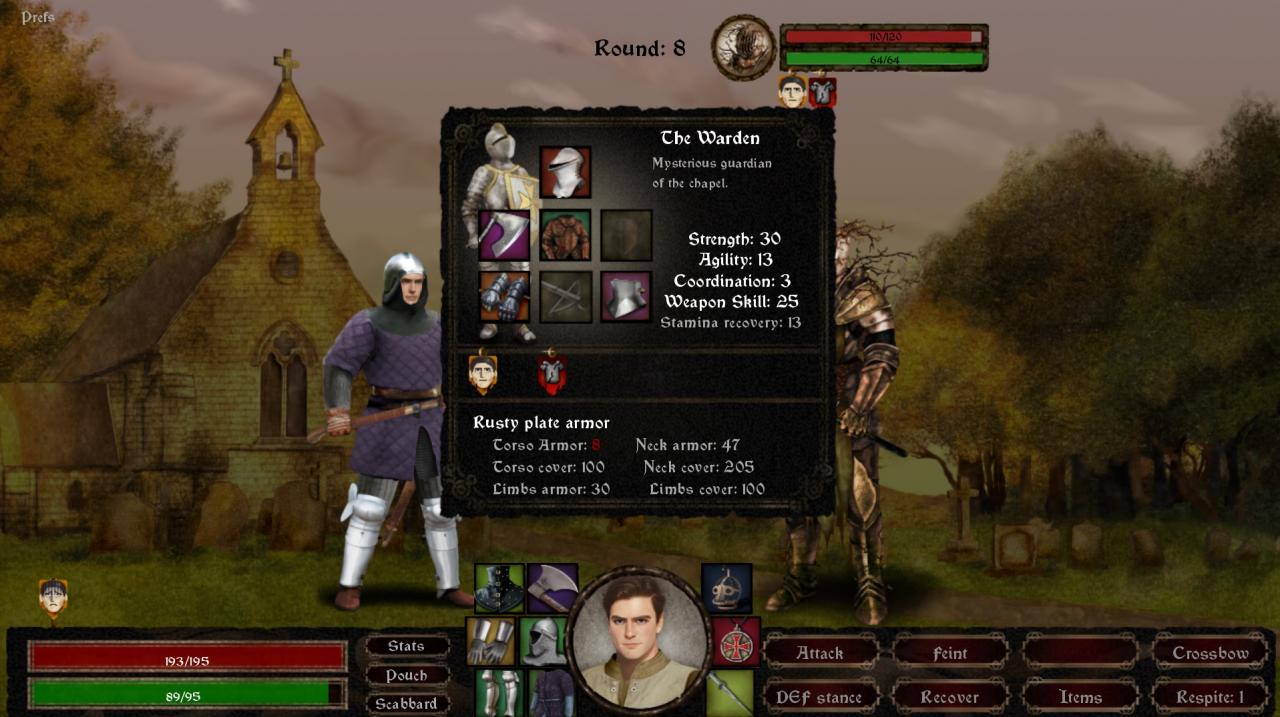
The Medallion Quest – Optional Warden Encounter
For Anna’s Medallion quest, you will need to defeat the Warden (anyone remember the Green Knight film from 2021?). There is a Virtue check pre-combat, the only difference is that a high Virtue player gets the Warden’s HP reduced by half before the fight starts. Everything else being the same.
The Warden regains 150 fatigue regularly. So he never tires. Other than having the appropriate stats, the key in dealing with the Warden is to bring a weapon and/or trinket that can destroy his Torso armor (hit chances for other parts are a bit low). Once the Torso armor is gone, the Warden will go down quickly.
Good weapon choices for this fight include 2-H axes that have Chop Armor and the 2-H Sword that can Obliterate armor.
Chapter V Optional Finale with Ruffin
Your choice on whether to chase or not chase Ruffin and Co. This choice has no impact on subsequent storyline. However, if you decide to chase them, there is no backing out of the final mano-a-mano with Ruffin, so be ready.
 Can you finally smack him down for good?
Once the final encounter with the mercenary forces is done, Olivia will throw herself on you and you will need to decide whether to marry her or not. If you decline her offer and runs, you move on to the Interlude below.
If you decide to accept her marriage proposal, then the following happens:
If you have low Virtue: Option to stay with Olivia happily ever after and trigger Ending 1. This ends this run and you can go and start your next run.
Alternatively, leave town and head to Paris and Interlude without a fuss.
If you have high Virtue, alas, happiness with Olivia is not in the cards. You may either:
Leave town quietly and head to Paris and Interlude without a fuss after finding out her true colors.
Or accuse Olivia of witchcraft and heresy, in which case you’ll get a rude awakening and have to fight your way out of Rennes and head to Paris and Interlude.
Nothing much to say here. It’s a short timer like the Prelude, craft, train, shop, rest, etc until the timer runs out.
However, if you go to the Knight’s Duel, do not take any poisoned weapons/bolts as it will result in immediate disqualification and a prestige/reputation hit.
Emma, aka my body for jewelry!
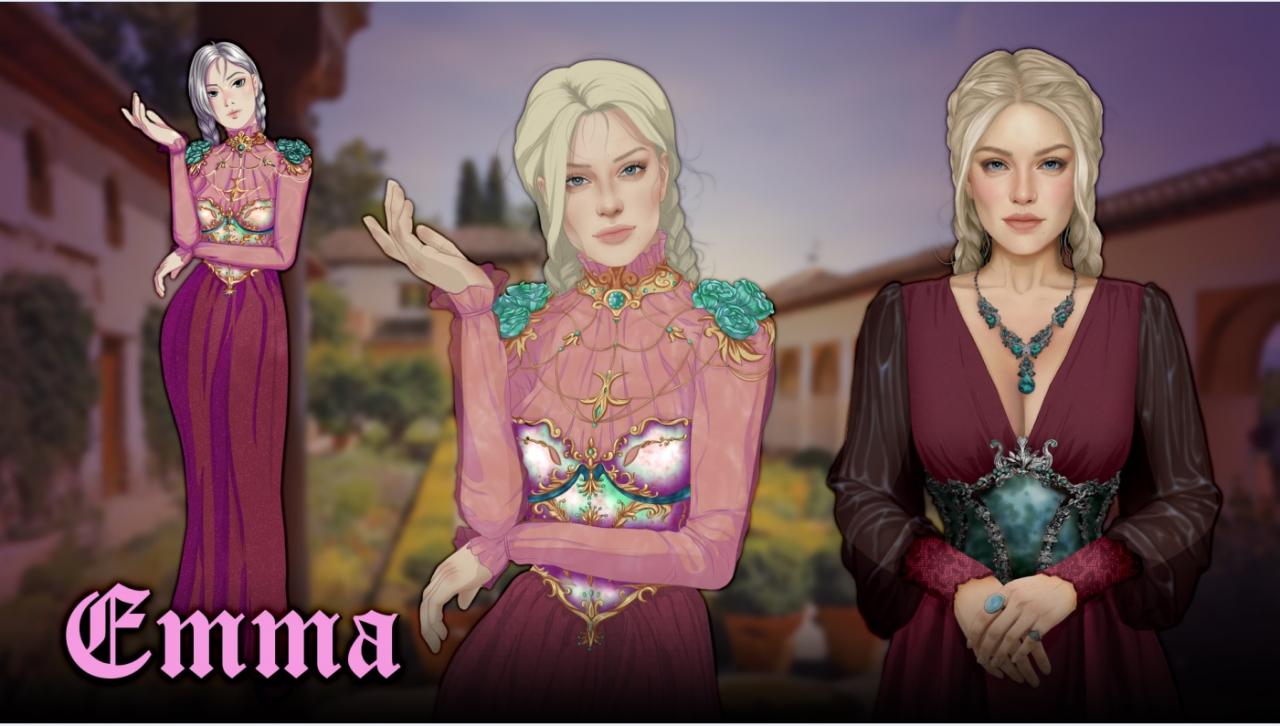
Unlike Olivia in the previous two Chapters, Emma doesn’t have much story or dialogue in Chapter VI. She is a fairly two dimensional place holder character. The only challenge you are going to have with her is to find all the jewelry she will accept to increase her affection rating over 100. As long as you have 5 or 6 pieces of jewelry trinkets ready for her when the time comes, she’s all yours. A real shame because her current HWG Reforged character design is probably the best out of the bunch.
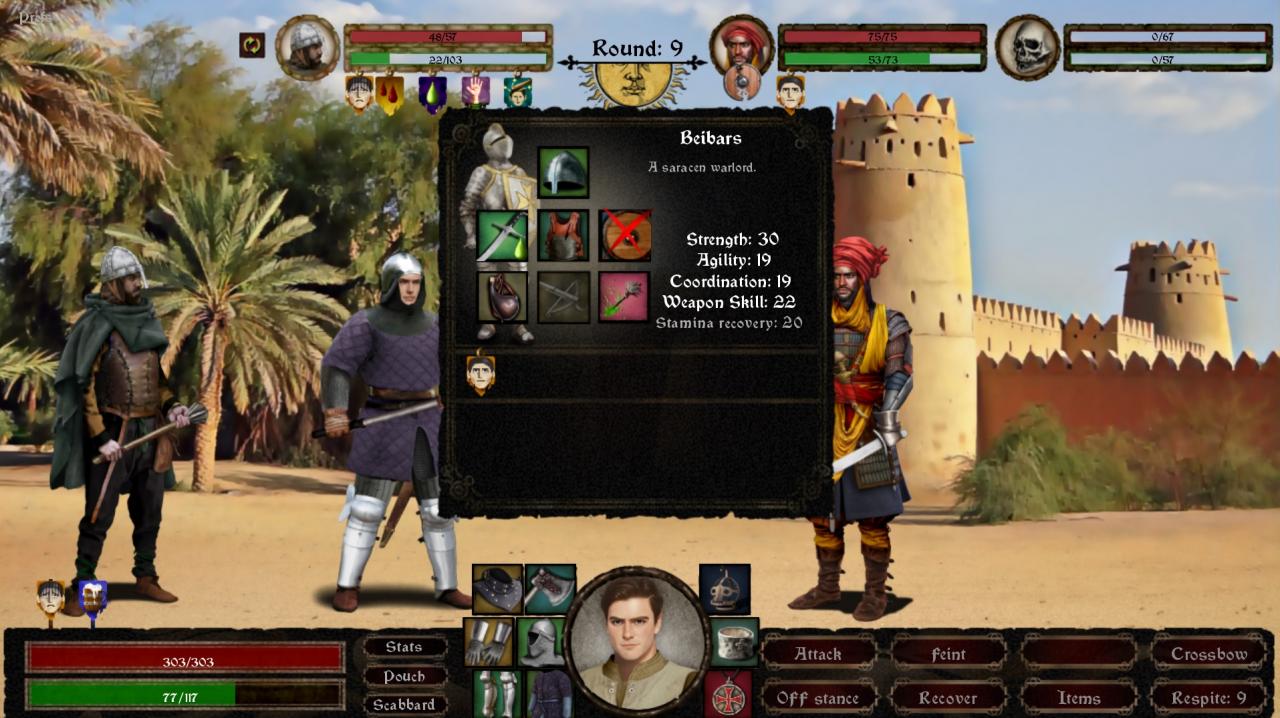
Meeting Beibar, mini-boss of an optional side quest
No combat at the end of the timer, just a menu with choices as you didn’t find Renauld:
Ending 3: Take the ship to go back to France.
Endings 4 or 5: Per halcyan2: Both of these require you to have a great relationship with Emma. You fail to find Renauld, so when time runs out you have the option to stay with Emma. Depending on your relationship with the Governor (Emma’s father), that determines whether you get Ending 4 or 5.
The El Mansur Route can be taken anytime on the Travel Map while you are in Chapter VI. It’s a grueling VN trip with a lot of natural hazards and combat. Bring LOTS of canteens, a back up helm, and don’t expect your squad members to survive this trip.
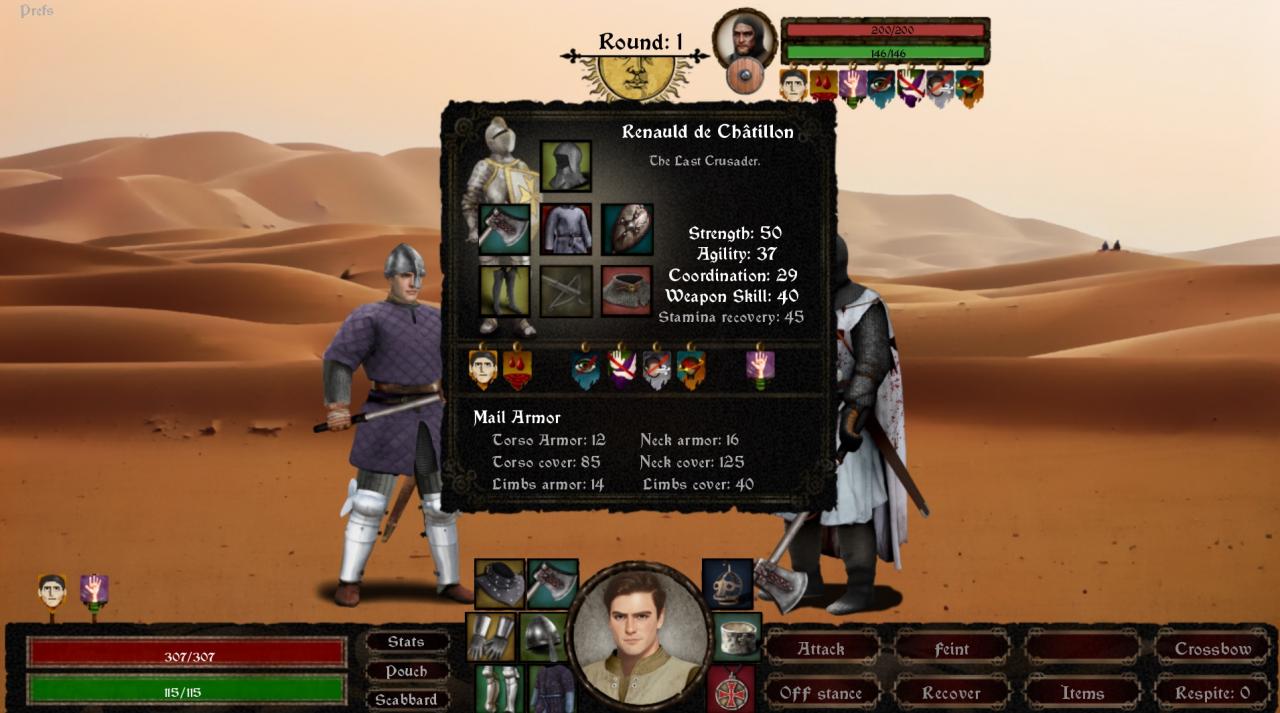
Meeting Renauld in El Mansur and surviving will complete the game and take you to Ending #6.
How to Edit Starting Attribute Caps (Final Tip for High Profile Level Players)
Once you have a high HWR Character Profile, you’ll be rolling in points for a manual start. However, starting skills are limited at 15 for Physical Attributes, and 10 for Weapon Skills. Some players may want a higher starting cap to waltz through the first few chapters and focus on the late game. And here is the solution:
From the Dev (death and rebirth): Open “script_dlc.rpy” file in the local game directory via Notepad and search for “screen character_creation_roguelike:” — this screen has a bunch of “+” and “-” buttons that control how high can you take your starting stats and how much points does that require.
However, the script is pretty messy, so below is a more clear example on the specific line you’re looking for:
In the “script_dlc.rpy” file below the “screen character_creation_roguelike:” section, look for the line:
elif player_strength < 15 and player_roguelike_points >= 100:
Change the 15 part (default starting cap) to a number of your choice and you got the new Strength cap for your new character. I personally changed it to 35 this time since I have way too many points to spent at 920+ Profile Level. You can adjust to your personal preference.
Repeat and rinse for the other attributes in the sections immediately below and you got your new OP starting character with expanded attribute caps. Good luck and have fun!
Sample starting character with expanded attribute caps:
How to Edit the Melee Training Cap Above 35
Open script.rpy in your local game folder and search for the two specific code sections below:
***
if player_gold >= 35 and player_weapon_skill_swords < 35:
elif player_weapon_skill_swords >= 35:
* * *
Just change the two 35 in both code sections above to whatever higher number you want and you should be good to go.
I modified my game’s script to 50 and tested it out in game. I was able to raise my melee skill above 35. So this works.
Good luck and have fun!
More Guides:
- Heads Will Roll: Reforged – Hardcore Achievement Guide
- Heads Will Roll: Reforged – All Console Commands & How to Enable Cheat
Does changing the skill cap in script file disable achievements?