This is a more in depth guide to how to work the blacksmith in Kynseed. This will include ore locations, mini-game info, prices, and more.
Basics
There are many items you can make, listed below:
- Bucket
- Charm
- Decorative
- Hammer
- Jewelry
- Shovel
- Sickle
- Sword
- Utensils
- Ward
The ores are as follows:
- Tin
- Copper
- Iron
- Zinc
- Luminium
- Shadderwryth
- Abysstone
- Hyalite
The Quillian ores are Tin, Copper, Iron, and Zinc. These will be found throughout the regular areas you adventure through. The rarer ones, in order of rareness, are Luminium, Shadderwryth, Abysstone, and Hyalite. These you can find in later areas of the game.
Store Stock
The stock storage for the smithy is behind the counter. It has three tabs, one for items you have that can be sold to anyone, one for items that have been requested by and specifically made for a customer, and one for ore. Your employees won’t make more items unless there is ore in stock, and often need different types to meet customer’s requests.
I’d recommend having 15-20 of each of the Quillian ore types before you purchase a smithy, this way you can make a bunch of items right off the bat and have more left over to be made into requested items.
Mini Games
There are several mini-games you will play when making an item at the blacksmith. There are five total. Most of this will be taken directly from the game.
Prices Through Sickle
The price of the items you make will always be the same; there is no haggling in this shop. There are things you can do to increase the price, such as picking certain perks, but that’s it. Here’s the prices for each item by ore type and quality. Below are the prices for the items bucket, charm, decorative, jewelry, shovel, and sickle.
Prices (The Rest) and Tips
Here are some tips for what ores (and ore levels) I recommend you use for each tool based on ease of mini-games and price.
- Buckets: the best Quillian ore is either Iron or Zinc, and the best rare ore is Shadderwryth. This one you can use whatever ore rating you want.
- Charms: all Quillian ores result in equal prices, while Luminium is likely the best bet for a rare ore. Again, this is one you can use whatever ore rating you want.
- Decorations: the best Quillian ore is Copper and the best rare is either Shadderwryth or Abysstone. Any ore rating.
- Hammer: Iron is best, then Shadderwryth. Any ore rating.
- Jewelry: Zinc and Copper are the best Quillian, and for rare ores it increases as you go up (Lum, then Shad, then Abyss, then Hya). Whatever rare ores you have extra or a lot of I’d recommend using to make jewelry, especially since it’s one of the pricier items. Any ore rating will work for this item type.
- Shovel: Any besides Tin, and all rare ores. I’d say mostly stick to the Quillian ores for this item type since shovels aren’t worth as much as others. Any ore rating.
- Sickle: Iron is the best Quillian ore and Shadderwryth is the best rare ore for this one. I’d recommend sticking to 2* ore or less, since when you use the 3* or above ore the sharpening mini-game becomes a lot more difficult.
- Sword: Copper, then Iron and Zinc. For rare ores, it’s like for jewelry. Like jewelry I’d recommend using your extra rarer ores for this item type. Like sickle, I recommend sticking to 2* ore or less for the sharpening mini-game.
- Utensils: Iron or copper are best. I’d stick with those two and avoid using rarer ores if possible since these don’t have high prices. Any ore rating.
- Ward: Zinc, then Iron, and Luminium. This is one of the pricier items. Any ore rating will work.
- The priciest items are swords, jewelry, charms, and wards!
Most of the requested items in the blacksmith are shovels, sickles , and swords. For some reason almost if not no customer will ask for any of the other item types. They will of course request those other item types to be made and picked up at a later date, but not to have them immediately. Because of this I recommend having shovels, sickles, and swords in stock at all times; everything else can be made on a case-by-case basis.
Balancing Your Checkbook
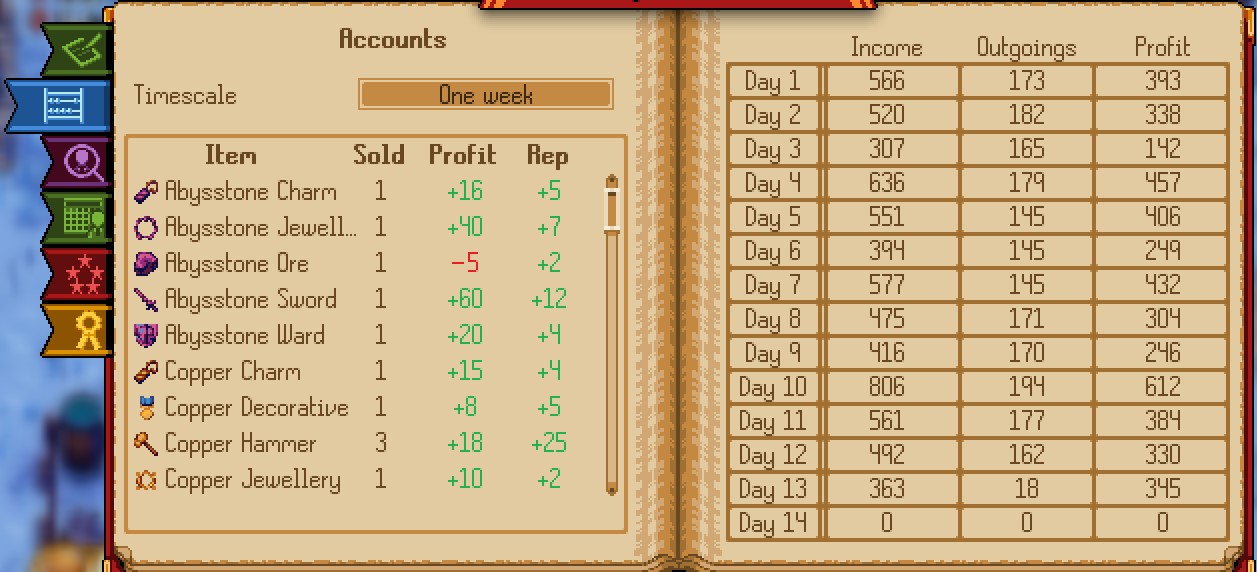
This page in your ledger shows exactly how much money you’ve made from each item, the reputation it gave you, and the total amount of money each day you make/lose. You can change the time scale from showing that week to that day, or even that month. You will also get a letter at the beginning of each month showing the same information in a condensed format.
This page will help you make sure that you’re actually making money and not losing it! The outgoings include the wages for your employees as well as money spent on buying items or ore.
Employees
You can hire employees to work in your blacksmith shop. There are two positions to fill, the seller and the blacksmith. The pages that are relevant for this in your ledger are the Staff and Rota pages.
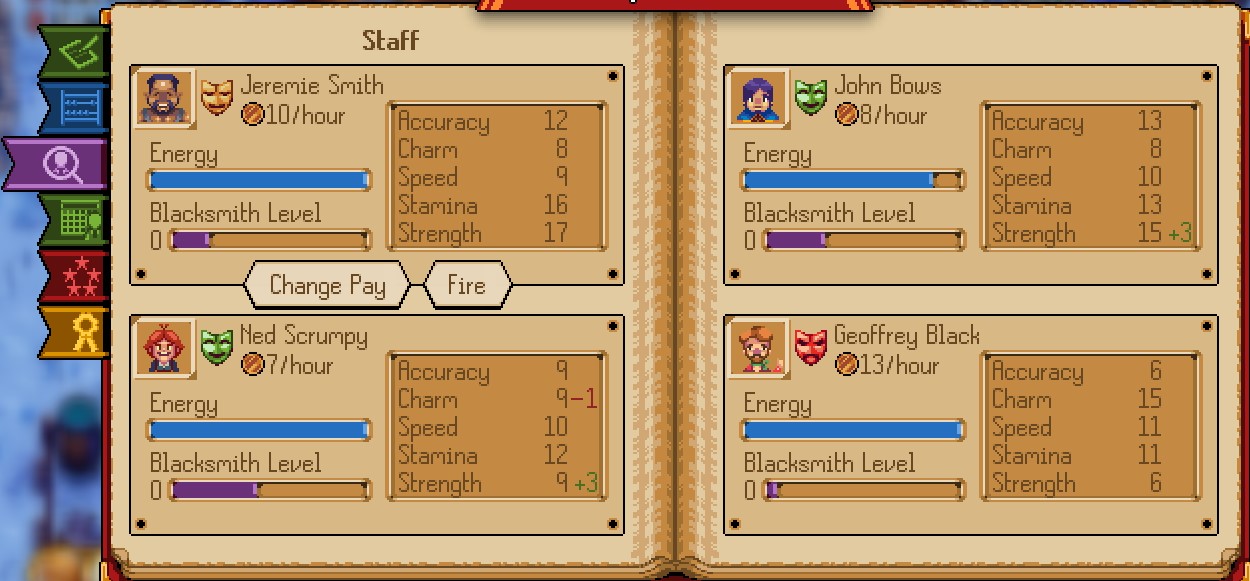
This page is where you can hire, change pay rate, and fire your employees. It also shows you their energy levels, mood, blacksmith level, pay rate, and stats.
Stats
The stats that matter most for this shop are Strength, Accuracy, and Speed. Sellers need higher Speed, and blacksmiths need higher Strength and Accuracy. The higher those stats are the higher quality will be produced and sold quickly and efficiently.
Mood
Their mood has an effect on their energy levels as well as how much their blacksmith level increases when working. Green means happiest, Yellow is fair or moderately happy, Red is unhappy. You can influence their mood by giving them preferred gifts and increasing their pay.
Energy
Energy goes down with the more work they do. You can replenish their energy by giving breaks or food gifts.
Blacksmith Level
No idea how this works, so if anyone wants to comment and let me know I’ll edit this to include that info.
Pay Rate
There is an expected or minimum pay for each employee based on their stats. The higher their stats the higher their minimum wage. Increasing pay rate as mentioned before makes employees’ mood go up.
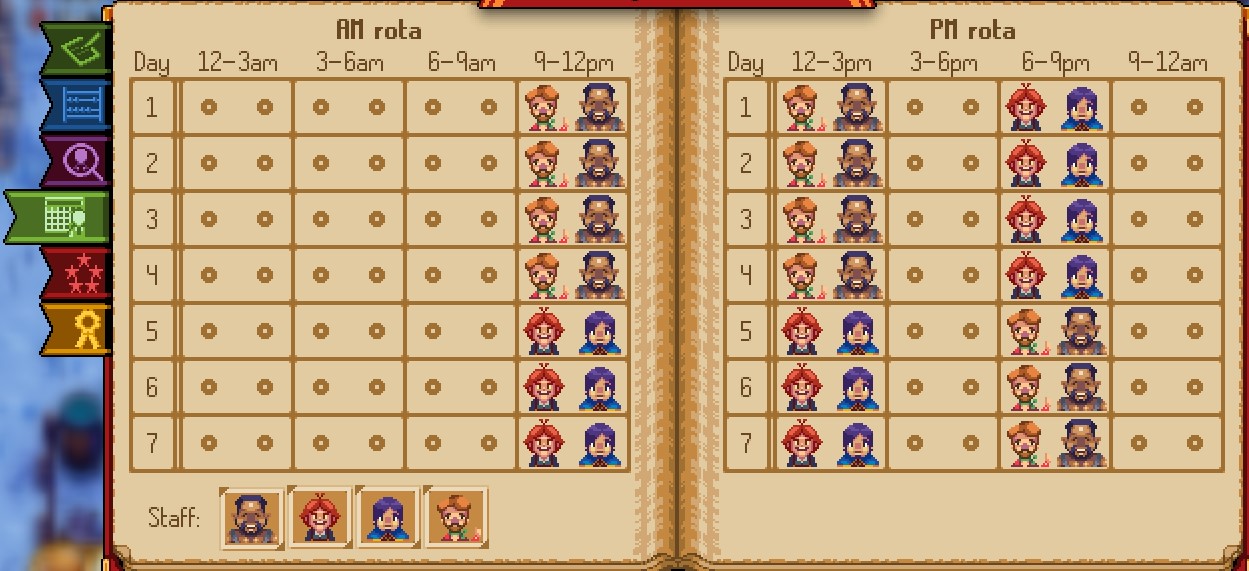
This page shows what times your employees can work. Your employees are shown in the bottom left and you can click on the circles to designate when they will work. I recommend having both a seller and a blacksmith working at the same time unless you are going to be working as one or the other since if even one employee is working the shop is open. If you have a blacksmith but no seller it will damage reputation due to customers coming in and not being served.
Reputation, Perk Points, and Specializations
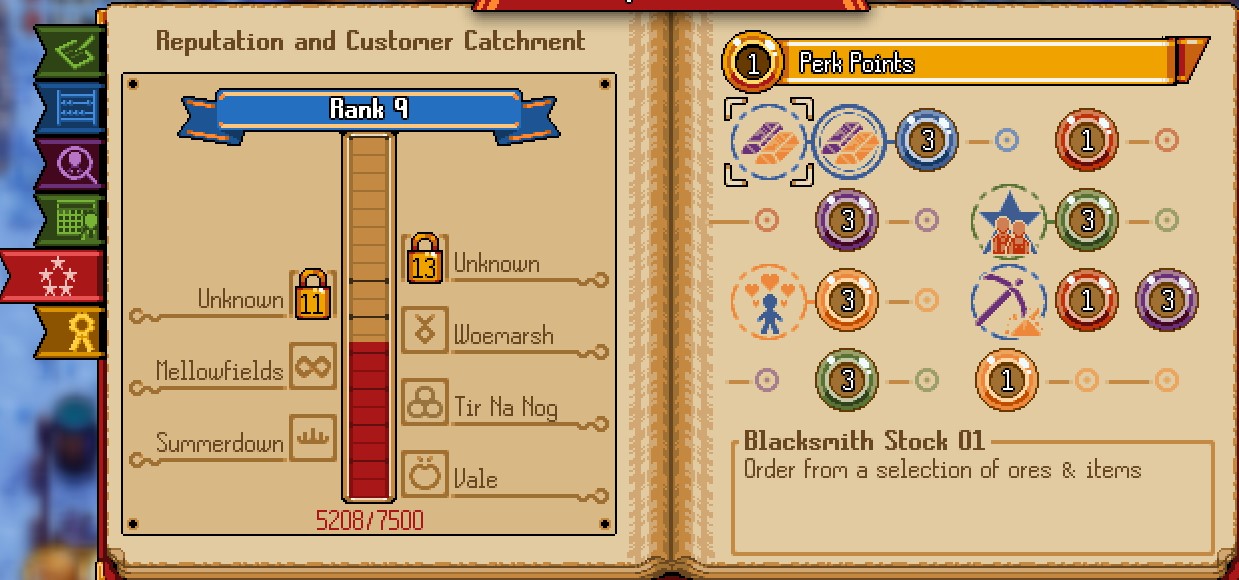
Reputation is something you gain in many ways, but in the blacksmith it is gained by selling items and having happy customers. The more reputation you have the more customer areas you unlock. Once you unlock Summerdown for example, customers from Summerdown will travel to your smithy to request items. Reputation is gained whenever you make a customer happy with a good sale, and is lost when you reject their order or give them the wrong item.
Once you rank up with your reputation you start to gain “perk points”. Perk points are gained every time you rank up. These can be spent unlocking certain perks that will increase employee stats, allow you to order certain items, etc. Here’s a table listing the perks and what they do:
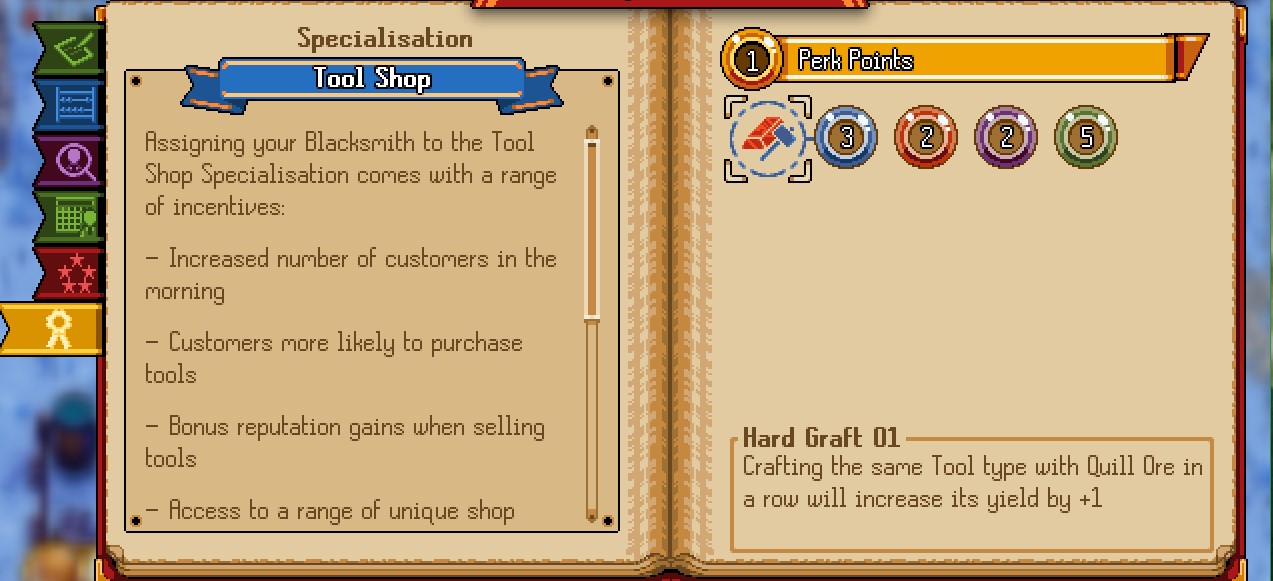
Specializations come a bit later in the game and have to be bought. There are three for the blacksmith: Tool Shop, Weapon Shop, and Jewelry Shop. Each shop type comes with certain perks and drawbacks. Things that are affected by specialization include what time of day customers come more often during, what items are most requested, the price of said items, and more. Here’s a list showing what items are affected by each specialization:
- Tool Shop: Sickles and shovels.
- Weapon Shop: Swords and wards.
- Jewelry Shop: Jewelry.
Each specialization also allows for more perk options. The specific perks are unique to each specialization but tend to affect things like output of crafts, such as making it so that every time you craft an item of a certain type twice in a row its yield is doubled. Here’s a link to a list of all the perk options for each specialization, courtesy of Bulgogi-Chan:
https://steamcommunity.com/app/758870/discussions/0/3723945543088322617/
Ore Mining
If you’re going to run a smithy you’re going to need a lot of ore. You can get ore by mining it, digging it up randomly, or from fighting monsters. Here’s a list of where to find each type of ore and how many nodes each mine has. [Side note – If anyone knows the details for Abysstone or Hyalite I’d love to add it to this; I haven’t gotten that far yet!]
As you might notice, there are a ton of nodes for Tin, some for Zinc, then it just goes down in number of nodes as you move up in order of the ores.
Other Advice
- Get Mr. Fairweather’s item, the Machine Tool. It doubles the yield of your crafting in the blacksmith.
- Some of the perks I’d recommend are the Blacksmith Staff Training levels, Customer Experience 1, and Manic Miner. I’d also recommend that for whatever specialization you choose you get the perk that doubles yield when crafting twice in a row with Quillian ore. There’s another level that does the same for rarer ores, and I’d recommend that too.
By Jasper Rivas