
I bounced off Dragonwilds twice before it clicked, and both times it was the same reason: I had no idea what order to do things in. I’d wander out, get flattened by skull-icon enemies, come home starving and exhausted, and log off feeling like the game hated me. Once I understood that survival, combat, and base building are actually one loop feeding into each other, the whole thing opened up. This guide is that roadmap — what to do first, what to ignore, and how the three systems connect from hour one. It’s for new players in their first few sessions; if you’re already farming vault cores, you’ve outgrown this.
The three meters I check before anything else
The HUD in the bottom-left is where your run lives or dies, and I learned the hard way that ignoring it has permanent consequences.
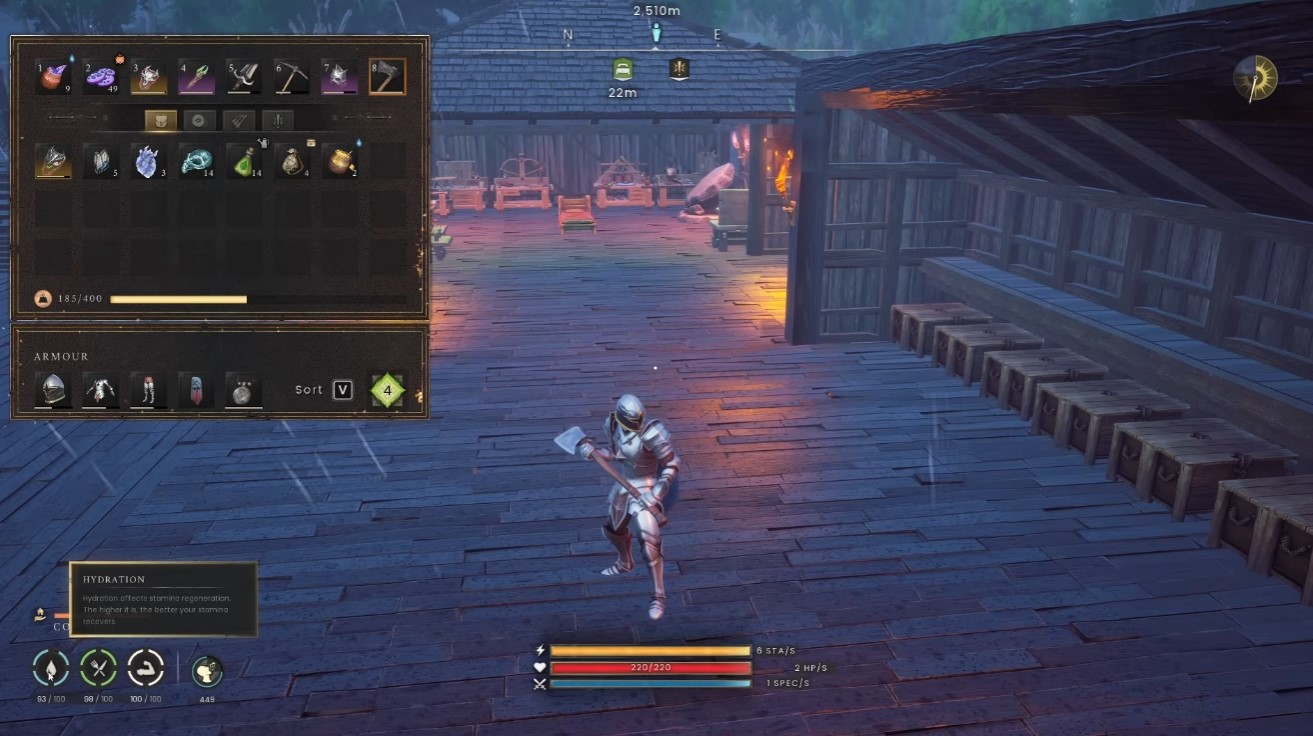
| Meter | What it does | What I do |
|---|---|---|
| Hydration | Higher hydration = faster stamina regeneration | Drink water; upgrade to infusions later for buffs like slower thirst drain |
| Sustenance | Food bar; hunger management | Eat raw berries in a pinch (10 health, 10 sustenance), cook stacks at base (dried berries give 20/20) |
| Rest | Sleeping or lying in bed | Return to base and rest — this one is not optional |
The Rest meter is the one that punishes you quietly. If you don’t rest, your stamina and weight capacity permanently decrease until you sleep again. At the 50 and 25 thresholds, weight capacity drops to 300, and stamina falls from 100 to 80, then 60. The bar blacks out and won’t recover until you lie in your bed. I lost a full day of progress to this because I kept exploring instead of going home.
Warning: Do not explore for days without returning to base for a quick rest. You don’t have to sleep — just lying in bed is enough to reset it.
Reading the rest of the screen
The rest of the interface matters more than it looks:
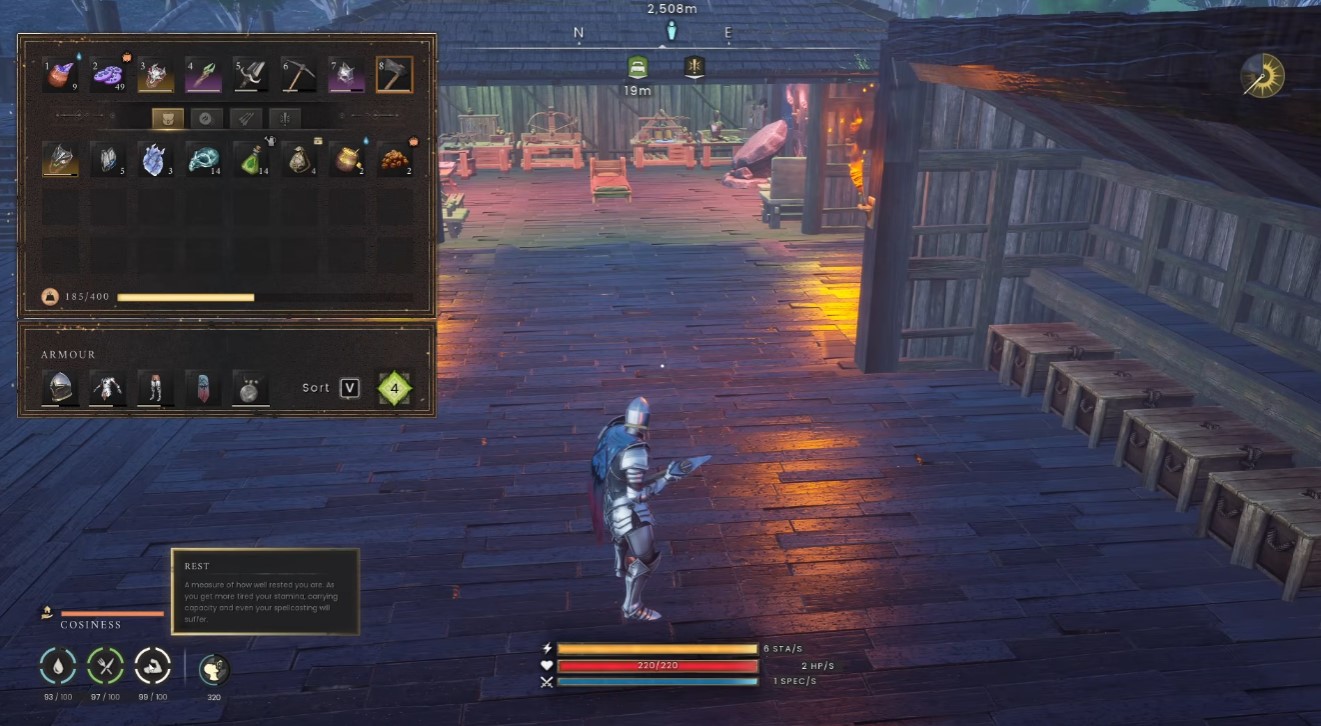
- Hotbar / radial wheel (top-left): Cycle weapons, tools, and gear. I slot gear pieces here for their passive perks.
- Compass (top-middle): Facing direction plus active points of interest.
- Day/night cycle (top-right): Tracks days and nights; your cue to head home and rest.
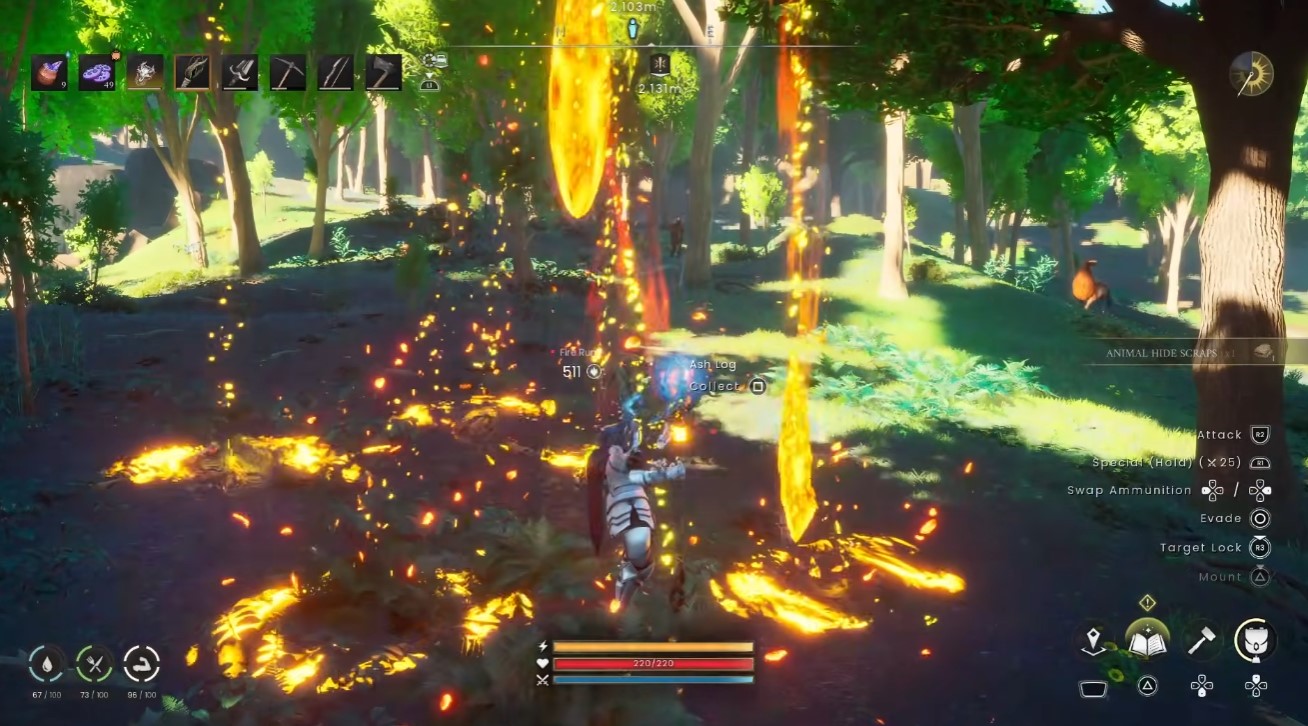
- Right-side prompts: Context-sensitive to whatever you’re holding — block with an axe, special attack and ammo swap with weapons.
- Bottom-right menus: Build menu, inventory, and magic. On controller, the triangle button casts magic: select the piece, look at the target, then cast.
- Special bar (center): Stamina, health, and special. Special attacks drain the special bar instead of stamina, so stamina stays free for parrying.
Runes: where they come from and why you care
Every spell in the game eats runes, so this is worth understanding early rather than late.
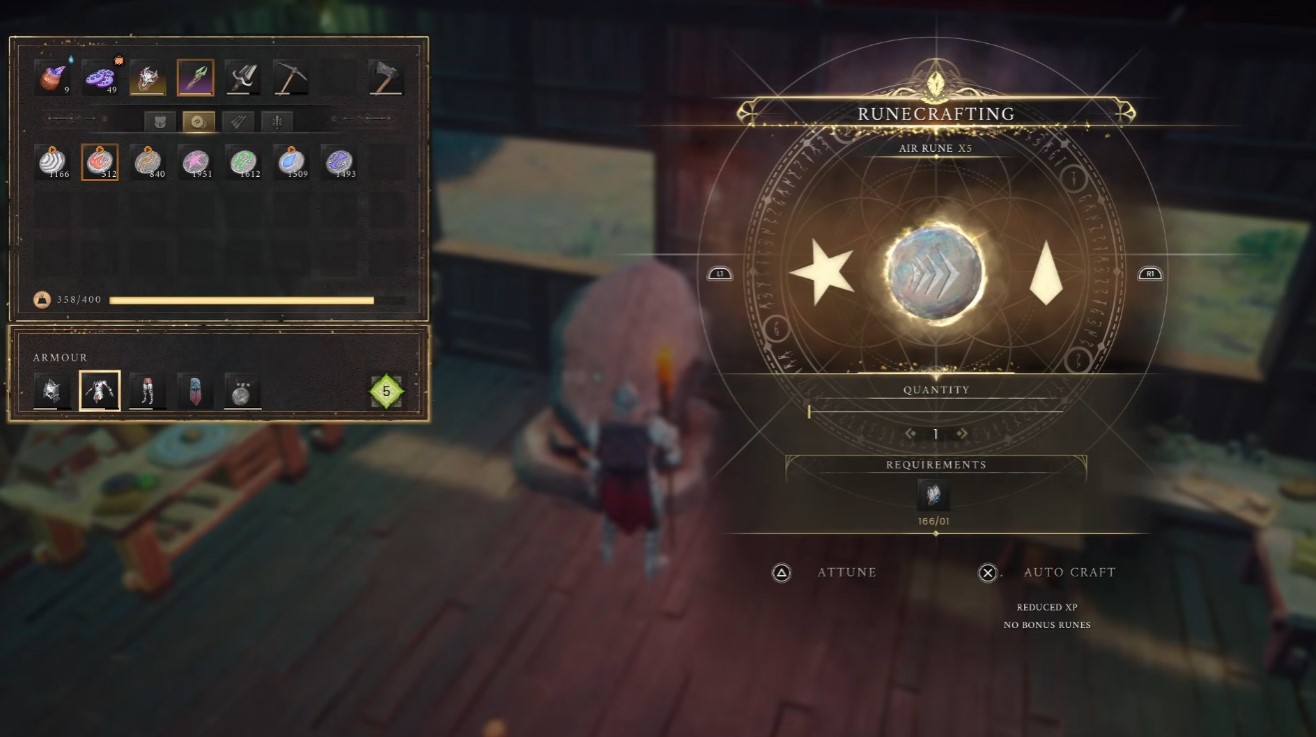
Runes drop from enemies, sit in chests, and float around the world as stones. Ground stones you just pick up. Sky stones need to be knocked down with rock explosion (it misses if they’re too high) or mined with a basic pickaxe. Then you convert basic runes at a Rune Vent by siphoning magic into your inventory — vents respawn over time. You can also craft runes at the rune altar, one of the first stations you build: take runes from broken stones, set the quantity, and craft.
Costs add up fast. Rock explosion, for example, runs 30 earth runes and 15 fire runes.
Combat: why everything one-shots you at first
This is the part that made me quit the first time, and it’s because I didn’t understand power level.
Power level shows in the bottom-right of your inventory and averages your equipped gear. Every zone has its own power level, and when you first enter, yours is always one below the zone’s until you get that zone’s gear. If you’re under-leveled, enemies display skull icons — that’s the game telling you to leave. Removing a gear piece lowers your average and can trigger the skull indicator, so don’t strip down mid-fight.
Weapon types
- Melee: Daggers, swords, axes. One-handed and two-handed versions, each with different special attacks.
- Staves: Cast magic.
- Bows: Basic bows, short bows, crossbows.
- Wands: Added in 1.0 — a more mobile magic option with slightly less damage.
The parry change that matters
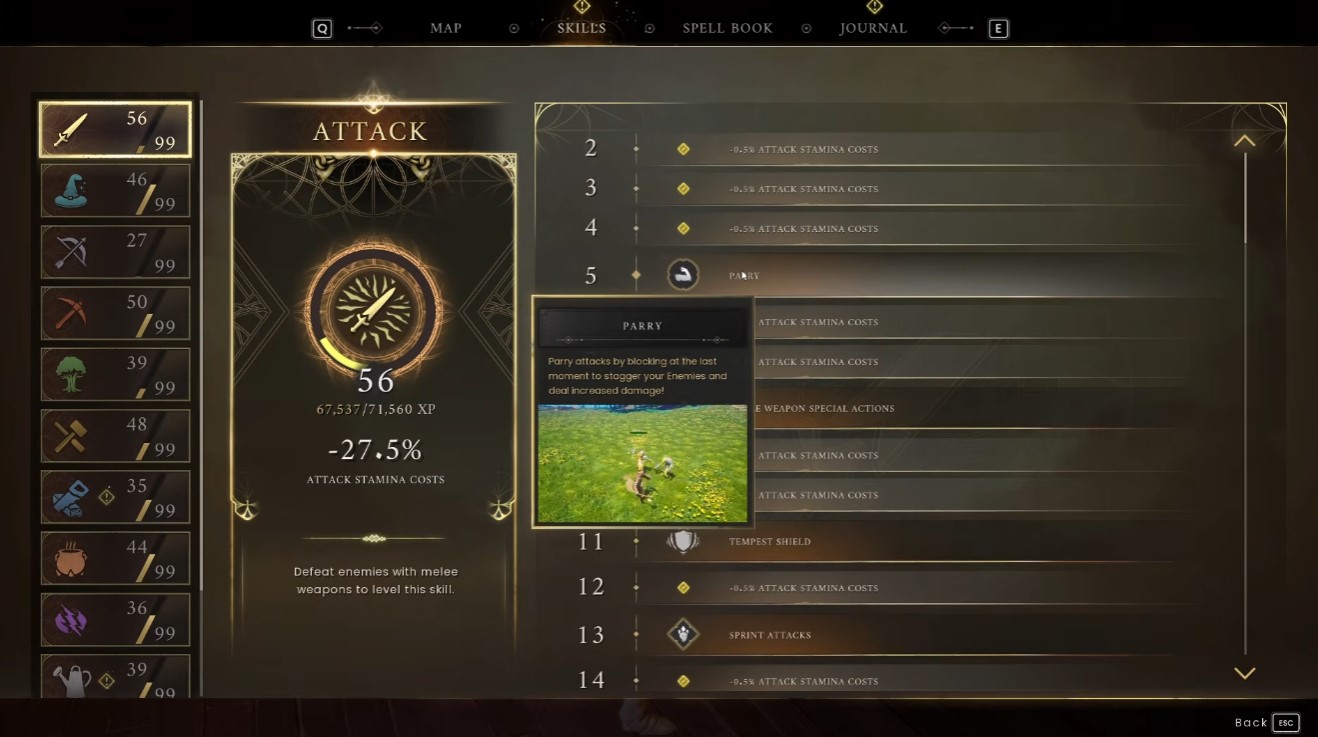
The parry system got a major overhaul in 1.0, and it’s worth building your whole combat rhythm around it. A successful parry replenishes stamina and stuns the enemy, which opens a follow-up attack and lets you land powerful finisher moves. Blocks do not give you the stun or the follow-up. So the loop is: normal attacks, combos, and parries balanced together — not turtling behind a shield.
Dodging without running away
Roll in any direction, or tap evade with no movement input for a short evade that still gives i-frames while keeping you close for an immediate follow-up. That short evade is my default in close-range fights. Don’t spam rolls — they create distance and lock you into longer animations.
Ranged and magic
Pull the arrow and fire early on; fall-off abilities unlock via skills later. Zooming in with the bow costs no stamina, which makes it a free scouting tool. Enemies have critical spots — headshots beat toe shots, and early on many creatures want you aiming for the hand.
Magic chains into combos with alternate attacks, using water, air, or fire ammo. Fire goes attack, attack, infuse, then a full firestorm, with greater abilities at higher levels. Water heals you while you stand in it. Wind knocks enemies back and forces repositioning. The R1 special attack doesn’t cost stamina. Pair magic with dash tech to cut down your downtime.
Tip: When you’re outnumbered, block and follow up instead of fishing for perfect parries. Perfect timing against three enemies is a losing bet.
Skills and the magic you’ll use for chores
Every action grants experience. Melee, magic, and range all level separately, and early levels reduce stamina cost. Parry is learned at level 5 through basic melee combat. Mining and lumbering skills unlock utility spells — rock explosion comes at level 11.
Here’s the thing I wish I’d known sooner: magic isn’t just for fighting. Use it to farm trees and splinter ground trees for fast resource collection. It genuinely out-gathers most other survival games once you lean into it.
Farming without losing your mind
Farming is tedious early — plant, water, compost, harvest, repeat — so here’s the version that wastes the least time.
- Plots: Different plots need different wood types and suit plants from different regions. Basic plants go in basic plots; advanced plots are for later-game plants.
- Digging: After placing a plot, dig it up with a shovel. A higher-quality shovel is faster.
- Grass layers: An empty plot develops another grass layer each day, up to three. Grass makes disease-cure potions.
- Disease: Plants can get diseased (sometimes unavoidably) or die. Dead plants must be cleared and dug up to restart.
- Water quality: Dirty water works for growth, but fresh water gives a better chance against disease. Fresh water comes from cooking or rain catchers.
- Harvesting: Do it manually one at a time, or use the uproot magic ability to auto-harvest everything in a radius straight into your inventory.
- Replanting: Berries keep their stems and regrow. Wheat and similar crops fully empty the plot and must be replanted.
Watering and compost
Select a seed, put it on the hotbar or equip it from inventory, then use it on the plot. Fill a watering can with dirty water (green and murky) or fresh water (blue icon on plots; green means dirty). The humidify magic option waters a whole area at once — it needs a pail in your inventory or water nearby — and every plot it touches increases farming level. It also converts water to clean water. Rain catchers store water for you.
For compost, toss burnt or extra food into the compost bin and let it convert. Craft a bucket, fill it from the bin, then hold it on a crop plot to fully compost that area. Keep some grass for the cure disease potion at the cooking range. Higher-quality compost helps prevent disease later.
The 1.0 storage change
Two quality-of-life changes worth knowing:
- Storage ledger: Previously you had to open each chest individually to deposit. Now one click deposits all inventory items already present in nearby chests. There’s a radius that works up/down and left/right, so central storage with verticality pays off.
- Craft-from-storage: Some stations auto-pull from nearby chests — arrows need feathers, wood, and talons and craft without them in your inventory. Others need manual placement: ores into a furnace (charcoal, tin, silver placed by hand, then queue smelting). Tannery and spinning wheels want items in inventory, and with upgrades you can place two items to combine into better ingredients.
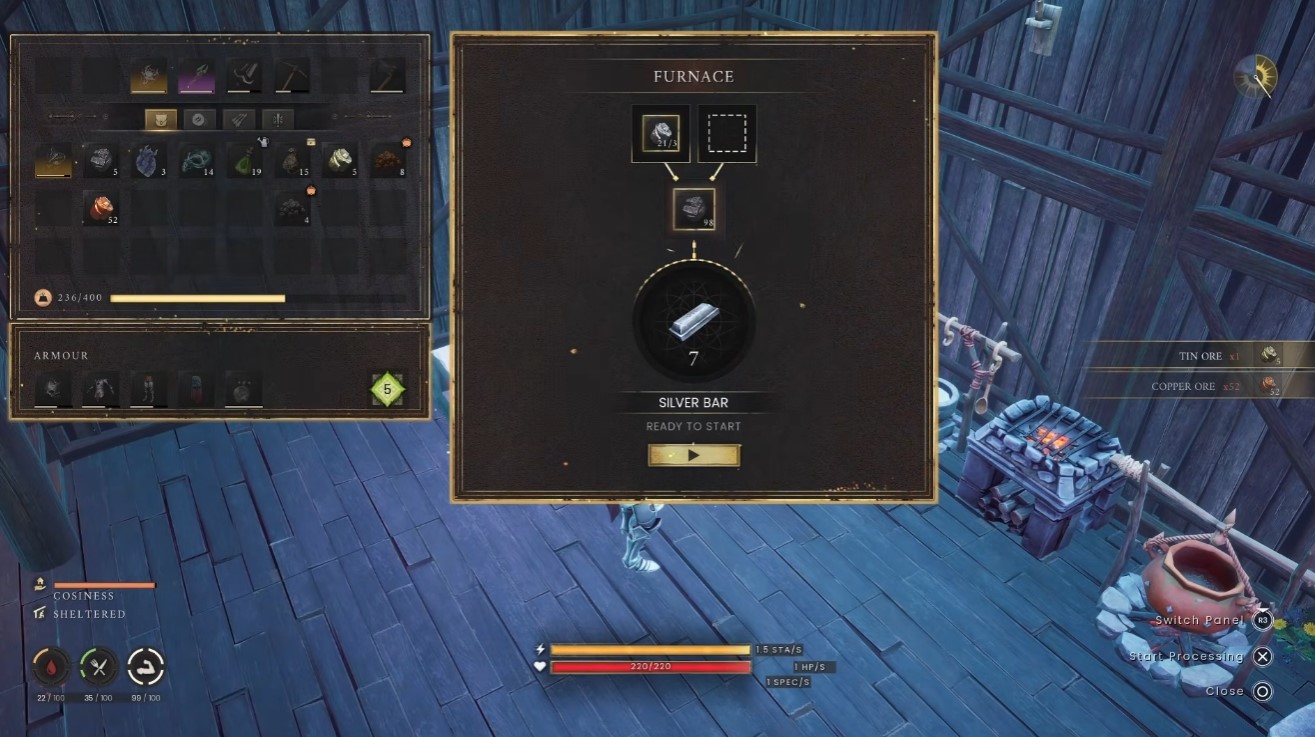
Note: After you acquire any new item, check every crafting bench for new uses. Refinement chains matter — flax becomes coarse thread at a spinning wheel, then rough cloth at a different bench. Dirty water has to be purified at a campfire or cooking station to make clean water.
Base building: the controls that actually matter
The build menu breaks into general, crafting, furniture, and more, with many items discovered out in the world. Nearly every new item you craft gets a cosmetic placeable version — small ore, tin version, bar version. Wooden barrels come from recipes found in chests.
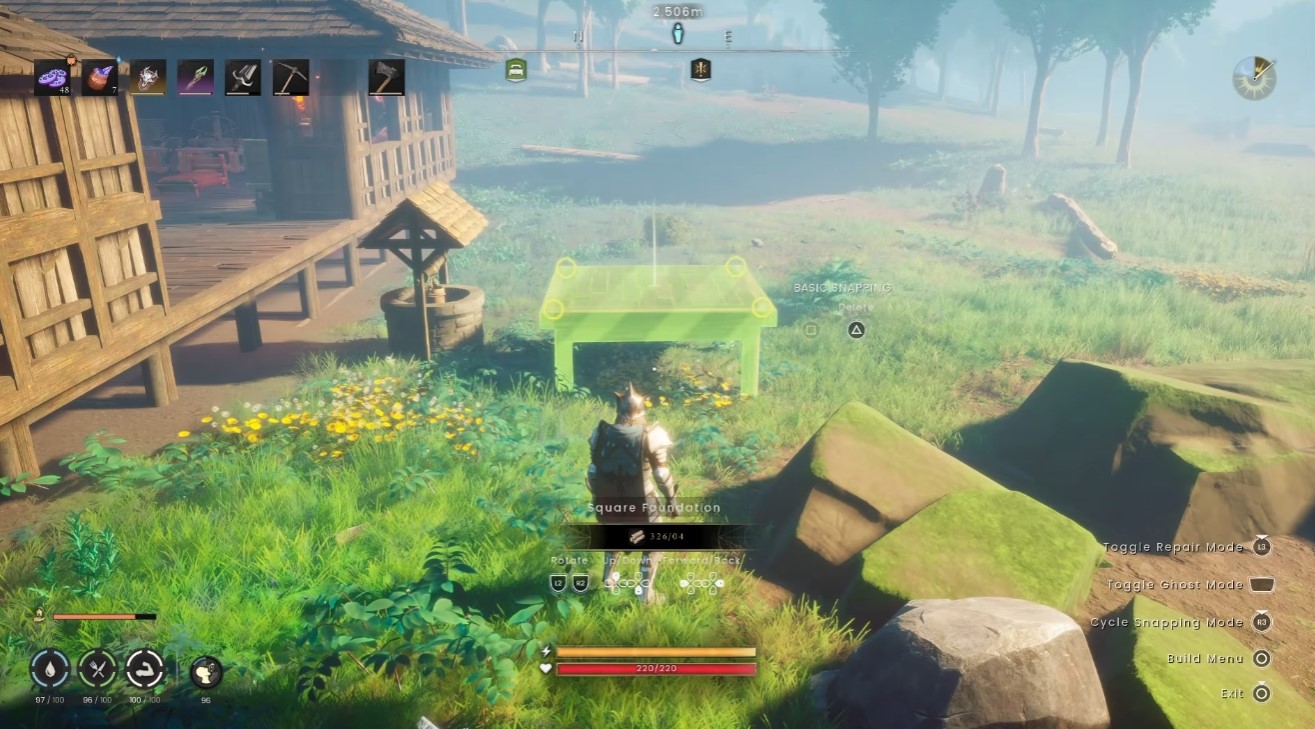
Lighting needs no fuel management. Place lights anywhere, including high up, and never restock. Different colors unlock later.
Snapping, rotation, and roofs
- Foundations: Start with a grid-like pattern and snap points at the four major corners. You can raise and lower pieces to almost any degree as long as they touch the ground — without moving the camera — and pull forward or push backward. This works even while snapping, so you can shift a piece down one instead of being forced to place it directly adjacent. No fake snap-point tricks needed.
- Walls: Rotate and snap automatically, with circular placement options for round builds instead of forced boxes.
- Roofs: Multiple angles including 30°, in small and large versions. Stagger pieces by one step, lower them, and mesh them together — the collision hitboxes are forgiving for intricate designs.
- Pillars: Normal, diagonal, and horizontal options.
Blueprint mode
In the bottom-right of the build menu, select a piece first to toggle ghost mode — blueprint mode. Plan an entire build without resources, place everything to preview the look, then walk back and fill in the spaces once you have materials. I use this for every base now instead of building blind.
Agility, the amulet, and fast travel
Agility challenges are scattered across the world and later appear inside raids. They teach midair dash, double jump, and when to use single versus double jump and dash to clear obstacles — all usable in the open world during combat and exploration. Run them repeatedly for better times and loot.
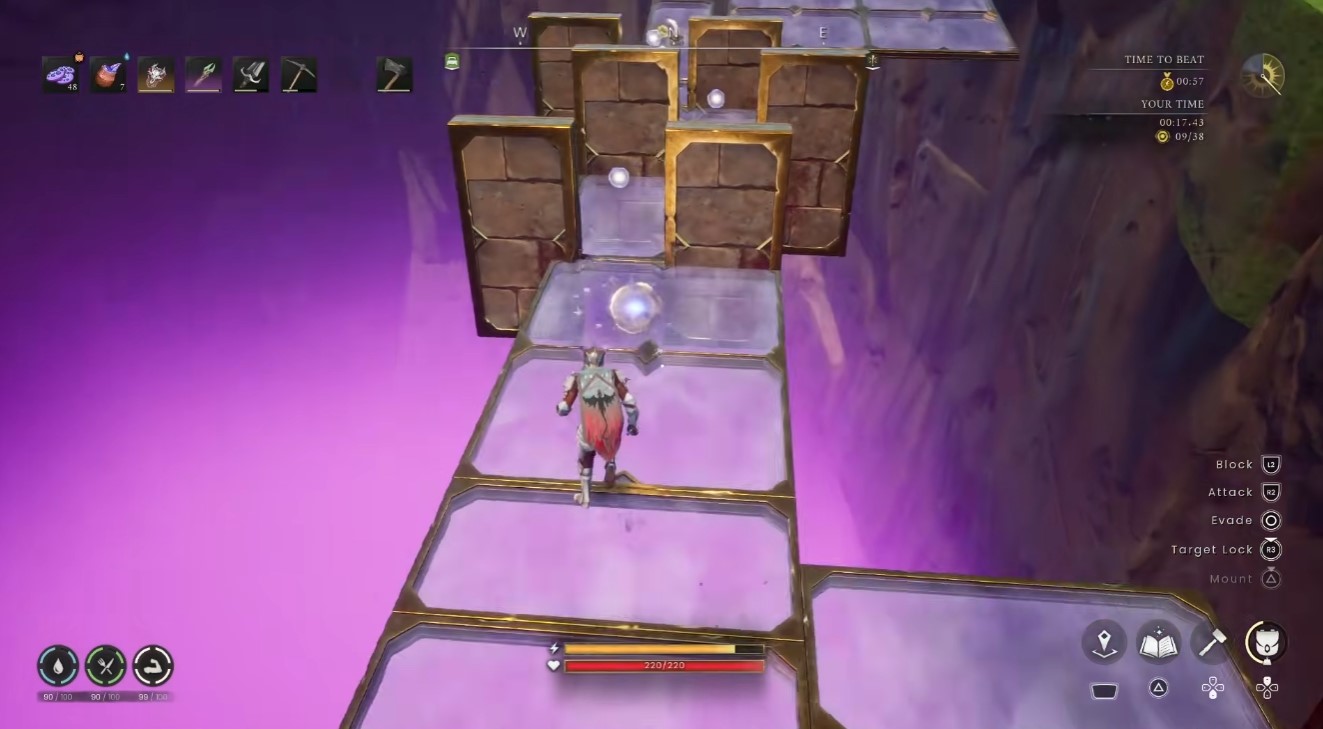
Rewards include gold, a pack, flowers, and leaves. The pack levels up and later smelts into ore. Flowers feed the amulet, which unlocks on one of your first completions and makes agility skill increase 100% faster while exploring, consuming feathers to randomly grant extra agility experience. Leaves smelt into bars later or go into jewelry.
For a deeper look at how these systems chain together, this Progression Guide walks through the same loop from a different angle.
Load stones, vaults, and burrows
| Travel method | Cost | Notes |
|---|---|---|
| Load stones | Runes, scaling with weight and distance | Craftable almost anywhere; require a vault core to build |
| Burrows | Free | Find at least two to use the network |
Load stones are fast travel points you can craft nearly anywhere, limited only by resources. Building one requires a vault core. Travel costs runes and scales with weight and distance — examples run 3 runes, 6 runes, and 13 runes when heavily loaded at 345 weight. A long trip home once cost me 37 law runes. Place load stones outside every vault and dungeon.
Vaults typically contain two to three vault cores. Enemies and loot respawn after a couple of days. Inside you’ll find traps and enemies, and at the end a lever unlocks the boss room. The easiest core farming route: backtrack from the lever room — a core is almost always near the end of that room — then grab the second core inside the boss room, since every boss room has one. Cores weigh 50 each, so enter with a clean inventory. You can skip the boss entirely by dodging its attacks and leaving the way you came.
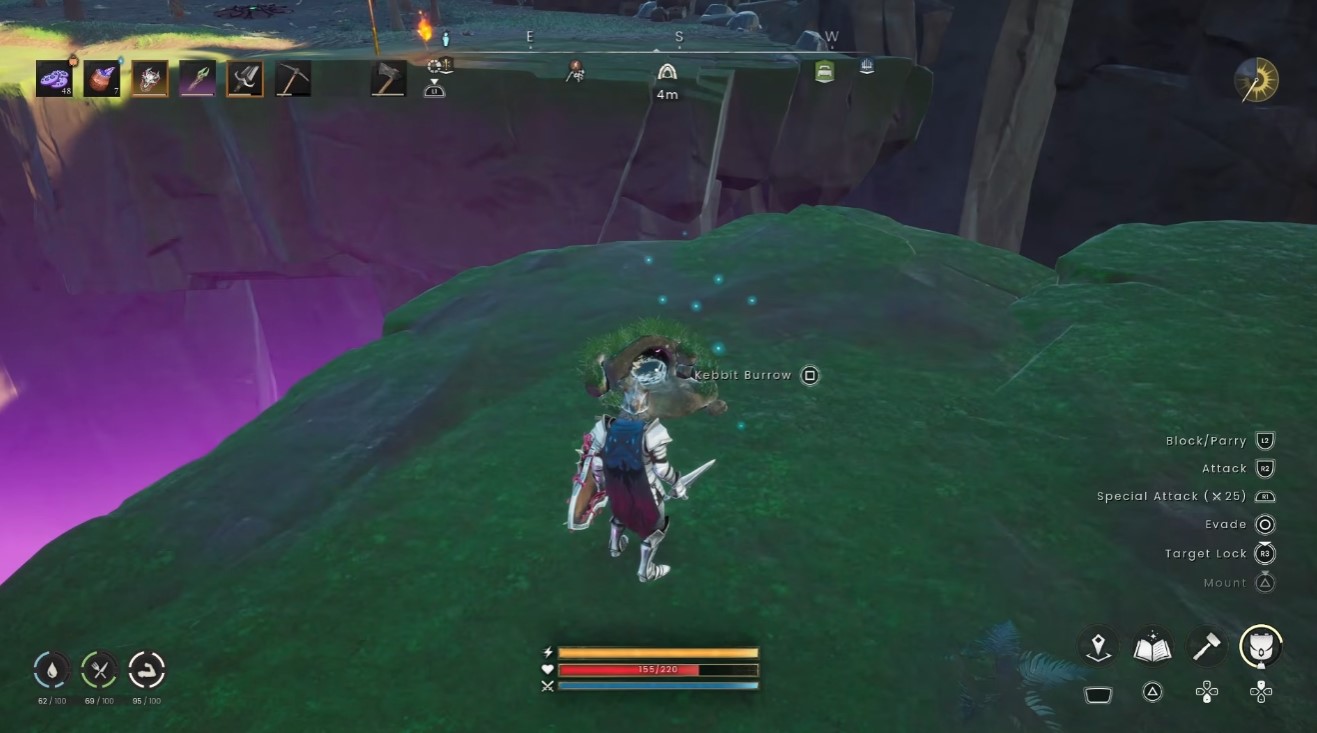
Burrows are the other early fast-travel mode, and travel between them is free. Place a load stone near burrows to cover long distances and save law runes. Map optimization improved a lot in 1.0 — less lag when crossing uncovered map.
Getting your first bow (and why flax matters)
The first real hurdle is a bow, because you need one to hunt deer for antlers. Start by gathering Flax — it’s important early, mid, and late game. You can also get Flax Seeds and grow it, which yields far more than the single-pickup version.
Picking up Flax for the first time unlocks the Spinning Wheel blueprint. Place it and interact to convert Flax or Coarse Animal Fur into Coarse Rope. Coarse Animal Fur uses a 3:1 ratio and isn’t replenishable since you have to hunt for it. Flax uses a 1:1 ratio and grows in bulk at a crop plot, so use Flax.
Once you have Coarse Rope, head to the Crafting Bench. The bow recipe unlocks, you craft it, then take down the deer and pick up the antlers to progress the story.
Hidden Pants: 50 free weight capacity
If you’re farming resources around your base, this is the single best early grab.
Prerequisite: unlock the Windstep ability at level 5 Agility. If you’ve run around even a little, you’ll have it.
- Head to the Lighthouse at the very beginning of the game, just above the Temple Woods area where the tutorial has you kill rats.
- Wait for the windmill to pass, then jump up one more time.
- Inside, head straight up to the chest. It contains several items, including especially light tattered boots that increase weight capacity.
- Once you discover the pants and learn to craft them, return to the Crafting Bench. They cost some Rune Essence and Coarse Animal Fur.
- Add them to your inventory and equip them.
The gear level on these is low and becomes irrelevant fast, but the 50 extra weight capacity never does. I wear them for all base farming — lumber, ores, everything.
The agility course and the amulet
Don’t neglect Agility. Everywhere you run costs stamina, and you’ll run a lot. The best entry-level spot is the first Agility Course.
Completing it rewards an Amulet that increases Agility skill while playing. Since you have no jewelry early, chase this immediately. You also get a satchel — open it for Warp Feathers. Getting one unlocks the recipe, but you need 8 total to craft the Amulet, so run the course multiple times.
Craft the Amulet at the basic Crafting Bench (navigate to the very bottom). It boosts Agility XP while exploring, and Warp Feathers get randomly consumed as you run, granting a massive boost — 100 XP instead of small amounts. Agility also unlocks double jump and midair dash, reduces sprinting stamina cost, and opens perks like Backpacker for extra carry capacity. Prioritize it.
Vaults, cores, and building your travel network
Head to the Vaults to unlock fast travel. There are vaults in every major region, each a dungeon with enemies, traps, and a boss, and each holds a Vault Core. Cores are needed for many recipes later, not just transportation.
When you first unlock it, you learn to craft a Load Stone. It’s fairly cheap: Stone, Rune Essence, and a Vault Core as the key component. Farm cores every time they come up — they respawn every 3 in-game days. The boss door will already be unlocked, so you can walk in and grab one, but take all 2 or 3 if you can. That’s how you build a full fast-travel network across the map.
Fast travel costs Law Runes, but it’s worth it. Later armor and weapons also need Vault Cores, so don’t skip the low-level ones.
Food, water, and infusions
Rest is mandatory if you’re out longer than a day or two — just lie in bed to avoid passing time. A full fast travel network makes this much less painful.
For food and water, don’t cook one small thing at a time. Combine ingredients for better returns:
- Raw berries give 10 health. Cooked berries give 20 (possibly 30). Dried Dwellberries restore 20 health and 20 sustenance.
- Dual Berries (third area) or Red Berries (starting area) are your infusion base.
- Redberry Infusion: Clean Water combined with a basic raw item. Thirst drains 33% slower.
- Dual Berry Infusion: Upgrades duration from 300 seconds to 600 seconds (10 minutes) with the same 33% slower thirst drain.
- Dwell Crunchies: Cooked berries plus grown wheat. Best food once you reach the third area, usable until tier 5 or 6.
Berries in a crop field don’t disappear after harvest, unlike wheat, so they’re easy to regrow.
Tip: Don’t eat the first thing you cook — check if it feeds another recipe. Cook an egg into a fried egg, then mix with shrimp. Save all meat from deer, cows, and chickens and turn it into one item for longer hunger duration.
For potions: craft an Agility Potion before running the Agility Course, a Lumbering Potion before chopping wood, and so on. Potions increase experience for everything, which speeds up progression across the board. Grab everything you see — items from the first swamp area (feathers, clay) show up in later recipes.
Farming efficiency with rain catchers
Build the Rain Catcher as soon as you have access — it’s fairly early. Dirty water from a lake keeps crops growing, but fresh water gives higher disease resistance, which means fewer disease potions and fewer crops that aren’t fully ready. Transfer water from Rain Catchers into Water Barrels so they constantly refill when it rains and keep your plants watered. With these two pieces in place, you’ll never lack a fresh water source.
Bronze and the core progression loop
Bronze is the first major upgrade for gear, weapons, and tools. You’ll find the ingredients — copper and tin — in the Fractured Plains, past the first area and the small swamp. Enemies there are tough and you’ll be one level under them.
Grind out a lot of bronze. It unlocks every other major crafting station:
- Blacksmith’s Bench: Weapons from tier 3 bronze, tier 4 iron, up to tier 5 steel.
- Fletching Bench: Bows, crossbows, short bows, and weapon upgrades/ascension.
- Armor Bench: The next tier of gear.
Make all of these before anything else, then settle into the loop that carries you through the rest of the game:
- Get to a new area.
- Find region-specific resources (copper and tin in Fractured Plains).
- Return to base and convert to bronze.
- Make any new workstations.
- Make the next tier of tools, needed to mine or chop higher-tier resources.
- Make weapons and armor.
- Once your level equals the zone’s level, start exploring, navigating, and hunting creatures for drops.
You’ll always be one level under the zone’s combatants. Don’t start fights or run dungeons the moment you arrive — hunt materials first and get that zone’s gear before major combat, or you’ll take more damage and deal less. The loop repeats: bronze, then iron, then steel.


